AUDI R8 SPYDER 2011 Owners Manual
Manufacturer: AUDI, Model Year: 2011, Model line: R8 SPYDER, Model: AUDI R8 SPYDER 2011Pages: 244, PDF Size: 59.74 MB
Page 91 of 244
Parking system
Parking system
advanced
Introduction
Applies to vehicles: with pa rkin g system advanced
D D
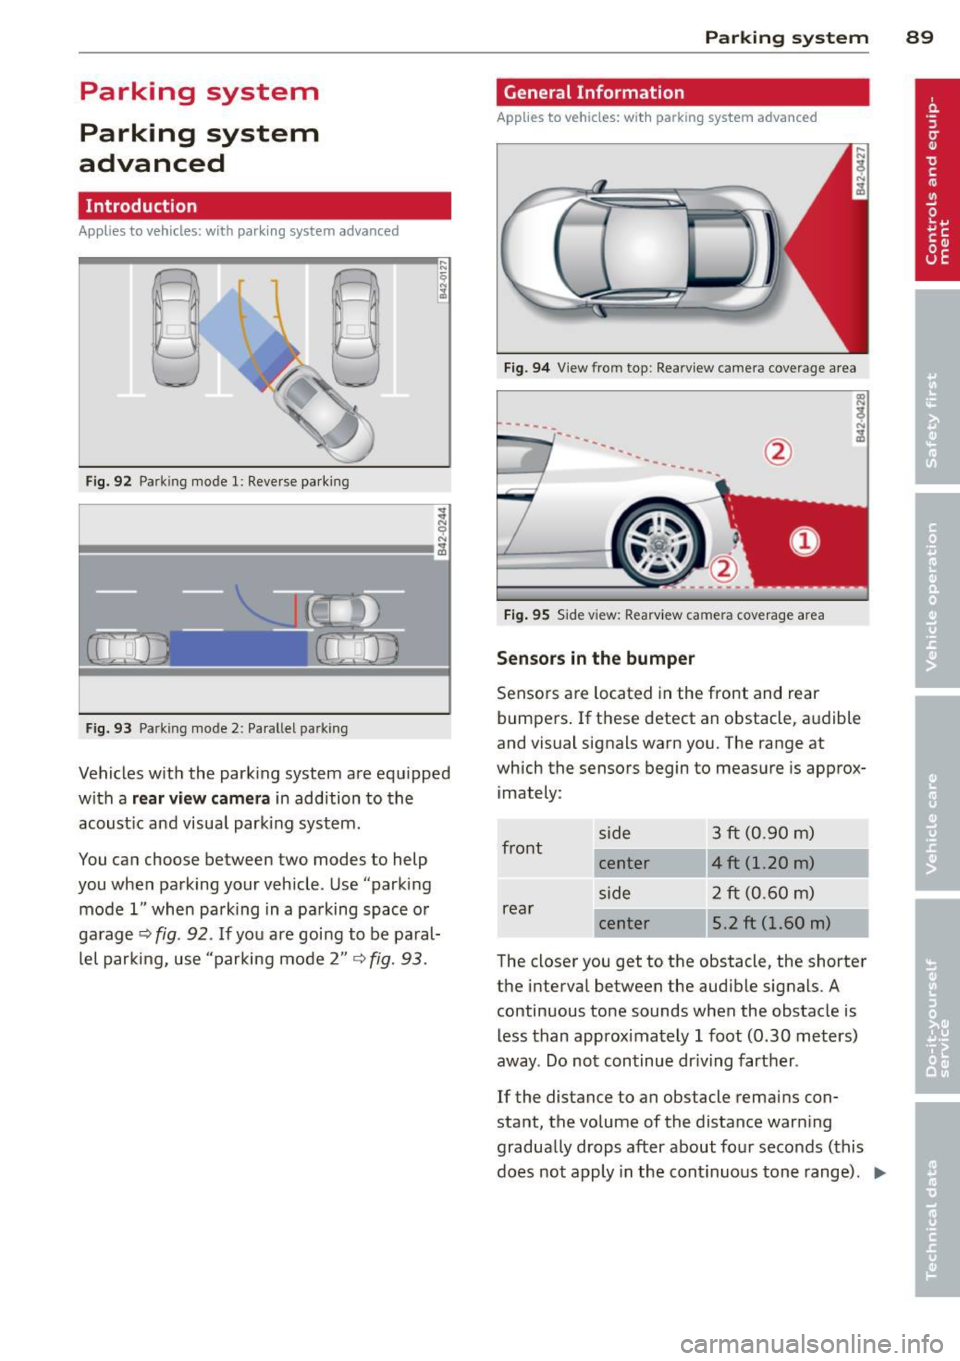
Fig. 92 Park ing mode l: Reve rse parking
F ig . 93 Parking mode 2: Pa rallel parking
Vehicles w ith the park ing system are equ ipped
with a
rear view camer a in addition to the
acoust ic and visual park ing system .
You ca n choose between two modes to help
you when parking your vehicle . Use "parking
mode 1" when park ing in a parking space o r
ga rage
Q fig . 92. If you are goi ng to be paral
l el par king, use "parking mode 2"
~ fig. 93.
Par king system 89
General Information
Applies to vehicles: wit h parking system advanced
Fig. 9 4 View from top: Rea rvi ew camera coverage area
---
---------
Fi g. 95 Side view: Rearv iew came ra coverage area
Sen sor s in the bumper
Sensors a re located in the front and rear
bumpers . If these detect an obstacle, a udible
and visual signals warn you. The range at
which the sensors begin to meas ure is approx
i mately:
front s
ide 3 ft (0.90 m)
center 4 ft (1.20 m)
side 2 ft (0.60 m)
rear center 5.2 ft (1.60 m)
The closer you get to the obstacle, the shorter
the interva l between the audible signals . A
continuous tone sounds when the obstacle is
less than approximately 1 foot (0.30 meters)
away . Do not continue dr iving farther .
If the distance to an obstacle rema ins con
stant, the volume of the distance warn ing
gradually drops after about fo ur seconds ( this
does not apply in the cont inuous tone range) .
II>
Page 92 of 244
90 Parking system
Rear view camera coverage area
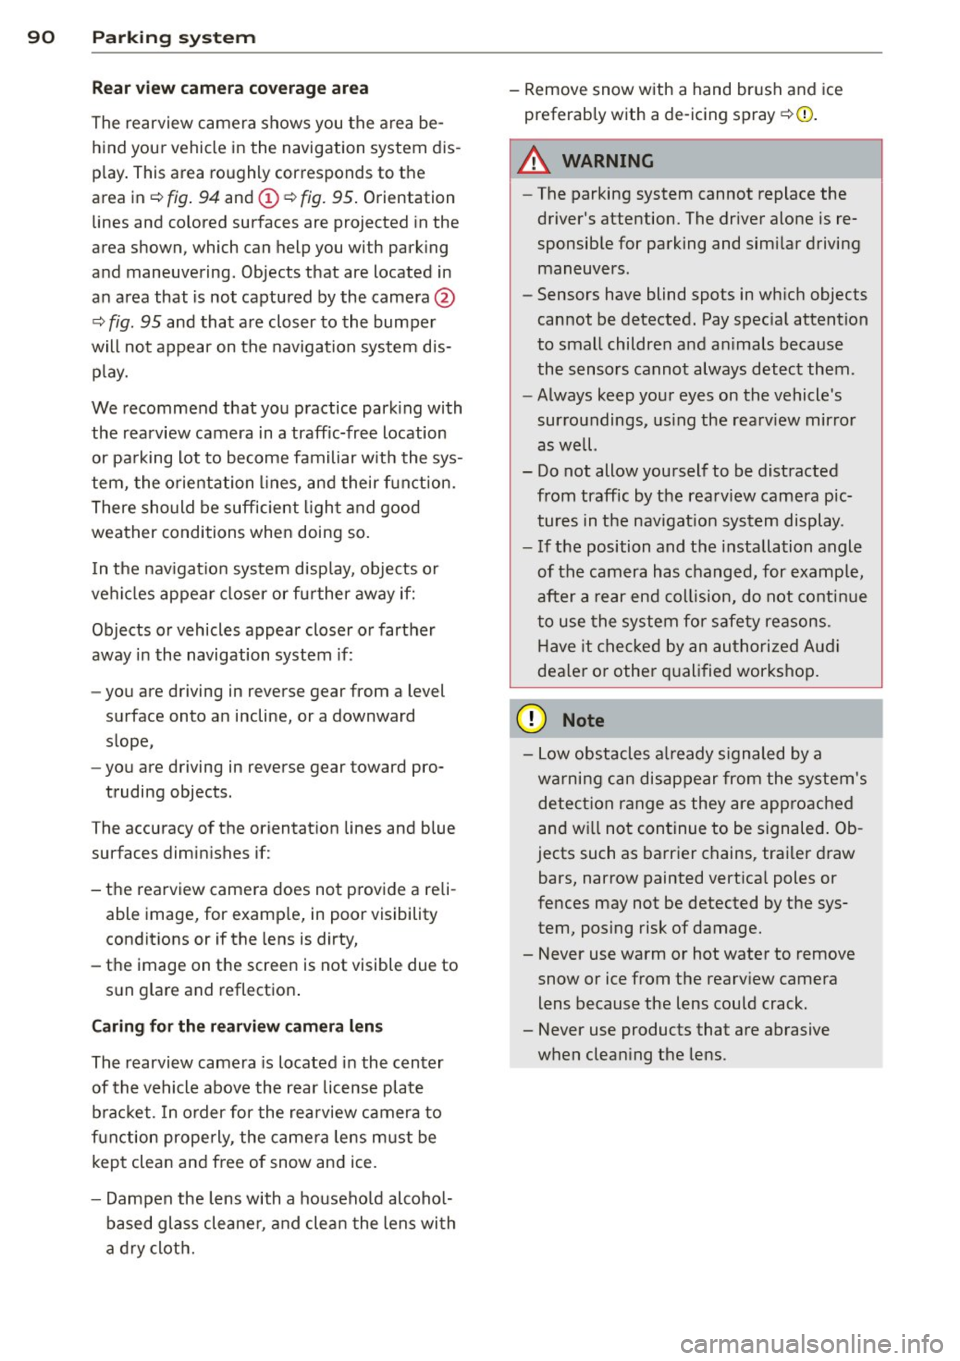
The rearview camera shows you the area behind your vehicle in the navigation system dis
play. This area roughly corresponds to the
area in
¢ fig. 94 and (!) ¢fig. 95. Orientation
lines and colored surfaces are projected in the
area shown, which can help you with parking
and maneuvering. Objects that are located in
an area that is not captured by the camera@
¢ fig. 95 and that are closer to the bumper
will not appear on the navigation system dis play.
We recommend that you practice parking with
the rearview camera in a traffic-free location
or parking lot to become familiar with the sys
tem, the orientation lines, and their function.
There should be sufficient light and good
weather conditions when doing so.
In the navigation system display, objects or
vehicles appear closer or further away if:
Objects or vehicles appear closer or farther
away in the navigation system if:
- you are driving in reverse gear from a level
surface onto an incline, or a downward
slope,
- you are driving in reverse gear toward pro-
truding objects.
The accuracy of the o rientation lines and blue
surfaces diminishes if:
- the rearview camera does not provide a reli able image, for example, in poor visibility
conditions or if the lens is dirty,
- the image on the screen is not visible due to
sun glare and reflection .
Caring for the rearview camera lens
The rearview camera is located in the center
of the vehicle above the rear license plate bracket. In order for the rearview camera to
function properly , the camera lens must be
kept clean and free of snow and ice .
- Dampen the lens with a household alcohol
based glass cleaner , and clean the lens with
a dry cloth. - Remove
snow with a hand brush and ice
preferably with a de-icing spray
¢ (D .
A WARNING
--
-The parking system cannot replace the
driver's attention. The driver alone is re
sponsible for parking and similar driving maneuvers .
- Sensors have blind spots in which objects
cannot be detected. Pay special attention
to small children and animals because
the sensors cannot always detect them .
- Always keep your eyes on the vehicle's
surroundings, using the rearview mirror
as well.
- Do not allow yourself to be distracted from traffic by the rearview camera pic
tures in the navigation system display .
- If the position and the installation angle
of the camera has changed, for example,
after a rear end collision, do not continue
to use the system for safety reasons .
Have it checked by an authorized Audi
dealer or other qualified workshop.
(D Note
-Low obstacles already s ignaled by a
warning can disappear from the system's detection range as they are approached
and will not continue to be signaled. Ob
jects such as barrier chains, trailer draw
bars, narrow painted vertical poles or
fences may not be detected by the sys
tem, posing risk of damage.
- Never use warm or hot water to remove
snow or ice from the rearview camera
lens because the lens could crack.
- Never use products that are abrasive
when cleaning the lens.
Page 93 of 244
Switching on and off
Applies to vehicles: with parking system advanced
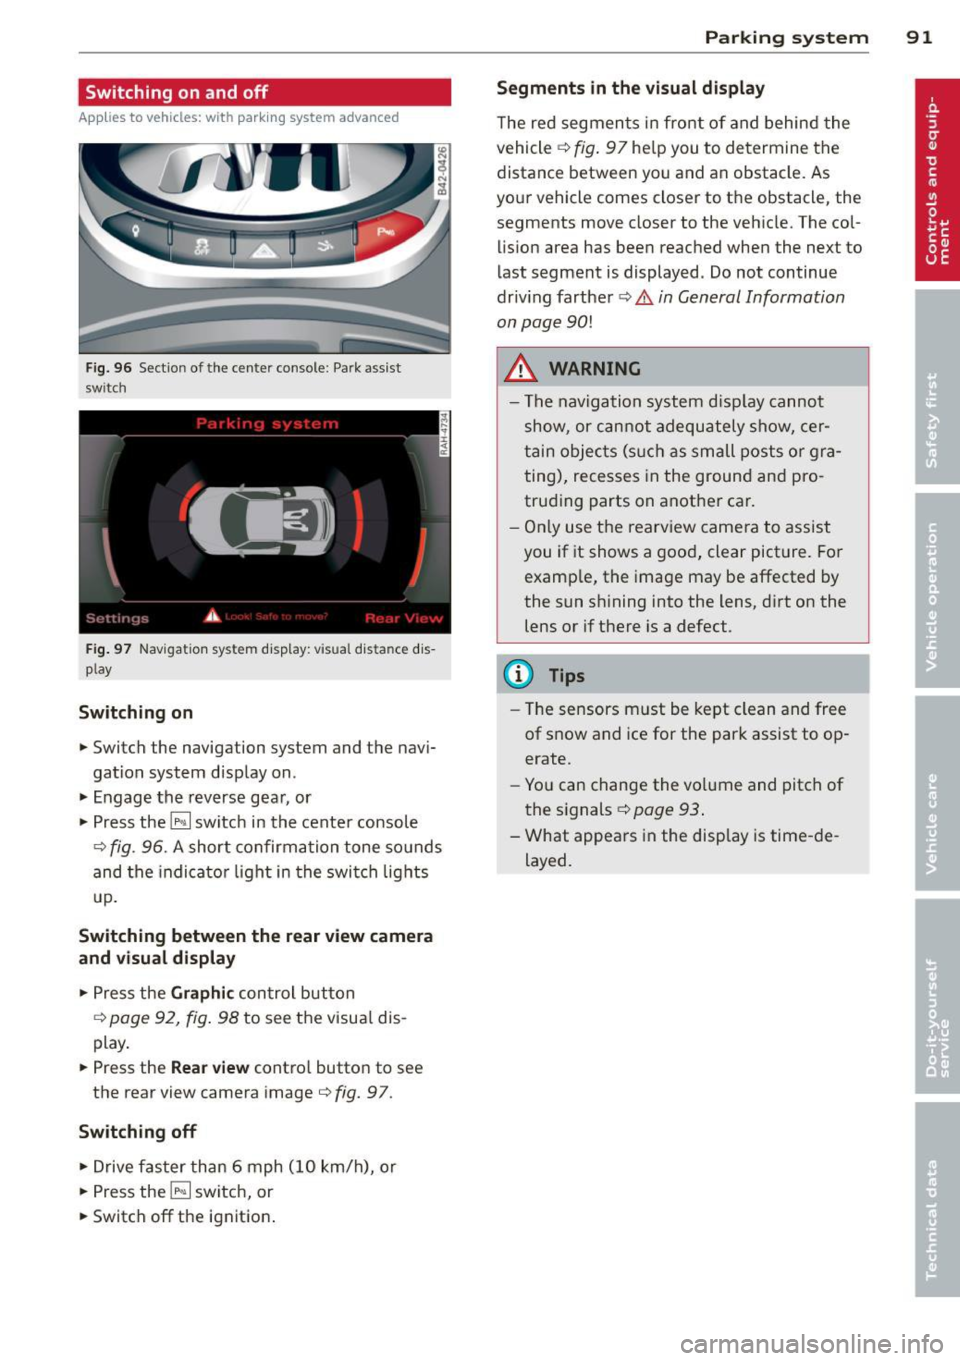
Fig . 96 Section of the center console: Par k ass ist
switch
F ig. 97 Nav igatio n system dis p lay: visual distance d is
play
Switching on
.,. Switch the navigation system and the navi
gation system disp lay on.
.,. Engage the reverse gear, or
.,. Press the
l""' I switc h in the center console
9 fig . 96. A short confirma tion tone so unds
and the indicato r light in the switch lights
up .
Sw itching between the rear v iew camera
and visual display
.,. Press the Graphic con trol button
9 page 9 2, fig . 98 to see the visua l dis
play .
.,. Press the
Rear view contro l button to see
the rear view camera image
c) fig. 9 7.
Switching off
.,. Drive faster than 6 mph (10 km/h), o r
.,. Press the
l""' I switch, or
.,. Switch off the ignition .
Parking system 91
Segm ents in the visual display
The red segmen ts i n fro nt of and behind the
vehicle
c) fig . 97 he lp you to de termine the
distance between yo u and an obstacle. As
you r vehicle comes close r to t he obstacle, the
segments move closer to the vehicle . The col
lision area has been reached when the next to
l ast segment is displayed. Do not continue
driv ing farther
c) .&. in General Information
on page
90!
A WARNING
- Th e nav igation system d isplay cannot
show, or c annot adequately show, cer
tain o bjects (s uch as small posts o r gra
ting), recesses in the groun d and pro
trud ing parts on anothe r ca r.
- On ly use t he rearview came ra to assist
you if it shows a goo d, clear pict ure. For
examp le, the image may be affected by
the sun sh ining into the lens, d irt on the
lens or if there is a defect.
@ Tips
- The sensors m ust be kept clean and free
of s now and ice for the park assist to op
erate .
- Yo u can change the vo lume and pitch of
the s ignals
c::> page 93 .
- What appea rs in the disp lay is time -de
layed.
-
Page 94 of 244
92 Parking system
Reverse parking
Applies to vehicles: with park ing system advanced
Parking mode 1 con be used when parking in
a garage or into a parking space.
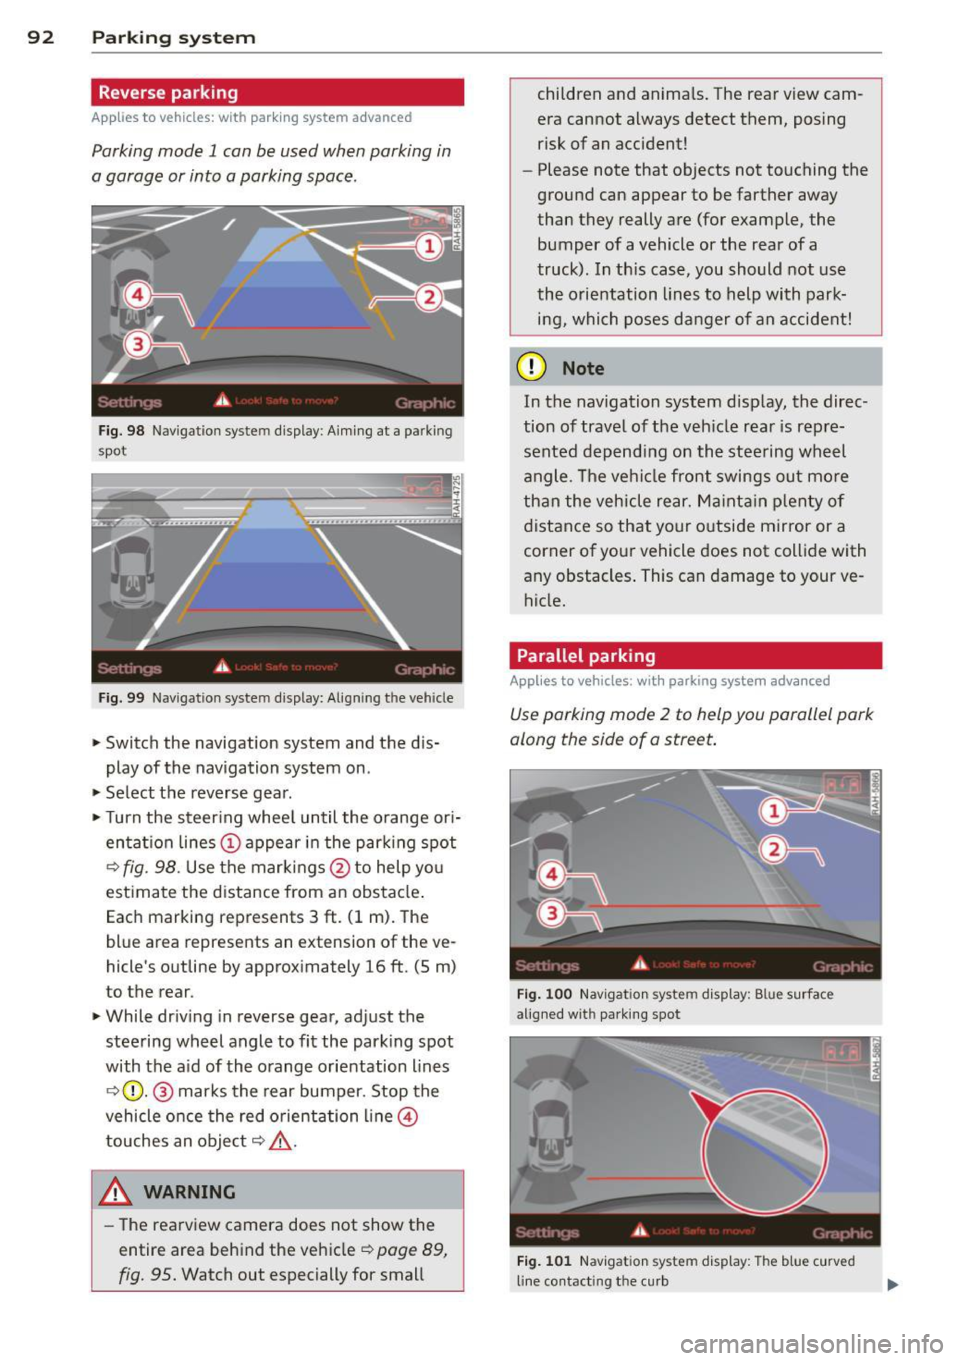
Fig. 98 Navigat ion syste m display : Aiming at a pa rk in g
spot
Fig. 99 Navigation syste m display: Align ing t he ve hicle
> Switch the navigation system and the dis
play of the navigation system on .
.,. Select the reverse gear .
.,. Turn the steer ing whee l until the orange ori
entat ion lines (;) appear in the parking spot
¢ fig. 98. Use the markings@to help yo u
estimate the distance from an obstacle .
Each marking represents 3
ft. (1 m). The
blue area represents an extension of the ve
hicle 's outline by approximately 16
ft. (5 m)
to the rear.
> While driving in reverse gear, adjust the
steering wheel angle to fit the parking spot
with the aid of the orange orientation lines
¢ (}). @ marks the rear bumper. Stop the
vehicle once the red orientation line@
touches an object¢,&. .
A WARNING
-The rearview camera does not show the
entire area behind the vehicle ¢
page 89,
fig. 95.
Watch out especially for small children and anima
ls. The rear view cam
era cannot always detect them, posing
risk of an accident!
- Please note that objects not touching the
ground can appear to be farther away
than they really are (for example, the
bumper of a vehicle or the rear of a
truck) . In th is case, you should not use
the orientation lines to help with park·
ing, which poses danger of an accident!
(D Note
In the navigation system display, the direc·
tion of travel of the vehicle rear is rep re
sented depending on the steering wheel
angle . The vehi cle front swings out more
than the vehicle rear. Maintain plenty of
distance so that your outside mirror or a
corner of your vehicle does not collide with
any obstacles . This can damage to your ve
hicle.
Parallel parking
Applies to vehicles: with parking system advanced
Use parking mode 2 to help you parallel park
along the side of a street.
Fig. 100 Navigat ion sy stem display : B lu e surfac e
alig ned wit h parking spot
Fig. 101 Navigation system display : T h e b lue curved
line contact ing t he curb
Page 95 of 244
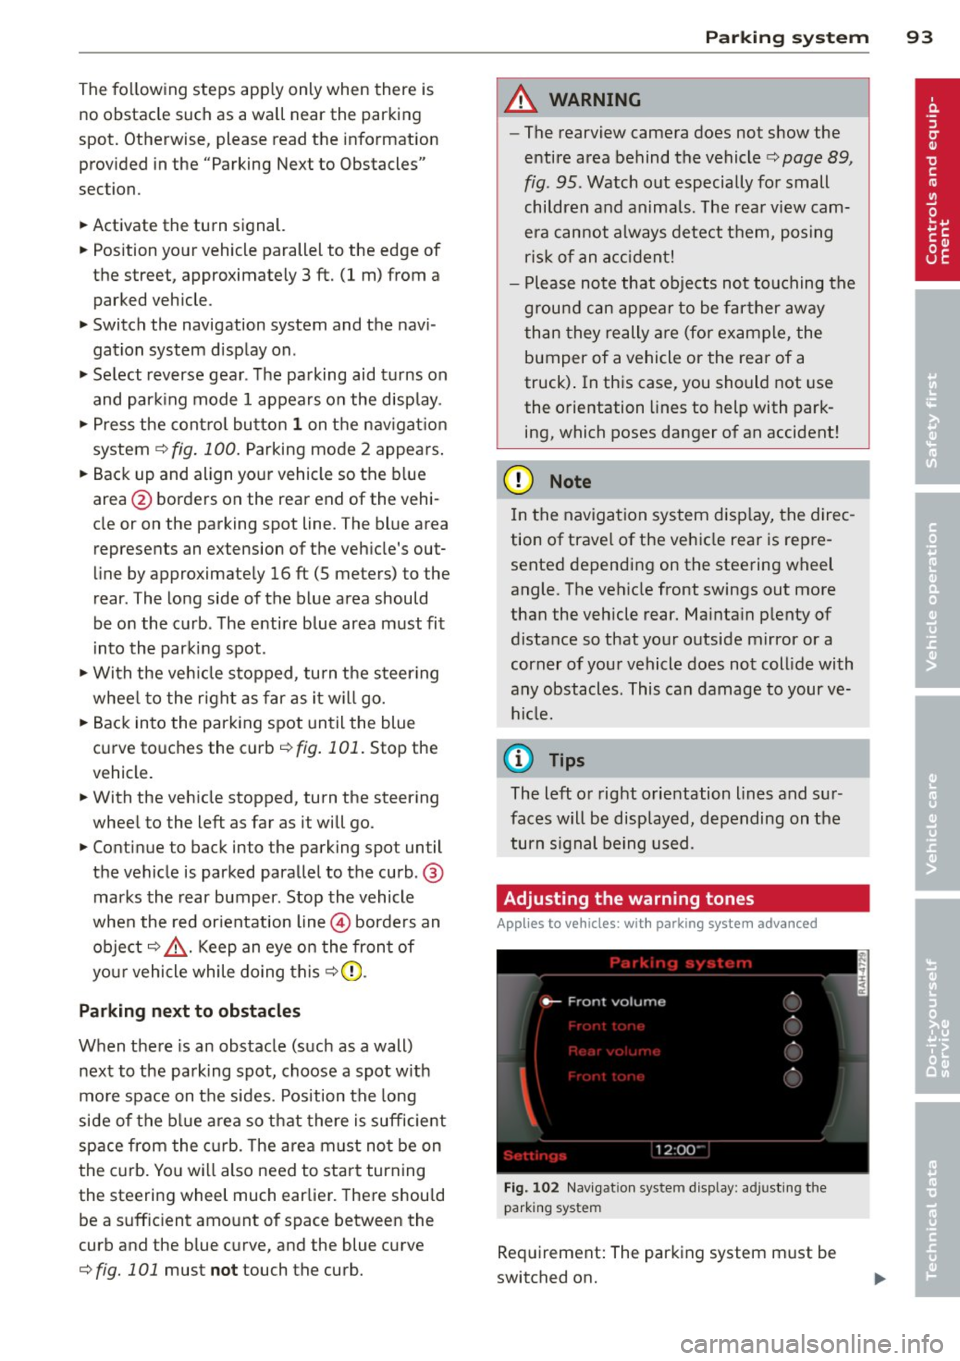
The following steps apply only when there is
no obstacle such as a wall near the parking
spot. Otherwise, please read the information
prov ided in the "Parking Next to Obstacles"
section.
~ Activate the turn signal.
~ Position yo ur vehicle parallel to the edge of
the street, approximately 3 ft. (1 m) from a parked vehicle .
~ Switch the navigation system and the nav i
gat ion system display on.
~ Se lect reverse gear . The parking aid tu rns on
and par king mode 1 appears on the display .
~ Press the control bu tto n 1 on the nav igat io n
system ¢
fig. 100. Parking mode 2 appea rs .
~ Backup and align yo ur vehicle so the b lue
area @ borders on the rear end of the vehi
cle or on the parking spot line. The bl ue area
represents an extension of the veh icle's out
line by approximate ly 16 ft (5 meters) to the
rear . The long side of the blue area should
be o n the curb . The entire blue area must fit
i nto the parking spot .
~ With the veh icle s topped, tu rn the s teer ing
whee l to the r ight as far as it w ill go.
~ Back into the park ing spot until the blue
cu rve to uches the curb¢
fig. 101. Stop the
vehicle.
~ With the veh icle stopped, turn the steer ing
wheel to the left as far as it will go .
~ Continue to back into the parking spot un til
the vehicle is parked para llel to the curb .@
marks the rear bumper. Stop the vehicle
when the red orientation line@ borde rs an
object ¢.&, . Keep an eye o n the fron t of
yo ur vehicle while do ing this ¢Ci) .
Parking next to obstacles
When t here is an obstacle (such as a wall)
next to the pa rking spot, choose a spot w it h
mo re space on t he sides. Position the long
side of the b lue a rea so that there is sufficient
space from the curb. The a rea m ust no t be on
the c urb. You w ill also need to start turn ing
the steeri ng wheel much earlie r. T he re should
be a s uffic ient amo unt of space between the
curb and the blue c urve, and the blue c urve
¢
fig. 101 must not touch the curb.
Par king system 93
A WARNING
-The rearview camera does not show the
entire area behind the vehicle¢
page 89,
fig. 95 . Watch out especially for small
children and anima ls . The rea r view cam
e ra can no t always de tect t hem, pos ing
ris k of an accident!
- P lease note that objects not touching the
g rou nd can appear to be far ther away
than they really are (for example, the
bumper of a vehicle or the rea r of a
truck) . In this case , you sho uld not use
the o rientation lines to help with park
ing, which poses danger of an accident!
(D Note
In the navigation system disp lay, the direc
tion of trave l of the vehicle rear is repre
sented depend ing on the stee ring wheel
angle. T he veh icle front swings out more
than the vehicle rear. Ma inta in p lenty of
distance so that you r o utside m irror or a
corner of you r vehicle does no t coll ide with
any obstacles. This can damage to your ve hicle.
(0 Tips
The left o r right o rientation lines and su r
faces will be disp layed, depending on the
turn s ignal being used .
Adjusting the warning tones
Applies to vehicles: wi th parking sys tem adva nced
Fi g. 102 Nav igat io n system d isplay: a djusting t he
park ing s yste m
Req uirement: The parking system m ust be
switched on.
Page 96 of 244
94 Parking system
• Press the Settings control button.
- Front volum e -front sensor vol ume
- Front fr equenc y-front sensor frequency
-Rear volume -rear sensor volume
-Rear frequency -rear sensor frequency
-In-car entert ainment fader -when the park-
ing system is sw itched on, t he volume of the
active audio source is lowered .
The new ly adjusted value is briefly heard from
the signa l generator.
(D Tips
Changed settings are activated when park
ing system is switched on aga in.
Error messages
Applies to vehicles: with parking system advanced
There is an error in the system if the LED on
the
IP.. ~ I sw itch is blinking and you hear a con
tinuous alarm for a few seconds after switch ing on the parking system or when the park
ing system is al ready act ivated. Have your au
thor ized Audi dealer co rrect the e rror.
@ Tips
If an error has occurred before the ignition
is tu rned off, the LED in the~ switch will
blin k the next time the ignit ion is switched
on, reverse gear sele cted, and the a coustic
pa rking system is ac tiva ted .
Page 97 of 244
Homelink®
Universal remote
control
General information
Appl ies to vehicles: with Horne Link® universal rem ote
control
The Homelink ® feature can learn up to three
radio frequency codes for most current trans
mitters used for operating garage doors, es tate gates, home or outdoor lighting sys
tems, and other devices.
You must first program the Homelink ® trans
mitter before you can use the system
¢ page 96, Programming the HomeLink ®
transmitter.
In order to program the Home link ® transmit
ter for devices utilizing rolling code, a second
person on a ladder who can safe ly reach the
garage door opener motor is recommended.
I t is also necessary to locate the "learn" but
ton on your garage door opener motor . Refer
to the operat ing instruct ions for the opener,
as the location and color of this button may
vary by manufacturer.
You can still use the origina l remote control
for the device at any time.
A WARNING
-
- Never use the Homelink ® transmitter
with any garage door opener that does
have not the safety stop and reverse fea
tu re as requ ired by federa l safety stand
ards . Th is includes any garage door open
er mode l manufact ured before April 1,
1982.
- A garage door opener which cannot de
te ct an object, signaling the door to stop
and rever se does no t mee t current feder
al safety standards. Using a ga rage doo r
opener witho ut these features increases
risk of serious inj ury or death.
- F or sa fety reasons never release the
par king brake or start the engine while
anyone is stand ing in front of the vehicle .
Hom elin k® 95
-A garage door or an estate gate may
sometimes be set in mot ion when the
Homelink ® remote control is being pro
grammed . If the device is repeatedly ac
tivated, th is can overstrain motor and
damage its e lectrical components -an
overheated moto r is a fire hazard!
- To avo id possib le injuries or property
damage, please always make abso lutely
certain that no persons o r objects are lo
ca ted in the range of motion of any
equ ipment being ope rated .
(D Tips
-If you would li ke more information on
Homel ink ®, w here to purchase the
Homel ink ® compatib le produc ts, or
would like to purchase the Homelink ®
Home Lighting Package, please ca ll toll
free: 1-800-355-3515 .
- For Declaration of Compliance to United States FCC and Ind ustry Canada reg ula
tions ¢
page 212 .
Page 98 of 244
96 Homelink®
Programming the Homelink ®
transmitter
Applies to vehicles: with Homelink® universal remote
co ntrol
The transmitter is programmed in two phas
es. For rolling code transmitters, a third
phase is also necessary .
~----------------- g: ~
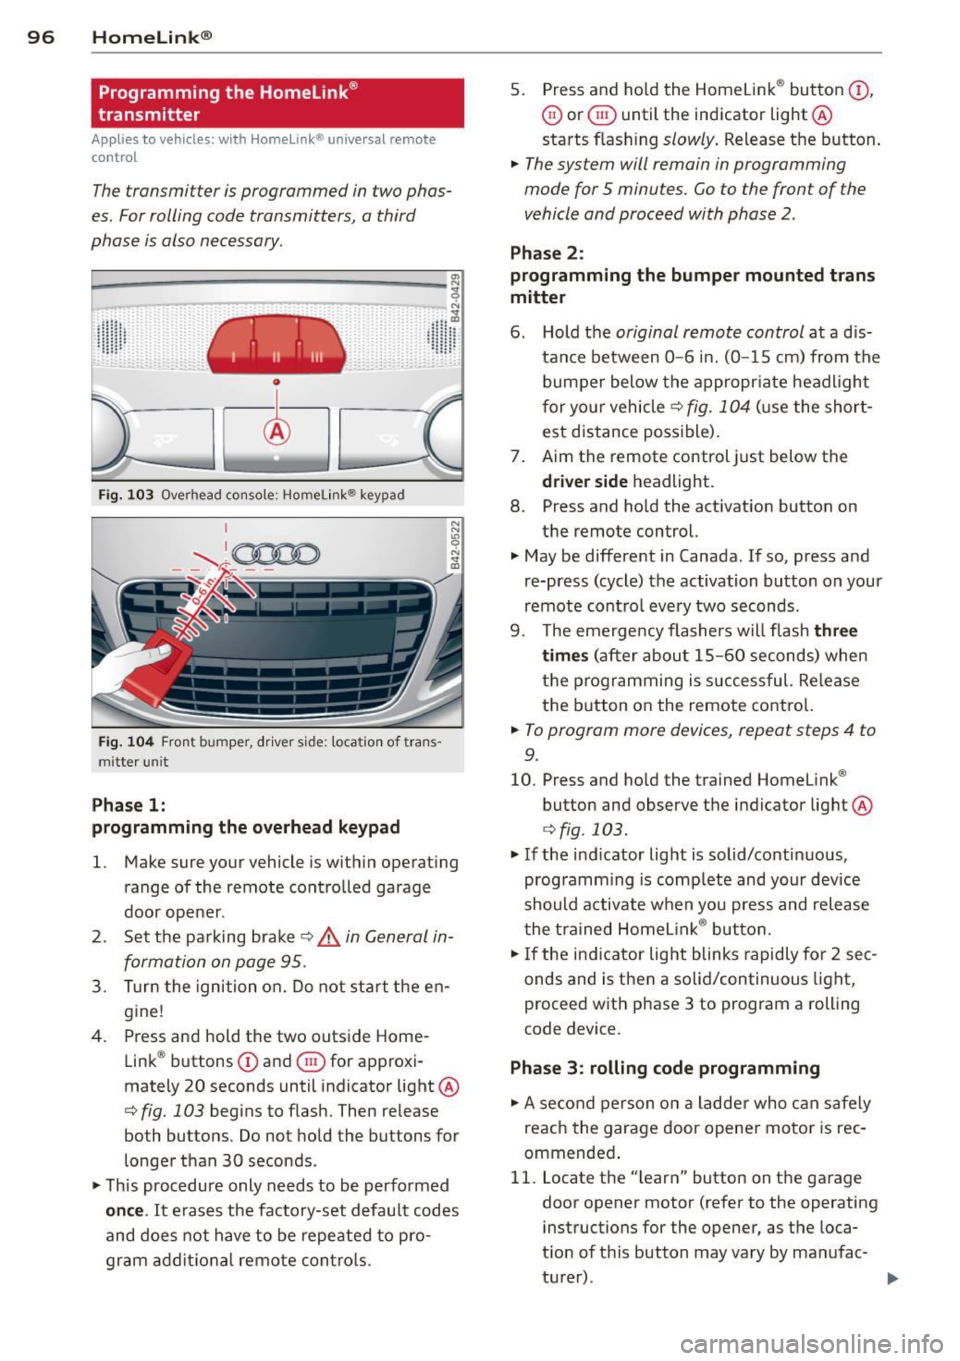
Fig . 103 Overhead console ; Homelink ® keypad
Fig. 104 Fron t bumper, drive r side: location of trans ·
m itterun it
Phase 1:
programming the overhead keypad
"' ,A
1. Make sure your vehicle is within operating
range of the remote controlled garage
door opener .
2 . Set the parking brake~,&.
in General in
formation on page 95 .
3. Turn the ignition on. Do not start the en
gine!
4 . Press and hold the two outside Home
Link ® buttons
CD and @for approxi
mately 20 seconds until indicator light ®
¢ fig. 103 begins to flash. Then release
both buttons . Do not hold the buttons for
longer than 30 seconds .
"'T his procedure only needs to be performed
once. It erases the factory-set default codes
and does not have to be repeated to pro
gram additional remote controls. 5
. Press and hold the Homelink ® button
(D ,
@ or @ until the indicator light ®
starts flash ing
slowly . Release the button.
.,. The system will remain in programming
mode for 5 minutes. Co to the front of the
vehicle and proceed with phase 2 .
Phase 2:
programming the bumper mounted trans
mitter
6 . Hold the original remote control at a dis
tance between
0 -6 in. (0 -15 cm) from the
bumper below the appropriate headlight
for your vehicle
~ fig. 104 (use the short
est distance possible).
7. Aim the remote control just below the
driver side headlight.
8. Press and hold the activation button on
the remote control.
"' May be different in Canada . If so, press and
re-press (cycle) the activation button on your
remote contro l every two seconds .
9. The emergency flashers will flash
three
times
(after about 15-60 seconds) when
the programming is successful. Re lease
the button on the remote control.
.,. To program more devices , repeat steps 4 to
9 .
10. Press and hold the trained Homelink ®
button and observe the indicator light®
¢fig . 103 .
"'If the ind icator light is solid/continuous,
programm ing is comp lete and your device
should activate when you press and release
the trained Homelink ® button.
"'If the indicator light blinks rapidly for 2 sec
onds and is then a solid/continuous light,
proceed with phase 3 to program a rolling
code device.
Phase 3: rolling code programming
.,. A second person on a ladder who can safely
reach the garage door opener motor is rec
ommended .
11. Locate the "learn" button on the garage
door opener motor (refer to the operating instructions for the opener, as the loca
t ion of this button may vary by manufac-
turer) .
~
Page 99 of 244
12. Press and release the learn button on the
garage door opener motor.
.. Note: once the button is pressed, there are
30 seconds in which to initiate the next
step .
13. On the Homel ink ® keypad inside the vehi
cle, firmly press and hold the Homelink ®
button previously programmed in phases
1 and 2 for two seconds and release. Re
peat this sequence
twice .
.. Some vehicles may require the press/hold/
release sequence up to three times to com
plete the training process .
.. Homelink ® should now activate your rolling
code equipped device.
If the 5 minute time limit is exceeded, the
emergency flashers will flash one time to in
d icate that the process has been terminated.
In this case, repeat steps 4 through 9 .
If the emergency flashe rs do not flas h
three
times (after about 15-60 seconds), program
ming was not successful. In this case, repeat
steps 4 through 9.
Remote control units for garage door openers
in Canada are set to stop transmitting radio
frequency s ignals after two seconds. This time
may not be sufficient for the Homelink ® sys
tem to learn the radio frequency s ignal. Per
form all other steps as described above .
Operating the Homelink® transmitter
Appl ies to vehicles: with Home link® univers al remote
co ntrol
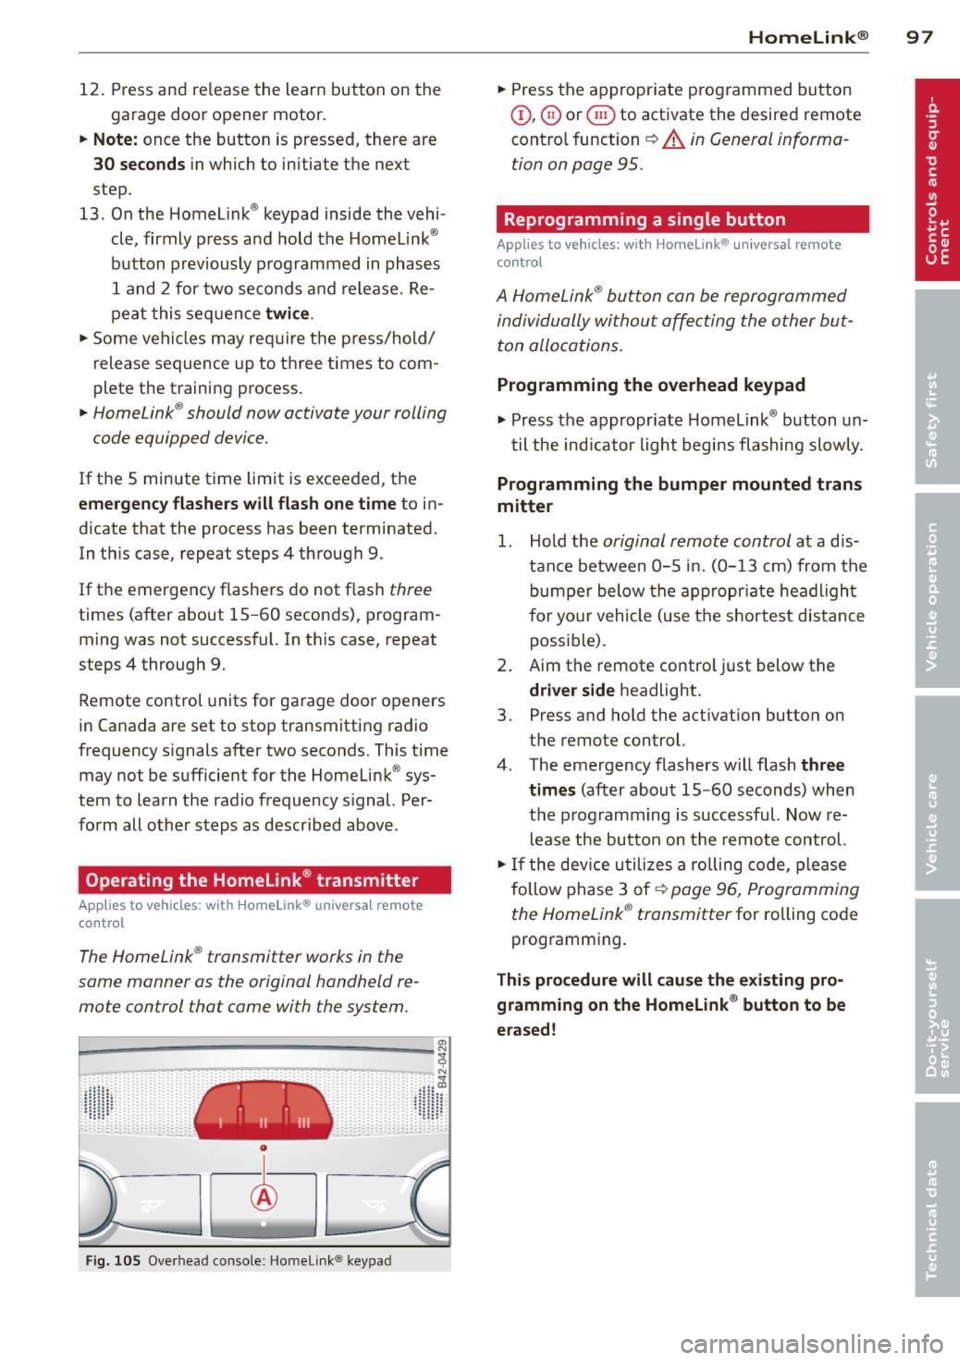
The Homelink ® transmitter works in the
same manner as the original handheld re
mote control that came with the system.
en
~-----------------~
0
t
Fi g. 105 Overhead co nsole: Homelink ® keypad
"' ..
Iii~ ::: ~, ~:::
Homelink ® 97
.. Press the appropriate programmed button
Q),@) or @ to activate the desired remote
contro l function
~ A in General informa
tion on page 95 .
Reprogramming a single button
Applies to vehicles: with Hom elink ® univ ersal remote
contr ol
A HomeLink ® button can be reprogrammed
individually without affecting the other but
ton allocations.
Programming the overhead keypad
.. Press the appropr iate Homelink ® button un-
til the indicato r light begins flashing slowly.
Programming the bumper mounted trans
mitter
1. Hold the original remote control at a dis
tance between
0-5 in. (0-13 cm) from the
bumper below the appropriate headlight
for your vehicle (use the shortest distance
possible) .
2. Aim the remote control just below the
driver side headlight.
3. Press and hold the activation button on
the remote control.
4. The emergency flashers w ill flash
three
times
(after about 15 -60 seconds) when
the programming is successful. Now re
lease the button on the remote control.
.. If the device utilizes a rolling code, please
follow phase 3 of
c:> page 96, Programming
the Homelink ® transmitter
for rolling code
programming.
This procedure will cause the existing pro
gramming on the Homelink ® button to be
erased!
Page 100 of 244
98 Homelink®
Erasing the programming of the
Homelink® transmitter
Appl ies to vehicles: with Home Link® unive rsa l remote
co ntrol
When you erase the programming, the pro
gramming on all three of the transmitter channels with be lost!
., Perform steps 1 to 4 as described on
c> page 96, Phase 1: programming the over
head keypad .
When completed, the Homel ink ® system will
be in the programming mode and is then
ready to learn the codes for remote controlled
devices .
@ Tips
-Programmed buttons cannot be erased
individua lly.
- For security reasons you are advised to
erase the prog ramming of the Home
Link ® system before you sell your vehicle .