AUDI R8 SPYDER 2011 Repair Manual
Manufacturer: AUDI, Model Year: 2011, Model line: R8 SPYDER, Model: AUDI R8 SPYDER 2011Pages: 244, PDF Size: 59.74 MB
Page 61 of 244
also turned on when the ignition key is removed. The lights turn off about 30 seconds
after the doors are closed. When the vehicle is
l ocked or when the ignit ion is turned on, the
interior light s are turned off .
When a door is open, the interior lights are
turned off after abo ut 10 m inutes to prevent
battery draining .
The brightness of the lights is controlled a u
tomatically by a dimmer when they are sw itched on and off.
Luggage compartment light
The light is located on the right side of the
luggage compartment .
These lights come on automatically when the
front lid is opened. The lights turn off auto
matically if the lid is left open for more then
10 minutes.
Vision
Sun visors
Using the sun visors makes driving safer.
Fi g. 68 Sun v isor
The vanity mirrors in the sun visors are eq uip
ped with covers. Clear vi
sion 59
Wiper and washer
system
Windshield wiper
The windshield wiper lever controls both the
windshield wipers and the washer system.
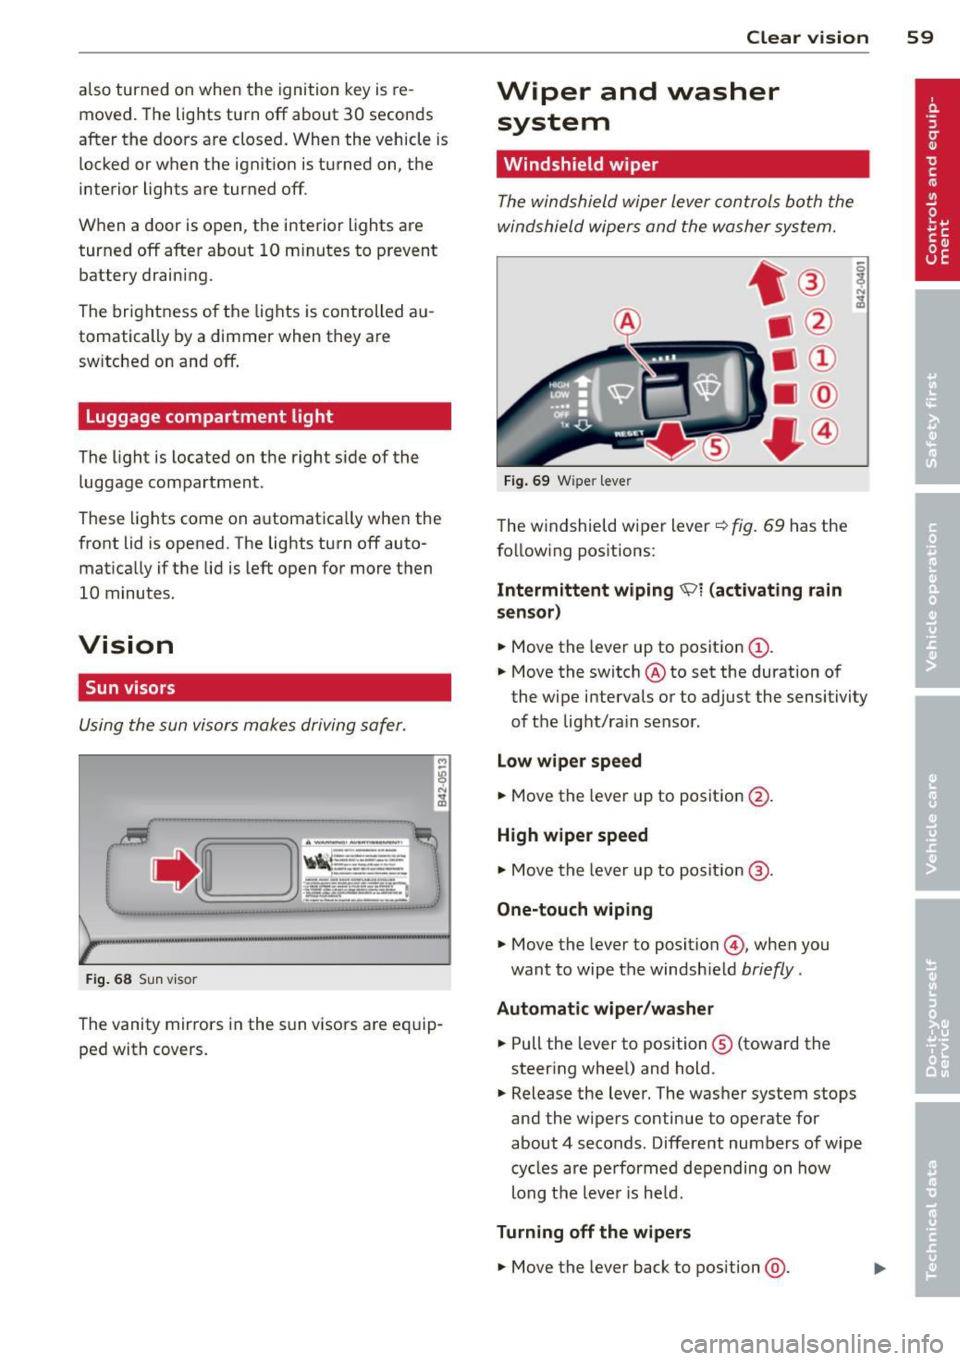
F ig . 69 W ipe r leve r
The windshield wiper lever ¢ fig. 69 has the
follow ing positions:
Intermittent w iping ~l (act ivating r ain
sen sor)
.,. Move the lever up to position (D .
.,. Move the switch @to set the duration of
the wipe intervals or to adjust the sensitivity
of the light/ra in sensor .
Lo w wiper spe ed
.,. Move the lever up to position @.
High wiper speed
.,. Move the leve r up to posit ion @.
One-touch wiping
.,. Move the lever to position ©, when you
want to wipe the windsh ield
briefly .
Automatic wip er/ wa sh er
.,. Pull the lever to position ® (toward the
steering whee l) and hold .
.,. Release the lever. The washer system stops
and the wipers continue to operate for
about 4 seconds . Different numbers of wipe
cycles are performed depending on how
long the lever is he ld.
Turning off the w ipe rs
.,. Move the lever back to position @ .
Page 62 of 244
60 Clear v is ion
Moving w iper blades to the service
posit ion
.. Do not lift the wiper arms away from the
glass when they are in their parked position;
this would damage the paint on the front
lid .
.. When there is a risk of frost, make sure that
the wiper b lades are not frozen to the wind
shield .
.. Move wipe r blades to the se rvice posit ion
¢page 61.
The windshield wipers and washer on ly work
when the ignition is turned on.
To reduce the sensit iv ity of the sensor, move
switch @down . To increase the sens itiv ity,
move the switch up. The higher you adjust the
sens itivity, the faste r th e sensor will react
when it senses moisture on the w indshield.
The pauses between w iper turns depend not
on ly on the sensitivity setting, but on the ve
hicle speed as well.
Du ring a temporary stop, e.g . at a t raff ic sig
na l, the set wipe r speed is automatically re
duced by one stage.
When the igni tion is tu rned on, the washer
jets are heated.
_& WARNING
- Wipe r blades a re cruc ial for safe driving!
Only when they are in good cond ition are
they able to clear the windows properly
to provide uncompromising visibility.
Worn or damaged wiper blades are a safety hazard ¢
page 61, Replacing
front wiper blades!
- The light/ra in sensor is only des igned to
assist and support the dr iver .
It remains
entirely the d river 's responsibility to
mon itor outs ide weather conditions and
to manually activate the w ipers as soon
as rain o r dri zzle red uces visibi lity
thro ugh t he windshie ld.
- T he windshie ld must not be treated with
water-repe llent materials. They can in
crease glare under poor visib ility condi
tions such as wetness, darkness, or when the s
un is low on the horizon . In addi
tion, they can cause the w indshield w ip
ers to chatter .
(D Note
In freezing or near freezing conditions:
- Always check that the w iper b lades are
not frozen to the g lass before you turn
the wipers on . Loosen a wiper blade
wh ich is frozen in place before operating
the wipers to prevent damage to the
w iper blade or the wiper motor.
- Do not use the w ipers to clear a frosted
window. Us ing the wipers as a conven
ient ice scraper will destroy the wiper
blades .
- Before you take your veh icle to an auto
matic car wash, make sure you have the
w indshield w iper system switched off
(lever in position 0), otherwise the w ind
shield w iper system could get damaged
in the car wash if it should suddenly
come on .
(D Tips
-The windshie ld w ipers are switched off
w hen the ignit ion is turned off. Act ivate
t he winds hield wipers after the igni tion
is switched back on by moving the wind
shield wiper lever to any position.
- Worn or d irty windshield wipe r blades
cause smearing, which can affect the op
eration of the light/rain sensor . Check
the cond ition of your windsh ield wiper
blades regularly.
- When the wipers are switched on man
ually and in ra in cond itions, the auto
matic headlights turn on
¢ page 55 or
off during the day when the wipers are
no longer operating . The automat ic
head lights fu nction is avai lab le in this
case on ly w hen the light switch is in the
"A UTO" posit ion ¢
page 55, fig. 63.
-Make su re the washer fluid reservoir is
t opped off before goi ng on a long tr ip.
Look up ¢
page 188 for checking and
filling the washe r containe r.
Page 63 of 244
-If you switch off the ignition w ith the
windshield wiper lever still in the inter
val w ipe pos ition and then come back a
while later and dr ive off , the rain sensor
will reactivate itself after the vehicle
speed has exceeded 4 mph (6 km/h) .
Service position
It is only possible to change wiper blades if
you move the wiper arms to the service posi
tion .
In order to use the windshield wipers, the
front lid must be comp letely closed.
Moving w ipe r blade s to the service
position
.. When there is a risk of frost, make sure that
the wiper b lades are no t frozen to the wind
shield .
.. Switch the ign ition on .
.. Move the wiper lever to pos ition
0
c::> page 59, fig. 69 .
.. Press the I RESE T I button unt il the Display
type
menu appears in the Driver Informa
tion System display .
.. Using the rocker switch and the
!RESET I b ut
ton, select the
Set > Wiper s > Front > Serv
ic e position on
function . The wind sh ield
wiper arms move to the service pos it ion.
Moving w ipe r blade s to park po siti on
.. Make certain that the wiper arms are ly ing
against the w indshie ld .
.. Switch the ignition on and move the wipe r
lever from position
O to 4 c::> page 59 ,
fig. 69. The wiper arms will move back to
t h e park pos ition .
(D Note
Never drive your vehicle when the wind
shield w iper arms are in the service pos i
tion and pulled away from the windshie ld.
When you dr ive faster than
4 mp h (6 km/
h), the w iper arms a utomat ica lly re turn to
t he par k position and could ca use pa int
d amage to the front lid!
Clear vi sion 61
@ Tips
- Yo u can also turn on t he service position,
for example, if yo u want to protect the
w indshield from icing by using a cover.
- Th e service posit io n moves to
off auto
matically when you operate the wind
shield wiper lever, or speed exceeds
4 mph (6 km/h).
Replacing front wiper blades
Wiper blades in good condition help keep the
windshield clear.
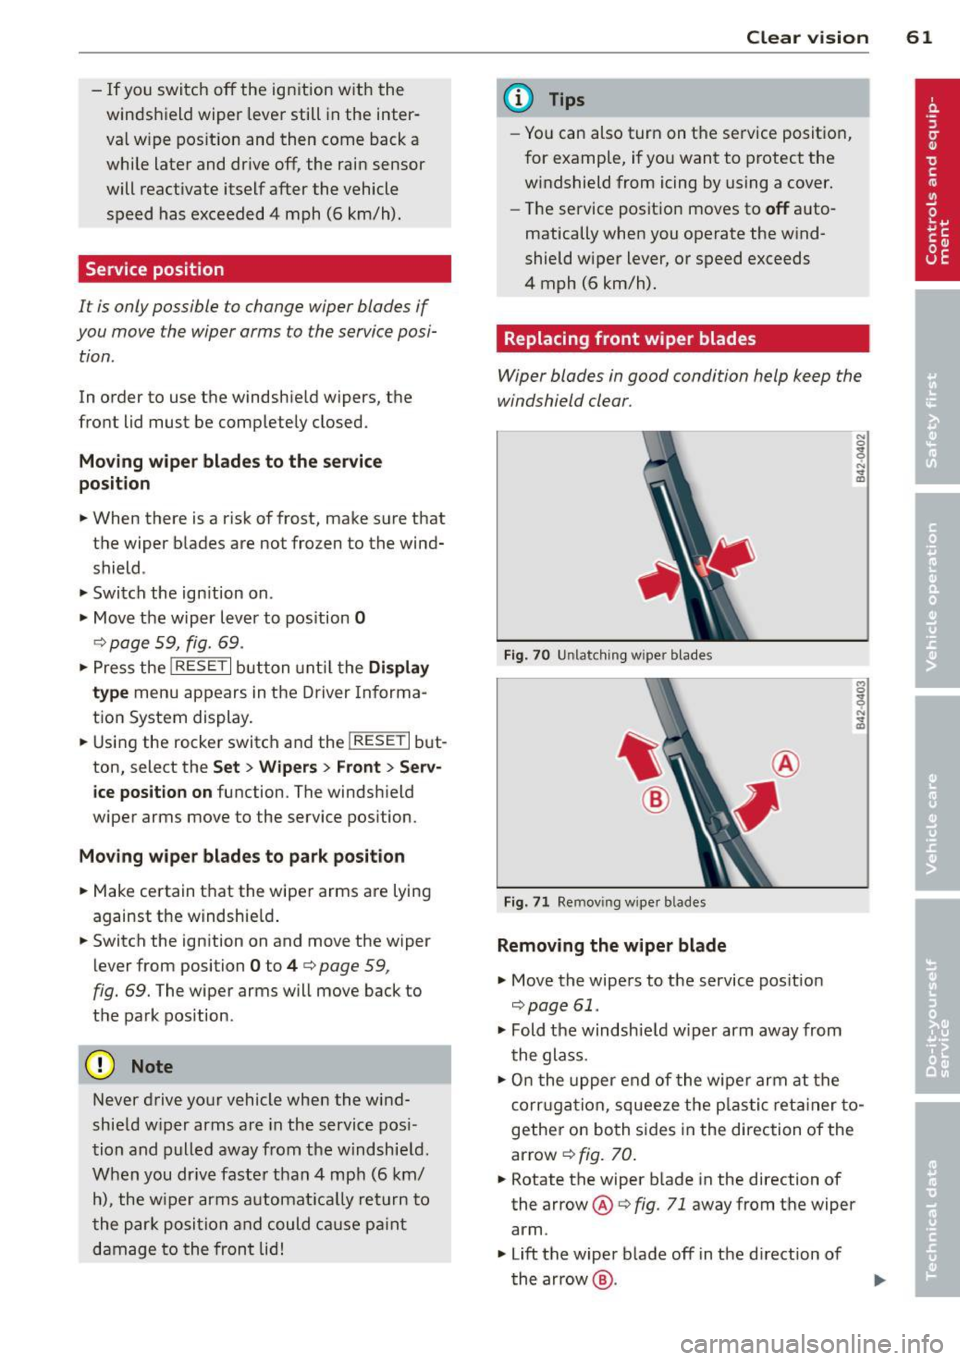
Fi g. 70 Unl atching w ipe r blade s
Fig. 71 Re mov ing w iper b lades
Removing the wiper blade
.. Move the wipers to the service pos it ion
c::> page 61.
.. Fold the windsh ie ld w iper arm away from
the glass .
N 0
i ,:. .., m
.. On the upper end of the wiper arm at the
corr uga tion, squeeze the p lastic ret ainer to
gethe r on both s ides in the direction of the
arrow
c::> fig. 70.
.. Rotate the w iper b lade in the direction of
the arrow @
c::> fig. 71 away from the wiper
arm .
.. Lift the wiper b lade off in the d irection of
t he arrow @.
Page 64 of 244
62 Clear vis ion
Install ing th e wiper blade
.,. Pla ce the rounded end of the wiper onto the
end of the w iper arm in the
op pos ite direc
tion to the arrow @
r=;, fig. 71.
.,. Squeeze the corrugation on the w iper until
you hear it click in the wiper arm .
.,. Fold the wiper arm back onto the wind
shield .
.,. Switch the ign ition on and move the wiper
lever down briefly
r=;, page 59, fig . 69 . The
wipe r will move back to the park position.
_& WARNING
- Clean yo ur wiper blades regularly w it h a
windshield washer solution to prevent streaking. If the wipe r blades are very
dirty, for examp le with insects, carefu lly
clean the w iper blades with a sponge or a
soft brush.
- For your safety, you should replace the
wiper blades once or twice a year. See
your authorized Aud i dealer for replace
ment blades.
(D Note
- The w iper blades may only be changed
r=;, page 61 in the service position! Other
wise, you r isk damaging the paint on the
front lid o r the windsh ield wiper motor .
- To prevent damage to the wiper system:
-Always loose n blades which a re fro zen
t o the windshield before operating
w ipers.
- Do not use gasoline, kerosene, paint
t hinne r, or o ther solven ts on o r near
t he wipe r blades .
- Do not attemp t to move the wipers by
hand.
{D) Tips
The front wiper b lades are different
lengths; the blade o n the dr ive r's side is
longer .
Mirrors
Automatically dimming inside mirror
The automatic dimming function can be
turned on and off if required .
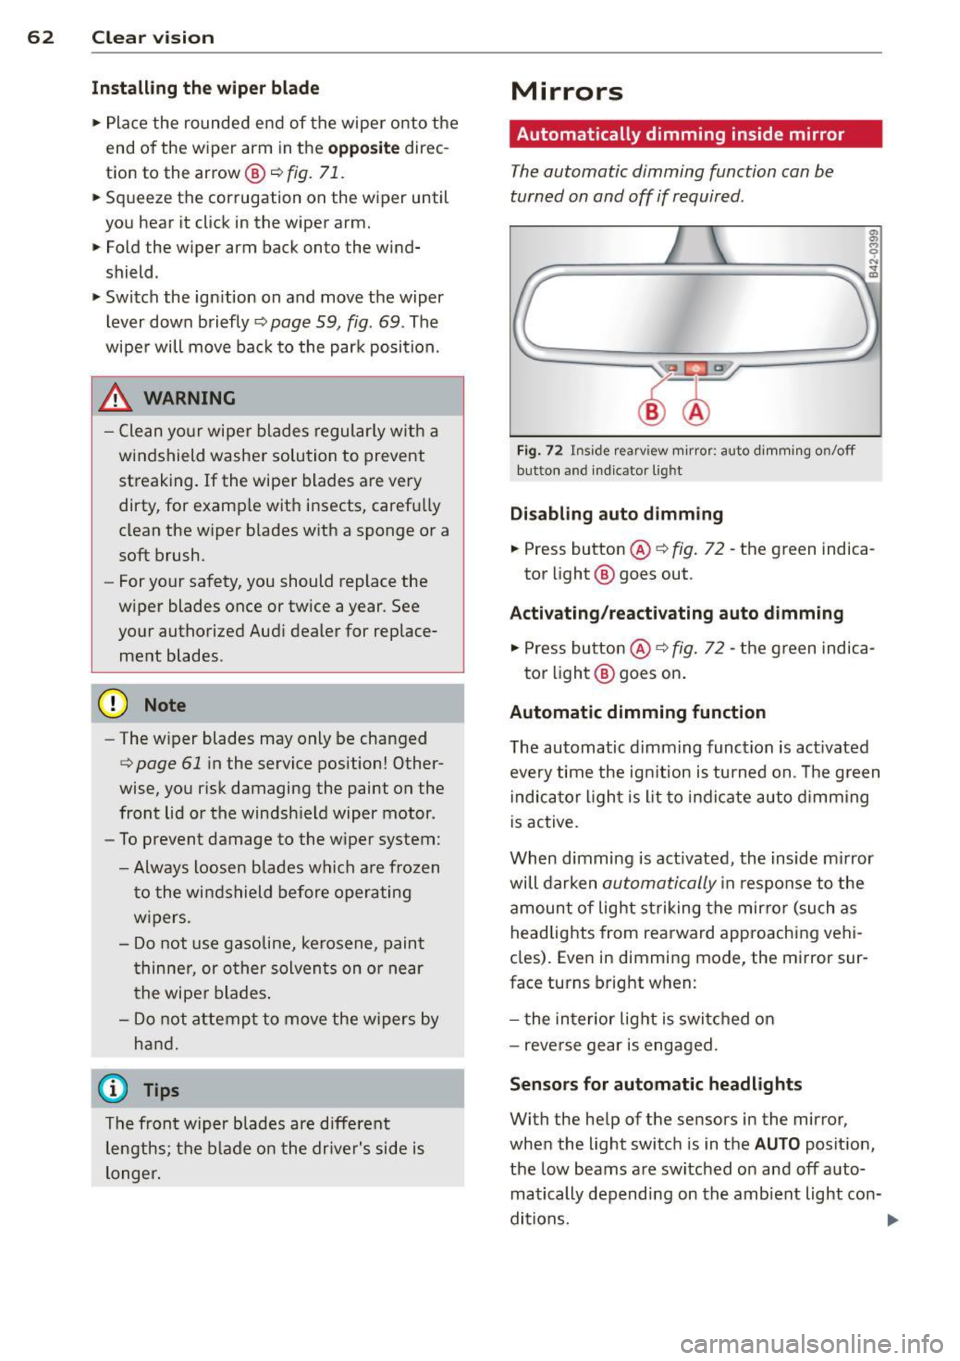
Fig . 72 Inside rearv iew mirror: auto d imming on/off
button and ind icator lig ht
Disabling auto d imming
.,. Press button ® r=;, fig. 72 -the green indica
tor light @ goes out .
Activating /reactivating auto dimming
.,. Press button @¢ fig. 72 -the green indica-
tor light @ goes on .
Automatic dimming function
The automatic dimming function is act ivated
every time the ign it ion is turned on . T he g reen
indica tor light is lit to indicate auto d imming
is active.
When dimming is act ivated, the inside m irror
will darken
automatically i n response to the
amount of light st riking the mirro r (such as
headlig hts from rearward approaching vehi
cles). Even in dimming mode, the mirror sur
face turns bright when:
- t he in terior lig ht is swi tched on
- reverse gear is engaged.
Senso rs for automatic headlight s
With the help of the sensors in the mirror,
when the light switc h is in the
AUTO posit ion,
the low beams are switched on and off auto matically depending on the amb ient light con-
ditions. ..,.
Page 65 of 244
_& WARNING
Broken glass of automatic dimming mirror
can cause electrolyte fluid leakage. Elec
trolyte fluid can irritate sk in, eyes, and res
piratory system .
- Repeated or prolonged exposure to elec trolyte can cause ir ritation to the resp ira
tory system, espec ially among people
with asthma or other respiratory condi
ti ons. Get fres h ai r i mmedia tely by leav
ing the vehicle or, if that is not possible,
open windows and doors all the way.
- If electrolyte gets into the eyes, flush
them thoro ughly with large amounts of
clean water for at least 15 min utes;
med ica l attent ion is recommended.
- If e lectrolyte contacts sk in, f lush affect
ed area with clean water for at least 15
minutes and then wash affected area
with soap and water; medical attention
is recommended . T horoughly wash af
fected clothing and shoes before reuse .
- If swallowed and person is conscious,
rinse mouth w ith water for at least 15
min utes . Do not i nd uce vom it in g unless
inst ructed to do so by medical professio
nal. Get medical atten tion immediately.
CD Note
liquid electro lyte leaked from a b roken
m irror glass will damage any p lastic surfa
ces it comes in contact with. Clean up spil
led electro lyte immediately wi th clear wa
t er and a sponge.
(D Tips
- If yo u switch off the automatic dim·
ming function on th e in sid e mirror , au
t o mati c dimming of the out sid e mirror s
w ill likewi se be di sabled .
-Check to make sure there are no objects
preventing light from reaching the inside
mirro r.
- Do no t attach any sticke rs to the wind
sh ield in front of t he two light sensors,
as this would interfere with both the au
tomatic operation of the headlights and
Clear vi sion 63
the a utomatic dimming of the inside
mirror(s) .
Outside mirrors
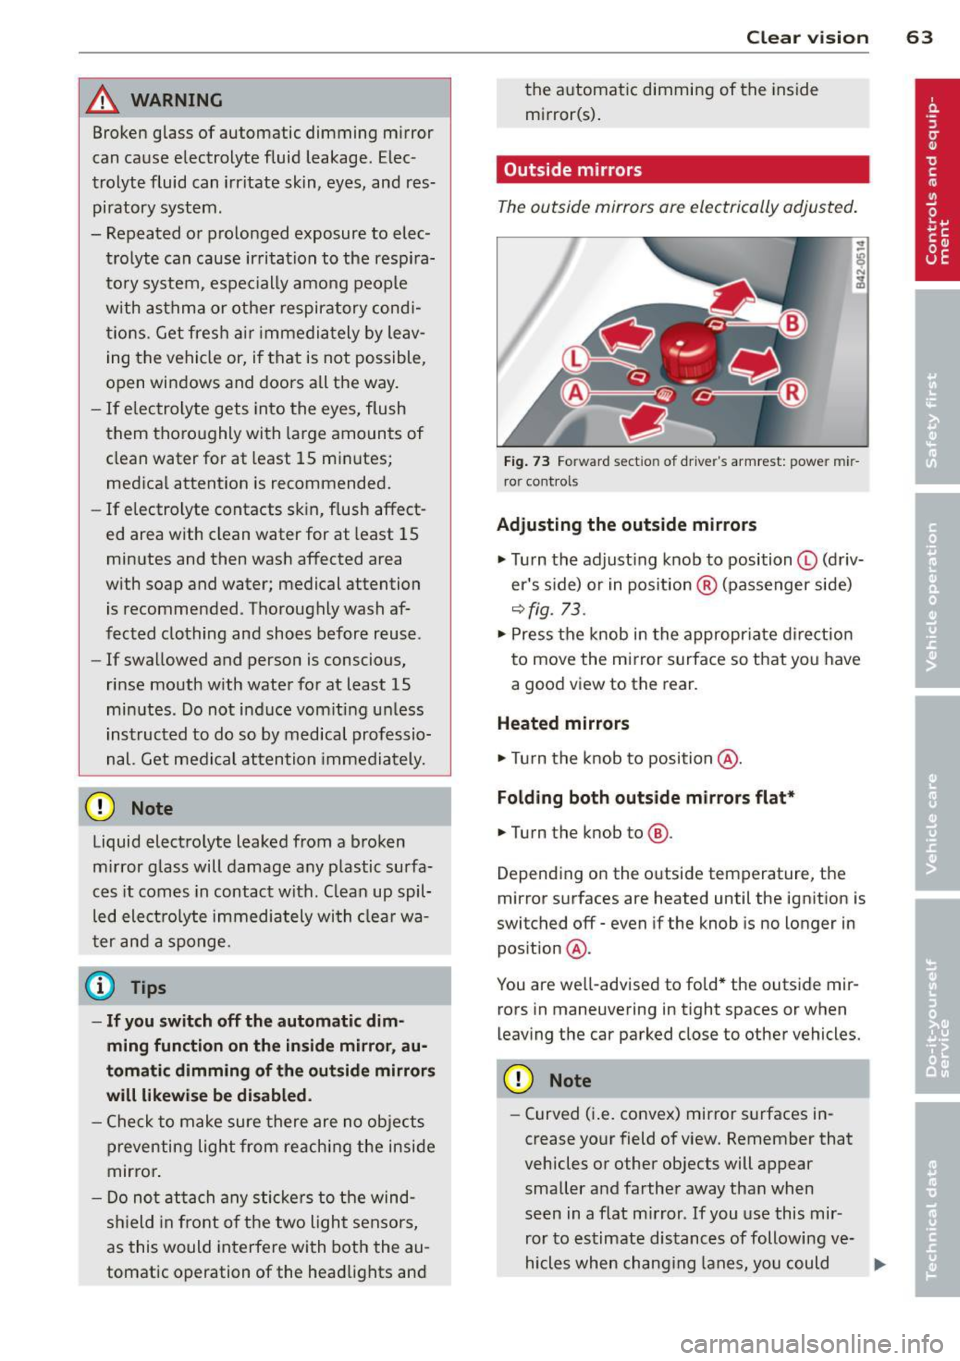
The outsid e mirrors ar e electrically adjusted .
Fig. 73 Forward sect io n of dr iv er's armrest: powe r mir
ro r control s
Adjusting the outside mirrors
.,. Turn the adjust ing knob to position © (driv
er 's s ide) or in pos ition ® (passenger side)
r::!) fig. 73.
... Press the knob in the appropriate dire ction
to move the mi rror surface so that yo u have
a good view to the rear .
Heated mirrors
... Tu rn the knob to position @.
Folding both out side mirro rs flat*
.,. Turn the knob to @.
Depend ing on the outside temperature, the
mirror surfaces are heated until the ignition is
switched off - even if the knob is no longer in
pos ition @.
You are we ll-advised to fold* the outside mir
rors in maneuvering in tight spaces or when
leaving the car parked close to other vehicles.
CD Note
- Curved (i .e. convex) mirror surfaces in
crease yo ur field of view. Remember that
vehicles or other objects will appear smaller and farther away than when
seen in a flat m irror . If you use this mir
ror to estimate distances of following ve-
hicles when chang ing lanes, you could ..,.
Page 66 of 244
64 Clear vis ion
estimate incorrect ly and cause an acci
dent .
- If the mirror ho using is moved un inten
tiona lly (for example, while parking your
vehicle), then you must first fo ld the mir
ror electrically. Do not readjust the mir
ror hous ing manually. You could damage
the motor which controls the mirror.
If there shou ld be a malfunction in the
electrical system, you can still adjust the
outs ide mirrors by press ing the edge of
the mirror .
Automatic dimming for outside mirrors
Applies to vehicles: with automatic dimming for outside
mirrors
The outside m irrors are dimmed together with
the automatic d imm ing of the inside m irror.
When the ign it ion is switched on, the m irrors
darken automat ically depending on the light
str iki ng them (e.g. headlights from the rea r).
When the interior lighting is switched on and
when reverse gear is engaged, the mirrors are
sw itched back to their or iginal br ightness (not
d immed).
_& WARNING
Broken g lass of automa tic dimming m irror
c an ca use e lectrolyte fluid leakage. Elec
trolyte fluid can irritate skin, eyes, and res
piratory system .
- Repeated o r prolonged exposure to elec
t ro lyte can cause irritation to the respira
tory system, especially among people
with asthma or other respiratory cond i
t ions. Get fresh air immediately by leav
ing the vehicle or, if that is not possible,
open wi ndows and doors all the way.
- If electrolyte gets into the eyes, flush
them thoroughly with la rge amounts of
clean water for at least 15 m in utes ;
med ica l attent ion is recommended.
- If electrolyte contacts sk in, f lush affect
ed area with clean water for at least 15
minutes and then wash affected ar ea with soap and water; medical attention
is recommended. Thoroughly wash af
fected clothing and shoes before reuse.
- If swallowed and person is conscious,
rinse mouth with water for at least 15
minutes. Do not induce vomiting unless
instructed to do so by medical professio
na l. Get medical attention immediately.
([) Note
Electrolyte leaking from a broken mirror
glass attacks the vehicle pa int and p lastic
surfaces. C lean up spilled elect ro lyte im
med iately with clear water and a sponge.
@ Tips
- If automatic dimming for the inside m ir
ror is switched off, the outside mirrors
are also not dimmed automat ically.
- Automatic d imm ing for the mirror on ly
operates properly if the l igh t striking the
inside m irror is not hi ndered by othe r ob
jects.
Digital compass
Activating or deactivating the compass
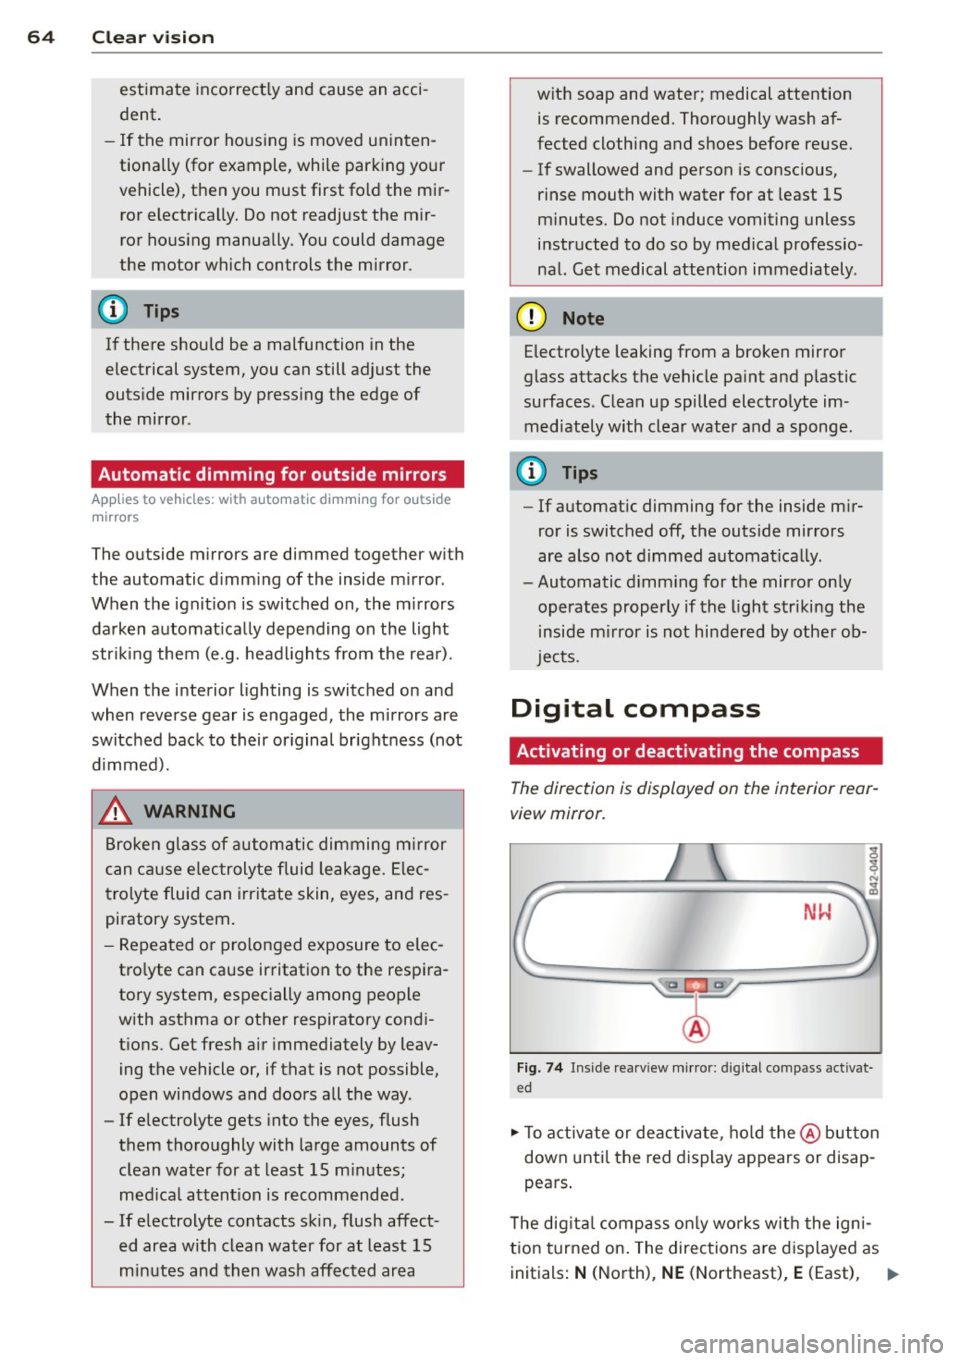
The direction is displayed on the interior rear
view mirror.
NW
Fi g. 74 Inside rea rv iew mirr or: digi tal co mpass activa t
ed
.. To activate or deac tiva te, ho ld the @ button
down unti l the red display appears or disap
pea rs .
T he dig ita l compass o nly works w it h the igni
t ion turned on . The directions are d isp layed as
initials :
N (North), NE (Northeast), E (East), 1111>
Page 67 of 244
SE (Southeast), S (South), SW (Southwest),
W (West), NW (Northwest).
@ Tips
To avoid inaccurate di rections, do not al
low any remote controls, electrical sys
tems, or metal parts close to the mirror .
Setting the magnetic deflection zone
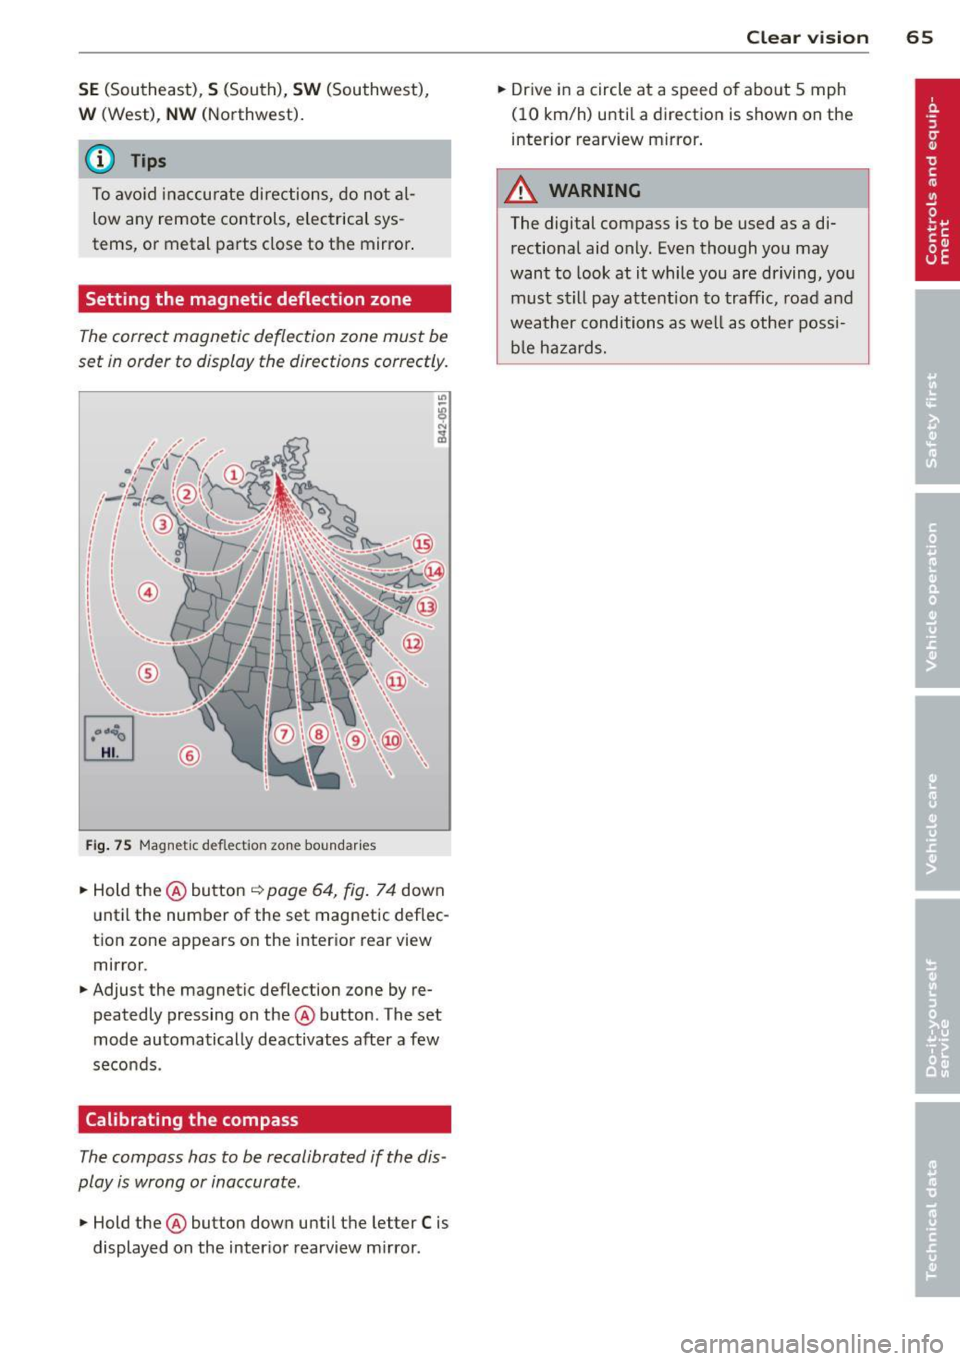
The correct magnetic deflection zone must be
set in order to display the directions correctly.
®
Fi g. 75 Magnet ic d efl ect io n zon e boundar ies
.. Hold the@ button ~ page 64, fig . 7 4 down
unt il the number of the set magnetic deflec
t ion zone appears on the inter ior rear view
mirror .
.. Adjust the magnetic deflection zone by re
peatedly pressing on the@ button . The set
mode automatically deactivates after a few
seco nds .
Calibrating the compass
The compass has to be recalibrated if the dis
play is wrong or inaccurate .
.. Hold the@ button down until the letter C is
displayed on the inter ior rearview m irror .
Clear vi sion 65
.. Dr ive in a circle at a speed o f abo ut 5 mph
(10 km/h) until a direction is shown on the
interior rearview mirror .
A WARNING
The digital compass is to be used as a di
rectional aid only. Even though you may
want to look at it while you are driving, you
must still pay attent ion to traffic, road and
weather conditions as well as othe r possi
b le ha za rds.
Page 68 of 244
66 Seat s a nd s tor ag e
Seats and storage
General recommen
dations
Why is your seat adjustment so
important?
The safety belts and the airbag system can
only provide maximum protection if the front
seats are correctly adjusted.
There are various ways of adjust ing the front
seats to provide safe and comfortable support
for the driver and the front passenger . Adjust
your seat properly so that :
- you can easily and quick ly reach all the
switches and controls in the instrument
panel
-your body is prope rly supported thus reduc
ing physical stress and fatigue
- the safety be lts and airbag system can offe r
maximum protection ¢
page 117.
In the following sec tions, you will see exactly
how you can best adjust you r seats .
There are special regulations and instructions
for insta lling a child safety seat on the front
passenger's seat. Always heed the informa
tion rega rd ing child safety provided in
¢ page 138, Child Safety .
A WARNING
Incorrect seating position of the driver and
all other passengers can result in serious
personal injury.
- Always keep your feet on the floor when
the vehicle is in motion -never p ut your
feet on top of the instrument panel, out
of the w indow or on top of the seat cush
ion! This applies espec ially to the passen
gers .
If your seating position is incorrect
you increase the r isk of injury in the case
of sudden braking or an acc ident.
If the
airbag infla tes and the seating position
is incorrect this could result in personal
injury or even death.
- It is important for bo th the driver and
front passenger to keep a distance of at least 10 inches (25 cm) between them
selves and the steering wheel and/or in
strument panel. If you're s itting any
closer than th is, the a irbag system can
not protect you properly . In addition to
this, the front seats and head restra ints
must be adjusted to your body height so
that they can give you max imum protec
tion.
- Always try to keep as much distance as
possible between yourself and the s teer
ing wheel or instrument pane l.
- Do not adjust the driver's o r fron t pa s
senger's seat whi le the vehicle is moving.
Your seat may move unexpected ly, caus
ing sudden loss of vehicle contro l and
personal inj ury . If you ad just yo ur seat
while the veh icle is moving, you are out
of posit io n.
Driver's seat
The correct seat position is important for safe
and relaxed driving.
We recommend that you adjust the driver's
seat in the fo llowing manner:
.,. Adjust the seat in fo re and aft direction so
t ha t you can easily p ush the peda ls to the
floor wh ile keeping your knee slightly bent
i::> A in Why is your seat adjustment so im
portant? on page 66 .
.,. Adjust the seatback so that when you sit
w ith your back against the seatback, you can
still grasp the top of the steering wheel.
.,. Posit io n the head restraint according to the
occupant 's height
<=:>page 68 . For maxi
mum protection, t he top of the head re
s t raint shou ld be a t least at eye level, pref
erab ly higher and idea lly level with the top
of the head
¢ page 102, fig. 107 .
A WARNING "--
Never place any objects in the dr iver's foot-
well. An object could get into the pedal
area and interfere with pedal function. In
case of sudden braking or an acc ident, you
wo uld not be able to brake or accelerate!
Page 69 of 244
Front passenger's seat
Always move the front passenger seat into the rearmost position .
To avoid contact with the airbag while it is de
p loying, do not sit any closer to the instru
ment panel than necessary and always wear
the three-point safety belt provided adjusted
correctly . We recommend that you adjust the
passenger's seat in the following manner:
.,. Move the front passenger seat into the rear
most position of the fore and aft adjustment
range
c:::> &. in Why is your seat adjustment
so important? on page
66.
.,. Bring the backrest up to an (almost) upright
position.
Do not ride with the seat reclined .
.,. The idea l position for the head restraint is
with the upper edge of the restraint leve l
with the top of your head
c:::> page 68. You
shou ld
not lower the top of the restra int be
low the level of your eyes .
.,. Place your feet on the floor in front of the
passenge r's seat .
Power seats
Adjustment switches
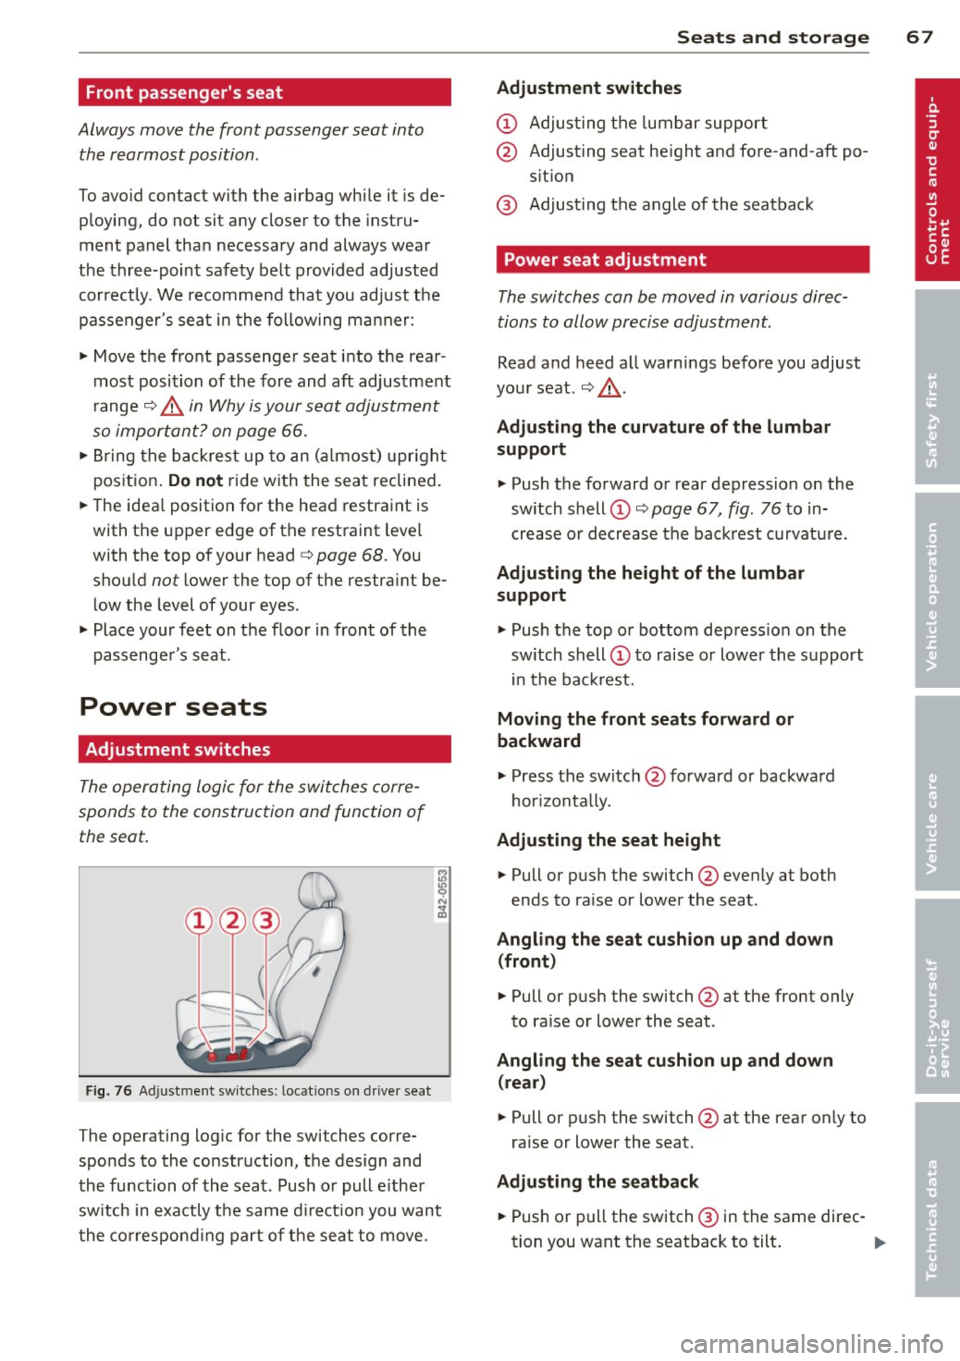
The operating logic for the switches corre
sponds to the construction and function of
the seat.
Fig . 76 Ad just men t sw itches: locations on driver sea t
The operating log ic for the switches corre
sponds to the construction, the design and
the function of the seat . Push or pull e ithe r
sw itch in exactly the same direction you want
the corresponding part of the seat to move.
Seats and storage 67
Adjustment switches
CD Adjusting the lumbar support
@ Adjusting seat height and fore-and-aft po
sit ion
@ Adjusting the angle of the seatback
Power seat adjustment
The switches can be moved in various direc
tions to allow precise adjustment.
Read and heed all warnings before you adjust
your seat.
c:::> &. .
Adjusting the curvature of the lumbar
support
.,. Push the forward or rear depression on the
sw itch shell
CD c:::> page 67, fig. 76 to in
crease or decrease the backrest curvature.
Adjusting the height of the lumbar
support
.,. Push the top o r bottom depress ion on the
sw itch shell
CD to raise or lower the support
i n the backrest.
Moving the front seats forward or
backward
.,. Press the switch @forward or backward
hor izont ally.
Adjusting the seat height
.,. Pull or pus h the switch @even ly at both
ends to ra ise or lower the seat .
Angling the seat cushion up and down
(front)
.,. Pull or push the switch @at the front only
to ra ise or lower the seat .
Angling the seat cushion up and down
(rear)
.,. Pull or pus h the switch @at the rear only to
raise or lower the seat.
Adjusting the seatback
... Push or pull the switch ® in the same direc-
tion you want the seatback to tilt . ..,.
Page 70 of 244
68 Seats and st o ra ge
_&. WARNING
- Ne ver adj ust t he d river's or front passen
ger seat whi le the vehicle is mov ing . If
you do this while the vehicle is moving,
you will be out of posit ion. Always adjust
the driver's or front passenger seat when
the vehicle is not moving.
- Be careful when adjusting the seat
height. Check to see that no one is in the
way, or serious injury could result!
- Because the seats can be electrically ad
justed with the ignit ion key removed,
never leave children unattended in the
vehicle. Unsupervised use of the e lectr ic
sea t ad justments may cause serious in
Jury.
- To reduce the r isk of injury in the case of
sudden bra king or accide nt, front pas
senge rs must never ride in a moving
ve
hicle wi th the seatback recl ined. Safety
belts and the airbag system offer maxi
mum p rotection on ly when the seatback
is upright and the safety belts are prop
er ly posit ioned on the body . The more
the seatback is recli ned, the greater the
r isk of personal injury from an incorrect
seating pos it ion and improperly posi
t ioned safety be lts!
- Always make su re the front seatbac ks are
in the up right posit ion when dr iv ing .
Head restraints
Adjusting head restraints
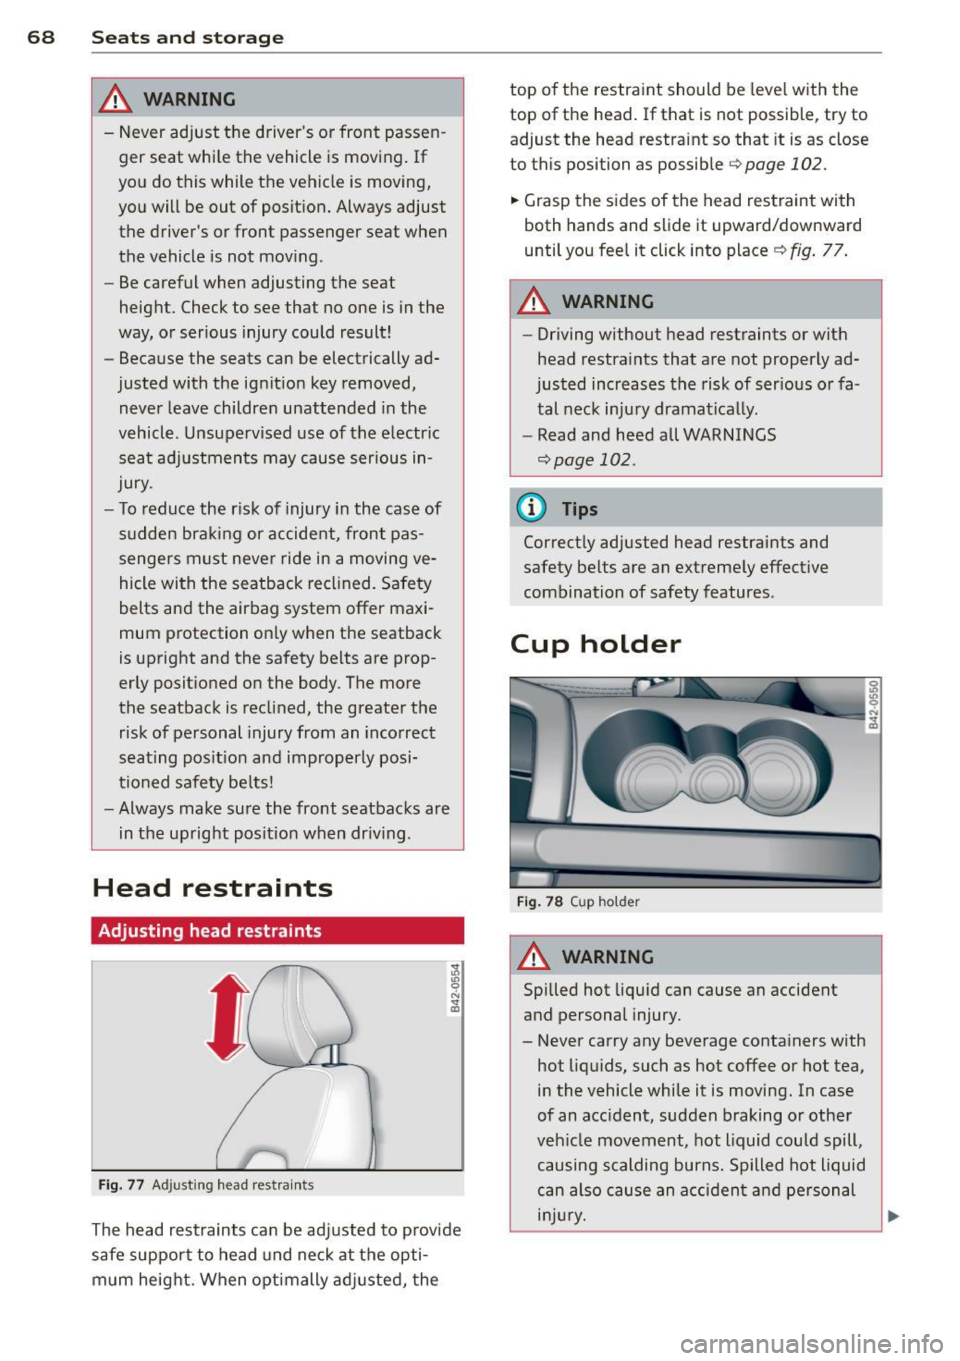
Fig . 77 Ad just ing head rest ra in ts
The head rest raints can be ad justed to p rovide
safe support to head und neck at t he opti
m um heig ht. When optimally ad justed, the top o
f th e restraint should be leve l w ith the
top of the head. If that is not possible, try to adjust the head restraint so that it is as close
to this position as possible
c::> page 102.
.. Grasp the s ides of the head restraint wi th
both hands and slide it upward/downward
until you fee l it click into place ¢
fig. 77 .
A WARNING
--
-Driving without head restraints or with
head restra ints that a re not properly ad
justed increases the risk of ser ious or fa
tal nec k inju ry dramatically.
- Read and heed all WARNI NGS
¢page 102.
(D Tips
Correct ly adjusted head restraints and
safety be lts are an ext reme ly effect ive
combination of safety features.
Cup holder
F ig . 7 8 Cup ho lder
A WARNING
--
Spilled hot liqu id can cause an accident
and personal injury.
- Never carry any beverage conta iners with
hot liq uids, such as hot coffee o r hot tea,
i n the vehicle while it is moving. In case
of an acc ident, sudden braking or other
veh icle movement, hot liquid could spill,
causing scalding burns. Spilled hot liquid
can also cau se an a cciden t and personal
i njur y.