AUDI RS7 SPORTBACK 2015 Manual PDF
Manufacturer: AUDI, Model Year: 2015, Model line: RS7 SPORTBACK, Model: AUDI RS7 SPORTBACK 2015Pages: 302, PDF Size: 74.76 MB
Page 71 of 302
M N
0:: <.J 'SI: ,...., \!) 1.1"1 ,...., 1.1"1 ,....,
Warm and cold Four-zone automatic
climate control
Description
Applies to vehicles: with four-zone automat ic climate co n
tro l
The climate control system warms, cools and
adds humidity to the a ir in the veh icle inter io r.
It is the most effect ive when the windows and
sunroof* are closed.
If the temperature inside
the parked vehicle becomes very warm, open ing the window briefly will speed up the cool
ing process.
I n all heating mode functions except
defrost,
the blower on ly switches to a higher speed
once the engine coolant has reached a certain
temperature.
Condensation from the cooling system can
drip and form a puddle of water under the ve
hicle. This is normal and does not mean there
is a leak.
Pollutant filt er
The po llutant filter removes pollutants such
as dust and pollen from the air.
The air pollutants filter must be changed at
the intervals spec ified in your Wa rranty
&
Maintenance book let, so that the air condi
tioner can properly work.
I f you d rive your vehicle in an area with h igh
air po llution, the fi lter may need to be
changed more frequent ly than specified in
your Audi Warranty
& Maintenance booklet. If
in doubt, ask your authorized Audi Service Ad·
visor for advice.
Key coded setting s
The clima te control sett ings are a utomat ica lly
stored and assigned to the remote contro l key
that is in use .
Warm and c old 69
A WARNING
-
Reduced visibi lity is dangerous and can
cause acc idents .
- For safe driving it is very important that
all windows be free of ice, snow and con
densat ion.
- Comp letely fam il iarize yourse lf with the
proper use and funct ion of the heat ing
a nd ventilation system and especially
how to defog and defrost the w indows.
- Never use the windshield wiper/washer system in freez ing weathe r unt il you
have warmed the windshie ld first, using
the heating and ventilation system. The
washer sol ution may freeze on the wind
shie ld and red uce visibi lity.
CJ) Note
- If you s uspect that the air conditioner
has been damaged, switch the system
off to avoid furt her damage and have it
inspected by a qualified dea lership .
- Repairs to the Audi air conditioner re
quire specia l technical know ledge and
special tools. Contact an authorized Audi
dealer fo r ass istance.
@ For the sake of the envi ronment
By reducing the amount of f uel you use,
you also red uce the amount of pollutants
emitted into the air.
(D Tips
- Keep the air intake s lo ts ( in front of the
w indshield) free from ice, snow and de
bris in order to maintain the proper func
tion of the climate control system.
- The energy ma nagement system may
switch the seat heating* or rear window defroster off temporar ily. These systems
are available again as soon as the energy
balance has been restored .
- Air escapes through vents under the rear window. When plac ing items of cloth ing
on the luggage compartment cover, en
sure that the openings are not covered.
Page 72 of 302
70 Warm and cold
Operation
Applies to vehicles: with four-zone automatic climate control
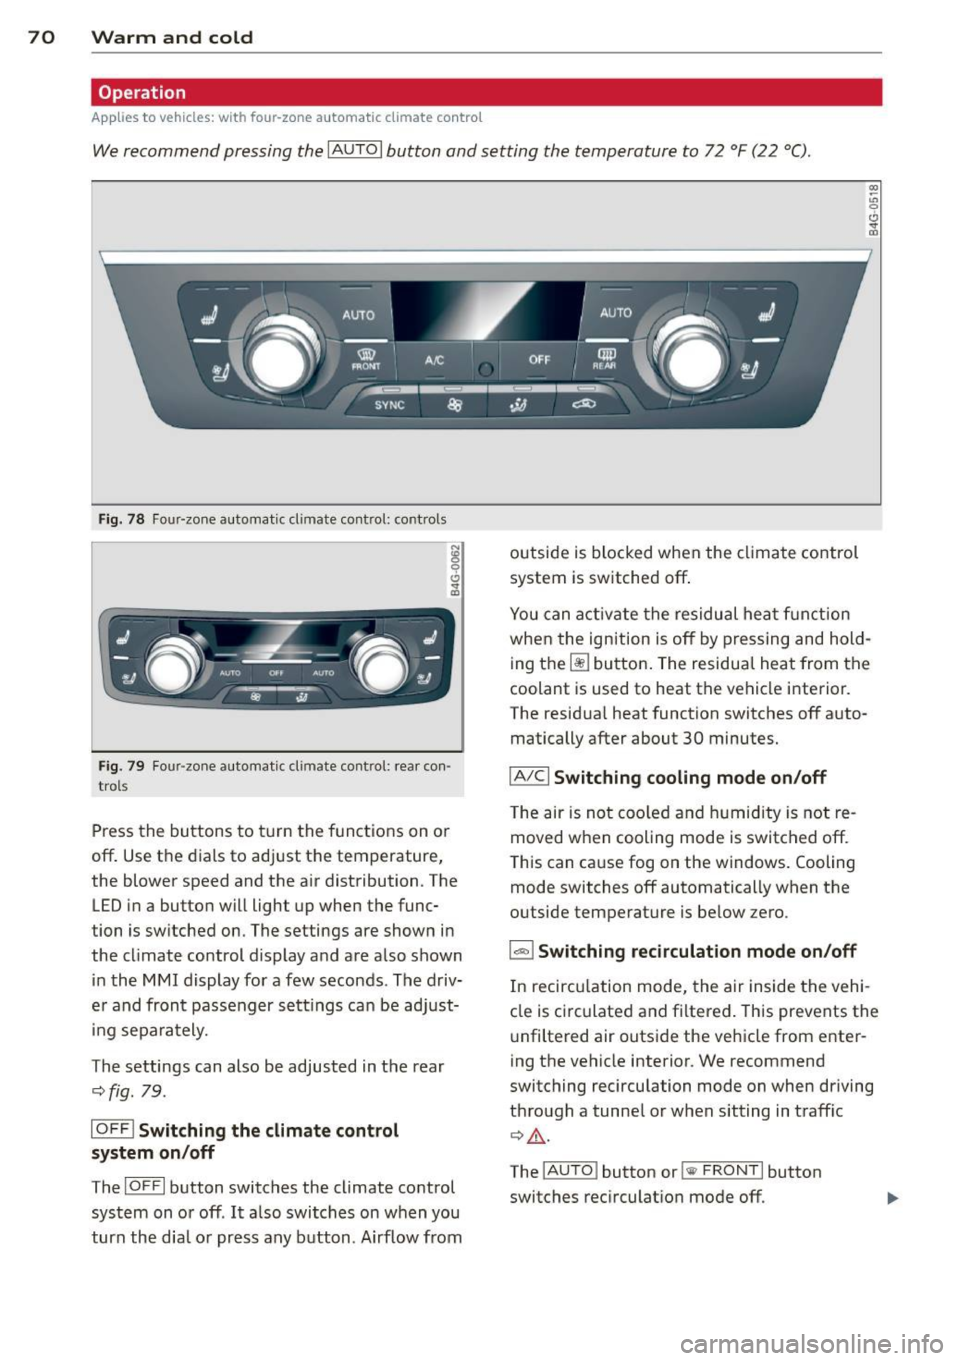
We recommend pressing the IAUTO I button and setting the temperature to 72 °F (22 °C) .
Fig. 78 Fo ur-zone automat ic climate control: contro ls
N :g
9 C)
"" m
Fig . 79 Four -zone automatic climate control: rear con
trols
Press the buttons to turn the functions on or
off . Use the dials to adj ust the temperature,
the blower speed and the a ir distribution. The
LED in a button will light up when the func
tion is switched on. The settings are shown in
the cl imate control display and are a lso shown
in the MMI display for a few seconds . The driv
e r and fron t passenger settings can be adjust
in g separately.
The settings can also be adjusted in the rear
c::>fig. 79.
IOFFl Switching the climate control
system on/off
The IO FFI button switches the climate control
system on or off .
It also switches on w hen you
turn the dia l or press any button . Airflow from outside is
blocked when the climate control
system is switched off.
(X) ~ u, 0 (!) ,,. a)
You can activate the residual heat function
when the ignition is off by pressing and hold
ing the ~ button. The residua l heat from the
coolant is used to heat the vehicle interior.
The residua l heat function switches off auto
matically after about 30 minutes.
IA/Cl Switching cooling mode on/off
T he air is not coo led and humidity is not re
moved when cooling mode is switched off .
This can cause fog on the windows. Cooling
mode switches off automatically when the
outside temperature is be low zero.
1-1 Switching recirculation mode on/off
In recircu lation mode, the air inside the vehi
cle is circulated and filtered . This prevents the
u nfiltered air outside the vehicle from enter
ing the vehicle interior. We recommend
switching recirculation mode on when driving
through a tunne l or when sitting in traff ic
c::> ,&. .
The
! A UT O! button or !sw FRONT! button
switches recirculation mode off.
Page 73 of 302
M N
0:: <.J 'SI: ,...., \!) 1.1'1 ,...., 1.1'1 ,....,
IAUTO I Switching automatic mode on
Automatic mode ma inta ins a constant tem
perature inside the ve hicle . Air temperature,
airflow and air distribution are controlled au
tomatically.
Adjusting th e temperatur e
Temperatures between 60 °F (+16 °C) and
84 °F ( +28 °C) can be set. O uts ide of this
range,
l o or hi wi ll appear in the climate con
trol system disp lay. At both of these settings,
the climate control system runs continuously
at maximum cooling or heating power. There
is no temperature regu lation.
~ Ad jus ting the airf low
You can adjust the airf low manually to suit
your needs . To have the airf low regulated au
tomatically, press the
I AUTO j button.
li!J Adjusting the air distribut ion
You can manually se lect the vents where the
ai r will flow. To have the air distribution regu
lated automatically, press the
IAUTOI button.
~I~* Adjusting seat heating /
ve ntilat ion *
Pressing the button switches the seat heat
ing/ventilation on at the highest setting ( level
3). The LEDs indicate the heating/ventilation
level. To reduce the heating/venti lation, press
the button again. To switch the seat heating/
ventilation off, press the button repeatedly
until the LED turns off.
After 10 minutes, the seat heating automati
cally switches from leve l 3 to level 2.
l
ed or cleared of condensation as quickly as possib le. The maximum amount of air flows
mainly from the vents below the windshield.
Recirculation mode switches off. The tempera
ture should be set to approximately 72 °F (22
°() .
The IAUTOI button switches the defroster off.
Warm and c old 71
liiii REAR ! Switch ing re ar window he ate r
on /off
The rear window heater only operates when
the engine is running. It switches off auto
matically after 10 to 20 minutes, depending
o n the outside temperature.
To prevent the rear window heater from
switching off automatically, press and ho ld
the
l liiil REARI button for more than 2 seconds.
This remains stored until the ign ition is
switched off .
I SYNC I Sy nch ron izat ion *
When synchronization is switched on, the
same settings are applied to both the driver
and front passenger, except for the seat heat
ing/ventilation*. The rear zone is also
synchronized. Synchronization switches off
when the settings for the front passenger s ide
o r rear are adjusted.
You can also switch synchronization on by pressing and holding a dial. For example, if
you press and hold the d ial on the front pas
senger side, the settings for that s ide are
transfer red to the d river side. The same ap
plies to the rear.
Air vents
You can open or close the center and outer
vents in the cockpit and the vents in the rear
cente r console and doo r pillars us ing the
ridged thumbwheels. The levers adjust the d i
rect ion of the a irflow from the vents.
&_ WARNING
-=
- Do not use the recirc ulation for extended
periods of time . The windows could fog
up since no fresh air can enter the vehi
cle. If the windows fog up, press the air recirculation butto n aga in immediately
to switch off the air recirculation func
tion or se lect defrost.
- Individuals w ith reduced sensitivity to
pa in or temperature could deve lop burns
when using the seat heating function . To
red uce the risk of i njury, these indiv idu-
als sho uld no t use seat heating. ..,.
Page 74 of 302
7 2 Warm and cold
(D Note
To avoid damage to the heating e lements
in the seats, do not kneel on the seats or
place heavy loads on a small area of the
seat .
Setup
Applies to vehicles: with four-zone a utomat ic clima te con·
tro l
The climate control system setup is accessed
through the MMI .
.,. Se lect : I CAR I func tion button> (Car )* sys·
terns con trol but ton > A /C.
Rear cabin settings*
When th is fu nction is selected, all sett ings for
the rear can be adjusted through the climate
control sys tem in the cockpit. The cl imate
con trol sy stem se ttings cannot be adjusted in
the rea r seat a t the same time. This func tion
switches o ff after a certain period of time or
when one of the dia ls in the cockp it is press
ed .
Auto recirculation*
The sensit ivity level of the au tomatic rec ircu
lation mode can be set at v ario us leve ls from
off to sensit ive. The recirculation mode is con
trolled a utomat ica lly. You must p ress the
I@ FRONT I button if fog forms on the win
dows.
Footwell temperature
You can ad just the footwe ll temperat ure so
that it is cooler or wa rmer.
Steering wheel heating
App lies to vehicles: wi th hea ted s tee rin g wheel
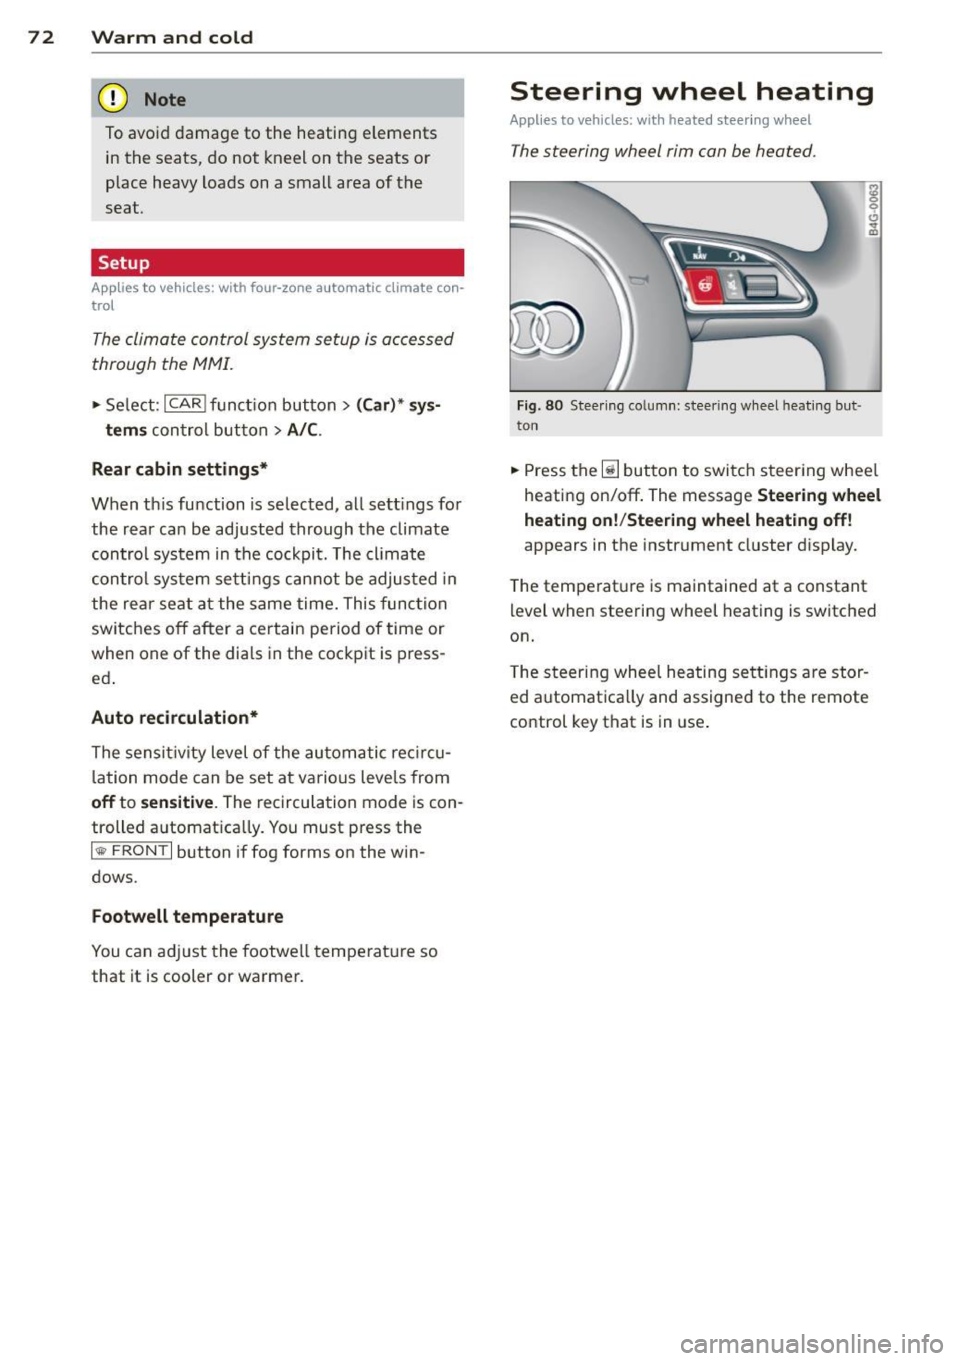
The steering wheel rim can be heated .
Fig. 80 S tee ring co lu mn : steeri ng w hee l h ea tin g but ·
ton
.,. Press the~ button to swi tch steering whee l
heati ng on/off . The message
Steering wheel
heating on !/Steering wheel heating off !
appears in the instrument cluster d isplay.
T he temperat ure is maintained at a constant
level when steering wheel heating is switched
on.
T he steering whee l hea ting se tt ings are stor
ed automat ica lly and assigned to the remote
control key that is in use .
Page 75 of 302
"' N
a:: I.J "". rl I.O
"' rl
"' rl
On the road
Steering
Manually adjustable steering wheel
Applies to vehicles: with manu ally adjustable steering
w hee l
The height and reach of the steering wheel
can be adjusted .
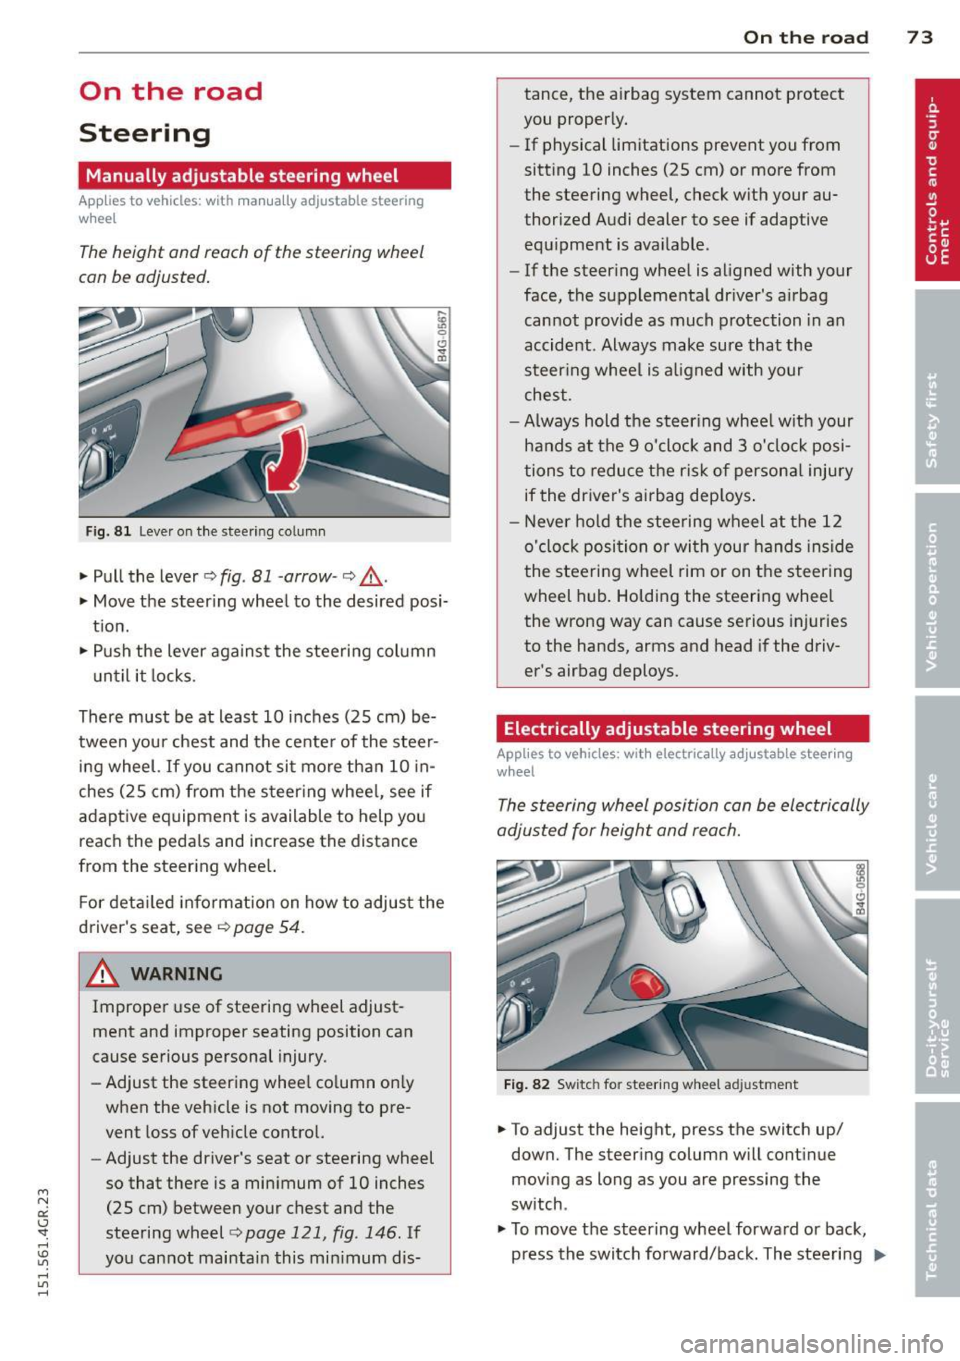
Fig. 8 1 Lever on t he steer ing co lumn
" Pull the lever¢ fig. 81 -arrow -¢_&..
"Move the steer ing whee l to the desired posi
t ion.
" Push the lever aga inst the steeri ng column
u ntil it locks.
There must be at least 10 inc hes (25 cm) be
tween your chest and the cente r of the steer
in g wheel.
If you cannot sit more than 10 in
ches (25 cm) from the s teer ing whee l, see if
adaptive eq uipment is available to help you
reach the peda ls and increase the distance
from the steer ing whee l.
F or deta iled informa tion on how to adjus t the
d river's seat, see
Q page 54.
_& WARNING
Improper use of steering wheel adjust
ment and improper seating position can
cause se rious personal injury .
- Adjust the steer ing whee l co lumn on ly
when the veh icle is not moving to pre
vent loss of veh icle cont rol.
-
- Adjust the driver's seat or steering wheel
so that there is a min imum of 10 inches
(25 cm) between your chest and the
steering wheel¢
page 121, fig . 146. If
yo u cannot mai ntai n this min imum dis-
On the road 73
tance, the a irbag system cannot protect
you proper ly.
- If physical limitations prevent you from
sitting 10 inches (25 cm) or more from
the steering wheel, check with your au
thorized A udi dealer to see if adaptive
equ ipment is ava ilable .
- If the steer ing wheel is aligned with your
face , the suppleme nta l dr iver's a irbag
cannot provide as much protection in an
accident . Always make sure that the
steer ing whee l is a ligned with your
ches t.
- Always hold the ste ering whee l w ith your
hands at the 9 o'clock and 3 o'clock posi
tions to reduce the ris k of persona l injury
if the driver's airbag dep loys .
- N ever hold the stee ring wheel at the 12
o' clock posi tion or wi th your hands ins ide
the stee rin g wheel rim or on t he steering
wheel hub . Holding the steering whee l
the wrong way can cause se rious injuries
to the hands, arms and head if the driv
er's airbag deploys.
Electrically adjustable steering wheel
App lies to vehicles: wi th electrica lly ad justable stee ring
w heel
The steering wheel position can be electrically
adjusted for height and reach.
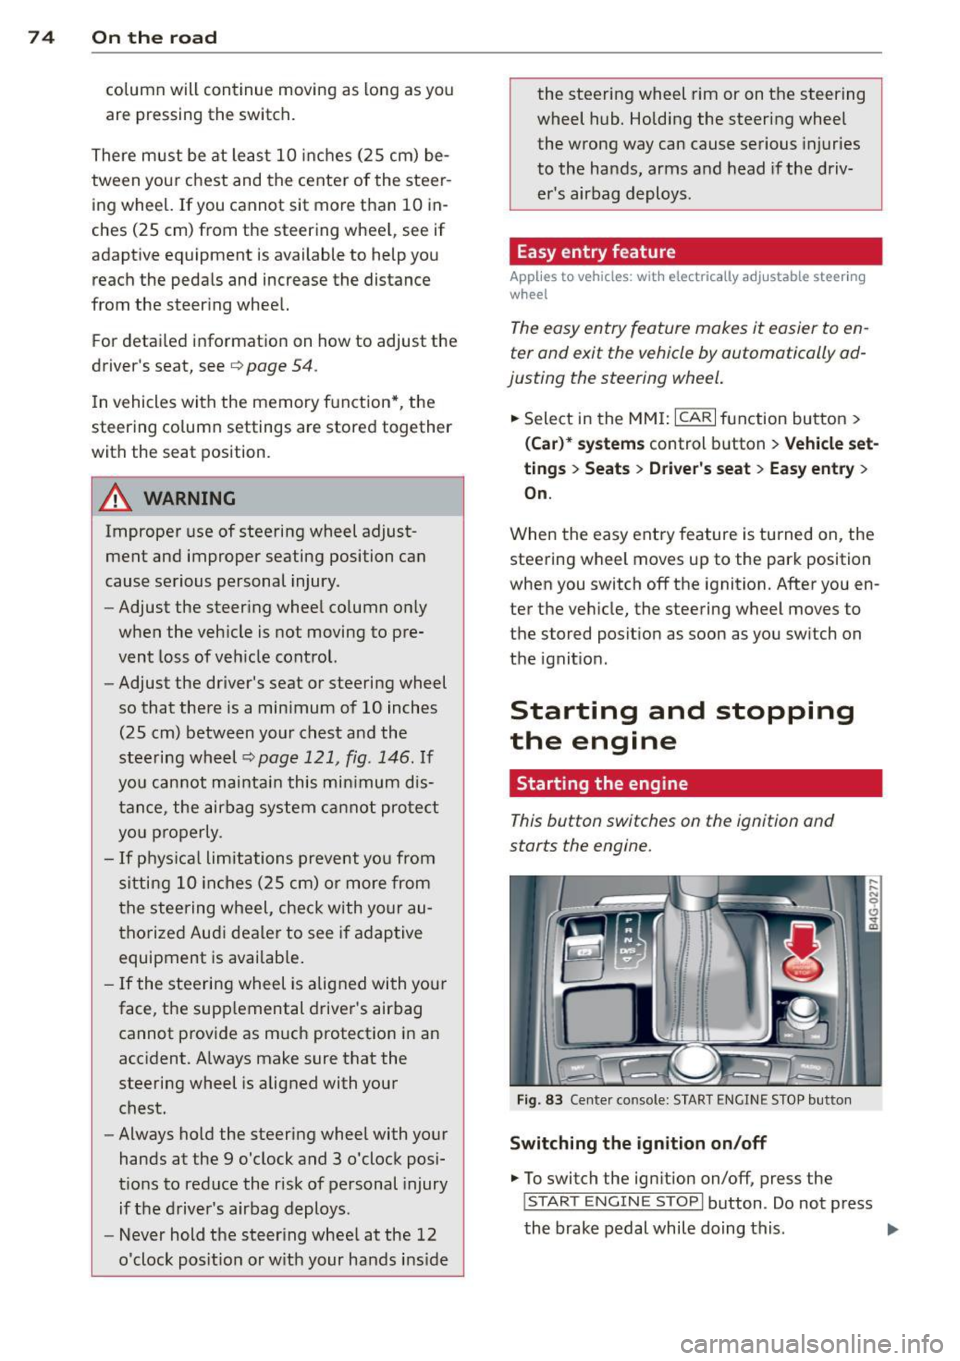
F ig . 82 Sw itc h fo r steeri ng w hee l adju stment
"To adjust the height, p ress the switch up/
down. The steer ing column w ill cont inue
moving as long as you are press ing the
switch .
" To move t he steering wheel forwa rd or back,
press the switch forward/back. The steering
I),-
Page 76 of 302
7 4 On the road
column will continue moving as long as you
are pressing the switch.
There must be at least 10 inc hes (25 cm) be
tween you r chest and the center of the steer
ing whee l.
If you cannot sit more than 10 in
ches (25 cm) from the steering whee l, see if
adaptive equipment is available to help you reach the pedals and increase the distance
from the steer ing wheel.
F or detai led information on how to adjust the
driver's seat, see
<::> page 54 .
In vehicles with the memory f unction* , the
steering column settings are stored together
with the seat position.
A WARNING
Improper use of steering wheel adjust
ment and improper seating position can
cause se rious personal injury.
- Adjust the steer ing whee l column on ly
when the vehicle is not moving to pre
vent loss of veh icle control.
-
- Adjust the driver's seat or steering wheel
so that the re is a min imum of 10 inches
(25 cm) between your chest and the
steering wheel ¢
page 1211 fig. 146. If
you can not maintain this min imum dis
tan ce, the airbag system cannot protect
yo u properly.
- If phys ica l limi tations prevent you from
sitting 10 in ches (25 cm) o r more from
the steering wheel, check with yo ur au
tho rized Aud i dealer to see if adaptive
equipment is availab le .
- If the steering wheel is aligned with you r
face, the supp lemental drive r's airbag
cannot provide as much protect ion in an
acc ident. A lways make sure that the
steering wheel is aligned with your
chest.
- Always hold the steering wheel with your
hands at the 9 o'clock and 3 o'clock posi
t ions to reduce the risk of pe rsonal injury
if the d river 's airbag deploys.
- Never hold the steering whee l at the 12
o'clock posit ion or w ith your hands i nside the steering wheel rim or on the steering
wheel hub. Hold
ing the steer ing wheel
the wrong way can cause serious injuries
to the hands, arms and head if the driv
er 's airbag deploys.
Easy entry feature
Applies to vehicles: with electrically adjustable steering
wheel
The easy entry feature makes it easier to en
ter and exit the vehicle by automatically ad
justing the steering wheel.
.. Select in the MM I: ICARI function button>
(Car )* sys tem s control b utton > V ehicle set
ting s
> Seats > D rive r's seat > Easy entry >
On .
When the easy ent ry feature is turned on, the
steering wheel moves up to the park position
when you switch
off the ignition. After you en
ter the veh icle, the steering wheel moves to
the stored position as soon as you sw itch on
the ignit ion.
Starting and stopping
the engine
Starting the engine
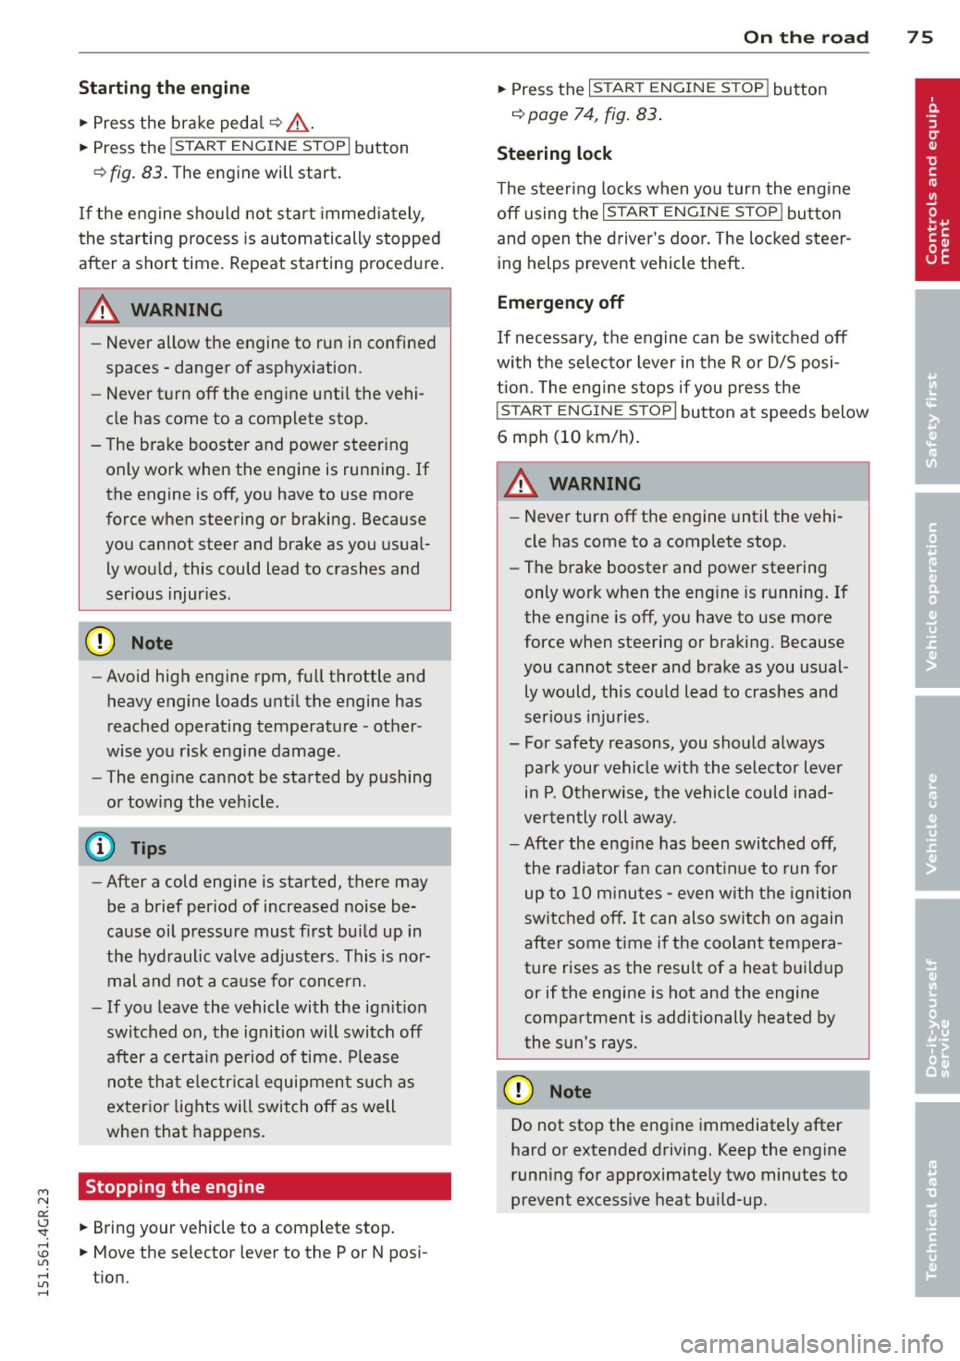
This button switches on the ignition and
starts the engine.
Fig . 83 Center console: S TART ENGINE S TOP butto n
Switching the ign ition on /off
.. To switch the ign ition on/off, press the
I STAR T ENGINE ST OPI button . Do not press
the brake pedal while doing this . .,.
Page 77 of 302
M N
0::
Starting th e engin e
"'Pre ss the brake peda l r::!> _&..
"'Press the I START ENGINE STOP I button
r::!>fig. 83. T he engine will start .
If the engine should not sta rt immediately ,
the sta rting process is automatically stopped
after a short time. Repeat starting procedure .
A WARNING
-Never allow the engine to run in confined
spaces -danger of asphyxiation .
- Never t urn off the engine unti l the vehi
cle has come to a complete stop.
- The brake booster and power steering
only work when the engine is running . If
the engine is off, you have to use more
force when steering or braking. Because
you cannot steer and brake as you usua l
ly would, this could lead to crashes and
ser ious injur ies .
(D Note
-Avoid high engine rpm, full throttle and
heavy engine loads unti l the engine has
reached operating temperature -other
wise yo u risk eng ine damage.
- The eng ine cannot be started by pushing
or tow ing the veh icle.
(D Tips
- After a cold engine is started, there may
be a brief period of increased noise be
ca use oil pressure mus t fi rst bu ild up in
the hyd raulic valve adjusters . This is nor
mal and not a ca use for concern.
- If you leave the vehicle with the ignit ion
switched on, the ignition will switch off
after a certai n pe riod of time. P lease
note tha t electr ica l equipment s uch as
exterior lights wi ll switch off as well
when that happens.
Stopping the engine
~ "' Bring your vehicle to a complet e stop. ,....,
~ "' Move the selector lever to the P or N po si-
,...., tion.
"' ,....,
On th e ro ad 75
"'Press the I START ENGINE ST OP I button
r::!>poge 74, fig . 83.
Ste ering lock
T he s teering locks when yo u tur n the engine
off using t he
I S TA RT ENGINE STO P! bu tton
and open the d river 's doo r. The locked steer
ing helps prevent vehicle theft.
Emergency off
If necessary, the engine can be switched off
with the selector lever in the R or D/S posi
t ion. The engine stops if you press the
I S TAR T ENG IN E ST OP I button at speeds below
6 mph (10 km/ h) .
A WARNING
- Never turn off the engine until the vehi
cle has come to a complete stop.
- The brake booster and power stee ring
only work when the eng ine is r unning . If
the engine is off, you have to use more
force when steering or braking. Because
you cannot steer and brake as you usual
ly would, this co uld lead to crashes and
serio us inju ries .
- For safety reasons , you should a lways
pa rk your vehicle w it h the selector lever
in P. Otherwise, the vehicle could inad
ver ten tly roll away.
- After the eng ine has been switched off,
the radiator fa n can cont in ue to run for
up to 10 minu tes -even with the ignition
sw itche d off . It can also sw itch on again
after some time i f th e coolant tempera
ture rises as the result of a heat b uildup
or if the engine is hot and the engine
compartment is additionally heated by
the sun's rays.
(U) Note
Do not stop the engine immediately after
hard o r extended driving. Keep the engine
running for approximate ly two minutes to
prevent excess ive heat bu ild-up .
Page 78 of 302
76 On the road
Driver message in the instrument
cluster display
Turn off ignition befor e le a v ing car
This message appears and a warning tone
sounds if yo u open the dr iver's door when the
ignition is switched on.
Press brake p edal to start engin e
This message appears if you press the
I STAR T ENGINE ST OP ! button to start the en
g ine and do not depress the brake pedal. The
engine can on ly be started if the brake pedal
is depressed.
II Is key in th e vehicle ?
If the indicator light turns on and the mes
sage appears, the remote control key was re
moved from the vehicle while the engine was
running. If the ig nit ion key is not in the vehi
cle you w ill not be able to sw itch on the ign i
tion or resta rt the engine after it has been
switched off. You w ill also not be ab le to lo ck
the veh icle from the outside.
Shift to P , otherwise vehicle can roll away .
Doors do not lo ck if lever i s not in P .
This message appears for safety reasons
along w ith an audib le warn ing tone if the P
selector lever posit io n is not engaged when
stopping the engine with the
I STAR T ENGINE ST OP ! button. Select the P se
lec tor lever po sition. Othe rwise the veh icle
could ro ll and it cannot be locked.
II Ke y is n ot r ecogniz ed . Hold ba ck of key
aga in st marked area . Se e owner' s manual.
If the indicator light turns on and th is mes
sage appears, there is a malfunction
c::> page 76.
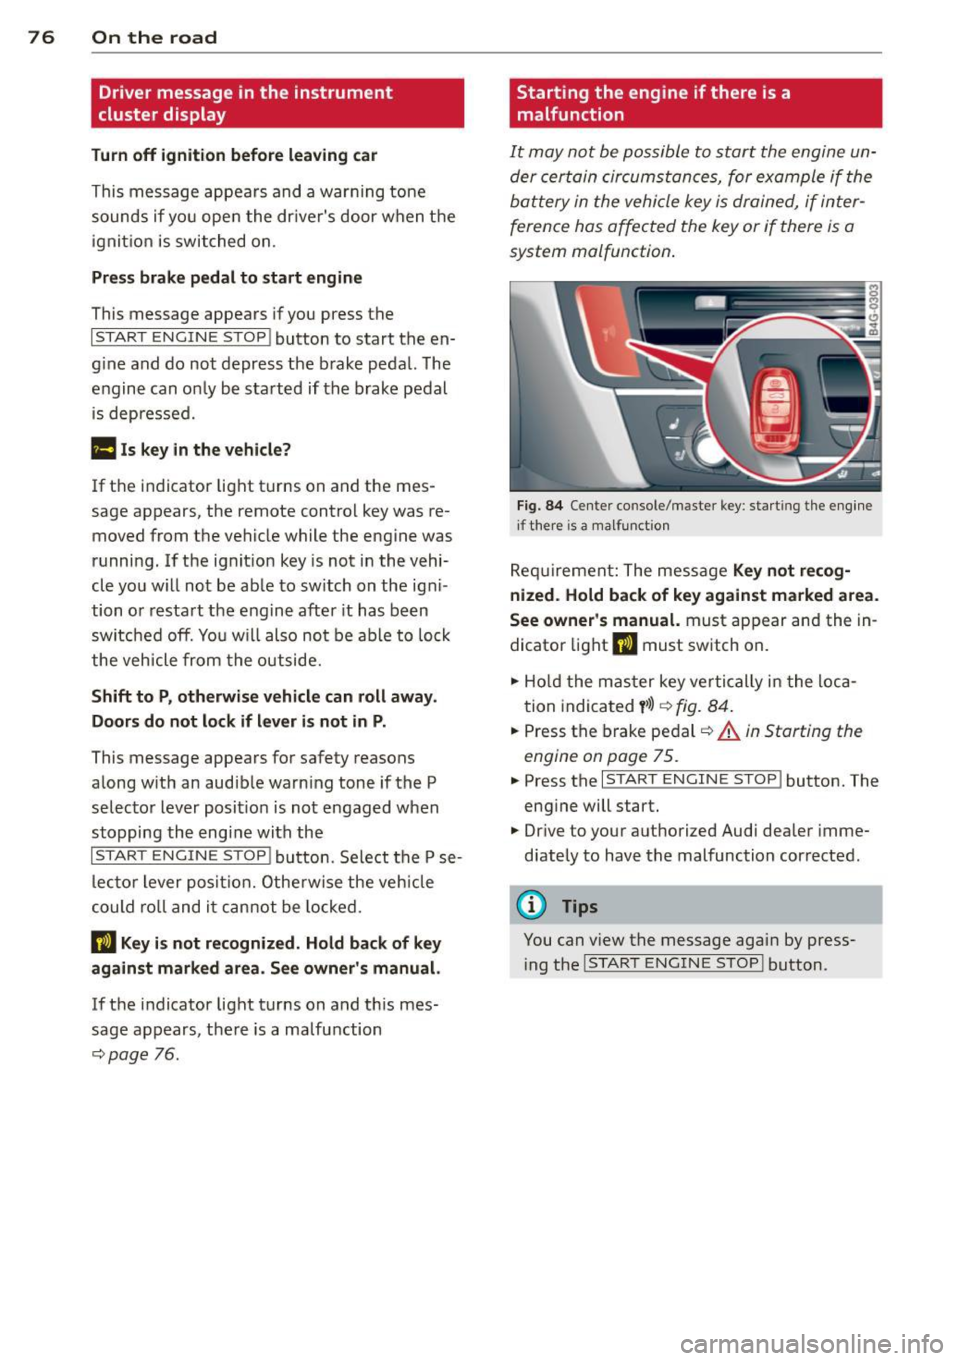
Starting the engine if there is a
malfunction
It may not be possible to start the engine un
der certain circumstances, for example if the
battery in the vehicle key
is drained, if inter
ference has affected the key or if there
is a
system malfunction .
Fig . 8 4 Center console/master key: start ing the eng ine
i f there is a malfunction
Req uirement: The mess age Ke y not r ecog
ni ze d. H old back of ke y again st ma rked are a.
See owne r's manual.
must appear and the in
dicator light
II must sw itch on.
.,. Ho ld the mas ter key vertically in the loca
tion indicated
y >l) r=:> fig. 84 .
.,. Press the brake pedal c::> A in Starting the
engine on page 75 .
... Press the I S TART ENGINE S T OP ! button. The
eng ine will start.
.,. Dr ive to your authorized Audi dealer imme
diately to have the malfunction corrected .
(D Tips
You can view the message again by press
i ng the
I STAR T ENGINE STOP I button.
Page 79 of 302
Electromechanical
parking brake
Operation
The electromechanical parking brake replaces
the hand brake.
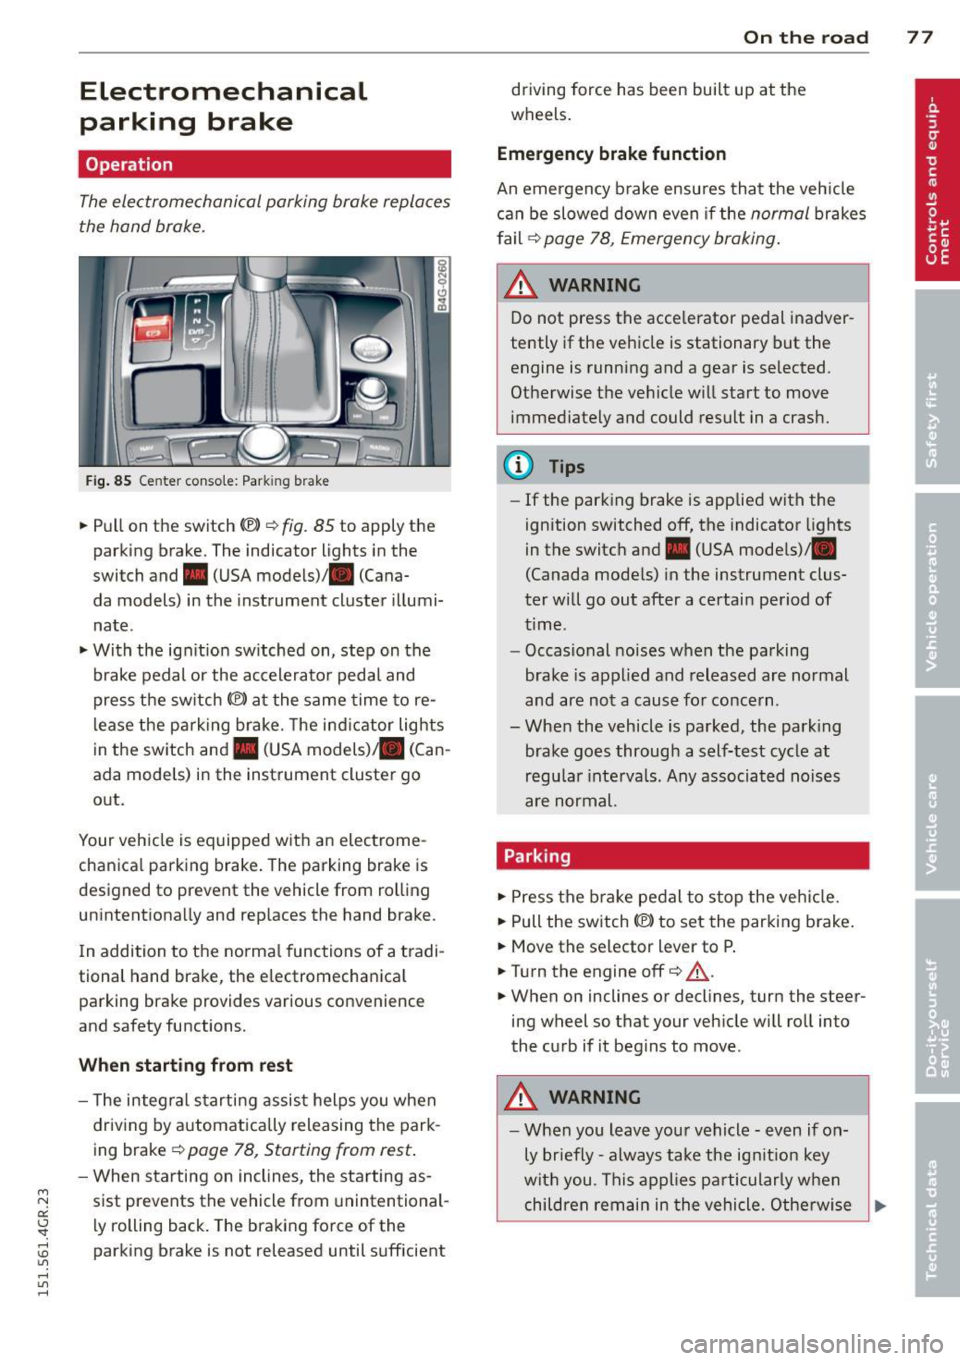
Fig. 85 Center conso le: Park ing brake
.. Pull on the switch (®)¢fig . 85 to apply the
parking brake. The indicator lights in the
switch and. (USA models)/ . (Cana-
da models) in the instrument cluster illumi
nate .
.. With the ignition sw itched on, step on the
brake pedal or the accelerator pedal and
press the sw itch C®> at the same time to re
lease the parking brake. The ind icator lights
in the switch and. (USA models) . (Can
ada mode ls) in the instrument cluster go
out.
Your vehicle is equipped with an electrome
chanica l parking brake. The parking brake is
designed to prevent the vehicle from rolling
unintentionally and replaces the hand brake.
I n addition to the normal functions of a tradi
tional hand brake , the electromechan ical
parking brake provides various convenience
and safety functions.
When starting from rest
-The integral starting assist helps you when
driving by automatically releasing the park
ing brake ¢ page 78, Starting from rest .
- When starting on inclines, the starting as-
"' r-1 sist prevents the vehicle from unintentional-a::
~ Ly rolling back. The braking force of the
:0 parking brake is not released until sufficient
"' ,....,
"' ,....,
On the road 77
driving force has been bui lt up at the
wheels.
Emergency brake function
An emergency brake ensures that the veh icle
can be slowed down even if the normal brakes
fail ¢ page 78, Emergency braking.
_& WARNING
Do not press the acce lerator pedal inadver
tently if the vehicle is stationary but the
engine is running and a gear is selected.
Otherwise the vehicle will start to move immediately and could result in a crash.
(D Tips
-If the parking brake is applied with the
ignition switched off, the indicator lights
in the switch and. (USA models)/ .
(Canada models) in the instrument clus
ter will go out after a certain period of
time.
- Occasional noises when the parking
brake is applied and released are normal
and are not a cause for concern .
- When the vehicle is parked , the park ing
brake goes through a self-test cycle at
regular interva ls . Any associated noises
are normal.
Parking
.,. Press the brake pedal to stop the veh icle.
.. Pull the switch(®) to set the parking brake .
.. Move the selector lever to P.
.. Turn the engine off¢,&. .
.,. When on inclines or declines, turn the steer
ing wheel so that your vehicle will roll into
the curb if it begins to move .
_& WARNING
-When you leave your vehicle - even if on-
ly briefly - always take the ign it ion key
with you . This applies particularly when
children remain in the vehicle. Otherwise
~
Page 80 of 302
78 On the road
th e chi ldren could start the engine, re
lease the parking brake or operate e lec
trical equipment (e.g. power windows) .
The re is the risk of an accide nt.
- When the vehicle is locked, no one -par
t icu larly not ch ildren should remain in
the vehicle . Locked doors make it more
difficult for emergency wor kers to get in
to the vehicle -putt ing lives a t risk.
Starting from rest
The starting assist function ensures that the
parking brake is released automatically upon
starting .
Stopping and applying parking br ake
• Pull the switch(®) to apply the park ing
brake.
Starting and automat ically releasing the
parking brake
• When you start to d rive as usua l, the park
ing brake is automatically re leased and your
vehicle begins to move .
When stopp ing at a traff ic signa l or stopp ing
i n city t raffic, t he parking brake can be ap
plied. The veh icle does not have to be held
with the footbrake. The park ing brake elimi
nates the tendency to c reep with a d rive ra nge
engaged. As soon as you dr ive off as usua l,
the park ing brake is released automati cally
and the veh icle star ts to move .
Starting on slopes
When starting on incl ines, the start ing ass ist
p revents the veh icle from unintentionally ro ll
i ng ba ck. The braking force of t he pa rking
b rake i s not rele ased until sufficient dr iv ing
for ce has been b uilt up at the whee ls.
@ Tips
For safety reasons, the park ing brake is re
leased autom ati cally only when the dr iv
er 's sa fe ty belt i s engage d in the bu ck le.
Emergency braking
In the event that the conventional brake sys
tem fails or locks .
• In an emergency, pull the switc h(® ) and
con tinue to pull it to slow your ve hicle down
w ith the park ing brake.
• As soon as you release the switch (®) or ac-
c e lerate, t he b ra ki ng process stops.
If you pu ll the switch (®) and hold it above a
speed of about 5 mph (8 km/h), the emergen
cy brak ing f unct ion is init iated . T he ve hicle is
braked at all fou r whee ls by a ctivating the hy
draulic brake sy stem. The br ake pe rfor mance
i s sim ilar to ma king an emergency stop~&. .
In order not to act ivate the eme rgency brak
ing by mis take, an audib le warni ng tone (bu z
z er) sounds whe n the swit ch(®) is pulled . As
soon as t he sw itch (®) is re leased , or the acce l
era tor peda l is depressed, eme rgency braking
stops.
_& WARNING ,_
Emergency braking should only be used in
an emergency, when the norma l foot bra ke
has fa iled or the brake pedal is obstructed.
Using the parki ng brake to perform eme r
gency b raking will s low your veh icle down
as if you had made a full bra ke application .
The law s of physi cs cannot be su spen ded
even wi th ESC and i ts asso ciated com po
nents (ABS, A SR, EDL) . In corners and
when road o r weathe r con ditions are bad,
a full brake application can ca use the vehi
cle to sk id or the rear end to break away -
risking an accident.
Speed warning system
, Introduction
The speed warning system helps you to stay
under a specified ma ximum sp eed .
The speed warn ing system warns you if you
are exceeding the maximum speed that you
have set . You will hear a warning tone when