AUDI S3 2015 Service Manual
Manufacturer: AUDI, Model Year: 2015, Model line: S3, Model: AUDI S3 2015Pages: 310, PDF Size: 76.15 MB
Page 41 of 310
....,
N
0 > co
rl I.O
"' ....,
"' rl
WARNING
----Read and following all WARNINGS. ¢ & in
Key set on page 35
@ Tips
If your vehicle is left standing for a long
period of time, note the following:
- The proximity sensor switches off after a
few days to save energy. You then have
to pull once on the door handle to unlock
the vehicle and a second time to open it.
- To prevent the battery from draining and
to retain the starting ability of yo ur vehi
cle as long as possible, the energy man
agement system gradua lly tuns off un
necessary convenience functions You
may not be able to unlock your vehicle
using the convenience key .
- For an explanation on conformity with
the FCC regulations in the United States
and the Industry Canada regulations, re
fer to ¢page
292 .
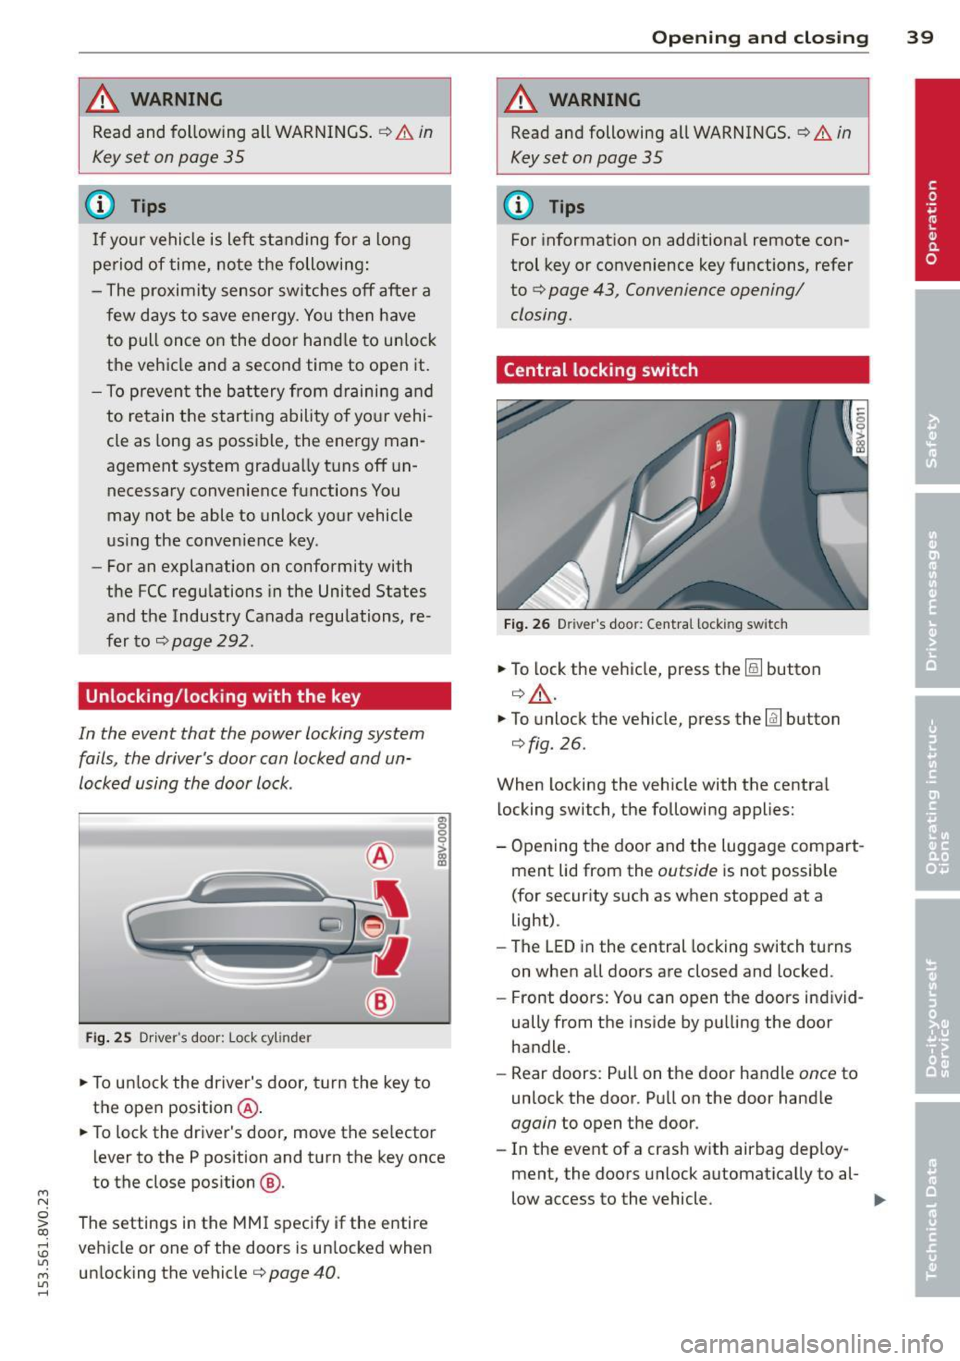
Unlocking/locking with the key
In the event that the power locking system
fails, the driver's door can locked and un
locked using the door lock .
Fig. 25 Driver 's door: Lock cy linder
.,. To unlock the driver's door, turn the key to
the ope n position @.
en 0 g
~
.,. To lock the driver's door, move the se lector
lever to the P position and turn the key once
to the close position
@ .
The settings in the MMI specify if the entire
vehicle or one of the doors is un locked when
unlocking the vehicle¢ page 40 .
Opening and closing 39
A WARNING
Read and following all WARNINGS. ¢ & in
Key set on page 35
(D Tips
For information on additional remote con
trol key or convenience key functions, refer
to
¢ page 43, Convenience opening/
closing.
Central locking switch
Fig. 26 Drive r's doo r: Centra l locki ng sw itch
.,. To lock the vehicle, press the@! button
¢.&, .
.,. To unlo ck the vehicle, press the @J button
¢fig.
26.
When locking the vehicle with the central locking switch, the following applies:
- Opening the door and the Luggage compart
ment lid from the outside is not possible
(for security such as when stopped at a
light).
- The
LED in the central locking switch turns
on when all doors are closed and locked .
- Front doors: You can open the doors ind iv id
ually from the inside by pulling the door
handle.
- Rear doors: Pull on the door handle once to
unlock the door. Pull on the door hand le
again to open the door .
- In the event of a crash w ith airbag deploy·
ment, the doors unlock automatically to al-
low access to the vehicle. ..,.
Page 42 of 310
![AUDI S3 2015 Service Manual 40 Openin g and clo sing
&_ WARNING
- The power locking switch works with the
ignition off and automatically locks the
entire vehicle when the
[ij] button is
pressed.
- The central lo AUDI S3 2015 Service Manual 40 Openin g and clo sing
&_ WARNING
- The power locking switch works with the
ignition off and automatically locks the
entire vehicle when the
[ij] button is
pressed.
- The central lo](/img/6/57541/w960_57541-41.png)
40 Openin g and clo sing
&_ WARNING
- The power locking switch works with the
ignition off and automatically locks the
entire vehicle when the
[ij] button is
pressed.
- The central locking sw itch is inoperative
when the veh icle is locked from the out
side .
- Locked doors make it more difficult for
emergency workers to get into the vehi cle, which p uts lives at risk . Do not leave
anyone beh ind in the vehicle, especially
children .
(D Tips
Your vehicle will lock automatically at a
speed of 9 mph (15 km/h)
Q page 35 . You
can unloc k the vehicle again us ing the cen
tral locking opening function.
Setting central locking
Applies to vehicles: with d river informat ion system
Various sett ings can be adjusted in the M MI:
Adjusting door unlockin g
You can determ ine which doo rs shou ld unloc k
when opening the vehicle .
.,. Select : the
I MENU ! button >Car > Syst ems *
control button > Vehicl e setting s > Central
locking > Door unl ocking .
Selecting All and pressing the l:ru button on
the remote control key unlocks the entire ve
h icle.
If you select
D river and then press the [ru but
ton on the remote control key, only the driv
e r's door will unlock . In vehicles with a con
venience key, only the front doo r whose han
d le you pu ll w ill unloc k.
If you press the
[ru button twice, the enti re ve hicl e w ill unloc k.
If yo u press the
[ru button, the entire vehicle
will always lock.
l ) Thi s fun ction is not a vailable in a ll coun tri es.
Adjusting Auto Lock
.,. Select: the I MENU I button > Ca r > Sys tems*
contro l button > Vehicle setting s > Lock
when d riv ing.
If you se lect On , the e nti re ve hicle w ill lock
a utomat ic all y when the speed reaches 9 mph
(15 km/h).
If the opening function is tr iggered by the
powe r lock ing system or a door hand le, the
vehicle unlocks again .
Folding* the exterior mirrors
.,. Select: the I MENU I button> Car > Sy stems *
contro l button > Vehicle setting s > Central
locking > Fold mirror s.
For mo re informa
tion , refer to
Q page 52, Adjusting the ex
terior mirrors.
If you se lect On , the outside mirro rs will fo ld
i n a utomat ica lly when you press t he
[ru button
o n the remote cont ro l key
Q page 52.
Tone when locking
.,. Select: the I MENU I button> Car > Systems *
control button > Vehicle setting s> Cent ral
loc king > Tone when l ocking .
When checked off./, a tone will sound when
you lock the vehicle .
If you press the [ru button twice, the entire ve
hicle will lock. There is a lock ing tone at the
same t ime
l) _
Electronic immobilizer
The immobili zer prevents unauthori zed use of
your vehicle .
A microchip in the key automatically deacti
vates the electron ic immobili zer when the key
is located in the vehicle . If you remove the key
from the vehicle, the electro nic immobilize r
activates again automatically .
Ill>
Page 43 of 310
....,
N
0 > co
rl I.O
"' ....,
"' rl
_& WARNING
Always take the key with you whenever you
leave your vehicle. The electronic immobil
izer can be deactivated w ith the key, so
this could make it possible for unauthor
ized persons to star t the engine and oper
ate vehicle systems such as the power win
dows or sunroo f. This can increase the risk
of serious injury.
(D Tips
-The vehicle cannot be started if an unau
thorized key is used .
It may not be poss i
ble to start the vehicle under certain cir
cumstances, for example if there is an
other radio module like the key from an
other vehicle or a transponder on the
same keychain.
- For an explanation on conformity with
the FCC regu lations in the United States
and the Industry Canada regulations, re
fer to
q page 292.
Safety central locking
App lies to vehicles: with safety central locking
Safety central locking provides the possibility,
to only unlock the driver's door and the fuel
filler door. The rest of the vehicle remains
l oc ked.
Unlocking the driver's door and the fuel
filler door
~ Press the remote control key or convenience
key~ button
once or turn the key onc e in
the opening direction.
Unlocking all doors , the luggage
compartment lid and the fuel filler door
~ Press the remote contro l key or convenience
key ~ button
twice within five seconds or
turn the key
twice within five seconds in the
opening direction.
When unlocking just the driver's door, the an
ti-theft alarm system* is also immediately de
activated.
Opening and closing 41
In vehicles with an MM I, you can directly ad
just the safety centra l locking
Q page 40.
Front passenger 's door and rear doors
emergency locking
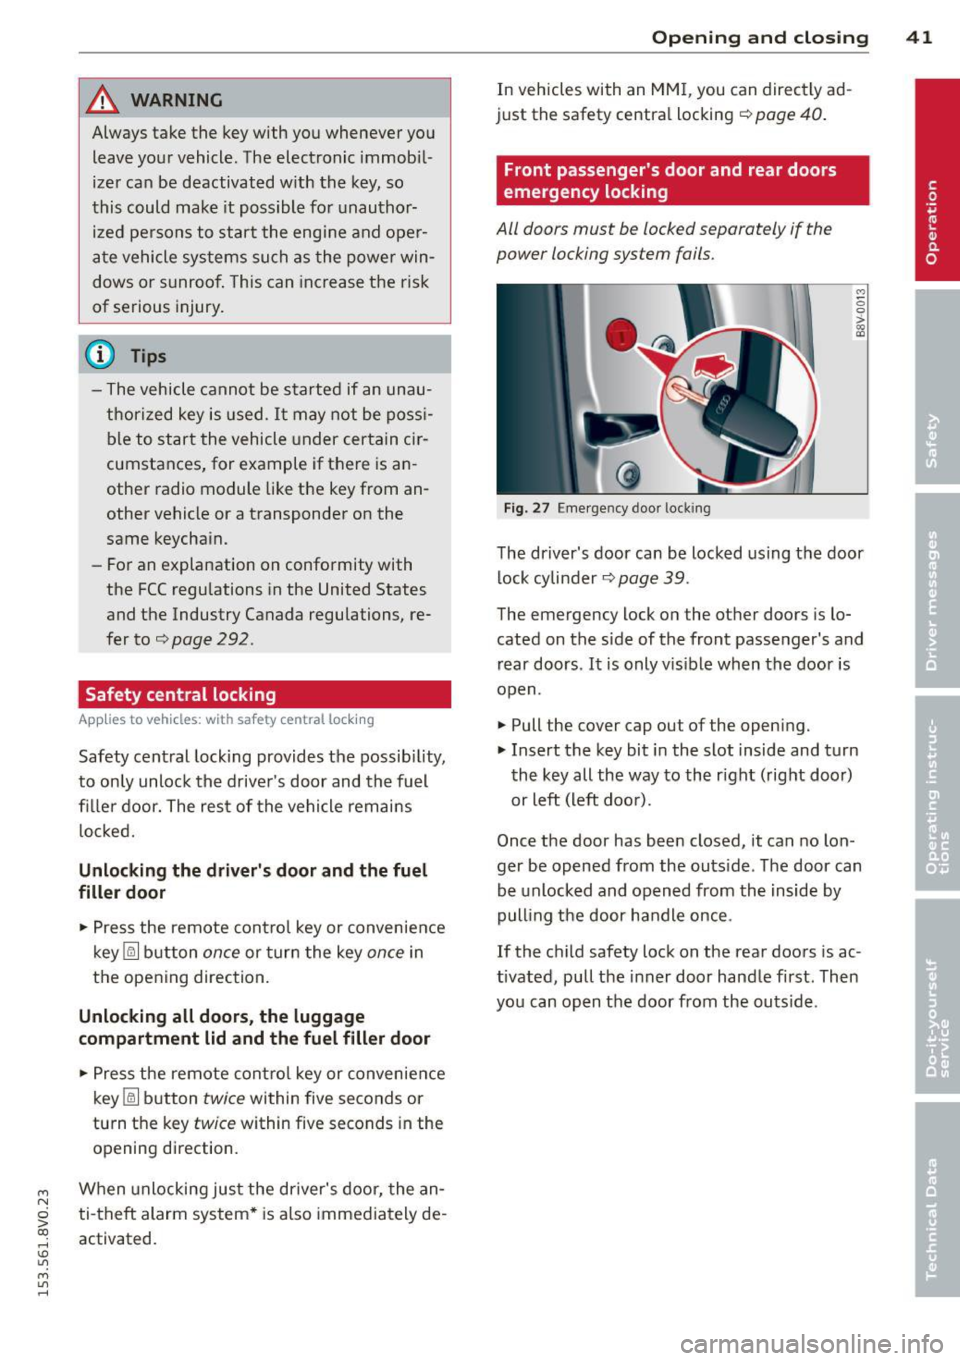
All doors must be locked separately if the
power locking system fails.
Fig. 2 7 Eme rgency door locking
M 0 0 > :ls
The driver's door can be locked using the door
lock cylinder
q page 39.
The emergency lock on the other doors is lo
cated on the side of the front passenger's and
rear doors.
It is only vis ible when the door is
open.
~ Pull the cover cap out of the opening.
~ Insert the key bit in the slot inside and turn
the key all the way to the right (right door)
or left (left doo r).
Once the door has been closed, it can no lon
ger be opened from the outs ide. The door can
be unlocked and opened from the inside by
pulling the door ha ndle once .
If the child safety lock on the rear doors is ac
tivated, pull the inner door handle first. Then
you can open the door from the outs ide .
Page 44 of 310
42 Opening and closing
Luggage compartment
lid
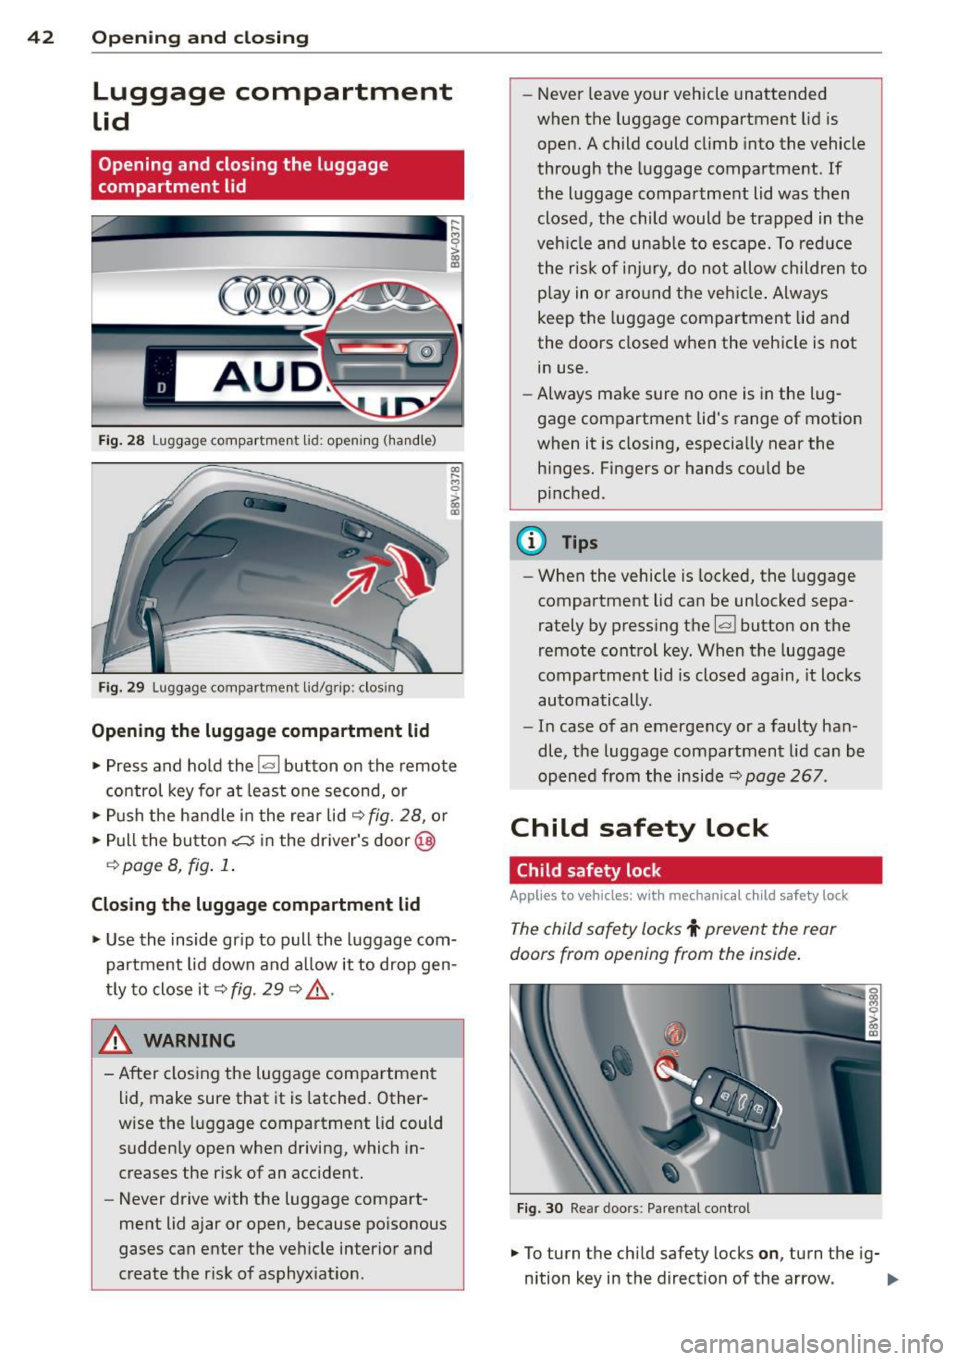
Opening and closing the luggage
compartment lid
Fig. 28 Luggage compartment lid: opening (ha ndle)
Fig. 29 Luggage compartment lid/grip: clos ing
Opening the luggage compartment lid
M 0
~ m
.,. Press and hold the !a l button on the remote
control key for at least one second, or
.,. Pus h the handle in the rear lid
c::> fig. 28, or
.,. Pull the button
cs in the dr iver's door@
¢ page 8, fig . 1 .
Closing the luggage compartment lid
.,. Use the inside gr ip to pull the luggage com
partment lid down and allow it to drop gen
tly to close it
c::> fig. 29 c::> &_.
~ ARNING
- After closing the luggage compartment
lid, make sure that it is latched. Other
wise the luggage compartment lid could
sudden ly open when driving, which in
creases the risk of an accident.
- Never drive with the luggage compart
ment lid ajar or open, because poisonous
gases can enter the vehicle interior and
create the risk of asphyx iation . -
Never leave your vehicle unattended
when the luggage compartment lid is
open. A child could climb into the vehicle
through the luggage compartment. If
the luggage compartment lid was then closed, the child would be trapped in the
veh icle and unable to escape. To reduce
the risk of injury, do not allow children to
p la y in o r aro und the vehicle. Always
keep the luggage compartment lid and
the doors closed when the veh icle is not
in use.
- Always make sure no one is in the lug
gage compartment lid's range of motion
when it is closing, especia lly near the
h inges. Fingers or hands could be
p inched.
{!) Tips
- When the vehicle is locked; the luggage
compartment lid can be unlocked sepa
rately by pressing the~ button on the
remote control key. When the luggage
compartment lid is closed again, it locks
automatically.
- In case of an emergency or a faulty han
dle, the luggage compartment lid can be
opened from the inside
c::> page 267.
Child safety lock
Child safety lock
Applies to vehicles: with mechanical c hild safety lock
The child safety locks t prevent the rear
doors from opening from the inside.
Fig. 30 Rear doors: Pare ntal control
.,. To turn the chi ld safety locks on , turn the ig-
nition key in the direction of the arrow . ..,.
Page 45 of 310
....,
N
0 > co
rl I.O
"' ....,
"' rl
.. To turn off, turn the ignition key opposite
the direction of the arrow .
When the child safety locks are activated, the
inside door handles do not work and the doors
can only be opened from the outside.
The ch ild safety lock only f unctions on the
door in whi ch it was act ivated.
Power windows
Controls
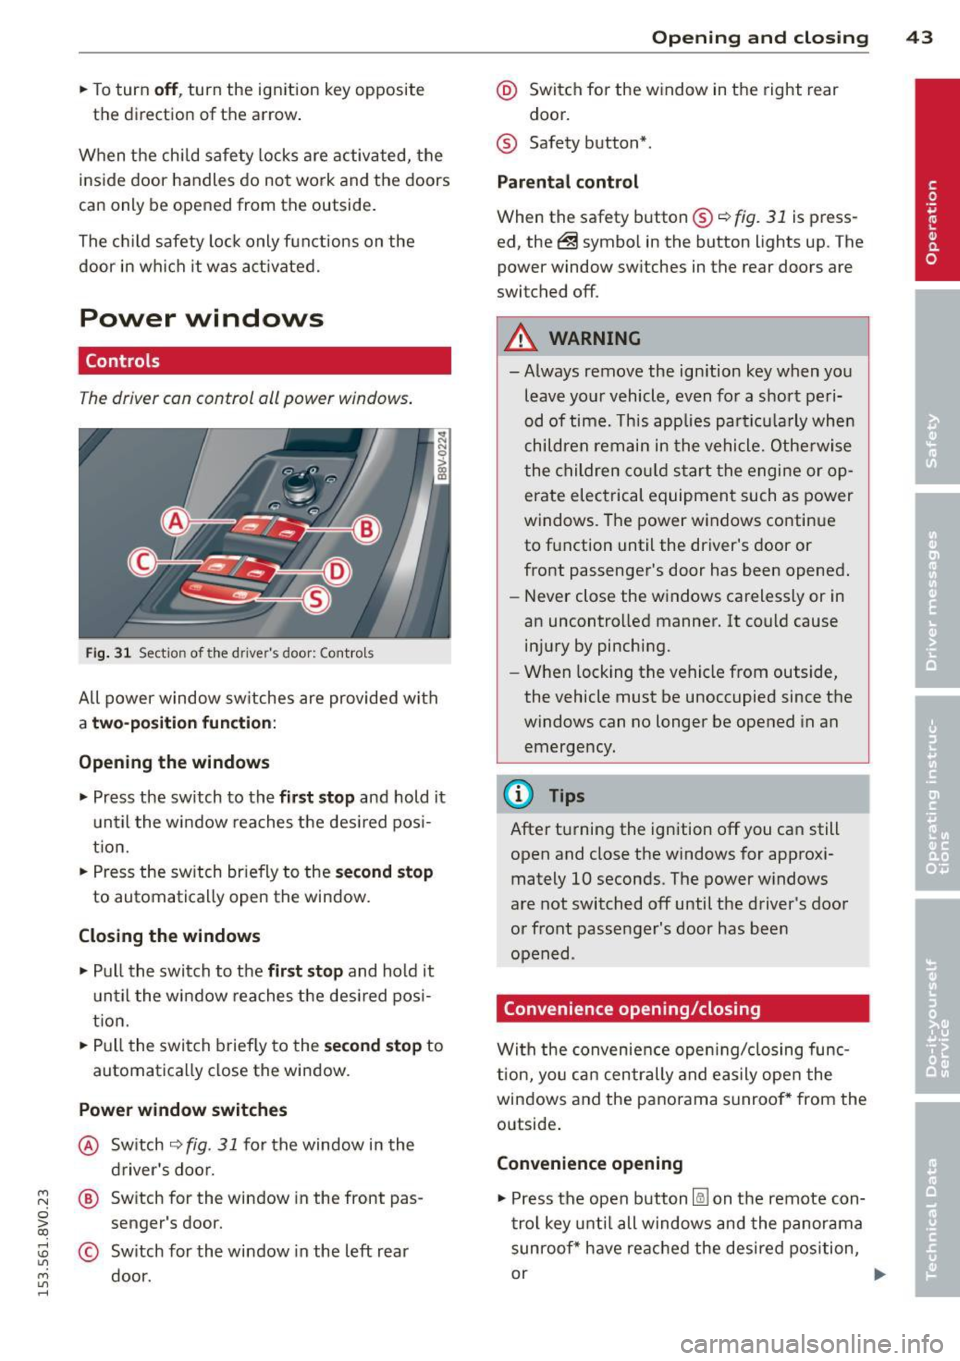
T he driver can control oil power windows .
Fig. 31 Sectio n of the drive r's d oor: Control s
All power window sw itches are provided with
a two-position function :
Opening the windows
.. Press the sw itch to the fir st stop and hold it
until the window reaches the desired pos i
tion.
.. Press the sw itch br iefly to the
second stop
to automatically open the window.
Closing the windows
.. Pull the switch to the first stop and hold it
until the window reaches the des ired posi
t ion .
.. Pull the switch briefly to the
second stop to
automatically close the window.
Power window switches
@ Switch ~ fig. 31 for the window in the
driver's door.
@ Switch for the window in the front pas
senger 's door.
© Sw itch for the window in the left rear
door.
Opening and closing 43
@ Switch for the window in the right rear
door.
® Safety button* .
Parental control
When the safety button®~ fig. 31 is press
ed, the@symbol in the button lights up. The
power window sw itches in the rear doors are
switched off.
A WARNING
-Always remove the ign ition key when you
leave your vehicle, even for a short peri
od of time. This applies particula rly when
children remain in the vehicle. Otherwise
the children could sta rt the engine or op
erate electrical equipment such as power
windows. The power windows continue
to function until the driver's door or
front passenger's door has been opened.
- Never close the windows carelessly or in
an uncontrolled manner. It could cause injury by pinching.
- When locking the vehicle from outside,
the vehicle must be unoccupied since the
windows can no longer be opened in an
emergency.
(D Tips
After turning the ignition off you can still
open and close the windows for approxi
mately 10 seconds. The power windows
are not switched off until the driver's door
or front passenger's door has been
opened .
Convenience opening/closing
With the convenience opening/closing func
t ion, you can centrally and easily open the
windows and the panorama sunroof* from the
outside.
Convenience opening
.. Press the open button l@J on the remote con
trol key until all windows and the panorama
sunroof* have reached the desired position,
or .,,.
Page 46 of 310
44 Opening and clo sing
• Hold the key in the driver's door lock until all
windows and the panorama sunroof* have
reached the desired position .
Conveni ence closing
• Hold the key in the d river's door lock i n the
lock pos ition until a ll wi ndows and the pan
o rama sunroo f* are closed .
Convenience closing with the convenience
key*
• To uch the sensor* on one of the front door
h and les and cont in u e touching it unt il all of
the windows and the panorama s unroof* are
closed . Do not place your hand in the door
hand le when doing th is.
Adjusting the convenience opening in the
MMI
• Se lect : the I MENU ! button> Car> Systems *
control button > Vehicle sett ings > Central
locking > Long -press to open windows
To enab le convenience opening of the win -
dows and the roo f*, the
Front windows , Rear
w indows *
and Roof* functions must be
sw itched
On .
A WARNING
-Never close the windows or pano rama
sunroof* carel essly or in an uncontro lled
m ann er, be cause th is increases the risk
o f i njury.
- Fo r se curity reasons, the windows can
only be opened with the remote c ontro l
k ey at a maxim um dis tance of ap proxi
ma tely 6 feet ( 2 meters) from the ve hi
cle .
- Pa y att ention when using the lock cyli n
der to close the windows and t he panora
ma sunroof* so that no one is pinche d.
Clos ing stops whe n the key is moved into
the start ing pos ition.
Correcting power window malfunctions
After disconnecting the vehicle battery , the
one-touch up and down feature must be acti vated again .
• Pull the power window switch u ntil the win
dow is completely ra ised .
• Release the sw itch and pull it agai n for at
l e ast one s econd .
Panorama sunroof
Description
Applies to vehicles: with panoramic sunroof
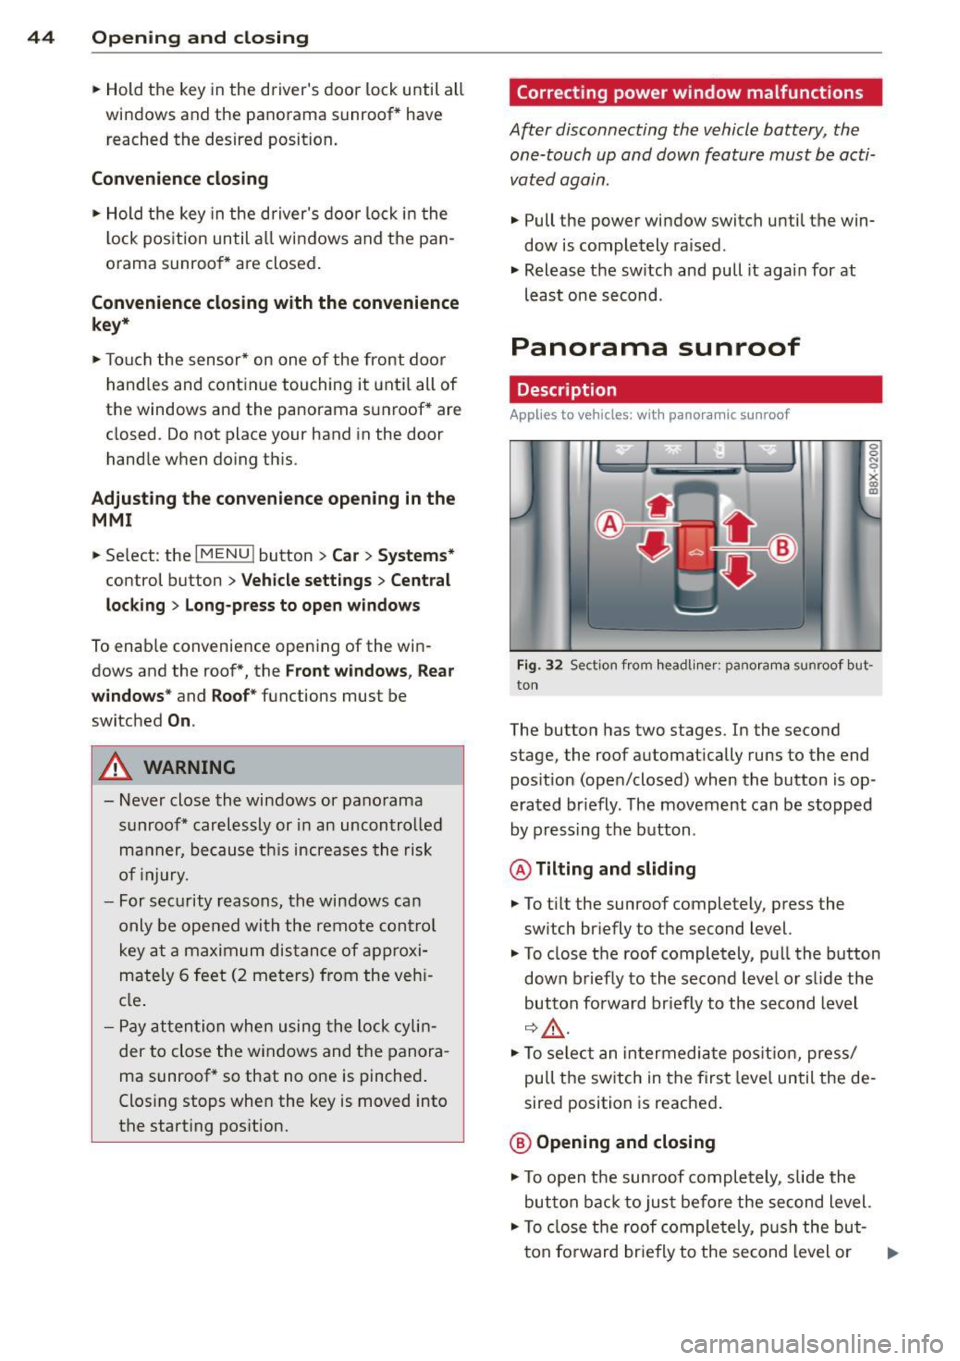
Fig. 32 Sect io n fr om headli ner: pano ra m a s unroof but
to n
The butto n has two stages . In the second
stage, the roof automat ically runs to the end
pos ition (open/closed) when the button is op
era ted br iefly . T he movement ca n be s topped
by pressing the b utton .
@Tilting and sliding
• To t ilt the sunroof completely , press the
sw itch br iefly to the second level.
• To close t he roof completely, pu ll the button
down b riefly to the seco nd leve l or s lide the
button forward br iefly to the s econd level
~~-
.. To se le ct an in termedia te pos it ion , press/
pull t he sw itch in the firs t leve l until the de
sired position is reached .
@ Opening and closing
• To open t he su nroof completely, sli de the
button bac k to ju st befo re the second level.
• To close t he roof comple tely, p ush the but-
t on fo rward br ie fly to the se cond level or .,..
Page 47 of 310
M N
0 > co ,...., \!) 1.1'1
M 1.1'1 ,....,
pull the button down briefly to the second
level ~
A_.
~ To se lect an intermediate position, press/
pull the switch forward/back in the first lev
el until the des ired pos it ion is reached.
A wind deflector integrated in the panorama
sunroof adapts automatica lly to the sunroof
position . Th is reduces w ind noise to a mini
mum in all panorama sunroof positions .
You can still operate the panorama sunroof
for about 10 minutes after the ignition is
switched off. The sw itch is deact ivated once
the dr iver 's or front passenger 's door is
opened .
Sun blind
The sun shade can be opened and closed man
ually, depending on the position of the panor
ama sunroof. The sun shade can be opened partially .
A WARNING
Be careful when closing the panoramic
sunroof -otherwise serious injury could re
sult! Always take the ignition key with you
w hen leav ing the veh icle.
0 Note
Always close your panoramic sun roof when
leaving your veh icle . Sudden rain can cause
damage to the in terior equ ipment of you r
veh icle, part icu larly the electronic equ ip
ment .
(D Tips
-Fo r information about convenience
opening/closi ng, refer to~
page 43.
- The panorama sunroof can only be
opened when the temperature is warmer
than -4°F
(-20 °().
Panorama sunroof emergency closing
Appl ies to vehicles: wit h pa noram ic sunroof
If the panorama sunroof detects resistance or
a n object in its path while closing, the sunroof
will open aga in automatically. If the sunroof
Opening and clo sin g 45
fails to close after removing the object and af
ter trying to close a second time, you can per
form an emergency closing .
~ Within five seconds after the sunroo f opens
automatically, pu ll the switch until the roof
closes .
If you let go of the switch early, the pano rama
s u nroof will open aga in.
•
Page 48 of 310
46 Lights and Vi sion
Lights and Vision
Exterior lighting
Switching lights on and off
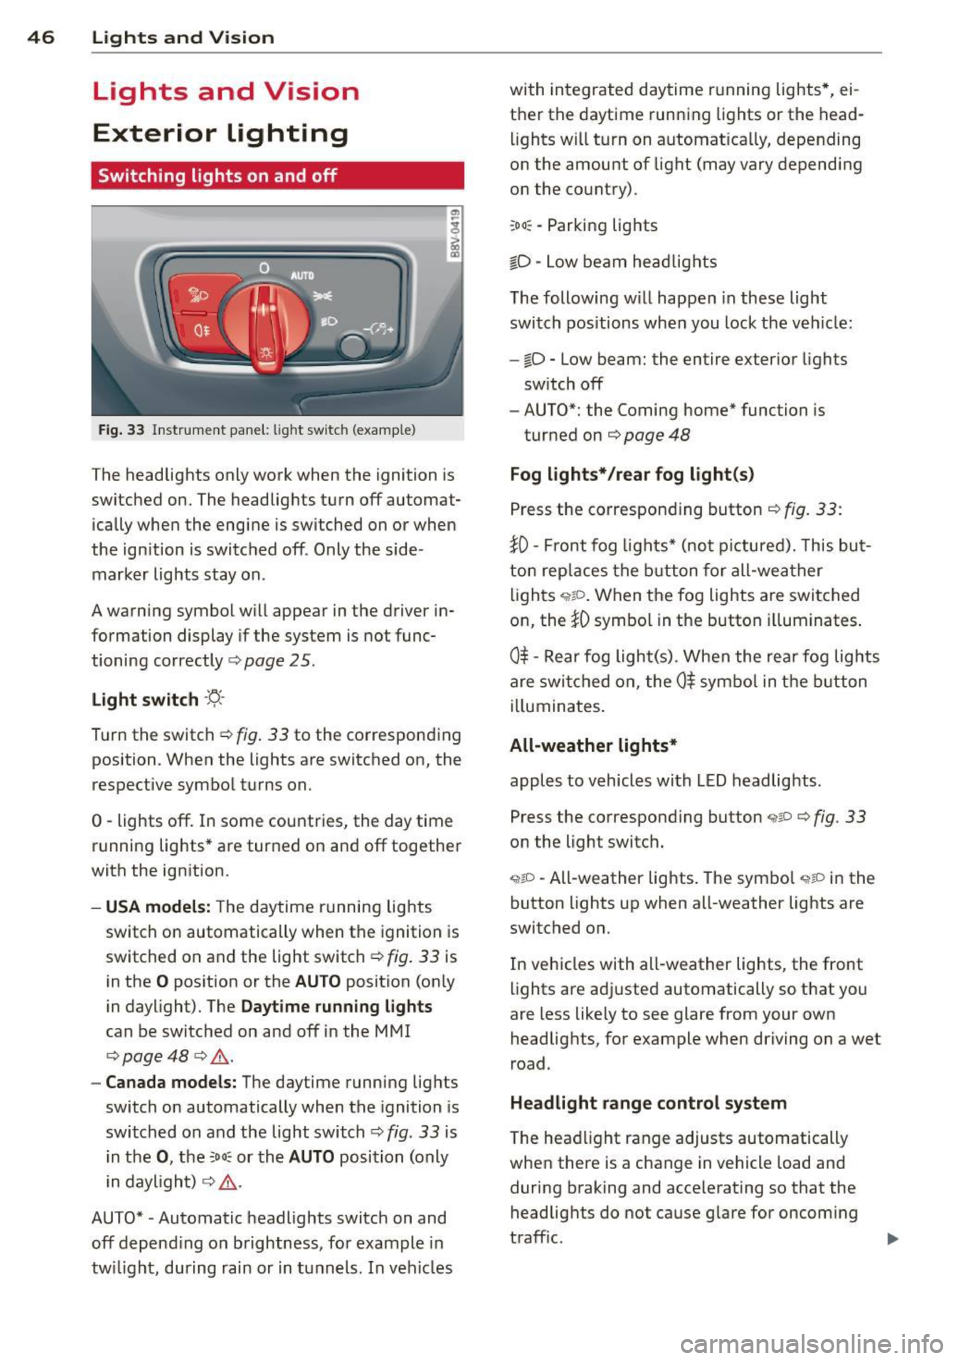
Fig . 33 Instr ument pane l: lig ht sw itc h (example)
The headlights only work when the ignition is
switched on. The headlig hts turn
off automat
ically when the engine is switched on or when
the ign ition is switc hed off . Only the side·
marker lights stay on .
A warning symbol w ill appear in the driver in
formation display if the system is no t func
tioning correctly
c:> page 25 .
Light switch ·'ti-·
T u rn the switch c:> fig . 33 to the corresponding
position . When the lights are switched on, the
respective symbol t urns on.
0 -lights off. In some countries, the day time
running lights* are turned on and
off together
with the ign ition.
- USA models: The daytime r unnin g lights
switch on automatically when the ignition is
switched on and the light switch
c:> fig. 33 is
in the
O pos ition or the AUTO position (on ly
in daylight). The
Daytime running lights
can be switched on and off in the MMI
c:> page 48 c:> ,& .
-Canada models: The daytime running lig hts
switch on automatically when the ignition is
switched on and the light switch
c:> fig . 33 is
i n t he
0 , the :oo : or th e AUTO position (only
i n daylight)
c:> ,& .
AUTO* -Automatic headlights switch on and
off depend ing on b rightness, fo r example in
tw ilight, during rain or in tunnels . In veh icles with in
tegrated daytime r unning lights*, ei
t h e r the daytime running lights or the head
lights wi ll tu rn on automat ica lly, depending
on the amount of light (may vary depending
o n the country).
:oo : -Parking lights
iD · Low beam he ad lights
T he following w il l happen in these light
switch pos itions whe n you lock the ve hicle:
-iD -Low beam: the entire exterior lights
sw itch
off
- AUTO*: the Coming home* function is
turned on
c:> page 48
Fog lights* /rear fog light(s)
P ress the correspon ding button c:> fig. 33 :
}0-Front fog lig ht s* (no t picture d). Thi s bu t
ton rep laces the button for all-wea ther
li gh ts ,;,rto . When the fog lights are swi tched
on, the
iD symbo l in the button illuminates .
0$ -Re ar fog ligh t(s) . When the rea r fog lig hts
are swi tched on, the
0$ sym bo l in t he bu tton
i ll uminates .
All-weather lights*
apples to vehicles with LED headlig hts.
Press the corresponding button
,;;iP c:> fig. 33
on the light switch .
<,t;O -All-weather lights . The sym bo l <,tP in the
button lights up when all-weather lights are
switched on.
In veh icles with all-weather lights, the front
li ghts are ad justed automatically so that you
are less like ly to see glare from your own
headlights, for example when driving on a wet
r oad.
Headlight range control system
T he hea dlight range adjusts automatically
when there is a change in vehicle load and
during b raking and accele rating so that the
headlig hts do not cause g lare for oncom ing
t raff ic.
Page 49 of 310
....,
N
0 > co
rl I.O
"' ....,
"' rl
Aud i adapti ve lig ht*
The adaptive light on ly functions when the
light switch is in the AUTO position. You can
deactivate adaptive light in the MMI
c:> page
48.
When switched on, adapt ive light adjusts to
curves depending on the vehicle speed and
steering whee l ang le. This provides better
l ighting through the curve . The system op er
ates in a speed range from approximately
6 mph (10 km/h) to 68 mph (110 km/h).
St atic corner ing li ght * (vehicles with adaptive
l ight) -th e corne ring light switches on auto
matically when the steering whee l is tu rned at
a cert ain angle a t speeds up to approximately
44 mph (70 km/h) and when the turn signal is
activated at speeds up to approximately
25 mph (40 km /h). The area to the s ide of the
ve hicle is il luminated better when turning .
Spee d d epen de nt ligh t dist rib uti on* -The
speed dependent light distribution adapts the
light in towns and on highways or express
ways . Inte rsect io ns can also be illuminated on
veh icles w ith a navigation system* .
Highway light function*
(Vehicles with adaptive light or L ED head
lights) -This function adapts the light ing for
h ighway driving based on vehicle speed .
A WARNING
-Automatic headligh ts* are only intended
to assist the dr iver. They do not re lieve
the driver of responsibility to check the headlights and to turn them on manua lly
according to the current light and visib ili
ty conditions. For example, fog cannot be detected by the light sensors. So al
ways switch on the low beam under
these weather conditions and when driv ing in the dark
io .
-Acc idents could occur if you cannot see
the road ahead of you well and if othe rs
on the road cannot see you. Always
swit ch you r headlights on so that you can Ligh
ts and Visi on 4 7
see the road ahead of you and ot hers can
see your vehicle from behind.
- Please observe legal regulations when
using the lighting systems described.
(D Note
The rear fog lights shou ld only be turned
on in accordance with traffic regu lations,
to prevent glare for traffic behind your ve
hicle.
(D Tips
- The light sensor for the automatic head
lights * is in the rearview mirror mount.
Therefore, do not place any stickers in
this area on the windshield .
- Some functions of the exterior lighting
can be adjusted
c:> page 48.
-If you turn off the ignition while the ex
terior lights are on and open the door,
you will hear a warning tone.
- The tail lights do not switch on when the
daytime running lights switch on.
- In cool or damp weather, the inside of
the headlights, turn signals and tail
lights can fog over due to the tempera
ture difference between the inside and
outside . They w ill clear shortly after
switching them on . This does not affect
the se rvice life of the lighting.
- A message w ill appear in the instrument
cluster if there is a malfunction in the
light senso r
c:> page 25.
Emergency flasher
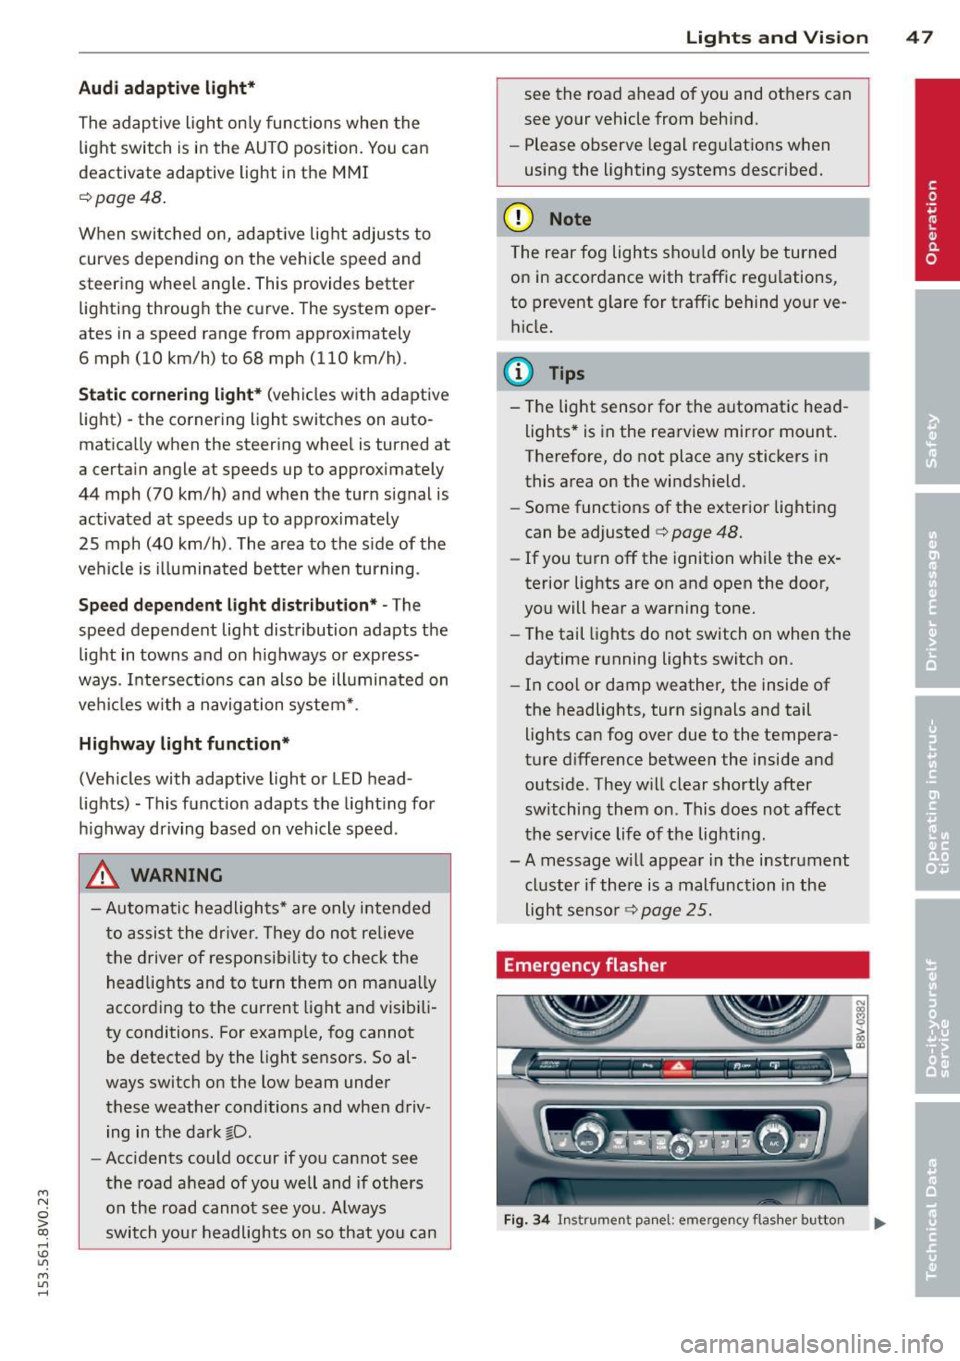
Fig. 34 In str umen t pa nel: em erg ency fla sher button
Page 50 of 310
48 Lights and Vision
The emergency flashers ma kes other drivers
aware of your ve hicle in dangero us situations .
... Press the~ button to sw itch the e mergency
flashers on o r off.
You can indicate a lane change or a tu rn whe n
the eme rgency flashers are sw itched on by us
ing the turn sign al lever. The eme rgency flash
e rs stop temporarily .
The emergency flashers also work when the ignit io n is tu rned off.
(D Tips
You should switch the em ergency f lashe rs
on if:
- You are the last ca r in a traffic jam so
that all o ther veh icles app roach ing from
behind can see you, or if
- Your vehicle has broken down o r you are
having an eme rgency, or if
- Your vehicle is being towed or if you a re
tow ing another vehicl e.
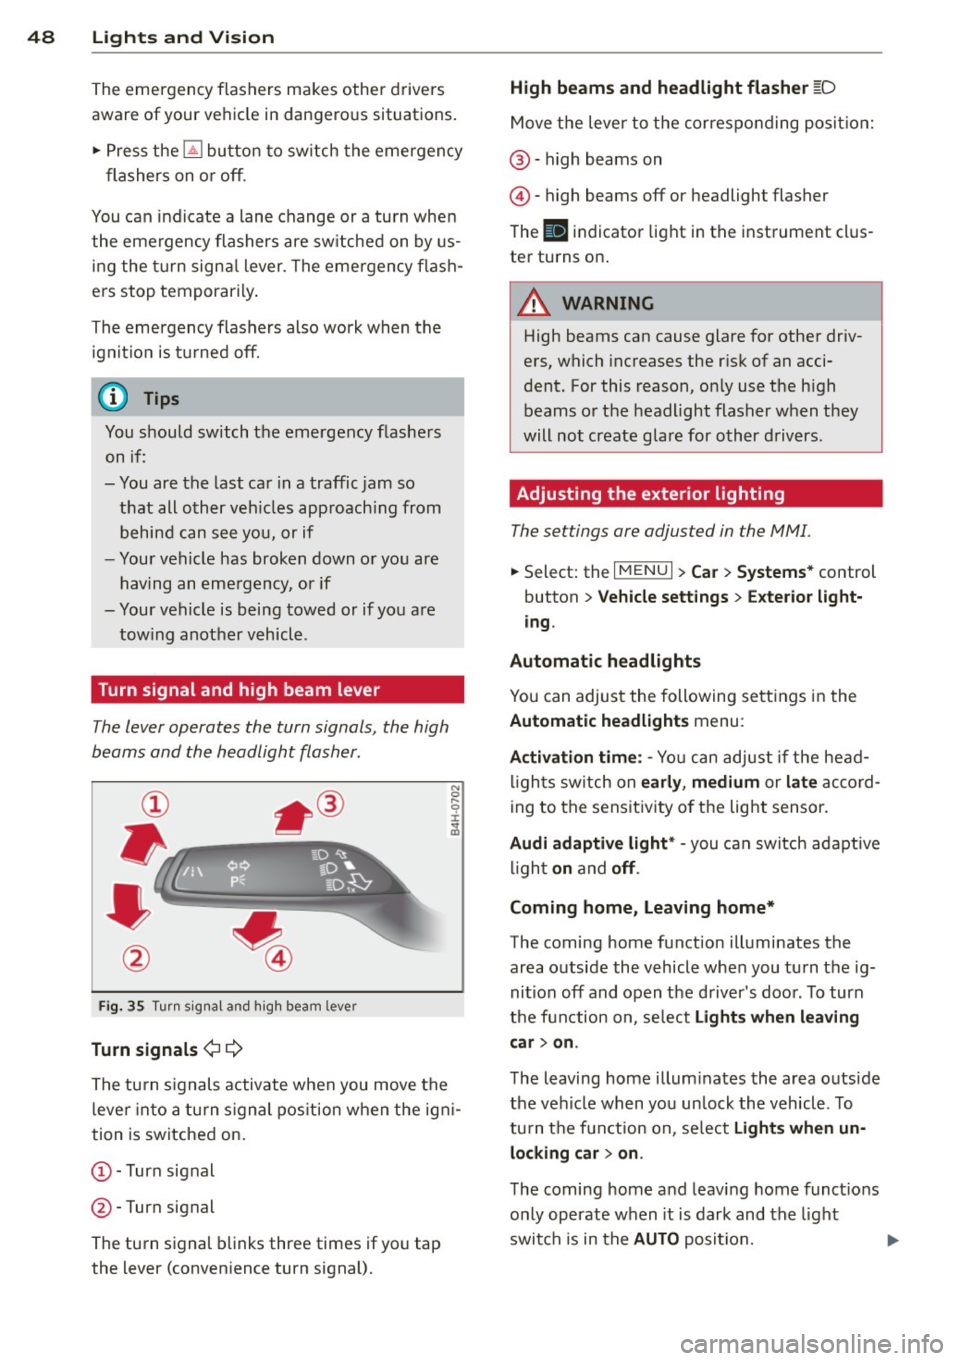
Turn signal and high beam lever
The lever operates the turn signals, the high
beams and the headlight flasher .
Fig. 35 Turn sig na l an d high beam leve r
Turn signals ¢¢
The tu rn s ignals activate when you move the
l eve r into a turn s ignal pos ition when the ign i
tion is switche d on.
@ -Turn sig nal
@ -Turn signal
The turn s ignal blinks three times if yo u tap
the lever (conven ience turn signal).
High beams and headlight flasher [D
Move the lever to t he corres po nding po sitio n:
@ -high b eams on
© -high beams off or headlight flasher
The
II indicator light in t he inst rument cl us
te r turns on .
A WARNING
High beams can cause glare for other driv
e rs, which increases the r isk of an acci
dent. For this reason, on ly use the h igh
beams o r the headlight flasher when they
will not create glare for o ther drivers .
Adjusting the exterior lighting
The settings are adjusted in the MMI.
... Select: the I MENU I> Car > Systems * control
button
> Vehicle sett ings > Exterior light
ing .
Automatic headlights
You can adjus t the following se tt ings in the
Automatic headlights menu :
Activation time : -Yo u can ad just if the head
li gh ts sw itch on
early , medium or la te ac co rd
ing to the sens it iv ity o f the lig ht senso r.
Audi adaptive light * -you can switch adaptive
li gh t
on and off .
Coming home, Leaving home*
The coming home function illuminates the
area o utside the vehicle whe n you tu rn the ig
nition off and open the d river 's doo r. T o turn
t h e fun ction on , se lect
Lights when leaving
car > on .
The leaving home illum inates the area outs ide
the ve hicl e when you un lock the vehicl e. T o
tu rn t he fun ct ion on, se lect
Light s when un
locking car > on.
The coming home a nd leav ing home funct ions
only operate when it is dark and the light
swit ch is in the
AUTO posi tion.