BMW M4 2016 Owners Manual
Manufacturer: BMW, Model Year: 2016, Model line: M4, Model: BMW M4 2016Pages: 228, PDF Size: 4.88 MB
Page 171 of 228
Mobility
To assist you in preserving your car’s mobility, this section contains important information on
operating fluids, wheels and tyres, maintenance and breakdown assistance.Online Edition for Part no. 01 40 2 964 013 - VI/15
Page 172 of 228
RefuellingVehicle equipmentThis chapter describes all standard, national
and special equipment provided in the model
series. Equipment not available in the vehicle is
therefore also described, for example the se‐
lected special equipment or national version.
This also applies to safety-relevant functions
and systems. Comply with the relevant na‐
tional regulations when using the correspond‐
ing functions and systems.
Notes Before refuelling, observe notes on fuel quality,
see page 174.
ATTENTION
If the range drops below 50 km, approx.
30 miles, the engine could not be supplied
anymore with sufficient fuel. Engine functions
are not ensured anymore. Danger of damage
to property. Refuel in good time.◀
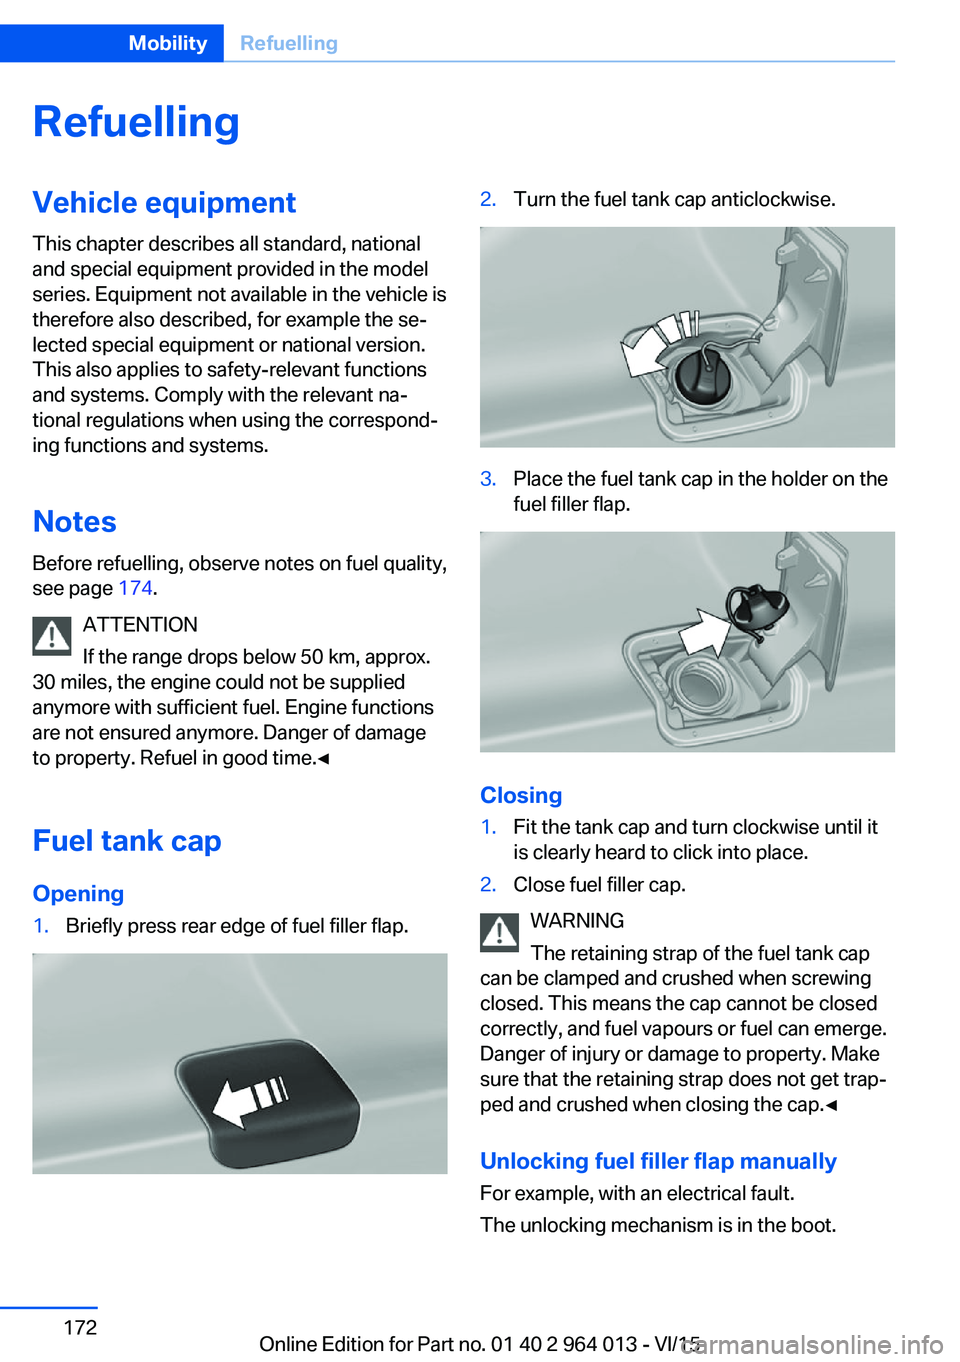
Fuel tank cap Opening1.Briefly press rear edge of fuel filler flap.2.Turn the fuel tank cap anticlockwise.3.Place the fuel tank cap in the holder on the
fuel filler flap.
Closing
1.Fit the tank cap and turn clockwise until it
is clearly heard to click into place.2.Close fuel filler cap.
WARNING
The retaining strap of the fuel tank cap
can be clamped and crushed when screwing
closed. This means the cap cannot be closed
correctly, and fuel vapours or fuel can emerge.
Danger of injury or damage to property. Make
sure that the retaining strap does not get trap‐
ped and crushed when closing the cap.◀
Unlocking fuel filler flap manually
For example, with an electrical fault.
The unlocking mechanism is in the boot.
Seite 172MobilityRefuelling172
Online Edition for Part no. 01 40 2 964 013 - VI/15
Page 173 of 228
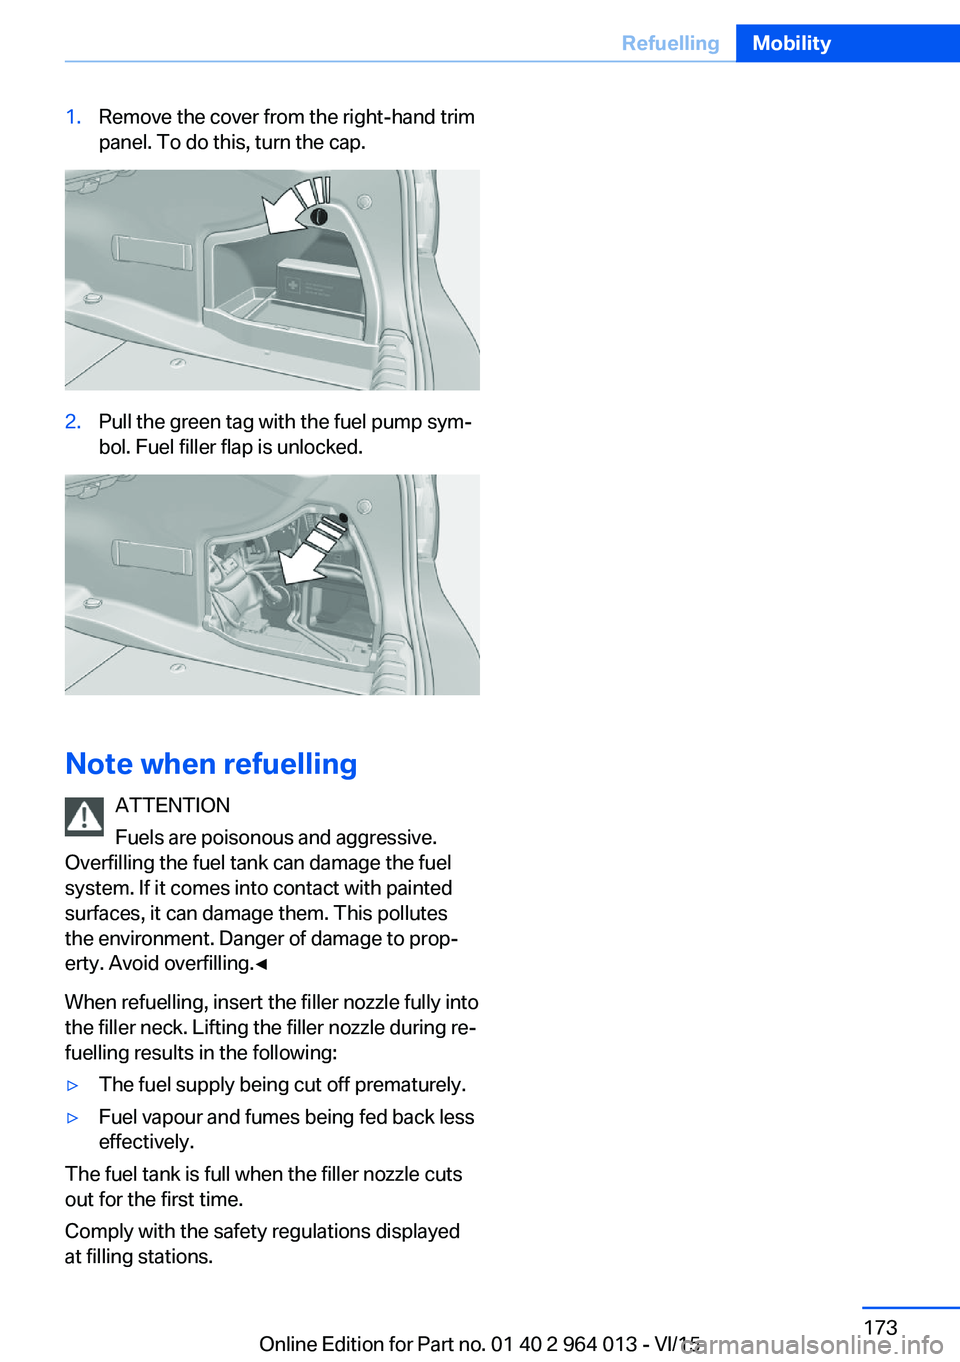
1.Remove the cover from the right-hand trim
panel. To do this, turn the cap.2.Pull the green tag with the fuel pump sym‐
bol. Fuel filler flap is unlocked.
Note when refuelling
ATTENTION
Fuels are poisonous and aggressive.
Overfilling the fuel tank can damage the fuel
system. If it comes into contact with painted
surfaces, it can damage them. This pollutes
the environment. Danger of damage to prop‐
erty. Avoid overfilling.◀
When refuelling, insert the filler nozzle fully into
the filler neck. Lifting the filler nozzle during re‐
fuelling results in the following:
▷The fuel supply being cut off prematurely.▷Fuel vapour and fumes being fed back less
effectively.
The fuel tank is full when the filler nozzle cuts
out for the first time.
Comply with the safety regulations displayed
at filling stations.
Seite 173RefuellingMobility173
Online Edition for Part no. 01 40 2 964 013 - VI/15
Page 174 of 228
FuelVehicle equipmentThis chapter describes all standard, national
and special equipment provided in the model
series. Equipment not available in the vehicle is
therefore also described, for example the se‐
lected special equipment or national version.
This also applies to safety-relevant functions
and systems. Comply with the relevant na‐
tional regulations when using the correspond‐
ing functions and systems.
Fuel quality
General Depending on the region, many filling stations
sell fuel that is adapted to the conditions in
winter or summer. Fuel that is sold in winter fa‐
cilitates cold starting, for example.
Note ATTENTION
Even fuels corresponding to the specifi‐
cations may be of low quality. Engine problems
can arise, for example poor engine starting, im‐
paired driving properties or reduced perform‐
ance. Danger of damage to property. In the
case of engine problems, use a different filling
station or refuel with a higher octane fuel from
a brand maufacturer.◀
Petrol
For optimal fuel consumption, the petrol
should be sulphur-free or as low in sulphur
content as possible.
Fuels labelled on the pump as containing metal
must not be used.ATTENTION
Even small quantities of the wrong fuel or
wrong fuel additives can damage the fuel sys‐
tem and engine. In addition, the catalytic con‐
verter will be permanently damaged. Danger of
damage to property. Do not use the following
fuel or additives with petrol engines:▷Leaded petrol.▷Metallic additives, for example manganese
or iron.
After filling the wrong fuel, do not press the
start/stop button. Contact a Service Partner or
a qualified specialist workshop.◀
You can fill up with fuels with a maximum pro‐
portion of ethanol of 10 %, in other words E10.
ATTENTION
Incorrect fuels can damage the fuel sys‐
tem and engine. Danger of damage to prop‐
erty. Do not fill with any fuels that either have a
higher ethanol content than recommended or
that contain methanol, for example M5 to
M100.◀
The engine has anti-knock control. This means
that different petrol grades can be used.
Petrol grade Super Plus, with RON 98.
Fill up this fuel so that the nominal perform‐
ance data values and consumption is achieved.
Minimum grade Super with RON 95.
ATTENTION
Fuel below the specified minimum qual‐
ity can impact the engine function or lead to
engine damage. Danger of damage to prop‐
erty. Do not refuel petrol below the specified
minimum quality.◀
Seite 174MobilityFuel174
Online Edition for Part no. 01 40 2 964 013 - VI/15
Page 175 of 228
Wheels and tyresVehicle equipment
This chapter describes all standard, national
and special equipment provided in the model
series. Equipment not available in the vehicle is
therefore also described, for example the se‐
lected special equipment or national version.
This also applies to safety-relevant functions
and systems. Comply with the relevant na‐
tional regulations when using the correspond‐
ing functions and systems.
Tyre pressures Information for your safety
A tyre’s condition and pressure influence the
following:▷Operating life of the tyre.▷Driving safety.▷Driving comfort.
Checking tyre pressures
WARNING
A tyre with inadequate or missing tyre in‐
flation pressure impairs driving properties, for example steering and braking. Danger of acci‐
dents. Check tyre inflation pressure regularly
and adjust as necessary, for example twice a
month or before any long journey.◀
Tyres have a natural, uniform tyre pressure
loss.
Tyres heat up when driving and with the tem‐
perature of the tyre, the tyre filling pressure in‐
creases. The tyre filling pressure data relate to
cold tyres or tyres at ambient temperature.
Only check the tyre pressure when the tyres
are cold. In other words, after driving for a max‐
imum of 2 km or if the vehicle has been parked
for at least 2 hours.
Inflating devices can display a pressure as
much as 0.1 bar too low.
With runflat indicator: reinitialise the runflat in‐
dicator after adjusting tyre pressures.
With tyre pressure monitor: reset the tyre pres‐
sure monitor after adjusting the tyre pressure
to a new value.
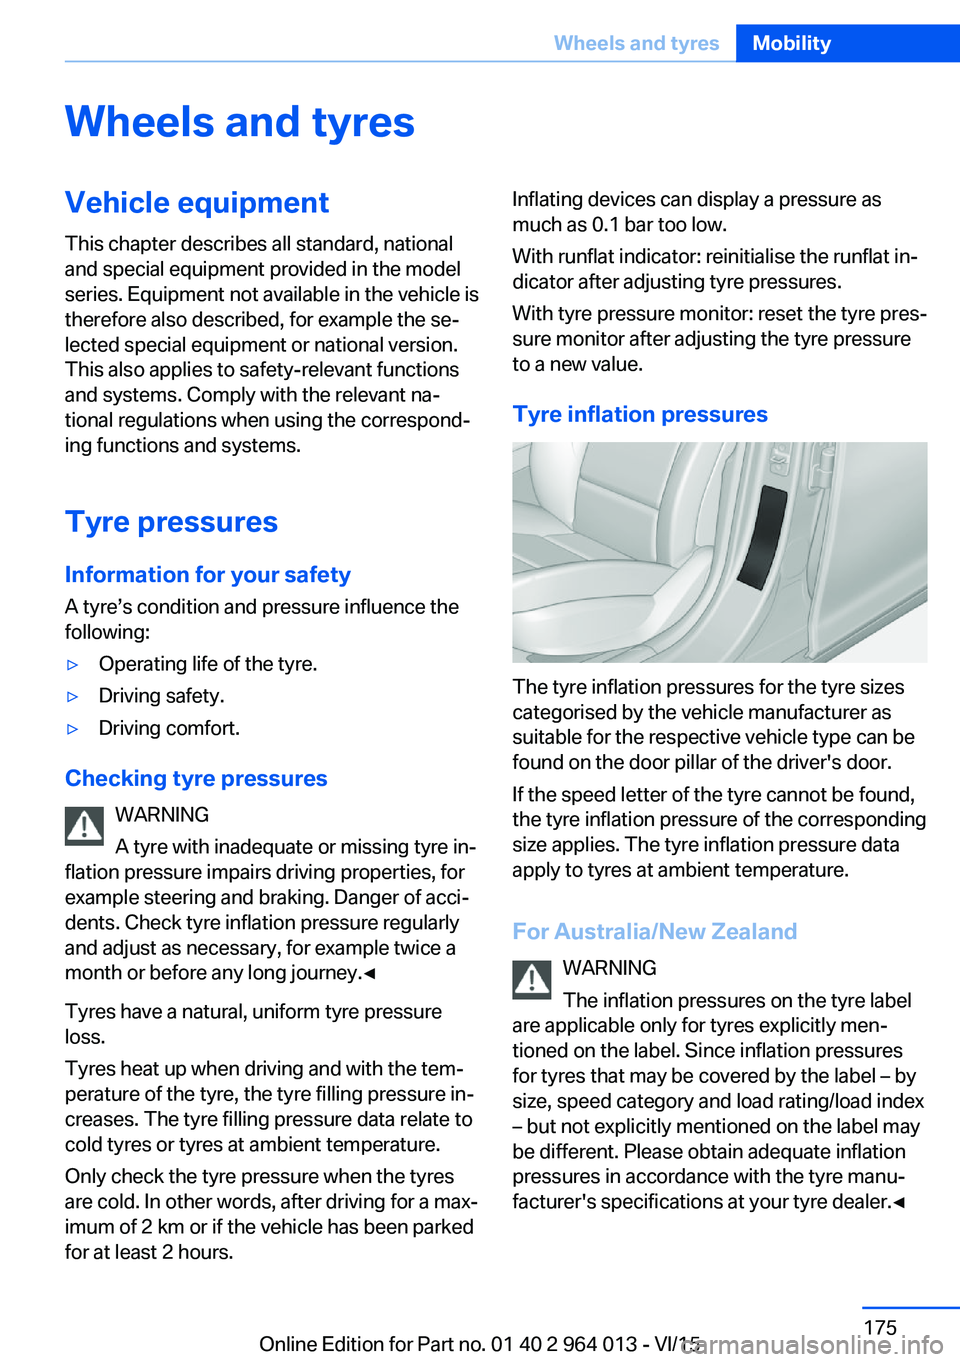
Tyre inflation pressures
The tyre inflation pressures for the tyre sizes
categorised by the vehicle manufacturer as
suitable for the respective vehicle type can be
found on the door pillar of the driver's door.
If the speed letter of the tyre cannot be found,
the tyre inflation pressure of the corresponding
size applies. The tyre inflation pressure data
apply to tyres at ambient temperature.
For Australia/New Zealand WARNING
The inflation pressures on the tyre label
are applicable only for tyres explicitly men‐
tioned on the label. Since inflation pressures
for tyres that may be covered by the label – by
size, speed category and load rating/load index
– but not explicitly mentioned on the label may
be different. Please obtain adequate inflation
pressures in accordance with the tyre manu‐
facturer's specifications at your tyre dealer.◀
Seite 175Wheels and tyresMobility175
Online Edition for Part no. 01 40 2 964 013 - VI/15
Page 176 of 228
Tyre sizes
The pressure values apply for the tyre sizes
categorised by the vehicle manufacturer as
suitable and the tyre makes recommended for
the respective vehicle type.
More information regarding wheels and tyres
can be enquired with a Service Partner or a
qualified specialist workshop.
Tyre tread
Summer tyres
The tyre tread depth should not be less than
3 mm, 0.12 in.
Below a tread depth of 3 mm, approximately
0.12 in, there is a high risk of aquaplaning.
Winter tyres The tyre tread depth should not be less than4 mm, approximately 0.16 in.
Below a tread depth of 4 mm, approximately
0.16 in, suitability for vehicle operation in win‐
ter is restricted.
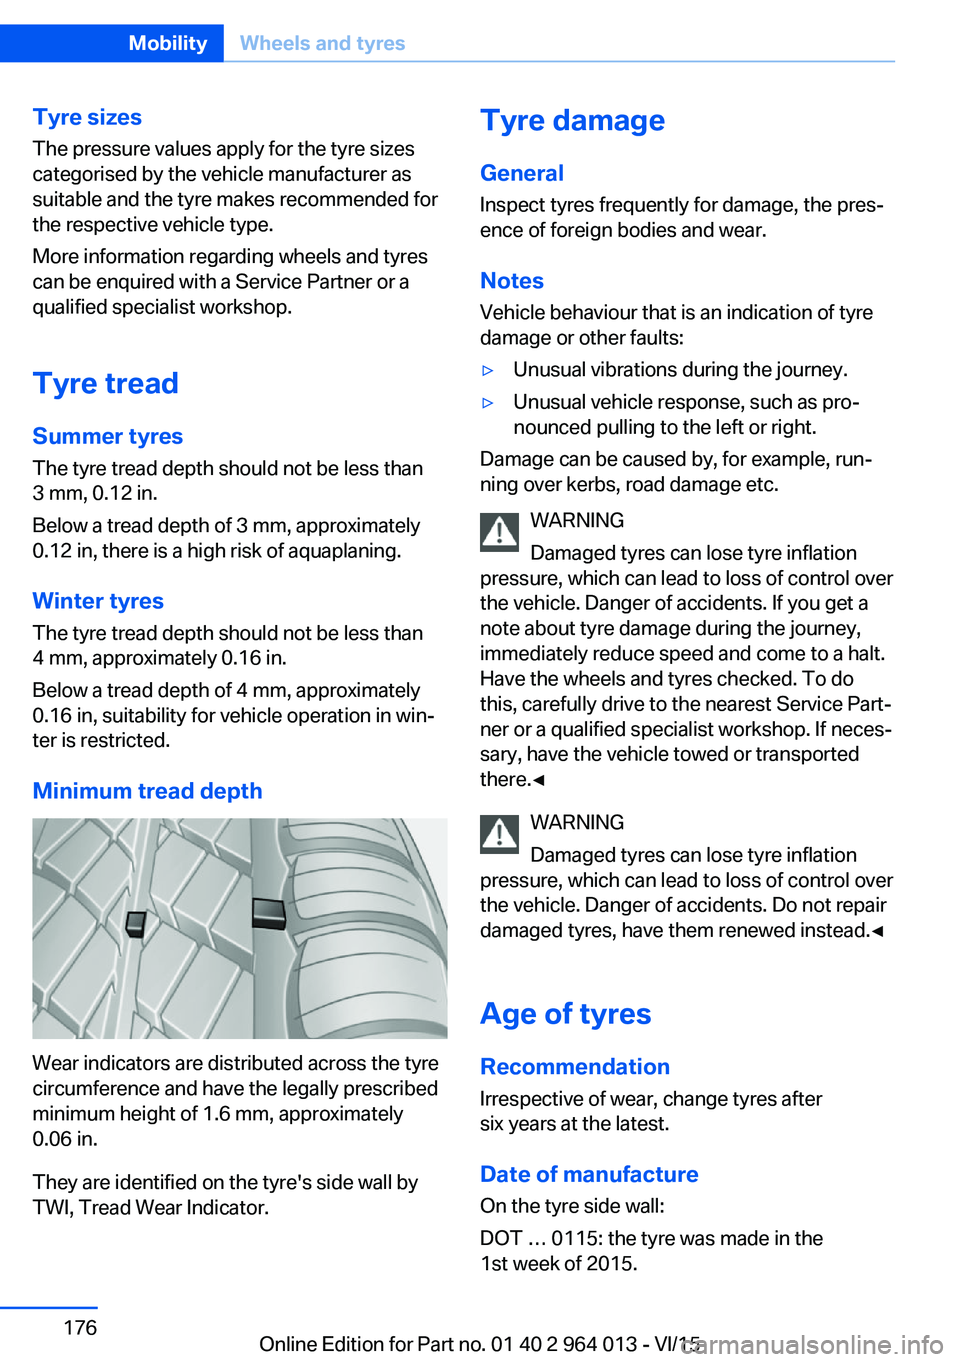
Minimum tread depth
Wear indicators are distributed across the tyre
circumference and have the legally prescribed
minimum height of 1.6 mm, approximately
0.06 in.
They are identified on the tyre's side wall by
TWI, Tread Wear Indicator.
Tyre damage
General Inspect tyres frequently for damage, the pres‐
ence of foreign bodies and wear.
Notes
Vehicle behaviour that is an indication of tyre
damage or other faults:▷Unusual vibrations during the journey.▷Unusual vehicle response, such as pro‐
nounced pulling to the left or right.
Damage can be caused by, for example, run‐
ning over kerbs, road damage etc.
WARNING
Damaged tyres can lose tyre inflation
pressure, which can lead to loss of control over
the vehicle. Danger of accidents. If you get a
note about tyre damage during the journey,
immediately reduce speed and come to a halt.
Have the wheels and tyres checked. To do
this, carefully drive to the nearest Service Part‐
ner or a qualified specialist workshop. If neces‐
sary, have the vehicle towed or transported
there.◀
WARNING
Damaged tyres can lose tyre inflation
pressure, which can lead to loss of control over
the vehicle. Danger of accidents. Do not repair
damaged tyres, have them renewed instead.◀
Age of tyres
Recommendation
Irrespective of wear, change tyres after
six years at the latest.
Date of manufacture
On the tyre side wall:
DOT … 0115: the tyre was made in the
1st week of 2015.
Seite 176MobilityWheels and tyres176
Online Edition for Part no. 01 40 2 964 013 - VI/15
Page 177 of 228
Replacement of wheels and
tyres
Fitting Have fitting and balancing performed by a
Service Partner or a qualified specialist work‐
shop.
Wheel and tyre combination The correct wheel and tyre combination and
rim designs for the vehicle can be consulted at
a Service Partner or a qualified specialist work‐
shop.
Incorrect wheel and tyre combinations will in‐
terfere with the proper functioning of various
systems, such as ABS and DSC.
To maintain good vehicle handling, always fit
tyres of the same make and tread pattern to all
wheels.
After a tyre has been damaged, fit the original
wheel and tyre combination again.
WARNING
Wheels and tyres that are categorised as
unsuitable by the vehicle manufacturer can
damage parts of the vehicle, for example by
touching the bodywork as a result of toleran‐
ces, in spite of having the same nominal size.
Danger of accidents. Use wheels and tyres that
have been categorised as suitable for the re‐
spective vehicle type by the vehicle manufac‐
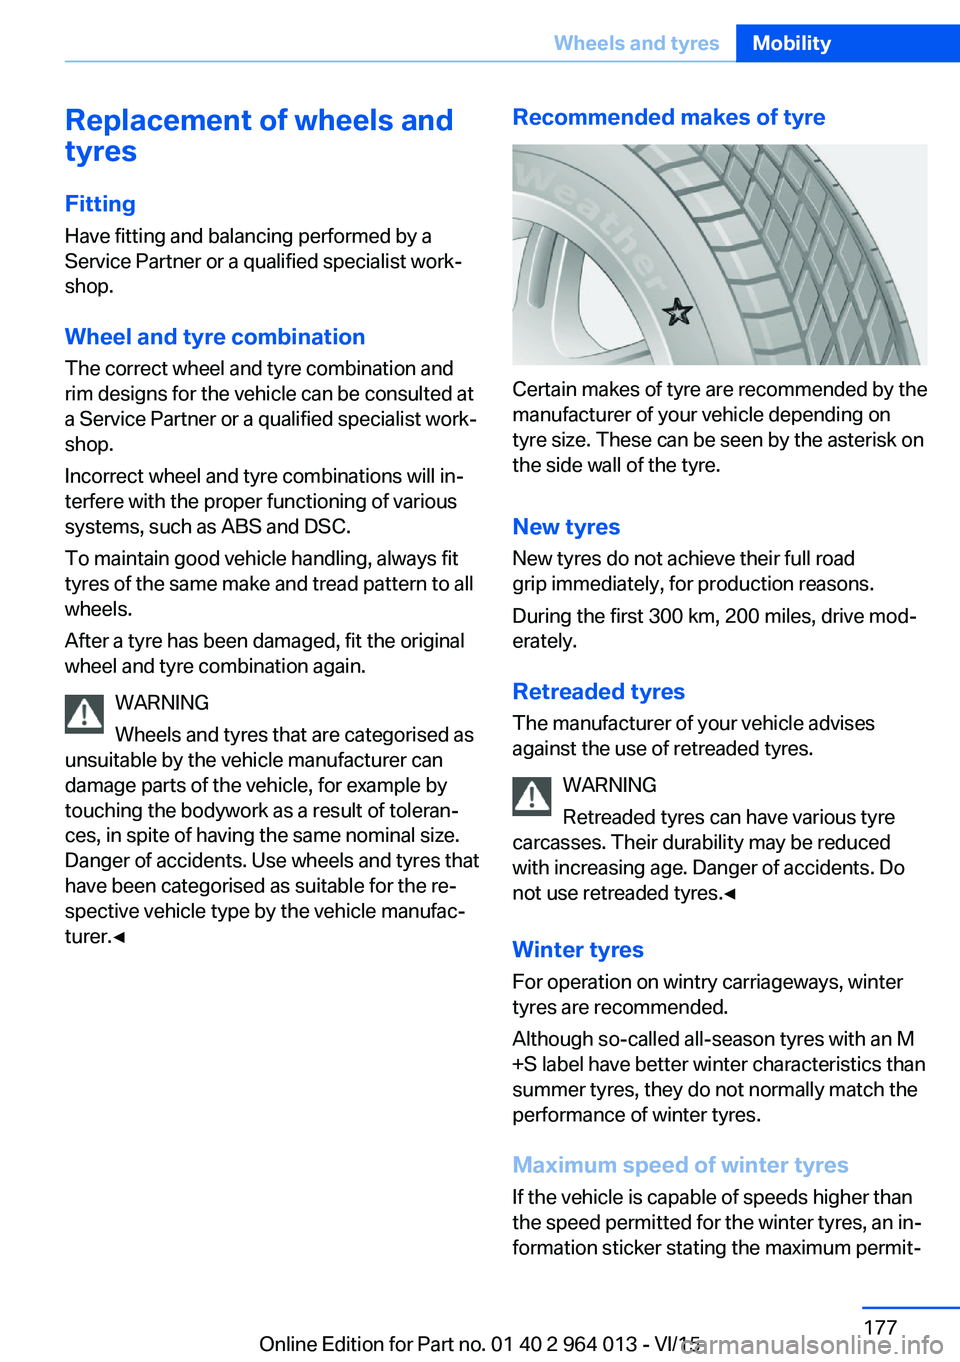
turer.◀Recommended makes of tyre
Certain makes of tyre are recommended by the
manufacturer of your vehicle depending on
tyre size. These can be seen by the asterisk on
the side wall of the tyre.
New tyres New tyres do not achieve their full road
grip immediately, for production reasons.
During the first 300 km, 200 miles, drive mod‐
erately.
Retreaded tyres The manufacturer of your vehicle advises
against the use of retreaded tyres.
WARNING
Retreaded tyres can have various tyre
carcasses. Their durability may be reduced
with increasing age. Danger of accidents. Do
not use retreaded tyres.◀
Winter tyres For operation on wintry carriageways, winter
tyres are recommended.
Although so-called all-season tyres with an M
+S label have better winter characteristics than
summer tyres, they do not normally match the
performance of winter tyres.
Maximum speed of winter tyres
If the vehicle is capable of speeds higher than
the speed permitted for the winter tyres, an in‐
formation sticker stating the maximum permit‐
Seite 177Wheels and tyresMobility177
Online Edition for Part no. 01 40 2 964 013 - VI/15
Page 178 of 228
ted speed for the tyres fitted must be dis‐
played in the driver's field of view. The sticker
is available from a Service Partner or a qualified
specialist workshop.
If winter tyres are fitted, observe and comply
with the respectively permitted maximum
speed.
Interchanging front and rear wheels
The manufacturer of your vehicle advises
against interchanging the front and rear
wheels. This could impair vehicle handling
Such a change is not permitted in vehicles with
different tyre or rim dimensions on the front
and rear axles.
Tyre storage
Store wheels and tyres in a cool, dry and pref‐
erably dark place when not in use.
Protect tyres against contamination from oil,
grease and fuel.
Do not exceed the maximum tyre pressure in‐
dicated on the tyre's side wall.
Remedying flat tyres Safety measures▷Park the vehicle on a solid surface and as
far away from moving traffic as possible.▷Switch on hazard warning lights.▷Protect the vehicle against rolling, by ap‐
plying the parking brake.▷Engage the steering wheel lock in the
straight ahead position of the wheels.▷Allow all vehicle occupants get out of the
vehicle and guide them out of the danger
area, for example behind the crash barrier.▷Set up warning triangle an appropriate dis‐
tance away.Mobility system
Principle With the mobility system, minor tyre damage
can be quickly sealed, to allow you to drive on.
To do that, liquid sealant is pumped into the
tyres which encloses the damage from the in‐ side when it hardens.
The compressor can be used to check the tyre
inflation pressure.
Notes▷Please observe the notes on the applica‐
tion of the Mobility system which are on
the compressor and the sealant container.▷Applying the Mobility system can be inef‐
fective for tyre damage as from a size of
approximately 4 mm.▷Contact a Service Partner or a qualified
specialist workshop if you are unable to put
the tyre back in operation.▷If possible, foreign matter that has penetra‐
ted the tyre should remain inside the tyre.▷Remove the speed limit sticker from the
sealant container and attach to the steer‐
ing wheel.▷Using sealants can damage the TPM wheel
electronics. If sealant is used, check the
electronics as soon as you get an opportu‐
nity and have them replaced if necessary.
DANGER
A blocked exhaust pipe or inadequate
ventilation can allow harmful exhaust fumes to
penetrate the vehicle. The exhaust gas con‐
tains carbon monoxide, which is colourless and
odourless, but highly toxic. In enclosed spaces,
the exhaust fumes can also build up outside
the vehicle. Danger of fatal injury. Keep the ex‐
haust pipe clear and ensure sufficient ventila‐
tion.◀
Storage
Mobility system is located under boot floor.
Seite 178MobilityWheels and tyres178
Online Edition for Part no. 01 40 2 964 013 - VI/15
Page 179 of 228
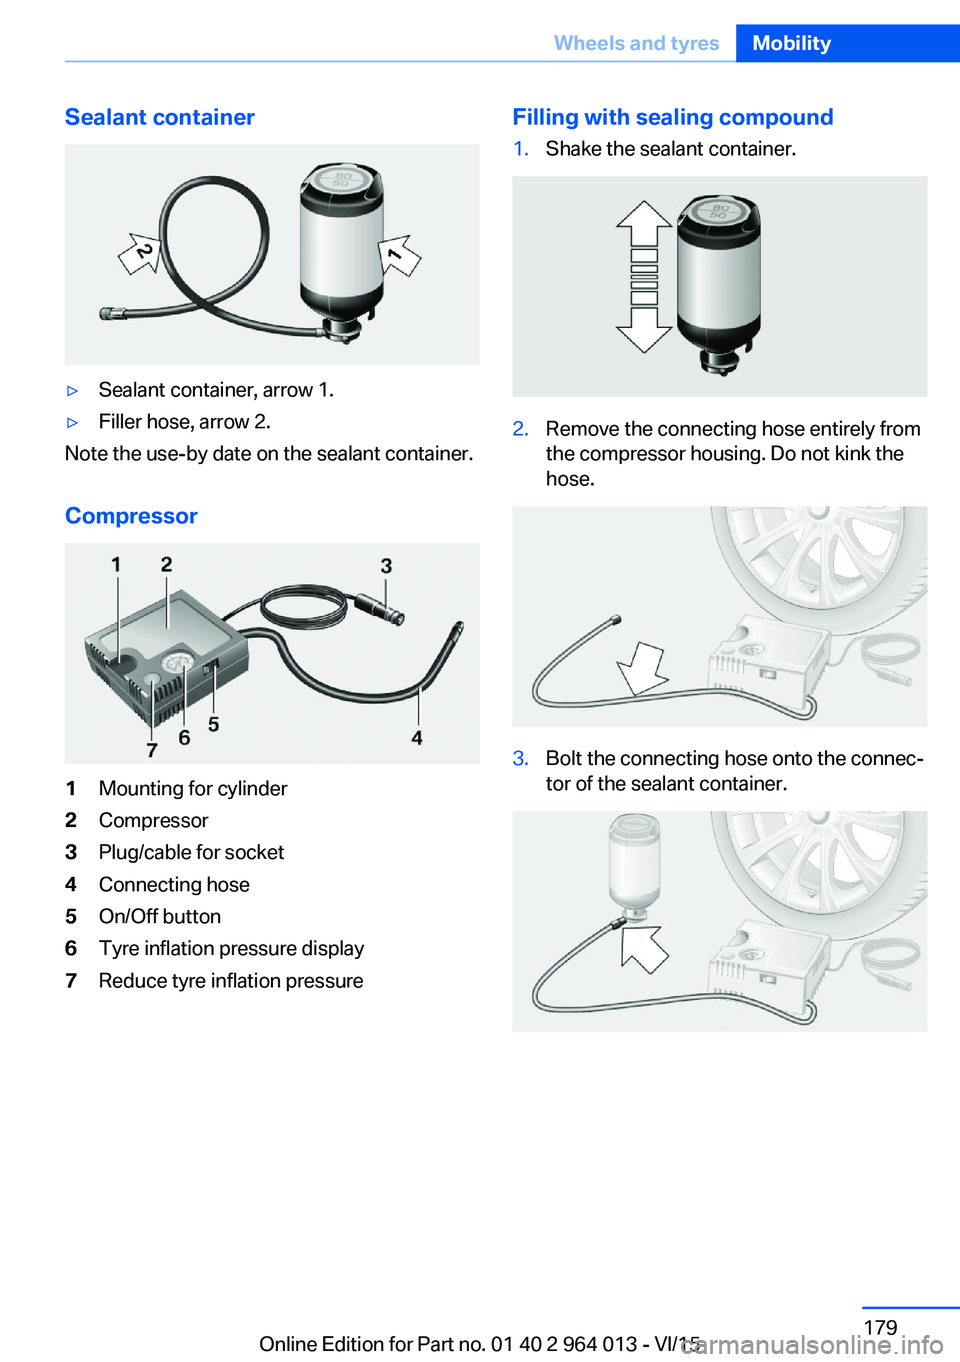
Sealant container▷Sealant container, arrow 1.▷Filler hose, arrow 2.
Note the use-by date on the sealant container.
Compressor
1Mounting for cylinder2Compressor3Plug/cable for socket4Connecting hose5On/Off button6Tyre inflation pressure display7Reduce tyre inflation pressureFilling with sealing compound1.Shake the sealant container.2.Remove the connecting hose entirely from
the compressor housing. Do not kink the
hose.3.Bolt the connecting hose onto the connec‐
tor of the sealant container.Seite 179Wheels and tyresMobility179
Online Edition for Part no. 01 40 2 964 013 - VI/15
Page 180 of 228
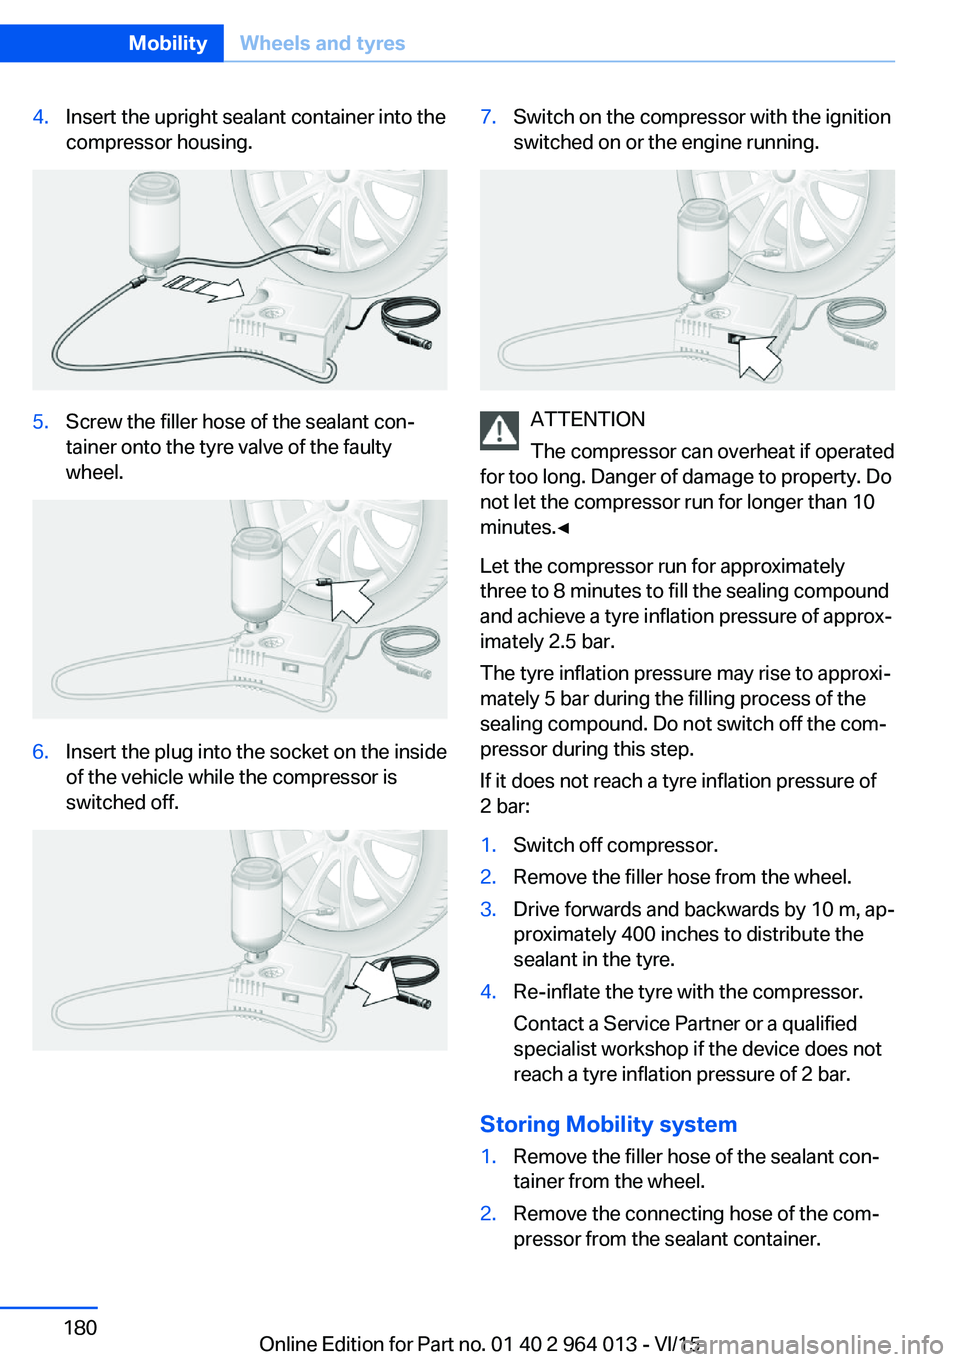
4.Insert the upright sealant container into the
compressor housing.5.Screw the filler hose of the sealant con‐
tainer onto the tyre valve of the faulty
wheel.6.Insert the plug into the socket on the inside
of the vehicle while the compressor is
switched off.7.Switch on the compressor with the ignition
switched on or the engine running.
ATTENTION
The compressor can overheat if operated
for too long. Danger of damage to property. Do
not let the compressor run for longer than 10
minutes.◀
Let the compressor run for approximately
three to 8 minutes to fill the sealing compound
and achieve a tyre inflation pressure of approx‐
imately 2.5 bar.
The tyre inflation pressure may rise to approxi‐
mately 5 bar during the filling process of the
sealing compound. Do not switch off the com‐
pressor during this step.
If it does not reach a tyre inflation pressure of
2 bar:
1.Switch off compressor.2.Remove the filler hose from the wheel.3.Drive forwards and backwards by 10 m, ap‐
proximately 400 inches to distribute the
sealant in the tyre.4.Re-inflate the tyre with the compressor.
Contact a Service Partner or a qualified
specialist workshop if the device does not
reach a tyre inflation pressure of 2 bar.
Storing Mobility system
1.Remove the filler hose of the sealant con‐
tainer from the wheel.2.Remove the connecting hose of the com‐
pressor from the sealant container.Seite 180MobilityWheels and tyres180
Online Edition for Part no. 01 40 2 964 013 - VI/15