BMW MOTORRAD K 1200 R 2008 Rider's Manual (in English)
Manufacturer: BMW MOTORRAD, Model Year: 2008, Model line: K 1200 R, Model: BMW MOTORRAD K 1200 R 2008Pages: 165, PDF Size: 2.18 MB
Page 91 of 165
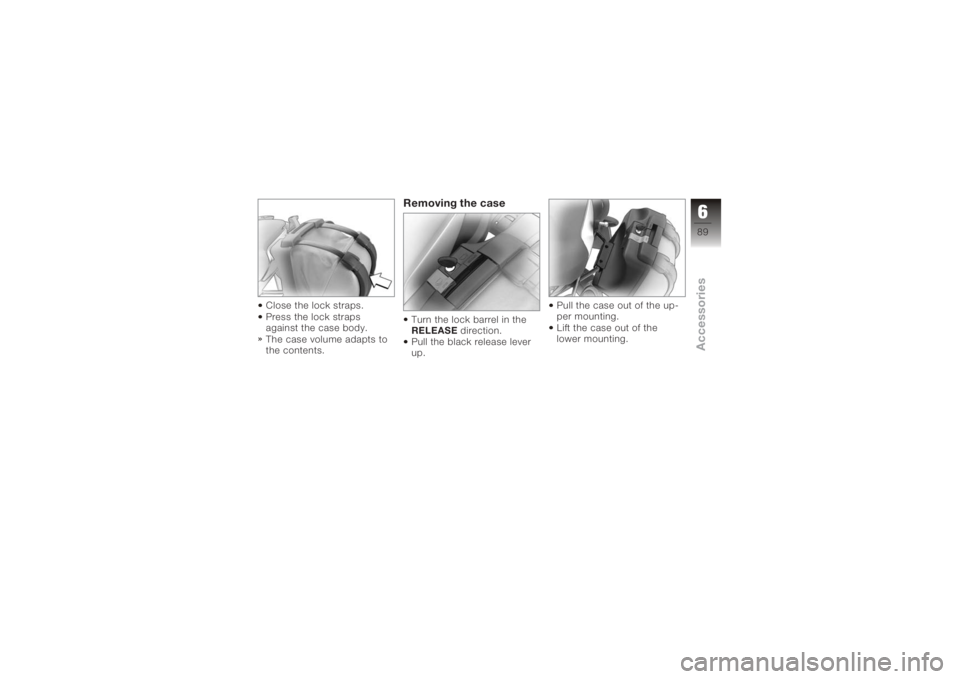
Close the lock straps.
Press the lock straps
against the case body.
The case volume adapts to
the contents.
Removing the caseTurn the lock barrel in the
RELEASEdirection.
Pull the black release lever
up. Pull the case out of the up-
per mounting.
Lift the case out of the
lower mounting.
689zAccessories
Page 92 of 165
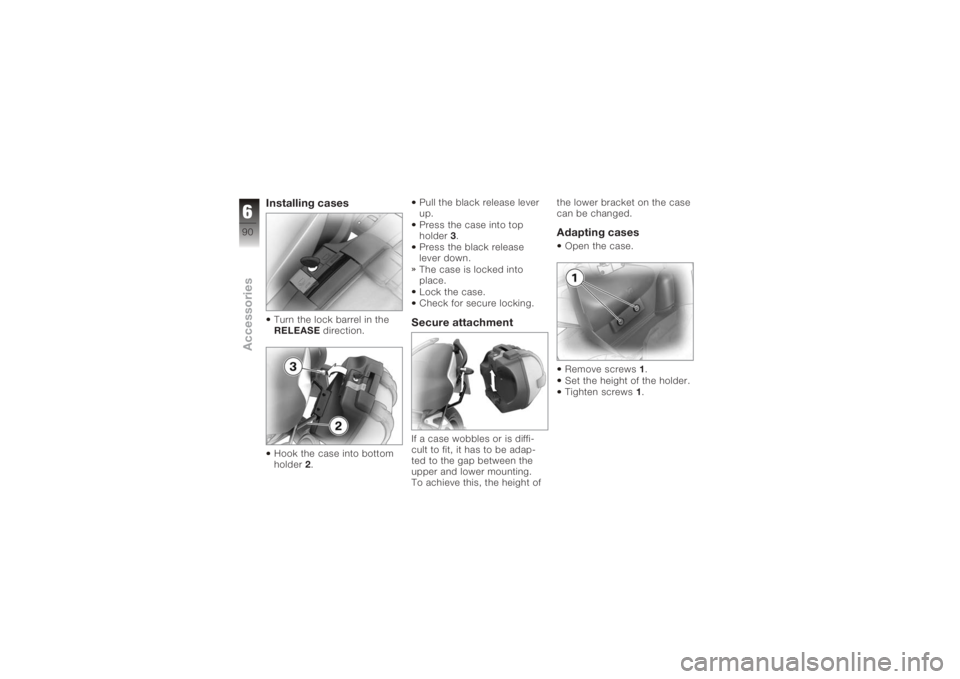
Installing casesTurn the lock barrel in the
RELEASEdirection.
Hook the case into bottom
holder 2. Pull the black release lever
up.
Press the case into top
holder
3.
Press the black release
lever down.
The case is locked into
place.
Lock the case.
Check for secure locking.
Secure attachmentIf a case wobbles or is diffi-
cult to fit, it has to be adap-
ted to the gap between the
upper and lower mounting.
To achieve this, the height of the lower bracket on the case
can be changed.
Adapting casesOpen the case.
Remove screws
1.
Set the height of the holder.
Tighten screws 1.
690zAccessories
Page 93 of 165
Maintenance
Maintenance - general
instructions................... 92
Toolkit ........................ 92
Overview, toolkit .............. 92
Contents, supplementary
kit
OA
.......................... 92
Overview, supplementary kit . . . 92
Engine oil . .................... 93
Brake system, general ......... 95
Brake pads .................... 96
Brake fluid .................... 97
Clutch ....................... 100
Tyres ........................ 101
Rims . ........................ 101
Wheels . . . ................... 102
Front-wheel stand ............ 110 Rear wheel stand
............. 112
Bulbs ........................ 113
Jump starting . . .............. 118
Battery . . . .................... 120
791zMaintenance
Page 94 of 165
Maintenance - general
instructionsThe 'Maintenance' chapter
describes work involving the
replacement of wear parts
that can be performed with
minimum effort.
If special tightening torques
are to be taken into account
for assembly, these are also
listed.
Threaded fasteners for which
a suitable tool is included in
the toolkit are marked ac-
cordingly.
If you are interested in inform-
ation on more extensive work,
we recommend the repair
manual on CD-ROM which
applies to your particular mo-
torcycle. You can obtain a
copy from your authorised
BMW Motorrad dealer.
ToolkitPosition on the motor-
cycleThe toolkit supplied with the
motorcycle is underneath the
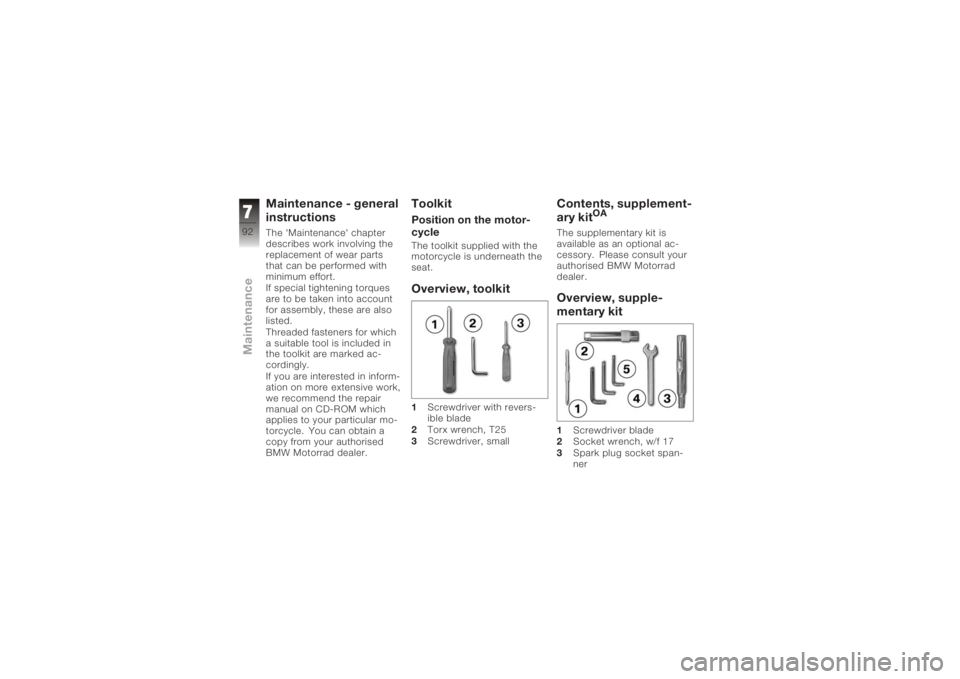
seat.Overview, toolkit1Screwdriver with revers-
ible blade
2 Torx wrench, T25
3 Screwdriver, small
Contents, supplement-
ary kit
OA
The supplementary kit is
available as an optional ac-
cessory. Please consult your
authorised BMW Motorrad
dealer.
Overview, supple-
mentary kit1 Screwdriver blade
2 Socket wrench, w/f 17
3 Spark plug socket span-
ner
792zMaintenance
Page 95 of 165
4Open-ended spanner,
w/f 17
5 TORX wrenches, T40,
T45, T50Engine oilChecking the engine oil
level
The engine can seize if
the oil level is low, and
this can lead to accidents.
Always make sure that the oil
level is correct.
Oil can collect in the
sump if the motorcycle
is out of use for an extended
period of time; this oil has to
be pumped into the oil tank
before the level is read. The
engine oil must be at oper-
ating temperature to do this.
Checking the oil level with the
engine cold or after no more
than a short ride will lead to
misinterpretation; this in turn, means that the engine will be
operated with the incorrect
quantity of oil.
In order to ensure that the en-
gine oil level is read correctly,
check the oil level only after a
lengthy trip.
The oil level varies with
the temperature of the
oil. The higher the temperat-
ure the higher the oil level in
the oil tank. Check the engine
oil level immediately after a
lengthy journey.
Make sure the engine is at
operating temperature and
hold the motorcycle upright.
with OA Centre stand:
Check that the engine is
at operating temperature,
make sure the ground is
level and firm and place
the motorcycle on its centre
stand. Allow the engine to idle for
one minute.
Switch off the ignition.
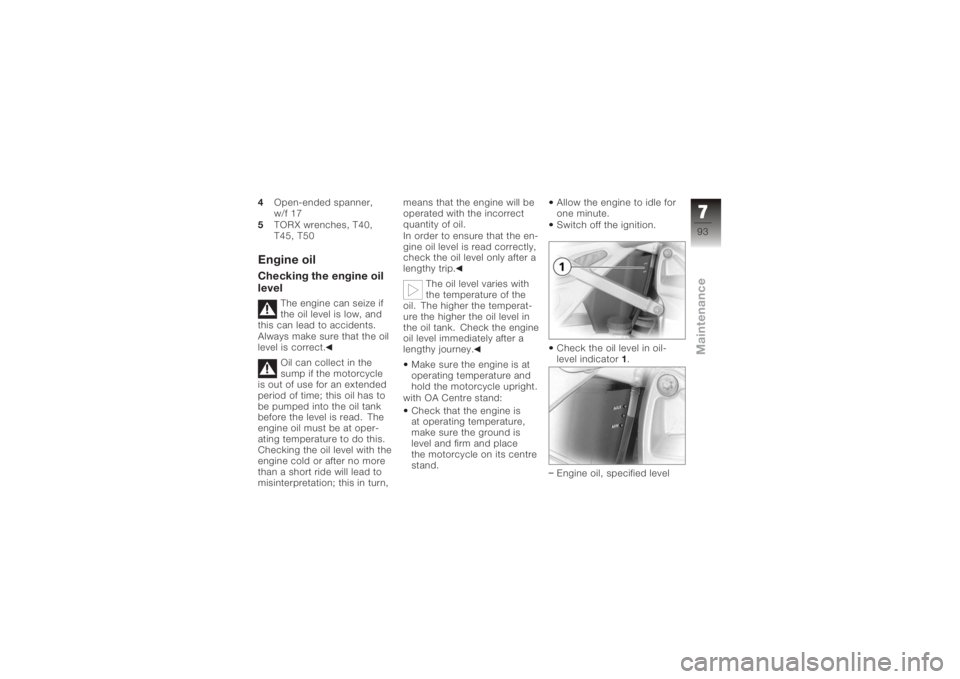
Check the oil level in oil-
level indicator
1.
Engine oil, specified level
793zMaintenance
Page 96 of 165
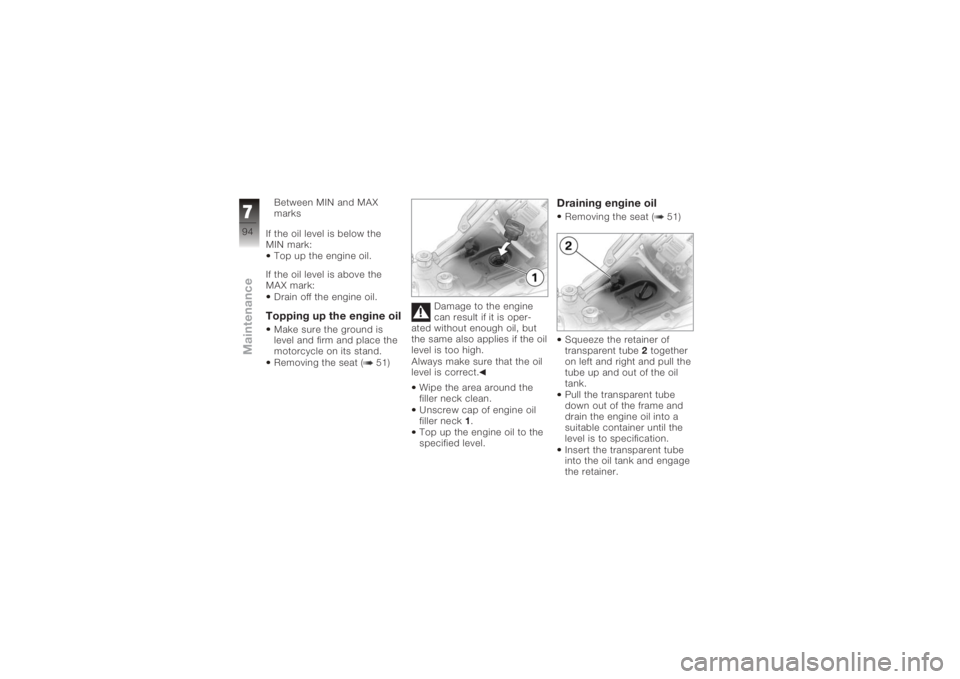
Between MIN and MAX
marks
If the oil level is below the
MIN mark: Top up the engine oil.
If the oil level is above the
MAX mark: Drain off the engine oil.Topping up the engine oilMake sure the ground is
level and firm and place the
motorcycle on its stand.
Removing the seat ( 51) Damage to the engine
can result if it is oper-
ated without enough oil, but
the same also applies if the oil
level is too high.
Always make sure that the oil
level is correct.
Wipe the area around the
filler neck clean.
Unscrew cap of engine oil
filler neck 1.
Top up the engine oil to the
specified level.
Draining engine oilRemoving the seat ( 51)
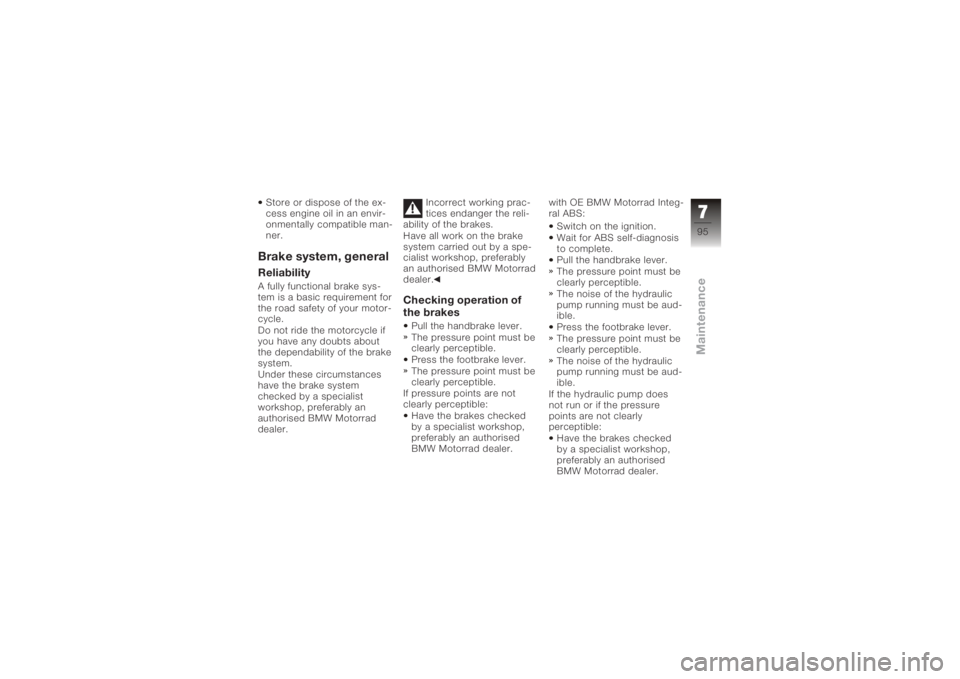
Squeeze the retainer of
transparent tube 2together
on left and right and pull the
tube up and out of the oil
tank.
Pull the transparent tube
down out of the frame and
drain the engine oil into a
suitable container until the
level is to specification.
Insert the transparent tube
into the oil tank and engage
the retainer.
794zMaintenance
Page 97 of 165
Store or dispose of the ex-
cess engine oil in an envir-
onmentally compatible man-
ner.Brake system, generalReliabilityA fully functional brake sys-
tem is a basic requirement for
the road safety of your motor-
cycle.
Do not ride the motorcycle if
you have any doubts about
the dependability of the brake
system.
Under these circumstances
have the brake system
checked by a specialist
workshop, preferably an
authorised BMW Motorrad
dealer.Incorrect working prac-
tices endanger the reli-
ability of the brakes.
Have all work on the brake
system carried out by a spe-
cialist workshop, preferably
an authorised BMW Motorrad
dealer.
Checking operation of
the brakesPull the handbrake lever.
The pressure point must be
clearly perceptible.
Press the footbrake lever.
The pressure point must be
clearly perceptible.
If pressure points are not
clearly perceptible: Have the brakes checked
by a specialist workshop,
preferably an authorised
BMW Motorrad dealer. with OE BMW Motorrad Integ-
ral ABS:
Switch on the ignition.
Wait for ABS self-diagnosis
to complete.
Pull the handbrake lever.
The pressure point must be
clearly perceptible.
The noise of the hydraulic
pump running must be aud-
ible.
Press the footbrake lever.
The pressure point must be
clearly perceptible.
The noise of the hydraulic
pump running must be aud-
ible.
If the hydraulic pump does
not run or if the pressure
points are not clearly
perceptible: Have the brakes checked
by a specialist workshop,
preferably an authorised
BMW Motorrad dealer.
795zMaintenance
Page 98 of 165
Brake padsChecking brake-pad
thickness, front brakes
Brake pads worn past
the minimum permissible
thickness can cause a reduc-
tion in braking efficiency and
under certain circumstances
they can cause damage to
the brake system.
In order to ensure the de-
pendability of the brake sys-
tem, do not permit the brake
pads to wear past the minim-
um permissible thickness.
Make sure the ground is
level and firm and place the
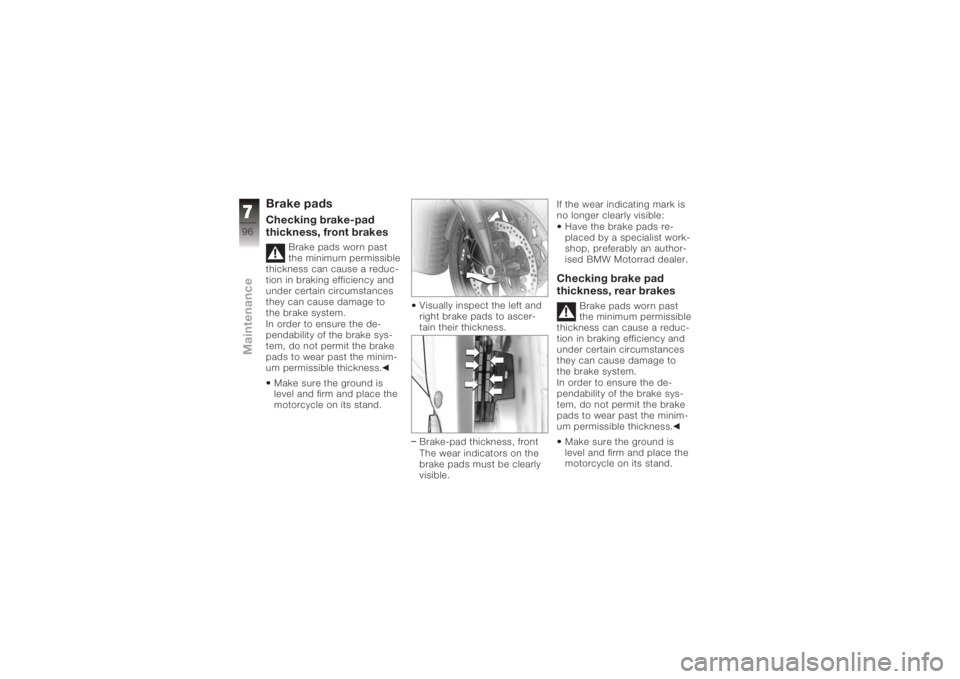
motorcycle on its stand. Visually inspect the left and
right brake pads to ascer-
tain their thickness.
Brake-pad thickness, front
The wear indicators on the
brake pads must be clearly
visible.If the wear indicating mark is
no longer clearly visible:
Have the brake pads re-
placed by a specialist work-
shop, preferably an author-
ised BMW Motorrad dealer.
Checking brake pad
thickness, rear brakes
Brake pads worn past
the minimum permissible
thickness can cause a reduc-
tion in braking efficiency and
under certain circumstances
they can cause damage to
the brake system.
In order to ensure the de-
pendability of the brake sys-
tem, do not permit the brake
pads to wear past the minim-
um permissible thickness.
Make sure the ground is
level and firm and place the
motorcycle on its stand.
796zMaintenance
Page 99 of 165
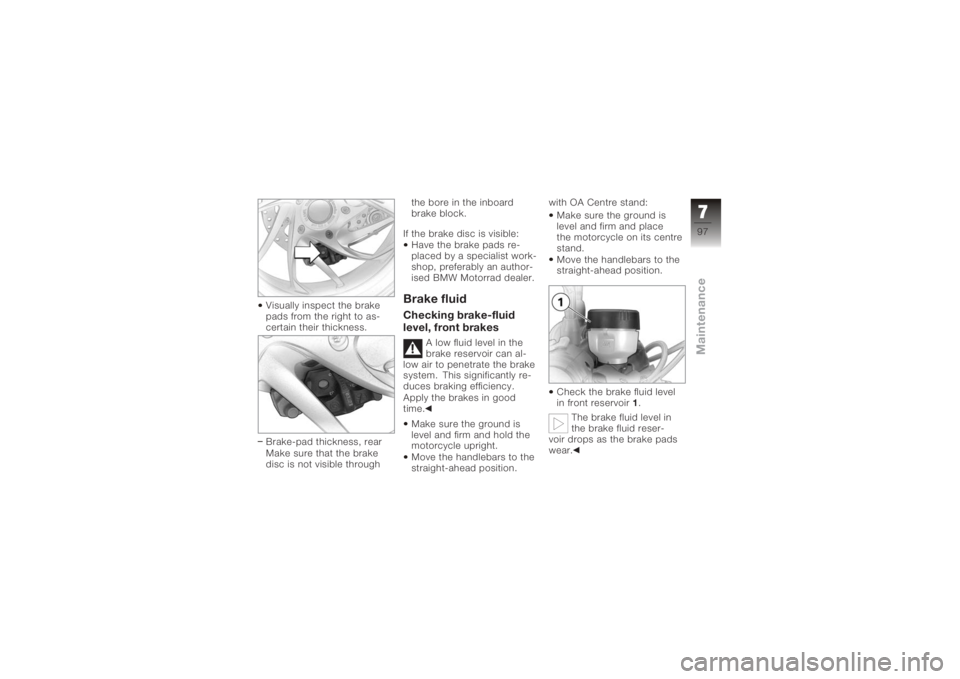
Visually inspect the brake
pads from the right to as-
certain their thickness.
Brake-pad thickness, rear
Make sure that the brake
disc is not visible throughthe bore in the inboard
brake block.
If the brake disc is visible: Have the brake pads re-
placed by a specialist work-
shop, preferably an author-
ised BMW Motorrad dealer.
Brake fluidChecking brake-fluid
level, front brakes
A low fluid level in the
brake reservoir can al-
low air to penetrate the brake
system. This significantly re-
duces braking efficiency.
Apply the brakes in good
time.
Make sure the ground is
level and firm and hold the
motorcycle upright.
Move the handlebars to the
straight-ahead position. with OA Centre stand:
Make sure the ground is
level and firm and place
the motorcycle on its centre
stand.
Move the handlebars to the
straight-ahead position.
Check the brake fluid level
in front reservoir 1.
The brake fluid level in
the brake fluid reser-
voir drops as the brake pads
wear.
797zMaintenance
Page 100 of 165
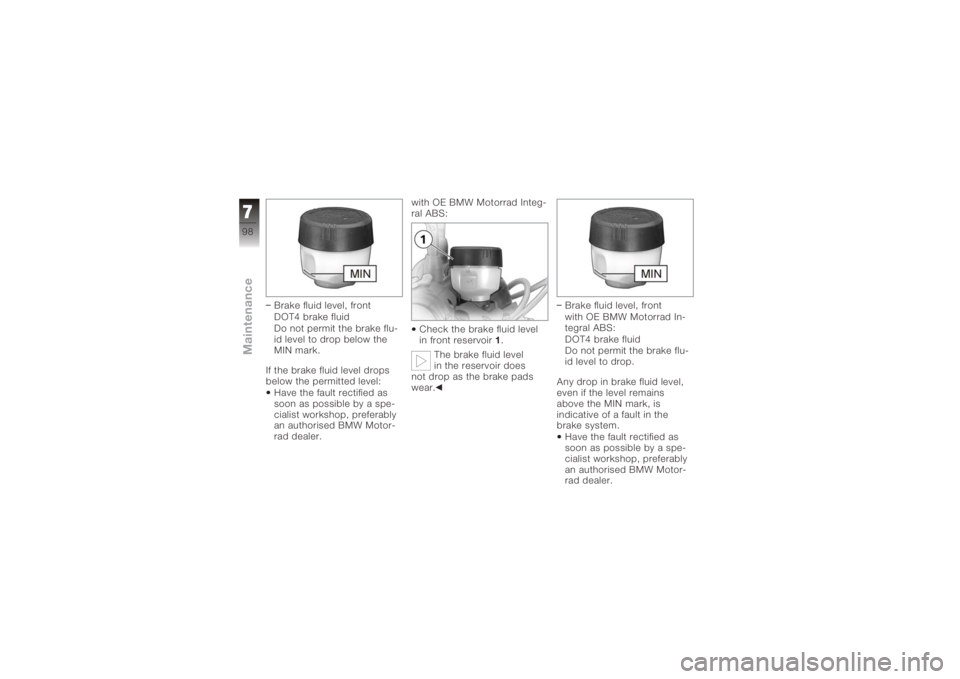
Brake fluid level, front
DOT4 brake fluid
Do not permit the brake flu-
id level to drop below the
MIN mark.
If the brake fluid level drops
below the permitted level: Have the fault rectified as
soon as possible by a spe-
cialist workshop, preferably
an authorised BMW Motor-
rad dealer. with OE BMW Motorrad Integ-
ral ABS:
Check the brake fluid level
in front reservoir 1.
The brake fluid level
in the reservoir does
not drop as the brake pads
wear. Brake fluid level, front
with OE BMW Motorrad In-
tegral ABS:
DOT4 brake fluid
Do not permit the brake flu-
id level to drop.
Any drop in brake fluid level,
even if the level remains
above the MIN mark, is
indicative of a fault in the
brake system. Have the fault rectified as
soon as possible by a spe-
cialist workshop, preferably
an authorised BMW Motor-
rad dealer.
798zMaintenance