set clock BMW MOTORRAD R 1150 RS 2002 Rider's Manual (in English)
[x] Cancel search | Manufacturer: BMW MOTORRAD, Model Year: 2002, Model line: R 1150 RS, Model: BMW MOTORRAD R 1150 RS 2002Pages: 96, PDF Size: 6.95 MB
Page 44 of 96

22
42
Safety check
Lights
Headlight
basic setting
L Note:
Do not prop the motorcycle on
the centre or side stand.
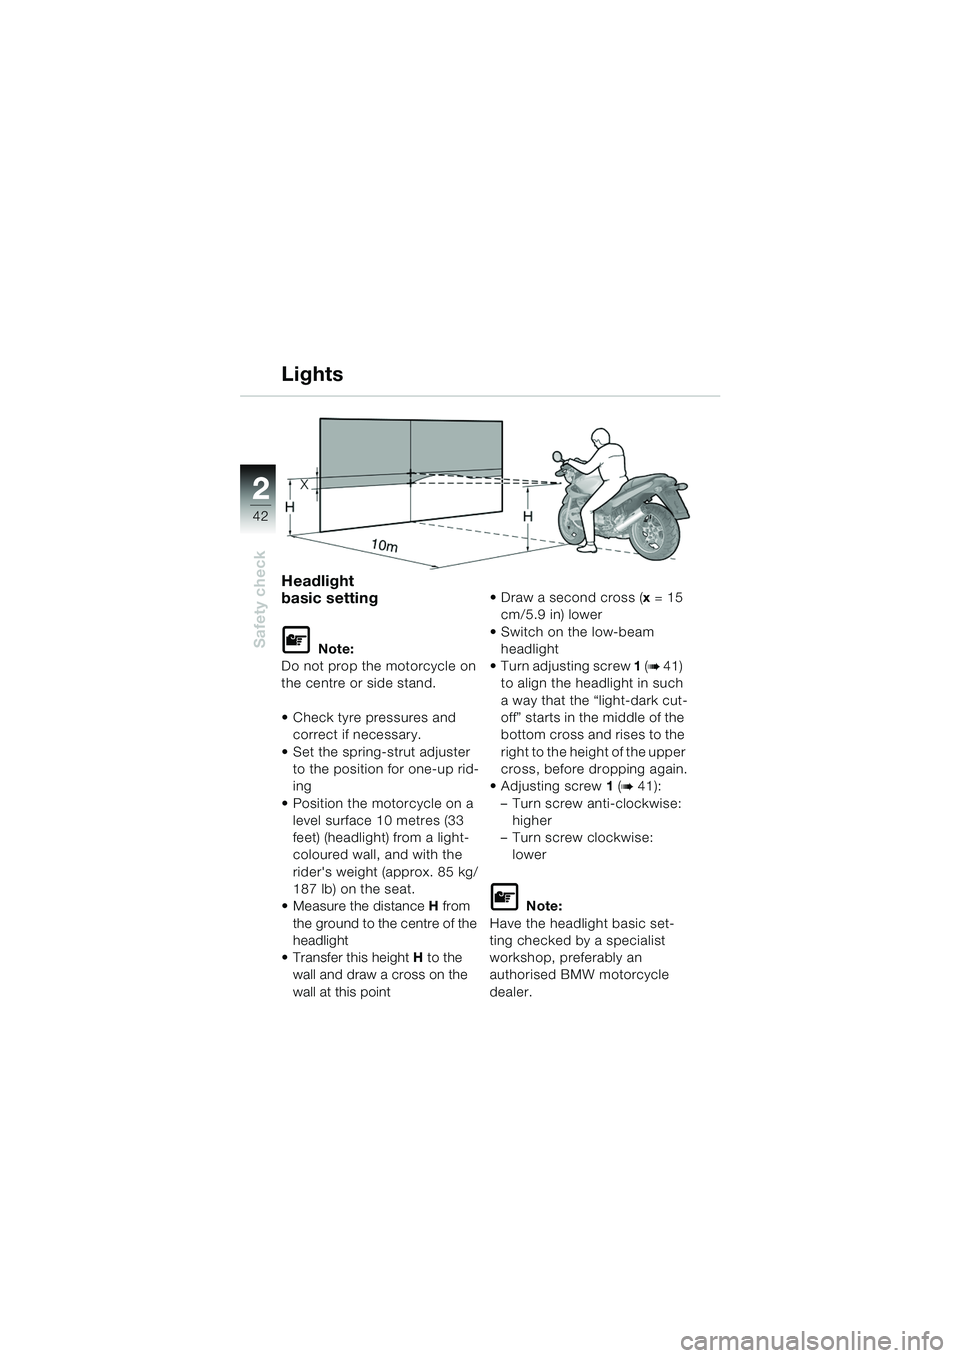
Check tyre pressures and correct if necessary.
Set the spring-strut adjuster to the position for one-up rid-
ing
Position the motorcycle on a level surface 10 metres (33
feet) (headlight) from a light-
coloured wall, and with the
rider's weight (approx. 85 kg/
187 lb) on the seat.
Measure the distance H from
the ground to the centre of the
headlight
Transfer this height H to the
wall and draw a cross on the
wall at this point Draw a second cross (
x= 15
cm/5.9 in) lower
Switch on the low-beam headlight
Turn adjusting screw 1 (
b 41)
to align the headlight in such
a way that the “light-dark cut-
off” starts in the middle of the
bottom cross and rises to the
right to the height of the upper
cross, before dropping again.
Adjusting screw 1 (
b 41):
– Turn screw anti-clockwise: higher
– Turn screw clockwise: lower
L Note:
Have the headlight basic set-
ting checked by a specialist
workshop, preferably an
authorised BMW motorcycle
dealer.
10rsbkg2.book Seite 42 Dienstag, 19. November 2002 4:56 16
Page 45 of 96

2
43
2
Safety check
1
2
d Warning:
Before the journey starts, ad-
just the front shock absorber
to suit road surface conditions
and intended riding style. Ad-
just the rear shock absorber to
suit the gross weight and load
on the motorcycle.
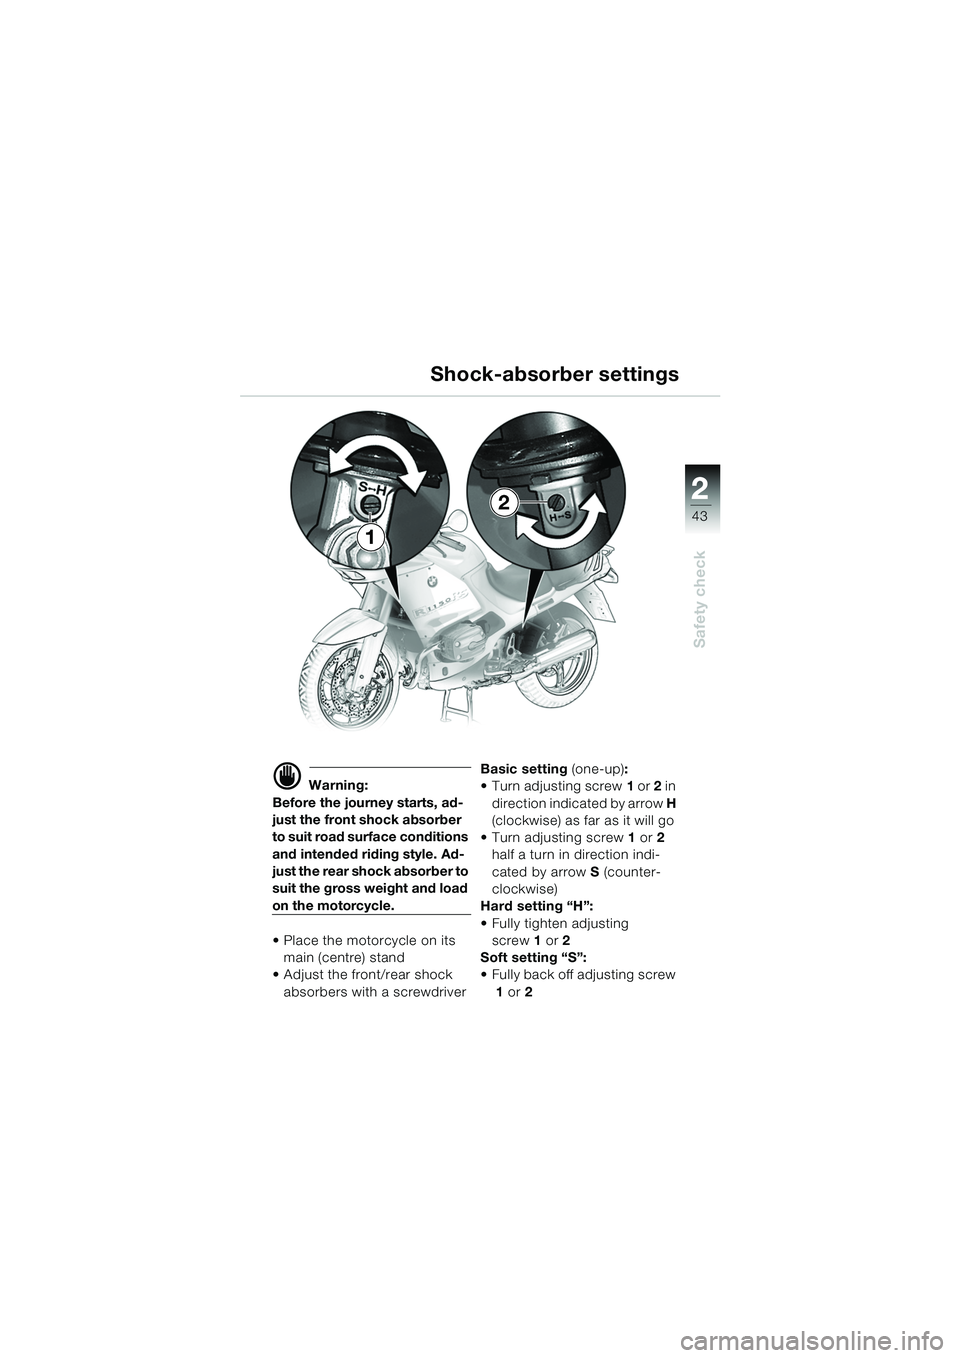
Place the motorcycle on its main (centre) stand
Adjust the front/rear shock
absorbers with a screwdriver Basic setting (one-up):
Turn adjusting screw
1 or 2 in
direction indicated by arrow H
(clockwise) as far as it will go
Turn adjusting screw 1 or 2
half a turn in direction indi-
cated by arrow S (counter-
clockwise)
Hard setting “H”:
Fully tighten adjusting screw 1 or 2
Soft setting “S”:
Fully back off adjusting screw 1 or 2
Shock-absorber settings
10rsbkg2.book Seite 43 Dienstag, 19. November 2002 4:56 16
Page 46 of 96

22
44
Safety check
d Warning:
Before the journey starts, ad-
just spring preload according
to the gross weight.
For safety reasons, never at-
tempt to alter spring preload
while the motorcycle is being
ridden.
Always halt the motorcycle
before adjusting.
If spring preload is changed,
the shock absorber has to be
adjusted accordingly.
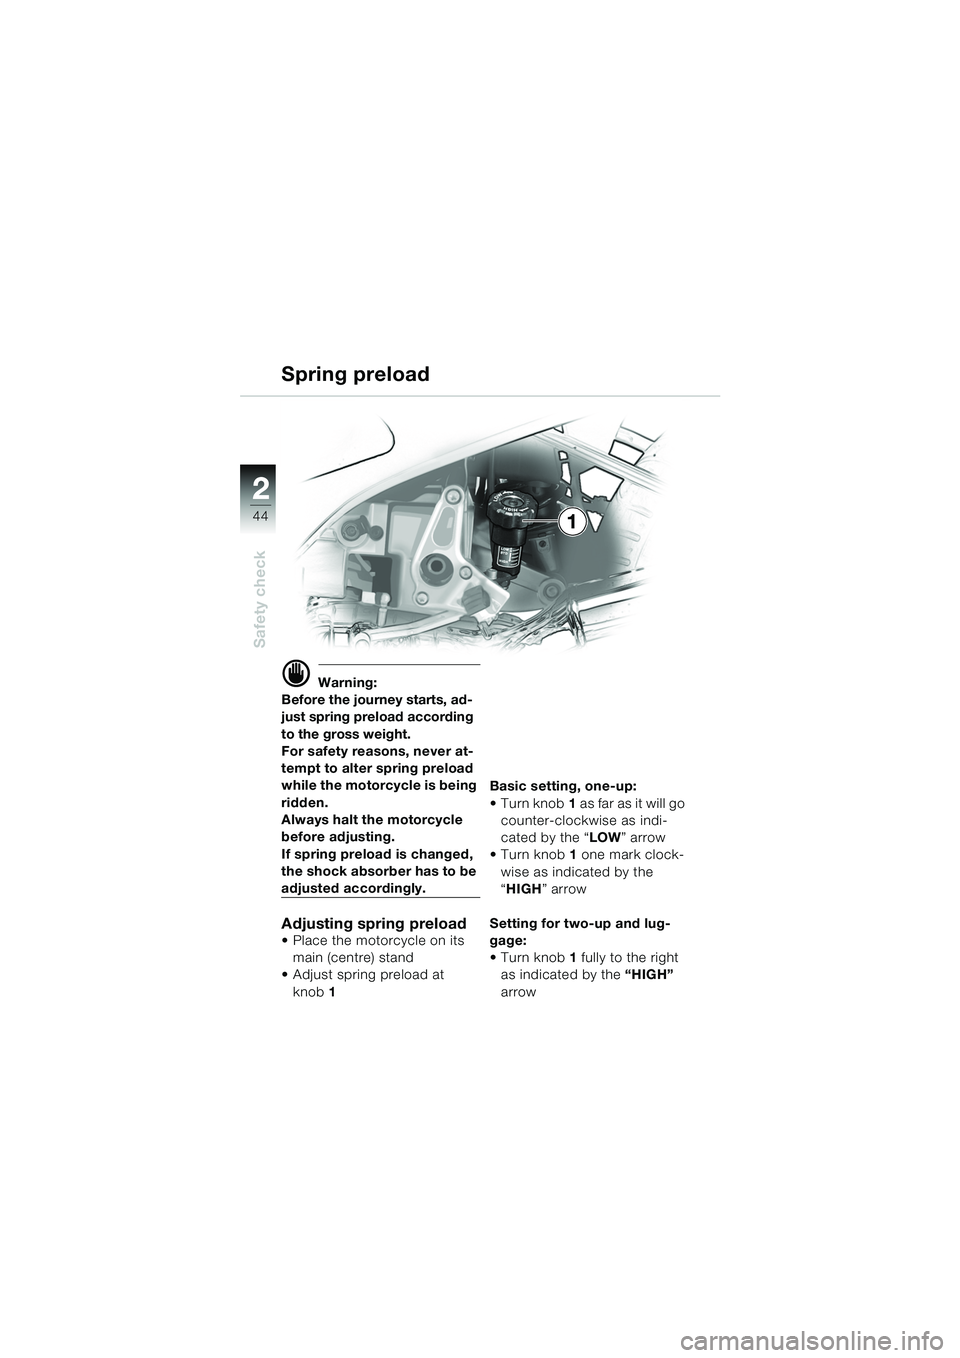
Adjusting spring preload Place the motorcycle on its main (centre) stand
Adjust spring preload at
knob 1 Basic setting, one-up:
Turn knob
1 as far as it will go
counter-clockwise as indi-
cated by the “ LOW” arrow
Turn knob 1 one mark clock-
wise as indicated by the
“ HIGH ” arrow
Setting for two-up and lug-
gage:
Turn knob 1 fully to the right
as indicated by the “HIGH”
arrow
Spring preload
1
10rsbkg2.book Seite 44 Dienstag, 19. November 2002 4:56 16
Page 93 of 96

91
Index
i
QQuantity, 25
RRear brakesBrake fluid reservoir, 5
Rear suspension, shock-absorber setting, 4
Refuelling, 24
Removing System case, 19
Reservoir for clutch fluid, 4
Reset knob for trip meter, 6
Residual braking function, 34, 75
Revolution counter, 6
Rider Information Display, 66, 67 Clock, 67
Engine oil temperature display,
66
Fuel gauge, 67
Gear indicator, 67
Rider Information Display (FID), 6
Rider’s equipment, 84
Riding, 68
Riding and changing gear, 69
Risk of asphyxiation, 52
Risk of fatal accident, 53
Risk of fire, 52
Running in, 58, 59
Running-in speeds, 58
SSafety checklist, 20
Safety instructions Catalytic converter, 53
General, 52, 53
Salt on brakes, 70
Seat, 16
Seat lock, 5
Seat, adjusting, 17
Seat, removing, 16
Service, 81
Service worldwide, 82
Shock absorbers, 43
Shock-absorber settings, 43
Side stand, 54, 55
Sight glass for engine oil, 4
Spark plug, left, 4
Spark plug, right, 5
Speedometer, 6
Spring preload, 44 Front wheel, 44
Spring preload, adjusting, 44
Starter button, 13
Starting, 62, 63
Suspension strut, 4
System case, 18, 19
Q - S
10rsbkg2.book Seite 91 Dienstag, 19. November 2002 4:56 16