climate control CADILLAC ESCALADE 2010 3.G User Guide
[x] Cancel search | Manufacturer: CADILLAC, Model Year: 2010, Model line: ESCALADE, Model: CADILLAC ESCALADE 2010 3.GPages: 616, PDF Size: 39.41 MB
Page 136 of 616
When you want to open a rear door when the securitylock is on, do the following:
1. Unlock the door by lifting the rear door manuallock, using the power door lock switch, or theRemote Keyless Entry (RKE) transmitter, if thevehicle has one.
2. Open the door from the outside.
To cancel the rear door security lock, do the following:
1. Unlock the door and open it from the outside.
2. Insert the key into the security lock slot and turn itso the slot is in the vertical position.
Lockout Protection
This feature protects you from locking the key in thevehicle when the key is in the ignition and a front dooris open.
If the driver's side power door lock switch is pressedwhen the driver's door is open and the key is in theignition, all of the doors will lock and then the driver'sdoor will unlock.
If the passenger's side power door lock switch ispressed when the front passenger's door is open andthe key is in the ignition, all of the doors will lock andthen the front passenger's door will unlock.
Liftgate/Liftglass
{WARNING:
It can be dangerous to drive with the liftglass or
liftgate open because carbon monoxide (CO) gas
can come into your vehicle. You cannot see or
smell CO. It can cause unconsciousness and
even death.
If you must drive with the liftglass or liftgate open,
or if electrical wiring or other cable connections
must pass through the seal between the body and
the liftglass or liftgate:
.Make sure all other windows are shut.
.Turn the fan on your heating or cooling
system to its highest speed with the
recirculation mode off. That will force outside
air into your vehicle. SeeDual Automatic
Climate Control System on page 4!20.
.If you have air outlets on or under the
instrument panel, open them all the way.
.If your vehicle is equipped with a power
liftgate, disable the power liftgate function.
SeeEngine Exhaust on page 3!41.
3-12
Page 138 of 616
Power Liftgate
Power Liftgate Operation
{WARNING:
Exhaust gases can enter the vehicle if it is driven
with the liftgate, trunk/hatch open, or with any
objects that pass through the seal between the
body and the trunk/hatch or liftgate. Engine
exhaust contains Carbon Monoxide (CO) which
cannot be seen or smelled. It can cause
unconsciousness and even death.
(Continued)
WARNING: (Continued)
If the vehicle must be driven with the liftgate,
or trunk/hatch open:
.Close all of the windows.
.Fully open the air outlets on or under the
instrument panel.
.Adjust the Climate Control system to a setting
that brings in only outside air and set the fan
speed to the highest setting. See Climate
Control System in the Index.
.If the vehicle is equipped with a power liftgate,
disable the power liftgate function.
For more information about carbon monoxide, see
Engine Exhaust on page 3!41.
3-14
Page 141 of 616
Manual Operation of Power Liftgate
To change the liftgate to manual operation, press theswitch on the overhead console to the OFF position.
With the power liftgate disabled and all of the doorsunlocked, the liftgate can be manually openedand closed.
To open the liftgate, press the touchpad on the handleon the outside of the liftgate, and lift the gate open.To close the liftgate, use the pull cup to lower theliftgate and close. The liftgate latch will power close.Always close the liftgate before driving.
If the RKE button or the power close button on theliftgate is pressed while power operation is disabled, thelights will flash three times, but the liftgate will not move.
It is not recommended that you drive with the liftgateopen, however, if you must drive with the liftgate open,the liftgate should be set to manual operation bypressing the OFF switch on the center console.
The liftgate has an electric latch. If the battery isdisconnected or has low voltage, the liftgate will notopen. The liftgate will resume operation when thebattery is reconnected and charged.
If the battery is properly connected with adequatevoltage, the switch is not disabled, and the liftgate stillwill not function, your vehicle should be taken to adealer/retailer for service.
Power Assist Steps
Your vehicle may have power assist steps.
The power assist steps automatically extend frombeneath the vehicle on the side in which the door hasbeen opened. Once the door is closed, the assist stepsautomatically move back under the vehicle after a briefdelay. The vehicle must not be moving for the assiststeps to extend or retract.
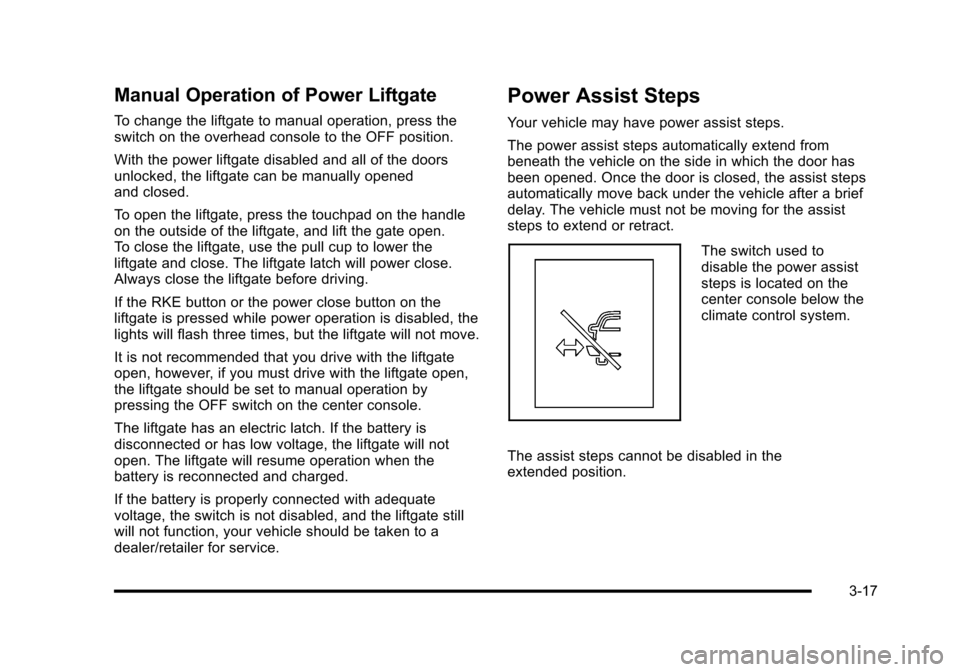
The switch used todisable the power assiststeps is located on thecenter console below theclimate control system.
The assist steps cannot be disabled in theextended position.
3-17
Page 154 of 616
2. If the engine does not start after 5!10 seconds,especially in very cold weather (below 0°F or!18°C), it could be flooded with too much gasoline.Try pushing the accelerator pedal all the way to thefloor and holding it there as you hold the key inSTART for up to a maximum of 15 seconds. Wait atleast 15 seconds between each try, to allow thecranking motor to cool down. When the enginestarts, let go of the key and accelerator. If thevehicle starts briefly but then stops again, do thesame thing. This clears the extra gasoline from theengine. Do not race the engine immediately afterstarting it. Operate the engine and transmissiongently until the oil warms up and lubricates allmoving parts.
Notice:The engine is designed to work with theelectronics in the vehicle. If you add electricalparts or accessories, you could change the waythe engine operates. Before adding electricalequipment, check with your dealer/retailer. If youdo not, the engine might not perform properly.Any resulting damage would not be covered bythe vehicle warranty.
Adjustable Throttle and Brake Pedal
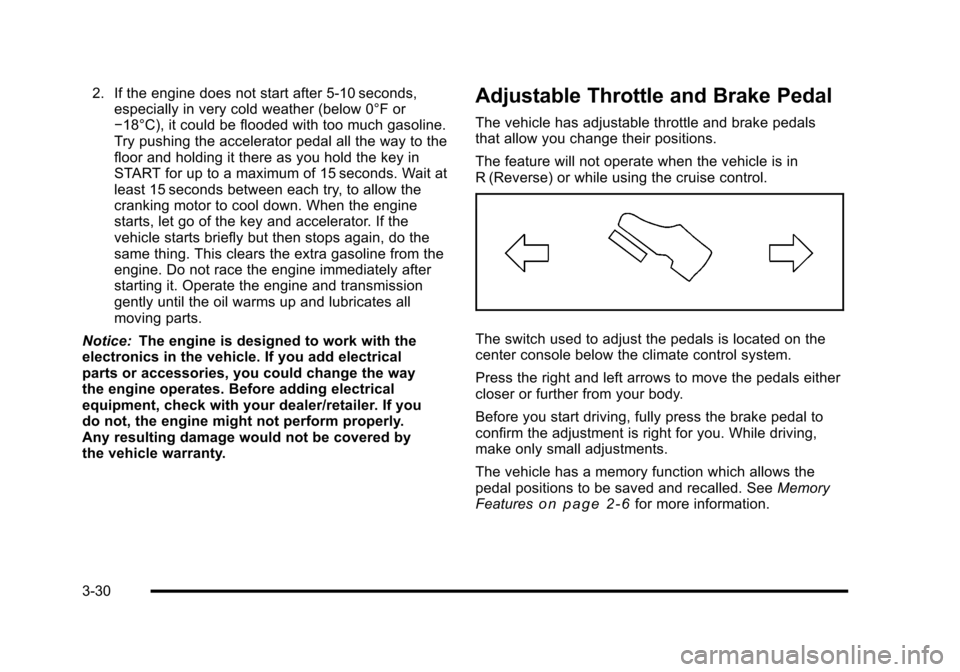
The vehicle has adjustable throttle and brake pedalsthat allow you change their positions.
The feature will not operate when the vehicle is inR (Reverse) or while using the cruise control.
The switch used to adjust the pedals is located on thecenter console below the climate control system.
Press the right and left arrows to move the pedals eithercloser or further from your body.
Before you start driving, fully press the brake pedal toconfirm the adjustment is right for you. While driving,make only small adjustments.
The vehicle has a memory function which allows thepedal positions to be saved and recalled. SeeMemoryFeatureso n p a g e 2!6for more information.
3-30
Page 169 of 616
Outside Convex Mirror
{WARNING:
A convex mirror can make things, like other
vehicles, look farther away than they really are.
If you cut too sharply into the right lane, you could
hit a vehicle on the right. Check the inside mirror
or glance over your shoulder before changing
lanes.
The passenger side mirror is convex shaped. A convexmirror's surface is curved so more can be seen from thedriver seat.
Outside Heated Mirrors
<(Rear Window Defogger):Press to heatthe mirrors.
See“Rear Window Defogger”underDual AutomaticClimate Control Systemon page 4!20for moreinformation.
Side Blind Zone Alert (SBZA)
If your vehicle has the Side Blind Zone Alert (SBZA)system, seeSide Blind Zone Alert (SBZA)onpage 3!48.
3-45
Page 193 of 616
Section 4 Instrument Panel
Instrument Panel Overview. . . . . . . . . . . . . . . . . . . . . . . . 4-3Hazard Warning Flashers . . . . . . . . . . . . . . . . . . . . . . . 4-3Horn . . . . . . . . . . . . . . . . . . . . . . . . . . . . . . . . . . . . . . . . . . . . 4-3Tilt Wheel . . . . . . . . . . . . . . . . . . . . . . . . . . . . . . . . . . . . . . . 4-3Heated Steering Wheel . . . . . . . . . . . . . . . . . . . . . . . . . 4-4Turn Signal/Multifunction Lever . . . . . . . . . . . . . . . . . . 4-4Turn and Lane-Change Signals . . . . . . . . . . . . . . . . . 4-5Headlamp High/Low-Beam Changer . . . . . . . . . . . . 4-5Flash-to-Pass . . . . . . . . . . . . . . . . . . . . . . . . . . . . . . . . . . . 4-6Windshield Wipers . . . . . . . . . . . . . . . . . . . . . . . . . . . . . . 4-6Windshield Washer . . . . . . . . . . . . . . . . . . . . . . . . . . . . . 4-7Rear Window Wiper/Washer . . . . . . . . . . . . . . . . . . . . 4-7Cruise Control . . . . . . . . . . . . . . . . . . . . . . . . . . . . . . . . . . 4-8Exterior Lamps . . . . . . . . . . . . . . . . . . . . . . . . . . . . . . . . . 4-11Headlamps on Reminder . . . . . . . . . . . . . . . . . . . . . . 4-15Daytime Running Lamps (DRL) . . . . . . . . . . . . . . . . 4-15Automatic Headlamp System . . . . . . . . . . . . . . . . . . 4-15Fog Lamps . . . . . . . . . . . . . . . . . . . . . . . . . . . . . . . . . . . . 4-16Instrument Panel Brightness . . . . . . . . . . . . . . . . . . . 4-16Dome Lamps . . . . . . . . . . . . . . . . . . . . . . . . . . . . . . . . . . 4-17Dome Lamp Override . . . . . . . . . . . . . . . . . . . . . . . . . . 4-17Entry Lighting . . . . . . . . . . . . . . . . . . . . . . . . . . . . . . . . . . 4-17Exit Lighting . . . . . . . . . . . . . . . . . . . . . . . . . . . . . . . . . . . 4-17
Reading Lamps . . . . . . . . . . . . . . . . . . . . . . . . . . . . . . . . 4-17Electric Power Management . . . . . . . . . . . . . . . . . . . 4-18Battery Run-Down Protection . . . . . . . . . . . . . . . . . . 4-18Accessory Power Outlet(s) . . . . . . . . . . . . . . . . . . . . . 4-19Ashtray(s) and Cigarette Lighter . . . . . . . . . . . . . . . 4-20Analog Clock . . . . . . . . . . . . . . . . . . . . . . . . . . . . . . . . . . 4-20
Climate Controls. . . . . . . . . . . . . . . . . . . . . . . . . . . . . . . . . . 4-20Dual Automatic Climate Control System . . . . . . . 4-20Outlet Adjustment . . . . . . . . . . . . . . . . . . . . . . . . . . . . . . 4-25Rear Air Conditioning and Heating System andElectronic Climate Controls . . . . . . . . . . . . . . . . . . 4-26
Warning Lights, Gages, and Indicators. . . . . . . . . . 4-27Instrument Panel Cluster . . . . . . . . . . . . . . . . . . . . . . . 4-28Speedometer and Odometer . . . . . . . . . . . . . . . . . . . 4-29Trip Odometer . . . . . . . . . . . . . . . . . . . . . . . . . . . . . . . . . 4-29Tachometer . . . . . . . . . . . . . . . . . . . . . . . . . . . . . . . . . . . . 4-29Safety Belt Reminders . . . . . . . . . . . . . . . . . . . . . . . . . 4-29Airbag Readiness Light . . . . . . . . . . . . . . . . . . . . . . . . 4-30Passenger Airbag Status Indicator . . . . . . . . . . . . . 4-31Charging System Light . . . . . . . . . . . . . . . . . . . . . . . . 4-32Brake System Warning Light . . . . . . . . . . . . . . . . . . . 4-33Antilock Brake System (ABS) Warning Light . . . 4-34
4-1
Page 210 of 616
Electric Power Management
The vehicle has Electric Power Management (EPM) thatestimates the battery's temperature and state of charge.It then adjusts the voltage for best performance andextended life of the battery.
When the battery's state of charge is low, the voltage israised slightly to quickly bring the charge back up.When the state of charge is high, the voltage is loweredslightly to prevent overcharging. If the vehicle has avoltmeter gage or a voltage display on the DriverInformation Center (DIC), you may see the voltagemove up or down. This is normal. If there is a problem,an alert will be displayed.
The battery can be discharged at idle if the electricalloads are very high. This is true for all vehicles. This isbecause the generator (alternator) may not be spinningfast enough at idle to produce all the power that isneeded for very high electrical loads.
A high electrical load occurs when several of thefollowing are on, such as: headlamps, high beams, foglamps, rear window defogger, climate control fan at highspeed, heated seats, engine cooling fans, trailer loads,and loads plugged into accessory power outlets.
EPM works to prevent excessive discharge of thebattery. It does this by balancing the generator's outputand the vehicle's electrical needs. It can increaseengine idle speed to generate more power, wheneverneeded. It can temporarily reduce the power demandsof some accessories.
Normally, these actions occur in steps or levels, withoutbeing noticeable. In rare cases at the highest levels ofcorrective action, this action may be noticeable to thedriver. If so, a Driver Information Center (DIC) messagemight be displayed, such as BATTERY SAVERACTIVE, BATTERY VOLTAGE LOW, or LOWBATTERY. If this message is displayed, it isrecommended that the driver reduce the electrical loadsas much as possible. SeeDIC Warnings and Messageson page 4!48.
Battery Run-Down Protection
This feature shuts off the dome lamps if they areleft on for more than 10 minutes when the ignition is inLOCK/OFF. This helps to prevent the battery fromrunning down.
4-18
Page 212 of 616
Ashtray(s) and Cigarette Lighter
The front ashtray and cigarette lighter are located in thecenter console near the cupholders, if the vehicle hasthem. Press on the access door to open it and use theashtray and lighter.
Notice:If papers, pins, or other flammable items areput in the ashtray, hot cigarettes or other smokingmaterials could ignite them and possibly damagethe vehicle. Never put flammable items in theashtray.
To remove the ashtray, pull it from the center console.Slide it back in and push down to be sure it is secure.
To use the cigarette lighter, push it in all the way, and letgo. When it is ready, it will pop back out by itself.
Notice:Holding a cigarette lighter in while it isheating does not let the lighter back away from theheating element when it is hot. Damage fromoverheating can occur to the lighter or heatingelement, or a fuse could be blown. Do not hold acigarette lighter in while it is heating.
Analog Clock
The analog clock is not connected with any othervehicle system and runs by itself.
To adjust the clock, do the following:
1. Locate the adjustment button, near the lower leftcorner of the clock.
2. Push and hold the adjustment button to advancethe clock hands. Holding the button down willcause the clock to advance faster. Release thebutton before you get to the desired time.
3. Push and release the button to increase the timeby one minute increments until the desired time isreached.
Climate Controls
Dual Automatic Climate Control
System
The heating, cooling, and ventilation in the vehicle canbe controlled with this system. The vehicle also has aflow-through ventilation system described later in thissection.
4-20
Page 213 of 616
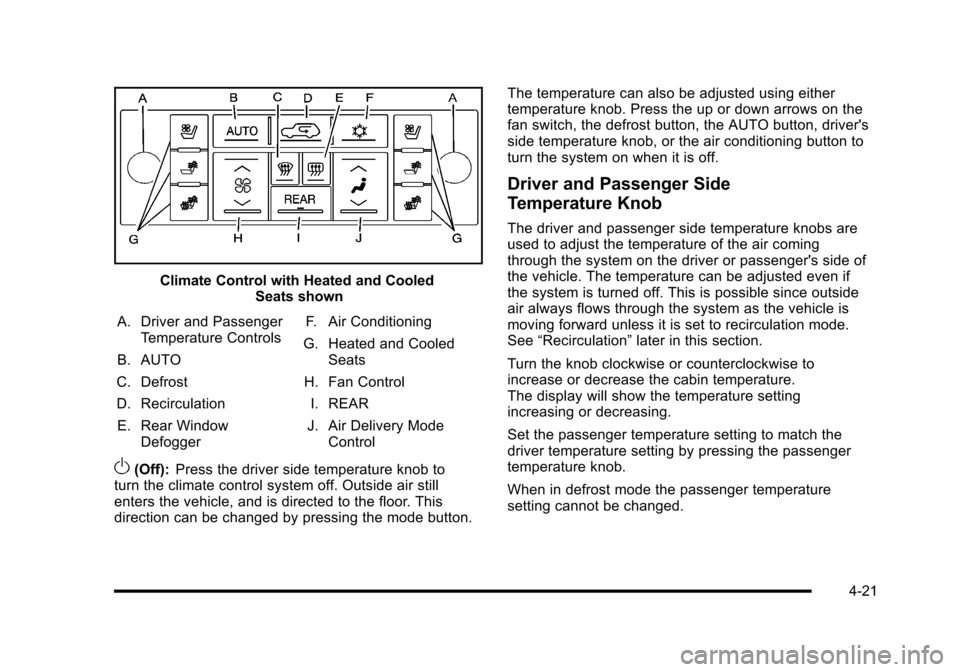
Climate Control with Heated and CooledSeats shown
A. Driver and PassengerTemperature Controls
B. AUTO
C. Defrost
D. Recirculation
E. Rear WindowDefogger
F. Air Conditioning
G. Heated and CooledSeats
H. Fan Control
I. REAR
J. Air Delivery ModeControl
O(Off):Press the driver side temperature knob toturn the climate control system off. Outside air stillenters the vehicle, and is directed to the floor. Thisdirection can be changed by pressing the mode button.
The temperature can also be adjusted using eithertemperature knob. Press the up or down arrows on thefan switch, the defrost button, the AUTO button, driver'sside temperature knob, or the air conditioning button toturn the system on when it is off.
Driver and Passenger Side
Temperature Knob
The driver and passenger side temperature knobs areused to adjust the temperature of the air comingthrough the system on the driver or passenger's side ofthe vehicle. The temperature can be adjusted even ifthe system is turned off. This is possible since outsideair always flows through the system as the vehicle ismoving forward unless it is set to recirculation mode.See“Recirculation”later in this section.
Turn the knob clockwise or counterclockwise toincrease or decrease the cabin temperature.The display will show the temperature settingincreasing or decreasing.
Set the passenger temperature setting to match thedriver temperature setting by pressing the passengertemperature knob.
When in defrost mode the passenger temperaturesetting cannot be changed.
4-21
Page 215 of 616
Manual Operation
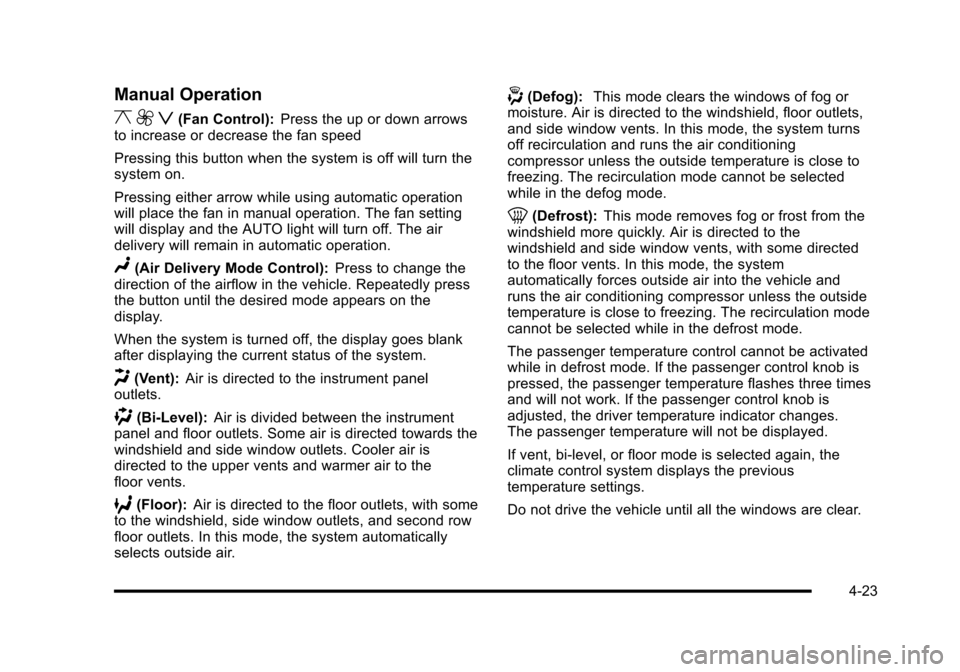
y9z(Fan Control):Press the up or down arrowsto increase or decrease the fan speed
Pressing this button when the system is off will turn thesystem on.
Pressing either arrow while using automatic operationwill place the fan in manual operation. The fan settingwill display and the AUTO light will turn off. The airdelivery will remain in automatic operation.
N(Air Delivery Mode Control):Press to change thedirection of the airflow in the vehicle. Repeatedly pressthe button until the desired mode appears on thedisplay.
When the system is turned off, the display goes blankafter displaying the current status of the system.
H(Vent):Air is directed to the instrument paneloutlets.
)(Bi-Level):Air is divided between the instrumentpanel and floor outlets. Some air is directed towards thewindshield and side window outlets. Cooler air isdirected to the upper vents and warmer air to thefloor vents.
6(Floor):Air is directed to the floor outlets, with someto the windshield, side window outlets, and second rowfloor outlets. In this mode, the system automaticallyselects outside air.
-(Defog):This mode clears the windows of fog ormoisture. Air is directed to the windshield, floor outlets,and side window vents. In this mode, the system turnsoff recirculation and runs the air conditioningcompressor unless the outside temperature is close tofreezing. The recirculation mode cannot be selectedwhile in the defog mode.
0(Defrost):This mode removes fog or frost from thewindshield more quickly. Air is directed to thewindshield and side window vents, with some directedto the floor vents. In this mode, the systemautomatically forces outside air into the vehicle andruns the air conditioning compressor unless the outsidetemperature is close to freezing. The recirculation modecannot be selected while in the defrost mode.
The passenger temperature control cannot be activatedwhile in defrost mode. If the passenger control knob ispressed, the passenger temperature flashes three timesand will not work. If the passenger control knob isadjusted, the driver temperature indicator changes.The passenger temperature will not be displayed.
If vent, bi-level, or floor mode is selected again, theclimate control system displays the previoustemperature settings.
Do not drive the vehicle until all the windows are clear.
4-23