light CHEVROLET EXPRESS 2020 Get To Know Guide
[x] Cancel search | Manufacturer: CHEVROLET, Model Year: 2020, Model line: EXPRESS, Model: CHEVROLET EXPRESS 2020Pages: 356, PDF Size: 5.7 MB
Page 2 of 356
Chevrolet Express Owner Manual (GMNA-Localizing-U.S./Canada/Mexico-
13882570) - 2020 - CRC - 11/1/19
ContentsIntroduction . . . . . . . . . . . . . . . . . . . . . . 2
Keys, Doors, and Windows . . . . . . 7
Seats and Restraints . . . . . . . . . . . 26
Storage . . . . . . . . . . . . . . . . . . . . . . . . . 76
Instruments and Controls . . . . . . . 78
Lighting . . . . . . . . . . . . . . . . . . . . . . . 110
Infotainment System . . . . . . . . . . . 117
Climate Controls . . . . . . . . . . . . . . 144
Driving and Operating . . . . . . . . . 150
Vehicle Care . . . . . . . . . . . . . . . . . . 214
Service and Maintenance . . . . . 303
Technical Data . . . . . . . . . . . . . . . . 317
Customer Information . . . . . . . . . 321
Reporting Safety Defects . . . . . . 331
OnStar . . . . . . . . . . . . . . . . . . . . . . . . 335
Connected Services . . . . . . . . . . . 341
Index . . . . . . . . . . . . . . . . . . . . 344
Page 4 of 356
Chevrolet Express Owner Manual (GMNA-Localizing-U.S./Canada/Mexico-
13882570) - 2020 - CRC - 11/1/19
Introduction 3
{Danger
Danger indicates a hazard with a
high level of risk which will result
in serious injury or death.
{Warning
Warning indicates a hazard that
could result in injury or death.
Caution
Caution indicates a hazard that
could result in property or vehicle
damage.
A circle with a slash through it is a
safety symbol which means“Do
not,” “Do not do this,” or“Do not let
this happen.”
Symbols
The vehicle has components and
labels that use symbols instead of
text. Symbols are shown along with
the text describing the operation or
information relating to a specific
component, control, message,
gauge, or indicator.
M: Shown when the owner ’s
manual has additional instructions
or information.
*: Shown when the service
manual has additional instructions
or information.
0: Shown when there is more
information on another page —
“see page.” Vehicle Symbol Chart
Here are some additional symbols
that may be found on the vehicle
and what they mean. See the
features in this manual for
information.
u:
Air Conditioning System
G: Air Conditioning Refrigerant Oil
9:Airbag Readiness Light
!: Antilock Brake System (ABS)
$:Brake System Warning Light
9:Dispose of Used Components
Properly
P: Do Not Apply High Pressure
Water
B: Engine Coolant Temperature
_: Flame/Fire Prohibited
H:Flammable
[:Forward Collision Alert
R:Fuse Block Cover Lock
Location
+: Fuses
Page 7 of 356
Chevrolet Express Owner Manual (GMNA-Localizing-U.S./Canada/Mexico-
13882570) - 2020 - CRC - 11/1/19
6 Introduction
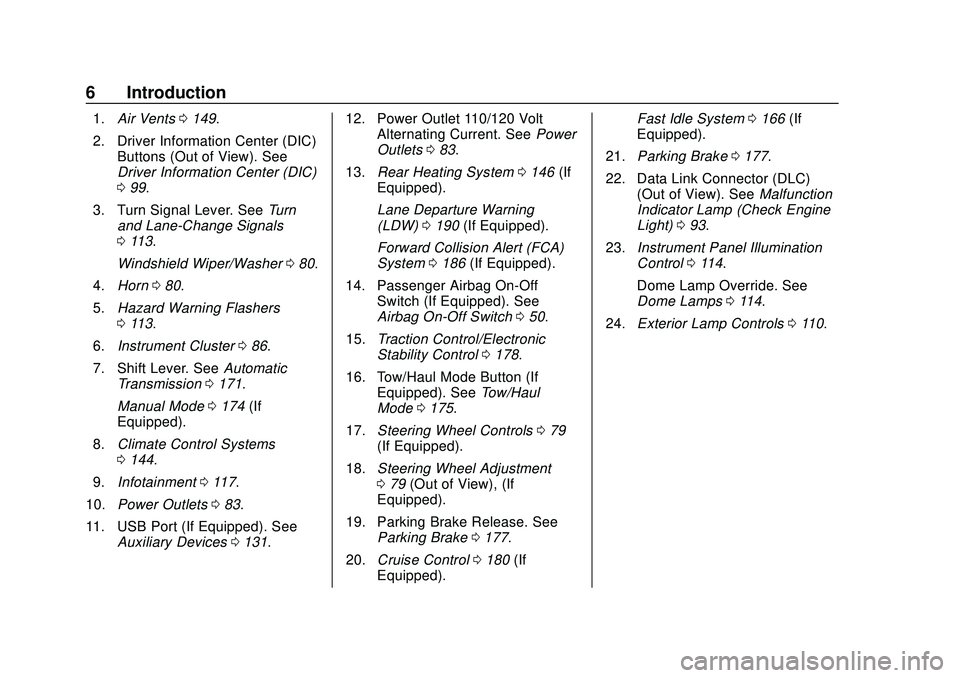
1.Air Vents 0149.
2. Driver Information Center (DIC) Buttons (Out of View). See
Driver Information Center (DIC)
099.
3. Turn Signal Lever. See Turn
and Lane-Change Signals
0 113.
Windshield Wiper/Washer 080.
4. Horn 080.
5. Hazard Warning Flashers
0113.
6. Instrument Cluster 086.
7. Shift Lever. See Automatic
Transmission 0171.
Manual Mode 0174 (If
Equipped).
8. Climate Control Systems
0144.
9. Infotainment 0117.
10. Power Outlets 083.
11. USB Port (If Equipped). See Auxiliary Devices 0131. 12. Power Outlet 110/120 Volt
Alternating Current. See Power
Outlets 083.
13. Rear Heating System 0146 (If
Equipped).
Lane Departure Warning
(LDW) 0190 (If Equipped).
Forward Collision Alert (FCA)
System 0186 (If Equipped).
14. Passenger Airbag On-Off Switch (If Equipped). See
Airbag On-Off Switch 050.
15. Traction Control/Electronic
Stability Control 0178.
16. Tow/Haul Mode Button (If Equipped). See Tow/Haul
Mode 0175.
17. Steering Wheel Controls 079
(If Equipped).
18. Steering Wheel Adjustment
079 (Out of View), (If
Equipped).
19. Parking Brake Release. See Parking Brake 0177.
20. Cruise Control 0180 (If
Equipped). Fast Idle System
0166 (If
Equipped).
21. Parking Brake 0177.
22. Data Link Connector (DLC) (Out of View). See Malfunction
Indicator Lamp (Check Engine
Light) 093.
23. Instrument Panel Illumination
Control 0114.
Dome Lamp Override. See
Dome Lamps 0114.
24. Exterior Lamp Controls 0110.
Page 9 of 356
Chevrolet Express Owner Manual (GMNA-Localizing-U.S./Canada/Mexico-
13882570) - 2020 - CRC - 11/1/19
8 Keys, Doors, and Windows
{Warning
If the key is unintentionally
rotated while the vehicle is
running, the ignition could be
moved out of the RUN position.
This could be caused by heavy
items hanging from the key ring,
or by large or long items attached
to the key ring that could be
contacted by the driver or
steering wheel. If the ignition
moves out of the RUN position,
the engine will shut off, braking
and steering power assist may be(Continued)
Warning (Continued)
impacted, and airbags may not
deploy. To reduce the risk of
unintentional rotation of the
ignition key, do not change the
way the ignition key and Remote
Keyless Entry (RKE) transmitter,
if equipped, are connected to the
provided key rings.
The ignition key and key rings, and
RKE transmitter, if equipped, are
designed to work together as a
system to reduce the risk of
unintentionally moving the key out
of the RUN position. The ignition
key has a small hole to allow
attachment of the provided key ring.
It is important that any replacement
ignition keys have a small hole. See
your dealer if a replacement key is
required.
The combination and size of the
rings that came with your keys were
specifically selected for your
vehicle. The rings are connected to
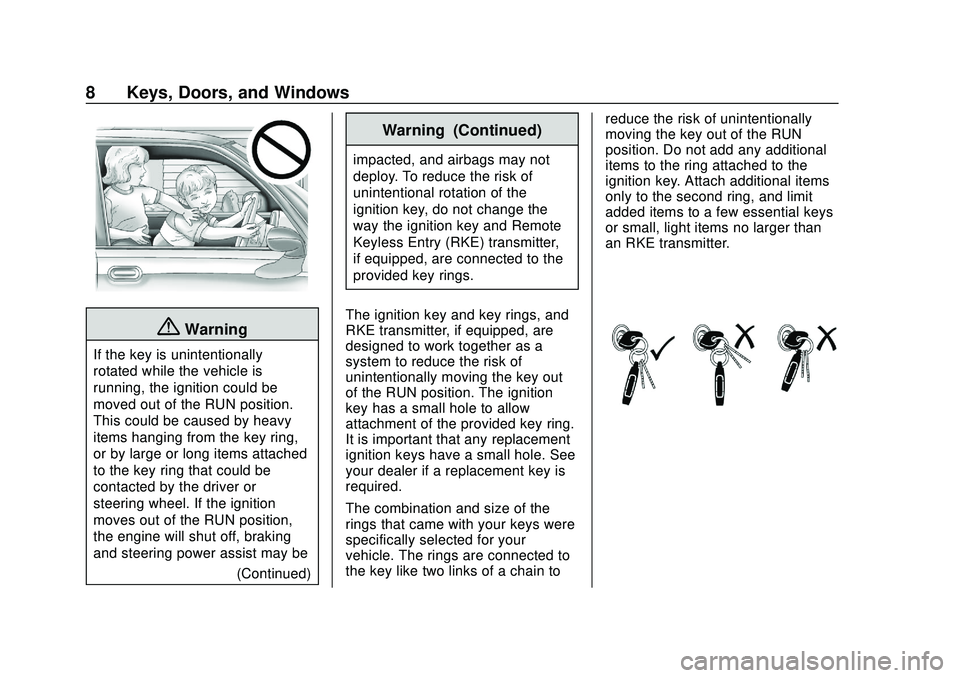
the key like two links of a chain to reduce the risk of unintentionally
moving the key out of the RUN
position. Do not add any additional
items to the ring attached to the
ignition key. Attach additional items
only to the second ring, and limit
added items to a few essential keys
or small, light items no larger than
an RKE transmitter.
Page 14 of 356
Chevrolet Express Owner Manual (GMNA-Localizing-U.S./Canada/Mexico-
13882570) - 2020 - CRC - 11/1/19
Keys, Doors, and Windows 13
.The key is in the ignition.
. The hood is open.
. The hazard warning flashers
are on.
. There is an emission control
system malfunction. See
Malfunction Indicator Lamp
(Check Engine Light) 093.
. The engine coolant temperature
is too high.
. The oil pressure is low.
. The vehicle is not in park.
. Two remote starts or a start with
an extension have already been
provided.
To turn on or off, see Vehicle
Personalization 0105.
Door Locks
{Warning
.
Passengers, especially
children, can easily open
the doors and fall out of a
(Continued)
Warning (Continued)
moving vehicle. When a
door is locked, the handle
will not open it. The chance
of being thrown out of the
vehicle in a crash is
increased if the doors are
not locked. So, all
passengers should wear
seat belts properly and the
doors should be locked
whenever the vehicle is
driven.
. Young children who get into
unlocked vehicles may be
unable to get out. A child
can be overcome by
extreme heat and can suffer
permanent injuries or even
death from heat stroke.
Always lock the vehicle
whenever leaving it.
. Outsiders can easily enter
through an unlocked door
when you slow down or stop
(Continued)
Warning (Continued)
the vehicle. Locking the
doors can help prevent this
from happening.
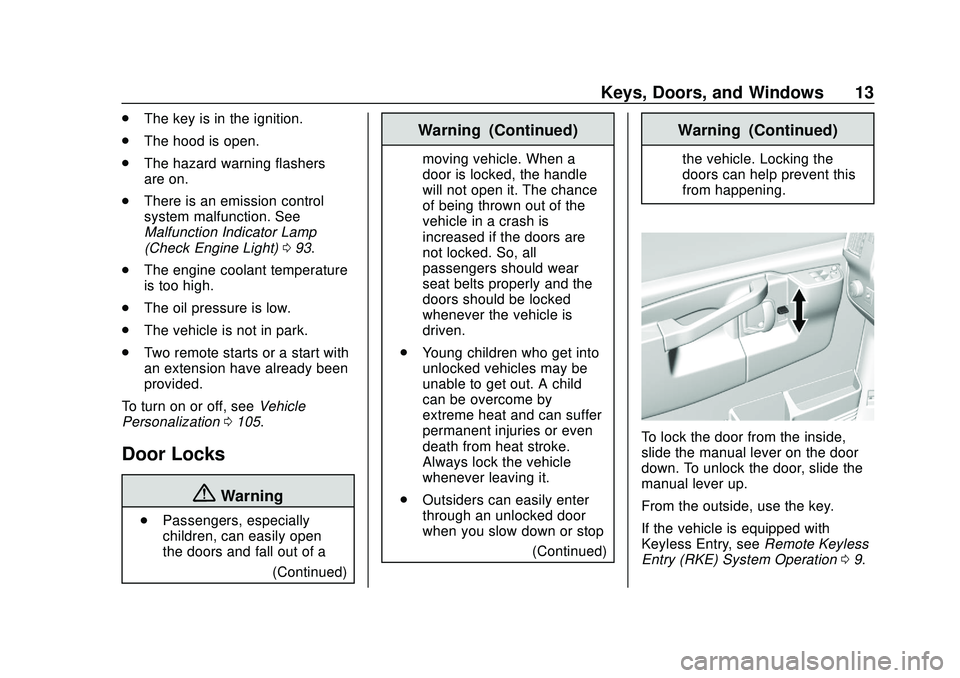
To lock the door from the inside,
slide the manual lever on the door
down. To unlock the door, slide the
manual lever up.
From the outside, use the key.
If the vehicle is equipped with
Keyless Entry, see Remote Keyless
Entry (RKE) System Operation 09.
Page 20 of 356
Chevrolet Express Owner Manual (GMNA-Localizing-U.S./Canada/Mexico-
13882570) - 2020 - CRC - 11/1/19
Keys, Doors, and Windows 19
Vehicle Security
This vehicle has theft-deterrent
features; however, they do not make
the vehicle impossible to steal.
Vehicle Alarm System
This vehicle has an anti-theft alarm
system.
Arming the Alarm System
1. Close the side door/rear doorsand the hood. Turn off the
vehicle.
2. Lock the vehicle in one of two ways:
.Use the RKE transmitter.
. With a door open, press the
inside
Q.
3. After 30 seconds the alarm system will arm. Pressing
Qon
the RKE transmitter a second
time will bypass the 30-second
delay and immediately arm the
alarm system. The vehicle alarm system will not
arm if the doors are locked with the
key or the manual door lock.
The alarm will also be activated if a
passenger door, side door, rear
door, or the hood is opened without
first disarming the system. When the
alarm is activated, the turn signals
flash and the horn sounds for about
30 seconds. The alarm system will
then re-arm to monitor for the next
unauthorized event.
Disarming the Alarm System
To disarm the alarm system or turn
off the alarm if it has been activated:
.
Press
Kon the RKE transmitter.
. Start the vehicle.
To avoid setting off the alarm by
accident:
. Lock the vehicle after all
occupants have left the vehicle
and all doors are closed.
. Always unlock a door with the
RKE transmitter. Unlocking the driver door with the
key will not disarm the system or
turn off the alarm.
How to Detect a Tamper
Condition
IfKis pressed and the horn chirps
and the lights flash three times, the
alarm was activated while the alarm
system was armed.
If the alarm system has been
activated, and allowed to complete
an event (approximately
one minute), a message will appear
on the Driver Information Center
(DIC) the next time the vehicle is
started.
Theft Alarm Notification
To enable e-mail or text notification,
see “Theft Alarm Notification” in
OnStar Security 0337.
Testing the Alarm
To test the alarm:
1. Lower the driver window and open the driver door.
Page 21 of 356
Chevrolet Express Owner Manual (GMNA-Localizing-U.S./Canada/Mexico-
13882570) - 2020 - CRC - 11/1/19
20 Keys, Doors, and Windows
2. PressQon the RKE
transmitter.
3. Close the door and wait for a few seconds.
4. Reach in through the open window, unlock the door with
the manual door lock, and
open the door.
This should set off the alarm.
If the alarm does not sound
when it should but the lamps
flash, check to see if the horn
works. The horn fuse may be
blown. To replace the fuse, see
Fuses and Circuit Breakers
0249.
Immobilizer
See Radio Frequency Statement
0 331.
Immobilizer Operation
This vehicle is equipped with the
PASS-Key®III+ (Personalized
Automotive Security System) theft-deterrent system. PASS-Key III
+ is a passive theft deterrent
system.
The system is automatically armed
when the key is removed from the
ignition.
You do not have to manually arm or
disarm the system.
The security light will come on if
there is a problem with arming or
disarming the theft-deterrent
system.
If the engine does not start and the
security light comes on, the key may
have a damaged transponder. Turn
the ignition off and try again.
If the engine still does not start, and
the key appears to be undamaged,
try another ignition key. If the engine
still does not start with the other key,
the vehicle needs service. If the
vehicle does start, the first key may
be faulty. See your dealer or a
locksmith who can service the
PASS-Key III+ to have a new
key made.
It is possible for the PASS-Key III+
decoder to learn the transponder
value of a new or replacement key.
Up to eight keys may be
programmed for the vehicle. This
procedure is for learning additional
keys only. If all the currently
programmed keys are lost or do not
operate, you must see your dealer
or a locksmith who can service
PASS-Key III+ to have keys made
and programmed to the system.
See your dealer or a locksmith who
can service PASS-Key III+ to get a
new key blank that is cut exactly as
the ignition key that operates the
system.
To program the new key:
1. Verify the new key has
1
stamped on it.
2. Insert the original, already programmed key into the
ignition lock cylinder and start
the engine. If the engine will
not start, see your dealer for
service.
Page 23 of 356
Chevrolet Express Owner Manual (GMNA-Localizing-U.S./Canada/Mexico-
13882570) - 2020 - CRC - 11/1/19
22 Keys, Doors, and Windows
On the lower portion of each mirror
there is an auxiliary convex mirror
that can be adjusted manually to
provide an extended field of view.
The mirrors can be manually folded
in or out.
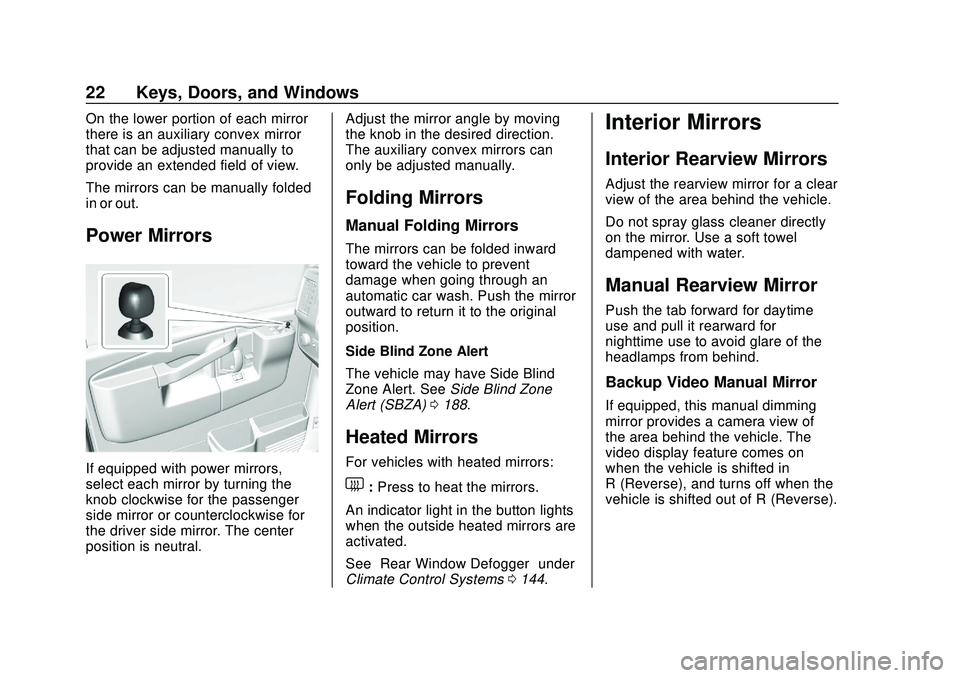
Power Mirrors
If equipped with power mirrors,
select each mirror by turning the
knob clockwise for the passenger
side mirror or counterclockwise for
the driver side mirror. The center
position is neutral.Adjust the mirror angle by moving
the knob in the desired direction.
The auxiliary convex mirrors can
only be adjusted manually.
Folding Mirrors
Manual Folding Mirrors
The mirrors can be folded inward
toward the vehicle to prevent
damage when going through an
automatic car wash. Push the mirror
outward to return it to the original
position.
Side Blind Zone Alert
The vehicle may have Side Blind
Zone Alert. See
Side Blind Zone
Alert (SBZA) 0188.
Heated Mirrors
For vehicles with heated mirrors:
1:Press to heat the mirrors.
An indicator light in the button lights
when the outside heated mirrors are
activated.
See “Rear Window Defogger” under
Climate Control Systems 0144.
Interior Mirrors
Interior Rearview Mirrors
Adjust the rearview mirror for a clear
view of the area behind the vehicle.
Do not spray glass cleaner directly
on the mirror. Use a soft towel
dampened with water.
Manual Rearview Mirror
Push the tab forward for daytime
use and pull it rearward for
nighttime use to avoid glare of the
headlamps from behind.
Backup Video Manual Mirror
If equipped, this manual dimming
mirror provides a camera view of
the area behind the vehicle. The
video display feature comes on
when the vehicle is shifted in
R (Reverse), and turns off when the
vehicle is shifted out of R (Reverse).
Page 25 of 356
Chevrolet Express Owner Manual (GMNA-Localizing-U.S./Canada/Mexico-
13882570) - 2020 - CRC - 11/1/19
24 Keys, Doors, and Windows
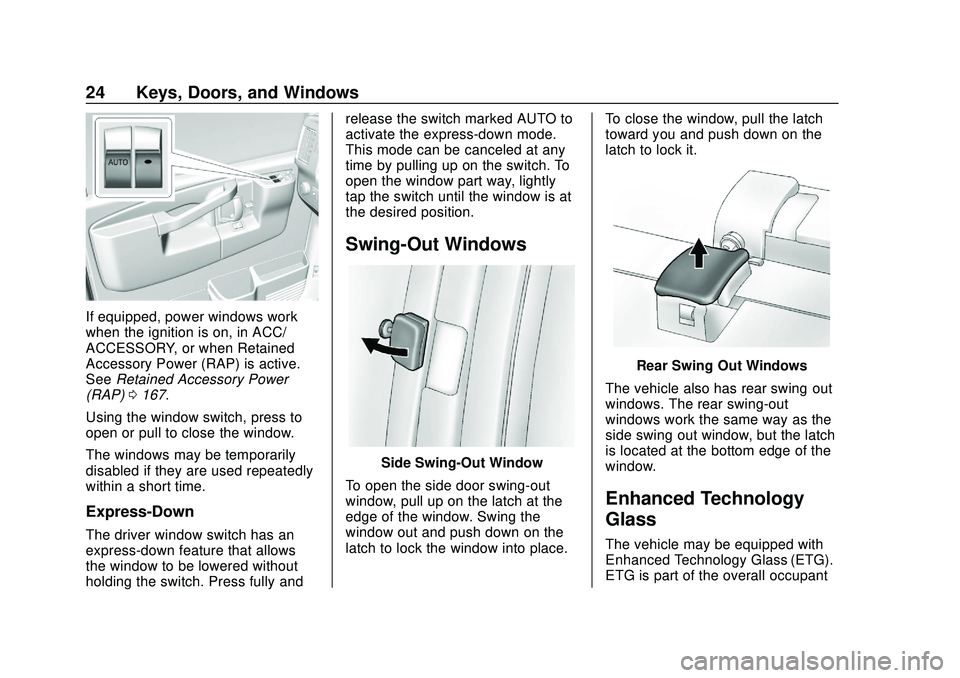
If equipped, power windows work
when the ignition is on, in ACC/
ACCESSORY, or when Retained
Accessory Power (RAP) is active.
SeeRetained Accessory Power
(RAP) 0167.
Using the window switch, press to
open or pull to close the window.
The windows may be temporarily
disabled if they are used repeatedly
within a short time.
Express-Down
The driver window switch has an
express-down feature that allows
the window to be lowered without
holding the switch. Press fully and release the switch marked AUTO to
activate the express-down mode.
This mode can be canceled at any
time by pulling up on the switch. To
open the window part way, lightly
tap the switch until the window is at
the desired position.
Swing-Out Windows
Side Swing-Out Window
To open the side door swing-out
window, pull up on the latch at the
edge of the window. Swing the
window out and push down on the
latch to lock the window into place. To close the window, pull the latch
toward you and push down on the
latch to lock it.
Rear Swing‐Out Windows
The vehicle also has rear swing‐out
windows. The rear swing-out
windows work the same way as the
side swing‐out window, but the latch
is located at the bottom edge of the
window.
Enhanced Technology
Glass
The vehicle may be equipped with
Enhanced Technology Glass (ETG).
ETG is part of the overall occupant
Page 38 of 356
Chevrolet Express Owner Manual (GMNA-Localizing-U.S./Canada/Mexico-
13882570) - 2020 - CRC - 11/1/19
Seats and Restraints 37
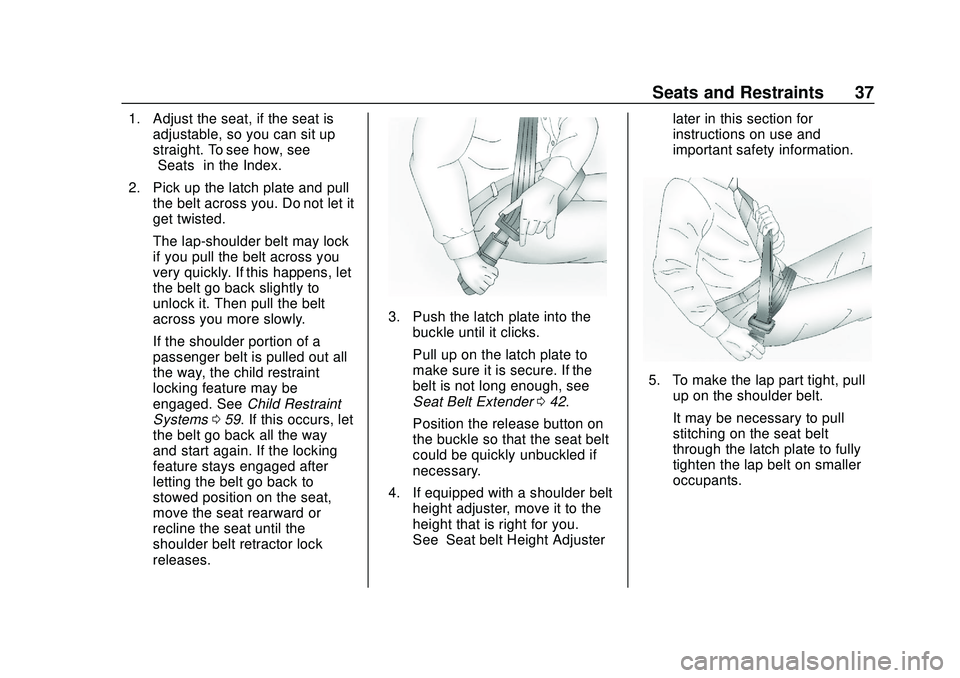
1. Adjust the seat, if the seat isadjustable, so you can sit up
straight. To see how, see
“Seats” in the Index.
2. Pick up the latch plate and pull the belt across you. Do not let it
get twisted.
The lap-shoulder belt may lock
if you pull the belt across you
very quickly. If this happens, let
the belt go back slightly to
unlock it. Then pull the belt
across you more slowly.
If the shoulder portion of a
passenger belt is pulled out all
the way, the child restraint
locking feature may be
engaged. See Child Restraint
Systems 059. If this occurs, let
the belt go back all the way
and start again. If the locking
feature stays engaged after
letting the belt go back to
stowed position on the seat,
move the seat rearward or
recline the seat until the
shoulder belt retractor lock
releases.
3. Push the latch plate into the buckle until it clicks.
Pull up on the latch plate to
make sure it is secure. If the
belt is not long enough, see
Seat Belt Extender 042.
Position the release button on
the buckle so that the seat belt
could be quickly unbuckled if
necessary.
4. If equipped with a shoulder belt height adjuster, move it to the
height that is right for you.
See “Seat belt Height Adjuster” later in this section for
instructions on use and
important safety information.
5. To make the lap part tight, pull
up on the shoulder belt.
It may be necessary to pull
stitching on the seat belt
through the latch plate to fully
tighten the lap belt on smaller
occupants.