CHEVROLET VOLT 2011 Owner's Guide
Manufacturer: CHEVROLET, Model Year: 2011, Model line: VOLT, Model: CHEVROLET VOLT 2011Pages: 516, PDF Size: 6.61 MB
Page 21 of 516

Black plate (15,1)Chevrolet Volt Owner Manual - 2011
In Brief 1-15
Vehicle Features
Radio(s)
This vehicle's radio is part of the
navigation system. SeeInfotainment
on page 7‑2.
Satellite Radio
Vehicles with an XM™ Satellite
Radio tuner and a valid XM Satellite
Radio subscription can receive XM
programming.
XM Satellite Radio Service
XM is a satellite radio service based
in the 48 contiguous United States
and 10 Canadian provinces. XM
Satellite Radio has a wide variety of
programming and commercial-free
music, coast to coast, and in
digital-quality sound. A fee is
required to receive the XM service.
For more information refer to:
.www.xmradio.com or call
1-800-929-2100 (U.S.).
.www.xmradio.ca or call
1-877-438-9677 (Canada).
For more information, see Satellite
Radio on page 7‑16.
Portable Audio Devices
This vehicle has a 3.5 mm (1/8 in)
auxiliary input and a USB port
located in the center stack.
External devices such as iPods
®,
laptop computers, MP3 players, CD
changers, and USB storage devices
may be connected, depending on
the audio system.
For more information, see Auxiliary
Devices on page 7‑38.
Page 22 of 516

Black plate (16,1)Chevrolet Volt Owner Manual - 2011
1-16 In Brief
Bluetooth®
The Bluetooth system allows users
with a Bluetooth-enabled cell phone
to make and receive hands-free
calls using the vehicle audio
system, microphone, and controls.
The Bluetooth-enabled cell phone
must be paired with the in-vehicle
Bluetooth system before it can be
used in the vehicle. Not all phones
will support all functions.
SeeBluetooth on page 7‑85.
Steering Wheel Controls
For vehicles with audio steering
wheel controls, some audio controls
can be adjusted at the steering
wheel.
b/g:Press to interact with
the available Bluetooth, OnStar,
or navigation system.
$/i: Press to silence the
vehicle speakers only. Press again
to turn the sound on. For vehicles
with OnStar or Bluetooth systems,
press to reject an incoming call,
or to end a current call.
_SRC^: Turn_or^to select a
radio band or audio source.
Turn
_or^to select the next or
previous favorite radio station, CD,
or MP3 track.
Press SRC to change between
radio and CD or DVD.
+ x−: Press + to increase or −to
decrease the volume.
For more information, see Steering
Wheel Controls on page 5‑6.
Page 23 of 516
Black plate (17,1)Chevrolet Volt Owner Manual - 2011
In Brief 1-17
Cruise Control
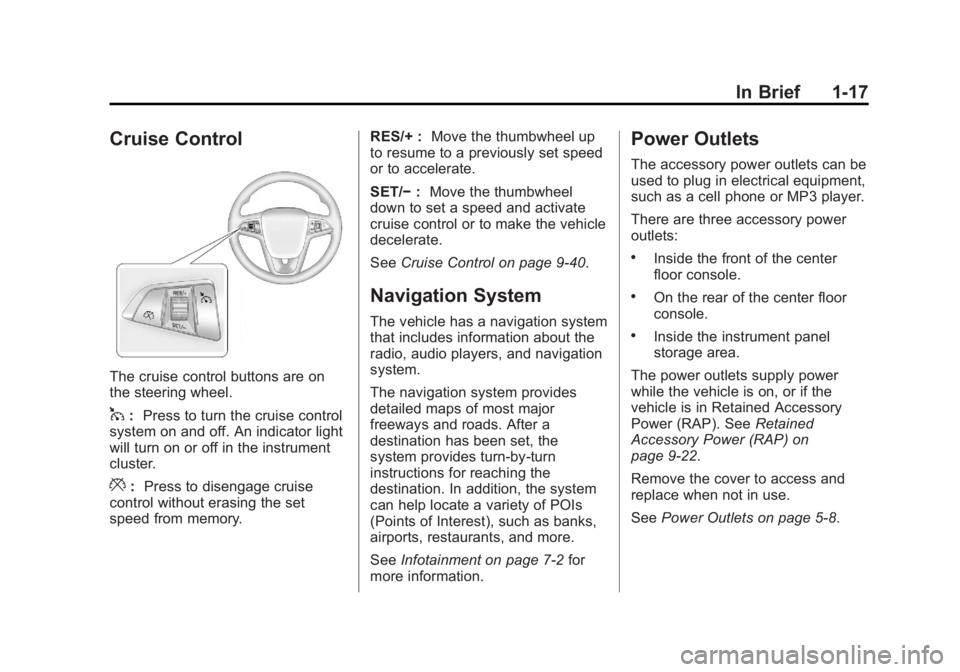
The cruise control buttons are on
the steering wheel.
1:Press to turn the cruise control
system on and off. An indicator light
will turn on or off in the instrument
cluster.
*: Press to disengage cruise
control without erasing the set
speed from memory. RES/+ :
Move the thumbwheel up
to resume to a previously set speed
or to accelerate.
SET/− :Move the thumbwheel
down to set a speed and activate
cruise control or to make the vehicle
decelerate.
See Cruise Control on page 9‑40.
Navigation System
The vehicle has a navigation system
that includes information about the
radio, audio players, and navigation
system.
The navigation system provides
detailed maps of most major
freeways and roads. After a
destination has been set, the
system provides turn-by-turn
instructions for reaching the
destination. In addition, the system
can help locate a variety of POIs
(Points of Interest), such as banks,
airports, restaurants, and more.
SeeInfotainment on page 7‑2 for
more information.
Power Outlets
The accessory power outlets can be
used to plug in electrical equipment,
such as a cell phone or MP3 player.
There are three accessory power
outlets:
.Inside the front of the center
floor console.
.On the rear of the center floor
console.
.Inside the instrument panel
storage area.
The power outlets supply power
while the vehicle is on, or if the
vehicle is in Retained Accessory
Power (RAP). See Retained
Accessory Power (RAP) on
page 9‑22.
Remove the cover to access and
replace when not in use.
See Power Outlets on page 5‑8.
Page 24 of 516
Black plate (18,1)Chevrolet Volt Owner Manual - 2011
1-18 In Brief
Battery and Efficiency
High Voltage Safety
Information
{WARNING
Exposure to high voltage
can cause shock, burns, and
even death. The high voltage
components in the vehicle can
only be serviced by technicians
with special training.
High voltage components are
identified by labels. Do not
remove, open, take apart,
or modify these components.
High voltage cable or wiring has
orange covering. Do not probe,
tamper with, cut, or modify high
voltage cable or wiring.
This vehicle has a high voltage
battery and a standard 12‐volt
battery. If the vehicle is in a crash, the
sensing system may shut down
the high voltage system. When this
occurs, the high voltage battery is
disconnected and the vehicle will
not start. The SERVICE VEHICLE
SOON message in the Driver
Information Center (DIC) will be
displayed. Before the vehicle can
be operated again, it must be
serviced at your dealer.
See
Battery on page 10‑28 for
important safety information. If an
airbag has inflated, see What Will
You See after an Airbag Inflates? on
page 3‑31.
Only a trained service technician
with the proper knowledge and
tools should inspect, test, or replace
the high voltage battery. See your
dealer if the high voltage battery
needs service.
See Battery on page 10‑28.
Charging
The high voltage battery can
be charged using a household
electrical outlet. There are three
ways to program how the vehicle
is charged. See Charging on
page 5‑33 for more information.
This section explains the process
for charging the high voltage battery.
Do not allow the vehicle to remain
in temperature extremes for long
periods without being driven or
plugged in. It is recommended that
the vehicle be plugged in when
temperatures are below 0°C (32°F)
and above 32°C (90°F) to maximize
high voltage battery life.
The charging system may run fans
and pumps that result in sounds
from the vehicle while it is turned
off. Additional unexpected clicking
sounds may be experienced caused
by the electrical devices used while
charging.
Page 25 of 516
Black plate (19,1)Chevrolet Volt Owner Manual - 2011
In Brief 1-19
Charging
Start Charge
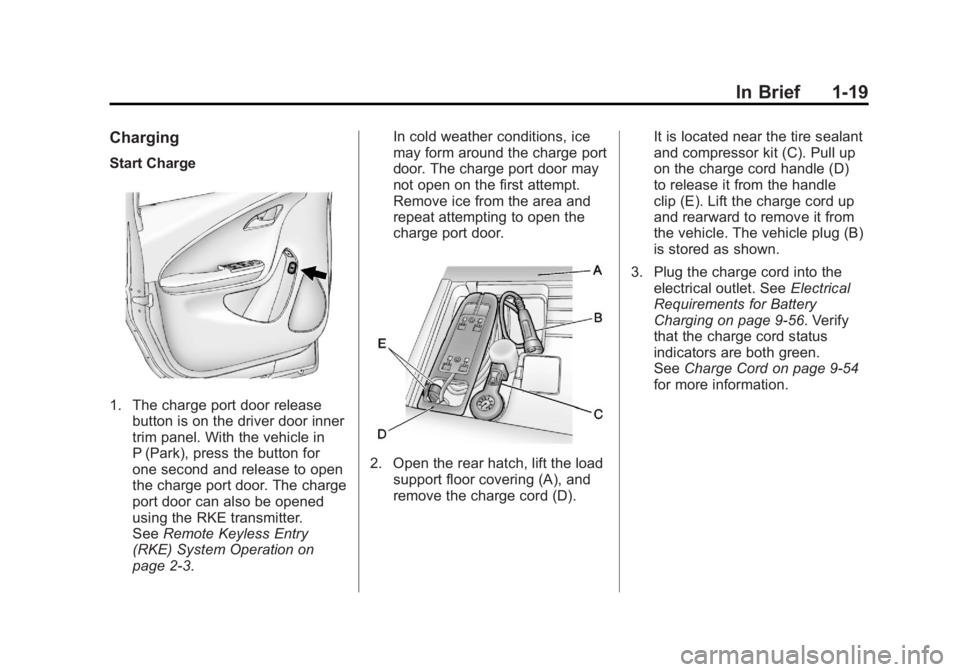
1. The charge port door releasebutton is on the driver door inner
trim panel. With the vehicle in
P (Park), press the button for
one second and release to open
the charge port door. The charge
port door can also be opened
using the RKE transmitter.
See Remote Keyless Entry
(RKE) System Operation on
page 2‑3. In cold weather conditions, ice
may form around the charge port
door. The charge port door may
not open on the first attempt.
Remove ice from the area and
repeat attempting to open the
charge port door.
2. Open the rear hatch, lift the load
support floor covering (A), and
remove the charge cord (D). It is located near the tire sealant
and compressor kit (C). Pull up
on the charge cord handle (D)
to release it from the handle
clip (E). Lift the charge cord up
and rearward to remove it from
the vehicle. The vehicle plug (B)
is stored as shown.
3. Plug the charge cord into the electrical outlet. See Electrical
Requirements for Battery
Charging on page 9‑56. Verify
that the charge cord status
indicators are both green.
See Charge Cord on page 9‑54
for more information.
Page 26 of 516
Black plate (20,1)Chevrolet Volt Owner Manual - 2011
1-20 In Brief
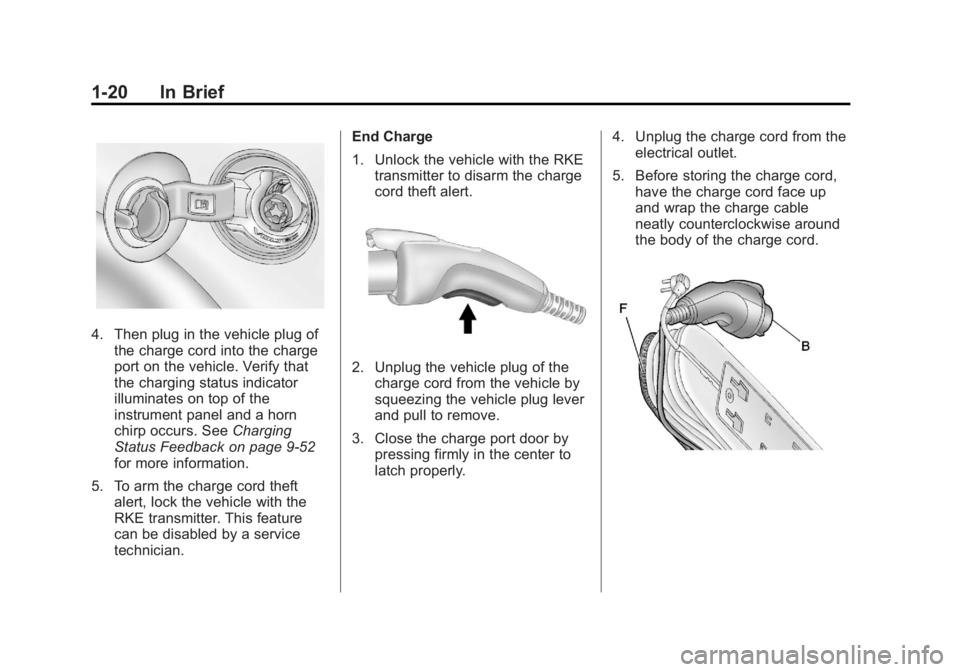
4. Then plug in the vehicle plug ofthe charge cord into the charge
port on the vehicle. Verify that
the charging status indicator
illuminates on top of the
instrument panel and a horn
chirp occurs. See Charging
Status Feedback on page 9‑52
for more information.
5. To arm the charge cord theft alert, lock the vehicle with the
RKE transmitter. This feature
can be disabled by a service
technician. End Charge
1. Unlock the vehicle with the RKE
transmitter to disarm the charge
cord theft alert.
2. Unplug the vehicle plug of thecharge cord from the vehicle by
squeezing the vehicle plug lever
and pull to remove.
3. Close the charge port door by pressing firmly in the center to
latch properly. 4. Unplug the charge cord from the
electrical outlet.
5. Before storing the charge cord, have the charge cord face up
and wrap the charge cable
neatly counterclockwise around
the body of the charge cord.
Page 27 of 516
Black plate (21,1)Chevrolet Volt Owner Manual - 2011
In Brief 1-21
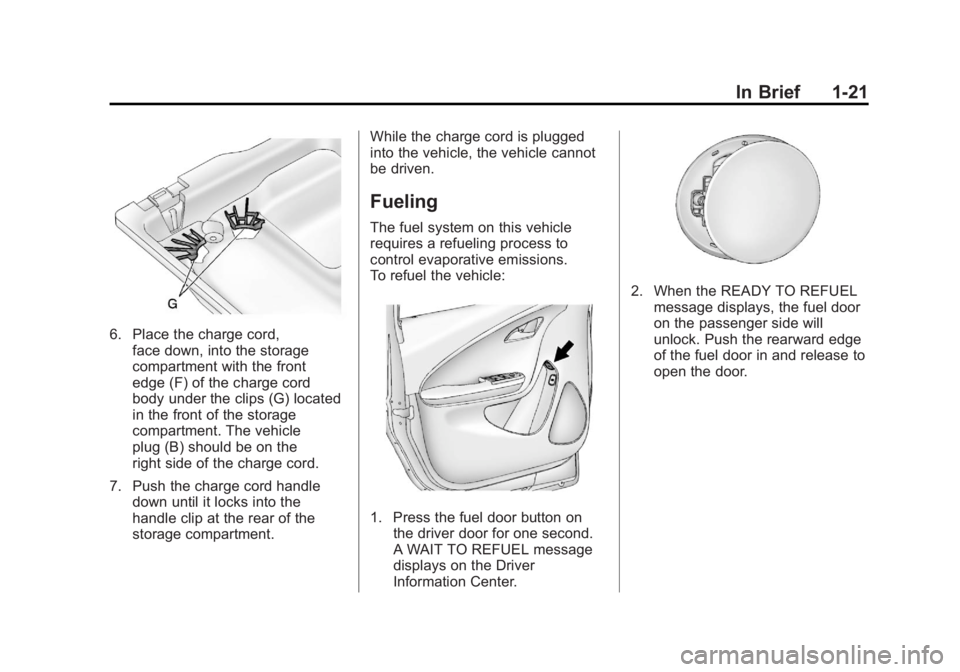
6. Place the charge cord,face down, into the storage
compartment with the front
edge (F) of the charge cord
body under the clips (G) located
in the front of the storage
compartment. The vehicle
plug (B) should be on the
right side of the charge cord.
7. Push the charge cord handle down until it locks into the
handle clip at the rear of the
storage compartment. While the charge cord is plugged
into the vehicle, the vehicle cannot
be driven.
Fueling
The fuel system on this vehicle
requires a refueling process to
control evaporative emissions.
To refuel the vehicle:
1. Press the fuel door button on
the driver door for one second.
A WAIT TO REFUEL message
displays on the Driver
Information Center.
2. When the READY TO REFUELmessage displays, the fuel door
on the passenger side will
unlock. Push the rearward edge
of the fuel door in and release to
open the door.
Page 28 of 516
Black plate (22,1)Chevrolet Volt Owner Manual - 2011
1-22 In Brief
3. Turn the fuel capcounterclockwise to remove.
While refueling, hang the fuel
cap tether from the hook on
the inside of the fuel door.
Complete refueling within
30 minutes of pushing the
fuel door button found on the
driver side door. If refueling
more than 30 minutes, push
the fuel door button again.
4. After refueling, reinstall the fuel cap by turning it clockwise until it
clicks. Close the fuel door.
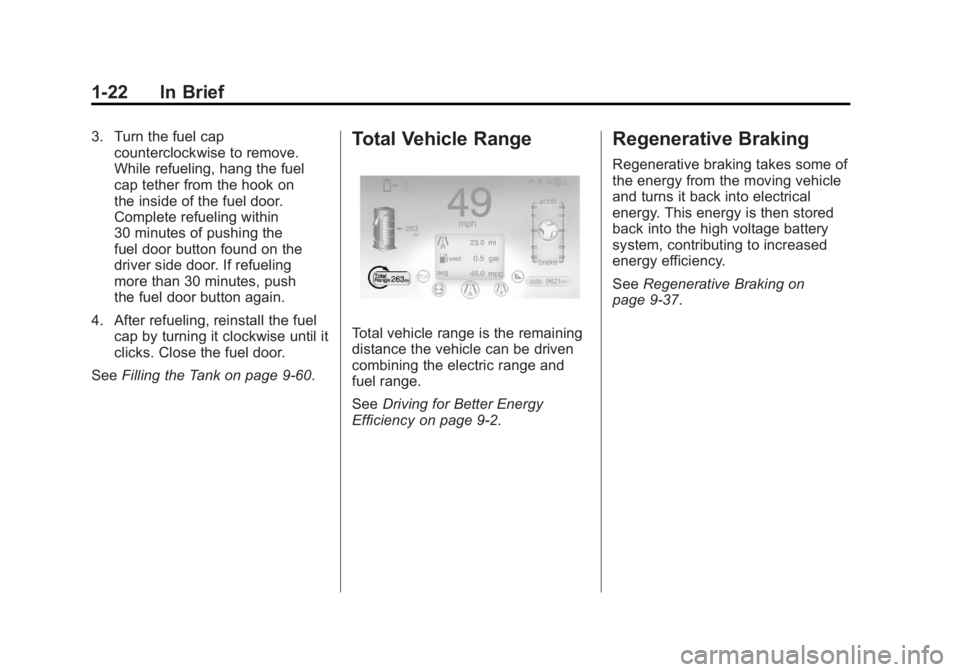
See Filling the Tank on page 9‑60.Total Vehicle Range
Total vehicle range is the remaining
distance the vehicle can be driven
combining the electric range and
fuel range.
SeeDriving for Better Energy
Efficiency on page 9‑2.
Regenerative Braking
Regenerative braking takes some of
the energy from the moving vehicle
and turns it back into electrical
energy. This energy is then stored
back into the high voltage battery
system, contributing to increased
energy efficiency.
See Regenerative Braking on
page 9‑37.
Page 29 of 516
Black plate (23,1)Chevrolet Volt Owner Manual - 2011
In Brief 1-23
Service
{WARNING
Never try to do your own service
on high voltage components.
You can be injured and the
vehicle can be damaged if you
try to do your own service work.
Service and repair of these high
voltage components should
only be performed by a trained
service technician with the proper
knowledge and tools. SeeDoing
Your Own Service Work on
page 10‑8.
Performance and
Maintenance
Traction Control
System (TCS)
The Traction Control System limits
wheel spin. The system turns on
automatically every time the vehicle
is on and cannot be turned off.
For more information, see Traction
Control System (TCS) on
page 9‑37.
Electronic Stability
Control (ESC)
Electronic Stability Control assists
with directional control of the
vehicle in difficult driving conditions.
The system turns on automatically
every time the vehicle is on and
cannot be turned off.
For more information, see Electronic
Stability Control (ESC) on
page 9‑39.
Tire Pressure Monitor
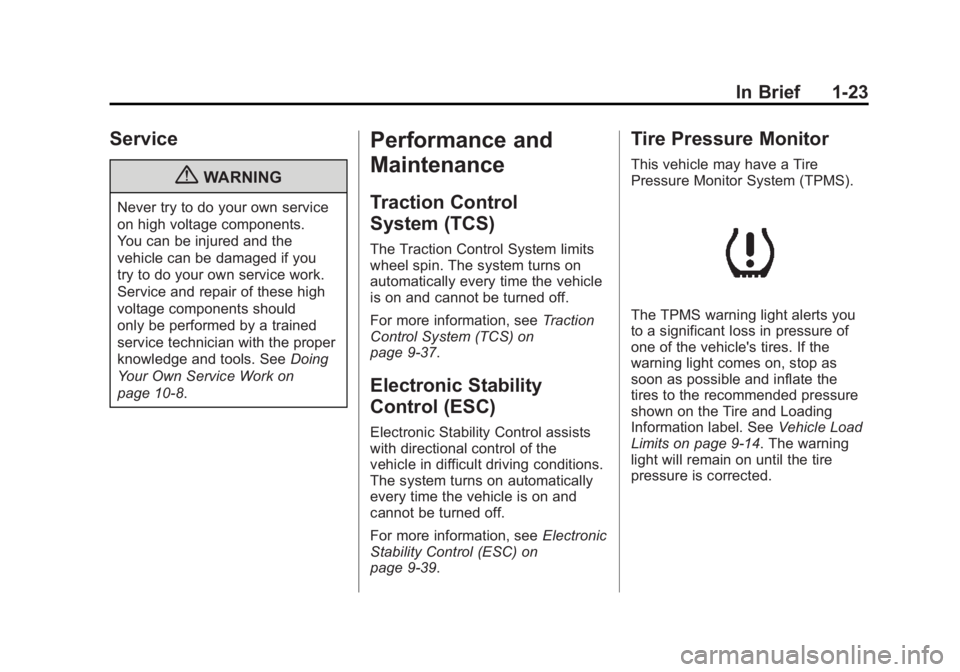
This vehicle may have a Tire
Pressure Monitor System (TPMS).
The TPMS warning light alerts you
to a significant loss in pressure of
one of the vehicle's tires. If the
warning light comes on, stop as
soon as possible and inflate the
tires to the recommended pressure
shown on the Tire and Loading
Information label. See Vehicle Load
Limits on page 9‑14. The warning
light will remain on until the tire
pressure is corrected.
Page 30 of 516
Black plate (24,1)Chevrolet Volt Owner Manual - 2011
1-24 In Brief
During cooler conditions, the low tire
pressure warning light may appear
when the vehicle is first started and
then turn off. This may be an early
indicator that the tire pressures are
getting low and the tires need to be
inflated to the proper pressure.
The TPMS does not replace normal
monthly tire maintenance. It is the
driver’s responsibility to maintain
correct tire pressures.
See Tire Pressure Monitor System
on page 10‑55.Tire Sealant and
Compressor Kit
This vehicle may have a tire sealant
and compressor kit that can be used
to seal small punctures in the tread
area of the tire. Significant sidewall
damage will require the tire to be
replaced.
See Tire Sealant and Compressor
Kit on page 10‑71 for complete
operating information.
Engine Oil Life System
The engine oil life system calculates
engine oil life based on vehicle use
and displays the CHANGE ENGINE
OIL SOON message when it is time
to change the engine oil and filter.
The oil life system should be reset
to 100% only following an oil
change. Resetting the Oil Life System
1. Use the SELECT knob to select
OIL LIFE on the DIC menu.
2. Press SELECT to start the OIL LIFE reset procedure.
3. The DIC menu will display “Are
you sure that you want to reset?”
Use SELECT to choose YES to
reset oil life or NO to exit and
return to the previous menu.
4. If YES is selected, the DIC menu will display RESET OIL LIFE for
a short time and then 100% OIL
LIFE will be displayed when
OIL LIFE is successfully reset.
See Engine Oil Life System on
page 10‑15.