child seat CITROEN BERLINGO VAN 2019 Owners Manual
[x] Cancel search | Manufacturer: CITROEN, Model Year: 2019, Model line: BERLINGO VAN, Model: CITROEN BERLINGO VAN 2019Pages: 324, PDF Size: 9.41 MB
Page 4 of 324
2
Contents
■
OverviewOverview 4
Labels 6
■
Eco-driving
1InstrumentsInstrument panels 10
Digital instrument panel 11
Warning and indicator lamps 13
Indicators 20
Trip computer 27
Touch screen BLUETOOTH audio system 28
Touch screen 29
Setting the date and time 31
2AccessElectronic key with remote control function and
built-in key, 32
Back-up procedures 38
Central locking / unlocking 41
Doors 43
General recommendations for the sliding
side doors
43
Rear roof flap 44
Alarm 45
Electric windows 47
Tilting rear door windows 49
3Ease of use and comfortGeneral recommendations for the seats 50
Front seats 50
Steering wheel adjustment 53
Mirrors 53
2-seat front bench seat 55
Rear bench seat (row 2) 56
Rear seats (row 2) 57
Rear seats (row 3) 57
Interior fittings 60
Two-position luggage cover shelf (removable) 65
Luggage cover (7-seat) 66
Warning triangle 67
Extenso Cab 68
Crew cab 70
Heating and Ventilation 73
Heating 74
Manual air conditioning 74
Dual-zone automatic air conditioning 75
Front demisting - de-icing 77
Heated windscreen 78
Demisting/de-icing the rear screen and/or
the door mirrors
78
Rear heating and air conditioning 79
Additional heating/ventilation system 79
Temperature conditioning (Electric) 81
4Lighting and visibilityLighting control stalk 83
Direction indicators 84
Automatic illumination of headlamps 84
Daytime running lamps / Sidelamps 85
Guide-me-home and welcome lighting 85
Automatic lighting systems - General
recommendations
86
Automatic headlamp dipping 86
Headlamp beam height adjustment 88
Wiper control stalk 88
Changing a wiper blade 90
Automatic wipers 90
5SafetyGeneral safety recommendations 92
Emergency or assistance 92
Hazard warning lamps 94
Horn 95
Pedestrian horn (Electric) 95
Electronic stability control (ESC) 95
Advanced Grip Control 97
Hill Assist Descent Control 98
Seat belts 99
Airbags 103
Child seats 106
Deactivating the front passenger airbag 108
ISOFIX child seats 11 2
i-Size child seats 11 5
Manual child lock 11 6
Electric child lock 11 6
6DrivingDriving recommendations 11 7
Starting/switching off the engine 11 9
Manual parking brake 123
Electric parking brake 123
Hill start assist 126
5-speed manual gearbox 126
6-speed manual gearbox 127
Automatic gearbox 127
Drive selector (Electric) 132
Driving modes 133
Gear shift indicator 134
Stop & Start (Petrol or Diesel) 134
Tyre under-inflation detection 136
Head-up display 138
Driving and manoeuvring aids - General
recommendations
139
Road signs recognition 140
Speed limiter 143
Cruise control - Specific recommendations 146
Programmable cruise control 146
Adaptive cruise control 148
Memorising speeds 152
Active Safety Brake with Collision Risk Alert and
Intelligent emergency braking assistance
152
Active lane departure warning system 155
Blind spot monitoring 158
Page 8 of 324
6
Overview
represented by an indicator and a reserve power
warning lamp on the instrument panel.
The 12 V accessory battery 3 powers the
vehicle’s conventional electrical system. It is
recharged automatically by the traction battery
via the on-board charger.
The on-board charger
4
provides domestic
charging (mode
2) and accelerated charging
(mode
3) of the traction battery as well as
recharging of the 12
V accessory battery.
The electric motor
5 provides propulsion in
accordance with the selected driving mode and
driving conditions. It recovers energy during
vehicle braking and deceleration phases.
Labels
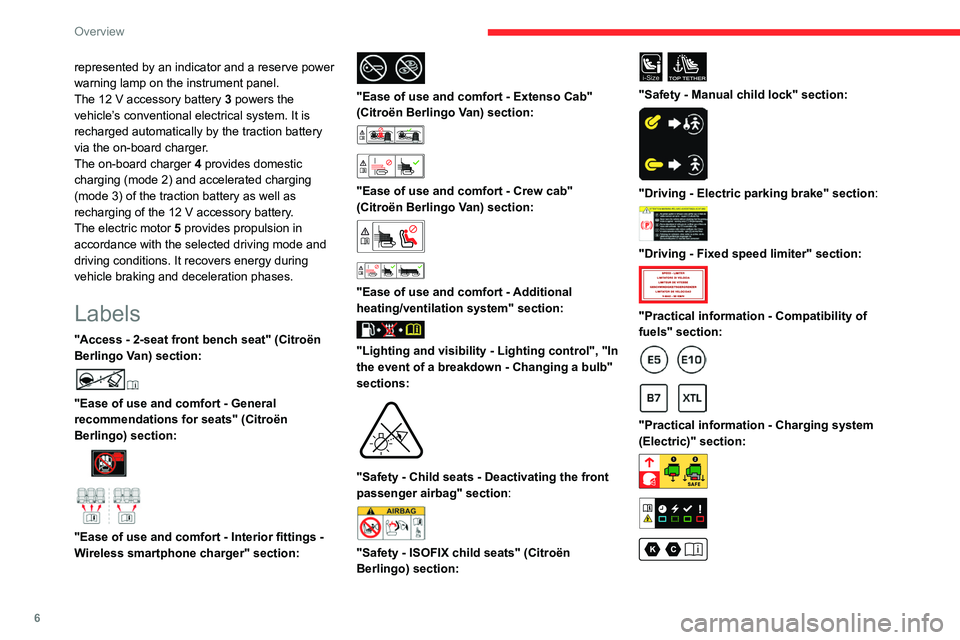
"Access - 2-seat front bench seat" (Citroën
Berlingo Van) section:
"Ease of use and comfort - General
recommendations for seats" (Citroën
Berlingo) section:
"Ease of use and comfort - Interior fittings -
Wireless smartphone charger" section:
"Ease of use and comfort - Extenso Cab"
(Citroën Berlingo Van) section:
"Ease of use and comfort - Crew cab"
(Citroën Berlingo Van) section:
"Ease of use and comfort - Additional
heating/ventilation system" section:
"Lighting and visibility - Lighting control", "In
the event of a breakdown - Changing a bulb"
sections:
"Safety - Child seats - Deactivating the front
passenger airbag" section:
"Safety - ISOFIX child seats" (Citroën
Berlingo) section:
i-SizeTOP TETHER
"Safety - Manual child lock" section:
"Driving - Electric parking brake" section:
"Driving - Fixed speed limiter" section:
"Practical information - Compatibility of
fuels" section:
"Practical information - Charging system
(Electric)" section:
Page 19 of 324
17
Instruments
1Check the pressure of the tyres as soon as
possible.
Reinitialise the detection system after adjusting
the pressure.
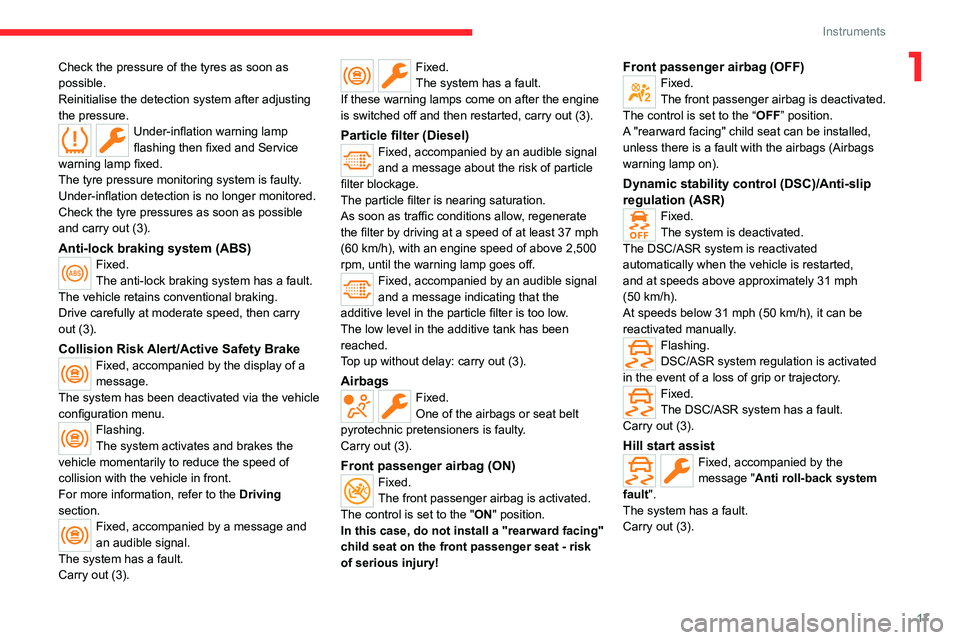
Under-inflation warning lamp
flashing then fixed and Service
warning lamp fixed.
The tyre pressure monitoring system is faulty.
Under-inflation detection is no longer monitored.
Check the tyre pressures as soon as possible
and carry out (3).
Anti-lock braking system (ABS)Fixed.
The anti-lock braking system has a fault.
The vehicle retains conventional braking.
Drive carefully at moderate speed, then carry
out (3).
Collision Risk Alert/Active Safety BrakeFixed, accompanied by the display of a
message.
The system has been deactivated via the vehicle
configuration menu.
Flashing.
The system activates and brakes the
vehicle momentarily to reduce the speed of
collision with the vehicle in front.
For more information, refer to the Driving
section.
Fixed, accompanied by a message and
an audible signal.
The system has a fault.
Carry out (3).
Fixed.
The system has a fault.
If these warning lamps come on after the engine
is switched off and then restarted, carry out (3).
Particle filter (Diesel)Fixed, accompanied by an audible signal
and a message about the risk of particle
filter blockage.
The particle filter is nearing saturation.
As soon as traffic conditions allow, regenerate
the filter by driving at a speed of at least 37
mph
(60
km/h), with an engine speed of above 2,500
rpm, until the warning lamp goes off.
Fixed, accompanied by an audible signal
and a message indicating that the
additive level in the particle filter is too low.
The low level in the additive tank has been
reached.
Top up without delay: carry out (3).
AirbagsFixed.
One of the airbags or seat belt
pyrotechnic pretensioners is faulty.
Carry out (3).
Front passenger airbag (ON)Fixed.
The front passenger airbag is activated.
The control is set to the "ON" position.
In this case, do not install a "rearward facing"
child seat on the front passenger seat - risk
of serious injury!
Front passenger airbag (OFF)Fixed.
The front passenger airbag is deactivated.
The control is set to the “OFF ” position.
A "rearward facing" child seat can be installed,
unless there is a fault with the airbags (Airbags
warning lamp on).
Dynamic stability control (DSC)/Anti-slip
regulation (ASR)
Fixed.
The system is deactivated.
The DSC/ASR system is reactivated
automatically when the vehicle is restarted,
and at speeds above approximately 31 mph
(50
km/h).
At speeds below 31
mph (50 km/h), it can be
reactivated manually.
Flashing.
DSC/ASR system regulation is activated
in the event of a loss of grip or trajectory.
Fixed.
The DSC/ASR system has a fault.
Carry out (3).
Hill start assistFixed, accompanied by the
message "Anti roll-back system
fault".
The system has a fault.
Carry out (3).
Page 50 of 324
48
Access
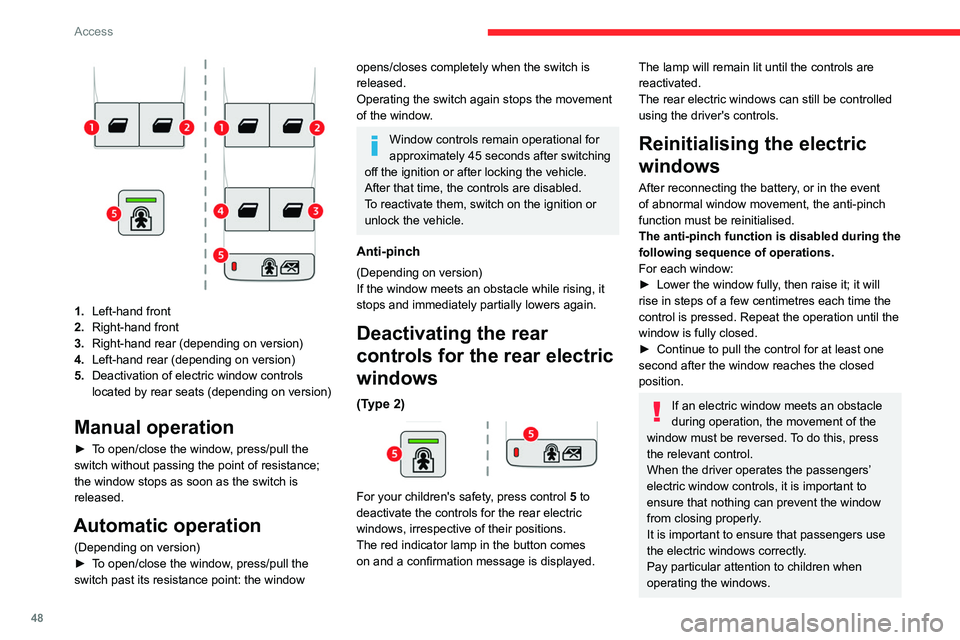
1.Left-hand front
2. Right-hand front
3. Right-hand rear (depending on version)
4. Left-hand rear (depending on version)
5. Deactivation of electric window controls
located by rear seats (depending on version)
Manual operation
► To open/close the window, press/pull the
switch without passing the point of resistance;
the window stops as soon as the switch is
released.
Automatic operation
(Depending on version)
►
T o open/close the window, press/pull the
switch past its resistance point: the window
opens/closes completely when the switch is
released.
Operating the switch again stops the movement
of the window.
Window controls remain operational for
approximately 45 seconds after switching
off the ignition or after locking the vehicle.
After that time, the controls are disabled.
To reactivate them, switch on the ignition or
unlock the vehicle.
Anti-pinch
(Depending on version)
If the window meets an obstacle while rising, it
stops and immediately partially lowers again.
Deactivating the rear
controls for the rear electric
windows
(Type 2)
For your children's safety, press control 5 to
deactivate the controls for the rear electric
windows, irrespective of their positions.
The red indicator lamp in the button comes
on and a confirmation message is displayed.
The lamp will remain lit until the controls are
reactivated.
The rear electric windows can still be controlled
using the driver's controls.
Reinitialising the electric
windows
After reconnecting the battery, or in the event
of abnormal window movement, the anti-pinch
function must be reinitialised.
The anti-pinch function is disabled during the
following sequence of operations.
For each window:
►
Lower the window fully
, then raise it; it will
rise in steps of a few centimetres each time the
control is pressed. Repeat the operation until the
window is fully closed.
►
Continue to pull the control for at least one
second after the window reaches the closed
position.
If an electric window meets an obstacle
during operation, the movement of the
window must be reversed. To do this, press
the relevant control.
When the driver operates the passengers’
electric window controls, it is important to
ensure that nothing can prevent the window
from closing properly.
It is important to ensure that passengers use
the electric windows correctly.
Pay particular attention to children when
operating the windows.
Page 57 of 324
55
Ease of use and comfort
3A child-monitoring mirror is installed above
the interior rear view mirror. It allows the
vehicle's rear passengers to be observed and
facilitates discussion between the front and rear
passengers without changing the mirror setting
and without turning around. It can be folded
easily to avoid dazzle.
2-seat front bench seat
Central seat
Table position
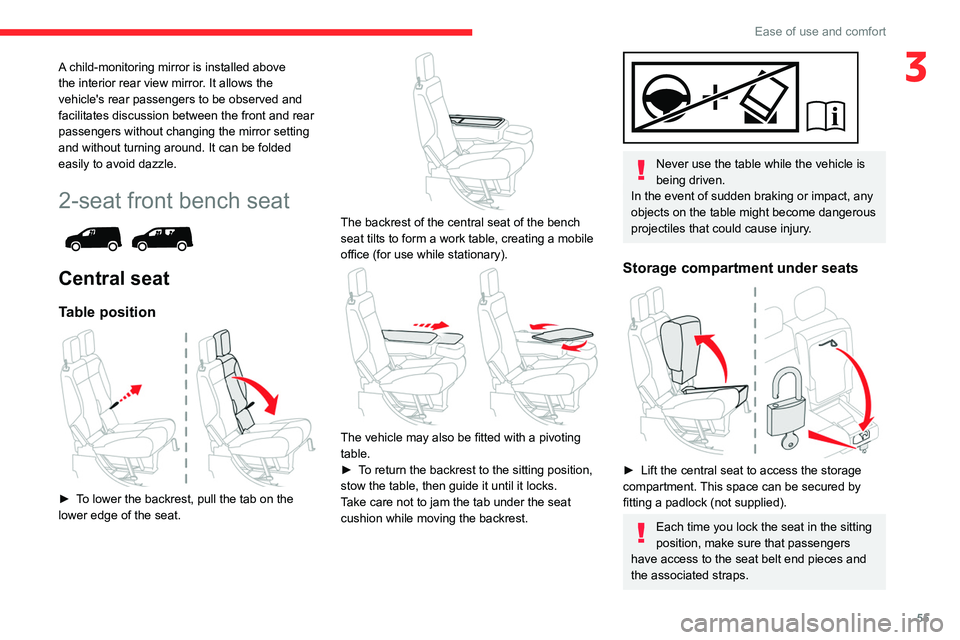
► To lower the backrest, pull the tab on the
lower edge of the seat.
The backrest of the central seat of the bench
seat tilts to form a work table, creating a mobile
office (for use while stationary).
The vehicle may also be fitted with a pivoting
table.
►
T
o return the backrest to the sitting position,
stow the table, then guide it until it locks.
Take care not to jam the tab under the seat
cushion while moving the backrest.
Never use the table while the vehicle is
being driven.
In the event of sudden braking or impact, any
objects on the table might become dangerous
projectiles that could cause injury.
Storage compartment under seats
► Lift the central seat to access the storage
compartment. This space can be secured by
fitting a padlock (not supplied).
Each time you lock the seat in the sitting
position, make sure that passengers
have access to the seat belt end pieces and
the associated straps.
Page 63 of 324
61
Ease of use and comfort
3In the event of sharp deceleration,
objects placed in the central storage
compartment of the roof may be transformed
into projectiles.
Rear storage compartment
This compartment is accessible from the rear
seats and from the vehicle's boot.
It has a capacity of 60 litres and the
maximum
permitted load is
10 kg.
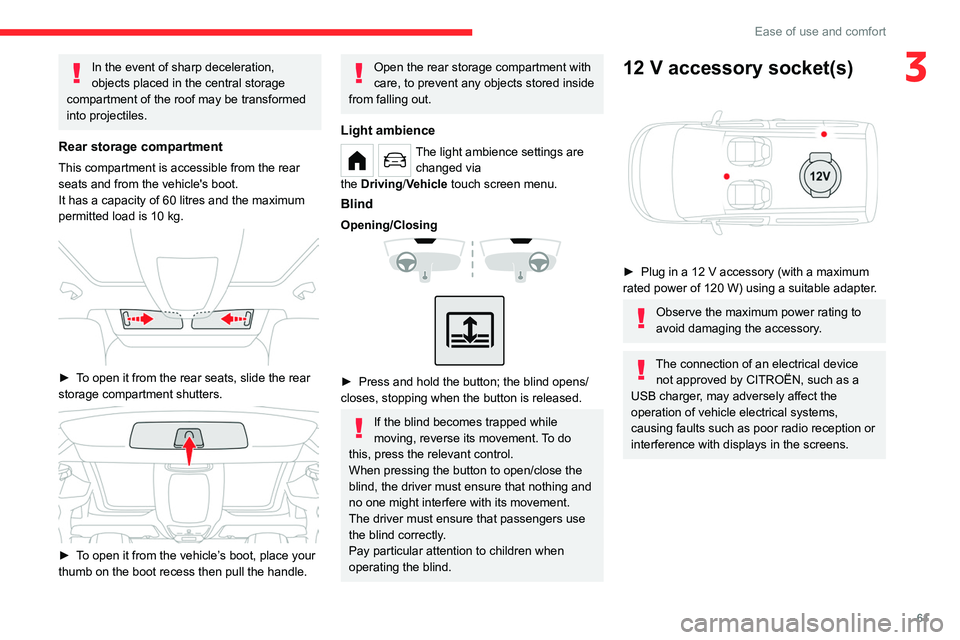
► To open it from the rear seats, slide the rear
storage compartment shutters.
► To open it from the vehicle’s boot, place your
thumb on the boot recess then pull the handle.
Open the rear storage compartment with
care, to prevent any objects stored inside
from falling out.
Light ambience
The light ambience settings are changed via
the
Driving/Vehicle touch screen menu.
Blind
Opening/Closing
► Press and hold the button; the blind opens/
closes, stopping when the button is released.
If the blind becomes trapped while
moving, reverse its movement. To do
this, press the relevant control.
When pressing the button to open/close the
blind, the driver must ensure that nothing and
no one might interfere with its movement.
The driver must ensure that passengers use
the blind correctly.
Pay particular attention to children when
operating the blind.
12 V accessory socket(s)
► Plug in a 12 V accessory (with a maximum
rated power of 120 W) using a suitable adapter.
Observe the maximum power rating to
avoid damaging the accessory.
The connection of an electrical device not approved by CITROËN, such as a
USB charger, may adversely affect the
operation of vehicle electrical systems,
causing faults such as poor radio reception or
interference with displays in the screens.
Page 67 of 324
65
Ease of use and comfort
3Installation behind row 1
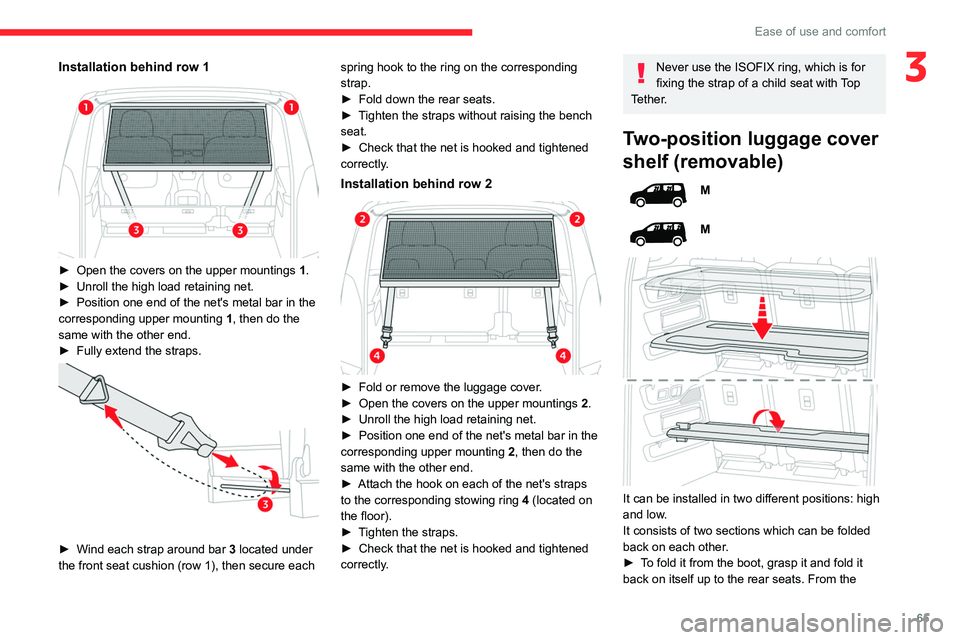
► Open the covers on the upper mountings 1 .
► Unroll the high load retaining net.
►
Position one end of the net's metal bar in the
corresponding upper mounting 1
, then do the
same with the other end.
►
Fully extend the straps.
► Wind each strap around bar 3 located under
the front seat cushion (row 1), then secure each spring hook to the ring on the corresponding
strap.
►
Fold down the rear seats.
►
T
ighten the straps without raising the bench
seat.
►
Check that the net is hooked and tightened
correctly
.
Installation behind row 2
► Fold or remove the luggage cover
.
► Open the covers on the upper mountings 2
.
►
Unroll the high load retaining net.
►
Position one end of the net's metal bar in the
corresponding upper mounting 2
, then do the
same with the other end.
►
Attach the hook on each of the net's straps
to the corresponding stowing ring 4
(located on
the floor).
►
T
ighten the straps.
►
Check that the net is hooked and tightened
correctly
.
Never use the ISOFIX ring, which is for
fixing the strap of a child seat with Top
Tether.
Two-position luggage cover
shelf (removable)
M
M
It can be installed in two different positions: high
and low.
It consists of two sections which can be folded
back on each other.
►
T
o fold it from the boot, grasp it and fold it
back on itself up to the rear seats. From the
Page 73 of 324
71
Ease of use and comfort
3Moving the partition
Moving the partition forwards
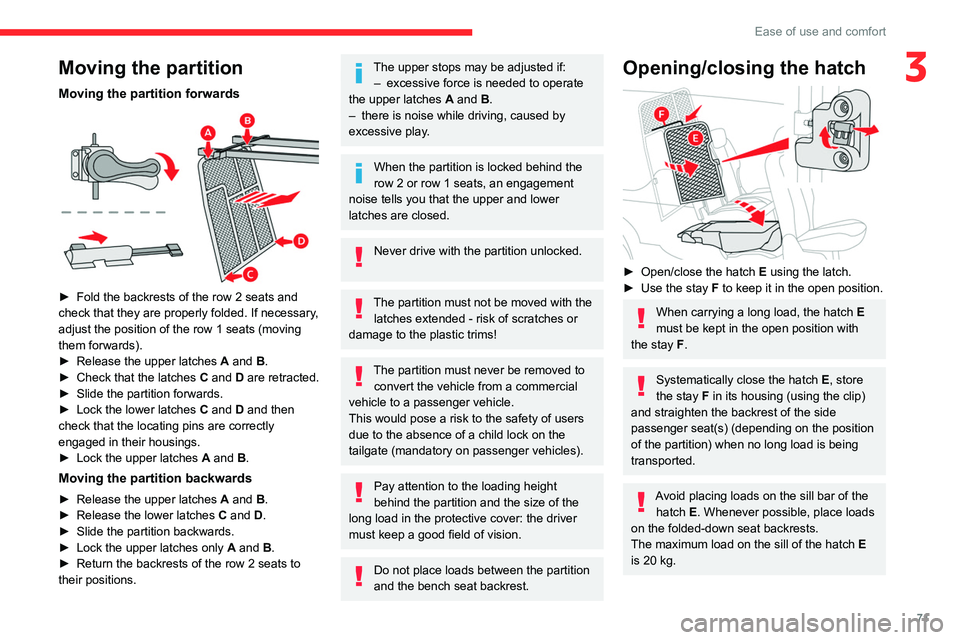
► Fold the backrests of the row 2 seats and
check that they are properly folded. If necessary ,
adjust the position of the row 1 seats (moving
them forwards).
►
Release the upper latches
A
and B.
►
Check that the latches
C and D are retracted.
►
Slide the partition forwards.
►
Lock the lower latches
C
and D and then
check that the locating pins are correctly
engaged in their housings.
►
Lock the upper latches
A
and B.
Moving the partition backwards
► Release the upper latches A and B.
► Release the lower latches C and D.
►
Slide the partition backwards.
►
Lock the upper latches only
A
and B.
►
Return the backrests of the row 2 seats to
their positions.
The upper stops may be adjusted if: – excessive force is needed to operate
the upper latches
A
and B.
–
there is noise while driving, caused by
excessive play
.
When the partition is locked behind the
row 2 or row 1 seats, an engagement
noise tells you that the upper and lower
latches are closed.
Never drive with the partition unlocked.
The partition must not be moved with the latches extended - risk of scratches or
damage to the plastic trims!
The partition must never be removed to convert the vehicle from a commercial
vehicle to a passenger vehicle.
This would pose a risk to the safety of users
due to the absence of a child lock on the
tailgate (mandatory on passenger vehicles).
Pay attention to the loading height
behind the partition and the size of the
long load in the protective cover: the driver
must keep a good field of vision.
Do not place loads between the partition
and the bench seat backrest.
Opening/closing the hatch
► Open/close the hatch E using the latch.
► Use the stay F to keep it in the open position.
When carrying a long load, the hatch E
must be kept in the open position with
the stay F.
Systematically close the hatch E, store
the stay F in its housing (using the clip)
and straighten the backrest of the side
passenger seat(s) (depending on the position
of the partition) when no long load is being
transported.
Avoid placing loads on the sill bar of the hatch E. Whenever possible, place loads
on the folded-down seat backrests.
The maximum load on the sill of the hatch E
is 20 kg.
Page 104 of 324
102
Safety
6.Rear centre seat belt (row 2) not fastened/
unfastened warning lamp.
7. Rear right-hand seat belt (row 2) not
fastened/unfastened warning lamp.
Not fastened at the front
When the ignition is switched on, warning lamp
1 lights up on the instrument panel (depending
on version) and the corresponding indicator lamp
(2, 3 or 4 (depending on version)) lights up if the
driver and/or front passenger have not fastened
their seat belts.
At a speed greater than 12 mph (20 km/h),
these warning lamps flash, accompanied by an
increasing audible signal for approximately two
minutes. After two minutes, these warning lamps
remain on as long as the front seatbelts are not
fastened.
Not fastened at the rear
When the ignition is switched on, with the engine
running or the vehicle moving at a speed below
12
mph (20 km/h), warning lamp 1 (depending
on version) and the corresponding indicator
lamps (5 to 7) light up for around sixty seconds,
if one or more rear seat belts (row 2) are not
fastened.
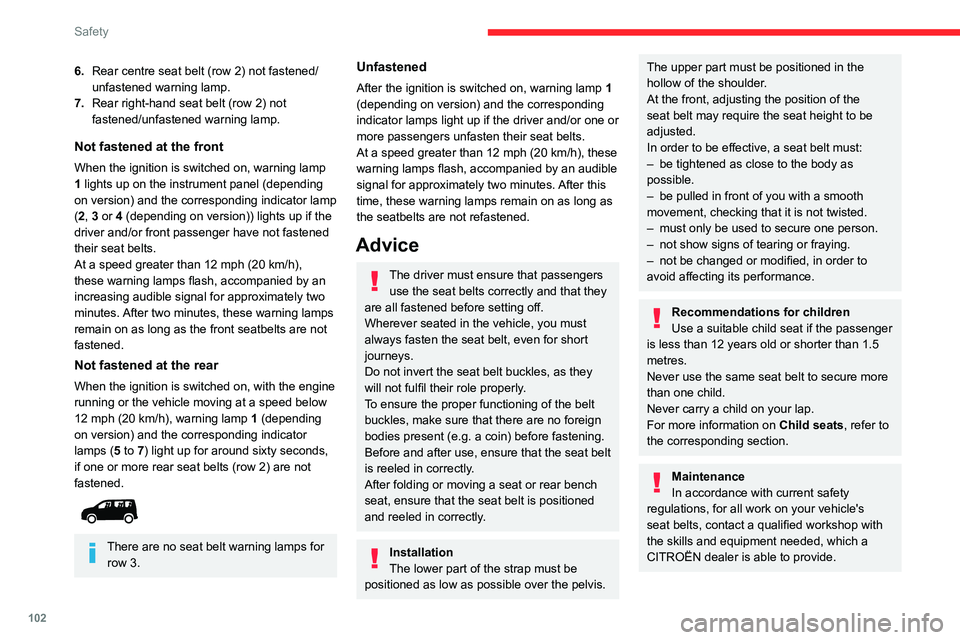
There are no seat belt warning lamps for row 3.
Unfastened
After the ignition is switched on, warning lamp 1
(depending on version) and the corresponding
indicator lamps light up if the driver and/or one or
more passengers unfasten their seat belts.
At a speed greater than 12 mph (20 km/h), these
warning lamps flash, accompanied by an audible
signal for approximately two minutes. After this
time, these warning lamps remain on as long as
the seatbelts are not refastened.
Advice
The driver must ensure that passengers use the seat belts correctly and that they
are all fastened before setting off.
Wherever seated in the vehicle, you must
always fasten the seat belt, even for short
journeys.
Do not invert the seat belt buckles, as they
will not fulfil their role properly.
To ensure the proper functioning of the belt
buckles, make sure that there are no foreign
bodies present (e.g.
a coin) before fastening.
Before and after use, ensure that the seat belt
is reeled in correctly.
After folding or moving a seat or rear bench
seat, ensure that the seat belt is positioned
and reeled in correctly.
Installation
The lower part of the strap must be
positioned as low as possible over the pelvis.
The upper part must be positioned in the
hollow of the shoulder.
At the front, adjusting the position of the
seat belt may require the seat height to be
adjusted.
In order to be effective, a seat belt must:
–
be tightened as close to the body as
possible.
–
be pulled in front of you with a smooth
movement, checking that it is not twisted.
–
must only be used to secure one person.
–
not show signs of tearing or fraying.
–
not be changed or modified, in order to
avoid affecting its performance.
Recommendations for children
Use a suitable child seat if the passenger
is less than 12 years old or shorter than 1.5
metres.
Never use the same seat belt to secure more
than one child.
Never carry a child on your lap.
For more information on Child seats, refer to
the corresponding section.
Maintenance
In accordance with current safety
regulations, for all work on your vehicle's
seat belts, contact a qualified workshop with
the skills and equipment needed, which a
CITROËN dealer is able to provide.
Page 107 of 324
105
Safety
5If fitted to the vehicle, this system offers
enhanced protection for the driver and
passenger in the event of a serious side impact,
limiting the risk of injury to the side of the head.
Each curtain airbag is built into the pillars and
the upper passenger compartment area.
With the two-seat front bench seat, the
passenger sitting in the centre is not
protected.
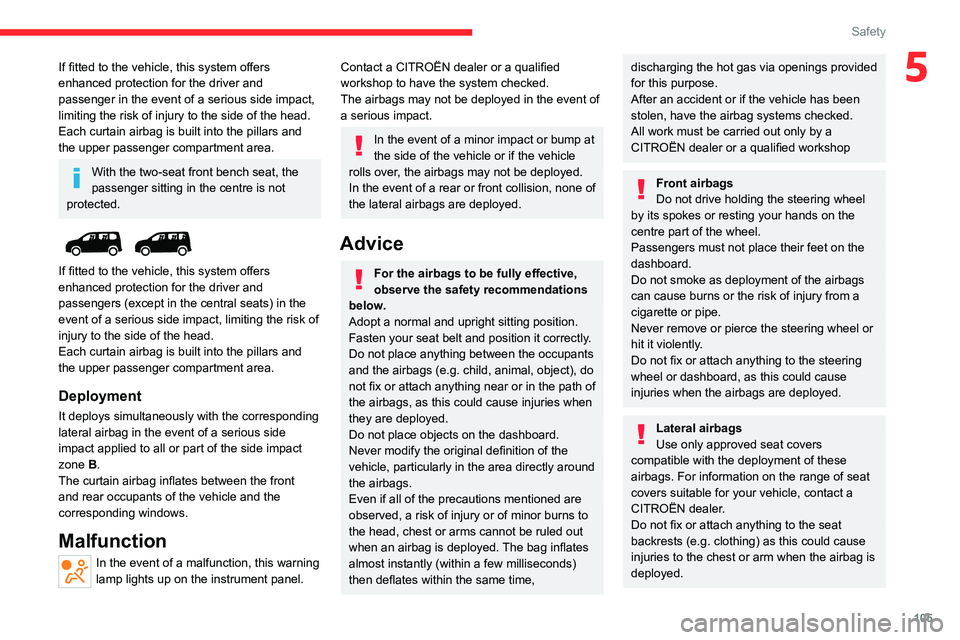
If fitted to the vehicle, this system offers
enhanced protection for the driver and
passengers (except in the central seats) in the
event of a serious side impact, limiting the risk of
injury to the side of the head.
Each curtain airbag is built into the pillars and
the upper passenger compartment area.
Deployment
It deploys simultaneously with the corresponding
lateral airbag in the event of a serious side
impact applied to all or part of the side impact
zone B.
The curtain airbag inflates between the front
and rear occupants of the vehicle and the
corresponding windows.
Malfunction
In the event of a malfunction, this warning
lamp lights up on the instrument panel.
Contact a CITROËN dealer or a qualified
workshop to have the system checked.
The airbags may not be deployed in the event of
a serious impact.
In the event of a minor impact or bump at
the side of the vehicle or if the vehicle
rolls over, the airbags may not be deployed.
In the event of a rear or front collision, none of
the lateral airbags are deployed.
Advice
For the airbags to be fully effective,
observe the safety recommendations
below.
Adopt a normal and upright sitting position.
Fasten your seat belt and position it correctly.
Do not place anything between the occupants
and the airbags (e.g.
child, animal, object), do
not fix or attach anything near or in the path of
the airbags, as this could cause injuries when
they are deployed.
Do not place objects on the dashboard.
Never modify the original definition of the
vehicle, particularly in the area directly around
the airbags.
Even if all of the precautions mentioned are
observed, a risk of injury or of minor burns to
the head, chest or arms cannot be ruled out
when an airbag is deployed. The bag inflates
almost instantly (within a few milliseconds)
then deflates within the same time,
discharging the hot gas via openings provided
for this purpose.
After an accident or if the vehicle has been
stolen, have the airbag systems checked.
All work must be carried out only by a
CITROËN dealer or a qualified workshop
Front airbags
Do not drive holding the steering wheel
by its spokes or resting your hands on the
centre part of the wheel.
Passengers must not place their feet on the
dashboard.
Do not smoke as deployment of the airbags
can cause burns or the risk of injury from a
cigarette or pipe.
Never remove or pierce the steering wheel or
hit it violently.
Do not fix or attach anything to the steering
wheel or dashboard, as this could cause
injuries when the airbags are deployed.
Lateral airbags
Use only approved seat covers
compatible with the deployment of these
airbags. For information on the range of seat
covers suitable for your vehicle, contact a
CITROËN dealer.
Do not fix or attach anything to the seat
backrests (e.g.
clothing) as this could cause
injuries to the chest or arm when the airbag is
deployed.