height CITROEN BERLINGO VAN 2021 Handbook (in English)
[x] Cancel search | Manufacturer: CITROEN, Model Year: 2021, Model line: BERLINGO VAN, Model: CITROEN BERLINGO VAN 2021Pages: 260, PDF Size: 7.57 MB
Page 91 of 260

89
Safety
5Child weight and age guide
Under 10 kg
(group
0)
Up to about 6
months old Under 10
kg
(group
0)
Under 13
kg
(group
0+)
Up to about 1 year old From 9 - 18 kg
(group 1)
From about 1 to 3 years old
Type of ISOFIX child seat Cotrearward-facing rearward-facing forward-facing
ISOFIX size category F G C D E C D A B B1
Row 1 (a) Not ISOFIX
Row
2 (b) Rear seat
behind the
driver's seatIL (c)
IL IUF/IL
Centre rear
seat (f) and
passenger’s
side rear
seat IL (d)
Row
3 (b) (e) Not ISOFIX
Key
(a) Refer to the current legislation in the country in which you are drivin\
g before placing a child in this seat position.
(b) To install a rearward-facing or forward-facing child seat on a rear seat,\
adjust the rear seat to the fully back position with the backrest strai\
ghtened.
(c) Installing a carrycot on this seat may prevent the use of one or more o\
f the other seats in this row.
(d) Adjust the front passenger seat without height adjuster to the fully bac\
k position.
(e) Installing child seats with a support leg is prohibited in the third ro\
w.
(f) On some versions, the central seat is not equipped with ISOFIX mounting\
s.
IUF Seat suitable for installing a forward-facing ISOFIX Universal seat sec\
ured using the upper strap.
IL Seat suitable for an ISOFIX Semi-Universal child seat, which may be eit\
her:
–
rearward-facing, fitted with an upper strap or a support leg.
Page 92 of 260

90
Safety
Manual child lock
Mechanical system to prevent opening of the
sliding side door using its interior lever.
Locking/Unlocking
► Rotate the control located on the edge of the
side door up to lock it, or down to unlock it.
Electric child lock
Remote control system to prevent opening of the
rear doors (sliding side door(s), side-hinged rear
doors or tailgate) using their interior controls.
– forward-facing, fitted with a support leg.
– a carrycot fitted with an upper strap or a support leg.
For more information on ISOFIX child seats and in particular on securing the upper strap, refer to the correspondi\
ng section.
i-Size child seats
i-Size child seats have two latches that engage on the two rings A.
These i-Size child seats also have:
–
either an upper strap that is attached to ring B
.
–
or a support leg that rests on the vehicle floor
, compatible with the approved i-Size seat position.
Their role is to prevent the child seat from tipping forward in the even\
t of a collision.
For more information on the ISOFIX mountings, refer to the corresponding section.
Locations for i-Size child seats
In accordance with the new European regulations, this table indicates the options for installing i-Size child seats on seats in the vehicle fitted with i-Size
approved ISOFIX mountings.
Seat position i-Size child restraint system
Row 1 (a) Passenger seatNot i-Size
Row 2 (b) (c) (d) i-U
Row
3 (b) Not i-Size
Key
(a) Refer to the current legislation in the country in which you are drivin\
g before placing a child in this seat position.
(b) To install a rearward-facing or forward-facing child seat on a rear seat,\
adjust the rear seat to the fully back position with the backrest strai\
ghtened.
(c) Adjust the front seat to its maximum height.
(d) On some versions, the central seat is not equipped with ISOFIX mounting\
s.
i-U Suitable for forward-facing and rearward-facing "Universal" i-Size rest\
raint systems.
i-UF Only suitable for forward-facing "Universal" i-Size restraint systems.
Page 94 of 260
92
Driving
Driving recommendations
► Observe the driving regulations and remain
vigilant whatever the traffic conditions.
►
Monitor your environment and keep your
hands on the wheel to be able to react to
anything that may happen any time.
►
Drive smoothly
, anticipate the need for
braking and maintain a longer safety distance,
especially in bad weather.
►
Stop the vehicle to carry out operations that
require close attention (such as adjustments).
►
During long trips, take a break every two
hours.
Important!
Never leave the engine running in a
closed space without sufficient
ventilation. Internal combustion engines emit
toxic exhaust gases such as carbon
monoxide. Danger of poisoning and death!
In severe wintry conditions (temperature
below -23°C), let the engine run for 4
minutes before moving off, to ensure the
correct operation and durability of the
mechanical components of your vehicle
(engine and gearbox).
Never drive with the parking brake
applied . Risk of overheating and
damage to the braking system!
Do not park the vehicle or leave the
engine running on a flammable
surface (dry grass, dead leaves, etc.). The
exhaust system of your vehicle is very hot,
even several minutes after the engine stops.
Risk of fire!
Never leave a vehicle unattended with
the engine running. If you have to leave
your vehicle with the engine running, apply
the parking brake and put the gearbox into
neutral or position N or P (depending on the
type of gearbox).
Never leave children inside the vehicle
unsupervised.
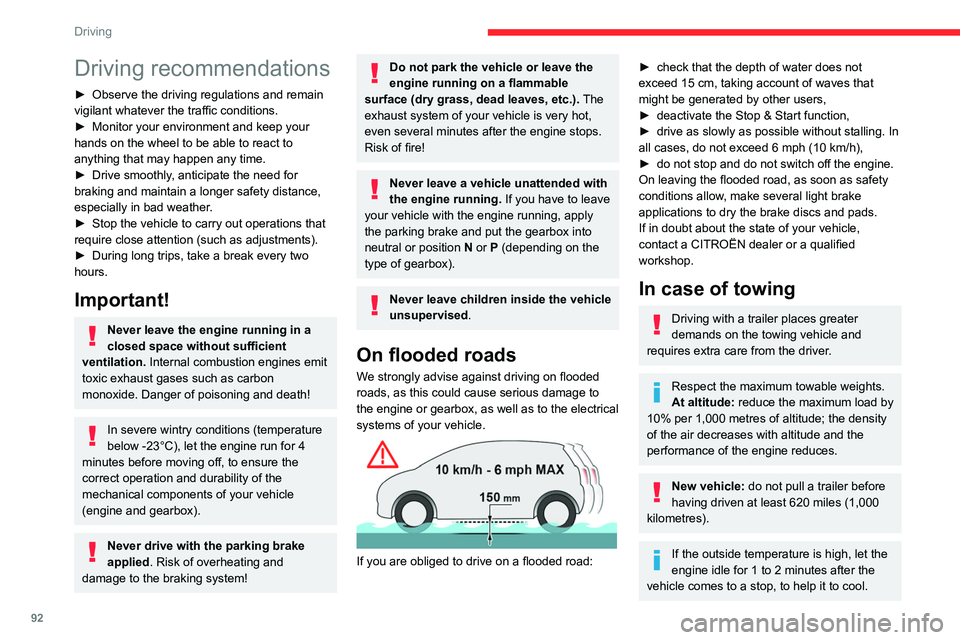
On flooded roads
We strongly advise against driving on flooded
roads, as this could cause serious damage to
the engine or gearbox, as well as to the electrical
systems of your vehicle.
If you are obliged to drive on a flooded road:
► check that the depth of water does not
exceed 15 cm, taking account of waves that
might be generated by other users,
►
deactivate the Stop & Start function,
►
drive as slowly as possible without stalling. In
all cases, do not exceed 6 mph (10
km/h),
►
do not stop and do not switch off the engine.
On leaving the flooded road, as soon as safety
conditions allow
, make several light brake
applications to dry the brake discs and pads.
If in doubt about the state of your vehicle,
contact a CITROËN dealer or a qualified
workshop.
In case of towing
Driving with a trailer places greater
demands on the towing vehicle and
requires extra care from the driver.
Respect the maximum towable weights.
At altitude: reduce the maximum load by
10% per 1,000 metres of altitude; the density
of the air decreases with altitude and the
performance of the engine reduces.
New vehicle: do not pull a trailer before
having driven at least 620 miles (1,000
kilometres).
If the outside temperature is high, let the
engine idle for 1 to 2 minutes after the
vehicle comes to a stop, to help it to cool.
Before setting off
Nose weight
► Distribute the load in the trailer so that the
heaviest items are as close as possible to the
axle and the nose weight (at the point where it
joins your vehicle) approaches the maximum
permitted without exceeding it.
Tyres
► Check the tyre pressures of the towing
vehicle and of the trailer, observing the
recommended pressures.
Lighting
► Check the electrical signalling on the trailer
and the headlamp beam height of your vehicle.
If a genuine CITROËN towing device is
used, the rear parking sensors will be
deactivated automatically to avoid the audible
signal.
When driving
Cooling
Towing a trailer uphill increases the temperature
of the coolant. The maximum towable load
depends on the gradient and the exterior
temperature. The cooling capacity of the fan
does not increase with engine speed.
► Reduce speed and lower the engine speed,
so as to limit the heating-up.
Page 95 of 260
93
Driving
6Before setting off
Nose weight
► Distribute the load in the trailer so that the
heaviest items are as close as possible to the
axle and the nose weight (at the point where it
joins your vehicle) approaches the maximum
permitted without exceeding it.
Tyres
► Check the tyre pressures of the towing
vehicle and of the trailer , observing the
recommended pressures.
Lighting
► Check the electrical signalling on the trailer
and the headlamp beam height of your vehicle.
If a genuine CITROËN towing device is
used, the rear parking sensors will be
deactivated automatically to avoid the audible
signal.
When driving
Cooling
Towing a trailer uphill increases the temperature
of the coolant. The maximum towable load
depends on the gradient and the exterior
temperature. The cooling capacity of the fan
does not increase with engine speed.
►
Reduce speed and lower the engine speed,
so as to limit the heating-up. In all cases, pay attention to the coolant
temperature.
If this warning lamp and the
STOP
warning lamp come on, stop the vehicle
and switch off the engine as soon as possible.
Brakes
Braking distances are increased when towing a
trailer. To avoid overheating of the brakes, the
use of engine braking is recommended.
Side wind
Bear in mind the increased susceptibility to the
wind that the vehicle will have.
Anti-theft protection
Electronic immobiliser
The remote control contains an electronic chip
which has a special code. When the ignition is
switched on, this code must be recognised in
order for starting to be possible.
A few seconds after switching off the ignition,
this system locks the engine control system,
therefore preventing the engine from being
started in the event of a break-in.
In the event of a fault, you are informed
by illumination of this warning lamp, an
audible signal and a message on the screen.
The vehicle will not start; contact a CITROËN
dealer as soon as possible.
Starting/switching off the
engine
Starting
The parking brake must be applied.
►
With a manual gearbox, shift the gear lever
into neutral, press the clutch pedal to the floor
and keep the pedal down until the engine runs.
►
With
an automatic gearbox, place the selector
in position P then depress the brake pedal.
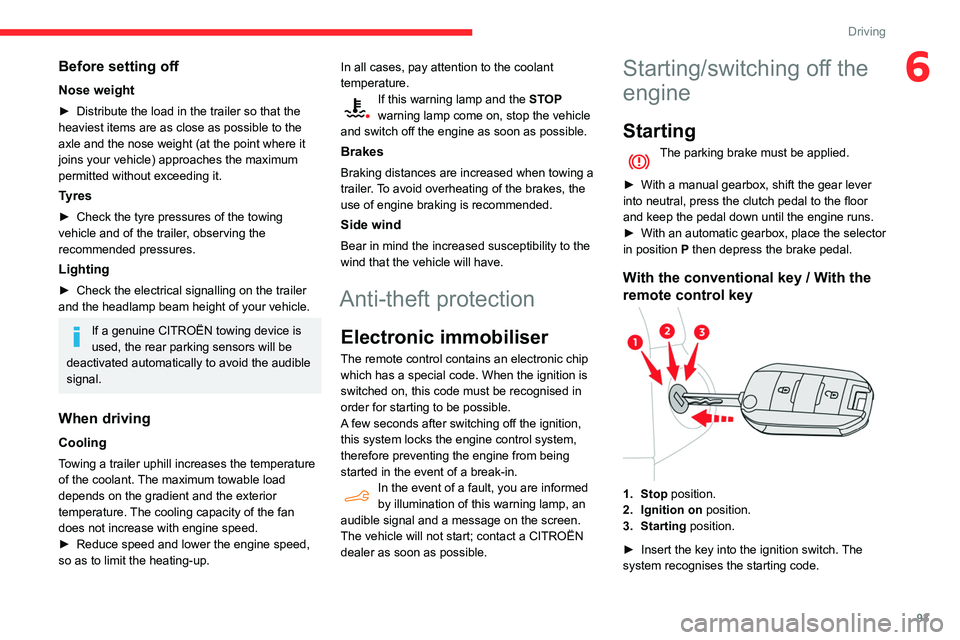
With the conventional key / With the
remote control key
1. Stop position.
2. Ignition on position.
3. Starting position.
►
Insert the key into the ignition switch.
The
system recognises the starting code.
Page 110 of 260

108
Driving
D.If your vehicle is suitably equipped, speed
limit information.
For more information on Navigation,
refer to the section Audio equipment
and telematics.
Selector
1. On.
2. Off (long press).
3. Brightness adjustment.
4. Display height adjustment.
Activation/Deactivation
► With the engine running, press button 1 to
activate the system and deploy the projection
blade.
► Press and hold button 2 to deactivate the
system and retract the projection blade.
The state of the system is saved when the
engine is switched off and restored on restarting.
Height adjustment
► With the engine running, adjust the display to
the desired height using the buttons 4
:
•
up to move the display up,
•
down to move the display down.
Brightness adjustment
► With the engine running, adjust the
brightness of the information display using the
buttons
3:
•
on the "sun" to increase the brightness,
•
on the "moon" to decrease the brightness.
When stationary or while driving, no
objects should be placed around the
projection blade (or in its recess) so as not to
impede its movement and correct operation.
In certain extreme weather conditions
(rain and/or snow, bright sunshine, etc.),
the head-up display may not be legible or
may suffer temporary interference.
Some sunglasses may hamper reading of the
information.
To clean the projection blade, use a clean,
soft cloth (such as a spectacles cloth or
microfibre cloth). Do not use a dry or abrasive
cloth, or detergent or solvent products, due to
the risk of scratching the projection blade or
damaging the non-reflective coating.
This system operates when the engine is running, and the settings are saved when
the ignition is switched off.
Driving and manoeuvring
aids - General
recommendations
Driving and manoeuvring aids cannot, in
any circumstances, replace the need for
vigilance on the part of the driver.
The driver must comply with the Highway
Code, must remain in control of the vehicle in
all circumstances and must be able to retake
control of it at all times. The driver must adapt
the speed to climactic conditions, traffic and
the state of the road.
It is the driver's responsibility to constantly
check the traffic, to assess the relative
distances and speeds of other vehicles and to
anticipate their movements before indicating
and changing lane.
The systems cannot exceed the limits of the
laws of physics.
Driving aids
You should hold the steering wheel
with both hands, always use the interior and
exterior rear view mirrors, always keep the
feet close to the pedals and take a break
every two hours.
Manoeuvring aids
The driver must always check the
surroundings of the vehicle before and during
the whole manoeuvre, in particular using the
mirrors.
Radar
The operation of the radar as well as the
associated functions may be impaired through
the accumulation of dirt (mud, frost, etc.), in
certain difficult weather conditions (very heavy
rain, snow) or if the bumper is damaged.
If the front bumper is to be repainted, contact
a CITROËN dealer or a qualified workshop;
certain types of paint could interfere with the
operation of the radar.
Page 146 of 260

144
Practical information
Towing device with quickly detachable towball
No tools are required to install or remove this
genuine towing device.
Trailers with LED lamps are not
compatible with the wiring harness of this
device.
Fitting
► On the towball, move the lever from position
1 to position 2.
►
Before fitting the towball, check that the
contact points (shown by the arrows) are clean.
Use a soft, clean cloth.
► Insert the end of the towball into the carrier ,
located underneath the rear bumper, as far as it
can go.
►
Secure the towball correctly by moving the
lever to position 3
("locked" position).
►
If necessary
, pivot the socket downwards,
paying attention to the exhaust pipe.
►
Connect the trailer plug to the 13-pin socket
provided next to the carrier
.
►
Secure the trailer by connecting its safety
cable to the eye on the carrier
.
Removing
► On the towball, move the lever from position
3 to position 2.
►
Remove the towball by pulling it towards you.
►
Once the towball has been removed, move
the lever from position 2
to position 1.
If the towball is not locked, the trailer can
detach. This may cause an accident.
Always lock the towball as described in the
instructions.
Observe the legislation in force in the country
in which you are driving.
Remove the towball when not in use.
Before starting the vehicle, check that the
trailer lamps operate correctly.
Before setting off, check the adjustment of the
headlamp beam height.
Connect the trailer plug with the engine
off .
If you connect the trailer plug within a few
minutes of switching off the engine, do not
touch the exhaust pipe. Risk of burns!
Carrier systems (box or bicycle
carrier)
Always comply with the maximum load
authorised on the towing device: if exceeded,
the device may detach from the vehicle,
potentially causing a serious accident.
For more information about the Engine
technical data and towed loads and in
particular, the maximum load on the towing
device, refer to the corresponding section.
Remove the quickly detachable towball
when not towing a trailer.
Energy economy mode
System which manages the duration of use of
certain functions to conserve a sufficient level of
charge in the battery.
After switching off the engine and for a maximum
cumulative period of around 40 minutes, you can
continue to use functions such as the audio and
telematics system, the wipers, the dipped beam
headlamps, the courtesy lamps, etc.
Page 147 of 260

145
Practical information
7Switching to the mode
A message indicating that the vehicle has
switched to economy mode is displayed on the
instrument panel screen and the active functions
are put on standby.
If a telephone call is in progress at the
time, it will be maintained for around 10
minutes using your audio system’s hands-free
system.
Exiting the mode
These functions will be automatically reactivated
the next time the vehicle is used.
In order to restore the use of these functions
immediately, start the engine and let it run:
–
for less than 10 minutes, to use the equipment
for approximately 5 minutes,
–
for more than 10 minutes, to use the
equipment for approximately 30 minutes.
Let the engine run for the duration specified to
ensure that the battery charge is sufficient.
Do not repeatedly and continuously restart the
engine in order to charge the battery
.
A flat battery prevents the engine from starting.
For more information on the 12 V battery,
refer to the corresponding section.
Load reduction mode
System that manages the use of certain
functions according to the level of charge
remaining in the battery.
When the vehicle is being driven, the load
reduction function temporarily deactivates certain
functions, such as the air conditioning and the
heated rear screen.
The deactivated functions are reactivated
automatically as soon as conditions permit.
Roof bars / Roof rack
Recommendations
Distribute the load uniformly, taking care
to avoid overloading one of the sides.
Arrange the heaviest part of the load as close
as possible to the roof.
Secure the load firmly.
Drive gently: the vehicle will be more
susceptible to the effects of side winds and its
stability may be affected.
Regularly check the security and tight
fastening of the roof bars and racks, at least
before each trip.
Remove the roof bars once they are no longer
needed.
In the event of loading ( not exceeding
40 cm in height) on the roof, do not
exceed the following loads:
–
T
ransverse bars on longitudinal bars:
80
kg.
–
T
wo transverse bars bolted to the roof:
100
kg.
–
Three transverse bars bolted to the roof:
150
kg.
–
An aluminium rack: 120
kg.
–
A
steel rack: 115 kg.
If the height exceeds 40
cm, adapt the speed
of the vehicle to the profile of the road to
avoid damaging the roof bars or the roof rack
and the fixings on the vehicle.
Refer to national legislation in order to comply
with the regulations for transporting objects
that are longer than the vehicle.
In the event of loading a 7-seat model
(not exceeding 40 cm in height) on the
roof, do not exceed the following loads:
–
Three transverse bars bolted to the roof:
100
kg.
–
An aluminium rack: 70
kg.
–
A
steel rack: 65 kg.
As a safety measure and to avoid damaging the roof, it is essential to use
Page 177 of 260

175
Technical data
9Dimensions (mm)
These dimensions have been measured on an unladen vehicle.The vehicle is available in two lengths (M and XL).
The height may vary, depending on wheel diameters.
Vehicle length
M (L1) XL (L2)
A Overall length 4,4034,753
B Overall heightWithout roof bars1,800 to 1,8071,812 to 1,818
With roof bars 1,837 to 1,8441,843 to 1,849
C Wheelbase 2,7852,975
D Front overhang 892
E Rear overhang 726886
F Width inc. mirrorsFolded1,921
Unfolded 2,107
G Front track width 1,553
Page 235 of 260

233
Alphabetical index
A
ABS 73
Accessories
69, 96
Access to the 3rd row
43
Access to the spare wheel
158–159
Active Safety Brake
122–123
AdBlue®
151
AdBlue® tank
152
Additive, Diesel
149–150
Adjusting headlamps
65
Adjusting head restraints
45
Adjusting seat
38, 43
Adjusting the air distribution
53–54
Adjusting the air flow
53–54
Adjusting the date
205, 229
Adjusting the height and reach of
the steering wheel
40
Adjusting the lumbar support
38
Adjusting the temperature
53–54
Adjusting the time
205, 229
Advanced Grip Control
75–76
Advice on care and maintenance
153
Advice on driving
7, 92
Airbags
80, 82–84
Airbags, curtain
81–82
Airbags, front
80–81, 84
Airbags, lateral
81–82
Air conditioning
52, 54, 55, 57
Air conditioning, digital
56
Air conditioning, dual-zone automatic
53–54
Air conditioning, electronic
(with display screen)
57
Air conditioning, manual
53, 55
Air intake
53–54
Air vents
52
Alarm
33–34
Android Auto connection
220
Anti-lock braking system (ABS)
73
Antitheft / Immobiliser
24
Apple CarPlay connection
201, 219
Applications
220
Armrest
38
Armrest, front
45
Assistance call
69–71
Assistance, emergency braking
73, 123
Audible warning
73
Audio streaming (Bluetooth)
188, 200, 224
B
Battery 144–145, 169, 171–172
Battery, 12 V
149, 169–170
Battery, charging
170–171
Battery, remote control
29, 59
Bench seat, one-piece, fixed
43
Blind spot monitoring system
128
Blind spot monitoring system, active
129
Blind spot sensors
127, 129
BlueHDi
149, 155
Bluetooth
(hands-free)
189–190, 202, 225–226
Bluetooth (telephone) 202–203, 225–226
Bodywork
154
Bonnet
146
Boot lid
26, 28
Bottle holder
45
Brake discs
150
Brake lamps
166
Brakes
150
Braking assistance system
73–74
Braking, automatic emergency
122–123
Braking, dynamic emergency
98–99
Brightness
204
Bulbs
162
Bulbs (changing)
161–162
Bulbs (changing, type)
162
C
Cable, audio 224
Cable, Jack
224
Capacity, fuel tank
140–141
Cap, fuel filler
140–141
Care of the bodywork
154
CD
187, 200
CD, MP3
187, 200
Central locking
23, 26
Changing a bulb
161–164
Changing a fuse
167–169
Changing a wheel
156, 158
Changing a wiper blade
66–67
Changing the remote control battery
29