Citroen C1 RHD 2016 1.G Workshop Manual
Manufacturer: CITROEN, Model Year: 2016, Model line: C1 RHD, Model: Citroen C1 RHD 2016 1.GPages: 268, PDF Size: 7.09 MB
Page 51 of 268

49
Rear head restraints*
The rear head restraints can be removed and have two positions:
-
h
igh, position for use.
-
l
ow, storage position. To
raise the head restraint, pull it upwards.
To
lower it, press lug A then the head restraint.
To
remove it:
-
t
ilt the seat back slightly,
-
m
ove the head restraint to the high
p
osition,
-
p
ress lug A pulling the head restraint
u
pwards at the same time.To
refit it:
-
t
ilt the seat back slightly,
-
e
ngage the rods of the head restraint in the
o
penings.
*
Depending on version.
To
put the head restraint in the low position,
p
ress lug A.
3
Ease of use and comfort
Page 52 of 268
50
Mirrors
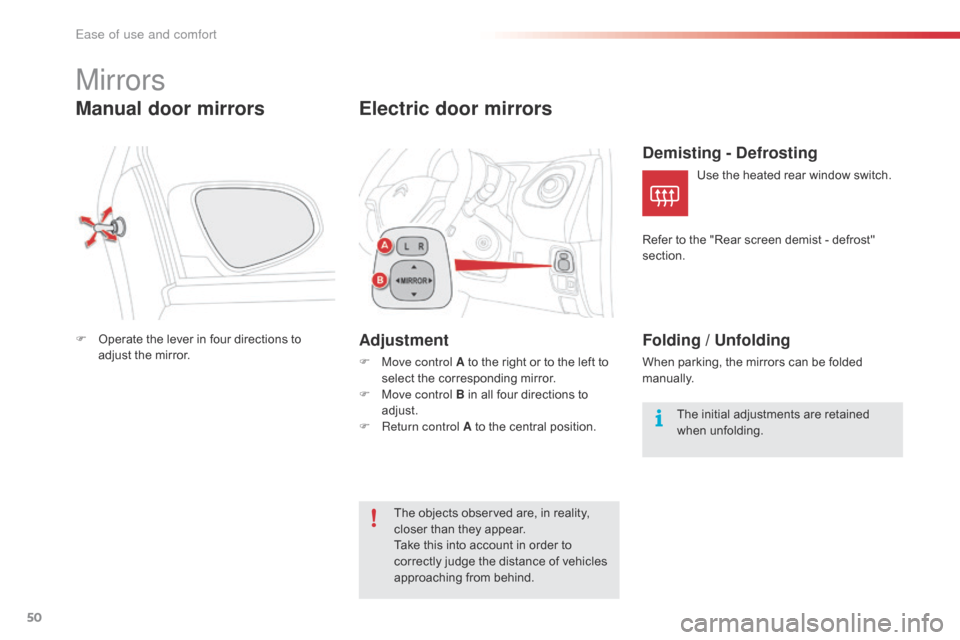
Manual door mirrors
F Operate the lever in four directions to a
djust the mirror.
Electric door mirrors
Adjustment
F Move control A to the right or to the left to s
elect the corresponding mirror.
F
M
ove control B in all four directions to
adj
ust.
F
R
eturn control A to the central position.
The
objects observed are, in reality,
c
loser than they appear.
Take
this into account in order to
c
orrectly judge the distance of vehicles
a
pproaching from behind.
Demisting - Defrosting
Use the heated rear window switch.
R
efer
to
the "Rear screen demist - defrost"
s
ection.
Folding / Unfolding
When parking, the mirrors can be folded m anually.
The
initial adjustments are retained
w
hen
u
nfolding.
Ease of use and comfort
Page 53 of 268
51
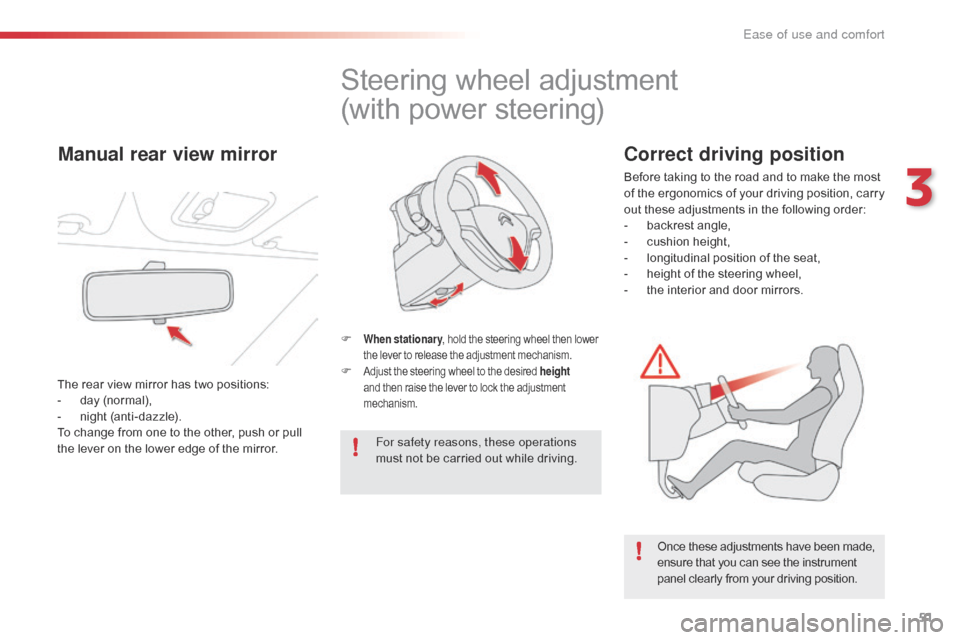
Steering wheel adjustment
(with power steering)
F When stationary , hold the steering wheel then lower t
he lever to release the adjustment mechanism.
F Adjust the steering wheel to the desired height
and then raise the lever to lock the adjustment m
echanism.
For safety reasons, these operations
must not be carried out while driving.
Once
these adjustments have been made,
e
nsure that you can see the instrument
p
anel clearly from your driving position.
Manual rear view mirror
The rear view mirror has two positions:
- d ay (normal),
-
n
ight (anti-dazzle).
To
change from one to the other, push or pull
t
he lever on the lower edge of the mirror.
Correct driving position
Before taking to the road and to make the most of t he e rgonomics o f y our d riving p osition, c arry
o
ut these adjustments in the following order:
-
b
ackrest angle,
-
c
ushion height,
-
l
ongitudinal position of the seat,
-
h
eight of the steering wheel,
-
t
he interior and door mirrors.
3
Ease of use and comfort
Page 54 of 268

52
Ventilation
1. Windscreen demisting/defrosting v ent.
2. C entre vent.
3.
S
ide vents.
4.
A
ir outlets to the front footwells.
5.
A
ir outlets to the rear footwells
(depending
o
n
v
ersion).
Ease of use and comfort
Page 55 of 268
53
Recommendations for use
If the interior temperature remains very high after a prolonged period parked in the sun, first ventilate the passenger compartment for a few minutes.
For
an even air distribution, make sure that you do not block the outside air inlet grille, the
v
ents, the air passages and the air outlets to the footwells.
Ensure
that the passenger compartment filter, located behind the glove box in the heater
u
nit, is in good condition. Have the filter elements replaced regularly. If you drive in dusty
c
onditions, change them twice as often.
Operate
the air conditioning system for 5 to 10 minutes, once or twice a month, to keep it in
p
er fect working order.
In
order to ensure that your air conditioning system continues to operate correctly, you are
a
dvised to have it checked regularly.
If
the system does not produce cold air, do not use it and contact a CITROËN dealer or a
q
ualified
w
orkshop.
The
air conditioning system does not contain chlorine and does not present any danger to
t
he ozone layer.
The
condensation created by the air conditioning results in a flow of water under the vehicle
w
hen stationary which is per fectly normal.
3
Ease of use and comfort
Page 56 of 268

54
Heating
The heating system only operates with the engine running.F
T
urn the control from blue
(
cold) to red (hot) to adjust the
t
emperature to your wishes.
Temperature adjustment
Air flow adjustment
F Turn the knob from position 1 to
4 to obtain the desired flow of
a
i r.
Avoid
driving for too long without
v
entilation (risk of misting and
d
eterioration of air quality).
Air distribution adjustment
Centre vent and side air vents.
C entre vent, side vents and footwells.
Footwells.
Windscreen
and footwells.
Windscreen.
The
air distribution can be varied by
p
lacing the control in an intermediate
p
osition.
Ease of use and comfort
Page 57 of 268

55
Manual air conditioning
The air conditioning system only operates with the engine running.
F
T
urn the control knob from
b
lue (cold) to red (hot) to
a
djust the temperature to your
r
equirements.
Temperature adjustment
Air flow adjustment
F Turn the control knob from p
osition 1 to position 4 to obtain
a
comfortable air flow.
If you put the air flow control in
position
0 (system off), the temperature is no
l
onger
controlled. However, a slight flow of air
c
an
still
be
felt, resulting from the movement of
t
he
vehicle.
Air distribution adjustment
Centre and side vents.
C entre and side air vents, footwells.
Footwells.
Windscreen
and footwells.
Windscreen.
3
Ease of use and comfort
Page 58 of 268
56
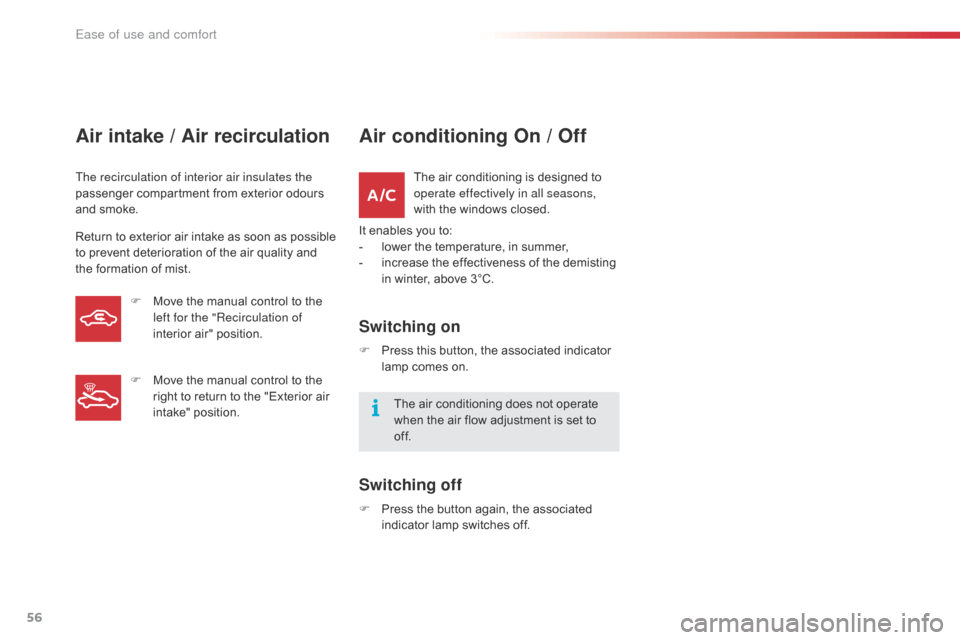
Air intake / Air recirculation
The recirculation of interior air insulates the
passenger compartment from exterior odours
a
nd smoke.
Return
to exterior air intake as soon as possible
t
o prevent deterioration of the air quality and
t
he formation of mist.
Air conditioning On / Off
The air conditioning is designed to operate effectively in all seasons,
with
the windows closed.
It
enables
you to:
-
l
ower
the temperature, in summer,
-
i
ncrease the effectiveness of the demisting
i
n
winter, above 3°C.
Switching on
F Press this button, the associated indicator l
amp comes on.
The
air conditioning does not operate
w
hen the air flow adjustment is set to
o
f f.
Switching off
F Press the button again, the associated i
ndicator lamp switches off.
F
M
ove
the
manual
control
to
the
l
eft for the "Recirculation of
interior
air"
position.
F
M
ove
the
manual
control
to
the
r
ight
to
return
to
the
"Exterior
air
i
ntake"
position.
Ease of use and comfort
Page 59 of 268

57
Manual override
It is possible to adjust one or more functions manually while leaving the other functions in
a
utomatic mode.
The "AUTO"
symbol switches off.
To
return to automatic mode, press the "AUTO"
button.
Switching
to manual mode may not be suitable
(
temperature, humidity, odour, condensation)
a
nd does not provide optimum comfort.
Automatic air conditioning
F Press the "AUTO" button.
The "AUTO"
symbol comes on.
The
air
conditioning
system
only
operates
with
the
engine
running.
By
pressing the "AUTO"
button again, you can
c
hoose
from one of the following settings in
t
urn:Automatic programme
Allows optimum operation of the s ystem.
Offers
temperature control while
r
estricting air flow.
Dynamic
air distribution mainly
t
owards the side air vents.
We
recommend
that
you
use
this
mode.
I
t
provides
optimised
automatic
control
of
a
ll
of
the
following
functions:
passenger
c
ompartment
temperature,
air
flow,
air
d
istribution
and
air
intake,
in
accordance
with
t
he
comfort
value
that
you
have
chosen.
This
system
is
designed
to
operate
effectively
i
n
all
seasons,
with
the
windows
and
fabric
roof
c
losed.
For
your
comfort,
when
the
engine
is
switched
o
ff,
the
settings
are
retained
until
the
engine
is
s
witched
on
again.
To
prevent
too
great
a
distribution
of
cold
air
w
hen
the
engine
is
cold,
the
air
flow
will
only
r
each
its
optimum
level
gradually.
3
Ease of use and comfort
Page 60 of 268
58
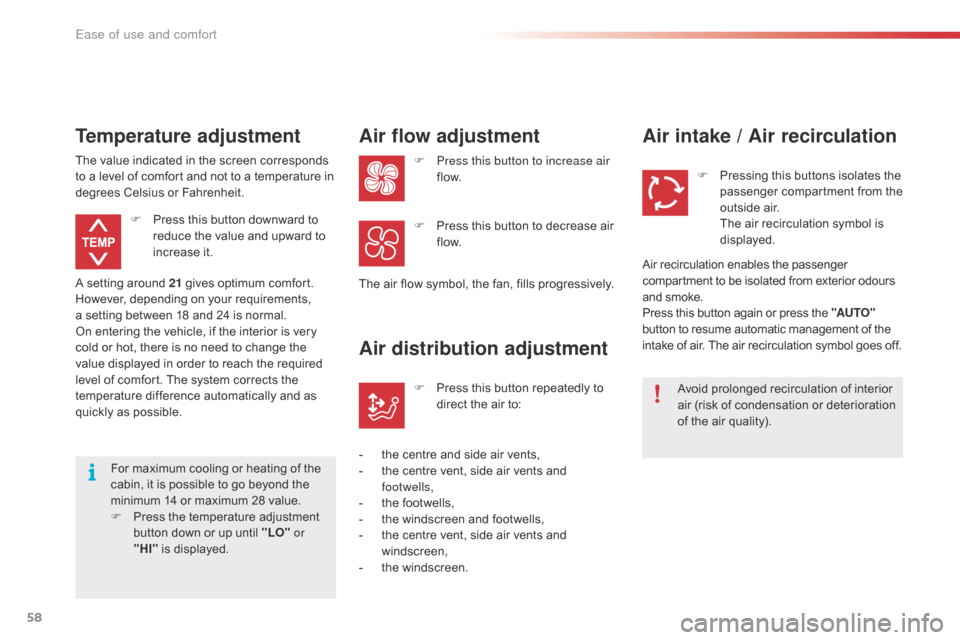
For maximum cooling or heating of the cabin, it is possible to go beyond the
m
inimum 14 or maximum 28 value.
F
P
ress the temperature adjustment
b
utton down or up until "LO" or
"HI"
is displayed.
A
setting around 21
gives optimum comfort.
H
owever, depending on your requirements,
a s
etting between 18 and 24 is normal.
On
entering the vehicle, if the interior is very
c
old
or hot, there is no need to change the
v
alue
displayed in order to reach the required
l
evel
of comfort. The system corrects the
t
emperature difference automatically and as
q
uickly as possible.
Temperature adjustment
F Press
this button downward to r
educe the value and upward to
inc
rease
it
.
The
value
indicated in the screen corresponds
t
o
a
level
of comfort and not to a temperature in
d
egrees
Celsius or Fahrenheit.
Air flow adjustment
F Press this button to increase air
f low.
The
air
flow symbol, the fan, fills progressively.
F
P
ress this button to decrease air
f
low.
Air distribution adjustment
- the centre and side air vents,
- t he centre vent, side air vents and
f
ootwells,
-
t
he footwells,
-
t
he windscreen and footwells,
-
t
he centre vent, side air vents and
w
indscreen,
-
t
he windscreen.F
P
ress this button repeatedly to
d
irect the air to:
Air intake / Air recirculation
Avoid prolonged recirculation of interior a
ir (risk of condensation or deterioration
o
f the air quality).
F
P
ressing this buttons isolates the
p
assenger compartment from the
o
utside air.
T
he air recirculation symbol is
d
isplayed.
Air
recirculation enables the passenger
c
ompartment to be isolated from exterior odours
a
nd
smoke.
Press
this button again or press the "AUTO"
button
to resume automatic management of the
i
ntake
of air. The air recirculation symbol goes off.
Ease of use and comfort