Citroen C4 2014.5 2.G Owner's Manual
Manufacturer: CITROEN, Model Year: 2014.5, Model line: C4, Model: Citroen C4 2014.5 2.GPages: 494, PDF Size: 21.47 MB
Page 101 of 494
99
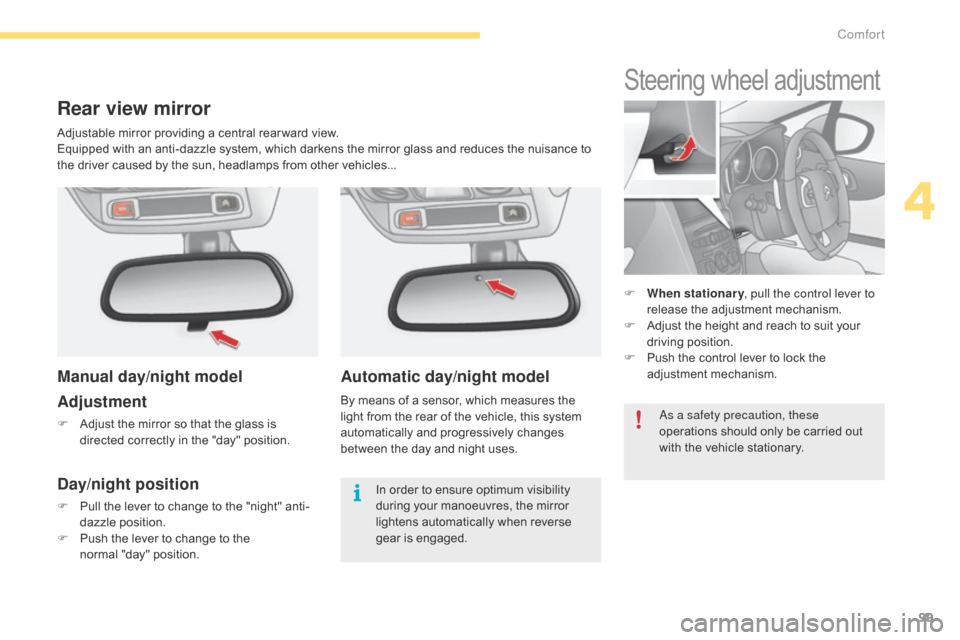
Automatic day/night model
By means of a sensor, which measures the light from the rear of the vehicle, this system
a
utomatically and progressively changes
b
etween the day and night uses.
Steering wheel adjustment
F When stationary , pull the control lever to
release the adjustment mechanism.
F
A
djust the height and reach to suit your
d
riving position.
F
P
ush the control lever to lock the
a
djustment
m
echanism.
Rear view mirror
Manual day/night model
Adjustment
F Adjust the mirror so that the glass is
directed correctly in the "day" position.
Day/night position
F Pull the lever to change to the "night" anti-
dazzle position.
F
P
ush the lever to change to the
normal
"day" position.
as a s
afety precaution, these
operations should only be carried out
w
ith the vehicle stationary.
In order to ensure optimum visibility d
uring your manoeuvres, the mirror l
ightens automatically when reverse
g
ear
i
s
enga
ged.
Adjustable
mirror providing a central rear ward view.
Equipped with an anti-dazzle system, which darkens the mirror glass and reduces the nuisance to
t
he driver caused by the sun, headlamps from other vehicles...
4
Comfort
Page 102 of 494
100
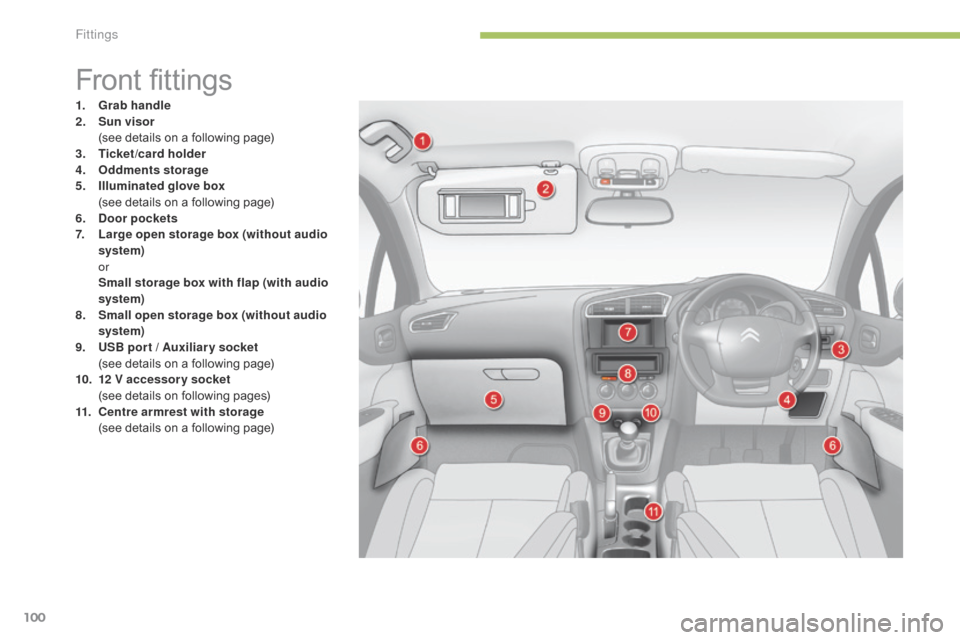
Front fittings
1. Grab handle
2. Sun visor
(
see details on a following page)
3.
T
icket/card holder
4.
O
ddments storage
5.
I
lluminated glove box
(
see details on a following page)
6.
Doo
r pocket s
7.
L
arge open storage box (without audio
system)
or
S
mall storage box with flap (with audio
system)
8.
S
mall open storage box (without audio
system)
9.
U
SB por t / Auxiliar y socket
(
see details on a following page)
10.
1
2 V accessory socket
(
see details on following pages)
11.
C
entre armrest with storage
(
see details on a following page)
Fittings
Page 103 of 494
101
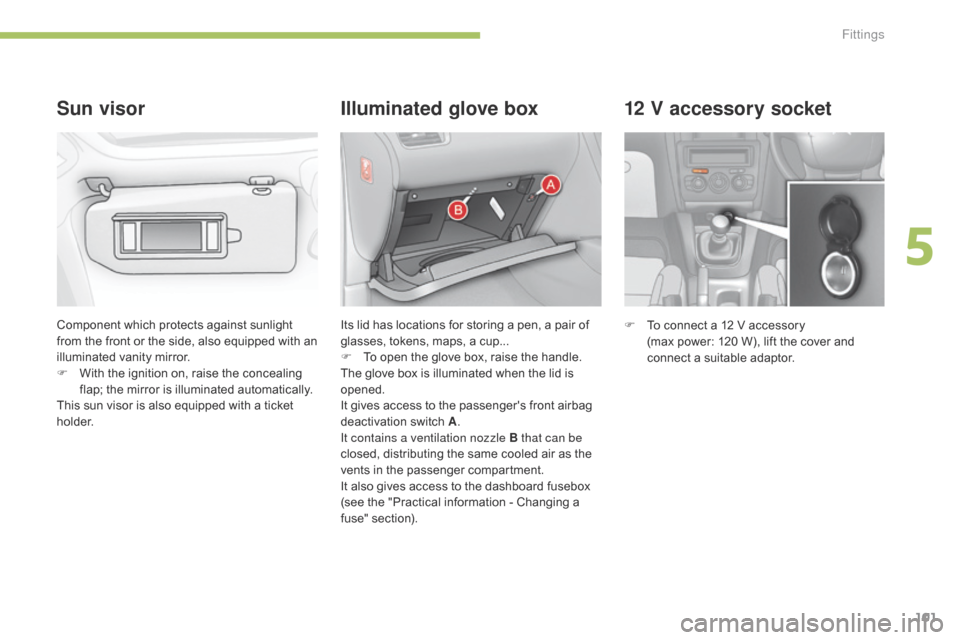
12 V accessory socket
F To connect a 12 V accessory
(max power: 120 W), lift the cover and
c
onnect a suitable adaptor.
Component
which
protects
against
sunlight
f
rom
the
front
or
the
side,
also
equipped
with
an
i
lluminated
v
anity
m
irror.
F
W
ith
the
ignition
on,
raise
the
concealing
f
lap;
the
mirror
is
illuminated
automatically.
This
sun
visor
is
also
equipped
with
a
ticket
h
o l d e r.
Sun visor Illuminated glove box
Its lid has locations for storing a pen, a pair of g
lasses, tokens, maps, a cup...
F
T
o open the glove box, raise the handle.
The
glove box is illuminated when the lid is
ope
ned.
It
gives access to the passenger's front airbag
d
eactivation
s
witch
A.
I
t contains a ventilation nozzle B that can be
closed,
distributing the same cooled air as the
v
ents in the passenger compartment.
It
also gives access to the dashboard fusebox
(
see the "Practical information - Changing a
f
use" section).
5
Fittings
Page 104 of 494
102
USB port / auxiliary socket
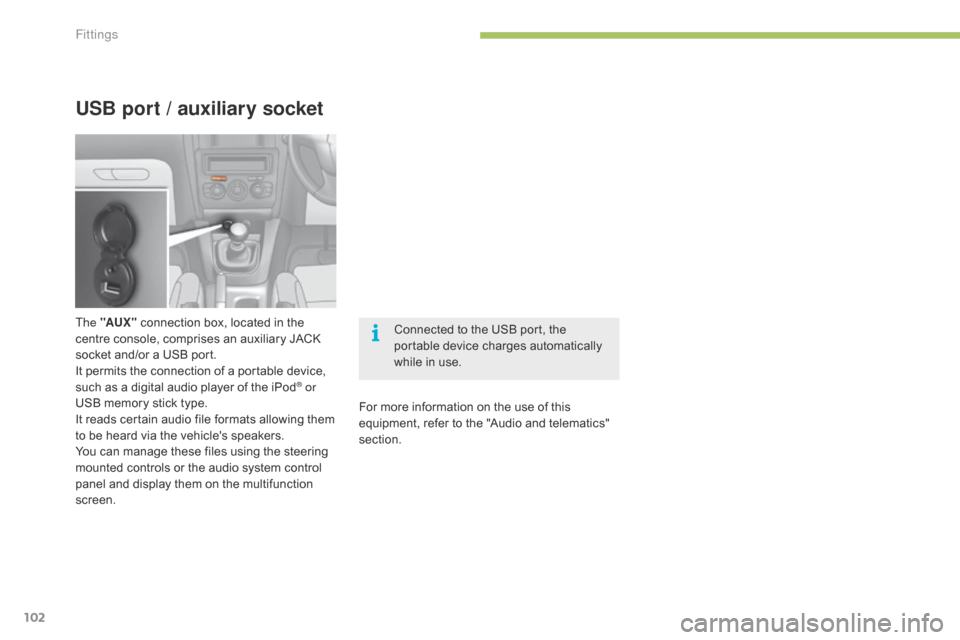
The "AUX " connection box, located in the c
entre console, comprises an auxiliary JACK
s
ocket and/or a USB port.
It
permits the connection of a portable device,
s
uch as a digital audio player of the iPod
® or
USB
memory
stick
type.
It
reads
certain
audio
file
formats
allowing them
t
o
be
heard
via
the
vehicle's
speakers.
You
can
manage
these
files
using
the
steering
m
ounted
controls
or
the
audio
system
control
p
anel
and
display
them
on
the
multifunction
sc
reen. Connected
to the USB port, the
p
ortable device charges automatically
w
hile in use.
For more information on the use of this
e
quipment, refer to the "Audio and telematics"
s
ection.
Fittings
Page 105 of 494
103
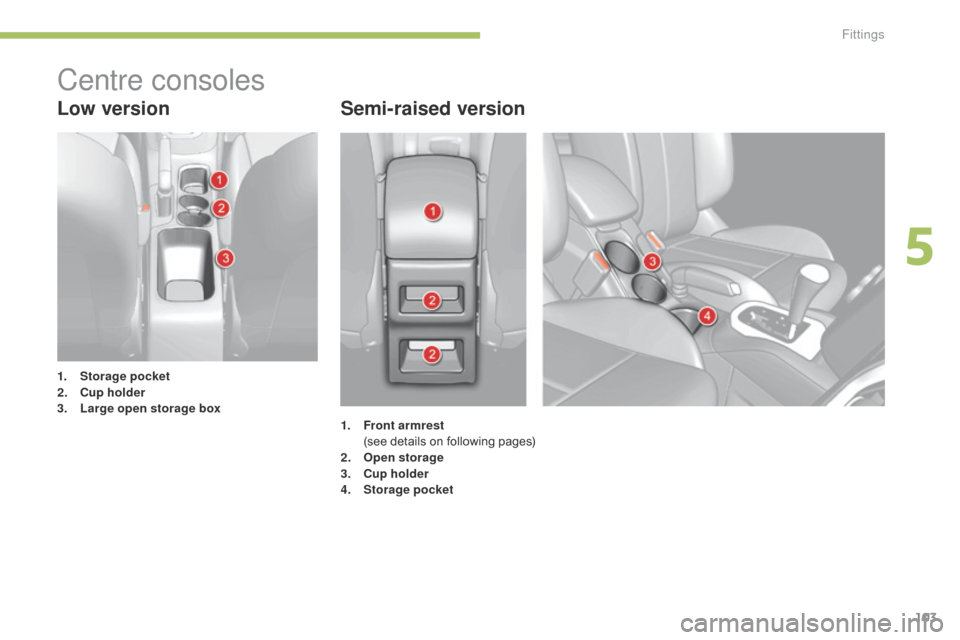
Low versionSemi-raised version
1. Storage pocket
2. C
up holder
3.
L
arge open storage box
Centre consoles
1. Front armrest (
see details on following pages)
2.
O
pen storage
3.
C
up holder
4.
Sto
rage pocket
5
Fittings
Page 106 of 494
104
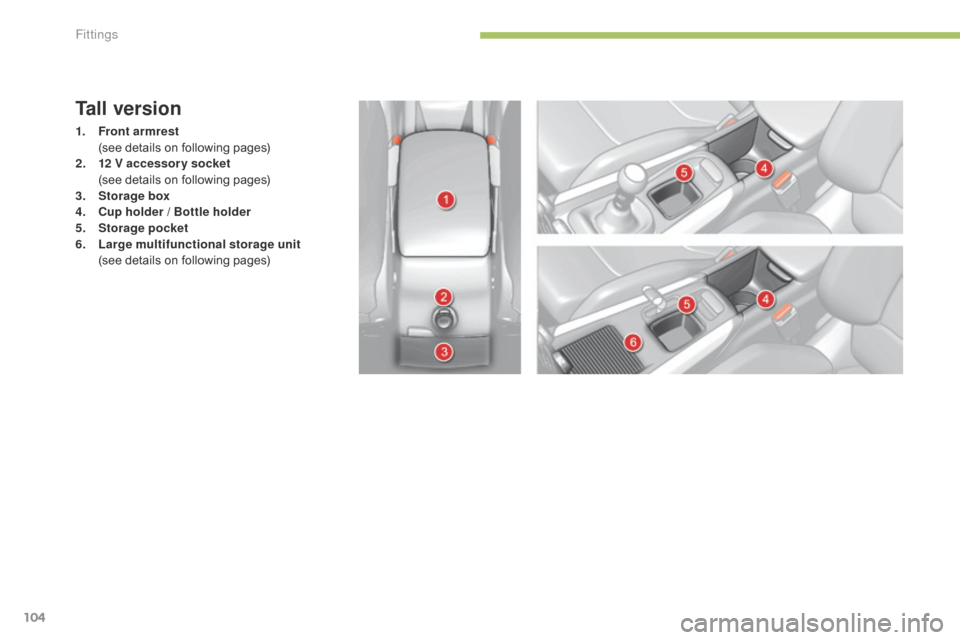
Tall version
1. Front armrest (
see details on following pages)
2.
1
2 V accessory socket
(
see details on following pages)
3.
Sto
rage box
4.
C
up holder / Bottle holder
5.
Sto
rage pocket
6.
L
arge multifunctional storage unit
(
see details on following pages)
Fittings
Page 107 of 494
105
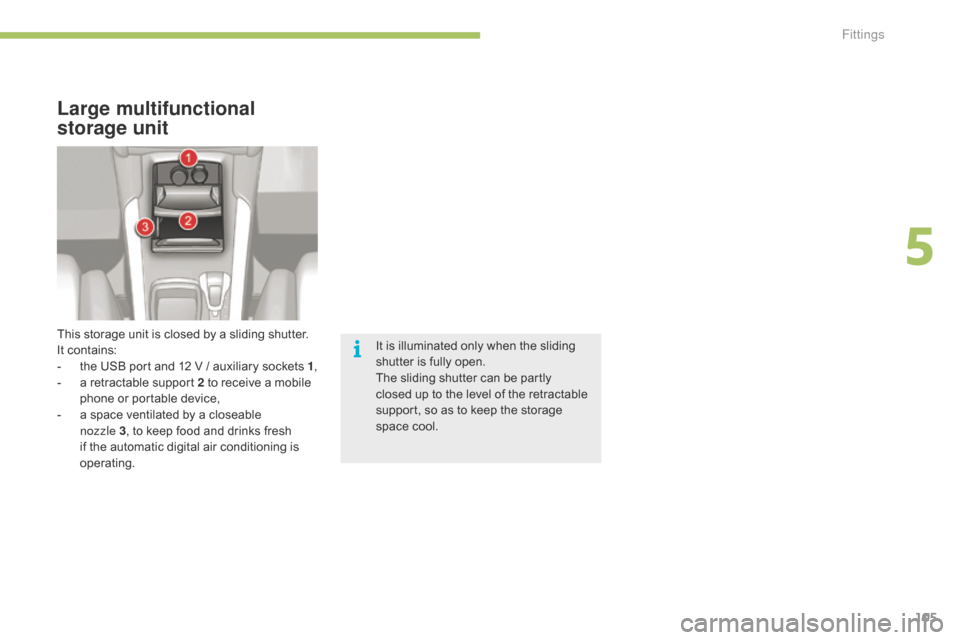
Large multifunctional
storage unit
It is illuminated only when the sliding shutter is fully open.
The
sliding shutter can be partly
c
losed up to the level of the retractable
s
upport, so as to keep the storage
s
pace cool.
This
storage
unit
is
closed
by
a
sliding
shutter.
It
contains:
-
t
he
USB
port
and
12
V
/
auxiliary
sockets
1 ,
-
a
retractable
support
2
to
receive
a
mobile
p
hone
or
portable
device,
-
a
space
ventilated
by
a
closeable
no
zzle 3 ,
to
keep
food
and
drinks
fresh
i
f
the
automatic
digital
air
conditioning
is
ope
rating.
5
Fittings
Page 108 of 494
106
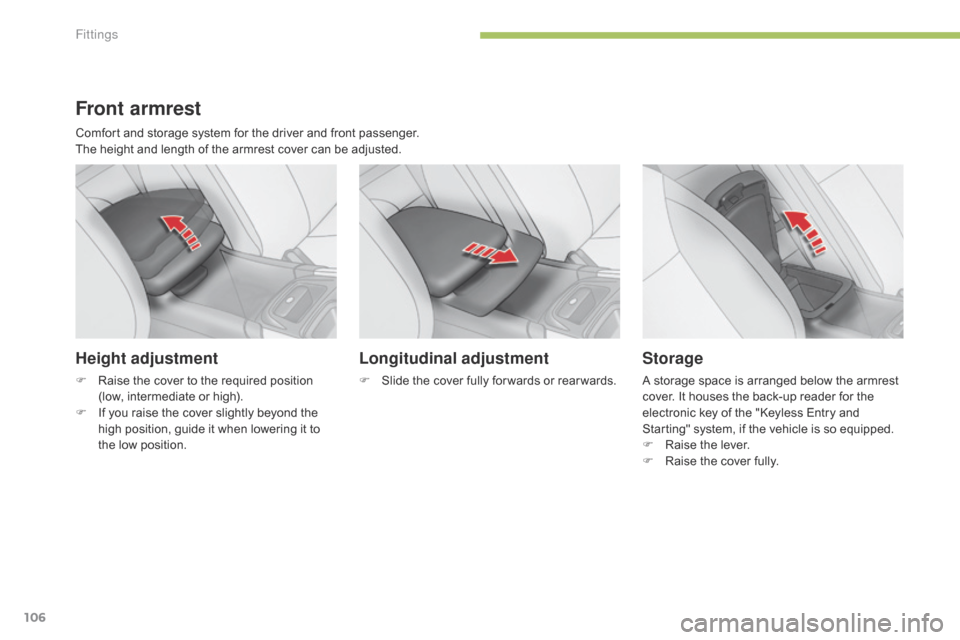
Front armrest
Comfort and storage system for the driver and front passenger.
T he height and length of the armrest cover can be adjusted.
Height adjustment
F Raise the cover to the required position (
low, intermediate or high).
F
I
f you raise the cover slightly beyond the
h
igh position, guide it when lowering it to
t
he low position.
Longitudinal adjustment
F Slide the cover fully for wards or rear wards.
Storage
A storage space is arranged below the armrest c
over. It houses the back-up reader for the
e
lectronic key of the "Keyless Entry and
S
tarting" system, if the vehicle is so equipped.
F
Ra
ise
t
he
l
ever.
F
R
aise the cover fully.
Fittings
Page 109 of 494
107
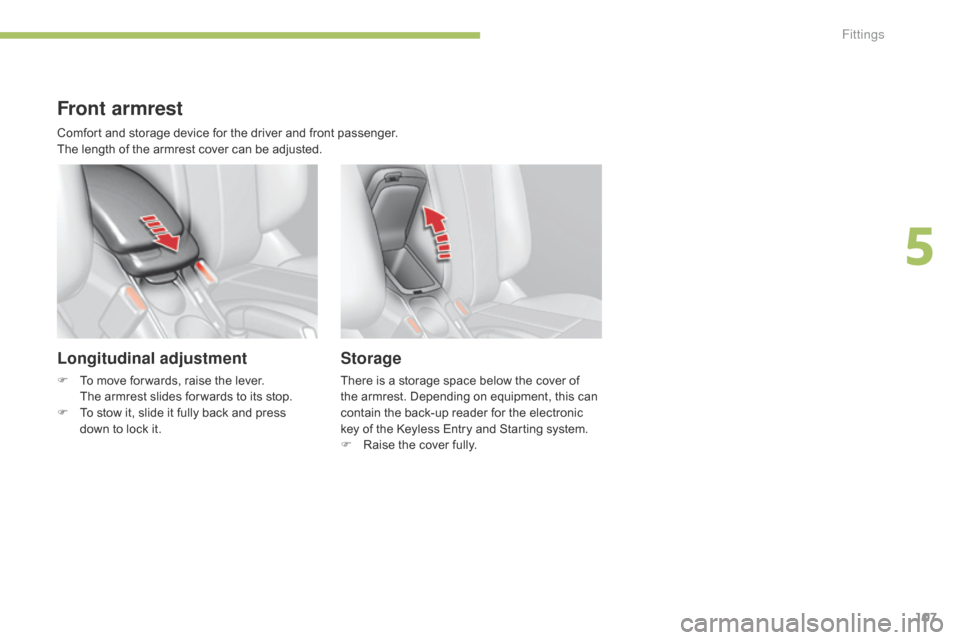
Front armrest
Longitudinal adjustment
F To move for wards, raise the lever.
The armrest slides for wards to its stop.
F
T
o stow it, slide it fully back and press
d
own to lock it.
Storage
There is a storage space below the cover of the armrest. Depending on equipment, this can
c
ontain the back-up reader for the electronic
k
ey of the Keyless Entry and Starting system.
F
R
aise the cover fully.
Comfort
and
storage
device
for
the
driver
and
front
passenger.
The
length
of
the
armrest
cover
can
be
adjusted.
5
Fittings
Page 110 of 494
108
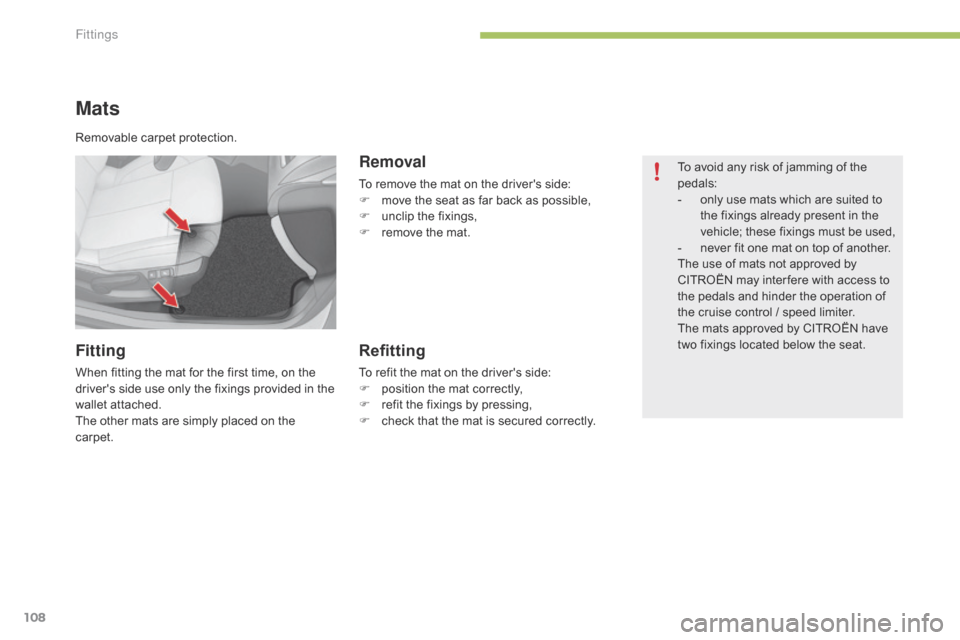
Mats
Fitting
When fitting the mat for the first time, on the driver's side use only the fixings provided in the
w
allet attached.
The
other mats are simply placed on the
c
arpet.
Removal
To remove the mat on the driver's side:
F m ove the seat as far back as possible,
F
u
nclip the fixings,
F
r
emove the mat.
Refitting
To refit the mat on the driver's side:
F p osition the mat correctly,
F
r
efit the fixings by pressing,
F
c
heck that the mat is secured correctly.To
avoid any risk of jamming of the
ped
als:
-
o
nly use mats which are suited to
t
he fixings already present in the
v
ehicle; these fixings must be used,
-
n
ever fit one mat on top of another.
The use of mats not approved by
C
ITROËN may inter fere with access to
t
he pedals and hinder the operation of
t
he cruise control / speed limiter.
The mats approved by CITROËN have
t
wo fixings located below the seat.
Removable
carpet
protection.
Fittings