CITROEN CX 1988 Service Manual
Manufacturer: CITROEN, Model Year: 1988,
Model line: CX,
Model: CITROEN CX 1988
Pages: 648, PDF Size: 95.8 MB
CITROEN CX 1988 Service Manual
CX 1988
CITROEN
CITROEN
https://www.carmanualsonline.info/img/9/56874/w960_56874-0.png
CITROEN CX 1988 Service Manual
Trending: clock, steering wheel adjustment, Adjust, bonnet, fuse diagram, roof, air filter
Page 111 of 648
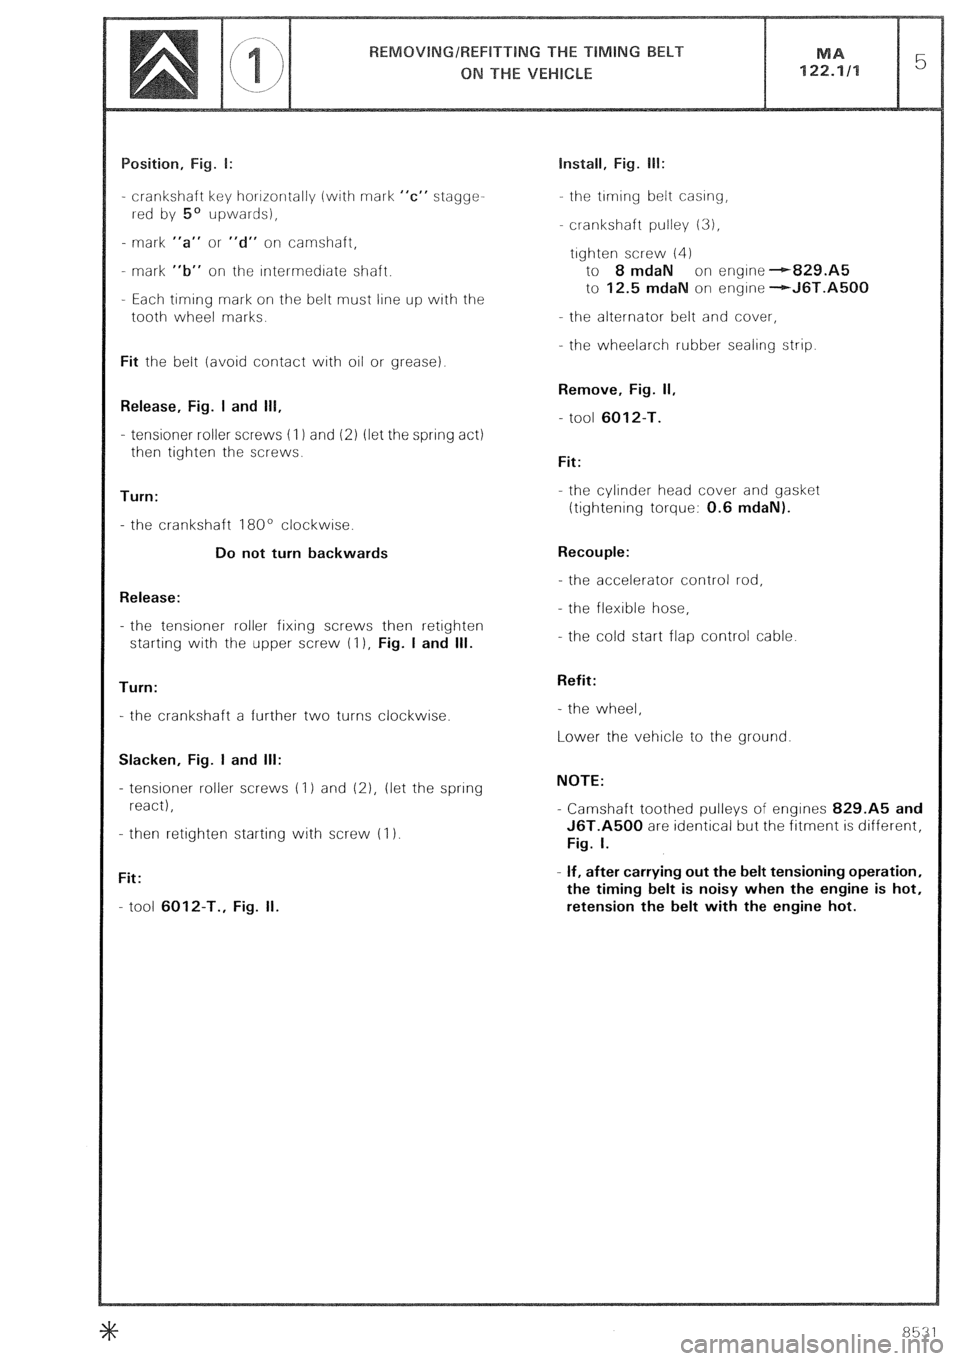
- crankshaft key horrrontally (with mark “c” stagge-
rred by 5’ upwards),
- mark “a” or “d” on camshaft,
- mark “b” on the rntermedrate shaft.
- Each timing mark on the belt must line up with the
tooth wheel marks.
Fit the belt (avoid contact with oil or grease).
Release, Fig. I and 111,
- tensioner roller screws (I 1 and 12) (let the spring act)
then tighten the screws.
Turn:
- the crankshaft 180’ clockwise.
Do not turn backwards
Release:
- the tensioner roller fixing screws then retrghten
starting with the upper screw (I ), Fig. I and Ill.
Turn:
- the crankshaft a further two turns clockwise.
Slacken, Fig. I and Ill:
- tensioner roller screws (1) and (21, (let the spring
react),
- then retighten starting with screw (I 1.
Fit:
- tool 6012-T., Fig. II. Install, Fig. lb:
the trming belt casing,
crankshaft pulley 13),
trghten screw (4)
to 8 mdaN on engine --r-829.A5
to 12.5 mdaN on engrne -+J6T.A5QQ
- the alternator belt and cover,
- the wheelarch rubber sealing strip.
Remove, Fig. II,
- tool 6012-T.
Fit:
- the cylinder head cover and gasket
ttightenrng torque: 0.6 mdaN).
Recouple:
- the accelerator control rod,
- the flexible hose,
- the cold start flap control cable.
Refit:
- the wheel,
Lower the vehicle to the ground.
NOTE:
- Camshaft toothed pulleys of engines 829.A5 and
J6T.A500 are identical but the fitment is different,
Fig. I.
- If, after carrying out the belt tensioning operation,
the timing belt is noisy when the engine is hot,
retension the belt with the engine hot.
Page 112 of 648
A TIMING CHAIN, A CHAIN TENSIONER
ON THE VEHICLE
Page 113 of 648
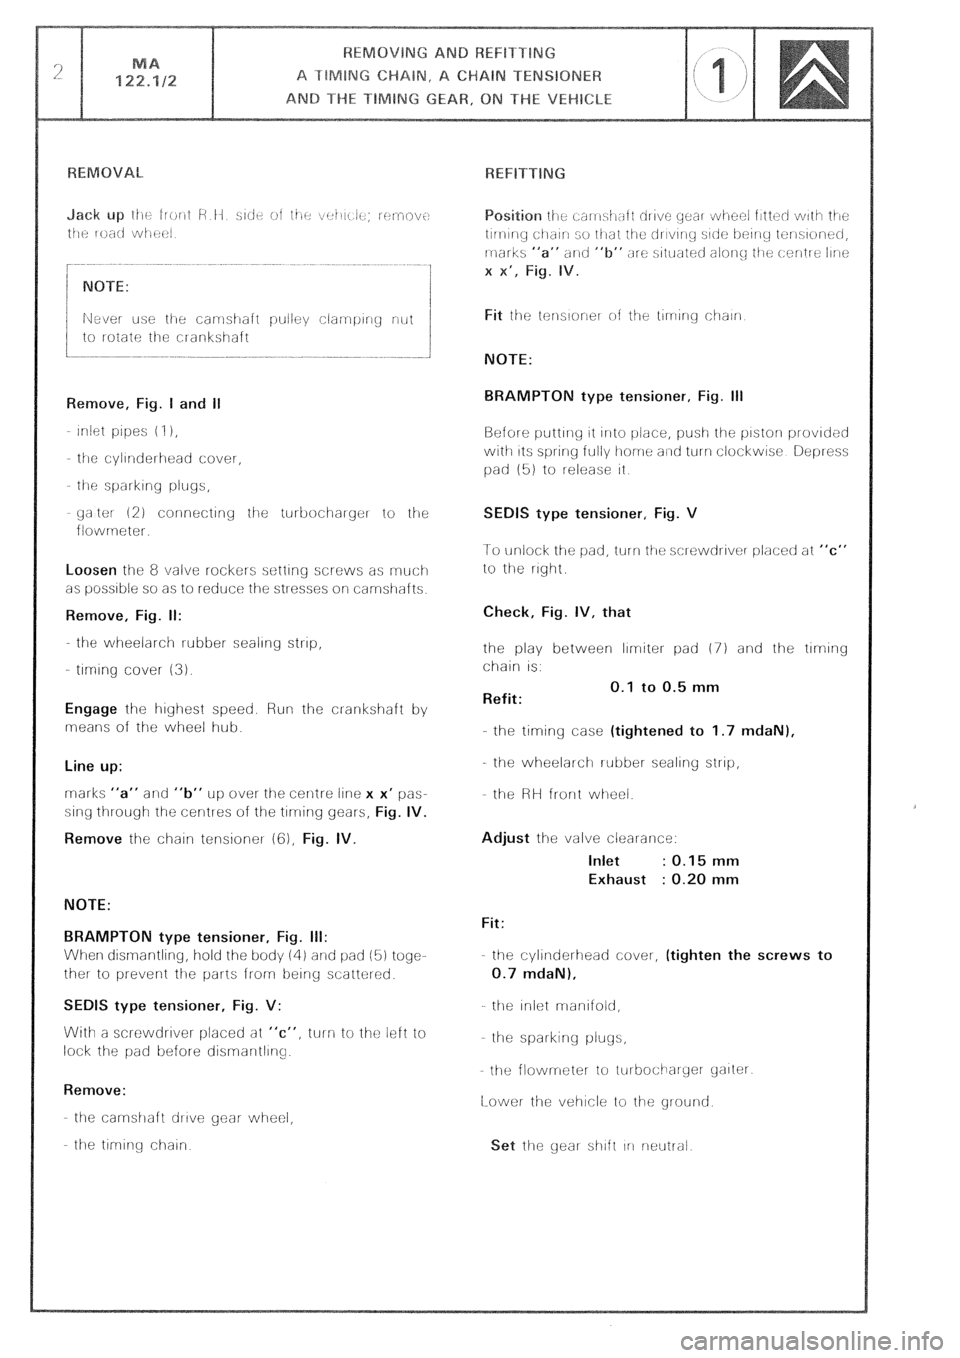
yaltot 12) connectiriy iije turbocihaiger to the
flowrneter.
Loosen the 8 valve rockers setting screws as rnuci-1
as possible so as to reduce the stresses oli camshafts
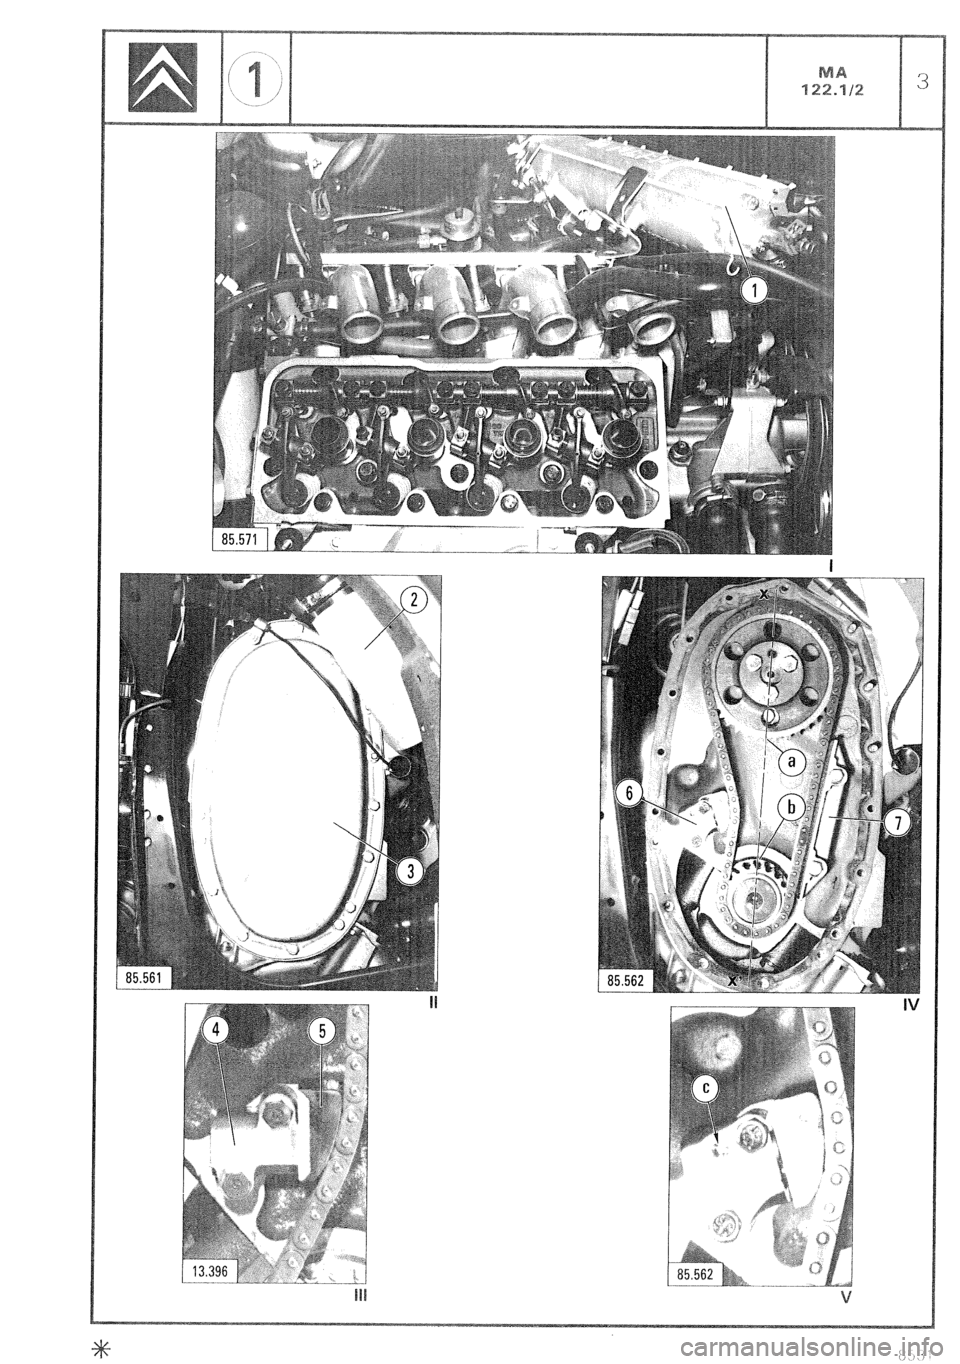
Remove, Fig. II:
the wheelarch rubber sealing strip,
- tlrmng cover (3).
Engage lhe highest speed. Run the cl-ankshaft by
means of the wheel hub.
Line up:
rnarks “a” and “b” UP over the cenlre line x x’ pas-
sing through the centres of the tlrrring gears,
Fig. IV.
Remove
the chain tensioner (cj), Fig. IV.
NOTE:
BRAMPTON type tensioner, Fig. III:
When dismantling, hold the body iii) and pad (5) togc-
ther to prevent the parts from being scatter&
SEDlS type tensioner, Fig. V:
With a screwdrlver placed at “c”, turn to the left io
lock the pad before disrnarltllrlg.
Remove:
the carnshaft drive gear- wheel,
the tlrnlr-ig chain
NOTE:
BRAMPTON type tensioner, Fig. Ill
Before putting 11 irrlo i.)ir!ce, push the pistorl provided
with 11s spring fully home a~rtl turn clockwise Depress
pad (51 to release it
SEDIS type tensioner, Fig. V
1-o unlock the pad, turn tile sclewdrlver placed at “c”
to the right
Check, Fig. IV, that
the play between limiter pad (7) and the tlmng
chain IS.
Refit: 0.1 to 0.5 mm
-.
the timing case (tightened to 1.7 mdaN),
the wheelarch rubber sealing strip,
the HH front wheel.
Adjust the valve clearance:
Inlet : 0.15 mm
Exhaust : 0.20 mm
Fit:
the cylinderhead cover, (tighten the screws to
0.7 mdaN),
the Iniot rnanlfold,
he spai-king pluys,
the flowmeter to iurbocilarycr yalter
[Lower the vehicle to the ground
Page 114 of 648
Page 115 of 648
eIimlny belt tensioner 6028-T.K
Page 116 of 648

emove:
the I-oati Wi-l~~d,
- the wheelarch lrnrrng,
- the belt protectron covets
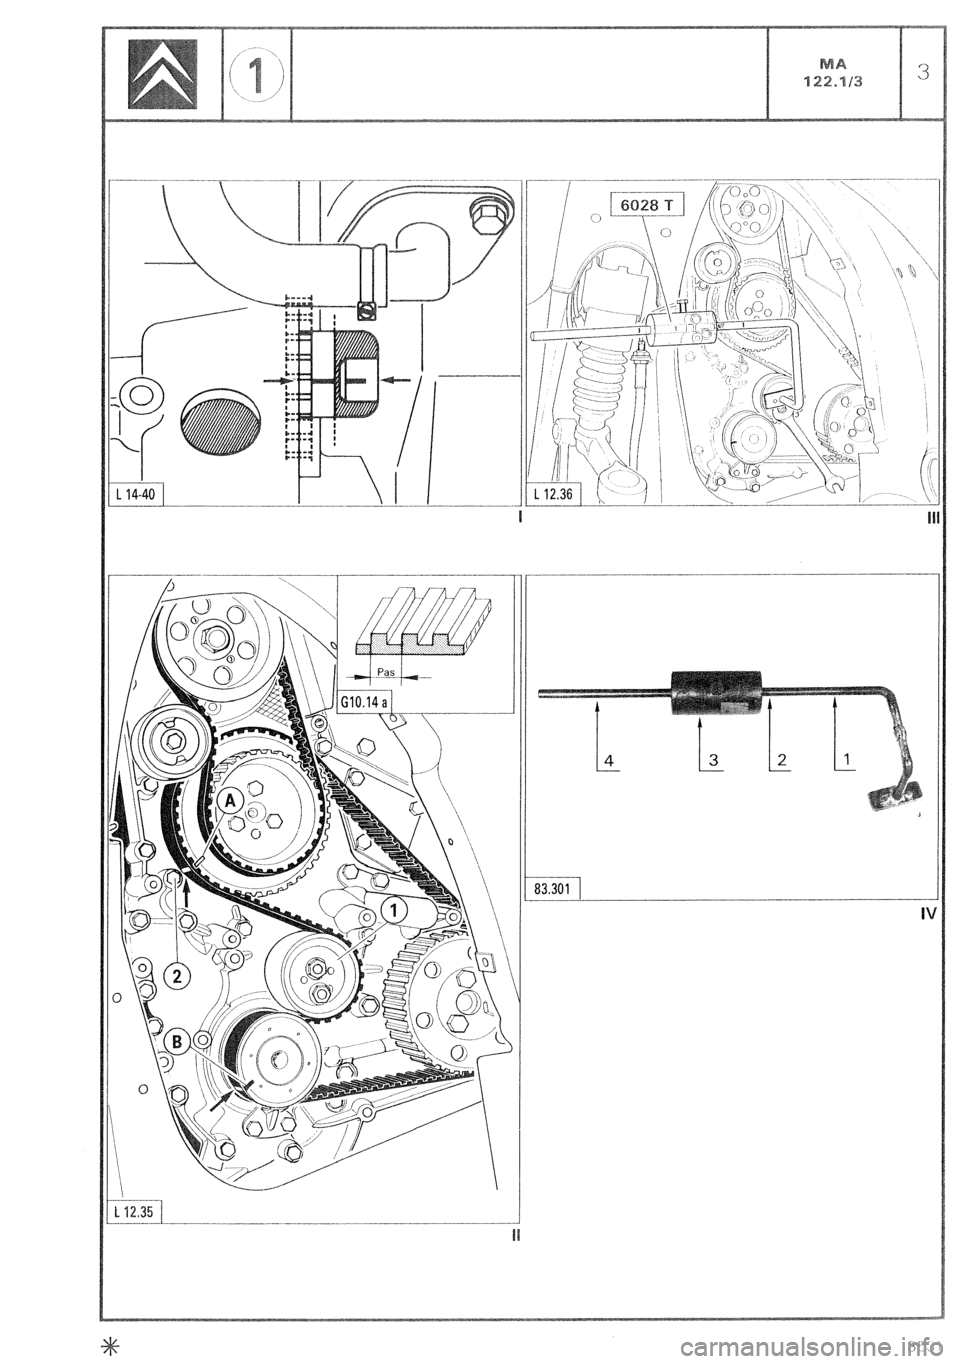
Position: Fig. I and II
the valves of cylrnder No. 1 rn the “rocking” ~OSI-
tion (look Into the engine 011 filler),
the flywheel wrth mar-ks- -alrgned,
- camsfraft gear wheel mark A opposite screw 12)
Loosen:
the nuts of the tensioners and compress the spring
of eacir tensloner. Hetighten the nuts.
Remove:
- injection pump belt,
- the trmrng belt
REFITTING
Fit, Fig. II:
the timrng belt- marks t-+-) and i-e-1 on the belt
should face the marks A and B on pinrons (there
are 35 pitches between A and B, passing around
the tensloner roller (I 1).
Loosen the nuts of the tensioner roller.
Install, Fig. III:
- tool 6Q28-T.K. on the roller
- the tool weight over the mark 2 of the rod, Fig 1V. Fitting the injection pump belt:
Run the engrne by 1 turn err the drrectrorr of rotation
until marks--- +- /Ino up, Fig. I
(wrth cylinder No 1 at the rnrtral trmrng
point)
Setting the pump to the injection point:
refer to Op @ MA. 146-011
Fit the InJectron purnf, drrvrng belt with the srde oppo-
site the roller, trght.
Slacken the roller nut. Let the roller- spring react
Tighten the rnut to 2 mdaN.
Rotate the engine by 2 turns in the direction of nor-
rnal rotation and check the pump timrng.
Remove the tools
Start the engine Warrn it up until the electric cooling
fans operate.
Retension the belt while the engine is hot, Fig. IV
Refit:
- the protectron covers,
- the wheelarch lining,
the road wheel
Page 117 of 648
Page 118 of 648
~~ ~~~~~ ~-~~~~~~
CHECKING AND ADJUSTING
THE VALVE CLEARANCES
Page 119 of 648
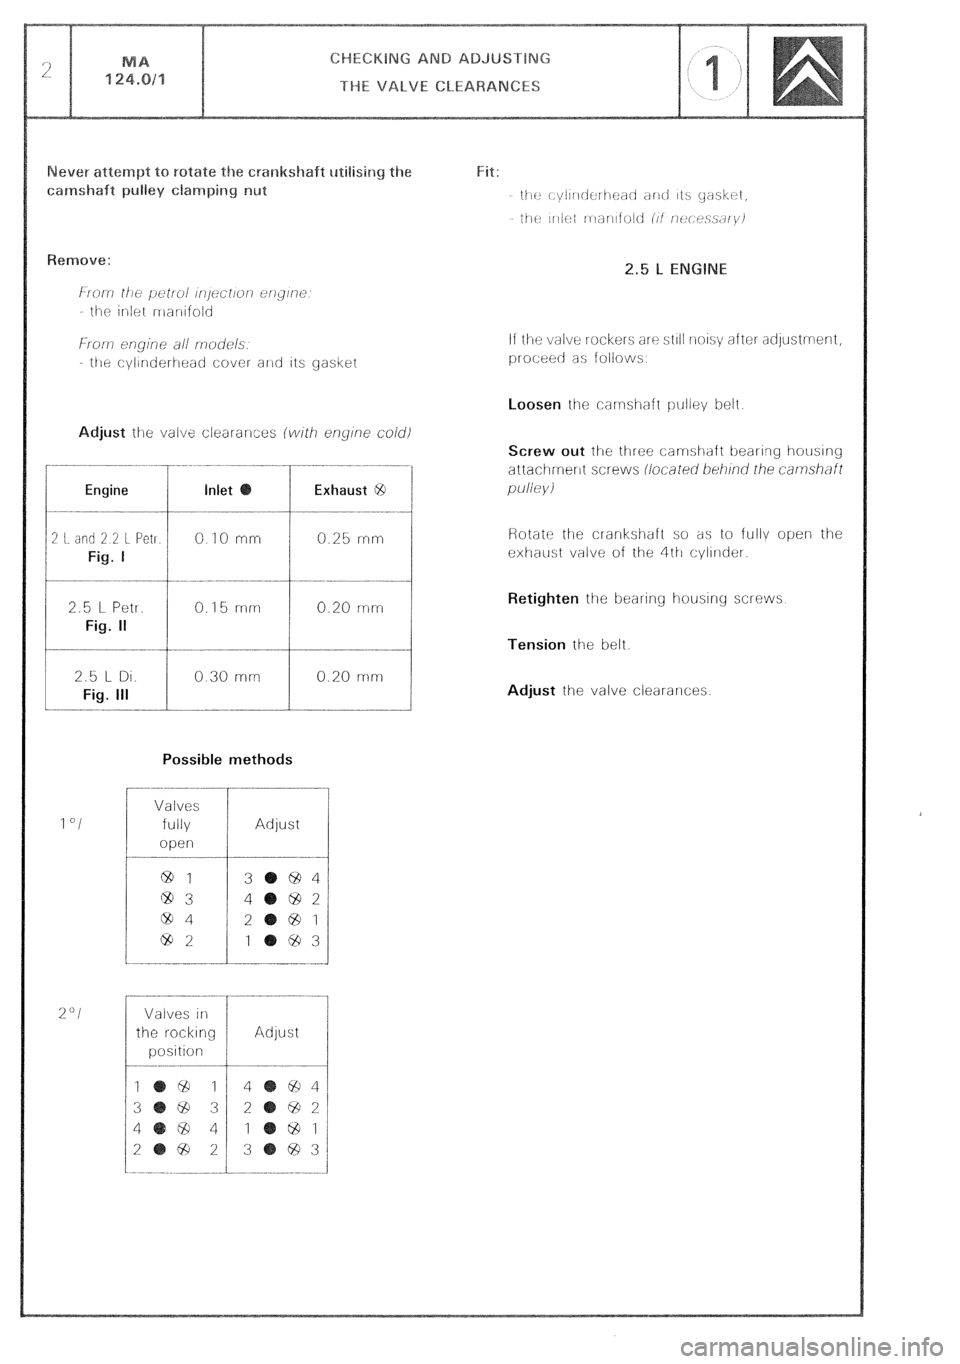
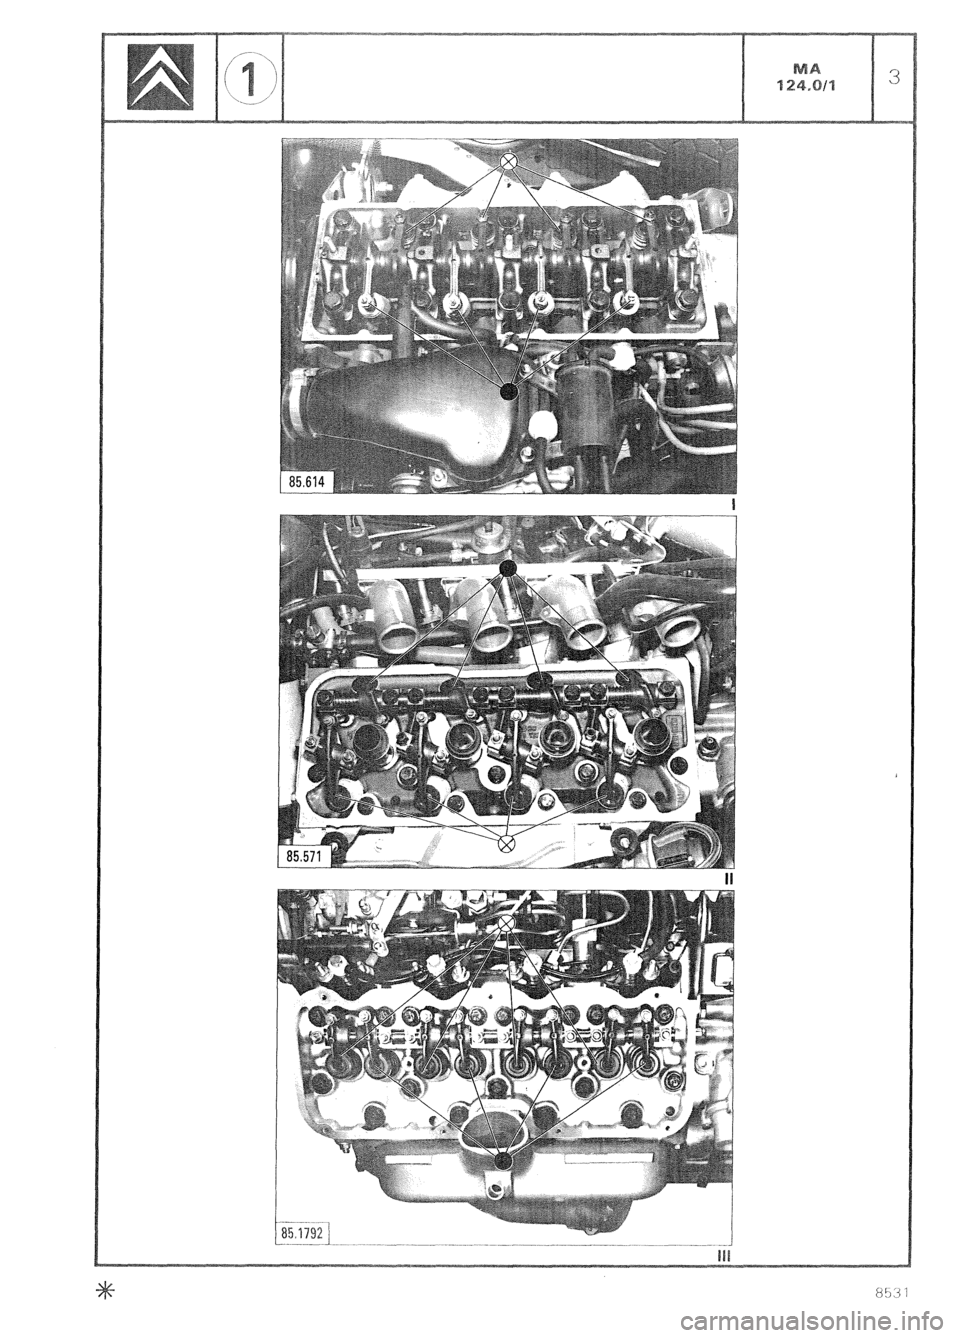
Engine Inlet Exhaust @
2 I. did 2 2 L Pet1
Fig. I
0 IO rnrr 0.25 rrirr
2.5 l- Petr.
Fig. II
0.15 mm 0.20 mm
Possible methods
1 “I
%“I
Valves
fully
open
64 1
@3
ciD4
69%
Adjust
3 694
4 692
2
@ 1
1 ‘83
Valves in
the r-ocklng
position Adjust If the valve rockers arc? sl~l! noIs\; after adystment,
proceec as follows
Screw out lhe three carmshaft bearing houslng
attachment screws iiocared beii/no’ rhe
carnshfl
pu//e)/i
Retighten
the beal-ing housing screws
Tension the belt.
Adjust the valve clearances.
Page 120 of 648
Trending: fuse box, gearbox, Rod, steering wheel, fuel filter, boot, ad blue

