light CITROEN DS3 2018 Handbook (in English)
[x] Cancel search | Manufacturer: CITROEN, Model Year: 2018, Model line: DS3, Model: CITROEN DS3 2018Pages: 248, PDF Size: 8.79 MB
Page 46 of 248
44
With the remote control
F Press the closed padlock to lock the vehicle completely.
F
P
ress the closed padlock again within five
seconds to deadlock the vehicle.
With the key
F Turn the key to the rear in the driver's door lock to lock the vehicle completely.
F
T
urn the key to the rear again within five
seconds to deadlock the vehicle.
Deadlocking is confirmed by fixed illumination
of the direction indicators for approximately two
seconds.
Depending on your version, the door mirrors
fold at the same time.
Locating your vehicle
F Press the closed padlock to locate your locked vehicle in
a
car park.
This is indicated by lighting of the courtesy
lamps and flashing of the direction indicators
for a
few seconds.
Remote control problem
Following disconnection of the vehicle battery,
replacement of the remote control battery or
in the event of a remote control malfunction,
you can no longer unlock, lock or locate your
vehicle.
F
F
irst of all, use the key in the door lock to
unlock or lock your vehicle.
F
T
hen reinitialise the remote control.
If the problem persists, contact the dealer
network as soon as possible.
Reinitialisation
Battery type: CR1620/3 volts.
F
S
witch off the ignition.
F
T
urn the key to position 2
(Ignition) .
F
P
ress the closed padlock button for a
few
seconds.
F
S
witch off the ignition and remove the key
from the switch.
The remote control is now fully operational
again.
Changing the battery
If the battery is discharged, you are
informed by lighting of this warning lamp in
the instrument panel, an audible signal and
a
message in the multifunction screen.
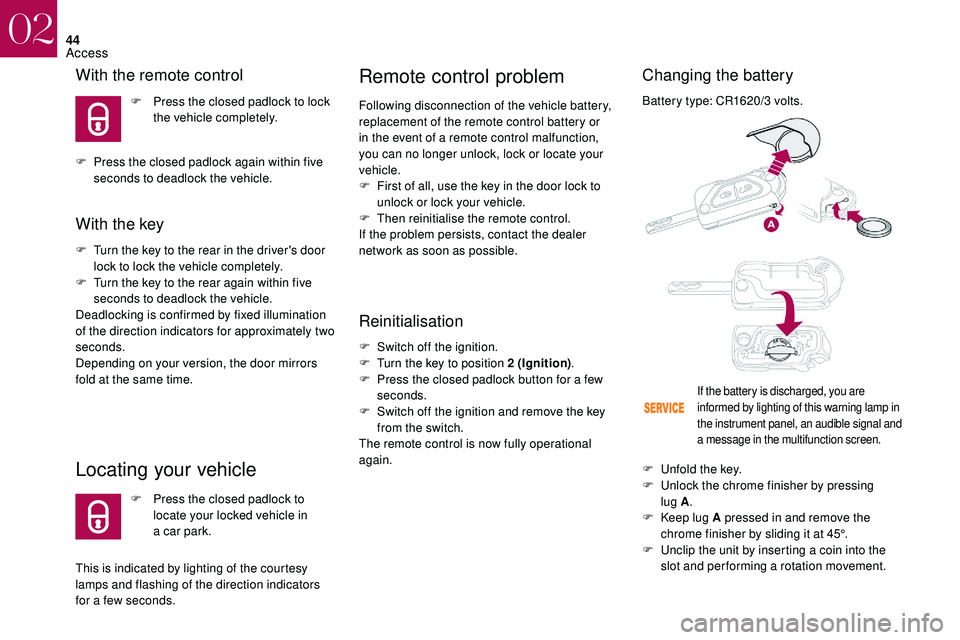
F Unfold the key.
F U nlock the chrome finisher by pressing
lug A .
F
K
eep lug A pressed in and remove the
chrome finisher by sliding it at 45°.
F
U
nclip the unit by inserting a coin into the
slot and per forming a
rotation movement.
02
Access
Page 51 of 248
49
Doors
Opening
From outside
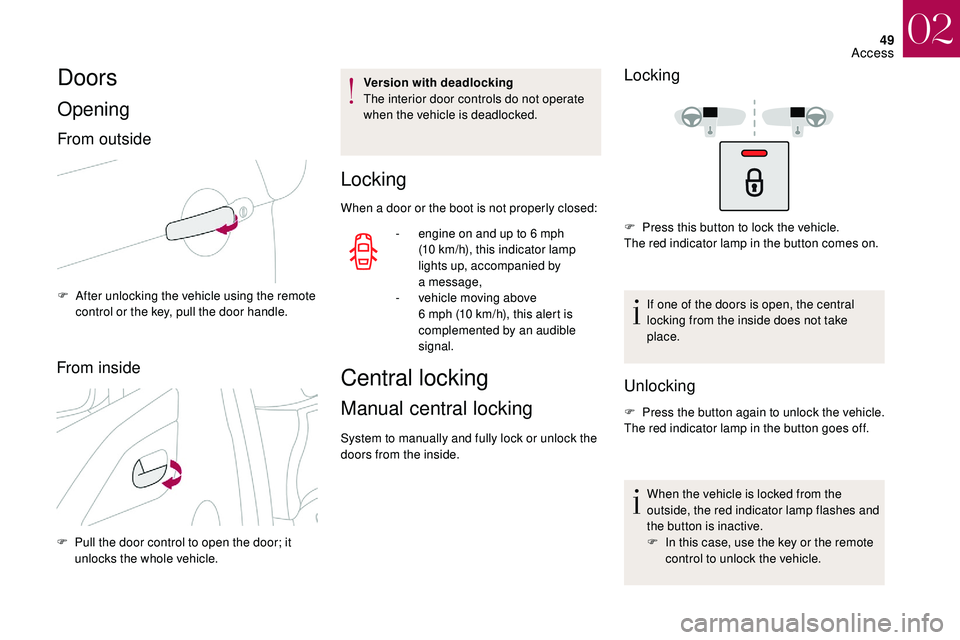
F After unlocking the vehicle using the remote control or the key, pull the door handle.
From inside
F Pull the door control to open the door; it unlocks the whole vehicle. Version with deadlocking
The interior door controls do not operate
when the vehicle is deadlocked.
Locking
- engine on and up to 6
mph
(10 km/h), this indicator lamp
lights up, accompanied by
a
message,
-
v
ehicle moving above
6
mph (10 km/h), this alert is
complemented by an audible
signal.
When a
door or the boot is not properly closed:
Central locking
Manual central locking
System to manually and fully lock or unlock the
doors from the inside.
Locking
If one of the doors is open, the central
locking from the inside does not take
place.
Unlocking
F Press the button again to unlock the vehicle.
The red indicator lamp in the button goes off.
When the vehicle is locked from the
outside, the red indicator lamp flashes and
the button is inactive.
F
I
n this case, use the key or the remote
control to unlock the vehicle.
F
P
ress this button to lock the vehicle.
The red indicator lamp in the button comes on.
02
Access
Page 57 of 248
55
During the automatic roof closure in zone
A (position 2 to position 1), pressing the
control stops the roof.
Acoustic air deflector
An acoustic air deflector is available in order to
improve the acoustic comfort of the occupants
of the vehicle in certain driving conditions
(high speed), by limiting currents in the
passenger compartment that are caused by air
displacement. When the roof opens, the deflector may deploy
if it is not fixed.
When the roof is closed, the deflector refolds
automatically.
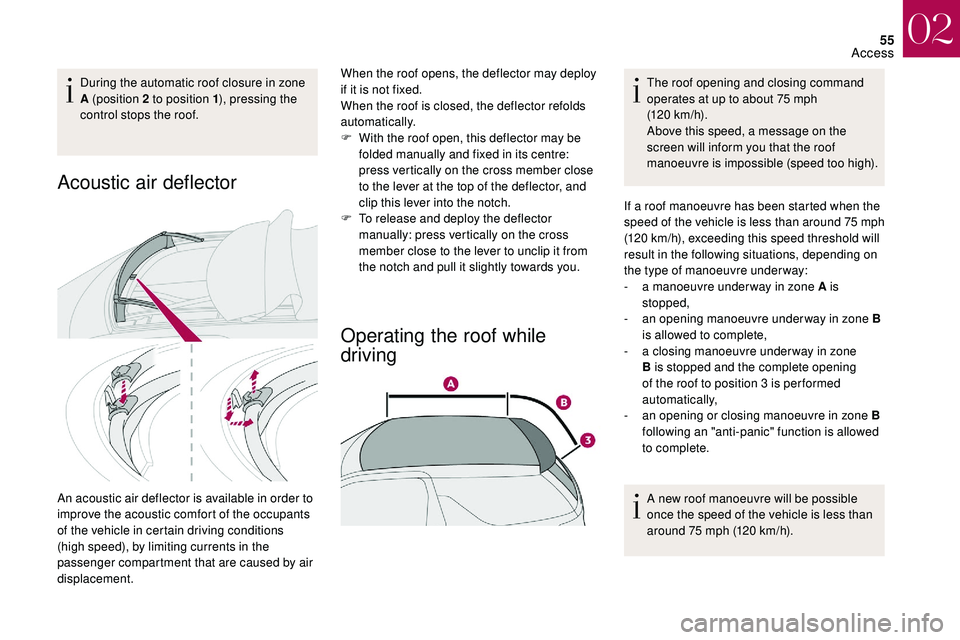
F
W
ith the roof open, this deflector may be
folded manually and fixed in its centre:
press vertically on the cross member close
to the lever at the top of the deflector, and
clip this lever into the notch.
F
T
o release and deploy the deflector
manually: press vertically on the cross
member close to the lever to unclip it from
the notch and pull it slightly towards you.
Operating the roof while
driving
The roof opening and closing command
operates at up to about 75 mph
(120
km/h).
Above this speed, a message on the
screen will inform you that the roof
manoeuvre is impossible (speed too high).
If a
roof manoeuvre has been started when the
speed of the vehicle is less than around 75
mph
(120
km/h), exceeding this speed threshold will
result in the following situations, depending on
the type of manoeuvre under way:
-
a m
anoeuvre under way in zone A is
stopped,
-
a
n opening manoeuvre under way in zone B
is allowed to complete,
-
a c
losing manoeuvre under way in zone
B is stopped and the complete opening
of the roof to position 3
is per formed
automatically,
-
a
n opening or closing manoeuvre in zone B
following an "anti-panic" function is allowed
to complete.
A new roof manoeuvre will be possible
once the speed of the vehicle is less than
around 75
mph (120 km/h).
02
Access
Page 68 of 248
66
Rear seats
Bench seat with fixed one-piece cushion and
folding backrest (1/3 -2/3) to adapt the loading
space in the boot.
Folding the backrestReturning the backrest to the
normal position
F Straighten the seat backrest 2 and secure it.
F C heck that the red indicator, located next to
the control 1 , is no longer visible.
When repositioning the seat backrest,
take care not to trap the seat belts.
Rear head restraints
Never drive with the head restraints
removed; they must be fitted and correctly
adjusted.
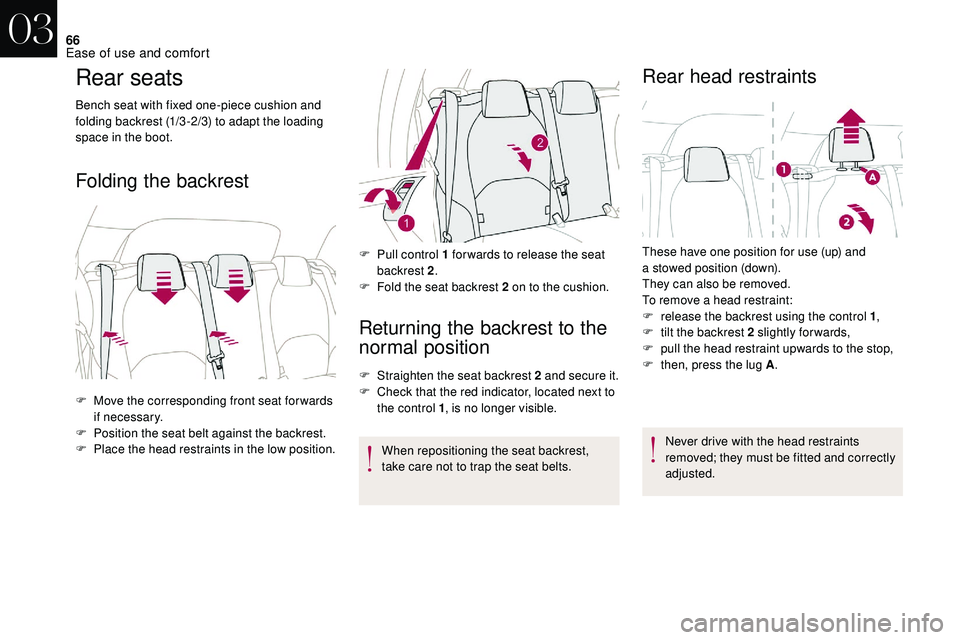
F
M
ove the corresponding front seat for wards
if necessary.
F
P
osition the seat belt against the backrest.
F
P
lace the head restraints in the low position. F
P
ull control 1
for wards to release the seat
backrest 2 .
F
F
old the seat backrest 2
on to the cushion.
These have one position for use (up) and
a
stowed position (down).
They can also be removed.
To remove a head restraint:
F
r
elease the backrest using the control 1
,
F
t
ilt the backrest 2 slightly forwards,
F
p
ull the head restraint upwards to the stop,
F
t
hen, press the lug A
.
03
Ease of use and comfort
Page 70 of 248
68
Unfolding
F From outside: unlock the vehicle using the remote control or the key.
F
F
rom inside: with the ignition on, pull the
control A in the central position rearwards.
The folding and unfolding of the door
mirrors using the remote control can be
deactivated in the dealer network or by
a
qualified workshop.
If necessary the mirrors can be folded
manually.
Rear view mirror
Equipped with an anti-dazzle system, which
darkens the mirror glass and reduces the
nuisance to the driver caused by the sun,
headlamps from other vehicles, etc.
Manual model
Adjustment
Day/night position
F
P
ull the lever to change to the "night" anti-
dazzle position.
F
P
ush the lever to change to the normal
"day" position.
Automatic "electrochrome" model
This system automatically and progressively
changes between the day and night uses by
means of a
sensor, which measures the light
from the rear of the vehicle.
In order to ensure optimum visibility during
your manoeuvres, the mirror lightens
automatically when reverse gear is
engaged.
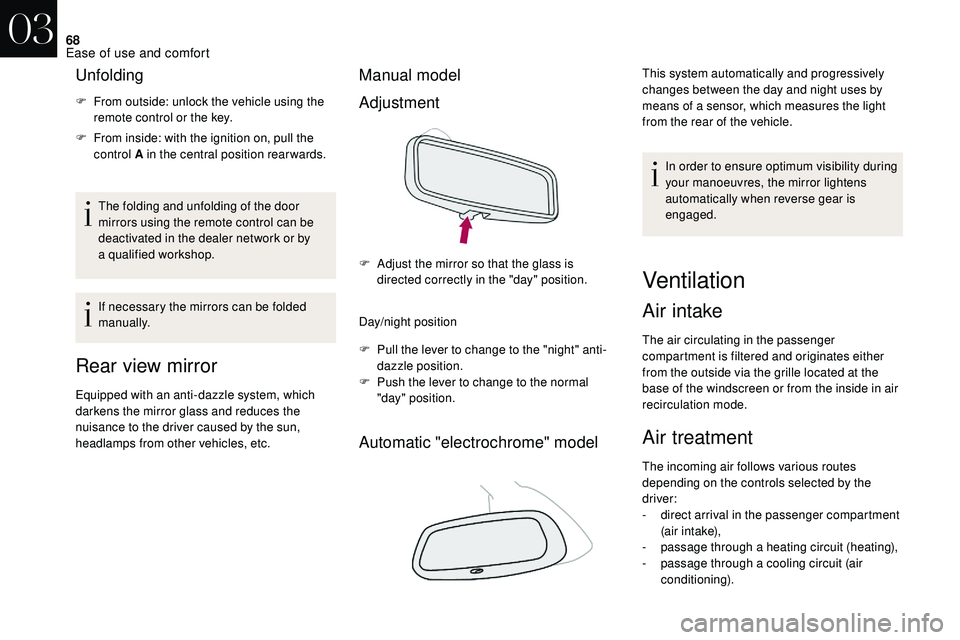
F
A
djust the mirror so that the glass is
directed correctly in the "day" position.
Ventilation
Air intake
The air circulating in the passenger
compartment is filtered and originates either
from the outside via the grille located at the
base of the windscreen or from the inside in air
recirculation mode.
Air treatment
The incoming air follows various routes
depending on the controls selected by the
driver:
-
d
irect arrival in the passenger compartment
(air intake),
-
p
assage through a
heating circuit (heating),
-
p
assage through a cooling circuit (air
conditioning).
03
Ease of use and comfort
Page 73 of 248
71
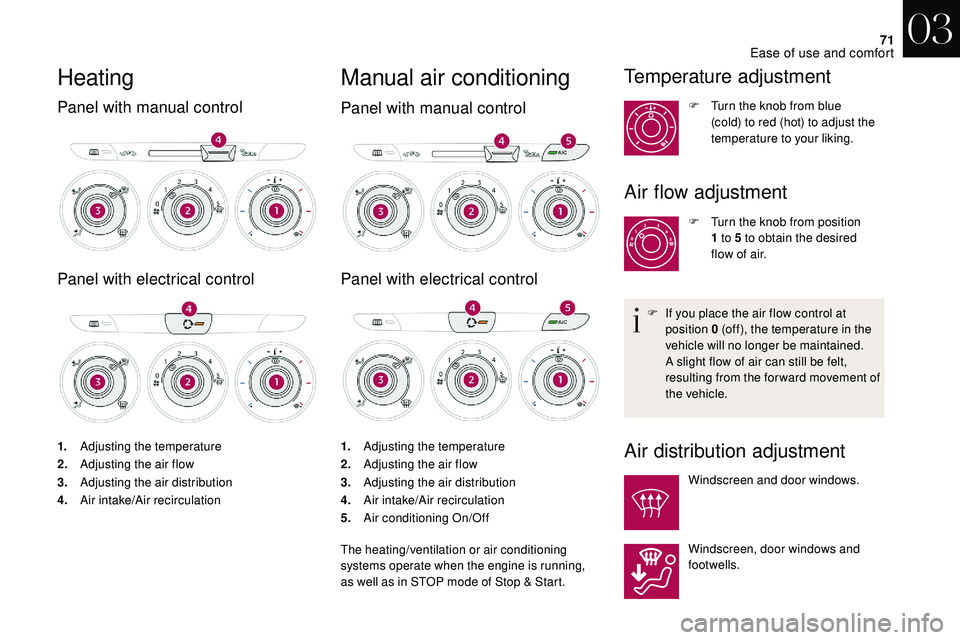
Heating
Panel with manual control
Panel with electrical control
1.Adjusting the temperature
2. Adjusting the air flow
3. Adjusting the air distribution
4. Air intake/Air recirculation 1.
Adjusting the temperature
2. Adjusting the air flow
3. Adjusting the air distribution
4. Air intake/Air recirculation
5. Air conditioning On/Off
The heating/ventilation or air conditioning
systems operate when the engine is running,
as well as in STOP mode of Stop & Start.
Manual air conditioning
Panel with manual control
Panel with electrical control
Temperature adjustment
F Turn the knob from blue (cold) to red (hot) to adjust the
temperature to your liking.
Air flow adjustment
F Turn the knob from position 1 to 5 to obtain the desired
flow of air.
F
I
f you place the air flow control at
position 0
(off), the temperature in the
vehicle will no longer be maintained.
A slight flow of air can still be felt,
resulting from the for ward movement of
the vehicle.
Air distribution adjustment
Windscreen and door windows.
Windscreen, door windows and
footwells.
03
Ease of use and comfort
Page 76 of 248
74
Deactivating the system
Press the "empty fan" air flow
button 7 until the fan symbol
disappears.
This action stops all functions of the air
conditioning system.
Temperature is no longer regulated. A slight air
flow can still be felt however, resulting from the
for ward movement of the vehicle.
Pressing the " filled fan" air flow button 7
or
AUTO again reactivates the system with the
values in effect prior to deactivation.
Avoid driving for too long with the system
switched off (risk of misting and air quality
deterioration).
Recirculation of interior air
The intake of exterior air prevents the formation
of mist on the windscreen and side windows.
Interior air recirculation isolates the passenger
compartment from exterior odours and fumes.
This function also allows the desired
temperature in the passenger compartment to
be reached in the shortest time.
With manual control
F Move the control to the left to activate recirculation of interior
a i r.
F
M
ove the control to the right to
return to the intake of exterior air
position.
With electrical control
F Press this button to activate interior air recirculation. The
indicator lamp comes on.
F
P
ress the button again to allow exterior air
intake. The indicator lamp goes off.
With automatic air conditioning
F Press this button to activate interior air recirculation. The
interior air recirculation symbol
is displayed.
F
P
ress the same button again or the AUTO
button to allow the intake of exterior air. The
symbol disappears.
Avoid prolonged use of air recirculation –
Risk of condensation and deterioration of
air quality!
Front demist – defrost
These markings on the control panel
indicate the control positions for
rapid demisting or defrosting of the
windscreen and side windows.
With the heating/ventilation
system
F Put the temperature and air flow controls to the dedicated marked position.
Air flow adjustment.
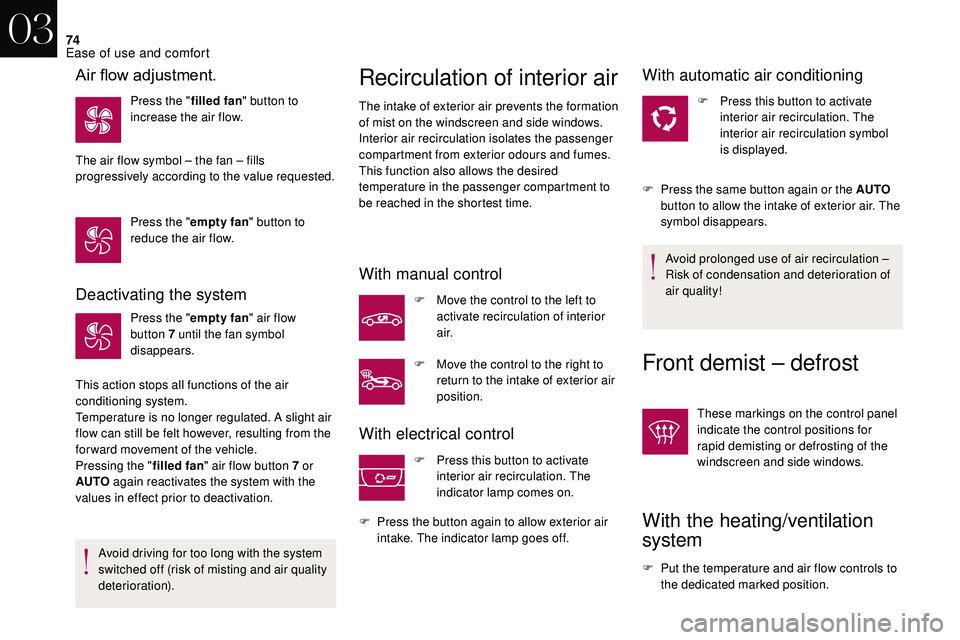
Press the " filled fan" button to
increase the air flow.
The air flow symbol – the fan – fills
progressively according to the value requested.
Press the " empty fan" button to
reduce the air flow.
03
Ease of use and comfort
Page 79 of 248
77
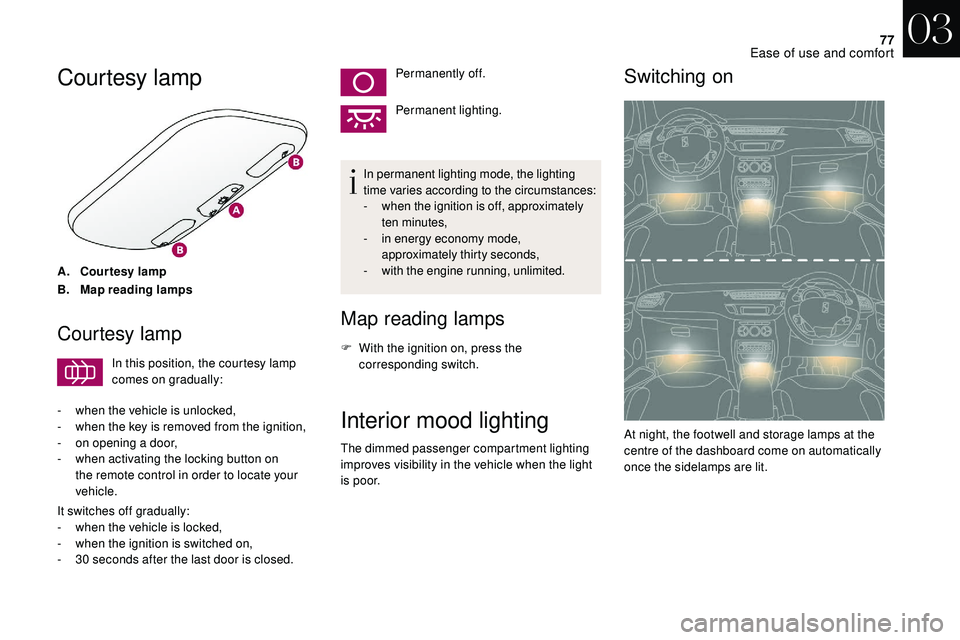
Courtesy lamp
A.Courtesy lamp
B. Map reading lamps
Courtesy lamp
In this position, the courtesy lamp
comes on gradually:
-
w
hen the vehicle is unlocked,
-
w
hen the key is removed from the ignition,
-
o
n opening a door,
-
w
hen activating the locking button on
the remote control in order to locate your
vehicle.
It switches off gradually:
-
w
hen the vehicle is locked,
-
w
hen the ignition is switched on,
-
3
0
seconds after the last door is closed. Permanently off.
Permanent lighting.
In permanent lighting mode, the lighting
time varies according to the circumstances:
-
w
hen the ignition is off, approximately
ten minutes,
-
i
n energy economy mode,
approximately thirty seconds,
-
w
ith the engine running, unlimited.
Map reading lamps
F With the ignition on, press the
corresponding switch.
Interior mood lighting
The dimmed passenger compartment lighting
improves visibility in the vehicle when the light
i s p o o r.
Switching on
At night, the footwell and storage lamps at the
centre of the dashboard come on automatically
once the sidelamps are lit.
03
Ease of use and comfort
Page 80 of 248
78
Switching off
The mood lighting switches off automatically
when the sidelamps are switched off.
It can be switched off manually by using the
lighting dimmer button on the instrument panel.
F
W
ith the lamps on, press the left-hand
button on the instrument panel several
times to progressively reduce the brightness
of the instruments and controls.
F
P
ress again to reduce the brightness to
a
minimum and switch off the mood lighting.
Programming
The function is activated or deactivated via the
vehicle configuration menu.
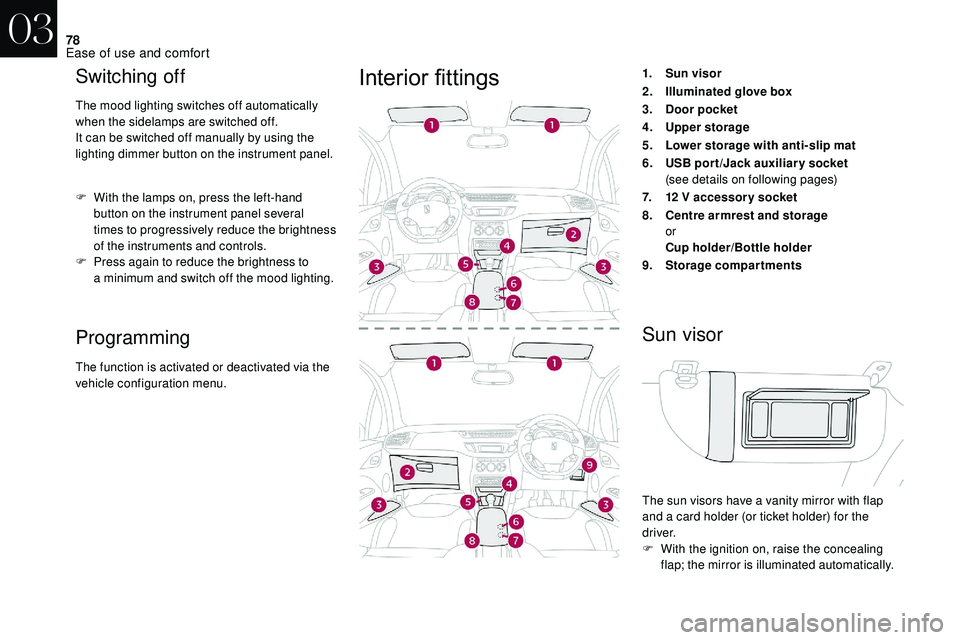
Interior fittings1.Sun visor
2. Illuminated glove box
3. Door pocket
4. Upper storage
5. Lower storage with anti-slip mat
6. USB por t /Jack auxiliar y socket
(see details on following pages)
7. 12
V accessory socket
8. Centre armrest and storage
or
Cup holder/Bottle holder
9. Storage compartments
Sun visor
The sun visors have a vanity mirror with flap
a nd a card holder (or ticket holder) for the
driver.
F
W
ith the ignition on, raise the concealing
flap; the mirror is illuminated automatically.
03
Ease of use and comfort
Page 84 of 248
82
Stowing ringsLuggage retaining strap
Boot lighting
F Reposition the carpet at the back of the
boot, folding it gently in two.
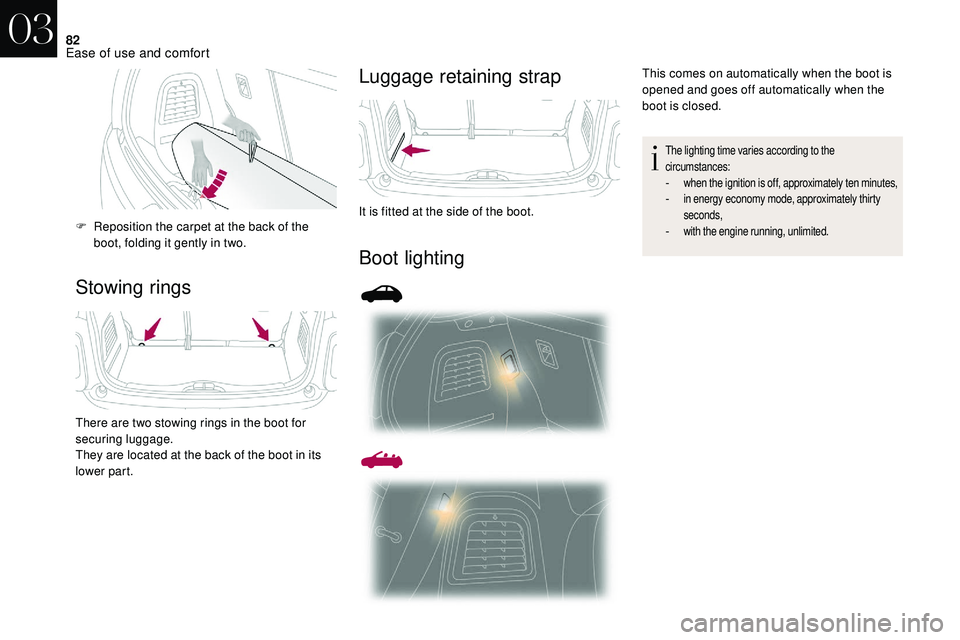
There are two stowing rings in the boot for
securing luggage.
They are located at the back of the boot in its
lower part. It is fitted at the side of the boot.
This comes on automatically when the boot is
opened and goes off automatically when the
boot is closed.
The lighting time varies according to the
circumstances:
- when the ignition is off, approximately ten minutes,- in energy economy mode, approximately thirty
seconds,
- with the engine running, unlimited.
03
Ease of use and comfort