CITROEN DS3 CABRIO 2015 Handbook (in English)
Manufacturer: CITROEN, Model Year: 2015, Model line: DS3 CABRIO, Model: CITROEN DS3 CABRIO 2015Pages: 404, PDF Size: 13.2 MB
Page 311 of 404
06
309
USING THE TELEPHONE
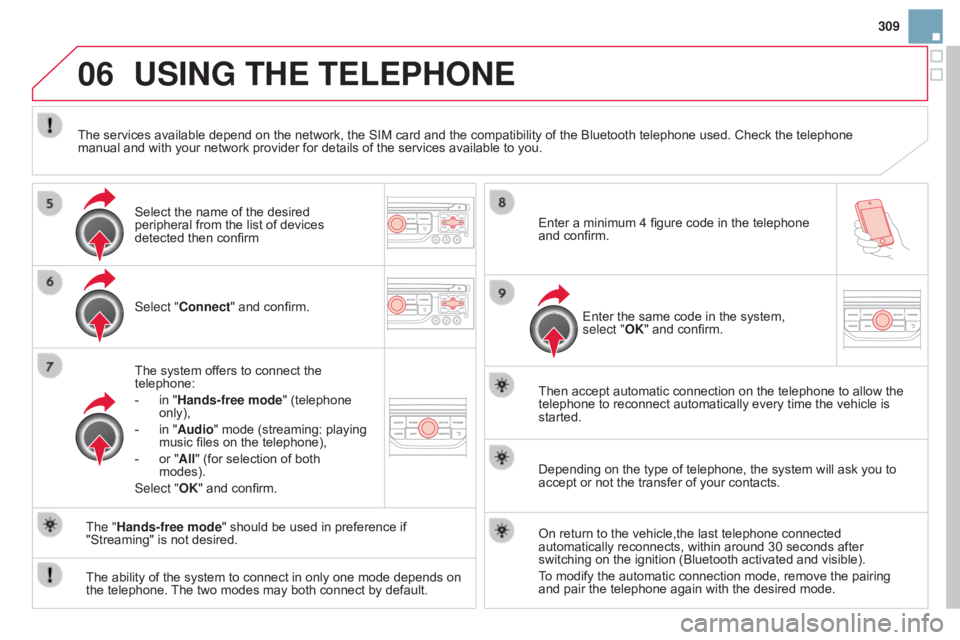
Select "Connect" and confirm.
The system offers to connect the
telephone:
-
in
"Hands-free mode" (telephone
only),
-
in
"Audio" mode (streaming: playing
music
files on the telephone),
-
or
"All" (for selection of both
modes).
Select "
OK" and confirm. Then
accept automatic connection on the telephone to allow the
telephone
to reconnect automatically every time the vehicle is
started.
The
ability of the system to connect in only one mode depends on
the
telephone.
The
two modes may both connect by default.
The "Hands-free mode"
should be used in preference if
"Streaming"
is not desired.
The
services available depend on the network, the SIM card and the compatibility of the Bluetooth telephone used. Check the telephone
manual
and with your network provider for details of the services available to you.
Depending on the type of telephone, the system will ask you to
accept
or not the transfer of your contacts.
On
return to the vehicle,the last telephone connected
automatically
reconnects, within around 30 seconds after
switching
on the ignition (Bluetooth activated and visible).
To
modify the automatic connection mode, remove the pairing
and
pair the telephone again with the desired mode.
Enter
a minimum 4 figure code in the telephone
and
confirm.
Enter the same code in the system,
select "
OK" and confirm.
Select
the name of the desired
peripheral
from the list of devices
detected
then confirm
Page 312 of 404
06USING THE TELEPHONE
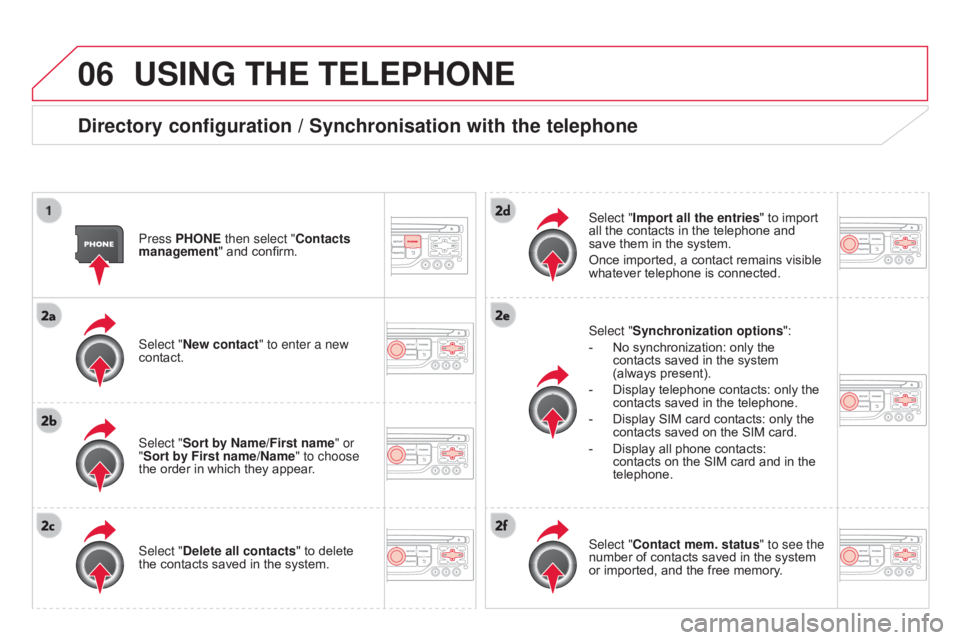
directory configuration / Synchronisation with the telephone
Press PHONE then select "Contacts
management" and confirm.
Select "New contact" to enter a new
contact.
Select "Sort by Name/First name" or
"Sort by First name/Name" to choose
the
order in which they appear.
Select "
d elete all contacts" to delete
the
contacts saved in the system. Select "Synchronization options
":
-
No
synchronization: only the
contacts
saved in the system
(always
present).
-
Display
telephone contacts: only the
contacts
saved in the telephone.
-
Display
SIM card contacts: only the
contacts
saved on the SIM card.
-
Display
all phone contacts:
contacts
on the SIM card and in the
telephone.
Select "
Import all the entries" to import all
the contacts in the telephone and save
them in the system.
Once
imported, a contact remains visible
whatever
telephone is connected.
Select "Contact mem. status" to see the
number
of contacts saved in the system
or
imported, and the free memory.
Page 313 of 404
06
3 11
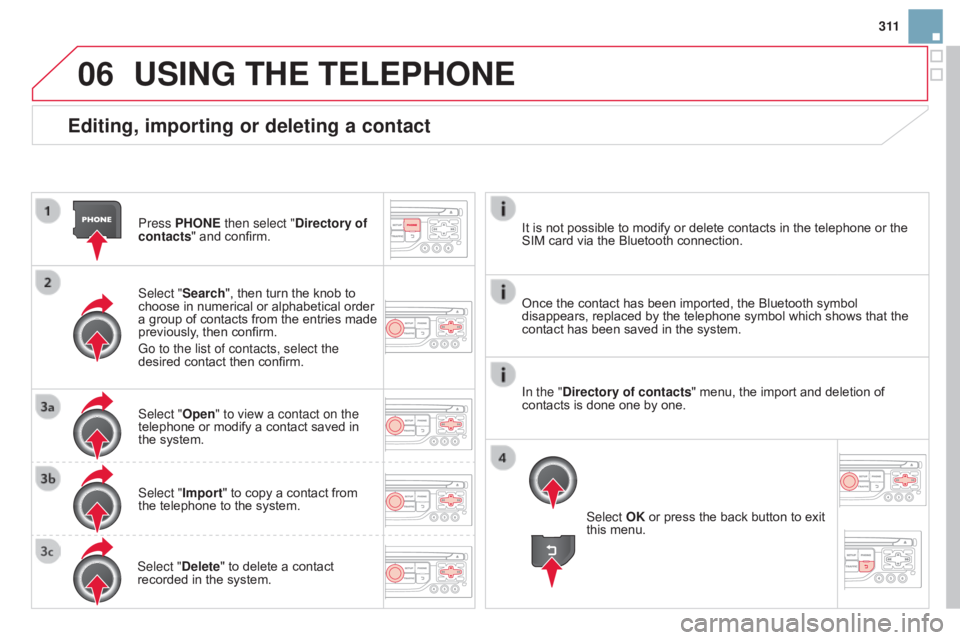
Editing, importing or deleting a contact
Press PHONE then select "directory of
contacts " and confirm.
Select "Search",
then turn the knob to
choose
in numerical or alphabetical order
a
group of contacts from the entries made
previously
, then confirm.
Go to the list of contacts, select the
desired
contact then confirm.
Select "Open" to view a contact on the
telephone
or modify a contact saved in
the
system.
Select "Import"
to copy a contact from
the
telephone to the system.
Select "
d elete" to delete a contact
recorded
in the system.
USING THE TELEPHONE
Select OK or press the back button to exit this menu.
Once
the
contact has been imported, the Bluetooth symbol
disappears,
replaced by the telephone symbol which shows that the
contact
has been saved in the system.
It
is
not
possible to modify or delete contacts in the telephone or the
SIM
card
via the Bluetooth connection.
In the "
d
irectory of contacts" menu, the import and deletion of
contacts
is
done one by one.
Page 314 of 404
06USING THE TELEPHONE
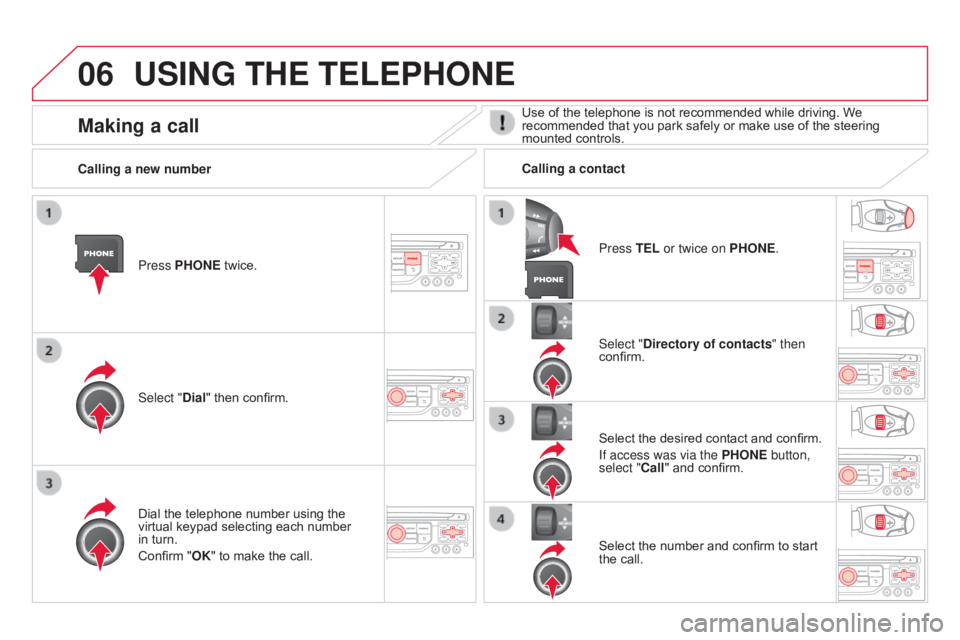
Press PHONE twice.
Select " d ial" then confirm. Select "
d irectory of contacts" then
confirm.
Dial
the telephone number using the
virtual
keypad selecting each number
in
turn.
Confirm
"OK" to make the call. Press TEL or twice on PHONE.
Calling a new number
Calling a contact
Select the desired contact and confirm.
If access was via the PHONE button,
select "Call"
and confirm.
Select
the number and confirm to start
the
call.
Making a callUse of the telephone is not recommended while driving. We recommended that you park safely or make use of the steering
mounted
controls.
Page 315 of 404
06
313
USING THE TELEPHONE
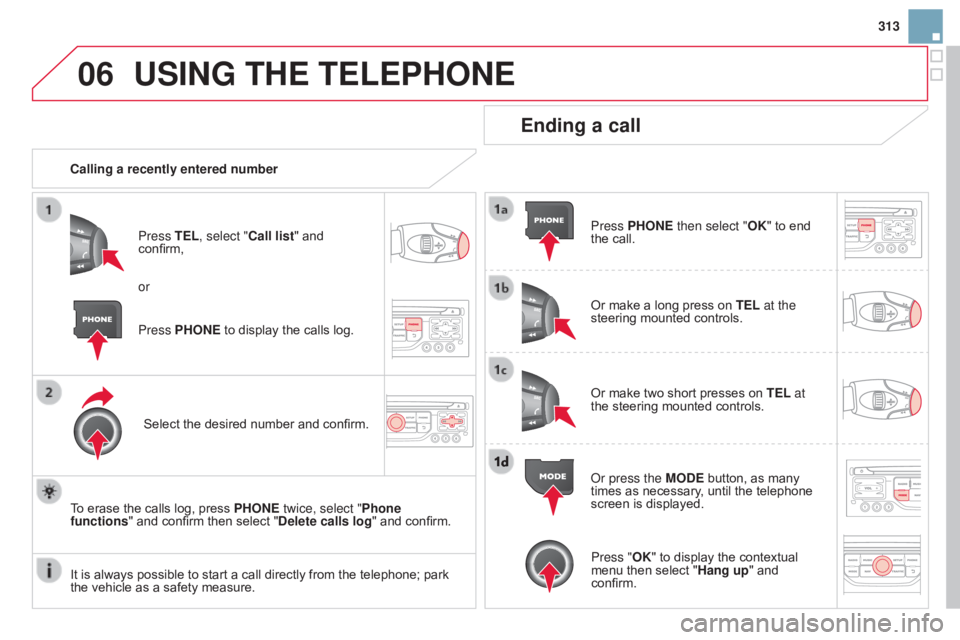
Calling a recently entered numberPress TEL, select "Call list" and
confirm,
Select
the desired number and confirm.
To
erase the calls log, press
PHONE
twice, select "Phone
functions"
and confirm then select " d elete calls log" and confirm.
Ending a call
Press PHONE then select "OK" to end the call.
Or
make a long press on TEL at the
steering
mounted controls.
Or
make two short presses on TEL at
the
steering mounted controls.
o
r press the MO d E button, as many
times
as necessary, until the telephone
screen
is displayed.
Press PHONE
to
display
the
calls
log.
or
Press "OK"
to display the contextual
menu
then select "Hang up" and
confirm.
It
is
always
possible
to
start
a
call
directly
from
the
telephone;
park
the
vehicle
as
a
safety
measure.
Page 316 of 404
06USING THE TELEPHONE
Receiving a call
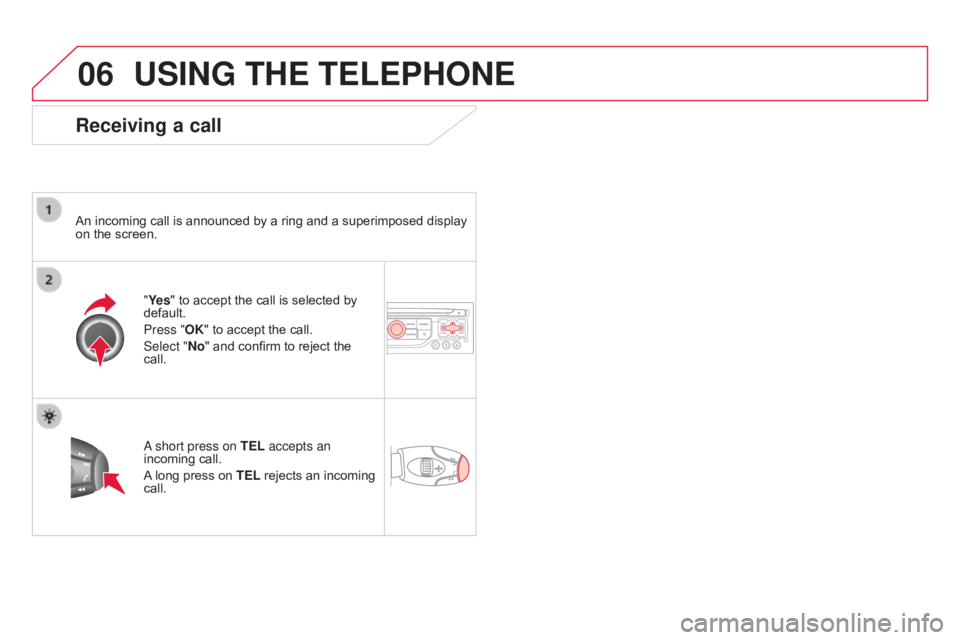
An incoming call is announced by a ring and a superimposed display on the screen.
"Ye s"
to accept the call is selected by
default.
Press "
OK" to accept the call.
Select "No"
and confirm to reject the
call.
a short press on
TEL accepts an
incoming
call.
A
long press on
TEL
rejects an incoming
call.
Page 317 of 404
06
315
Options during a call*
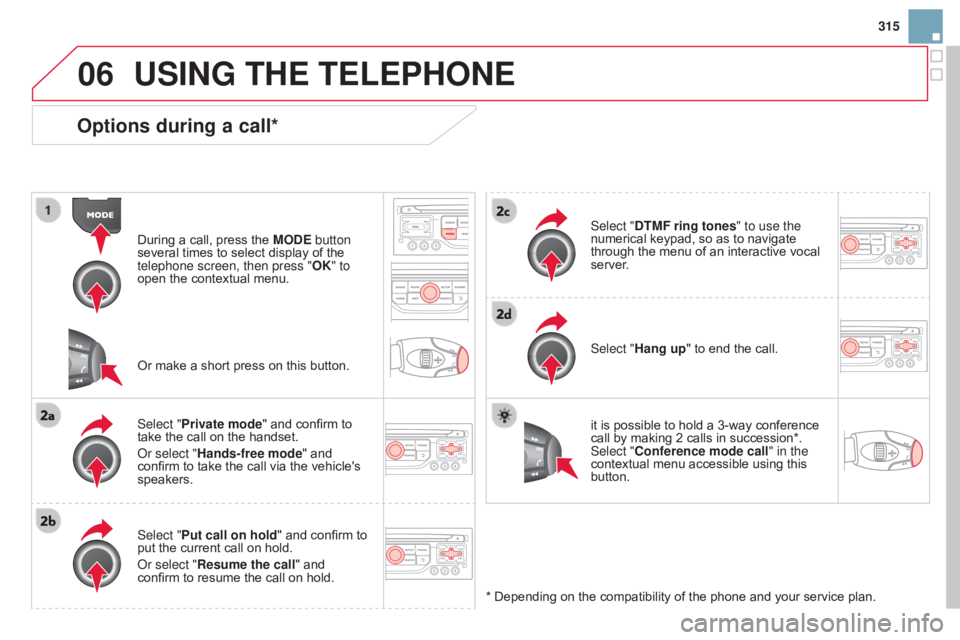
During a call, press the MOd E button
several times to select display of the
telephone screen, then press "OK
" to
open
the contextual menu.
Select "Private mode"
and confirm to
take
the call on the handset.
o
r select "Hands-free mode" and
confirm
to take the call via the vehicle's
speakers.
Select "
Put call on hold "
and confirm to
put
the current call on hold.
o
r select "Resume the call" and
confirm
to resume the call on hold. Select "
d TMF ring tones
" to use the
numerical keypad, so as to navigate through
the menu of an interactive vocal
server
.
Select "Hang up"
to end the call.
*
Depending on the compatibility of the phone and your service plan.
it
is possible to hold a 3-way conference
call
by making 2 calls in succession*.
Select "
Conference mode call" in the
contextual
menu accessible using this
button.
Or
make a short press on this button.
USING THE TELEPHONE
Page 318 of 404
06
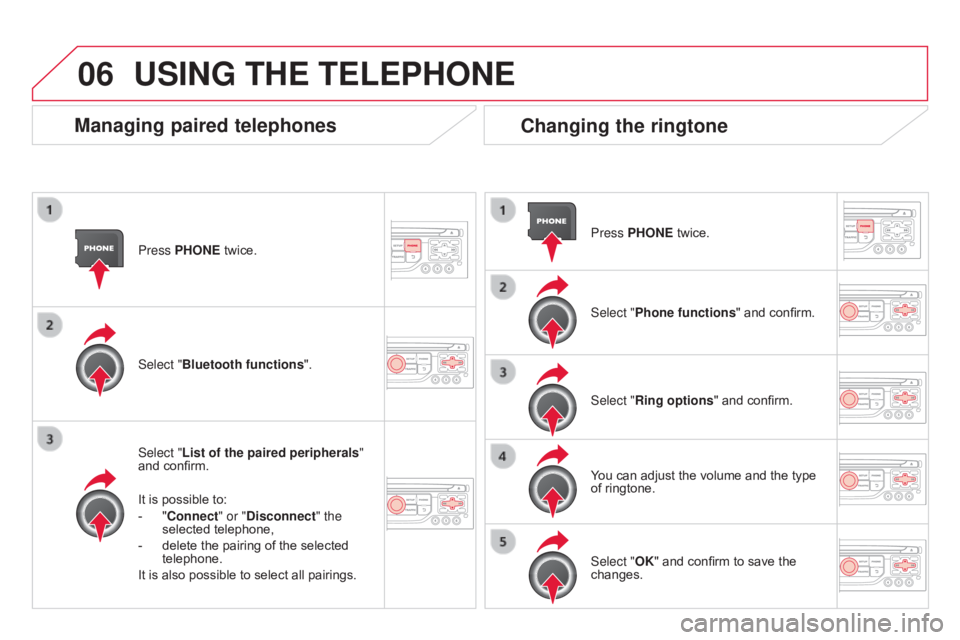
Press PHONE twice.
Select " List of the paired peripherals "
and
confirm.
It
is possible to:
-
"
Connect" or " d isconnect" the
selected
telephone,
-
delete
the pairing of the selected
telephone.
It
is also possible to select all pairings.
Managing paired telephones Changing the ringtone
Press PHONE twice.
Select " Phone functions "
and confirm.
Select "Ring options "
and confirm.
You
can adjust the volume and the type
of
ringtone.
Select "Bluetooth functions
".
Select "OK"
and confirm to save the
changes.
USING THE TELEPHONE
Page 319 of 404
07
317
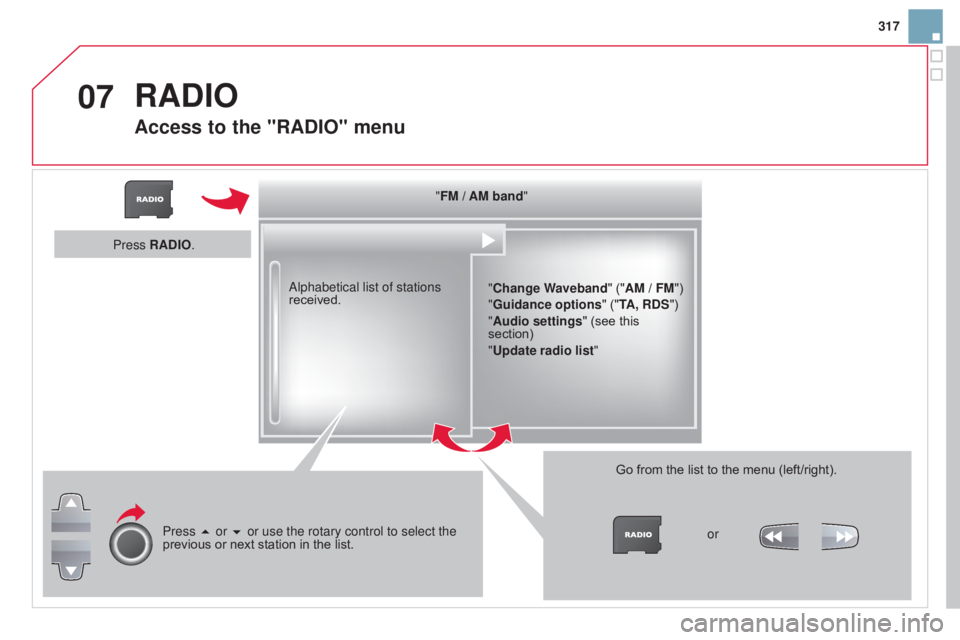
"FM / AM band" "Change Waveband"
("AM / FM")
"Guidance options "
("TA, R
d
S")
"Audio settings "
(see
this
section)
"
Update radio list "
a
lphabetical list of stations
received.
Press 5 or 6 or use the rotary control to select the
previous
or
next
station
in
the
list. Go
from
the
list
to
the
menu
(left/right).
or
Press RA
d
IO.
RAdIO
Access to the "RAdIO" menu
Page 320 of 404
07
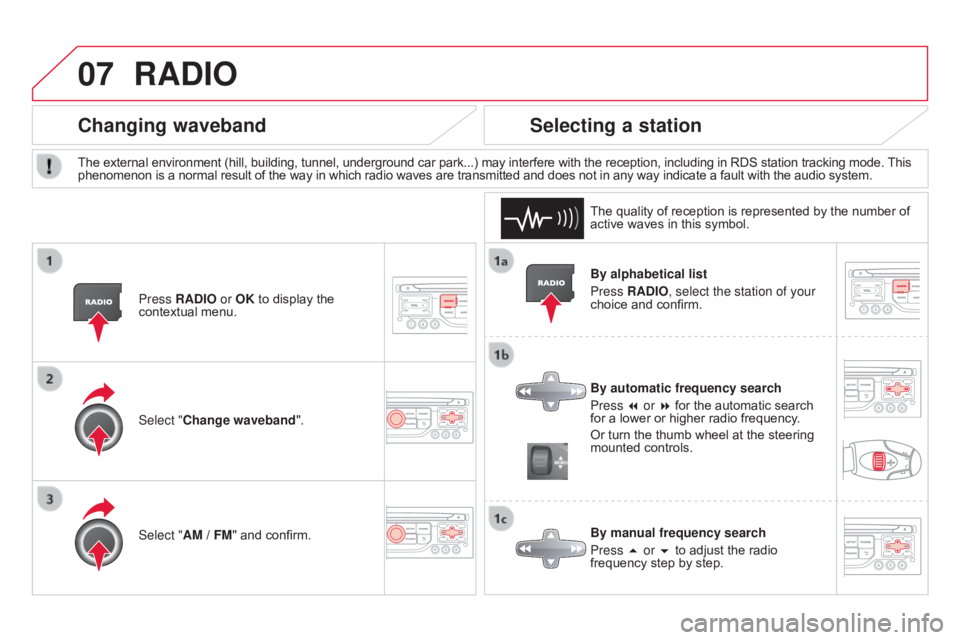
By alphabetical list
Press RAd IO, select the station of your
choice
and confirm.
By automatic frequency search
Press 7 or 8
for the automatic search
for
a lower or higher radio frequency.
Or
turn the thumb wheel at the steering
mounted
controls.
By manual frequency search
Press 5 or 6
to adjust the radio
frequency
step by step.
Selecting a station
The external environment (hill, building, tunnel, underground car park...) may interfere with the reception, including in RDS station tracking mode. This phenomenon is a normal result of the way in which radio waves are transmitted and does not in any way indicate a fault with the audio system.
The
quality of reception is represented by the number of
active
waves in this symbol.
Press RA
d IO or OK to display the
contextual
menu.
Changing waveband
Select "Change waveband".
Select "AM / FM" and confirm.
RAdIO