Citroen GRAND C4 PICASSO RHD 2016 2.G Owner's Manual
Manufacturer: CITROEN, Model Year: 2016, Model line: GRAND C4 PICASSO RHD, Model: Citroen GRAND C4 PICASSO RHD 2016 2.GPages: 523, PDF Size: 13.63 MB
Page 211 of 523
209
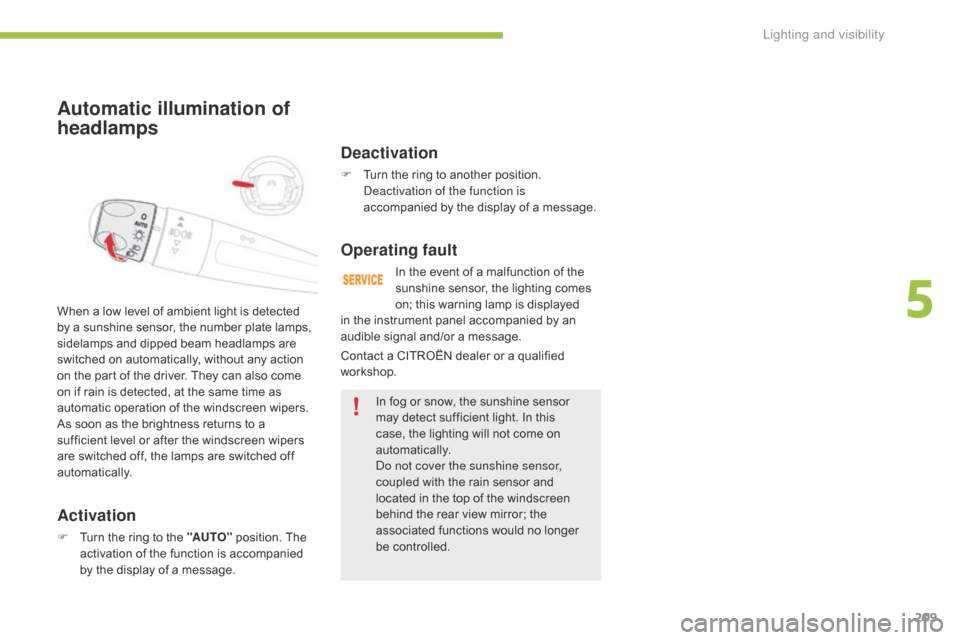
Automatic illumination of
headlamps
Activation
F Turn the ring to the "AUTO" position. The a
ctivation of the function is accompanied
b
y the display of a message.
When
a low level of ambient light is detected
b
y a sunshine sensor, the number plate lamps,
s
idelamps and dipped beam headlamps are
s
witched on automatically, without any action
o
n the part of the driver. They can also come
o
n if rain is detected, at the same time as
a
utomatic operation of the windscreen wipers.
As soon as the brightness returns to a
s
ufficient level or after the windscreen wipers
a
re switched off, the lamps are switched off
au
tomatically.
Deactivation
F Turn
the ring to another position. D
eactivation of the function is
accompanied
by the display of a message.
Operating fault
In the event of a malfunction of the sunshine sensor, the lighting comes
o
n; this warning lamp is displayed
I
n
fog or snow, the sunshine sensor
m
ay detect sufficient light. In this
c
ase, the lighting will not come on
au
tomatically.
Do not cover the sunshine sensor,
coupled
with the rain sensor and
l
ocated in the top of the windscreen
b
ehind the rear view mirror; the
a
ssociated functions would no longer
be c
ontrolled.
Contact
a
CITROËN dealer or a qualified
w
orkshop.
in
the
instrument panel accompanied by an
a
udible
signal and/or a message.
5
Lighting and visibility
Page 212 of 523
210
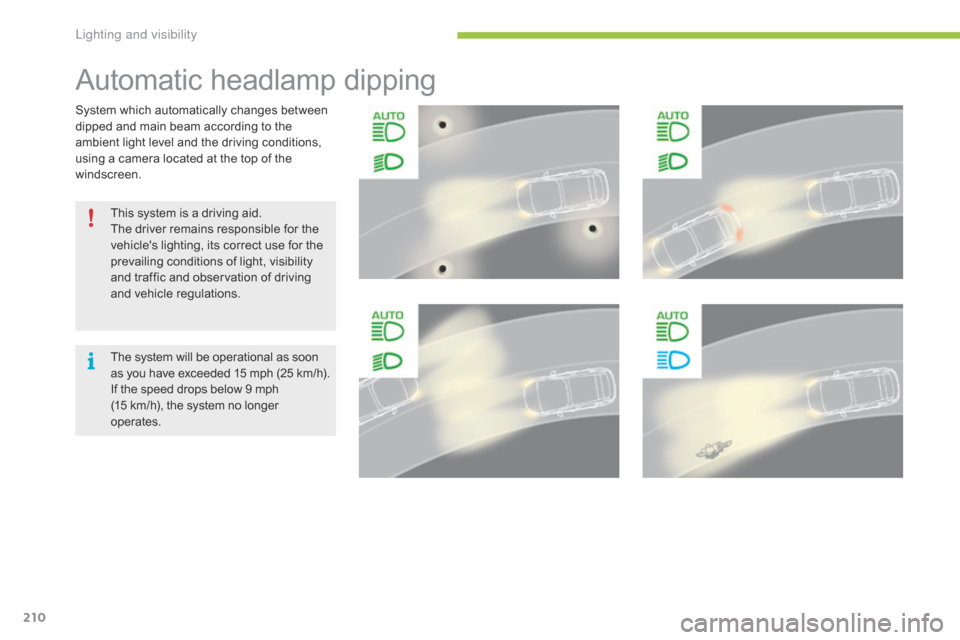
System which automatically changes between dipped and main beam according to the
a
mbient light level and the driving conditions,
u
sing a camera located at the top of the
w
indscreen. This
system is a driving aid.
The
driver remains responsible for the
v
ehicle's lighting, its correct use for the
p
revailing conditions of light, visibility
a
nd traffic and observation of driving
a
nd vehicle regulations.
The
system will be operational as soon
a
s
you
have
exceeded
15
mph
(25 km/h).
If
the speed drops below 9 mph
(
15 km/h), the system no longer
ope
rates.
Automatic headlamp dipping
L
Page 213 of 523
211
The system may suffer inter ference or not work correctly:
-
u
nder conditions of poor visibility
(
falling snow, heavy rain or thick
f
og,
...
),
-
i
f the windscreen is dirty, misted or
o
bscured (by a sticker, ...) in front of
t
he camera,
-
i
f the vehicle is facing highly
re
flective
si
gns.
The
system is not able to detect:
-
r
oad users that do not have their
o
wn lighting, such as pedestrians,
-
r
oad users whose lighting is
o
bscured, such as vehicles running
b
ehind a safety barrier (on a
m
otor way, for example),
-
r
oad users at the top or bottom of
a
steep slope, on twisty roads, on
c
rossroads.
Deactivation
F In the Driving menu, select the "Driving
assistance " tab, then "Automatic
headlamp dip ";
the system changes to
"
automatic illumination headlamps" mode.
To
reactivate the system, flash the headlamps
ag
ain.
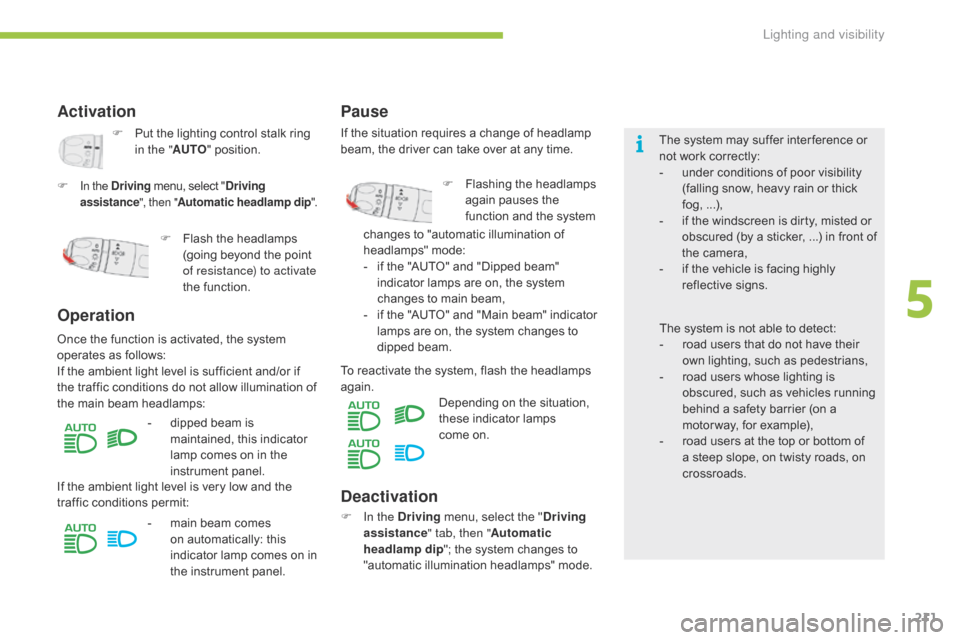
Depending on the situation,
t
hese indicator lamps
c
ome on.
Activation
F Put
the lighting control stalk ring i
n the " AUTO "
position.
F
In the Driving menu, select "Driving
assistance ", then "Automatic headlamp dip ".
Operation
- dipped beam is m
aintained, this indicator
l
amp comes on in the
in
strument
pan
el.
F
F
lash the headlamps
(
going beyond the point
o
f resistance) to activate
the function.
Once
the
function is activated, the system
o
perates
as
follows:
If
the
ambient
light level is sufficient and/or if
t
he
traffic
conditions do not allow illumination of
t
he
main
beam
headlamps:
If
the
ambient
light level is very low and the
t
raffic
conditions permit:
-
m
ain beam comes
o
n automatically: this
i
ndicator lamp comes on in
t
he instrument panel.
Pause
If the situation requires a change of headlamp beam, the driver can take over at any time.
F
F
lashing the headlamps
a
gain pauses the
f
unction and the system
c
hanges to "automatic illumination of
h
eadlamps"
m
ode:
-
i
f the "AUTO" and "Dipped beam"
i
ndicator lamps are on, the system
c
hanges to main beam,
-
i
f the "AUTO" and "Main beam" indicator
l
amps are on, the system changes to
d
ipped
be
am.
5
Lighting and visibility
Page 214 of 523

212
To make your approach to the vehicle easier, these illuminate:
-
t
he zones facing the driver’s and
p
assenger’s
do
ors,
-
t
he zones for ward of the door mirrors and
r
ear ward of the front doors.
Door mirror spotlamps
Switching on
Switching off
They go off automatically after 30 seconds.
Exterior welcome lighting
Switching on
F Press the open padlock on the r
emote control or one of the front
d
oor handles with Keyless Entry
an
d
S
tarting.
Front daytime running
lamps
(light-emitting diodes)
They come on automatically when the engine is started, when the lighting control stalk is in
p
osition " 0" or " AUTO ".
In
some weather conditions (e.g. low
t
emperature or humidity), the presence
o
f misting on the internal sur face of the
g
lass of the headlamps and rear lamps
i
s normal; it disappears after the lamps
h
ave been on for a few minutes. The
remote switching on of the lighting makes
y
our approach to the vehicle easier in poor
light. It is activated when the lighting control
i
s in the "
AUTO" position and the level of light
d
etected by the sunshine sensor is low.
Switching off
The exterior welcome lighting switches off a
utomatically after a set time, when the ignition
i
s switched on or on locking the vehicle.
When
the
courtesy
lamp
is
in
this
p
osition,
the
spotlamps
come
on
au
tomatically:
-
w
hen
you
unlock
the
vehicle,
-
w
hen
you
remove
the
electronic
key
from
t
he
r
eader,
-
w
hen
you
open
a
door,
-
when you use the remote control to locate the vehicle.
The dipped beam headlamps and sidelamps c ome on; your vehicle is also unlocked.
Lighting and visibility
Page 215 of 523
213
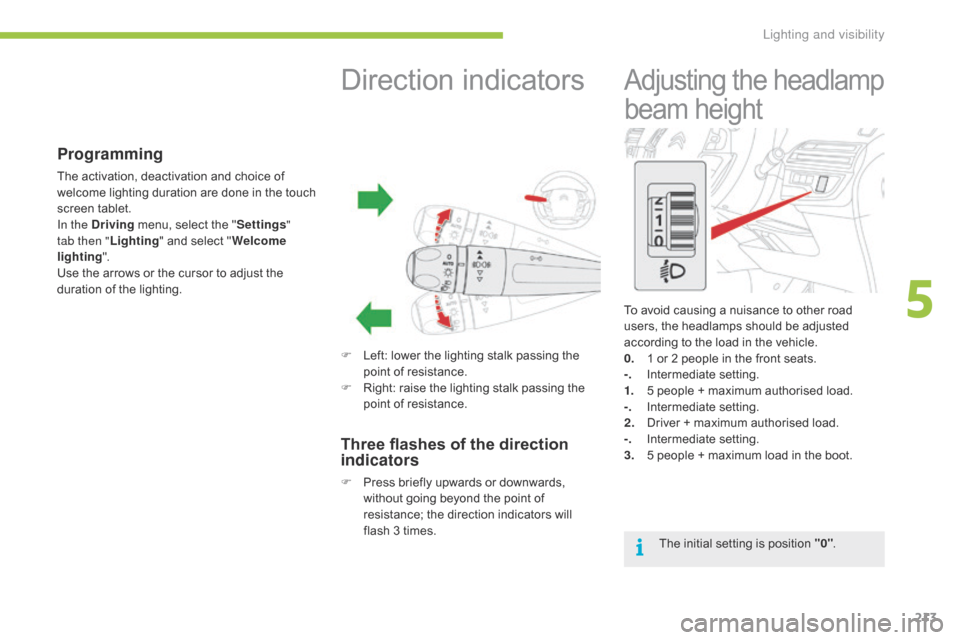
To avoid causing a nuisance to other road users, the headlamps should be adjusted
a
ccording to the load in the vehicle.
0.
1
or 2 people in the front seats.
-.
I
ntermediate
s
etting.
1.
5
people + maximum authorised load.
-.
I
ntermediate
s
etting.
2.
D
river + maximum authorised load.
-.
I
ntermediate
s
etting.
3.
5
people + maximum load in the boot.
Adjusting the headlamp
b
eam
hei
ght
The initial setting is position "0".
Programming
The activation, deactivation and choice of w
elcome lighting duration are done in the touch
s
creen
t
ablet.
In the Driving
menu, select the "Settings "
tab then " Lighting"
and select "Welcome
lighting ".
Use
the arrows or the cursor to adjust the
d
uration of the lighting.
Direction indicators
F Left: lower the lighting stalk passing the p
oint of resistance.
F
R
ight: raise the lighting stalk passing the
p
oint of resistance.
Three flashes of the direction
indicators
F Press briefly upwards or downwards, w
ithout going beyond the point of
r
esistance; the direction indicators will
f
lash 3 times.
5
Lighting and visibility
Page 216 of 523
214
Cornering lighting
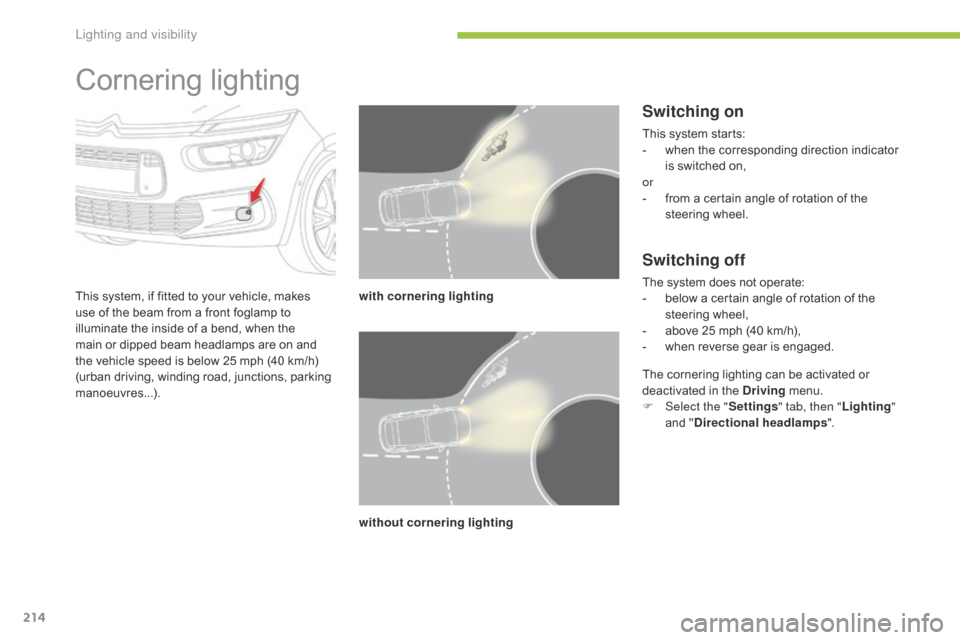
This system, if fitted to your vehicle, makes use of the beam from a front foglamp to
i
lluminate the inside of a bend, when the
m
ain or dipped beam headlamps are on and
t
he vehicle speed is below 25 mph (40 km/h)
(
urban driving, winding road, junctions, parking
m
anoeuvres...). with cornering lighting
without cornering lighting
Switching on
This system starts:
- w hen the corresponding direction indicator
i
s switched on,
or
-
f
rom a certain angle of rotation of the
s
teering
w
heel.
Switching off
The system does not operate:
- b elow a certain angle of rotation of the
s
teering
w
heel,
-
a
bove 25 mph (40 km/h),
-
w
hen reverse gear is engaged.
The
cornering lighting can be activated or
d
eactivated in the Driving
menu.
F
Sel
ect the " Settings " tab, then " Lighting"
and
"Directional headlamps ".
Lighting and visibility
Page 217 of 523
215
Directional lighting
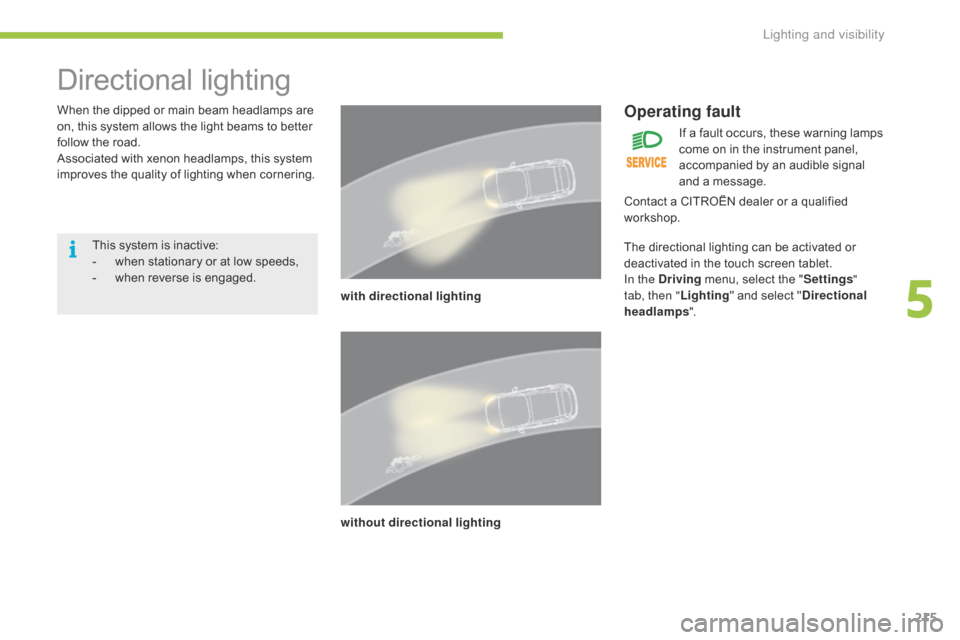
When the dipped or main beam headlamps are o
n, this system allows the light beams to better
f
ollow the road.
Associated
with xenon headlamps, this system
i
mproves the quality of lighting when cornering.
with directional lighting
without directional lightingOperating fault
This system is inactive:
- w hen stationary or at low speeds,
-
w
hen
r
everse
is enga
ged. If
a fault occurs, these warning lamps
c
ome on in the instrument panel,
a
ccompanied by an audible signal
a
nd a message.
Contact a CITROËN dealer or a qualified
w
orkshop.
The directional lighting can be activated or
d
eactivated in the touch screen tablet.
In the Driving
menu, select the "Settings "
tab, then " Lighting"
and select "Directional
headlamps ".
5
Lighting and visibility
Page 218 of 523
216
Wiper control stalk
Programming
Your vehicle may also include some functions that can be configured:
-
a
utomatic
r
ain
sen
sitive
w
indscreen
w
ipers,
-
r
ear wiping on engaging reverse gear.
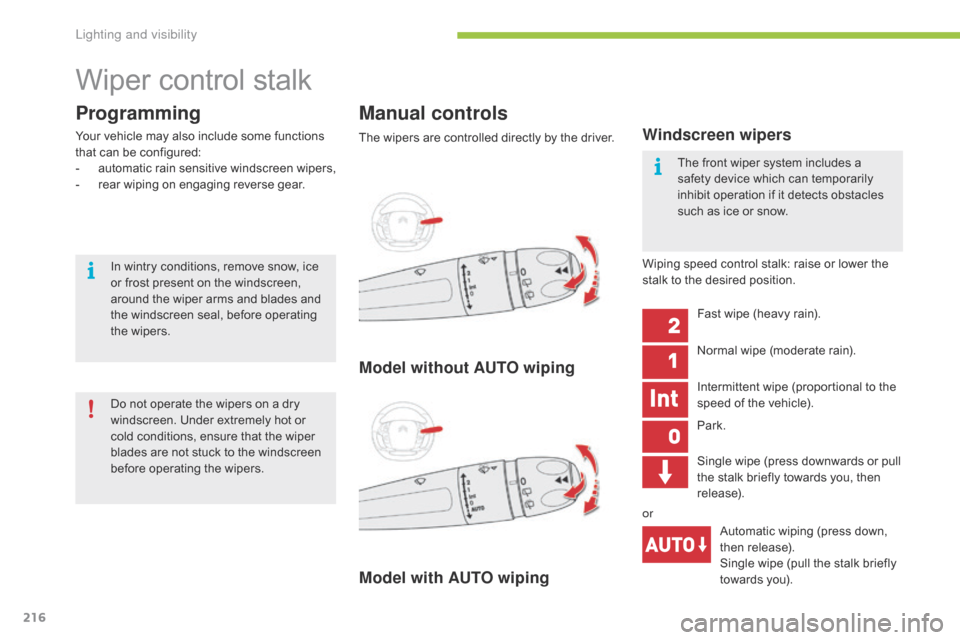
Manual controls
Windscreen wipers
Fast wipe (heavy rain).
N ormal wipe (moderate rain).
Intermittent
wipe (proportional to the
s
peed of the vehicle).
Park.
Automatic
wiping (press down,
t
hen
r
elease).
Single
wipe (pull the stalk briefly
t
owards you).
The
wipers
are
controlled
directly
by
the
driver.
Wiping
speed control stalk: raise or lower the
s
talk
to
the desired position.
Model without AUTO wiping
Model with AUTO wiping
Single wipe (press downwards or pull t
he stalk briefly towards you, then
r
elease).
or
In
wintry
conditions,
remove
snow,
ice
o
r
frost
present
on
the
windscreen,
a
round
the
wiper
arms
and
blades
and
t
he
windscreen
seal,
before
operating
t
he
wipers.
Do
not
operate
the
wipers
on
a
dry
w
indscreen.
Under
extremely
hot
or
c
old
conditions,
ensure
that
the
wiper
b
lades
are
not
stuck
to
the
windscreen
b
efore
operating
the
wipers. The
front wiper system includes a
s
afety device which can temporarily
i
nhibit operation if it detects obstacles
s
uch as ice or snow.
Lighting and visibility
Page 219 of 523
217
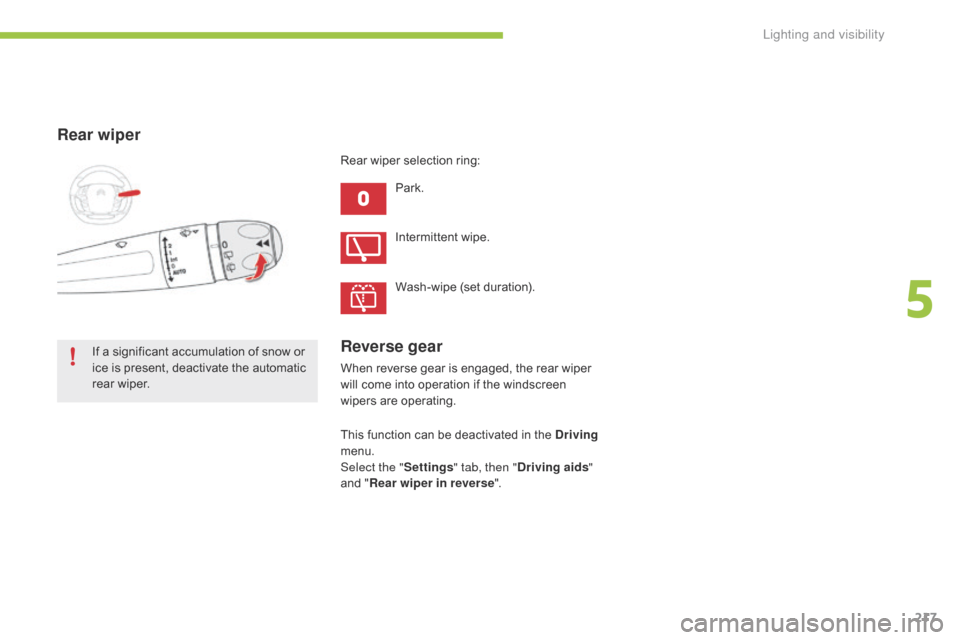
Rear wiper
Park.
If
a
significant
accumulation
of
snow
or
i
ce
is
present,
deactivate
the
automatic
r
ear
wiper. Intermittent
wipe.
Wash-wipe
(set duration).
Rear
wiper selection ring:
Reverse gear
When reverse gear is engaged, the rear wiper w
ill come into operation if the windscreen
w
ipers are operating.
This
function can be deactivated in the Driving
menu.
Select the " Settings" tab, then " Driving aids"
and
"Rear wiper in reverse ".
5
Lighting and visibility
Page 220 of 523
218
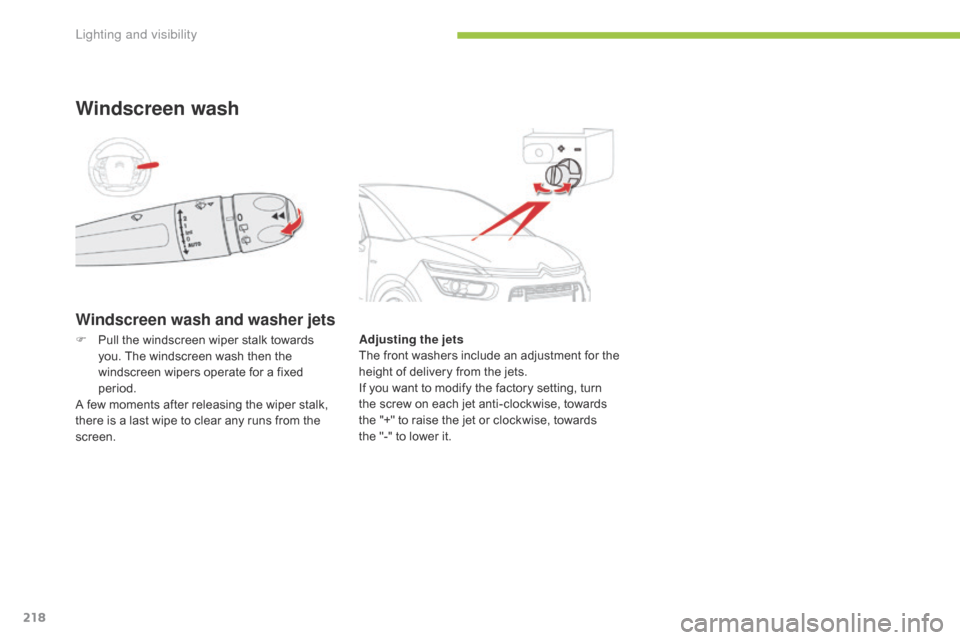
Windscreen wash and washer jets
Windscreen wash
Adjusting the jets
The f ront w ashers i nclude a n a djustment f or t he
h
eight of delivery from the jets.
If
you want to modify the factory setting, turn
t
he screw on each jet anti-clockwise, towards
t
he "+" to raise the jet or clockwise, towards
t
he "-" to lower it.
F
P
ull
the
windscreen
wiper
stalk
towards
y
ou.
The
windscreen
wash
then
the
w
indscreen
wipers
operate
for
a
fixed
p
eriod.
A
few
moments
after
releasing
the
wiper
stalk,
t
here
is
a
last
wipe
to
clear
any
runs
from
the
sc
reen.
Lighting and visibility