CITROEN RELAY 2019 Handbook (in English)
Manufacturer: CITROEN, Model Year: 2019, Model line: RELAY, Model: CITROEN RELAY 2019Pages: 232, PDF Size: 8.21 MB
Page 131 of 232
129
Checks
These operations allow your vehicle to be
kept in good working order. Ask for advice
from a CITROËN dealer or refer to the
manufacturer's service schedule included
in the handbook pack.
Battery
The battery does not require any
maintenance.
However, check regularly that the
terminals are correctly tightened
(models without quick release
terminals) and that the connections
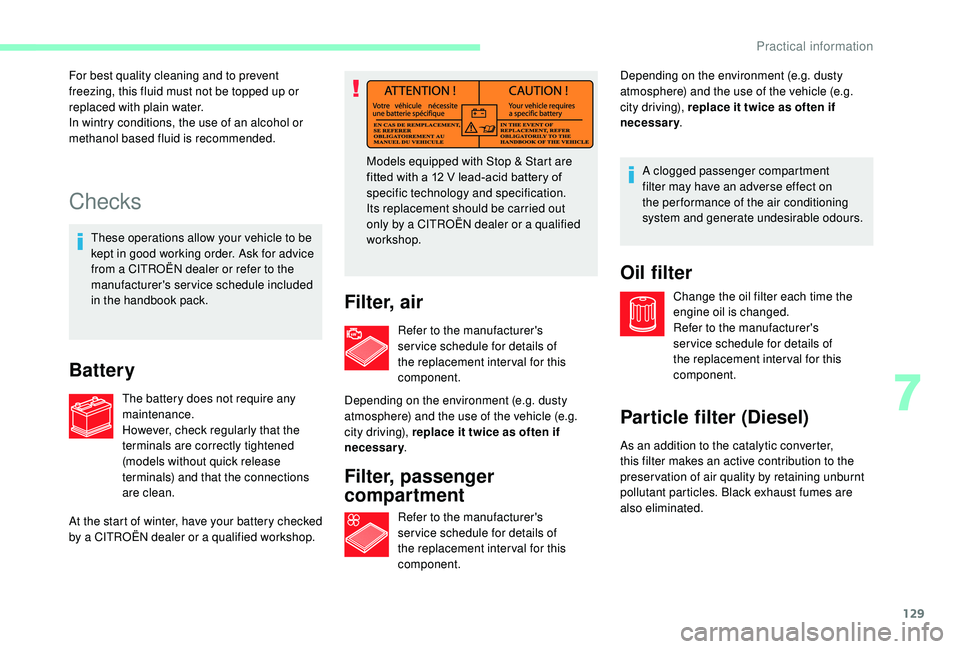
are clean. Models equipped with Stop & Start are
fitted with a
12 V lead-acid battery of
specific technology and specification.
Its replacement should be carried out
only by a CITROËN dealer or a qualified
workshop.
Filter, air
At the start of winter, have your battery checked
by a CITROËN dealer or a qualified workshop.
For best quality cleaning and to prevent
freezing, this fluid must not be topped up or
replaced with plain water.
In wintry conditions, the use of an alcohol or
methanol based fluid is recommended.
Refer to the manufacturer's
ser vice schedule for details of
the replacement inter val for this
component.
Depending on the environment (e.g. dusty
atmosphere) and the use of the vehicle (e.g.
city driving), replace it twice as often if
necessary .
Filter, passenger
compartment
Refer to the manufacturer's
ser vice schedule for details of
the replacement inter val for this
component. Depending on the environment (e.g. dusty
atmosphere) and the use of the vehicle (e.g.
city driving), replace it twice as often if
necessary
.
Oil filter
Change the oil filter each time the
engine oil is changed.
Refer to the manufacturer's
ser vice schedule for details of
the replacement inter val for this
component.
Particle filter (Diesel)
A clogged passenger compartment
filter may have an adverse effect on
the per formance of the air conditioning
system and generate undesirable odours.
As an addition to the catalytic converter,
this filter makes an active contribution to the
preser vation of air quality by retaining unburnt
pollutant particles. Black exhaust fumes are
also eliminated.
7
Practical information
Page 132 of 232
130
Operation
This filter, fitted in the exhaust system,
accumulates particles of soot. The engine
management unit controls the automatic
periodic elimination of the soot particles
(regeneration).
The regeneration procedure is triggered
depending on the amount of particles
accumulated and the vehicle use conditions.
During this phase, you may notice some
unusual phenomena – increased idling speed,
cooling fan running, increase in smoke and
higher exhaust gas temperature – which does
not affect the operation of the vehicle or the
environment.After prolonged idling or driving at very
low speeds, you may occasionally notice
water vapour being emitted from the
exhaust when accelerating. This is of no
consequence to the running of the vehicle
or to the environment. Because of the higher exhaust gas
temperature resulting from the normal
operation of the particle filter, it is
recommended that you do not park the
vehicle over inflammable materials (grass,
dry leaves, pine needles, etc.) so as to
avoid any risk of fire.
Saturation/Regeneration
If there is risk of blockage of the
filter, this warning lamp comes on in
the instrument panel.
This alert tells you that the particle filter is
starting to saturate (in conditions of urban
driving of exceptionally long duration: low
speeds, traffic jams, etc.).
To regenerate the filter, it is advised to drive
as soon as possible, when traffic conditions
and the law permit, at a
speed of at least
37
mph (60 km/h), with an engine speed above
2,000
rpm for about fifteen minutes (until the
warning lamp and/or the message disappears).
If possible, avoid switching off the engine
before the end of the filter regeneration;
repeated interruptions could cause premature
deterioration of the engine oil. It is not
recommended to end regeneration of the filter
with the vehicle stationary.
Malfunction
If this alert persists, do not ignore the warning;
it indicates that a fault has occurred in the
exhaust system/particle filter assembly.
Have the whole system checked by a
CITROËN
dealer or a
qualified workshop.
Manual gearbox
The gearbox does not require any
maintenance (no oil change).
Brake pads
Brake wear depends on the style
of driving, particularly in the case
of vehicles used in town, over short
distances. It may be necessary to
have the condition of the brakes
checked, even between vehicle
services.
If this warning lamp comes on, have
the brake pad wear checked by
a
CITROËN dealer or a qualified
workshop.
Practical information
Page 133 of 232
131
Brake disc wear
For information on checking brake
disc wear, contact a CITROËN or
a
qualified workshop.
Parking brake
If excessive travel or a loss of
e ffectiveness of this system is
noticed, the parking brake must
be checked, even between two
services.
This system must be checked by a
CITROËN
dealer or a
qualified workshop.
Diesel fuel filter
The Diesel fuel filter is located under the
bonnet, close to the brake fluid reser voir. If this warning lamp comes on, the
filter must be purged to remove
water.
You can also purge the fuel filter
regularly, every time the engine oil
is changed.
Purging water from the filterThe HDi engines use advanced technology.
All work must be done by personnel that
have had special training, which can be
ensured by going to a
CITROËN dealer or
a
qualified workshop.
Only use products recommended by
CITROËN or products of equivalent quality
and specification.
In order to optimise the operation of
components as important as those in the
braking system, CITROËN selects and
offers very specific products.
After washing the vehicle, dampness, or
in wintry conditions, ice can form on the
brake discs and pads: braking efficiency
may be reduced. Make light brake
applications to dry and defrost the brakes.
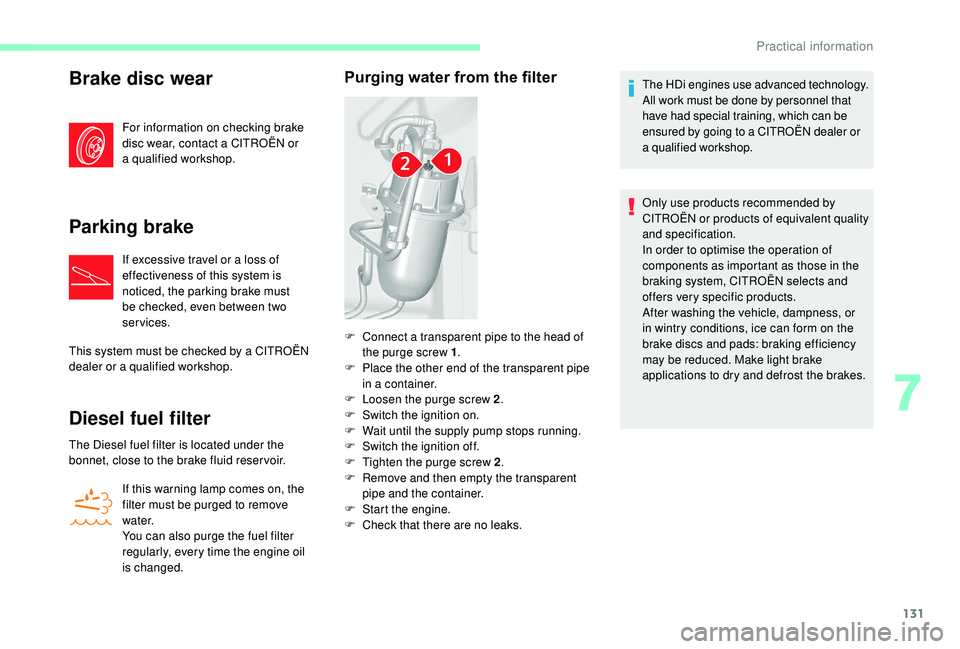
F
C
onnect a
transparent pipe to the head of
the purge screw 1 .
F
P
lace the other end of the transparent pipe
in a
container.
F
L
oosen the purge screw 2 .
F
S
witch the ignition on.
F
W
ait until the supply pump stops running.
F
S
witch the ignition off.
F
T
ighten the purge screw 2 .
F
R
emove and then empty the transparent
pipe and the container.
F
S
tart the engine.
F
C
heck that there are no leaks.
7
Practical information
Page 134 of 232
132
Freezing of the AdBlue®
AdBlue® freezes at temperatures below
around -11°C.
The SCR system includes a
heater for the
AdBlue
® tank, allowing you to continue
driving in very cold conditions.
Topping up with AdBlue®
Before topping up, please read the
following warnings carefully.
Precautions for use
AdBlue® is a urea-based solution. This fluid
is
non-flammable, colourless and odourless
(stored in a
cool place).
In the event of contact with the skin, wash the
affected area with soap and running water. In
the event of contact with the eyes, immediately
rinse the eyes with large amounts of water
or with an eye wash solution for at least
15
minutes. If a burning sensation or irritation
persists, get medical attention.
If swallowed, immediately wash out the mouth
with clean water and then drink plenty of water.
In certain conditions (high exterior temperature,
for example), the risk of ammonia being
released cannot be excluded: do not inhale
the vapours. Ammonia has an irritant effect on
mucous membranes (eyes, nose and throat).
AdBlue® (BlueHDi
engines)
To respect the environment and ensure
compliance with the Euro 6
standard, without
adversely affecting the per formance or fuel
consumption of Diesel engines, CITROËN
has taken the decision to equip its vehicles
with a
system that associates SCR (Selective
Catalytic Reduction) with a
Diesel particle filter
(DPF) for the treatment of exhaust gases.
SCR system
Using a liquid called AdBlue® containing urea, a
catalytic converter turns up to 85% of nitrogen
oxides (NOx) into nitrogen and water, which are
harmless to health and the environment.
The AdBlue
® is contained in a special tank with
a
capacity of approximately 14 litres.
It has an exterior filler located behind the fuel
filler flap below the fuel filler cap and closed
with a
blue filler cap .
An alarm system is triggered once the
remaining range is 1,500 (2,400 km), in other
words once the reser ve level is reached. Once the AdBlue
® tank is empty, a
regulatory device prevents the engine
from being restarted.
If the SCR system is faulty, the level of
emissions from your vehicle no longer
meet the Euro 6
regulations: your vehicle
becomes polluting.
In the event of a
confirmed fault with the
SCR system, you must go to a
CITROËN
dealer or a
qualified workshop as soon
as possible: having travelled 250 miles
(400 km), a device will be triggered
automatically to prevent the engine from
starting.
Practical information
Page 135 of 232
133
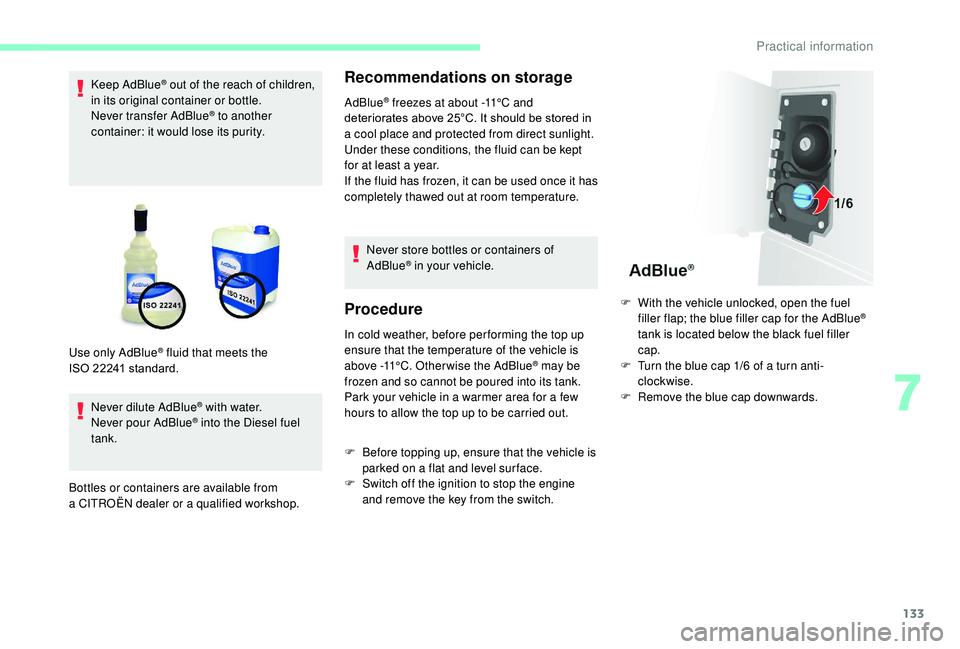
Keep AdBlue® out of the reach of children,
in its original container or bottle.
Never transfer AdBlue
® to another
container: it would lose its purity.
Never dilute AdBlue
® with water.
Never pour AdBlue® into the Diesel fuel
tank.
Bottles or containers are available from
a
CITROËN dealer or a
qualified workshop.
Recommendations on storage
AdBlue® freezes at about -11°C and
deteriorates above 25°C. It should be stored in
a
cool place and protected from direct sunlight.
Under these conditions, the fluid can be kept
for at least a
year.
If the fluid has frozen, it can be used once it has
completely thawed out at room temperature.
Never store bottles or containers of
AdBlue
® in your vehicle.
Procedure
In cold weather, before per forming the top up
ensure that the temperature of the vehicle is
above -11°C. Other wise the AdBlue
® may be
frozen and so cannot be poured into its tank.
Park your vehicle in a
warmer area for a few
hours to allow the top up to be carried out.
Use only AdBlue
® fluid that meets the
ISO
22241
standard.
F
B
efore topping up, ensure that the vehicle is
parked on a
flat and level sur face.
F
S
witch off the ignition to stop the engine
and remove the key from the switch. F
W
ith the vehicle unlocked, open the fuel
filler flap; the blue filler cap for the AdBlue
®
tank is located below the black fuel filler
cap.
F
T
urn the blue cap 1/6 of a turn anti-
clockwise.
F
R
emove the blue cap downwards.
7
Practical information
Page 136 of 232
134
Refilling
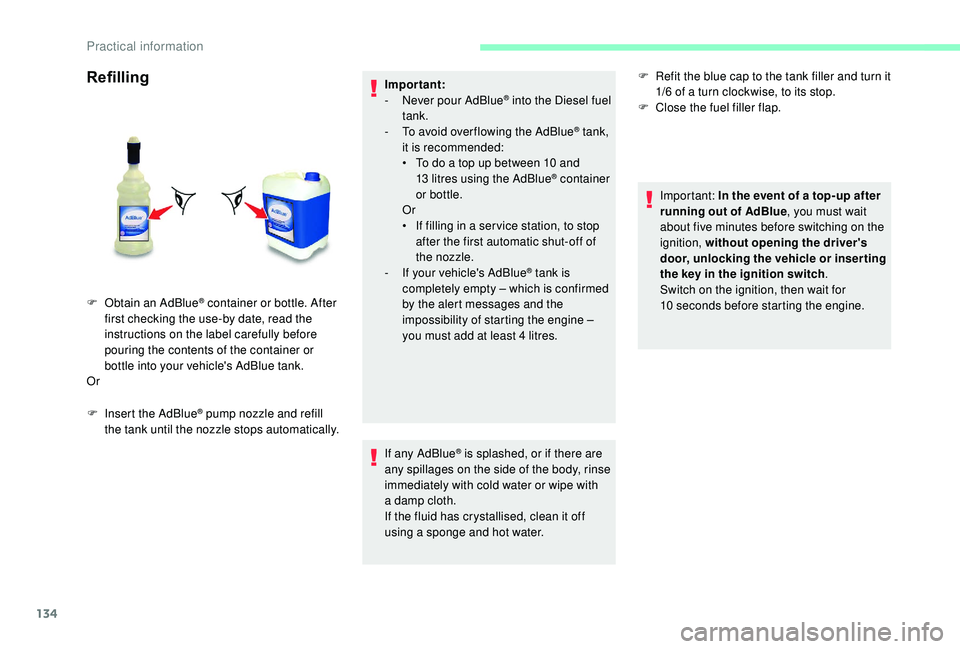
F Insert the AdBlue® pump nozzle and refill
the tank until the nozzle stops automatically. Important:
-
N
ever pour AdBlue
® into the Diesel fuel
tank.
-
T
o avoid over flowing the AdBlue
® tank,
it is recommended:
•
T
o do a
top up between 10
and
13
litres using the AdBlue
® container
or bottle.
Or
•
I
f filling in a
ser vice station, to stop
after the first automatic shut-off of
the nozzle.
-
I
f your vehicle's AdBlue
® tank is
completely empty – which is confirmed
by the alert messages and the
impossibility of starting the engine –
you must add at least 4
litres.
If any AdBlue
® is splashed, or if there are
any spillages on the side of the body, rinse
immediately with cold water or wipe with
a
damp cloth.
If the fluid has crystallised, clean it off
using a
sponge and hot water.
F
O
btain an
AdBlue
® container or bottle. After
first checking the use-by date, read the
instructions on the label carefully before
pouring the contents of the container or
bottle into your vehicle's AdBlue tank.
Or F
R
efit the blue cap to the tank filler and turn it
1/6 of a turn clockwise, to its stop.
F
C
lose the fuel filler flap.
Important: In the event of a top-up after
running out of AdBlue , you must wait
about five minutes before switching on the
ignition, without opening the driver's
door, unlocking the vehicle or inser ting
the key in the ignition switch .
Switch on the ignition, then wait for
10 seconds before starting the engine.
Practical information
Page 137 of 232
135
Temporary puncture
repair kit
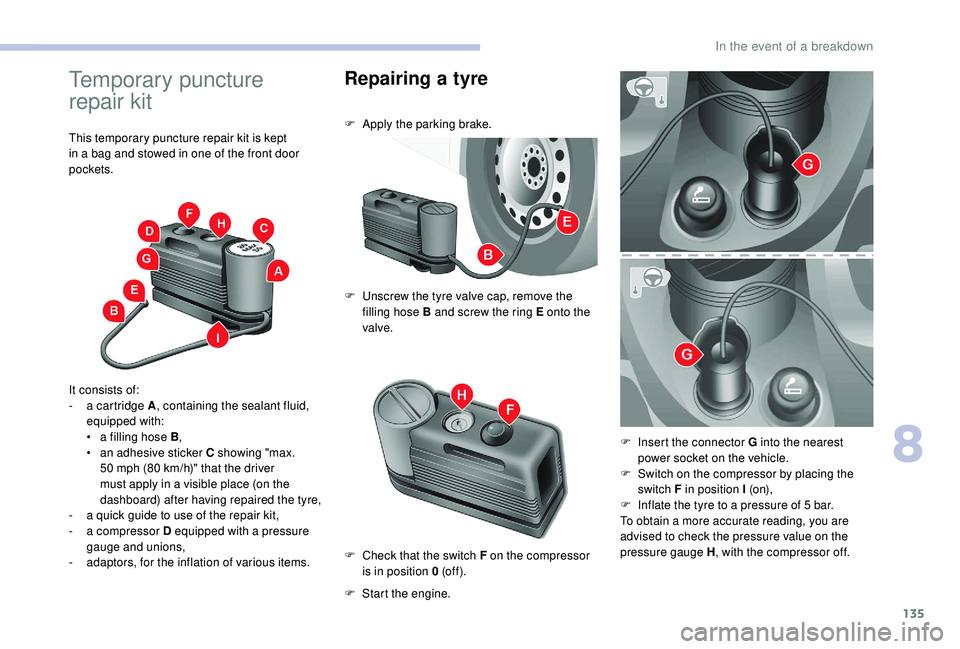
This temporary puncture repair kit is kept
in a bag and stowed in one of the front door
pockets.
It consists of:
-
a c
artridge A , containing the sealant fluid,
equipped with:
•
a f
illing hose B ,
•
a
n adhesive sticker C showing "max.
50
mph (80 km/h)" that the driver
must apply in a
visible place (on the
dashboard) after having repaired the tyre,
-
a q
uick guide to use of the repair kit,
-
a c
ompressor D equipped with a pressure
gauge and unions,
-
a
daptors, for the inflation of various items.
Repairing a tyre
F Apply the parking brake.
F
U
nscrew the tyre valve cap, remove the
filling hose B and screw the ring E onto the
valve.
F
S
tart the engine.
F
C
heck that the switch F on the compressor
is in position 0 (of f ). F
I
nsert the connector G into the nearest
power socket on the vehicle.
F
S
witch on the compressor by placing the
switch F in position I (o n),
F
I
nflate the tyre to a pressure of 5 bar.
To obtain a
more accurate reading, you are
advised to check the pressure value on the
pressure gauge H , with the compressor off.
8
In the event of a breakdown
Page 138 of 232

136
F If a pressure of at least 3 bar is not
reached within 5 minutes, disconnect the
compressor from the valve and the power
socket, then move the vehicle for ward by
approximately 10
metres to distribute the
sealant fluid inside the tyre.
F
T
hen repeat the inflation operation:
•
i
f a pressure of at least 3 bar is not
reached within 10
minutes, switch off your
vehicle: the tyre has suffered too much
damage and it could not be repaired.
Contact a
CITROËN dealer or a qualified
workshop.
•
i
f the tyre has been inflated to a pressure
of 5
bar, set off again immediately.
F
A
fter driving for approximately 10 minutes,
stop and check the pressure of the tyre
again.
F
A
djust the pressure to the value given on
the label on the driver's door pillar, and
contact a
CITROËN dealer or a qualified
workshop as soon as possible.
This puncture repair kit and replacement
cartridges are available from CITROËN
dealers.Checking and adjusting the
pressure
The compressor can only be used to check and
adjust the pressure.
F
D
isconnect the hose I and connect it to the
tyre valve directly; the cartridge will then be
connected to the compressor and the filling
fluid will not be injected.
If it is necessary to deflate the tyre, connect the
hose I to the tyre valve and press the yellow
button, placed in the centre of the switch on the
compressor.
Replacing the cartridge
To replace the sealant cartridge, proceed as
follows:
F
D
isconnect the hose I .
F
T
urn the cartridge to be replaced
anticlockwise and lift it,
F
I
nsert the new cartridge and turn it
clockwise,
F
R
econnect the hose I and attach hose B in
its location.
The cartridge contains ethylene glycol, a
product which is harmful if swallowed and
which causes irritation to the eyes.
It must be kept out of the reach of children. After use, do not discard the cartridge
into the environment, take it to an
authorised waste disposal site or
a
CITROËN dealer.
In the event of a breakdown
Page 139 of 232

137
Special feature with pneumatic
suspension
If the vehicle is fitted with this system, you must
activate vehicle lifting mode before lifting the
vehicle with a jack. For vehicles with the steering wheel on the
right, the buttons are located on the right of the
steering wheel.
F
W
ith the ignition on, simultaneously press
buttons 1 and 2 for at least 5 seconds.
Their indicator lamps come on fixed.
F
T
o leave this mode, simultaneously press
buttons 1 and 2 for another 5
seconds.
Their indicator lamps go off and the system
becomes fully operational again.
This mode deactivates itself automatically if the
speed of about 3 mph (5 km/h) is exceeded.
Spare wheel
Parking
F Park the vehicle where it does not block
traffic: the ground must be level, stable and
non-slippery.
F
I
f the road is sloping or damaged, place an
object under the wheels to act as a
chock.
F
W
ith a
manual gearbox, engage first gear
then switch off the ignition to block the
wheels.
F
A
pply the parking brake and check that the
warning lamp is on in the instrument panel.
F
T
he passengers must get out of the vehicle
and wait where they are safe.
F
P
ut on the high visibility vest and signal that
the vehicle is immobile by using the devices
envisaged by the legislation in force in the
country where you are driving (warning
triangle, hazard warning lamps, etc.).
F
E
quip yourself with the tools. Once your vehicle is properly secured, you
should proceed in this order:
1-Take the tools.
2- Remove the spare wheel from its
compartment.
3- Position the jack.
4- Change the wheel to be repaired.
5- Put away the wheel to be repaired.
1 - Take the tools
These are stowed in a box located under the
f ront passenger seat.
F
T
urn the button a quarter of a turn then pull
the box.
F
A
fter use, press the button then turn it
a
quarter of a turn to secure the box.
8
In the event of a breakdown
Page 140 of 232

138
A.Long socket.
B. B a r.
C. Jack.
D. Wheelbrace.
E. Screwdriver (handle and bits).
F. Removable towing eye.
2 - Remove the spare wheel
f
rom its compartment
To make the procedure easier, raise the
rear of the vehicle. The spare wheel is specific to your
vehicle, do not use it on other vehicles of
a
different model.
Likewise, do not use spare wheels that are
from a model different to your vehicle.
These instructions also apply to the bolts.
With steel wheels :
H. Handle.
I. Carrier. With alloy wheels
:
H. Handle.
I. Carrier.
J. Support.
K. Bolt.
In the event of a breakdown