instrument panel DATSUN PICK-UP 1977 User Guide
[x] Cancel search | Manufacturer: DATSUN, Model Year: 1977, Model line: PICK-UP, Model: DATSUN PICK-UP 1977Pages: 537, PDF Size: 35.48 MB
Page 470 of 537

RADIO
REMOVAL
AND
INSTALLATION
Radio
Removal
Pull
radio
knobs
offradio
control
shafts
Body
Electrical
System
2
Remove
radio
holding
nuts
and
washer
from
radio
control
shafts
3
Remove
radio
bezel
from
the
front
of
radio
4
From
under
instrument
panel
disconnect
antenna
cable
and
lead
wires
power
lead
and
speaker
lead
5
Remove
radio
from
instrument
panel
Installation
Fr
m
behind
instrument
panel
position
radio
to
instrument
panel
2
Install
radio
bezel
to
the
front
of
radio
3
Install
washers
and
nuts
on
radio
control
shafts
and
tighten
them
secure
ly
Then
install
control
knobs
4
Connect
antenna
cable
and
lead
wires
power
lead
and
speaker
lead
Antenna
and
antenna
cable
Removal
From
behind
instrument
panel
disconnect
antenna
cable
at
conne
tor
2
Remove
plug
on
antenna
base
and
remove
antenna
base
retaining
screw
3
Remove
antenna
and
cable
as
sembly
from
fr
ont
pillar
4
Unscrew
antenna
clip
from
front
pillar
if
necessary
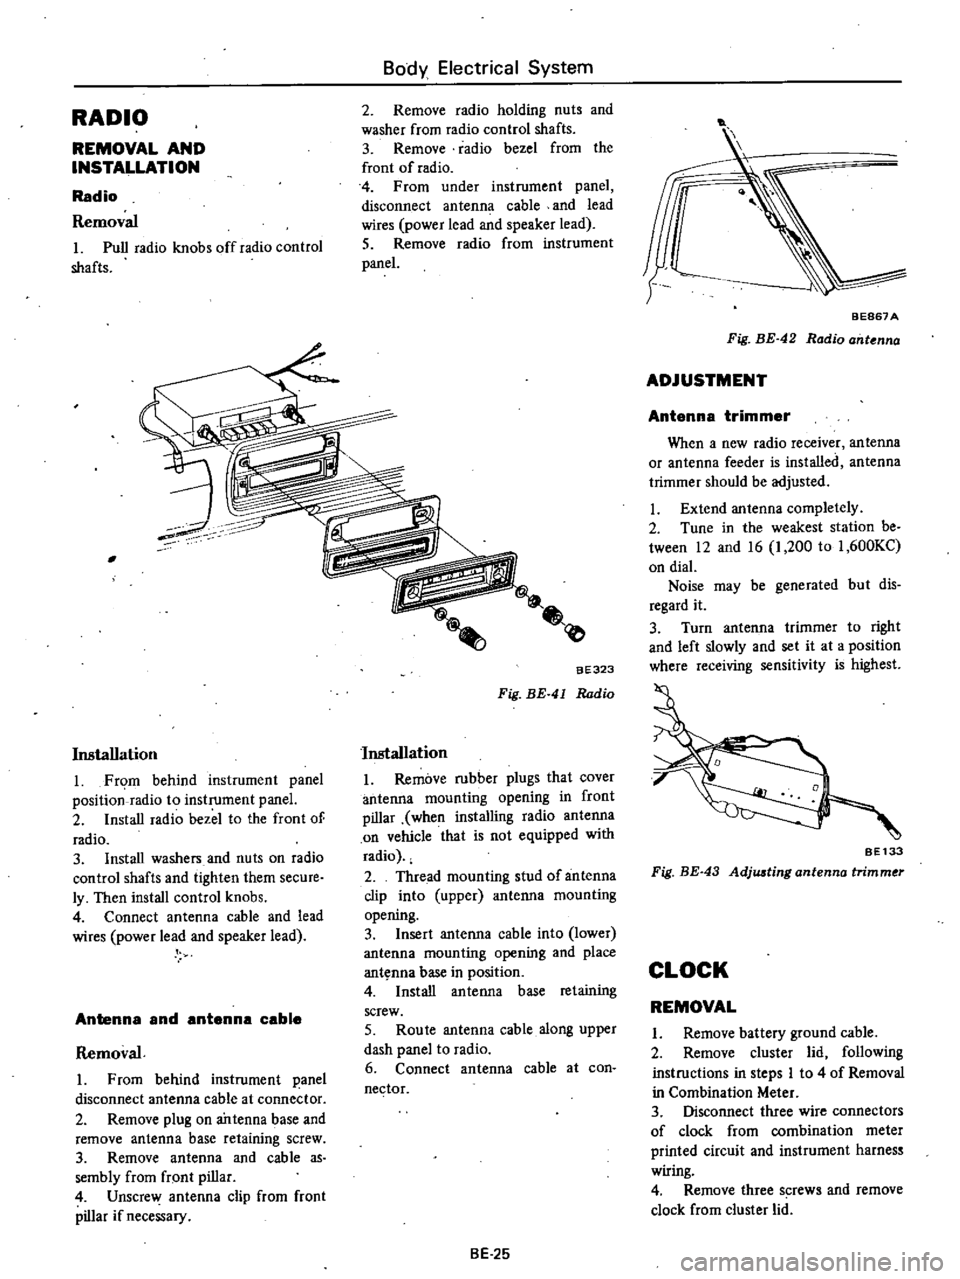
aE323
Fig
BE
41
Radio
Installation
Remove
rubber
plugs
that
cover
antenna
mounting
opening
in
front
pillar
when
installing
radio
antenna
on
vehicle
that
is
not
equipped
with
radio
2
Thread
mounting
stud
of
antenna
clip
into
upper
antenna
mountins
opening
3
Insert
antenna
cable
into
lower
antenna
mounting
opening
and
place
ant
nna
base
in
position
4
Install
antenna
base
retaining
screw
5
Route
antenna
cable
along
upper
dash
panel
to
radio
6
Connect
antenna
cable
at
con
nector
BE
25
t
BEB67
A
Fig
BE
42
Radio
ant
nna
ADJUSTMENT
Antenna
trimmer
When
a
new
radio
receiver
antenna
or
antenna
feeder
is
installed
antenna
trimmer
should
be
adjusted
Extend
antenna
completely
2
Tune
in
the
weakest
station
be
tween
12
and
16
1
200
to
1
600KC
on
dial
Noise
may
be
generated
but
dis
regard
it
3
Turn
antenna
trimmer
to
right
and
left
slowly
and
set
it
at
a
position
where
receiving
sensitivity
is
highest
SE133
Fig
BE
43
Adjwting
antenna
trimmer
CLOCK
REMOVAL
Remove
battery
ground
cable
2
Remove
cluster
lid
following
instructions
in
steps
I
to
4
of
Removal
in
Combination
Meter
3
Disconnect
three
wire
connectors
of
clock
from
combination
meter
printed
circuit
and
instrument
harnes
wiring
4
Remove
three
s
rews
and
remove
clock
from
cluster
lid
Page 471 of 537

INSTALLATION
I
Position
clock
to
cluster
lid
and
install
three
screws
2
Connect
three
wire
connectors
of
clock
to
each
connection
two
to
combination
meter
printed
circuit
one
to
instrument
h
ness
wiring
3
Install
cluster
lid
to
instrument
panel
4
Connect
battery
ground
cable
HEATER
DESCRIPTION
@
Body
Electrical
System
Fig
BE
44
Clock
1
Defroster
nozzle
L
U
2
Deflor
tcr
duct
L
R
3
Heater
control
4
Resistor
5
Heater
motor
6
Heater
case
7
Ventilator
knob
8
Heater
core
9
Conuol
cable
clip
10
Heater
cock
11
Defroster
duct
R
H
12
Defroster
nozzle
R
H
BE687B
Fig
BE
45
Heater
comtruction
BE
26
Page 472 of 537

Operation
of
the
heater
is
control
led
by
two
control
levers
located
on
the
instrument
panel
and
a
hand
op
erated
knob
on
the
center
of
the
heater
unit
The
AIR
LEVER
controls
the
air
intake
valve
and
or
room
valve
by
its
lever
positions
OFF
DEFROST
and
ROOM
through
the
control
cables
The
air
intake
valve
draws
the
fresh
outside
air
from
the
cowl
top
grille
and
supplies
the
air
into
the
heater
unit
The
room
valve
is
located
at
the
bottom
of
the
heater
unit
The
air
coming
through
the
air
intake
valve
opening
is
forced
through
the
heater
core
to
the
room
valve
where
the
air
is
distributed
to
the
floor
outlet
and
or
defroster
outlets
depending
on
the
position
of
the
room
valve
The
VENT
KNOB
is
directly
linked
to
the
vent
valve
which
provides
fresh
air
for
the
passenger
Push
the
knob
all
the
way
in
to
open
the
valve
The
fresh
ventilating
air
comes
out
of
the
heater
center
outlet
The
TEMP
lever
is
a
dual
pur
pose
control
one
is
for
regulating
the
flow
of
engine
coolant
flowing
into
Body
Electrical
System
the
heater
unit
and
the
other
for
the
operation
of
the
fan
motor
When
the
lever
is
in
the
OFF
position
the
water
cock
is
closed
and
the
circulation
of
engine
coolant
through
the
heater
core
stops
When
the
lever
is
slided
to
any
other
position
than
OFF
the
water
cock
opens
in
proportion
to
the
lever
setting
and
allow
engine
coolant
to
flow
into
heater
core
To
control
the
fan
motor
opera
tion
push
or
pull
the
lever
knob
Two
speeds
are
provided
for
the
fan
motor
by
using
a
three
position
switch
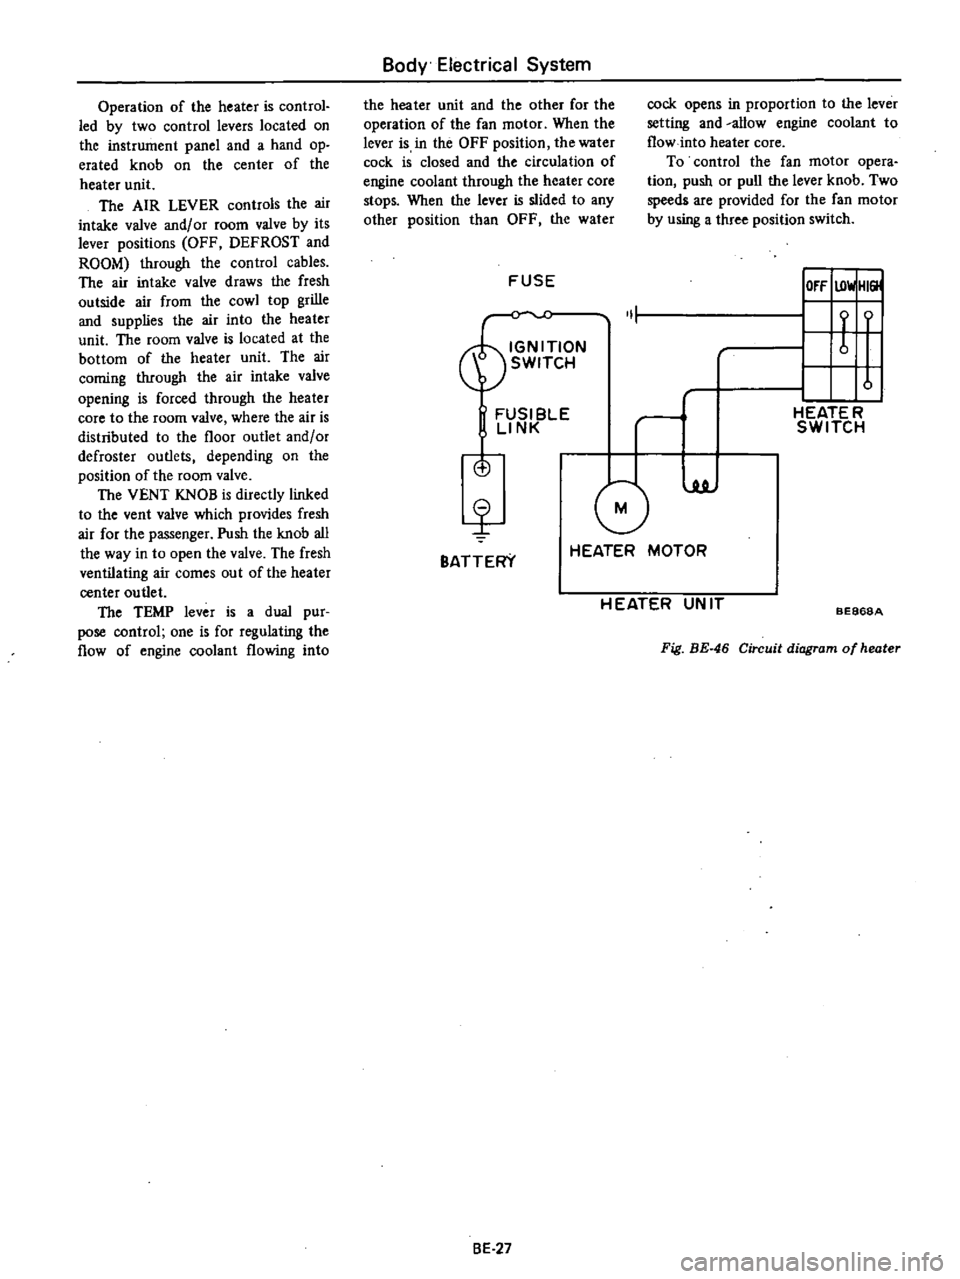
FUSE
IOfF
UlwlHI
ON
1
t
f
SWITCH
u
FUSI
BlE
rl
HEATE
R
LINK
SWITCH
is
G
luJ
BATTERY
HEATER
MOTOR
H
EATER
UN
IT
BE868A
Fig
BE
46
Circuit
diagram
of
heater
8E
27
Page 491 of 537

OUTLINE
OF
AIR
CONDITIONER
REFRIGERATION
SYSTEM
CONDENSER
COMPRESSOR
RECEIVER
DRYER
COOLING
UNIT
ELECTRICAL
CIRCUIT
OUTLINE
OF
AIR
CONDITIONER
The
air
conditioner
consists
es
sentially
of
a
cooling
unit
compressor
condenser
receiver
dryer
and
piping
The
cooling
unit
secured
with
three
brackets
is
a
ttached
to
the
location
occupied
by
the
package
tray
in
the
dash
panel
The
cooled
air
from
the
duct
is
directed
into
the
passenger
compart
Air
Conditioning
DESCRIPTION
CONTENTS
AC
2
AC3
AC
3
AC3
AC4
AC4
AC
5
DESCRIPTION
MAIN
RELAY
FAN
SWITCH
THERMO
SWITCH
PRESSURE
SWITCH
COMPRESSOR
RELAY
F
I
C
D
SOLENOID
VALVE
AC
5
AC
7
AC
7
AC
7
AC
7
AC
7
AC
7
ment
through
the
three
outlets
at
the
instrument
panel
The
compressor
serves
to
compress
the
vaporized
refrigerant
and
is
attach
ed
through
the
bracket
to
the
loca
tion
occupied
by
the
mechanical
fuel
pump
on
the
engine
The
condenser
cools
the
compres
sed
refrigerant
vapor
sent
by
the
com
pressor
and
is
located
on
the
front
of
the
radiator
in
the
engine
compart
ment
The
receiver
dryer
serving
as
a
reservoir
for
storage
of
the
liquid
sent
by
the
condenser
is
located
on
the
right
in
the
engine
compartment
The
piping
consists
of
two
flexible
hoses
and
five
copper
tubes
which
connect
various
components
of
the
air
conditioning
system
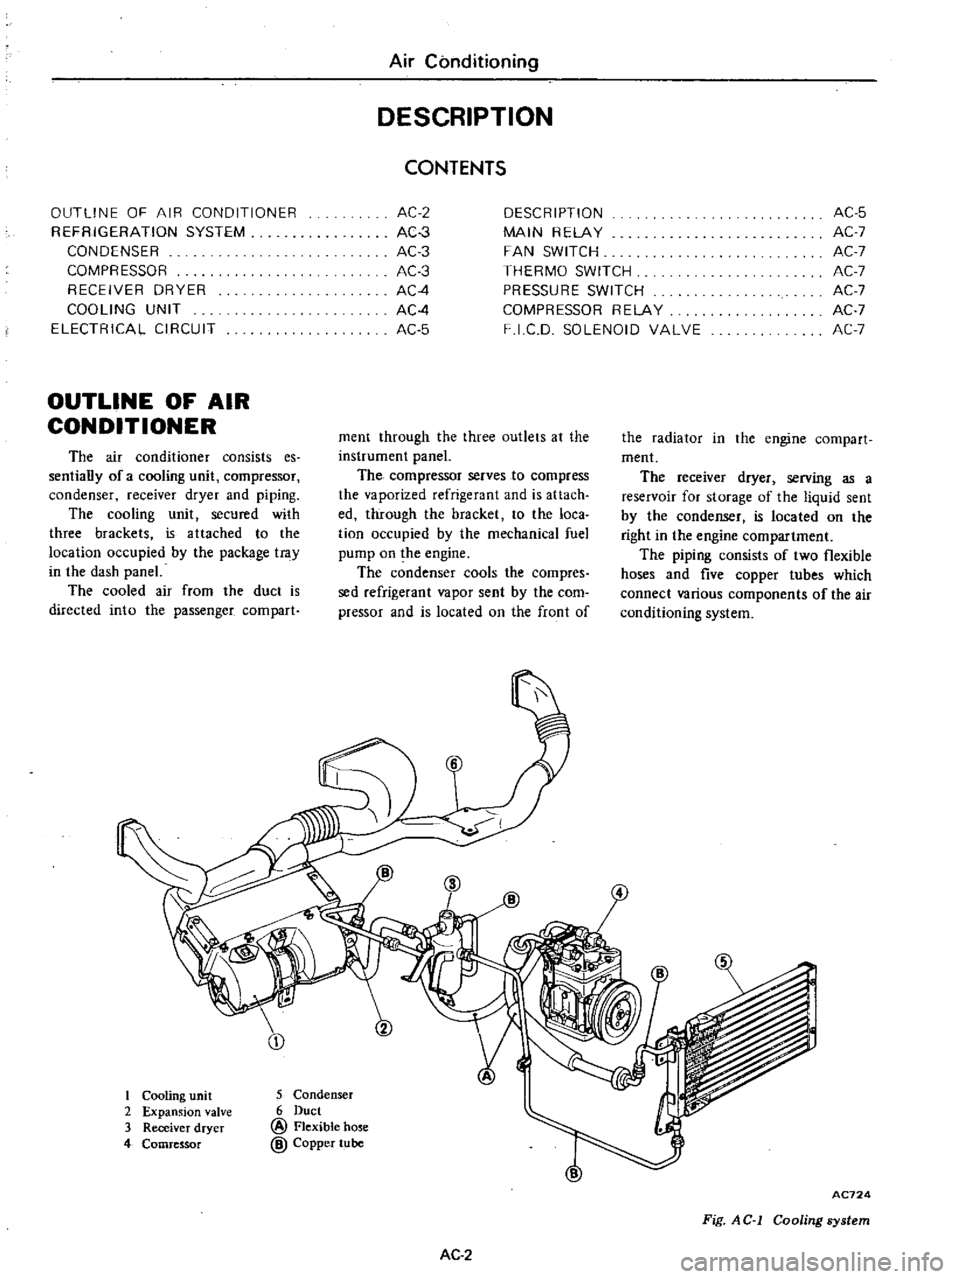
I
Cooling
unit
2
Expansion
valve
3
Receiver
dryer
4
Comressor
5
Condenser
6
Duct
@
Flexible
hose
@
Copper
tube
AC
2
AC724
Fig
AC
1
Cooling
system