ECO mode DODGE DURANGO 2020 Repair Manual
[x] Cancel search | Manufacturer: DODGE, Model Year: 2020, Model line: DURANGO, Model: DODGE DURANGO 2020Pages: 464, PDF Size: 22.14 MB
Page 258 of 464

256STARTING AND OPERATING
5. After the shift is completed and the
NEUTRAL (N) light stays on, release the
NEUTRAL (N) button.
6. Shift the transmission into REVERSE.
7. Release the brake pedal for five seconds and ensure that there is no vehicle
movement.
8. Press and hold the brake pedal. Shift the transmission back into NEUTRAL.
9. Firmly apply the parking brake.
10. With the transmission and transfer case in NEUTRAL, push and hold the ENGINE
START/STOP button until the engine turns
off.
11. Place the transmission gear selector in PARK. Release the brake pedal.
12. Push the ENGINE START/STOP button twice (without pressing the brake pedal) to turn
the ignition to the OFF mode. 13. Attach the vehicle to the tow vehicle using a
suitable tow bar.
14. Release the parking brake.
NOTE:
Steps 1 through 3 are requirements that
must be met before pushing the NEUTRAL (N)
button, and must continue to be met until the
shift has been completed. If any of these
requirements are not met before pushing the
NEUTRAL (N) button or are no longer met
during the shift, the NEUTRAL (N) indicator
light will flash continuously until all require -
ments are met or until the NEUTRAL (N)
button is released.
The ignition must be in the ON/RUN mode for
a shift to take place and for the position indi -
cator lights to be operable. If the ignition is
not in the ON/RUN mode, the shift will not
take place and no position indicator lights will
be on or flashing.
A flashing NEUTRAL (N) position indicator
light indicates that shift requirements have
not been met.
Shifting Out Of NEUTRAL (N)
Use the following procedure to prepare your
vehicle for normal usage.
1. Bring the vehicle to a complete stop,
leaving it connected to the tow vehicle.
2. Firmly apply the parking brake.
3. Start the engine.
4. Press and hold the brake pedal.
5. Shift the transmission into NEUTRAL.
CAUTION!
Damage to the transmission may occur if the
transmission is shifted into PARK with the
transfer case in NEUTRAL (N) and the engine
running. With the transfer case in NEUTRAL
(N) ensure that the engine is OFF before
shifting the transmission into PARK.
20_WD_OM_EN_USC_t.book Page 256
Page 259 of 464
STARTING AND OPERATING257
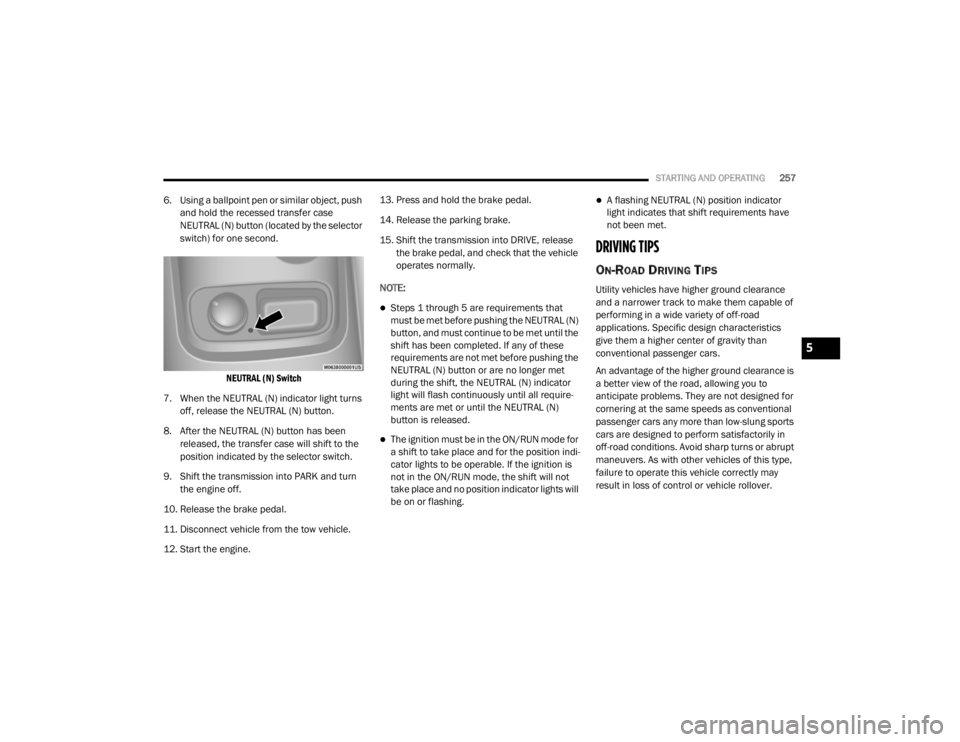
6. Using a ballpoint pen or similar object, push
and hold the recessed transfer case
NEUTRAL (N) button (located by the selector
switch) for one second.
NEUTRAL (N) Switch
7. When the NEUTRAL (N) indicator light turns off, release the NEUTRAL (N) button.
8. After the NEUTRAL (N) button has been released, the transfer case will shift to the
position indicated by the selector switch.
9. Shift the transmission into PARK and turn the engine off.
10. Release the brake pedal.
11. Disconnect vehicle from the tow vehicle.
12. Start the engine. 13. Press and hold the brake pedal.
14. Release the parking brake.
15. Shift the transmission into DRIVE, release
the brake pedal, and check that the vehicle
operates normally.
NOTE:
Steps 1 through 5 are requirements that
must be met before pushing the NEUTRAL (N)
button, and must continue to be met until the
shift has been completed. If any of these
requirements are not met before pushing the
NEUTRAL (N) button or are no longer met
during the shift, the NEUTRAL (N) indicator
light will flash continuously until all require -
ments are met or until the NEUTRAL (N)
button is released.
The ignition must be in the ON/RUN mode for
a shift to take place and for the position indi -
cator lights to be operable. If the ignition is
not in the ON/RUN mode, the shift will not
take place and no position indicator lights will
be on or flashing.
A flashing NEUTRAL (N) position indicator
light indicates that shift requirements have
not been met.
DRIVING TIPS
ON-ROAD DRIVING TIPS
Utility vehicles have higher ground clearance
and a narrower track to make them capable of
performing in a wide variety of off-road
applications. Specific design characteristics
give them a higher center of gravity than
conventional passenger cars.
An advantage of the higher ground clearance is
a better view of the road, allowing you to
anticipate problems. They are not designed for
cornering at the same speeds as conventional
passenger cars any more than low-slung sports
cars are designed to perform satisfactorily in
off-road conditions. Avoid sharp turns or abrupt
maneuvers. As with other vehicles of this type,
failure to operate this vehicle correctly may
result in loss of control or vehicle rollover.
5
20_WD_OM_EN_USC_t.book Page 257
Page 291 of 464
IN CASE OF EMERGENCY289
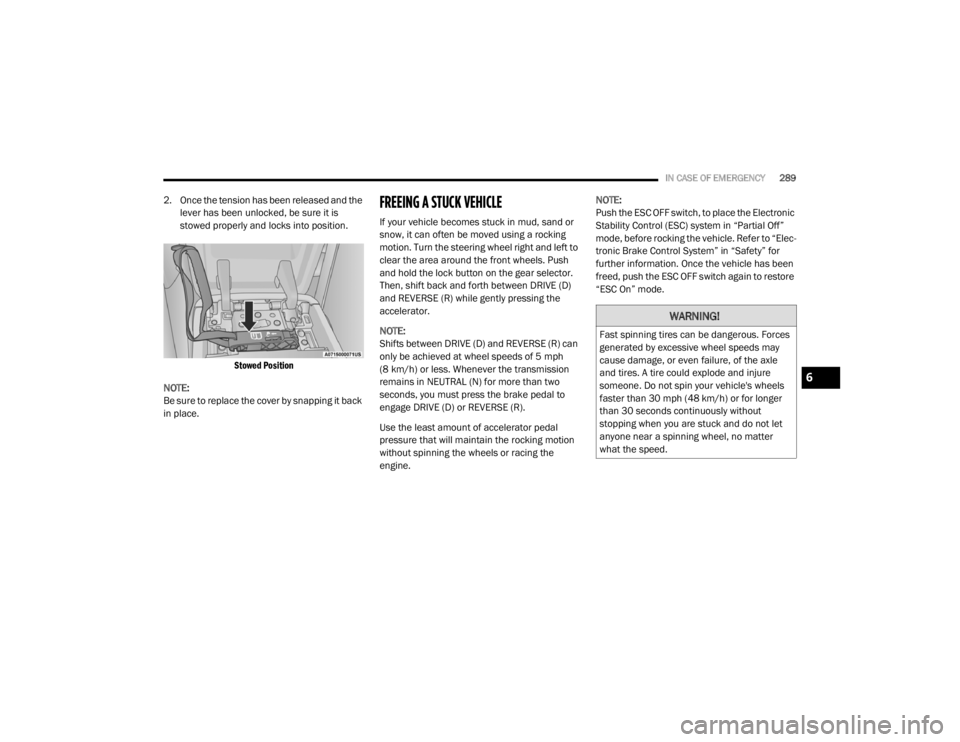
2. Once the tension has been released and the
lever has been unlocked, be sure it is
stowed properly and locks into position.
Stowed Position
NOTE:
Be sure to replace the cover by snapping it back
in place.FREEING A STUCK VEHICLE
If your vehicle becomes stuck in mud, sand or
snow, it can often be moved using a rocking
motion. Turn the steering wheel right and left to
clear the area around the front wheels. Push
and hold the lock button on the gear selector.
Then, shift back and forth between DRIVE (D)
and REVERSE (R) while gently pressing the
accelerator.
NOTE:
Shifts between DRIVE (D) and REVERSE (R) can
only be achieved at wheel speeds of 5 mph
(8 km/h) or less. Whenever the transmission
remains in NEUTRAL (N) for more than two
seconds, you must press the brake pedal to
engage DRIVE (D) or REVERSE (R).
Use the least amount of accelerator pedal
pressure that will maintain the rocking motion
without spinning the wheels or racing the
engine. NOTE:
Push the ESC OFF switch, to place the Electronic
Stability Control (ESC) system in “Partial Off”
mode, before rocking the vehicle. Refer to “Elec
-
tronic Brake Control System” in “Safety” for
further information. Once the vehicle has been
freed, push the ESC OFF switch again to restore
“ESC On” mode.
WARNING!
Fast spinning tires can be dangerous. Forces
generated by excessive wheel speeds may
cause damage, or even failure, of the axle
and tires. A tire could explode and injure
someone. Do not spin your vehicle's wheels
faster than 30 mph (48 km/h) or for longer than 30 seconds continuously without
stopping when you are stuck and do not let
anyone near a spinning wheel, no matter
what the speed.
6
20_WD_OM_EN_USC_t.book Page 289
Page 294 of 464
292IN CASE OF EMERGENCY
Proper towing or lifting equipment is required to
prevent damage to your vehicle. Use only tow
bars and other equipment designed for this
purpose, following equipment manufacturer’s
instructions. Use of safety chains is mandatory.
Attach a tow bar or other towing device to main
structural members of the vehicle, not to
bumpers or associated brackets. State and
local laws regarding vehicles under tow must be
observed.
If you must use the accessories (wipers,
defrosters, etc.) while being towed, the ignition
must be in the ON/RUN mode, not the ACC
mode.
If the key fob is unavailable, or the vehicle's
battery is discharged, refer to “Manual Park
Release” in this chapter for instructions on
shifting the transmission out of PARK (P) for
towing or loading onto a flatbed truck. NOTE:
SRT Models:
The manufacturer requires towing
your vehicle with all four wheels OFF the ground
using a flatbed.
REAR WHEEL DRIVE MODELS
The manufacturer recommends towing your
vehicle with all four wheels OFF the ground
using a flatbed.
If flatbed equipment is not available, and the
transmission is operable, the vehicle may be
towed (with rear wheels on the ground) under
the following conditions:
The transmission must be in NEUTRAL (N).
Refer to “Manual Park Release” in this
section for instructions on shifting the trans -
mission to NEUTRAL (N) when the engine is
off.
The towing speed must not exceed 30 mph
(48 km/h).
The towing distance must not exceed
30 miles (48 km). If the transmission is not operable, or the
vehicle must be towed faster than 30 mph
(48 km/h) or farther than 30 miles (48 km), tow
with the rear wheels
OFF the ground.
Acceptable methods are to tow the vehicle on a
flatbed, or with the front wheels raised and the
rear wheels on a towing dolly, or (when using a
suitable steering wheel stabilizer to hold the
front wheels in the straight position) with the
rear wheels raised and the front wheels ON the
ground.
ALL WHEEL DRIVE MODELS
The manufacturer recommends towing with all
wheels OFF the ground. Acceptable methods
are to tow the vehicle on a flatbed or with one
end of the vehicle raised and the opposite end
on a towing dolly.
CAUTION!
Do not use sling type equipment when
towing. Vehicle damage may occur.
When securing the vehicle to a flat bed
truck, do not attach to front or rear suspen -
sion components. Damage to your vehicle
may result from improper towing.
CAUTION!
Towing faster than 30 mph (48 km/h) or
farther than 30 miles (48 km) with rear
wheels on the ground can cause severe
transmission damage. Damage from
improper towing is not covered under the
New Vehicle Limited Warranty.
20_WD_OM_EN_USC_t.book Page 292
Page 318 of 464
316SERVICING AND MAINTENANCE
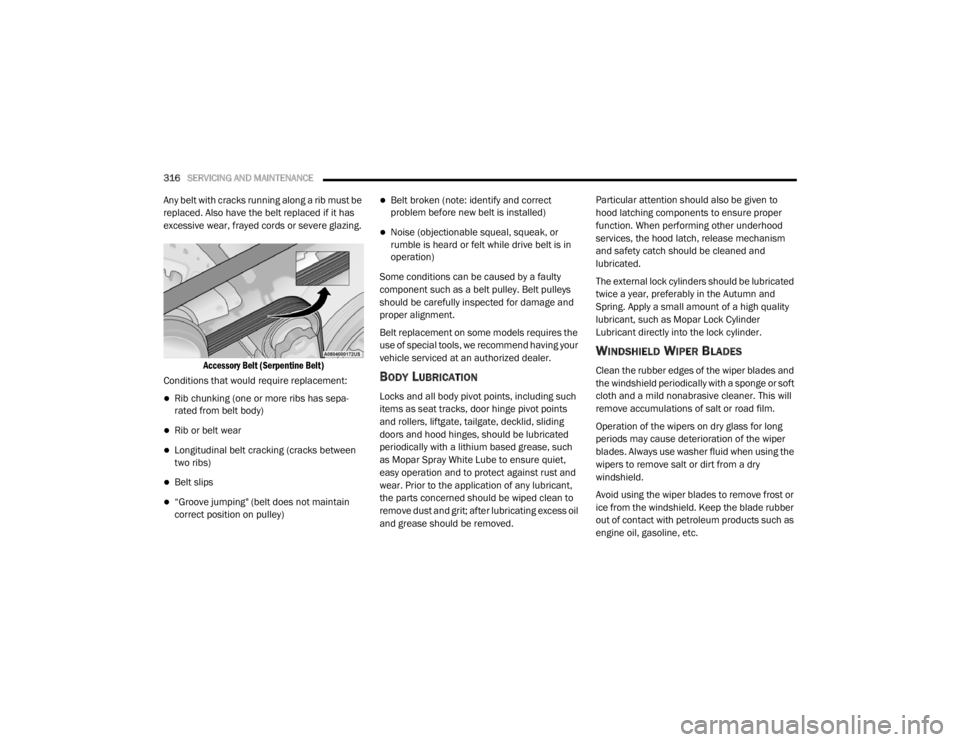
Any belt with cracks running along a rib must be
replaced. Also have the belt replaced if it has
excessive wear, frayed cords or severe glazing.
Accessory Belt (Serpentine Belt)
Conditions that would require replacement:
Rib chunking (one or more ribs has sepa -
rated from belt body)
Rib or belt wear
Longitudinal belt cracking (cracks between
two ribs)
Belt slips
“Groove jumping" (belt does not maintain
correct position on pulley)
Belt broken (note: identify and correct
problem before new belt is installed)
Noise (objectionable squeal, squeak, or
rumble is heard or felt while drive belt is in
operation)
Some conditions can be caused by a faulty
component such as a belt pulley. Belt pulleys
should be carefully inspected for damage and
proper alignment.
Belt replacement on some models requires the
use of special tools, we recommend having your
vehicle serviced at an authorized dealer.
BODY LUBRICATION
Locks and all body pivot points, including such
items as seat tracks, door hinge pivot points
and rollers, liftgate, tailgate, decklid, sliding
doors and hood hinges, should be lubricated
periodically with a lithium based grease, such
as Mopar Spray White Lube to ensure quiet,
easy operation and to protect against rust and
wear. Prior to the application of any lubricant,
the parts concerned should be wiped clean to
remove dust and grit; after lubricating excess oil
and grease should be removed. Particular attention should also be given to
hood latching components to ensure proper
function. When performing other underhood
services, the hood latch, release mechanism
and safety catch should be cleaned and
lubricated.
The external lock cylinders should be lubricated
twice a year, preferably in the Autumn and
Spring. Apply a small amount of a high quality
lubricant, such as Mopar Lock Cylinder
Lubricant directly into the lock cylinder.
WINDSHIELD WIPER BLADES
Clean the rubber edges of the wiper blades and
the windshield periodically with a sponge or soft
cloth and a mild nonabrasive cleaner. This will
remove accumulations of salt or road film.
Operation of the wipers on dry glass for long
periods may cause deterioration of the wiper
blades. Always use washer fluid when using the
wipers to remove salt or dirt from a dry
windshield.
Avoid using the wiper blades to remove frost or
ice from the windshield. Keep the blade rubber
out of contact with petroleum products such as
engine oil, gasoline, etc.
20_WD_OM_EN_USC_t.book Page 316
Page 323 of 464
SERVICING AND MAINTENANCE321
In unusual situations involving grossly
malfunctioning engine operation, a scorching
odor may suggest severe and abnormal catalyst
overheating. If this occurs, stop the vehicle, turn
off the engine and allow it to cool. Service,
including a tune-up to manufacturer's
specifications, should be obtained immediately.
To minimize the possibility of catalytic converter
damage:
Do not interrupt the ignition when the trans -
mission is in gear and the vehicle is in
motion.
Do not try to start the vehicle by pushing or
towing the vehicle.
Do not idle the engine with any ignition
components disconnected or removed, such
as when diagnostic testing, or for prolonged
periods during very rough idle or malfunc -
tioning operating conditions.
COOLING SYSTEMEngine Coolant Checks
Check the engine coolant (antifreeze)
protection every 12 months (before the onset of
freezing weather, where applicable). If the
engine coolant (antifreeze) is dirty, the system
should be drained, flushed, and refilled with
fresh OAT coolant (conforming to MS.90032) by
an authorized dealer. Check the front of the
A/C condenser for any accumulation of bugs,
leaves, etc. If dirty, clean by gently spraying
water from a garden hose vertically down the
face of the condenser.
Check the engine cooling system hoses for
brittle rubber, cracking, tears, cuts, and
tightness of the connection at the coolant
recovery bottle and radiator. Inspect the entire
system for leaks. DO NOT REMOVE THE
COOLANT PRESSURE CAP WHEN THE COOLING
SYSTEM IS HOT.
Cooling System — Drain, Flush And Refill
NOTE:
Some vehicles require special tools to add
coolant properly. Failure to fill these systems
properly could lead to severe internal engine
damage.
WARNING!
You or others can be badly burned by hot
engine coolant (antifreeze) or steam from
your radiator. If you see or hear steam
coming from under the hood, do not open
the hood until the radiator has had time
to cool. Never open a cooling system pres -
sure cap when the radiator or coolant bottle
is hot.
Keep hands, tools, clothing, and jewelry
away from the radiator cooling fan when
the hood is raised. The fan starts automati -
cally and may start at any time, whether the
engine is running or not.
When working near the radiator cooling fan,
disconnect the fan motor lead or turn the
ignition to the OFF mode. The fan is
temperature controlled and can start at any
time the ignition is in the ON mode.7
20_WD_OM_EN_USC_t.book Page 321
Page 339 of 464
SERVICING AND MAINTENANCE337
Radial Ply Tires
Tire Repair
If your tire becomes damaged, it may be
repaired if it meets the following criteria:
The tire has not been driven on when flat.
The damage is only on the tread section of
your tire (sidewall damage is not repairable).
The puncture is no greater than a ¼ of an
inch (6 mm).
Consult an authorized tire dealer for tire repairs
and additional information.
Damaged Run Flat tires, or Run Flat tires that
have experienced a loss of pressure should be
replaced immediately with another Run Flat tire
of identical size and service description (Load
Index and Speed Symbol). Replace the tire pressure sensor as well as it is
not designed to be reused.
Run Flat Tires — If Equipped
Run Flat tires allow you the capability to drive
50 miles (80 km) at 50 mph (80 km/h) after a
rapid loss of inflation pressure. This rapid loss
of inflation is referred to as the Run Flat mode.
A Run Flat mode occurs when the tire inflation
pressure is of/or below 14 psi (96 kPa). Once a
Run Flat tire reaches the run flat mode it has
limited driving capabilities and needs to be
replaced immediately. A Run Flat tire is not
repairable. When a run flat tire is changed after
driving with underinflated tire condition, please
replace the TPM sensor as it is not designed to
be reused when driven under run flat mode
14 psi (96 kPa) condition.
NOTE:
TPM Sensor must be replaced after driving the
vehicle on a flat tire condition.
It is not recommended driving a vehicle loaded
at full capacity or to tow a trailer while a tire is in
the run flat mode.
See the tire pressure monitoring section for
more information.
Tire Spinning
When stuck in mud, sand, snow, or ice
conditions, do not spin your vehicle's wheels
above 30 mph (48 km/h) or for longer than
30 seconds continuously without stopping.
Refer to “Freeing A Stuck Vehicle” in “In Case Of
Emergency” for further information.
WARNING!
Combining radial ply tires with other types of
tires on your vehicle will cause your vehicle to
handle poorly. The instability could cause a
collision. Always use radial ply tires in sets of
four. Never combine them with other types of
tires.
WARNING!
Fast spinning tires can be dangerous. Forces
generated by excessive wheel speeds may
cause tire damage or failure. A tire could
explode and injure someone. Do not spin your
vehicle's wheels faster than 30 mph
(48 km/h) for more than 30 seconds
continuously when you are stuck, and do not
let anyone near a spinning wheel, no matter
what the speed.
7
20_WD_OM_EN_USC_t.book Page 337
Page 355 of 464
TECHNICAL SPECIFICATIONS353
When available, the usage of TOP TIER
Detergent Gasoline is recommended. Visit
www.toptiergas.com for a list of TOP TIER
Detergent Gasoline Retailers.
Indiscriminate use of fuel system cleaning
agents should be avoided. Many of these
materials intended for gum and varnish
removal may contain active solvents or similar
ingredients. These can harm fuel system gasket
and diaphragm materials.
GASOLINE/OXYGENATE BLENDS
Some fuel suppliers blend unleaded gasoline
with oxygenates such as ethanol. Problems that result from using gasoline
containing more than 15% ethanol (E-15) or
gasoline containing methanol are not the
responsibility of the manufacturer and may void
or not be covered under New Vehicle Limited
Warranty.
DO NOT USE E-85 IN NON-FLEX FUEL
V
EHICLES
Non-Flex Fuel Vehicles (FFV) are compatible
with gasoline containing up to 15% ethanol
(E-15). Use of gasoline with higher ethanol
content may void the New Vehicle Limited
Warranty.
If a Non-FFV vehicle is inadvertently fueled with
E-85 fuel, the engine will have some or all of
these symptoms:
Operate in a lean mode.
OBD II Malfunction Indicator Light on.
Poor engine performance.
Poor cold start and cold drivability.
Increased risk for fuel system component
corrosion.
CNG AND LP FUEL SYSTEM
M
ODIFICATIONS
Modifications that allow the engine to run on
Compressed Natural Gas (CNG) or Liquid
Propane (LP) may result in damage to the
engine, emissions, and fuel system
components. Problems that result from running
CNG or LP are not the responsibility of the
manufacturer and may void or not be covered
under the New Vehicle Limited Warranty.
MMT IN GASOLINE
Methylcyclopentadienyl Manganese Tricarbonyl
(MMT) is a manganese-containing metallic
additive that is blended into some gasoline to
increase octane. Gasoline blended with MMT
provides no performance advantage beyond
gasoline of the same octane number without
MMT. Gasoline blended with MMT reduces
spark plug life and reduces emissions system
performance in some vehicles. The
manufacturer recommends that gasoline
without MMT be used in your vehicle.
CAUTION!
DO NOT use E-85, gasoline containing
methanol, or gasoline containing more than
15% ethanol (E-15). Use of these blends may
result in starting and drivability problems,
damage critical fuel system components,
cause emissions to exceed the applicable
standard, and/or cause the Malfunction
Indicator Light to illuminate. Please observe
pump labels as they should clearly
communicate if a fuel contains greater than
15% ethanol (E-15).
8
20_WD_OM_EN_USC_t.book Page 353
Page 398 of 464
396MULTIMEDIA
6. Phone
Press the Phone button on the touchscreen
to access the Uconnect Phone feature.
7. Settings Press the Settings button on the touch -
screen to access the Uconnect Settings
menu.
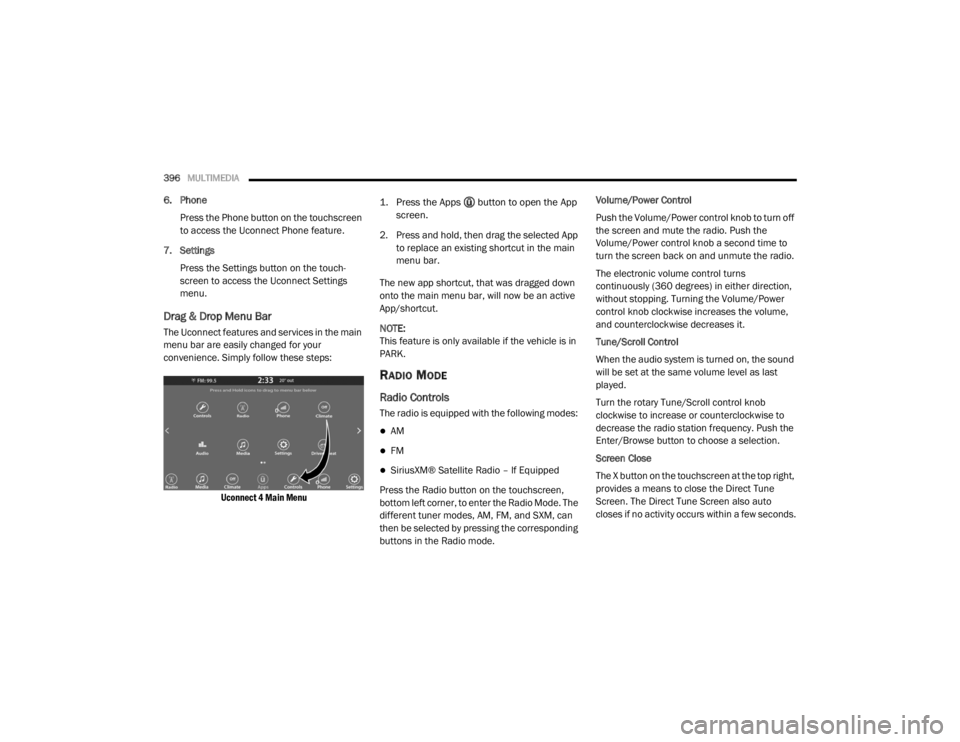
Drag & Drop Menu Bar
The Uconnect features and services in the main
menu bar are easily changed for your
convenience. Simply follow these steps:
Uconnect 4 Main Menu
1. Press the Apps button to open the App
screen.
2. Press and hold, then drag the selected App to replace an existing shortcut in the main
menu bar.
The new app shortcut, that was dragged down
onto the main menu bar, will now be an active
App/shortcut.
NOTE:
This feature is only available if the vehicle is in
PARK.
RADIO MODE
Radio Controls
The radio is equipped with the following modes:
AM
FM
SiriusXM® Satellite Radio – If Equipped
Press the Radio button on the touchscreen,
bottom left corner, to enter the Radio Mode. The
different tuner modes, AM, FM, and SXM, can
then be selected by pressing the corresponding
buttons in the Radio mode. Volume/Power Control
Push the Volume/Power control knob to turn off
the screen and mute the radio. Push the
Volume/Power control knob a second time to
turn the screen back on and unmute the radio.
The electronic volume control turns
continuously (360 degrees) in either direction,
without stopping. Turning the Volume/Power
control knob clockwise increases the volume,
and counterclockwise decreases it.
Tune/Scroll Control
When the audio system is turned on, the sound
will be set at the same volume level as last
played.
Turn the rotary Tune/Scroll control knob
clockwise to increase or counterclockwise to
decrease the radio station frequency. Push the
Enter/Browse button to choose a selection.
Screen Close
The X button on the touchscreen at the top right,
provides a means to close the Direct Tune
Screen. The Direct Tune Screen also auto
closes if no activity occurs within a few seconds.
20_WD_OM_EN_USC_t.book Page 396
Page 399 of 464
MULTIMEDIA397
Seek And Direct Tune Functions
The Seek Up and Down functions are activated
by pressing the double arrow buttons on the
touchscreen to the right and left of the radio
station display or by pushing the left Steering
Wheel Audio Control up or down.
Seek Up
Press and release the Seek Up button on the
touchscreen to tune the radio to the next
listenable station or channel. During a Seek Up
function, if the radio reaches the starting
station after passing through the entire band
two times, the radio will stop at the station
where it began.
Fast Seek Up
Press and hold the Seek Up button on the
touchscreen to advance the radio through the
available stations or channels at a faster rate.
The radio stops at the next available station or
channel when the button on the touchscreen is
released. Seek Down
Press and release the Seek Down button on the
touchscreen to tune the radio to the next
listenable station or channel. During a Seek
Down function, if the radio reaches the starting
station after passing through the entire band
two times, the radio will stop at the station
where it began.
Fast Seek Down
Press and hold the Seek Down button on the
touchscreen to advance the radio through the
available stations or channel at a faster rate.
The radio stops at the next available station or
channel when the button on the touchscreen is
released.
Direct Tune
Press the Tune button on the touchscreen
located at the bottom of the radio screen. The
Direct Tune button on the touchscreen is
available in AM, FM, and SXM radio modes and
can be used to direct tune the radio to a desired
station or channel.Press the available number button on the
touchscreen to begin selecting a desired
station. Once a number has been entered, any
numbers that are no longer possible (stations
that cannot be reached) will become
deactivated/grayed out.
Undo
You can backspace an entry by pressing the
bottom left on the touchscreen.
OK
Once the last digit of a station has been
entered, press the OK button, and the Direct
Tune screen will close. The system will
automatically tune to that station.
The selected Station or Channel number is
displayed in the Direct Tune text box.
Setting Presets
The Presets are available for all Radio Modes,
and are activated by pressing any of the six
Preset buttons on the touchscreen, located at
the top of the screen.
9
20_WD_OM_EN_USC_t.book Page 397