DODGE GRAND CARAVAN 2009 5.G Owners Manual
Manufacturer: DODGE, Model Year: 2009, Model line: GRAND CARAVAN, Model: DODGE GRAND CARAVAN 2009 5.GPages: 535, PDF Size: 18.61 MB
Page 151 of 535
CAUTION!DO NOT place any article under a power seat or
impede its ability to move as it may cause damage to
the seat controls. Seat travel may become limited if
movement is stopped by an obstruction in the seat’s
path.
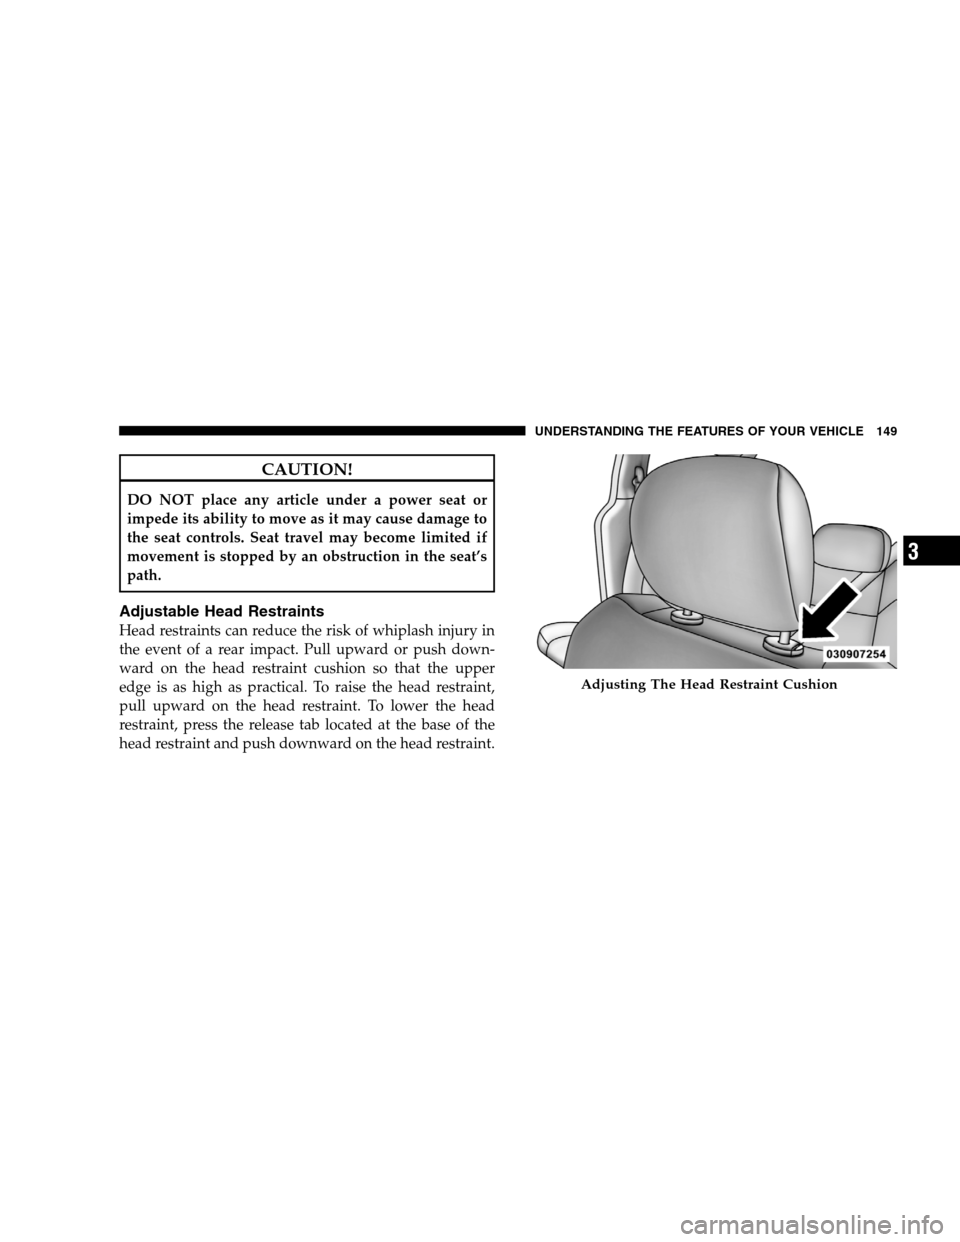
Adjustable Head Restraints
Head restraints can reduce the risk of whiplash injury in
the event of a rear impact. Pull upward or push down-
ward on the head restraint cushion so that the upper
edge is as high as practical. To raise the head restraint,
pull upward on the head restraint. To lower the head
restraint, press the release tab located at the base of the
head restraint and push downward on the head restraint.
Adjusting The Head Restraint Cushion
UNDERSTANDING
THE FEATURES OF YOUR VEHICLE 149 3
Page 152 of 535
Heated Seats — If EquippedThis feature heats the front driver and passenger seats.
The controls for front heated seats are located on the
center instrument panel area.
After turning the ignition ON, you can choose from High,
Low, or Off heat settings. Amber indicator lights in each
switch indicate the level of heat in use. Two indicator
lights will illuminate for High, one for Low, and none for
Off.
Press the switch once to select High-level heat-
ing. Press the switch a second time to select
Low-level heating. Press the switch a third time
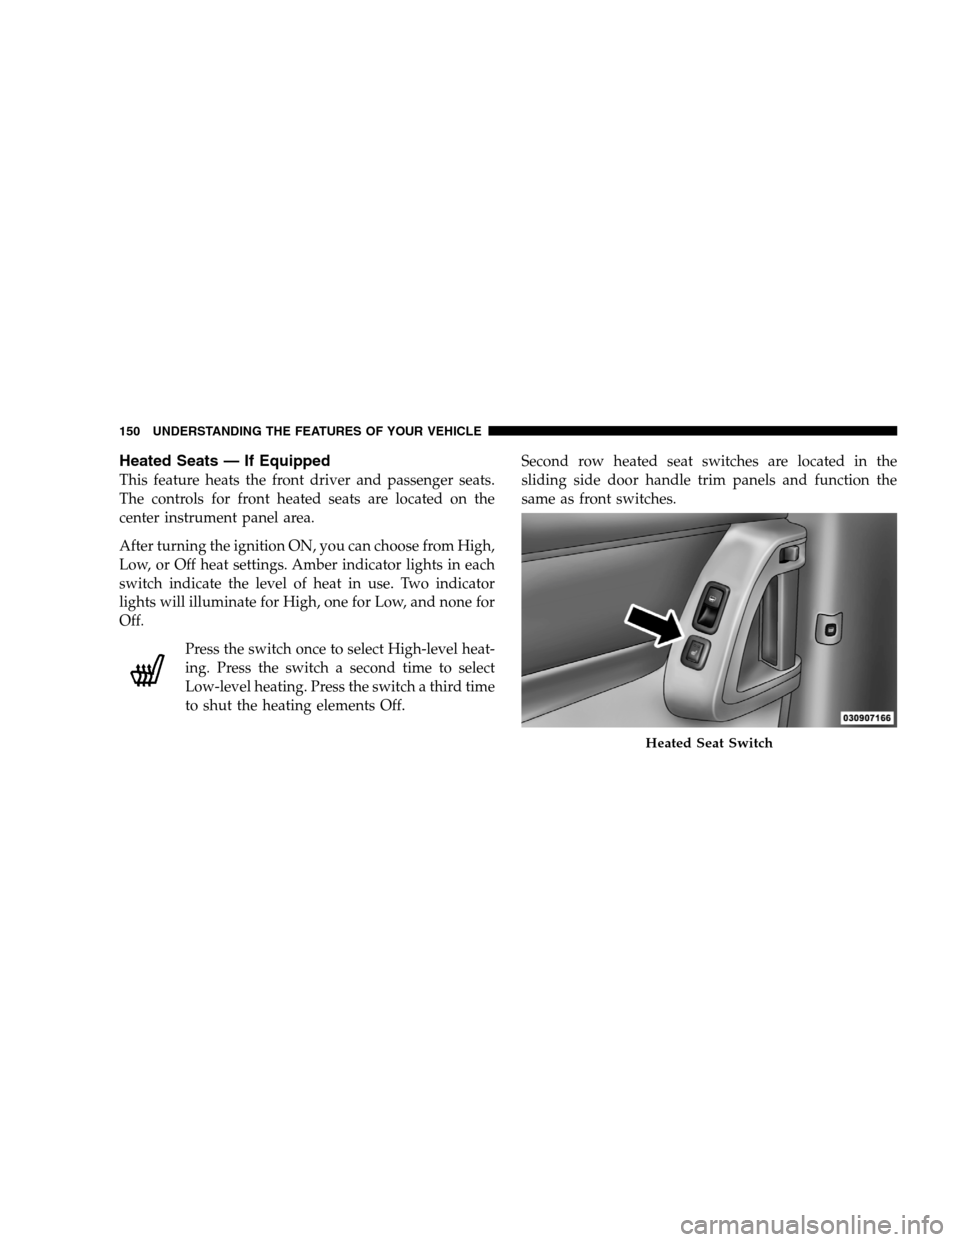
to shut the heating elements Off. Second row heated seat switches are located in the
sliding side door handle trim panels and function the
same as front switches. Heated Seat Switch
150 UNDERST
ANDING THE FEATURES OF YOUR VEHICLE
Page 153 of 535
WARNING!Persons who are unable to feel pain to the skin
because of advanced age, chronic illness, diabetes,
spinal cord injury, medication, alcohol use, exhaus-
tion or other physical condition must exercise care
when using the seat heater. It may cause burns even
at low temperatures, especially if used for long
periods of time. DO NOT place anything on the seat
that insulates against heat, such as a blanket or
cushion. This may cause the seat heater to overheat.
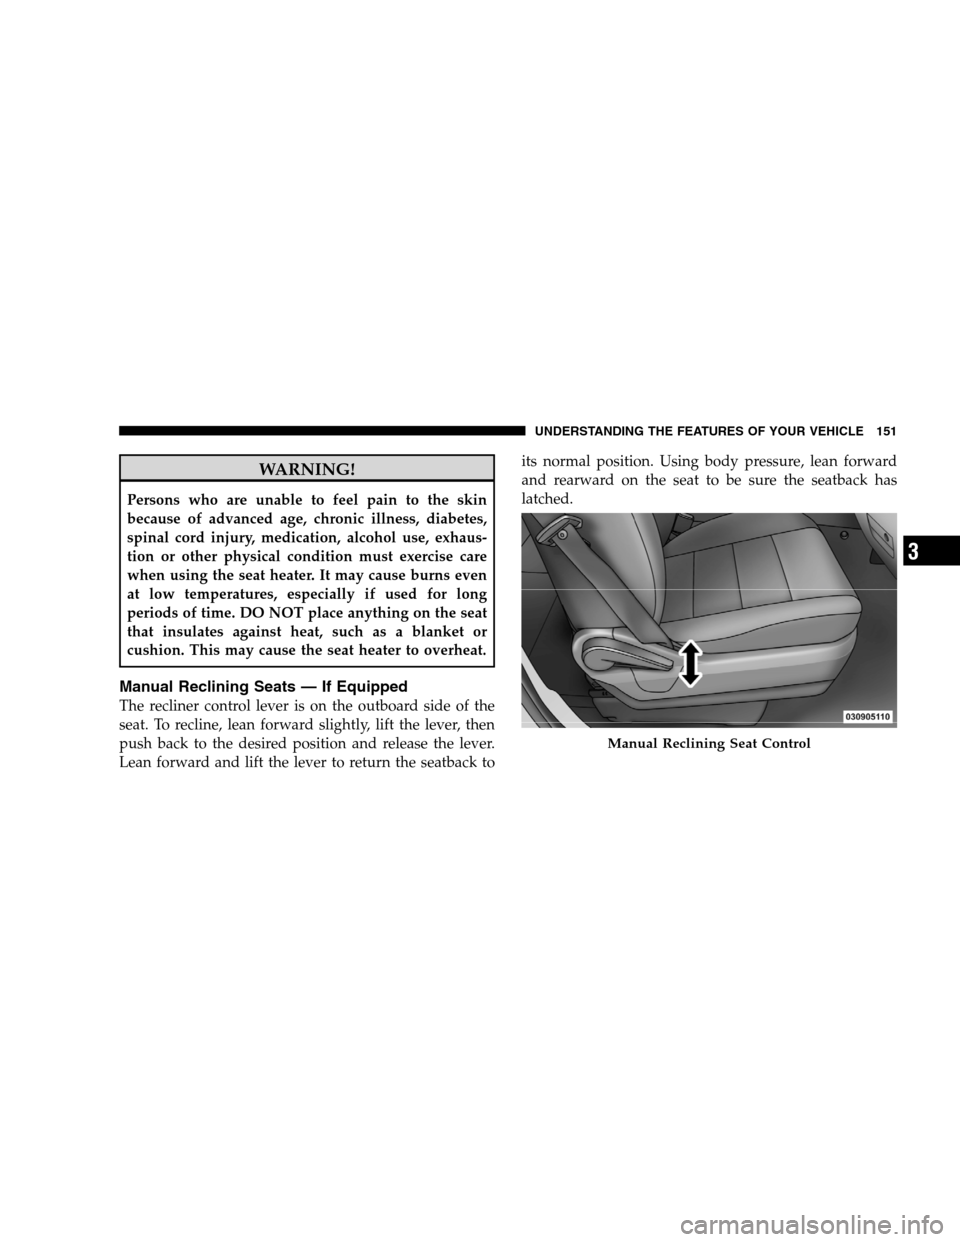
Manual Reclining Seats — If Equipped
The recliner control lever is on the outboard side of the
seat. To recline, lean forward slightly, lift the lever, then
push back to the desired position and release the lever.
Lean forward and lift the lever to return the seatback to
its normal position. Using body pressure, lean forward
and rearward on the seat to be sure the seatback has
latched. Manual Reclining Seat Control
UNDERSTANDING
THE FEATURES OF YOUR VEHICLE 151 3
Page 154 of 535
WARNING!DO NOT ride with the seatback reclined so that the
shoulder belt is no longer resting against your chest.
In a collision you could slide under the seat belt and
be seriously or fatally injured. Use the recliner only
when the vehicle is parked.
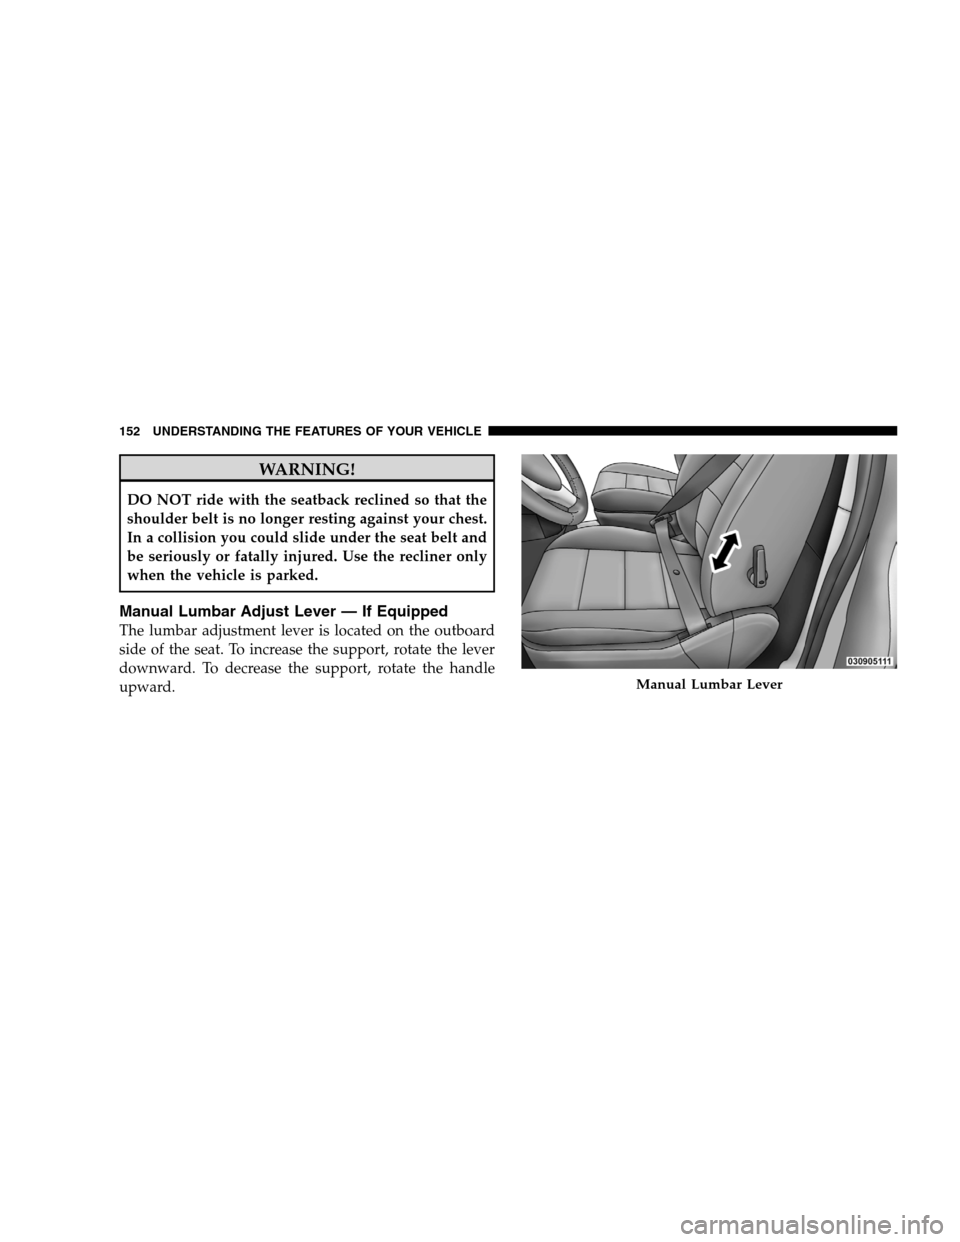
Manual Lumbar Adjust Lever — If Equipped
The lumbar adjustment lever is located on the outboard
side of the seat. To increase the support, rotate the lever
downward. To decrease the support, rotate the handle
upward.
Manual Lumbar Lever
152 UNDERST
ANDING THE FEATURES OF YOUR VEHICLE
Page 155 of 535
Stow ’n GoT
Seating — If Equipped
On vehicles equipped with Stow ’n Got seating, the
second and third row seats may be folded into the floor
for convenient storage.
To Fold Second Row Seats
1. Move the front seat fully forward.
2. Lower the head restraints and raise the armrests on the
second row seat.
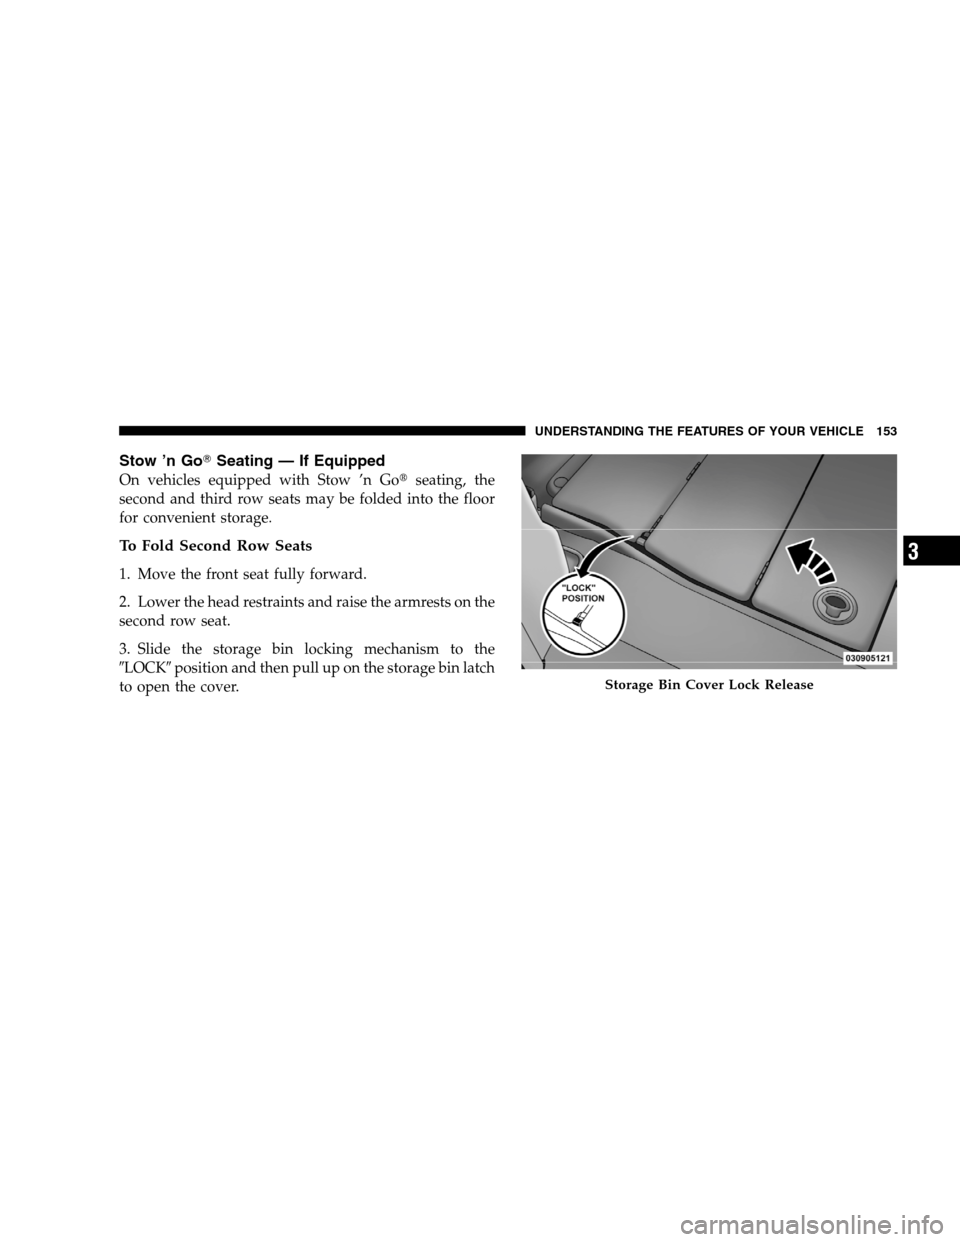
3. Slide the storage bin locking mechanism to the
9LOCK9 position and then pull up on the storage bin latch
to open the cover. Storage Bin Cover Lock Release
UNDERSTANDING
THE FEATURES OF YOUR VEHICLE 153 3
Page 156 of 535
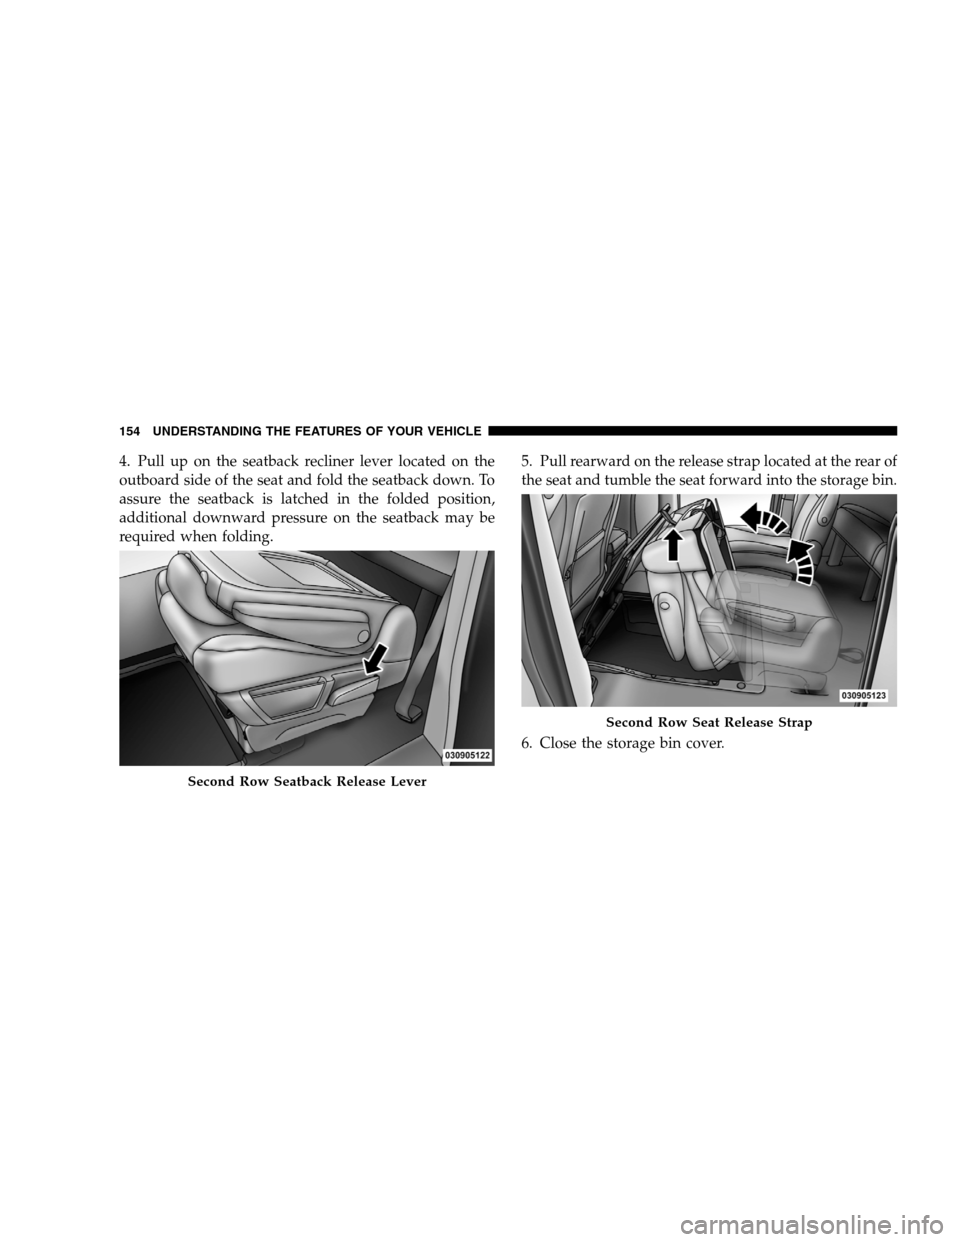
4. Pull up on the seatback recliner lever located on the
outboard side of the seat and fold the seatback down. To
assure the seatback is latched in the folded position,
additional downward pressure on the seatback may be
required when folding.5. Pull rearward on the release strap located at the rear of
the seat and tumble the seat forward into the storage bin.
6. Close the storage bin cover.Second Row Seatback Release Lever Second Row Seat Release Strap
154 UNDERST
ANDING THE FEATURES OF YOUR VEHICLE
Page 157 of 535
CAUTION!The storage bin cover must be locked and flat to
avoid damage from contact with the front seat tracks,
which have minimal clearance to the cover.
WARNING!
In an accident, serious injury could result if the seat
storage bin covers are not properly latched.
DO NOT drive the vehicle with the storage bin
covers open.
Keep the storage bin covers closed and latched
while the vehicle is in motion.
DO NOT use a storage bin latch as a tie down.
To Unfold Second Row Seats
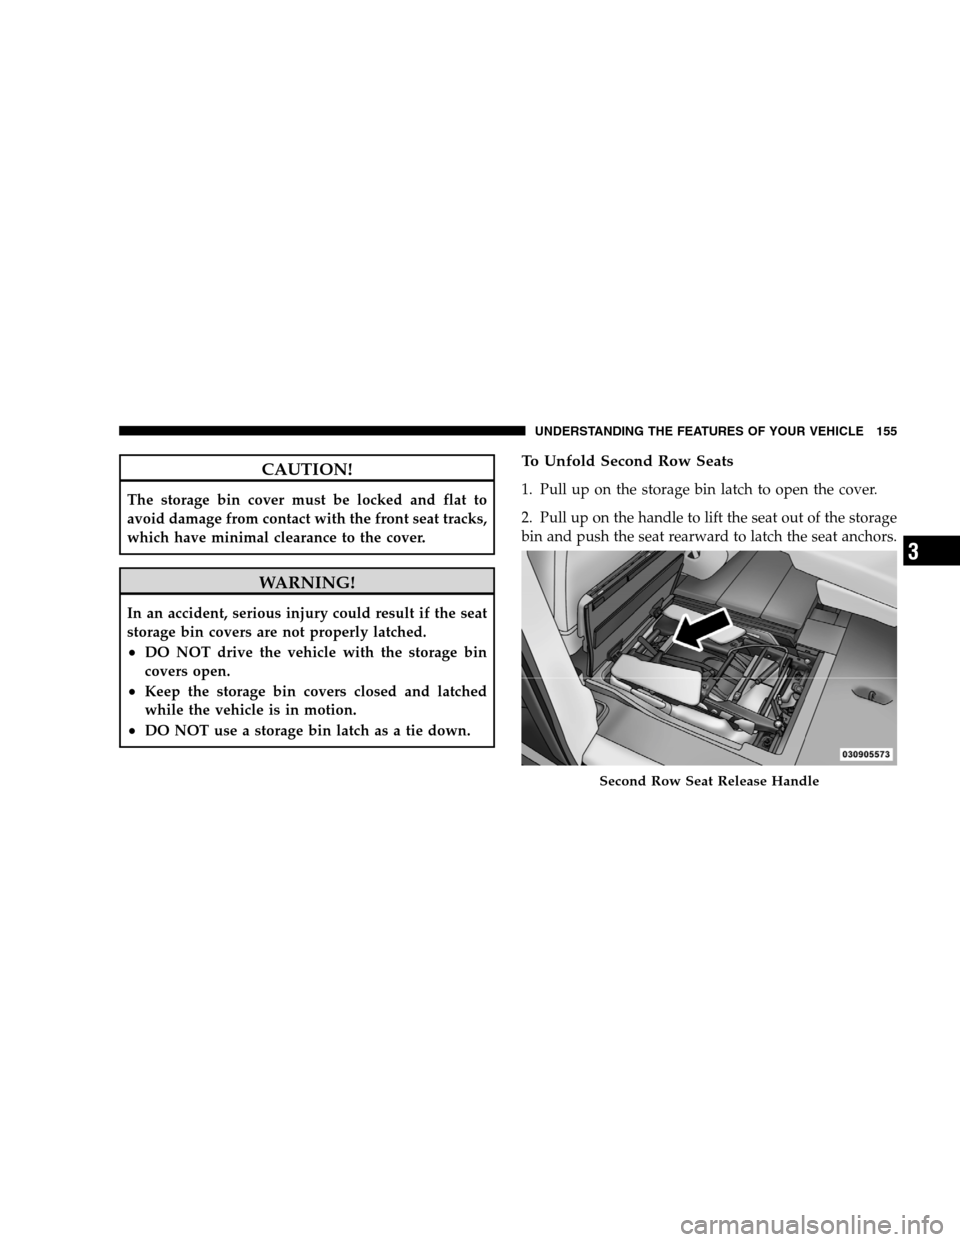
1. Pull up on the storage bin latch to open the cover.
2. Pull up on the handle to lift the seat out of the storage
bin and push the seat rearward to latch the seat anchors. Second Row Seat Release Handle
UNDERSTANDING
THE FEATURES OF YOUR VEHICLE 155 3
Page 158 of 535
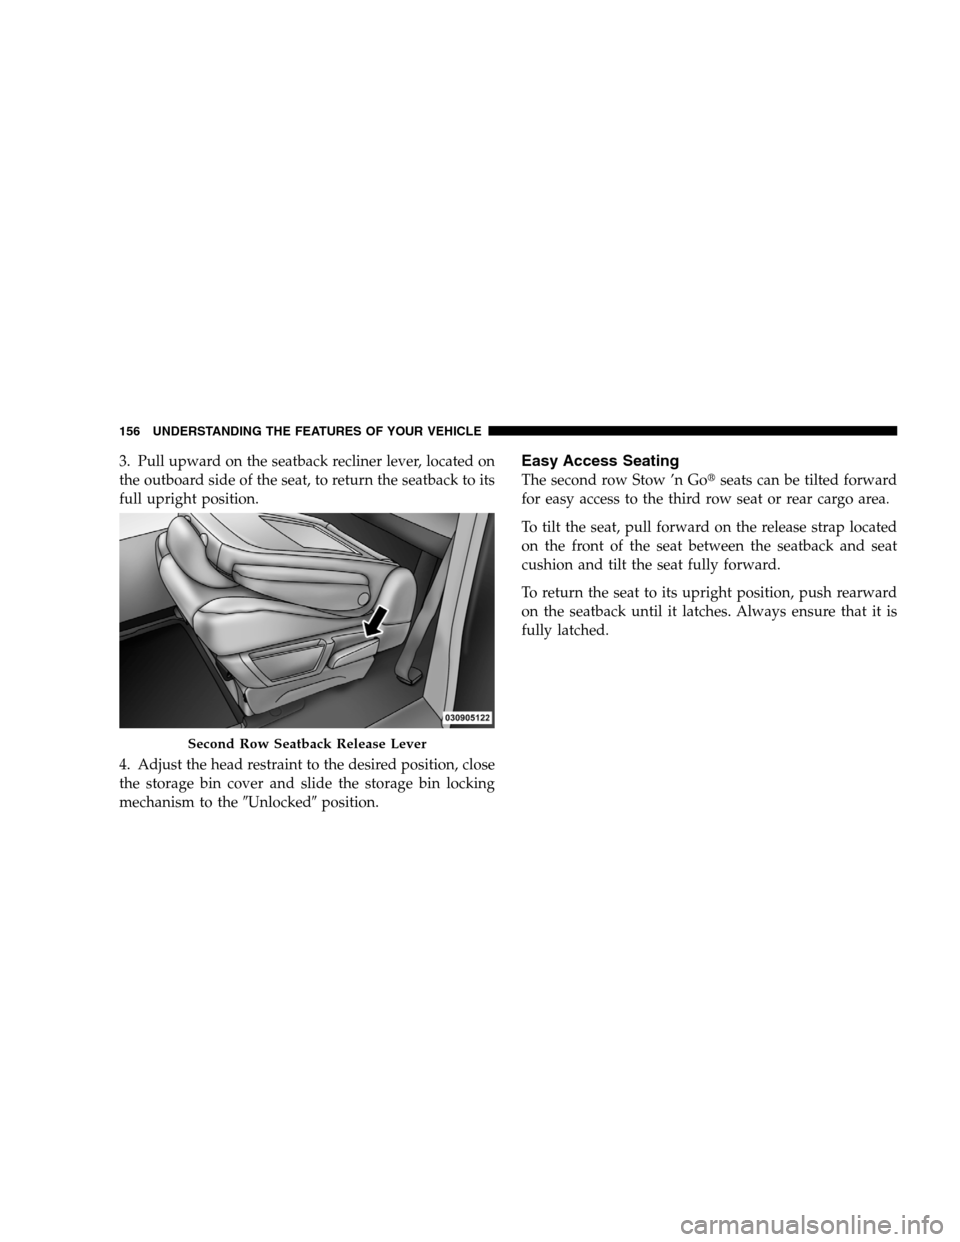
3. Pull upward on the seatback recliner lever, located on
the outboard side of the seat, to return the seatback to its
full upright position.
4. Adjust the head restraint to the desired position, close
the storage bin cover and slide the storage bin locking
mechanism to the9Unlocked9position.Easy Access Seating
The second row Stow ’n Got seats can be tilted forward
for easy access to the third row seat or rear cargo area.
To tilt the seat, pull forward on the release strap located
on the front of the seat between the seatback and seat
cushion and tilt the seat fully forward.
To return the seat to its upright position, push rearward
on the seatback until it latches. Always ensure that it is
fully latched. Second Row Seatback Release Lever
156 UNDERST
ANDING THE FEATURES OF YOUR VEHICLE
Page 159 of 535
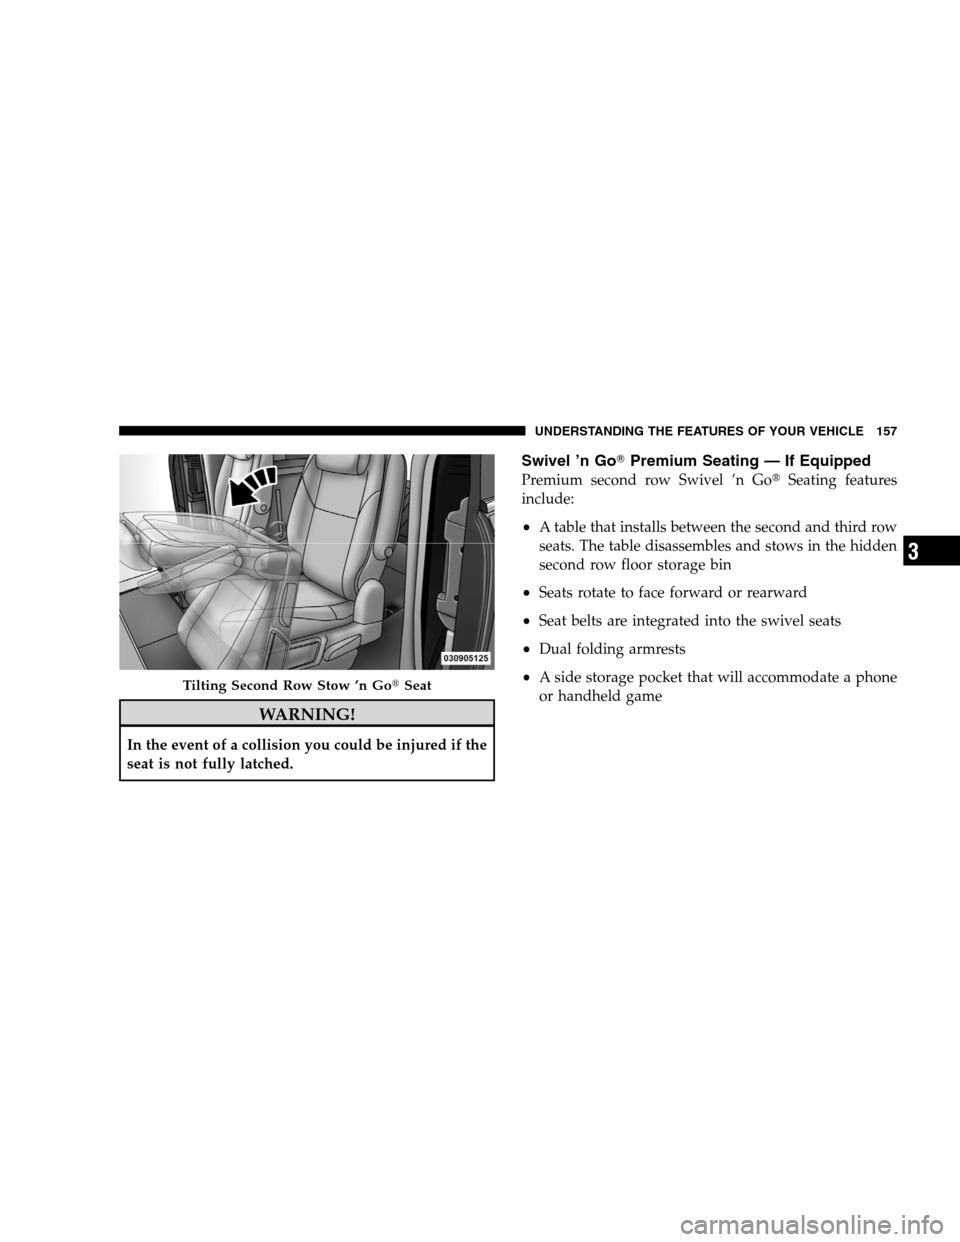
WARNING!In the event of a collision you could be injured if the
seat is not fully latched.
Swivel ’n GoT
Premium Seating — If Equipped
Premium second row Swivel ’n Got Seating features
include:
A table that installs between the second and third row
seats. The table disassembles and stows in the hidden
second row floor storage bin
Seats rotate to face forward or rearward
Seat belts are integrated into the swivel seats
Dual folding armrests
A side storage pocket that will accommodate a phone
or handheld game Tilting Second Row Stow ’n Got
SeatUNDERSTANDING THE FEATURES OF YOUR VEHICLE 157 3
Page 160 of 535
Seats are removable
WARNING!
When the seatback release handle is lifted, the seat-
back will rotate forward. To avoid injury, if you are
not seated in the seat, stay clear from the area in the
path of the rotating seatback.
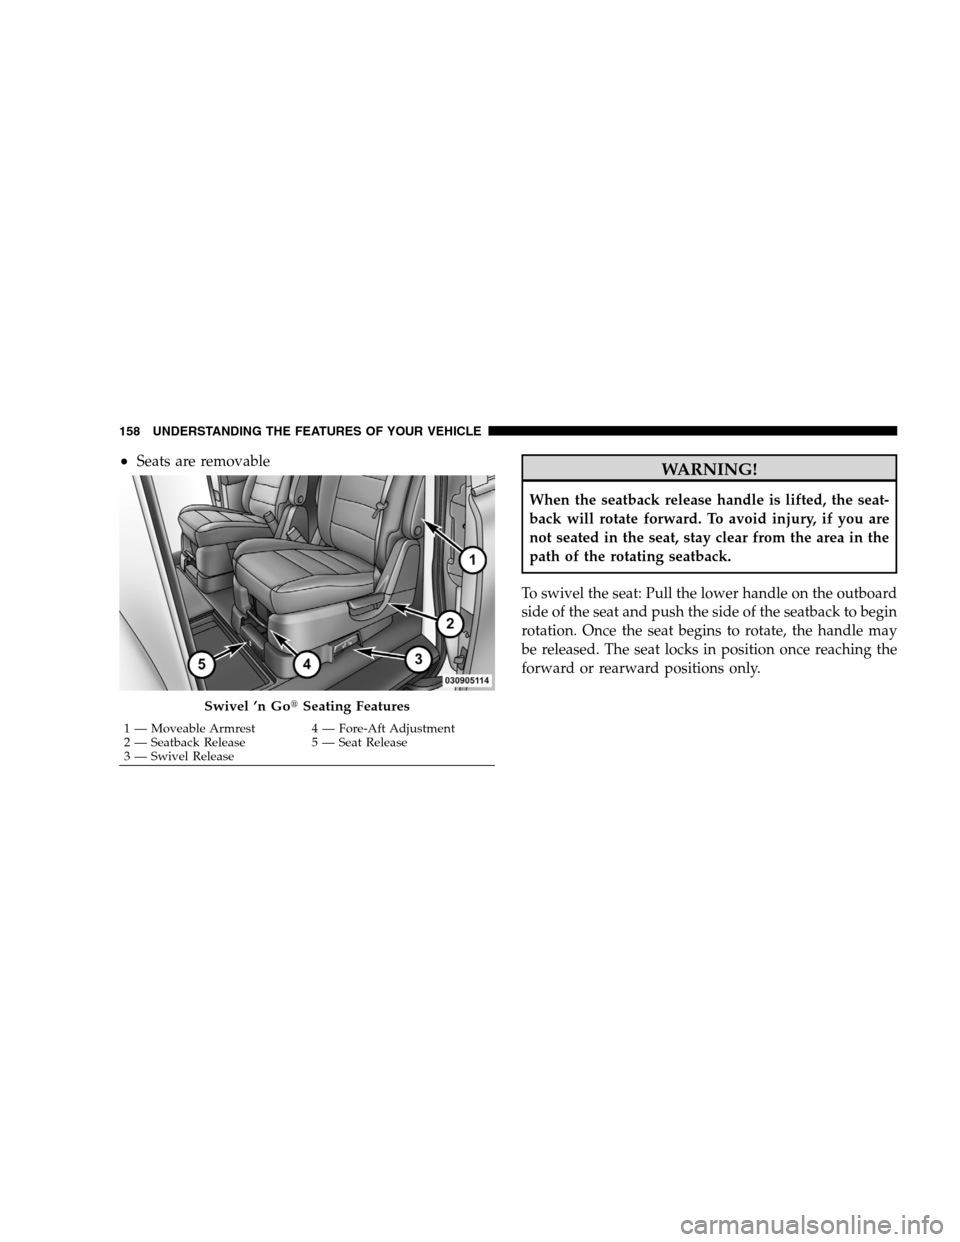
To swivel the seat: Pull the lower handle on the outboard
side of the seat and push the side of the seatback to begin
rotation. Once the seat begins to rotate, the handle may
be released. The seat locks in position once reaching the
forward or rearward positions only. Swivel ’n Got
Seating Features 1 — Moveable Armrest 4 — Fore-Aft Adjustment
2 —
Seatback Release 5 — Seat Release
3 — Swivel Release
158 UNDERSTANDING THE FEATURES OF YOUR VEHICLE