DODGE SPRINTER 2008 2.G Owners Manual
SPRINTER 2008 2.G
DODGE
DODGE
https://www.carmanualsonline.info/img/12/5679/w960_5679-0.png
DODGE SPRINTER 2008 2.G Owners Manual
Trending: steering, wiper fluid, manual transmission, tire type, rear view mirror, navigation, hood open
Page 531 of 666
529 Practical hints
Changing bulbs
5
\1
Turn bulb holder
1
and the bulb
counterclockwise and remove the
holder.
\1
Press down on the bulb, turn it coun-
terclockwise and remove it from bulb
holder
1
.
\1
Press the new bulb into bulb
holder
1
and screw it in clockwise.
\1
Place bulb holder
1
into the lamp
and turn it clockwise.
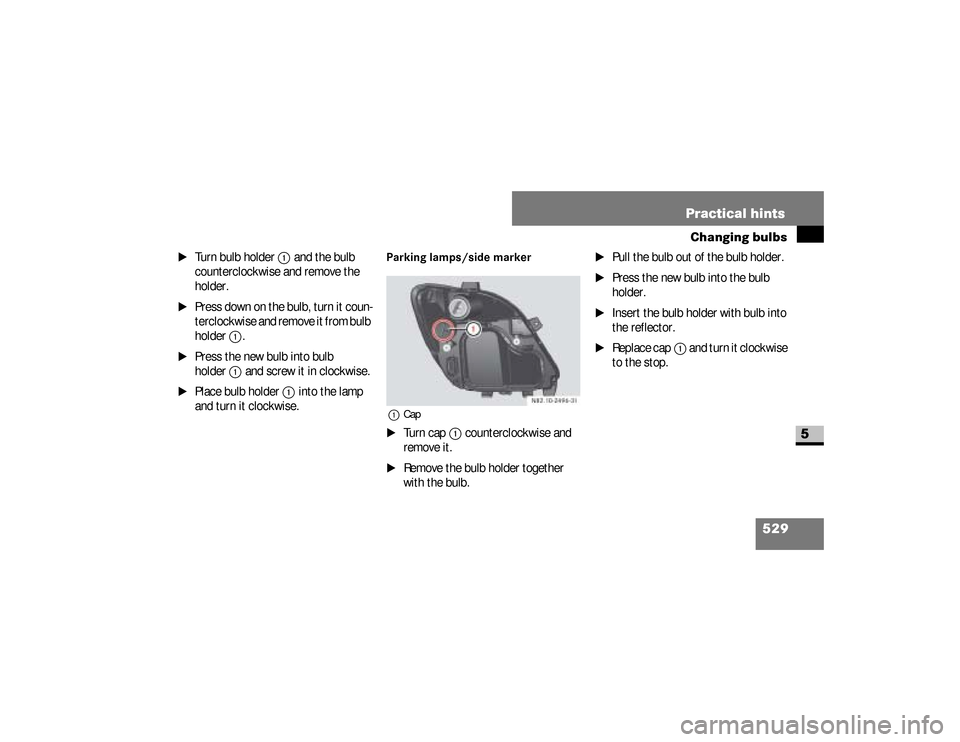
Parking lamps/side marker 1Cap\1
Turn cap
1
counterclockwise and
remove it.
\1
Remove the bulb holder together
with the bulb.
\1
Pull the bulb out of the bulb holder.
\1
Press the new bulb into the bulb
holder.
\1
Insert the bulb holder with bulb into
the reflector.
\1
Replace cap
1
and turn it clockwise
to the stop.
nf_BA.book Page 529 Friday, January 25, 2008 3:53 PM
Page 532 of 666
530 Practical hintsChanging bulbs
5
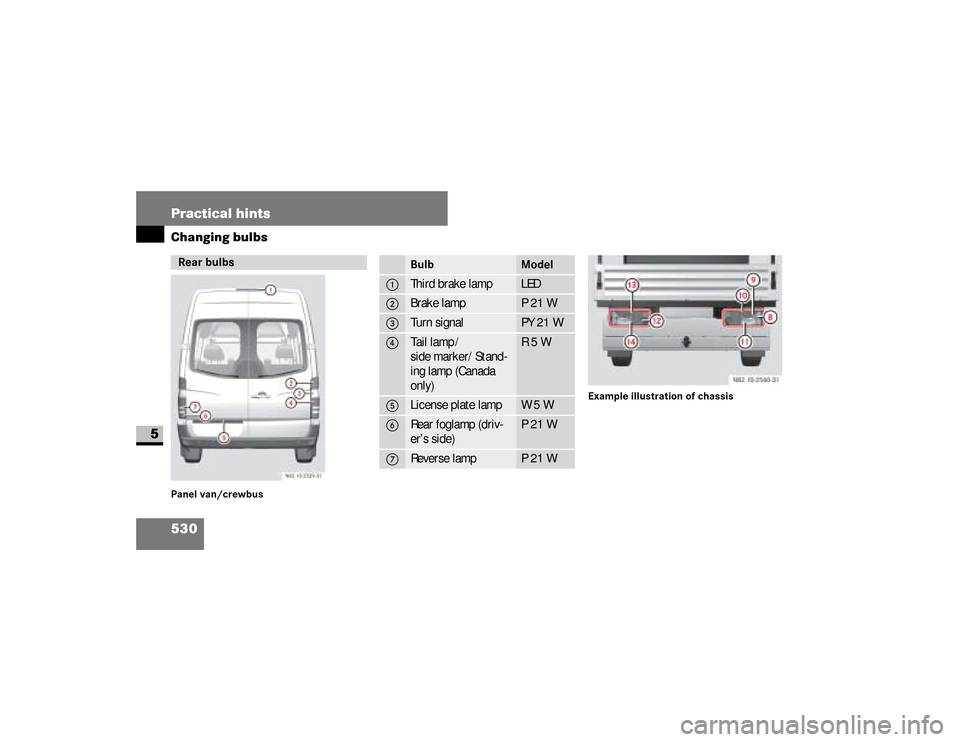
Panel van/crewbusExample illustration of chassisRear bulbs
N82.10-2529-31
Bulb
Model
1
Third brake lamp
LED
2
Brake lamp
P21W
3
Turn signal
PY 21 W
4
Tail lamp /
side marker/Stand-
ing lamp (Canada
only)
R5W
5
License plate lamp
W5W
6
Rear foglamp (driv-
er’s side)
P 21 W
7
Reverse lamp
P 21 W
nf_BA.book Page 530 Friday, January 25, 2008 3:53 PM
Page 533 of 666
531 Practical hints
Changing bulbs
5
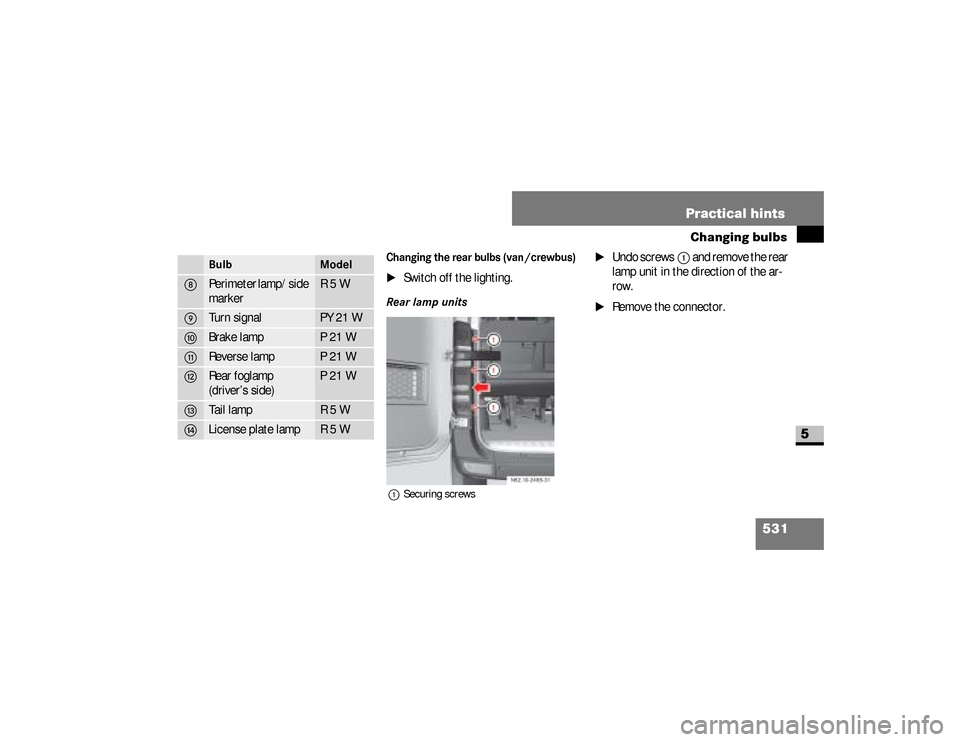
Changing the rear bulbs (van /crewbus)\1
Switch off the lighting.
Rear lamp units1Securing screws
\1
Undo screws
1
and remove the rear
lamp unit in the direction of the ar-
row.
\1
Remove the connector.
Bulb
Model
8
Perimeter lamp/side
marker
R5W
9
Turn signal
PY 21 W
a
Brake lamp
P21W
b
Reverse lamp
P21W
c
Rear foglamp
(driver’s side)
P 21 W
d
Tail lamp
R5W
e
License plate lamp
R5W
nf_BA.book Page 531 Friday, January 25, 2008 3:53 PM
Page 534 of 666
532 Practical hintsChanging bulbs
5
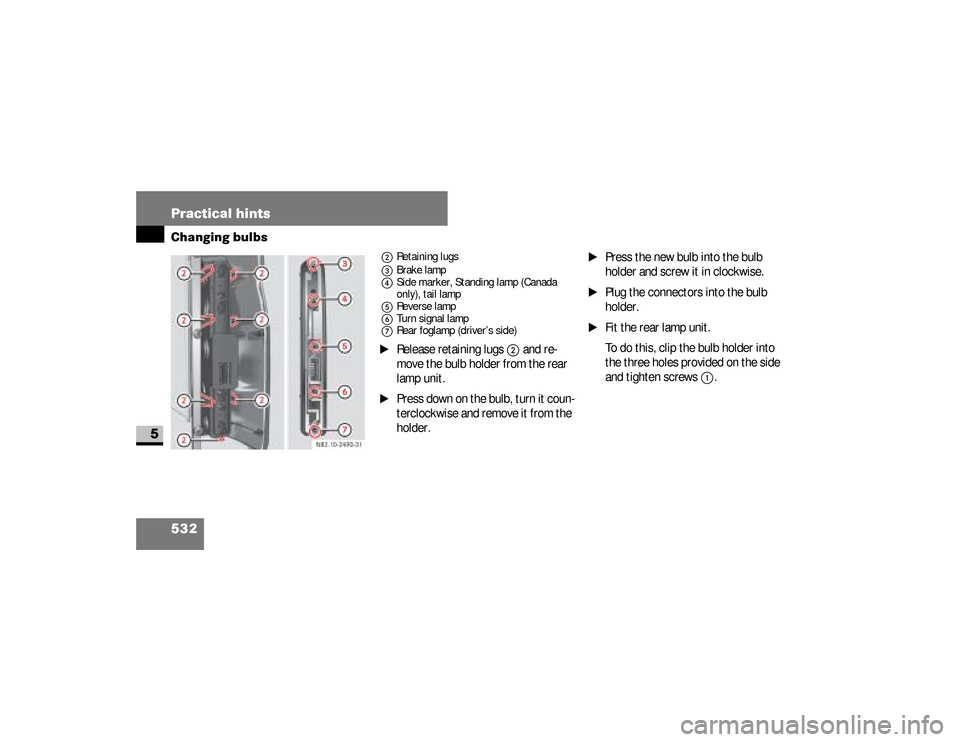
2Retaining lugs
3Brake lamp
4Side marker, Standing lamp (Canada
only), tail lamp
5Reverse lamp
6Turn signal lamp
7Rear foglamp (driver’s side)\1
Release retaining lugs
2
and re-
move the bulb holder from the rear
lamp unit.
\1
Press down on the bulb, turn it coun-
terclockwise and remove it from the
holder.
\1
Press the new bulb into the bulb
holder and screw it in clockwise.
\1
Plug the connectors into the bulb
holder.
\1
Fit the rear lamp unit.
To do this, clip the bulb holder into
the three holes provided on the side
and tighten screws
1
.
nf_BA.book Page 532 Friday, January 25, 2008 3:53 PM
Page 535 of 666
533 Practical hints
Changing bulbs
5
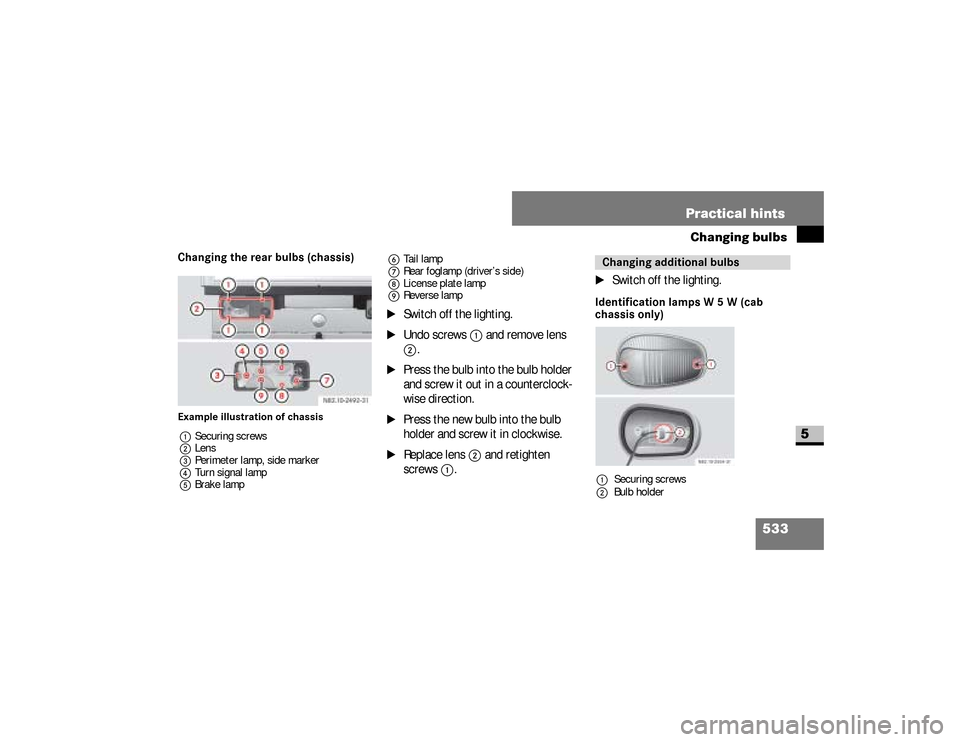
Changing the rear bulbs (chassis)Example illustration of chassis
1Securing screws
2Lens
3Perimeter lamp, side marker
4Turn signal lamp
5Brake lamp6Tail lamp
7Rear foglamp (driver’s side)
8License plate lamp
9Reverse lamp
\1
Switch off the lighting.
\1
Undo screws
1
and remove lens
2
.
\1
Press the bulb into the bulb holder
and screw it out in a counterclock-
wise direction.
\1
Press the new bulb into the bulb
holder and screw it in clockwise.
\1
Replace lens
2
and retighten
screws
1
.
\1
Switch off the lighting.
Identification lamps W 5 W (cab
chassis only) Changing additional bulbs1Securing screws
2Bulb holder
nf_BA.book Page 533 Friday, January 25, 2008 3:53 PM
Page 536 of 666
534 Practical hintsChanging bulbs
5
\1
Switch off the lighting.
\1
Undo screws
1
and remove lamp
housing.
\1
Turn the bulb holder
2
and remove it
together with the bulb.
\1
Pull the bulb out of the bulb holder 2
.
\1
Press the new bulb into the bulb hol-
der
2
.
\1
Screw the bulb holder
2
containing
the bulb into the lamp housing.
\1
Carefully reattach the lamp housing
and retighten screws
1
.
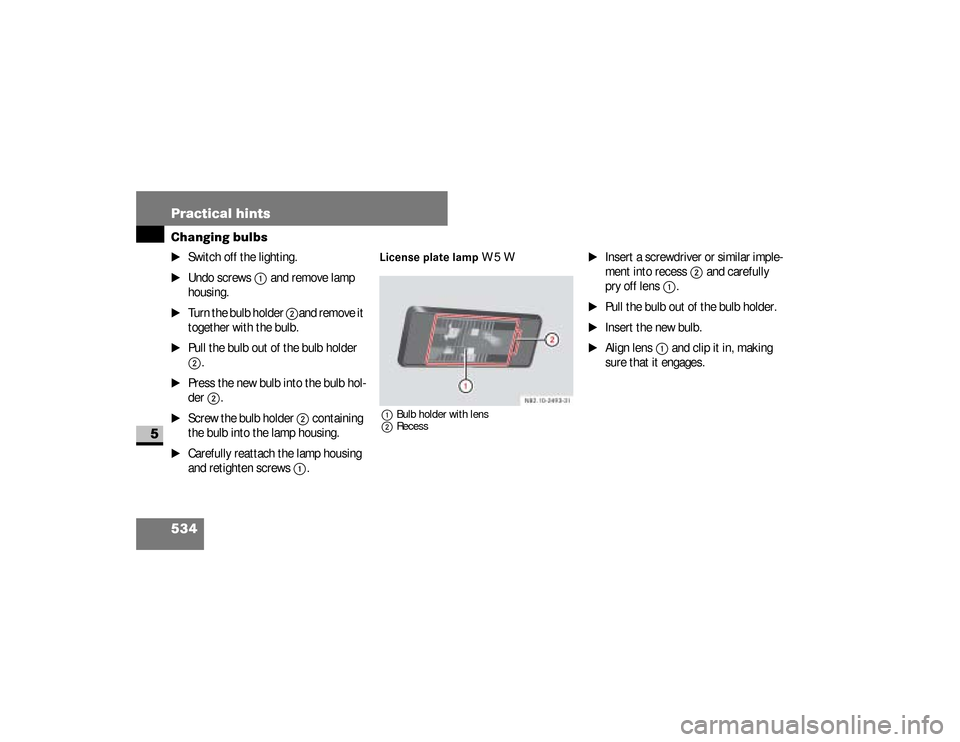
License plate lamp
W5W
1Bulb holder with lens
2Recess
\1
Insert a screwdriver or similar imple-
ment into recess
2
and carefully
pry off lens
1
.
\1
Pull the bulb out of the bulb holder.
\1
Insert the new bulb.
\1
Align lens
1
and clip it in, making
sure that it engages.
nf_BA.book Page 534 Friday, January 25, 2008 3:53 PM
Page 537 of 666
535 Practical hints
Changing bulbs
5
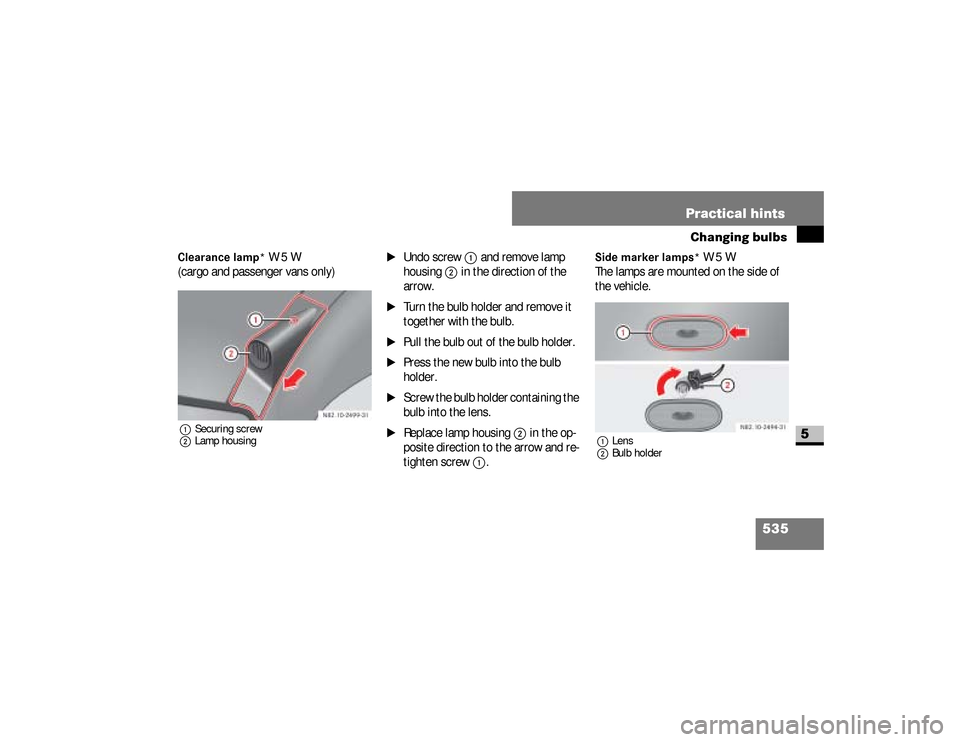
Clearance lamp*
W5W
(cargo and passenger vans only)
1Securing screw
2Lamp housing
\1
Undo screw
1
and remove lamp
housing
2
in the direction of the
arrow.
\1
Turn the bulb holder and remove it
together with the bulb.
\1
Pull the bulb out of the bulb holder.
\1
Press the new bulb into the bulb
holder.
\1
Screw the bulb holder containing the
bulb into the lens.
\1
Replace lamp housing
2
in the op-
posite direction to the arrow and re-
tighten screw
1
.
Side marker lamps*
W5W
The lamps are mounted on the side of
the vehicle.
1Lens
2Bulb holder
nf_BA.book Page 535 Friday, January 25, 2008 3:53 PM
Page 538 of 666
536 Practical hintsChanging bulbs
5
\1
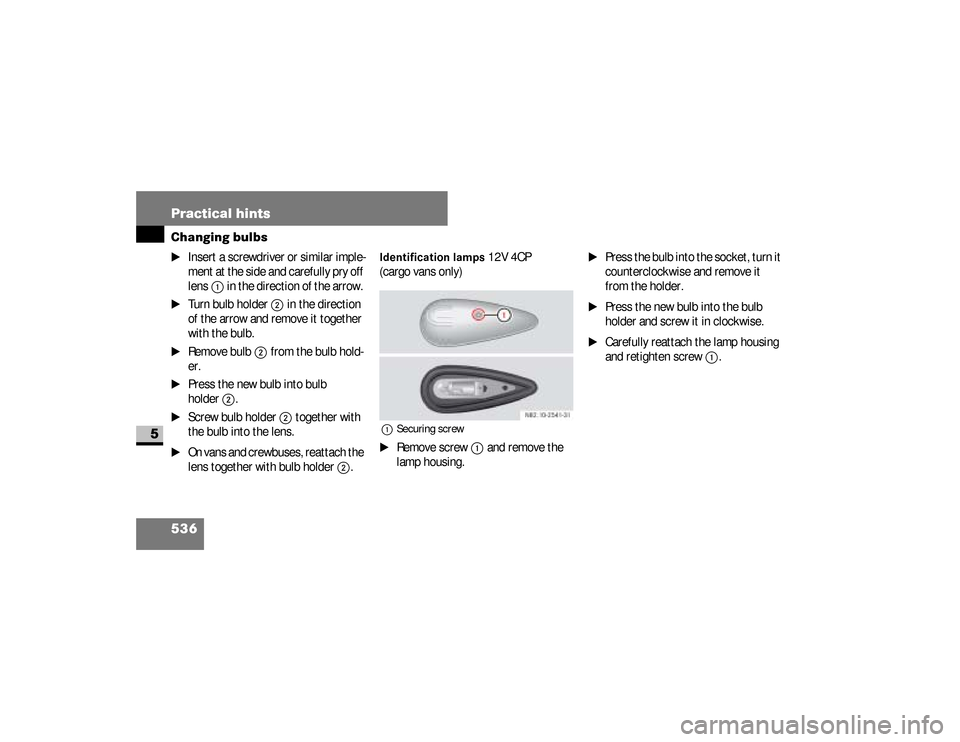
Insert a screwdriver or similar imple-
ment at the side and carefully pry off
lens
1
in the direction of the arrow.
\1
Turn bulb holder
2
in the direction
of the arrow and remove it together
with the bulb.
\1
Remove bulb
2
from the bulb hold-
er.
\1
Press the new bulb into bulb
holder
2
.
\1
Screw bulb holder
2
together with
the bulb into the lens.
\1
On vans and crewbuses, reattach the
lens together with bulb holder
2
.
Identification lamps
12V 4CP
(cargo vans only)
1Securing screw\1
Remove screw
1
and remove the
lamp housing.
\1
Press the bulb into the socket, turn it
counterclockwise and remove it
from the holder.
\1
Press the new bulb into the bulb
holder and screw it in clockwise.
\1
Carefully reattach the lamp housing
and retighten screw
1
.
nf_BA.book Page 536 Friday, January 25, 2008 3:53 PM
Page 539 of 666
537 Practical hints
Changing bulbs
5
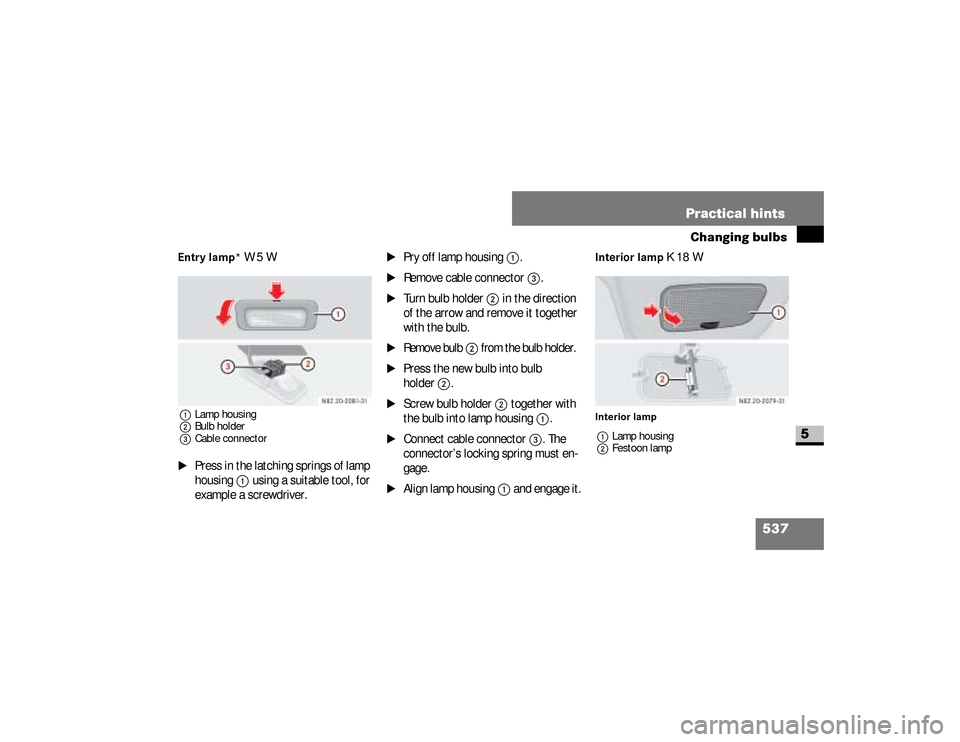
Entry lamp*
W5W
1Lamp housing
2Bulb holder
3Cable connector\1
Press in the latching springs of lamp
housing
1
using a suitable tool, for
example a screwdriver.
\1
Pry off lamp housing
1
.
\1
Remove cable connector
3
.
\1
Turn bulb holder
2
in the direction
of the arrow and remove it together
with the bulb.
\1
Remove bulb
2
from the bulb holder.
\1
Press the new bulb into bulb
holder
2
.
\1
Screw bulb holder
2
together with
the bulb into lamp housing
1
.
\1
Connect cable connector
3
. The
connector’s locking spring must en-
gage.
\1
Align lamp housing
1
and engage it.
Interior lamp
K18W
Interior lamp
1Lamp housing
2Festoon lamp
N82.20-2081-31
N82.20-2079-31
nf_BA.book Page 537 Friday, January 25, 2008 3:53 PM
Page 540 of 666
538 Practical hintsChanging bulbs
5
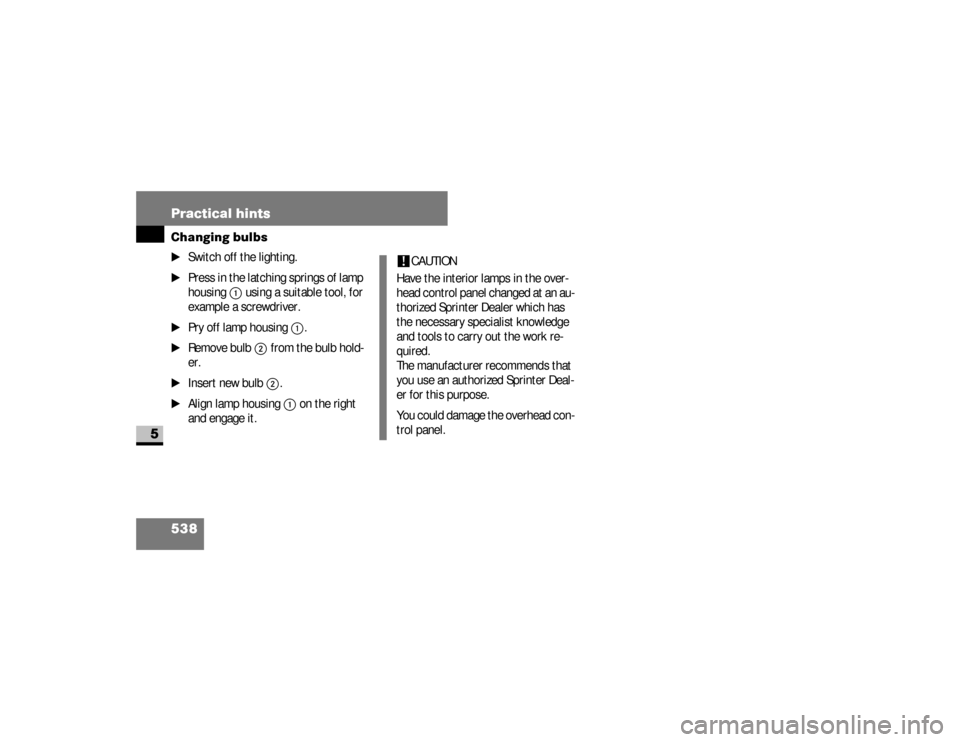
\1
Switch off the lighting.
\1
Press in the latching springs of lamp
housing
1
using a suitable tool, for
example a screwdriver.
\1
Pry off lamp housing
1
.
\1
Remove bulb
2
from the bulb hold-
er.
\1
Insert new bulb
2
.
\1
Align lamp housing
1
on the right
and engage it.
!
CAUTION
Have the interior lamps in the over-
head control panel changed at an au-
thorized Sprinter Dealer which has
the necessary specialist knowledge
and tools to carry out the work re-
quired.
The manufacturer recommends that
you use an authorized Sprinter Deal-
er for this purpose.
You could damage the overhead con-
trol panel.
nf_BA.book Page 538 Friday, January 25, 2008 3:53 PM
Trending: fuel reserve, buttons, traction control, wiper fluid, windshield wipers, inflation pressure, air conditioning
