mirror FIAT DUCATO 2010 Owner handbook (in English)
[x] Cancel search | Manufacturer: FIAT, Model Year: 2010, Model line: DUCATO, Model: FIAT DUCATO 2010Pages: 286, PDF Size: 12.53 MB
Page 49 of 286
48
KNOWING
YOUR CAR
SAFETY
STARTING
AND
DRIVING
WARNING
LIGHTS AND
MESSAGES
IN AN
EMERGENCY
MAINTENANCE
AND CARE
TECHNICAL
SPECIFICATIONS
INDEX
F0N0022mfig. 46F0N0024mfig. 47
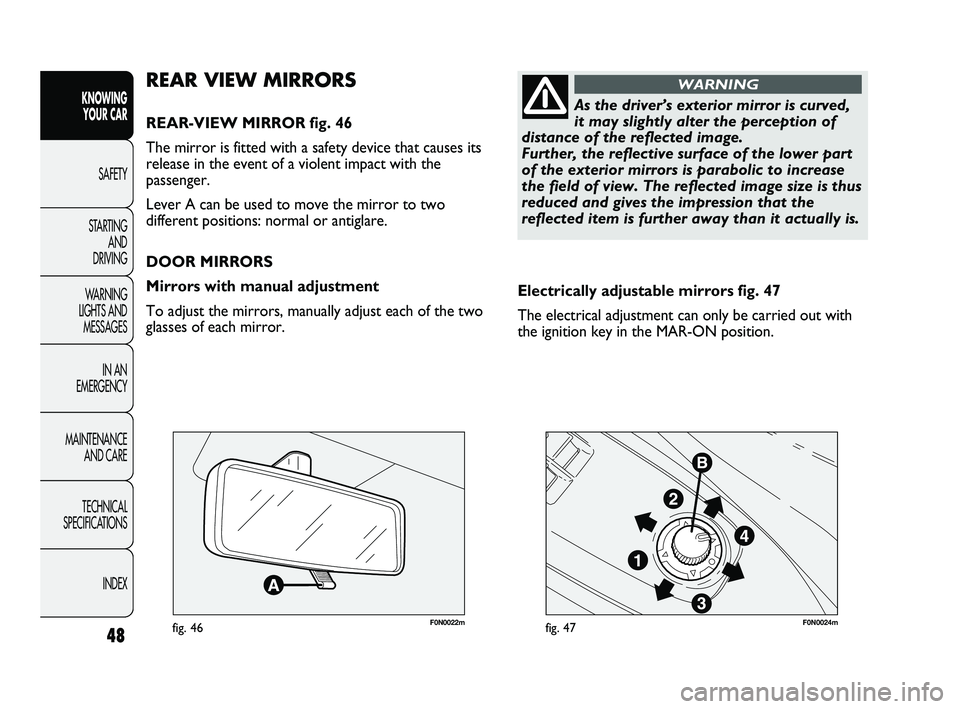
Electrically adjustable mirrors fig. 47
The electrical adjustment can only be carried out with
the ignition key in the MAR-ON position.
REAR VIEW MIRRORS
REAR-VIEW MIRROR fig. 46
The mirror is fitted with a safety device that causes its
release in the event of a violent impact with the
passenger.
Lever A can be used to move the mirror to two
different positions: normal or antiglare.
DOOR MIRRORS
Mirrors with manual adjustment
To adjust the mirrors, manually adjust each of the two
glasses of each mirror.
As the driver’s exterior mirror is curved,
it may slightly alter the perception of
distance of the reflected image.
Further, the reflective surface of the lower part
of the exterior mirrors is parabolic to increase
the field of view. The reflected image size is thus
reduced and gives the impression that the
reflected item is further away than it actually is.
WARNING
037-128 DUCATO LUM EN 7ed 6/21/10 2:10 PM Page 48
Page 50 of 286
49
KNOWING
YOUR CAR
SAFETY
STARTING
AND
DRIVING
WARNING
LIGHTS AND
MESSAGES
IN AN
EMERGENCY
MAINTENANCE
AND CARE
TECHNICAL
SPECIFICATIONS
INDEX
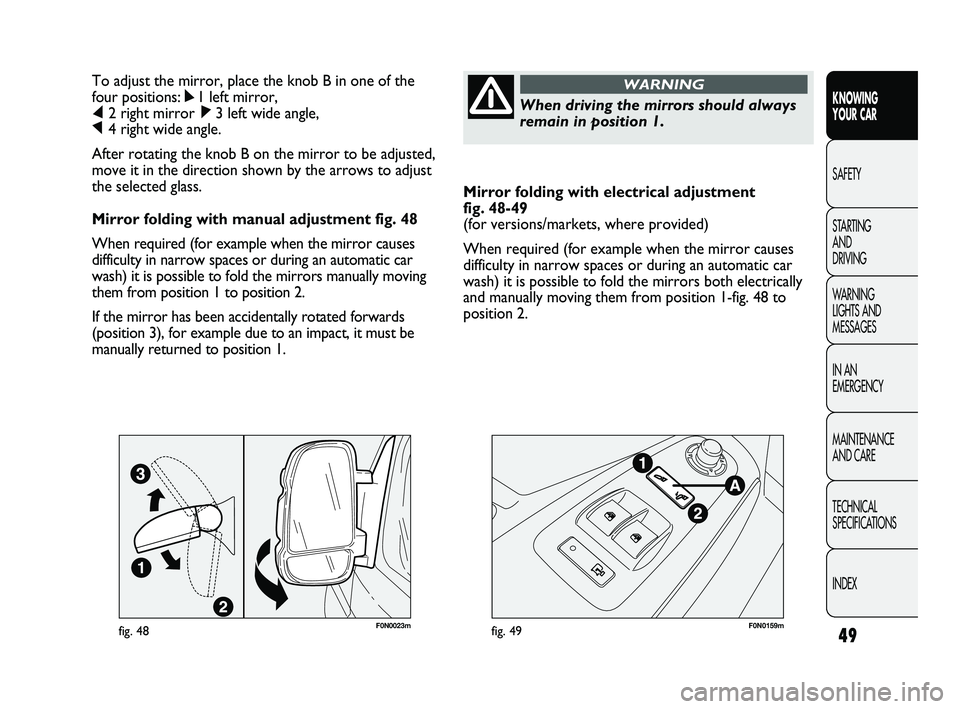
Mirror folding with electrical adjustment
fig. 48-49
(for versions/markets, where provided)
When required (for example when the mirror causes
difficulty in narrow spaces or during an automatic car
wash) it is possible to fold the mirrors both electrically
and manually moving them from position 1-fig. 48 to
position 2. To adjust the mirror, place the knob B in one of the
four positions: ÿ1 left mirror,
⁄2 right mirror ¤3 left wide angle,
Ÿ4 right wide angle.
After rotating the knob B on the mirror to be adjusted,
move it in the direction shown by the arrows to adjust
the selected glass.
Mirror folding with manual adjustment fig. 48
When required (for example when the mirror causes
difficulty in narrow spaces or during an automatic car
wash) it is possible to fold the mirrors manually moving
them from position 1 to position 2.
If the mirror has been accidentally rotated forwards
(position 3), for example due to an impact, it must be
manually returned to position 1.
When driving the mirrors should always
remain in position 1.
WARNING
F0N0023mfig. 48F0N0159mfig. 49
037-128 DUCATO LUM EN 7ed 6/21/10 2:10 PM Page 49
Page 51 of 286
50
KNOWING
YOUR CAR
SAFETY
STARTING
AND
DRIVING
WARNING
LIGHTS AND
MESSAGES
IN AN
EMERGENCY
MAINTENANCE
AND CARE
TECHNICAL
SPECIFICATIONS
INDEX
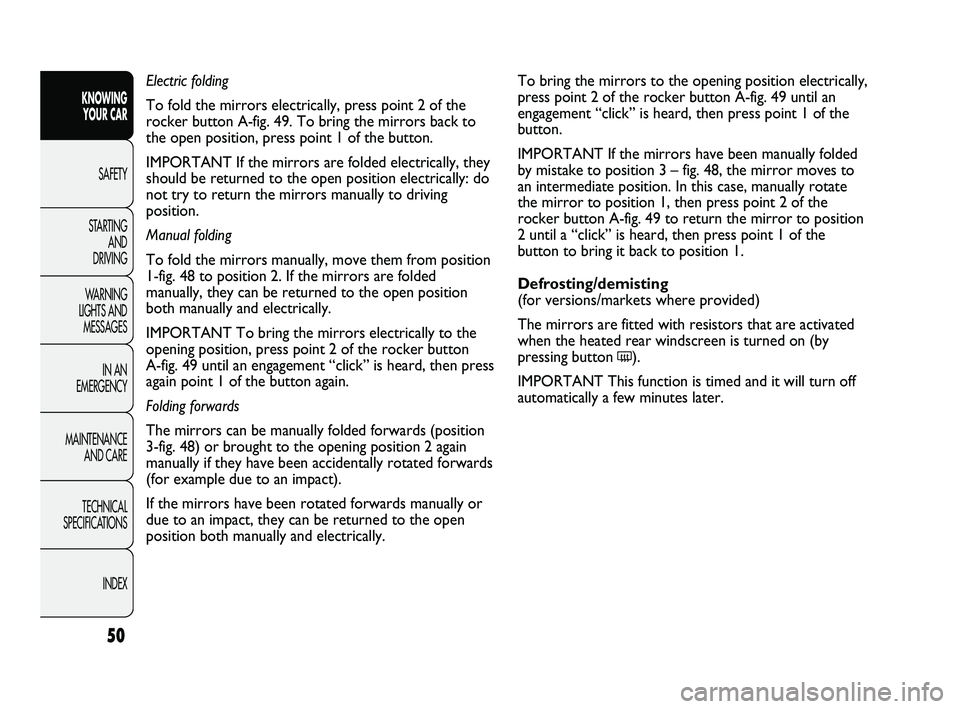
To bring the mirrors to the opening position electrically,
press point 2 of the rocker button A-fig. 49 until an
engagement “click” is heard, then press point 1 of the
button.
IMPORTANT If the mirrors have been manually folded
by mistake to position 3 – fig. 48, the mirror moves to
an intermediate position. In this case, manually rotate
the mirror to position 1, then press point 2 of the
rocker button A-fig. 49 to return the mirror to position
2 until a “click” is heard, then press point 1 of the
button to bring it back to position 1.
Defrosting/demisting
(for versions/markets where provided)
The mirrors are fitted with resistors that are activated
when the heated rear windscreen is turned on (by
pressing button
().
IMPORTANT This function is timed and it will turn off
automatically a few minutes later. Electric folding
To fold the mirrors electrically, press point 2 of the
rocker button A-fig. 49. To bring the mirrors back to
the open position, press point 1 of the button.
IMPORTANT If the mirrors are folded electrically, they
should be returned to the open position electrically: do
not try to return the mirrors manually to driving
position.
Manual folding
To fold the mirrors manually, move them from position
1-fig. 48 to position 2. If the mirrors are folded
manually, they can be returned to the open position
both manually and electrically.
IMPORTANT To bring the mirrors electrically to the
opening position, press point 2 of the rocker button
A-fig. 49 until an engagement “click” is heard, then press
again point 1 of the button again.
Folding forwards
The mirrors can be manually folded forwards (position
3-fig. 48) or brought to the opening position 2 again
manually if they have been accidentally rotated forwards
(for example due to an impact).
If the mirrors have been rotated forwards manually or
due to an impact, they can be returned to the open
position both manually and electrically.
037-128 DUCATO LUM EN 7ed 6/21/10 2:10 PM Page 50
Page 55 of 286
54
KNOWING
YOUR CAR
SAFETY
STARTING
AND
DRIVING
WARNING
LIGHTS AND
MESSAGES
IN AN
EMERGENCY
MAINTENANCE
AND CARE
TECHNICAL
SPECIFICATIONS
INDEX
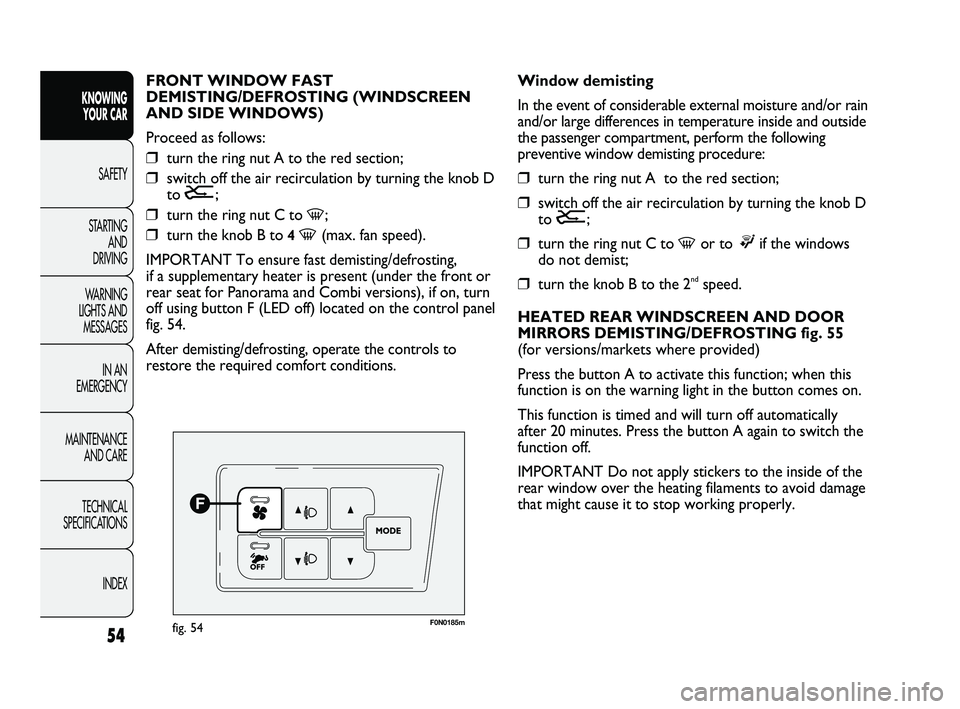
F0N0185mfig. 54
Window demisting
In the event of considerable external moisture and/or rain
and/or large differences in temperature inside and outside
the passenger compartment, perform the following
preventive window demisting procedure:
❒turn the ring nut A to the red section;
❒switch off the air recirculation by turning the knob D
to
Ú;
❒turn the ring nut C to -or to ®if the windows
do not demist;
❒turn the knob B to the 2ndspeed.
HEATED REAR WINDSCREEN AND DOOR
MIRRORS DEMISTING/DEFROSTING fig. 55
(for versions/markets where provided)
Press the button A to activate this function; when this
function is on the warning light in the button comes on.
This function is timed and will turn off automatically
after 20 minutes. Press the button A again to switch the
function off.
IMPORTANT Do not apply stickers to the inside of the
rear window over the heating filaments to avoid damage
that might cause it to stop working properly. FRONT WINDOW FAST
DEMISTING/DEFROSTING (WINDSCREEN
AND SIDE WINDOWS)
Proceed as follows:
❒turn the ring nut A to the red section;
❒switch off the air recirculation by turning the knob D
to
Ú;
❒turn the ring nut C to -;
❒turn the knob B to 4 -(max. fan speed).
IMPORTANT To ensure fast demisting/defrosting,
if a supplementary heater is present (under the front or
rear seat for Panorama and Combi versions), if on, turn
off using button F (LED off) located on the control panel
fig. 54.
After demisting/defrosting, operate the controls to
restore the required comfort conditions.
037-128 DUCATO LUM EN 7ed 6/21/10 2:10 PM Page 54
Page 60 of 286
59
KNOWING
YOUR CAR
SAFETY
STARTING
AND
DRIVING
WARNING
LIGHTS AND
MESSAGES
IN AN
EMERGENCY
MAINTENANCE
AND CARE
TECHNICAL
SPECIFICATIONS
INDEX
F0N0043mfig. 58
INTERNAL AIR RECIRCULATION
ACTIVATION
Turn the knob D to
Ò.
It is advisable to switch the internal air recirculation on
while standing in queues or in tunnels to prevent the
introduction of polluted air. Do not use the function for
a long time, particularly if there are many passengers on
board, to prevent the windows from misting up.
IMPORTANT The inside air recirculation system makes
it possible to reach the required heating or cooling
conditions faster.
Do not use the air recirculation function on rainy/cold
days as it would considerably increase the possibility of
the windows misting inside.
SYSTEM SERVICING
In winter, the climate control system must be turned on
at least once a month for about 10 minutes. Before
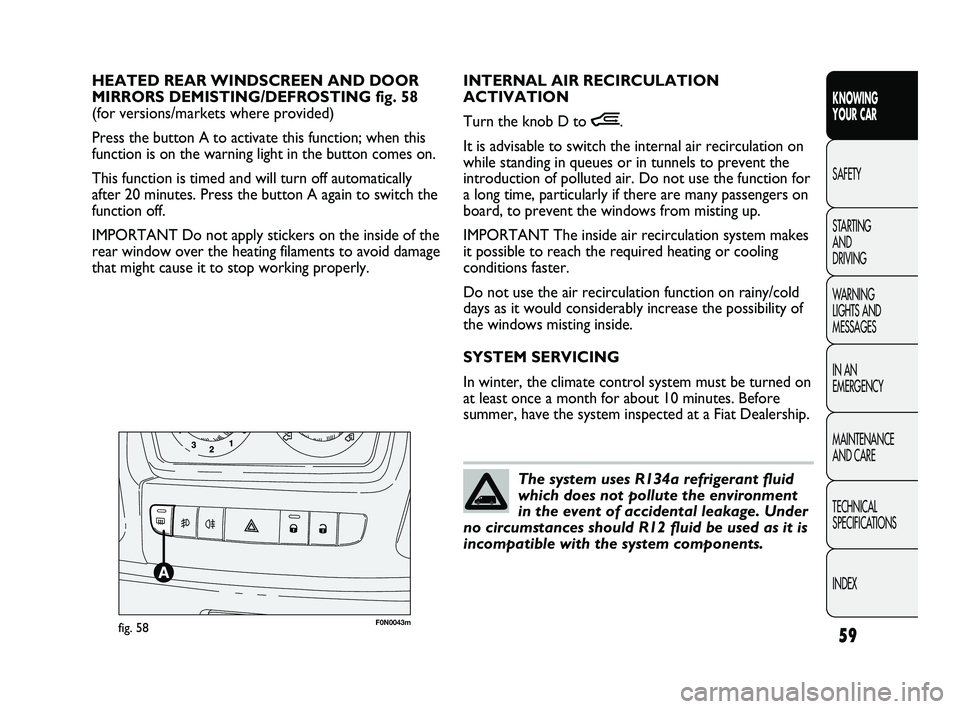
summer, have the system inspected at a Fiat Dealership. HEATED REAR WINDSCREEN AND DOOR
MIRRORS DEMISTING/DEFROSTING fig. 58
(for versions/markets where provided)
Press the button A to activate this function; when this
function is on the warning light in the button comes on.
This function is timed and will turn off automatically
after 20 minutes. Press the button A again to switch the
function off.
IMPORTANT Do not apply stickers on the inside of the
rear window over the heating filaments to avoid damage
that might cause it to stop working properly.
The system uses R134a refrigerant fluid
which does not pollute the environment
in the event of accidental leakage. Under
no circumstances should R12 fluid be used as it is
incompatible with the system components.
037-128 DUCATO LUM EN 7ed 6/21/10 2:10 PM Page 59
Page 62 of 286
61
KNOWING
YOUR CAR
SAFETY
STARTING
AND
DRIVING
WARNING
LIGHTS AND
MESSAGES
IN AN
EMERGENCY
MAINTENANCE
AND CARE
TECHNICAL
SPECIFICATIONS
INDEX
E System off button.
F Compressor enabling/disabling button.
G Air recirculation control button.
H Fan speed increase/decrease control buttons.
I Temperature increase/decrease control knob.
USING THE CLIMATE CONTROL SYSTEM
The system can be started in different ways, but it is
advisable to start by pressing the AUTO button and
then turning the knob to set the temperature required
on the display. The system will start running
automatically in this way and the set temperature will be
reached as quickly as possible. The system will adjust
the temperature, the quantity and the distribution of the
air introduced into the passenger compartment and, by
managing the recirculation function, the activation of the
compressor. During fully automatic operation, the only
manual intervention required is the possible activation
of the following functions:
❒Òair recirculation, to keep it always on or off;
❒Zto speed up demisting/defrosting of the front
windows, rear window and door mirrors.During fully automatic system operation, you can change
the set temperature, air distribution and fan speed at
any time by using the relevant buttons or knobs: the
system will automatically change its settings to adjust to
the new requirements. During fully automatic operation
(FULL AUTO), the word FULL will disappear if the air
distribution and/or flow rate and/or engagement of the
compressor and/or recirculation settings are changed.
In this way, the functions will switch from automatic to
manual control until the AUTO button is pressed again.
With one or more functions turned on manually, the
adjustment of the intake air temperature continues to
be managed automatically, except with the compressor
switched off: if this is the case, the temperature of the
air introduced into the passenger compartment cannot
be lower than that of the outside air.
CONTROLS
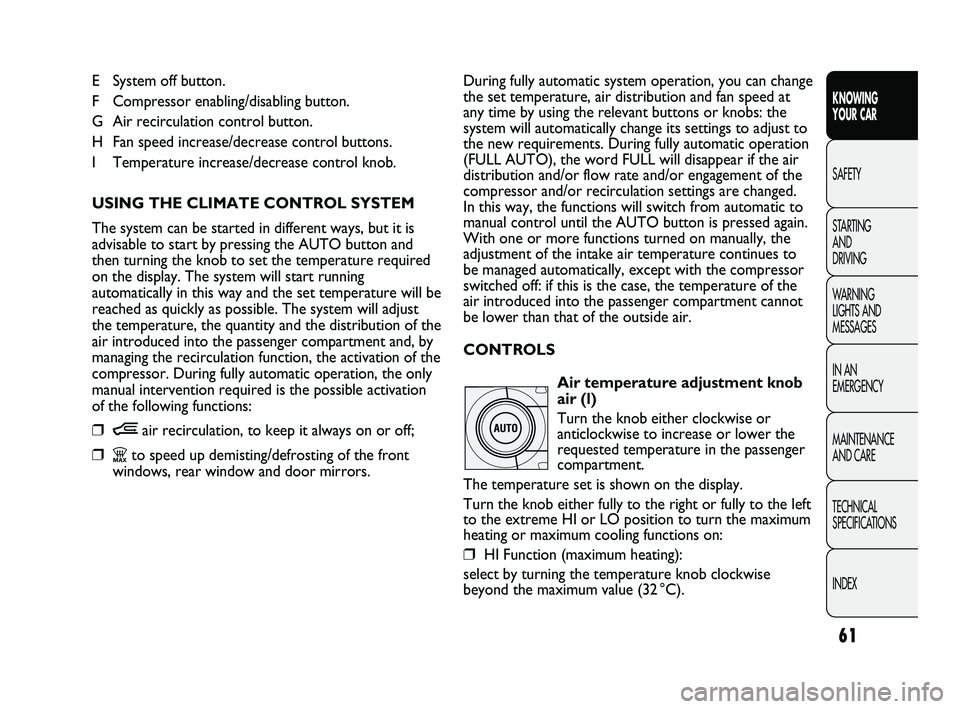
Air temperature adjustment knob
air (l)
Turn the knob either clockwise or
anticlockwise to increase or lower the
requested temperature in the passenger
compartment.
The temperature set is shown on the display.
Turn the knob either fully to the right or fully to the left
to the extreme HI or LO position to turn the maximum
heating or maximum cooling functions on:
❒HI Function (maximum heating):
select by turning the temperature knob clockwise
beyond the maximum value (32 °C).
037-128 DUCATO LUM EN 7ed 6/21/10 2:10 PM Page 61
Page 80 of 286
79
KNOWING
YOUR CAR
SAFETY
STARTING
AND
DRIVING
WARNING
LIGHTS AND
MESSAGES
IN AN
EMERGENCY
MAINTENANCE
AND CARE
TECHNICAL
SPECIFICATIONS
INDEX
Deactivation fig. 77
Move the lever from position B or turn the ignition key
to OFF. The next time the vehicle is started (ignition
key in ON position), the sensor is not reactivated even
if the lever is still in position B. To activate the sensor,
move the lever to position A or C and then back to
position B or turn the ring nut for adjusting the
sensitivity. Rain sensor activation will be indicated by at
least one wiper “stroke” even if the windscreen is dry.
The rain sensor is capable of recognising the difference
between day and night and making the necessary
adjustments automatically. RAIN SENSOR
(for versions/markets where provided)
The rain sensor is located behind the rear view mirror
in contact with the windscreen and has the purpose of
automatically adjusting the frequency of the windscreen
wiper strokes depending on the intensity of the rain
during intermittent operation.
IMPORTANT Keep the glass in the sensor area clean.
Activation fig. 77
Move the right lever down by one click (position B).
The activation of the sensor is signalled by a “stroke” to
show that the command has been acquired.
Turn the control F to increase the rain sensor
sensitivity.
The increasing of the rain sensor sensitivity is signalled
by a “stroke” to show that the command has been
acquired.
If the windscreen washer is used with the rain sensor
activated, the normal washing cycle is performed, after
which the rain sensor resumes its normal automatic
operation.HEADLIGHT WASHERS
(for versions/markets where provided)
The headlight washers are “retractable”, i.e.: they are
located inside the front bumper and they are activated
when (with dipped beams on) the windscreen washer is
operated.
IMPORTANT Check the correct operation and
cleanliness of the jets at regular intervals.
Streaks of water may cause unnecessary
blade movements.
WARNING
037-128 DUCATO LUM EN 7ed 6/21/10 2:10 PM Page 79
Page 96 of 286
95
KNOWING
YOUR CAR
SAFETY
STARTING
AND
DRIVING
WARNING
LIGHTS AND
MESSAGES
IN AN
EMERGENCY
MAINTENANCE
AND CARE
TECHNICAL
SPECIFICATIONS
INDEX
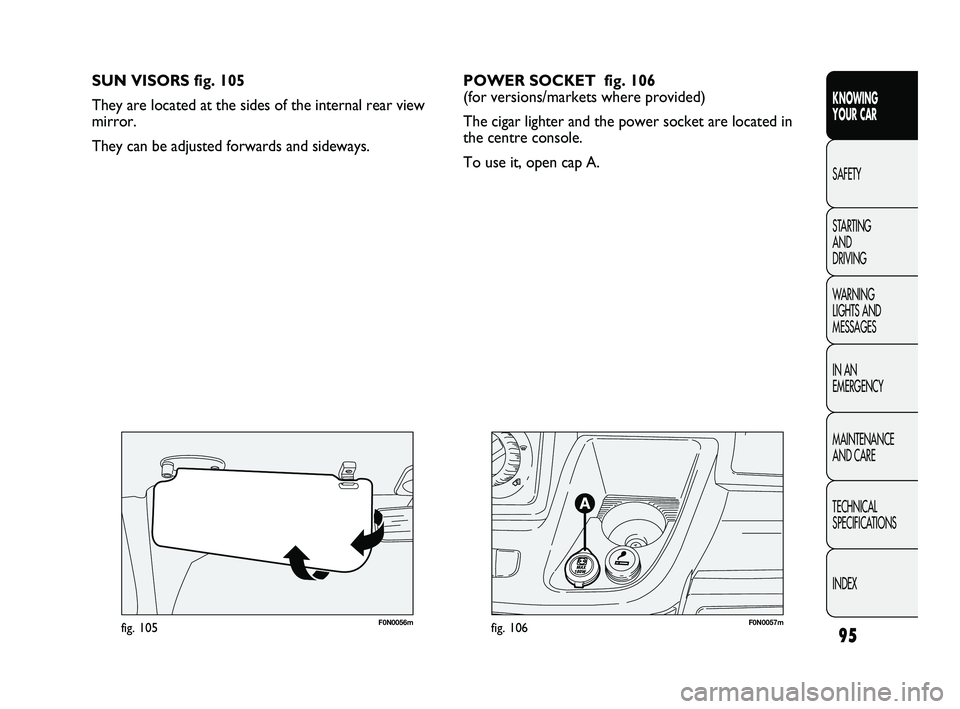
F0N0057mfig. 106F0N0056mfig. 105
SUN VISORS fig. 105
They are located at the sides of the internal rear view
mirror.
They can be adjusted forwards and sideways.POWER SOCKET fig. 106
(for versions/markets where provided)
The cigar lighter and the power socket are located in
the centre console.
To use it, open cap A.
037-128 DUCATO LUM EN 7ed 6/21/10 2:10 PM Page 95
Page 99 of 286
98
KNOWING
YOUR CAR
SAFETY
STARTING
AND
DRIVING
WARNING
LIGHTS AND
MESSAGES
IN AN
EMERGENCY
MAINTENANCE
AND CARE
TECHNICAL
SPECIFICATIONS
INDEX
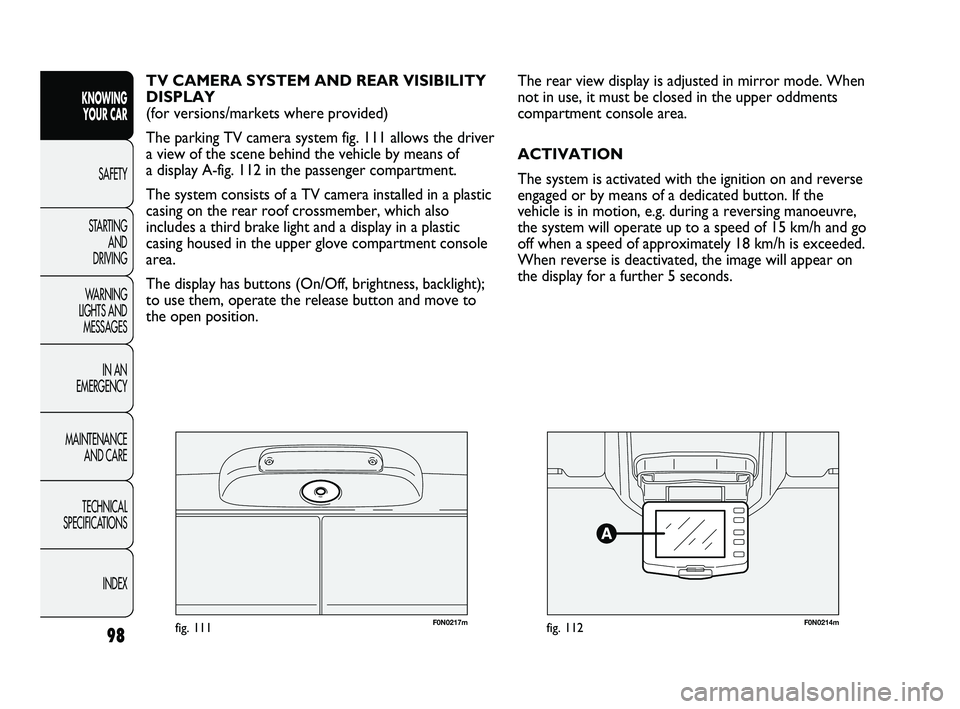
F0N0217mfig. 111F0N0214mfig. 112
The rear view display is adjusted in mirror mode. When
not in use, it must be closed in the upper oddments
compartment console area.
ACTIVATION
The system is activated with the ignition on and reverse
engaged or by means of a dedicated button. If the
vehicle is in motion, e.g. during a reversing manoeuvre,
the system will operate up to a speed of 15 km/h and go
off when a speed of approximately 18 km/h is exceeded.
When reverse is deactivated, the image will appear on
the display for a further 5 seconds. TV CAMERA SYSTEM AND REAR VISIBILITY
DISPLAY
(for versions/markets where provided)
The parking TV camera system fig. 111 allows the driver
a view of the scene behind the vehicle by means of
a display A-fig. 112 in the passenger compartment.
The system consists of a TV camera installed in a plastic
casing on the rear roof crossmember, which also
includes a third brake light and a display in a plastic
casing housed in the upper glove compartment console
area.
The display has buttons (On/Off, brightness, backlight);
to use them, operate the release button and move to
the open position.
037-128 DUCATO LUM EN 7ed 6/21/10 2:10 PM Page 98
Page 155 of 286
154
KNOWING
YOUR CAR
SAFETY
STARTING
AND
DRIVING
WARNING
LIGHTS AND
MESSAGES
IN AN
EMERGENCY
MAINTENANCE
AND CARE
TECHNICAL
SPECIFICATIONS
INDEX
TOWING TRAILERS
IMPORTANT NOTES
The vehicle must be provided with a type-approved tow
hook and adequate electrical system to tow caravans or
trailers. Installation should be carried out by specialised
personnel who will issue the required papers for
travelling on roads.
Install any specific and/or additional rear view mirrors as
specified by the Highway Code.
Remember that when towing a trailer, steep hills are
harder to climb, the braking spaces increase and
overtaking takes longer depending on the overall weight.
Engage a low gear when driving downhill, rather than
constantly using the brake.
The weight of the trailer on the vehicle tow hook will
reduce the loading capacity of the vehicle by the same
amount. Consider the weight of the trailer fully laden,
including accessories and luggage, to make sure you do
not exceed the maximum towable weight (shown on
the vehicle registration document).
Do not exceed the speed limits specific for each country
you are driving in, in the case of vehicles towing trailers.
In any case, the top speed must not exceed 100 km/h.
Fit a suitable towing stabiliser to the trailer to be towed. CONDITIONS OF USE
Cold starting
Short journeys and frequent cold starts will prevent the
engine from reaching optimal running temperature.
Consequently, both consumption (from +15 to +30% on
urban cycle ) and emissions will increase.
Traffic and road conditions
Rather high consumption levels are linked to situations
with heavy traffic, for instance when travelling in queues
with frequent use of the lower gears or in cities with
many traffic lights. Winding mountain roads and rough
road surfaces also adversely affect consumption.
Traffic hold-ups
During prolonged hold-ups (e.g. level crossings) the
engine should be switched off.
147-160 DUCATO LUM EN 7ed 6/21/10 2:13 PM Page 154