FIAT DUCATO BASE CAMPER 2014 Owner handbook (in English)
Manufacturer: FIAT, Model Year: 2014, Model line: DUCATO BASE CAMPER, Model: FIAT DUCATO BASE CAMPER 2014Pages: 367, PDF Size: 20.39 MB
Page 141 of 367
WARNING
94) Always drive at a speed appropriate to the traffic conditions, the weather and traffic regulations. The engine may be
stopped if the DPF light is on; however, repeated interruption of the regeneration process may result in premature
deterioration of the engine oil. For this reason, always wait until the warning light switches off before stopping the
engine as described above. It is not advisable to complete DPF regeneration with the vehicle stationary.Warning lights on
panelWhat it means What to do
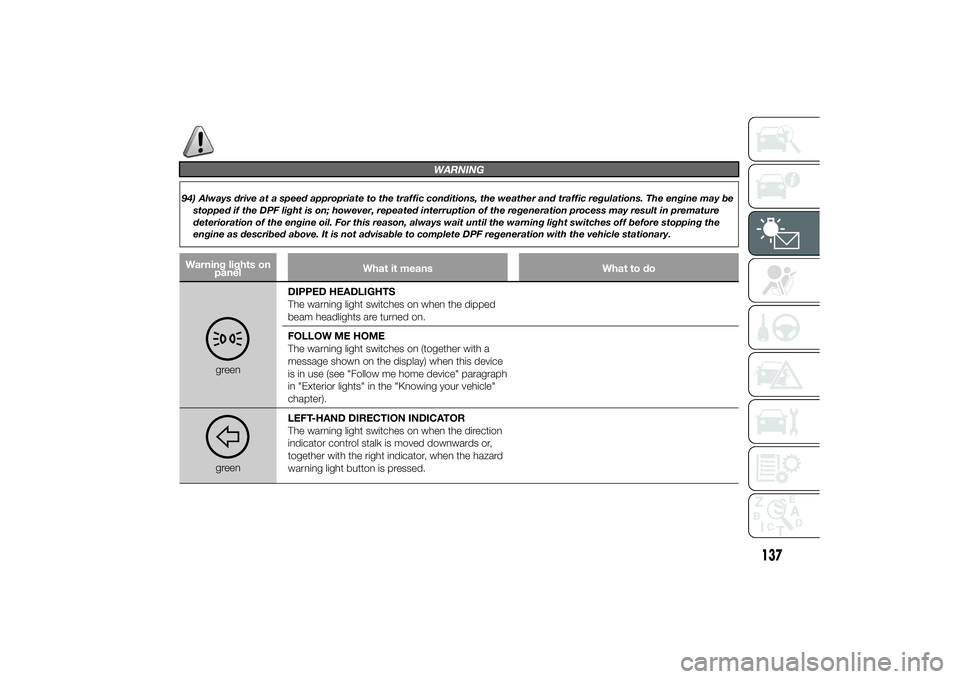
greenDIPPED HEADLIGHTS
The warning light switches on when the dipped
beam headlights are turned on.
FOLLOW ME HOME
The warning light switches on (together with a
message shown on the display) when this device
is in use (see "Follow me home device" paragraph
in "Exterior lights" in the "Knowing your vehicle"
chapter).greenLEFT-HAND DIRECTION INDICATOR
The warning light switches on when the direction
indicator control stalk is moved downwards or,
together with the right indicator, when the hazard
warning light button is pressed.
137
Page 142 of 367
Warning lights on
panelWhat it means What to do
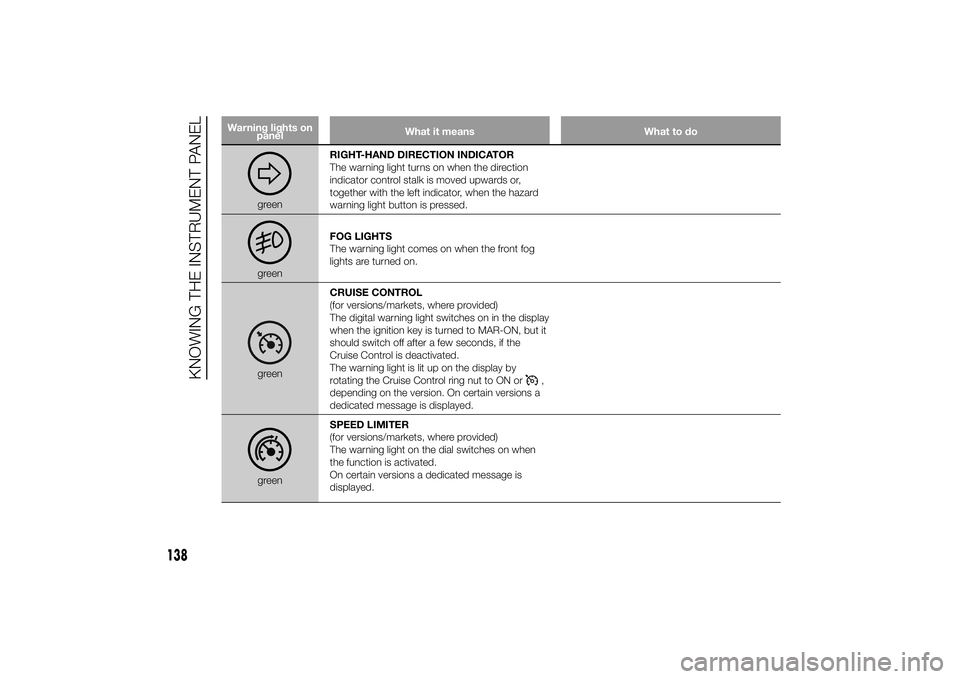
greenRIGHT-HAND DIRECTION INDICATOR
The warning light turns on when the direction
indicator control stalk is moved upwards or,
together with the left indicator, when the hazard
warning light button is pressed.greenFOG LIGHTS
The warning light comes on when the front fog
lights are turned on.greenCRUISE CONTROL
(for versions/markets, where provided)
The digital warning light switches on in the display
when the ignition key is turned to MAR-ON, but it
should switch off after a few seconds, if the
Cruise Control is deactivated.
The warning light is lit up on the display by
rotating the Cruise Control ring nut to ON or
,
depending on the version. On certain versions a
dedicated message is displayed.
greenSPEED LIMITER
(for versions/markets, where provided)
The warning light on the dial switches on when
the function is activated.
On certain versions a dedicated message is
displayed.
138
KNOWING THE INSTRUMENT PANEL
Page 143 of 367
Warning lights on
panelWhat it means What to do
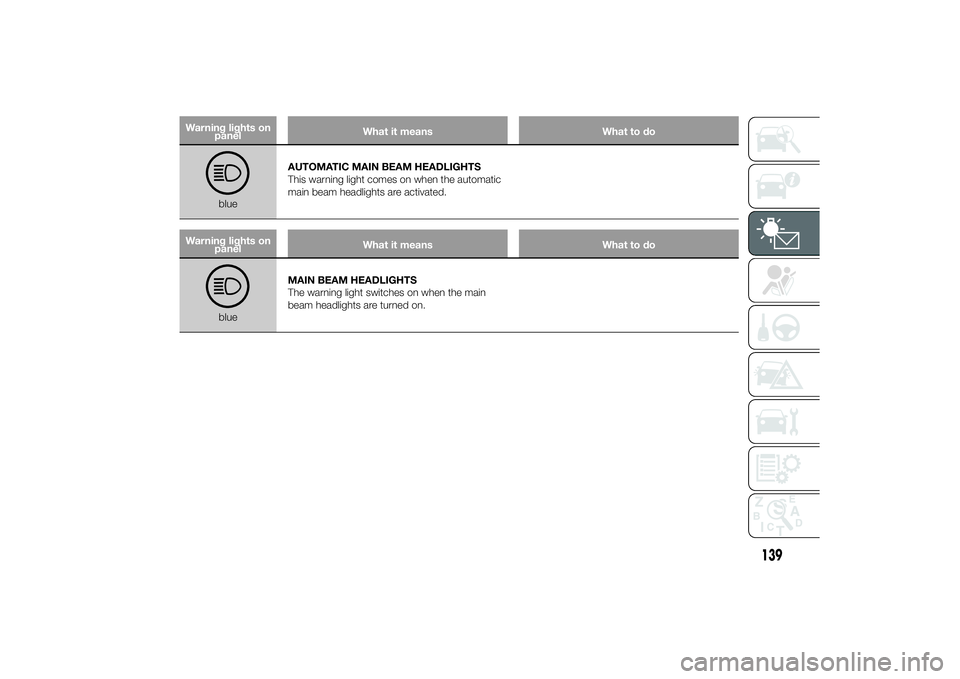
blueAUTOMATIC MAIN BEAM HEADLIGHTS
This warning light comes on when the automatic
main beam headlights are activated.
Warning lights on
panelWhat it means What to do
blueMAIN BEAM HEADLIGHTS
The warning light switches on when the main
beam headlights are turned on.
139
Page 144 of 367
Messages on display
What it means What to do
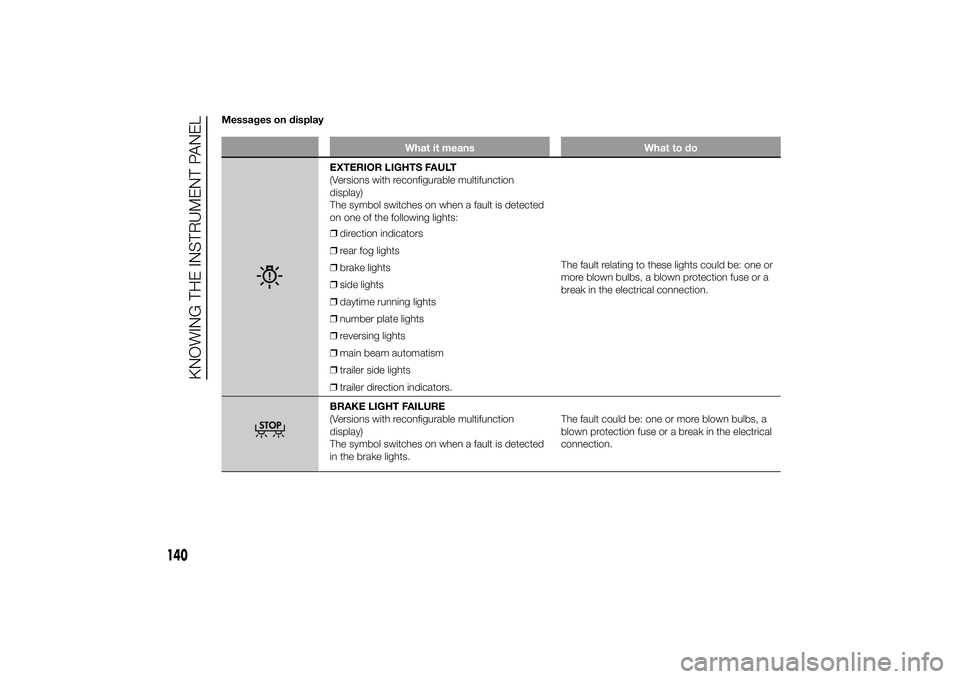
EXTERIOR LIGHTS FAULT
(Versions with reconfigurable multifunction
display)
The symbol switches on when a fault is detected
on one of the following lights:
❒direction indicators
❒rear fog lights
❒brake lights
❒side lights
❒daytime running lights
❒number plate lights
❒reversing lights
❒main beam automatism
❒trailer side lights
❒trailer direction indicators.The fault relating to these lights could be: one or
more blown bulbs, a blown protection fuse or a
break in the electrical connection.BRAKE LIGHT FAILURE
(Versions with reconfigurable multifunction
display)
The symbol switches on when a fault is detected
in the brake lights.The fault could be: one or more blown bulbs, a
blown protection fuse or a break in the electrical
connection.
140
KNOWING THE INSTRUMENT PANEL
Page 145 of 367
What it means What to do
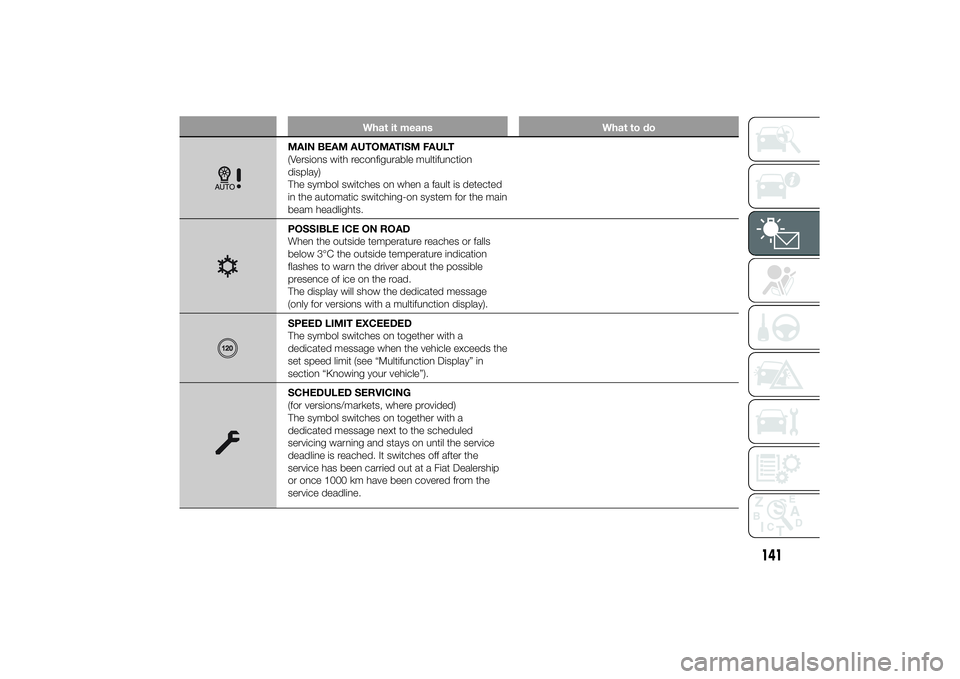
MAIN BEAM AUTOMATISM FAULT
(Versions with reconfigurable multifunction
display)
The symbol switches on when a fault is detected
in the automatic switching-on system for the main
beam headlights.POSSIBLE ICE ON ROAD
When the outside temperature reaches or falls
below 3°C the outside temperature indication
flashes to warn the driver about the possible
presence of ice on the road.
The display will show the dedicated message
(only for versions with a multifunction display).SPEED LIMIT EXCEEDED
The symbol switches on together with a
dedicated message when the vehicle exceeds the
set speed limit (see “Multifunction Display” in
section “Knowing your vehicle”).SCHEDULED SERVICING
(for versions/markets, where provided)
The symbol switches on together with a
dedicated message next to the scheduled
servicing warning and stays on until the service
deadline is reached. It switches off after the
service has been carried out at a Fiat Dealership
or once 1000 km have been covered from the
service deadline.
141
Page 146 of 367

What it means What to do
FUEL CUT-OFF DEVICE INERTIA SWITCH
TRIPPED
(Versions with reconfigurable multifunction
display)
This symbol on the display switches on when the
fuel cut-off device inertia switch has tripped.For the fuel cut-off inertia switch reactivation
procedure, refer to the "Electrical power supply
and fuel cut-off switch" section in the "Knowing
your vehicle" chapter. If it is still not possible to
restore the fuel supply, contact a Fiat Dealership.PARKING SENSOR FAILURE
(Versions with reconfigurable multifunction
display)
The symbol switches on together with a
dedicated message to indicate a failure of the
parking sensors.DRIVING ADVISOR SYSTEM FAILURE
(Versions with reconfigurable multifunction
display)
The symbol switches on in the display with the
two direction warning lights
and
lighting up,
along with an acoustic signal and a dedicated
message.
TRAFFIC SIGN RECOGNITION FAILURE
The symbol switches on in the display together
with a dedicated message to indicate a failure of
the Traffic Sign Recognition.
LIMITED RANGE
The display shows a dedicated message to warn
the driver that the vehicle's range is less than 50
km.
142
KNOWING THE INSTRUMENT PANEL
Page 147 of 367
What it means What to do
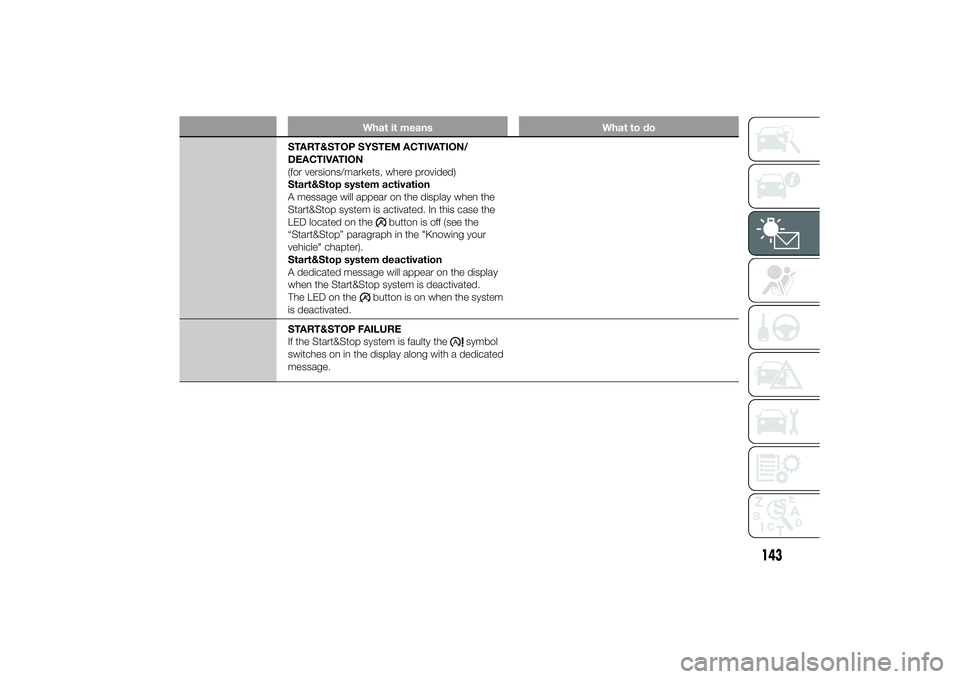
START&STOP SYSTEM ACTIVATION/
DEACTIVATION
(for versions/markets, where provided)
Start&Stop system activation
A message will appear on the display when the
Start&Stop system is activated. In this case the
LED located on the
button is off (see the
“Start&Stop” paragraph in the "Knowing your
vehicle" chapter).
Start&Stop system deactivation
A dedicated message will appear on the display
when the Start&Stop system is deactivated.
The LED on the
button is on when the system
is deactivated.
START&STOP FAILURE
If the Start&Stop system is faulty the
symbol
switches on in the display along with a dedicated
message.
143
Page 148 of 367
144
This page is intentionally left blank
Page 149 of 367
SAFETY
The chapter that you are about to read
is very important: it describes the
safety systems with which the car is
equipped and provides instructions on
how to use them correctly.SEAT BELTS ...................................146
SBR SYSTEM .................................147
PRETENSIONERS...........................147
CARRYING CHILDREN SAFELY ......150
SETUP FOR “UNIVERSAL ISOFIX”
CHILD RESTRAINT SYSTEM ..........154
FRONT AIRBAGS............................160
SIDE BAGS .....................................165
145
Page 150 of 367
SEAT BELTSUSING THE SEAT BELTS
The belt should be worn keeping the
torso straight and rested against the
backrest.
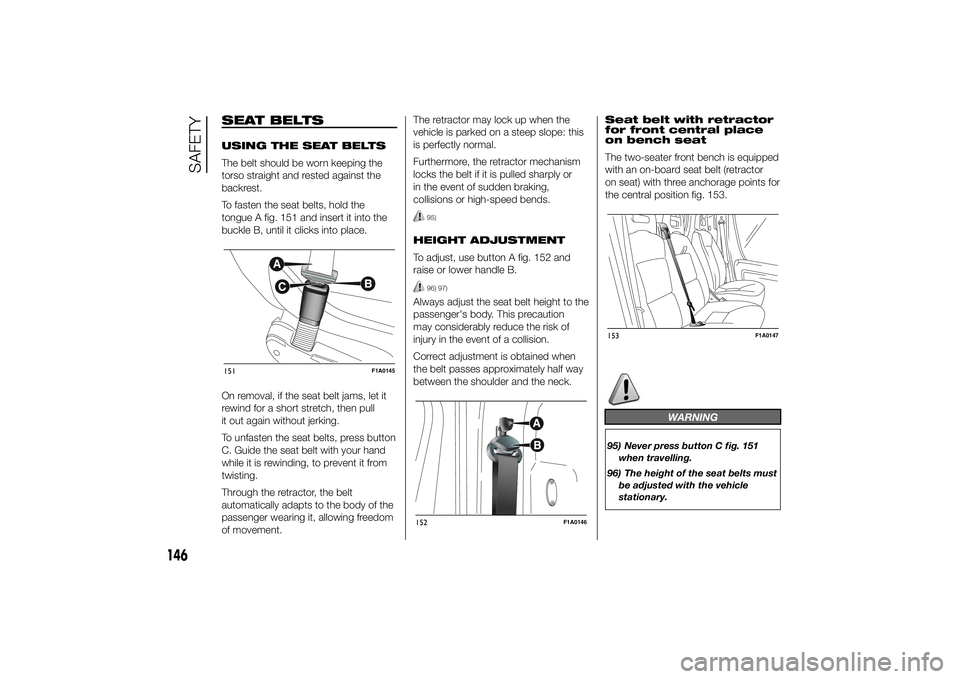
To fasten the seat belts, hold the
tongue A fig. 151 and insert it into the
buckle B, until it clicks into place.
On removal, if the seat belt jams, let it
rewind for a short stretch, then pull
it out again without jerking.
To unfasten the seat belts, press button
C. Guide the seat belt with your hand
while it is rewinding, to prevent it from
twisting.
Through the retractor, the belt
automatically adapts to the body of the
passenger wearing it, allowing freedom
of movement.The retractor may lock up when the
vehicle is parked on a steep slope: this
is perfectly normal.
Furthermore, the retractor mechanism
locks the belt if it is pulled sharply or
in the event of sudden braking,
collisions or high-speed bends.
95)
HEIGHT ADJUSTMENT
To adjust, use button A fig. 152 and
raise or lower handle B.
96) 97)
Always adjust the seat belt height to the
passenger's body. This precaution
may considerably reduce the risk of
injury in the event of a collision.
Correct adjustment is obtained when
the belt passes approximately half way
between the shoulder and the neck.Seat belt with retractor
for front central place
on bench seat
The two-seater front bench is equipped
with an on-board seat belt (retractor
on seat) with three anchorage points for
the central position fig. 153.
WARNING
95) Never press button C fig. 151
when travelling.
96) The height of the seat belts must
be adjusted with the vehicle
stationary.
151
F1A0145
152
F1A0146
153
F1A0147
146
SAFETY