FIAT SEDICI 2009 2.G Owners Manual
Manufacturer: FIAT, Model Year: 2009, Model line: SEDICI, Model: FIAT SEDICI 2009 2.GPages: 270, PDF Size: 3.44 MB
Page 201 of 270
200
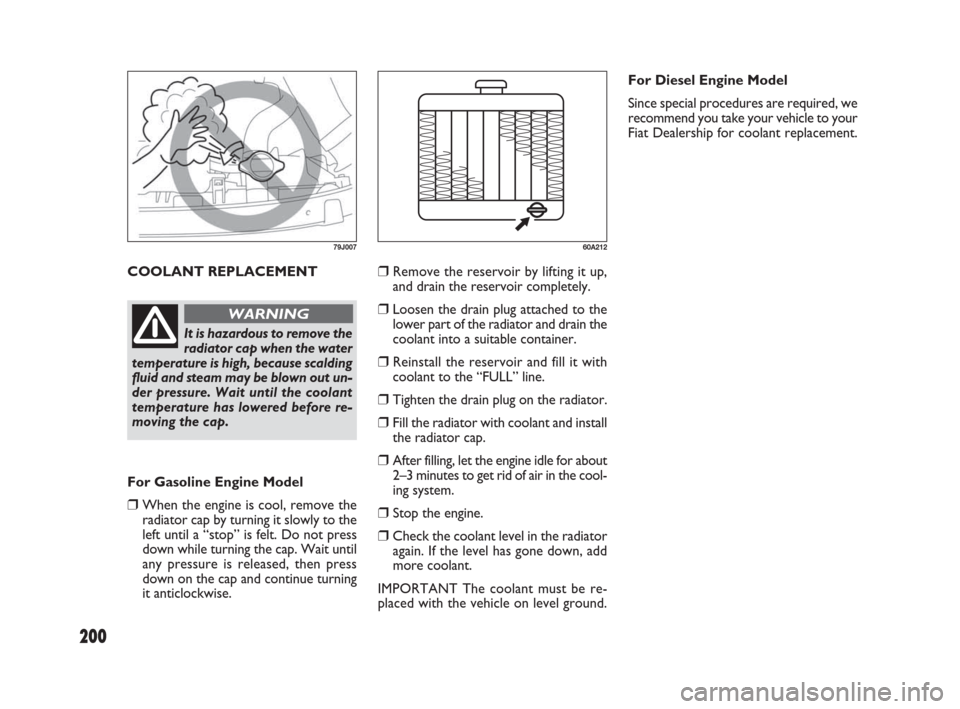
COOLANT REPLACEMENT
79J007
It is hazardous to remove the
radiator cap when the water
temperature is high, because scalding
fluid and steam may be blown out un-
der pressure. Wait until the coolant
temperature has lowered before re-
moving the cap.
WARNING
For Gasoline Engine Model
❒When the engine is cool, remove the
radiator cap by turning it slowly to the
left until a “stop” is felt. Do not press
down while turning the cap. Wait until
any pressure is released, then press
down on the cap and continue turning
it anticlockwise.For Diesel Engine Model
Since special procedures are required, we
recommend you take your vehicle to your
Fiat Dealership for coolant replacement.
❒Remove the reservoir by lifting it up,
and drain the reservoir completely.
❒Loosen the drain plug attached to the
lower part of the radiator and drain the
coolant into a suitable container.
❒Reinstall the reservoir and fill it with
coolant to the “FULL” line.
❒Tighten the drain plug on the radiator.
❒Fill the radiator with coolant and install
the radiator cap.
❒After filling, let the engine idle for about
2–3 minutes to get rid of air in the cool-
ing system.
❒Stop the engine.
❒Check the coolant level in the radiator
again. If the level has gone down, add
more coolant.
IMPORTANT The coolant must be re-
placed with the vehicle on level ground.
60A212
183-230 SEDICI LUM FL GB 1E 19-06-2009 11:00 Pagina 200
Page 202 of 270
201
AIR CLEANER
If the air cleaner is clogged with dust, there
will be greater intake resistance, result-
ing in decreased power output and in-
creased fuel consumption.
IMPORTANT Damage may result if the
washer motor is operated with no fluid in
the washer tank.
79J091
Front and rear (for versions/markets, where provided)WINDSHIELD WASHER
FLUID
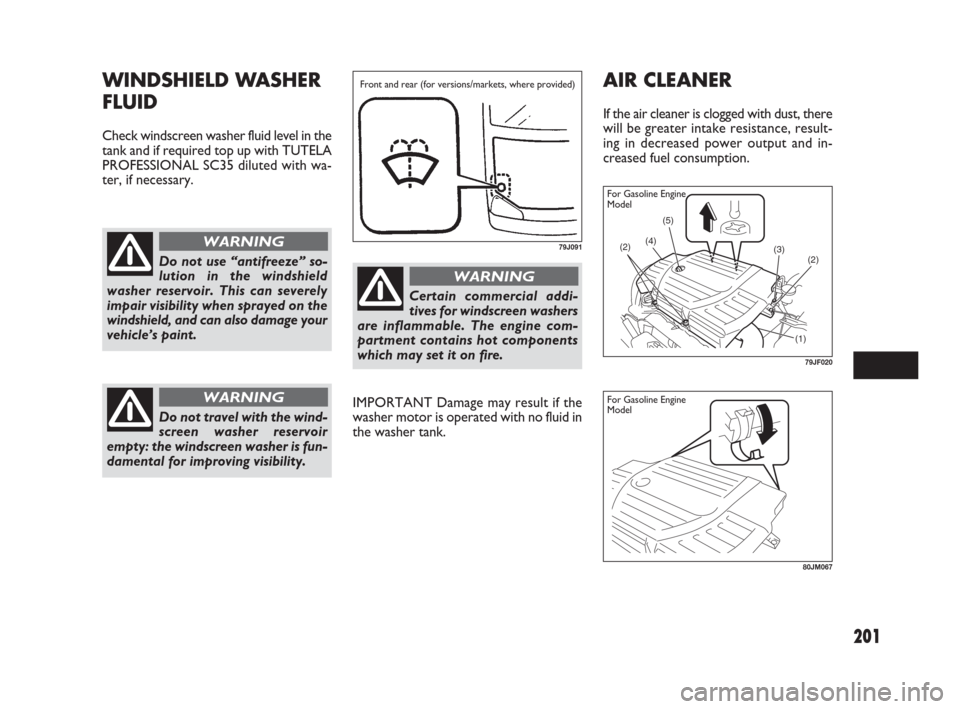
Check windscreen washer fluid level in the
tank and if required top up with TUTELA
PROFESSIONAL SC35 diluted with wa-
ter, if necessary.
Do not use “antifreeze” so-
lution in the windshield
washer reservoir. This can severely
impair visibility when sprayed on the
windshield, and can also damage your
vehicle’s paint.
WARNING
Certain commercial addi-
tives for windscreen washers
are inflammable. The engine com-
partment contains hot components
which may set it on fire.
WARNING
Do not travel with the wind-
screen washer reservoir
empty: the windscreen washer is fun-
damental for improving visibility.
WARNING
(4)(5)
(1) (2)
(3)
(2)
79JF020
80JM067
For Gasoline Engine
Model
For Gasoline Engine
Model
183-230 SEDICI LUM FL GB 1E 19-06-2009 11:00 Pagina 201
Page 203 of 270
202
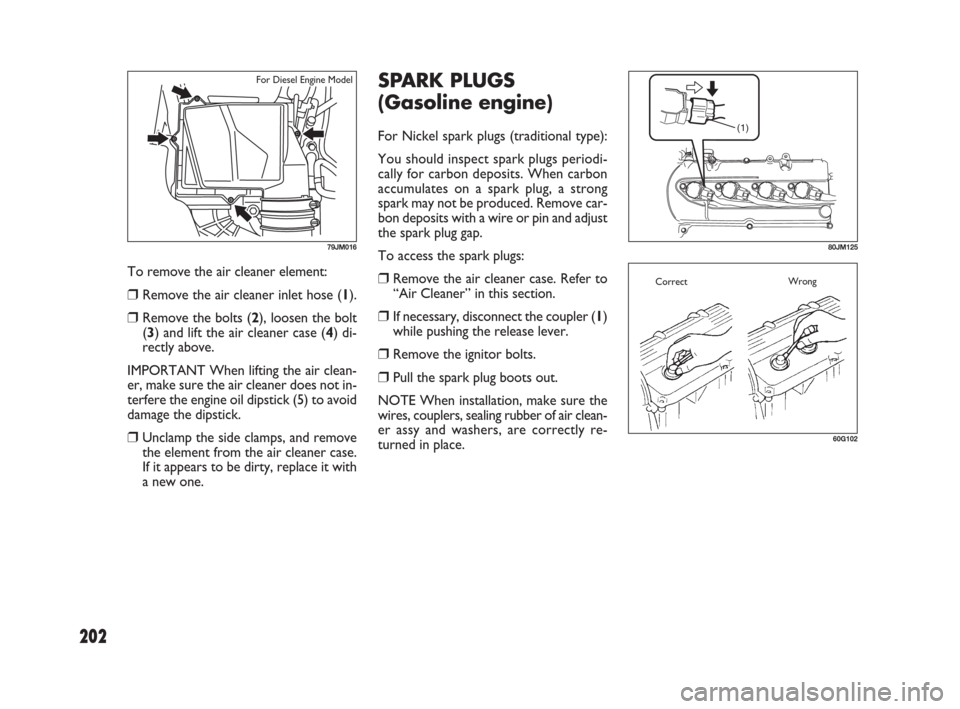
To remove the air cleaner element:
❒Remove the air cleaner inlet hose (1).
❒Remove the bolts (2), loosen the bolt
(3) and lift the air cleaner case (4) di-
rectly above.
IMPORTANT When lifting the air clean-
er, make sure the air cleaner does not in-
terfere the engine oil dipstick (5) to avoid
damage the dipstick.
❒Unclamp the side clamps, and remove
the element from the air cleaner case.
If it appears to be dirty, replace it with
a new one.
SPARK PLUGS
(Gasoline engine)
For Nickel spark plugs (traditional type):
You should inspect spark plugs periodi-
cally for carbon deposits. When carbon
accumulates on a spark plug, a strong
spark may not be produced. Remove car-
bon deposits with a wire or pin and adjust
the spark plug gap.
To access the spark plugs:
❒Remove the air cleaner case. Refer to
“Air Cleaner” in this section.
❒If necessary, disconnect the coupler (1)
while pushing the release lever.
❒Remove the ignitor bolts.
❒Pull the spark plug boots out.
NOTE When installation, make sure the
wires, couplers, sealing rubber of air clean-
er assy and washers, are correctly re-
turned in place.
(1)
80JM125
60G102
CorrectWrong
79JM016
For Diesel Engine Model
183-230 SEDICI LUM FL GB 1E 19-06-2009 11:00 Pagina 202
Page 204 of 270
203
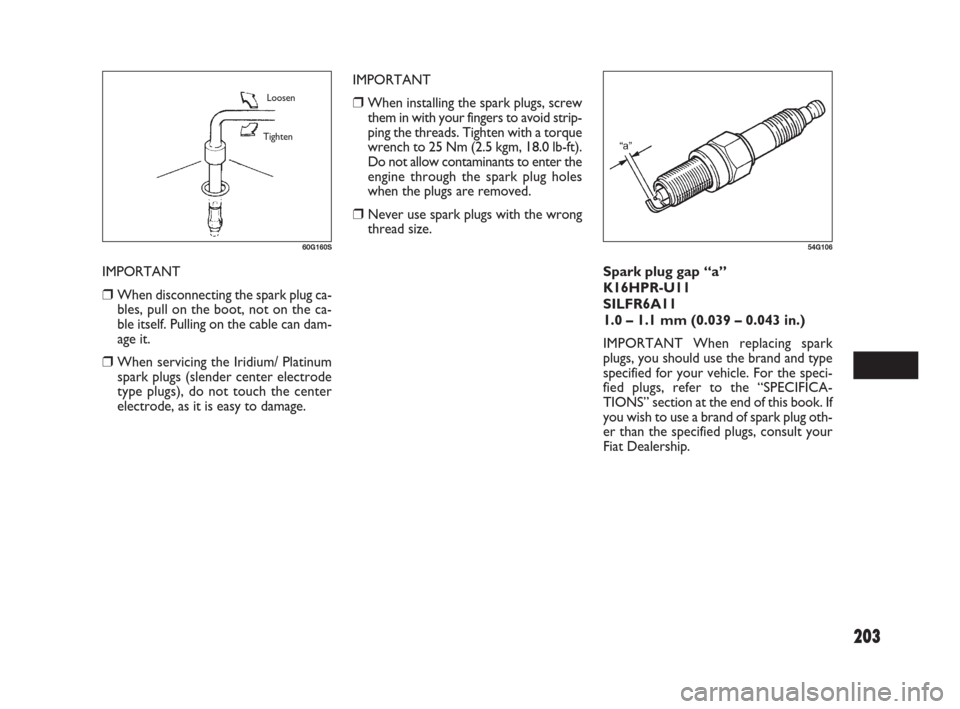
Spark plug gap “a”
K16HPR-U11
SILFR6A11
1.0 – 1.1 mm (0.039 – 0.043 in.)
IMPORTANT When replacing spark
plugs, you should use the brand and type
specified for your vehicle. For the speci-
fied plugs, refer to the “SPECIFICA-
TIONS” section at the end of this book. If
you wish to use a brand of spark plug oth-
er than the specified plugs, consult your
Fiat Dealership.
54G106
IMPORTANT
❒When installing the spark plugs, screw
them in with your fingers to avoid strip-
ping the threads. Tighten with a torque
wrench to 25 Nm (2.5 kgm, 18.0 lb-ft).
Do not allow contaminants to enter the
engine through the spark plug holes
when the plugs are removed.
❒Never use spark plugs with the wrong
thread size.
IMPORTANT
❒When disconnecting the spark plug ca-
bles, pull on the boot, not on the ca-
ble itself. Pulling on the cable can dam-
age it.
❒When servicing the Iridium/ Platinum
spark plugs (slender center electrode
type plugs), do not touch the center
electrode, as it is easy to damage.
60G160S
Loosen
Tighten
183-230 SEDICI LUM FL GB 1E 19-06-2009 11:00 Pagina 203
Page 205 of 270
204
NOTE If your engine is equipped with the
hightension cord type ignition wiring and
you experience some firing problem of
spark plugs, such as, hard engine- starting,
misfire etc., the cause may be located not
only on spark plugs but also on deterio-
rated ignition wirings (generally, used for
more than 80,000 km or five years). If
spark plug replacement does not solve the
problem, have the ignition wiring and oth-
er ignition system inspected by your Fiat
Dealership.FUEL FILTER
(Diesel engine)
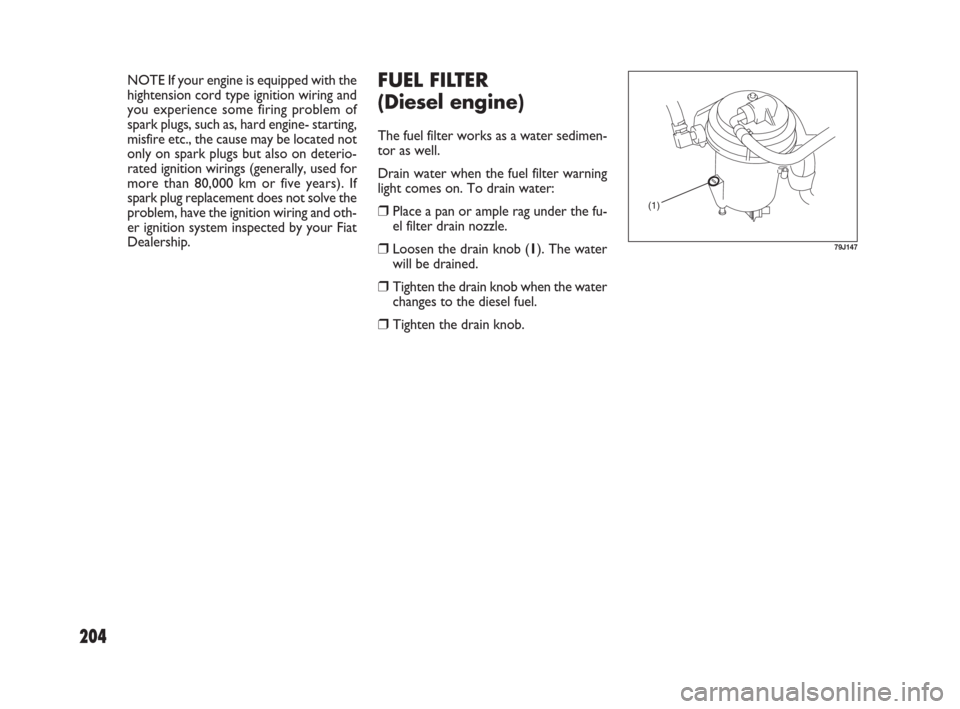
The fuel filter works as a water sedimen-
tor as well.
Drain water when the fuel filter warning
light comes on. To drain water:
❒Place a pan or ample rag under the fu-
el filter drain nozzle.
❒Loosen the drain knob (1). The water
will be drained.
❒Tighten the drain knob when the water
changes to the diesel fuel.
❒Tighten the drain knob.
(1)
79J147
183-230 SEDICI LUM FL GB 1E 19-06-2009 11:00 Pagina 204
Page 206 of 270
205
NOTE With disc brakes, the fluid level can
be expected to gradually fall as the brake
pads wear.
BRAKES
BRAKE FLUID
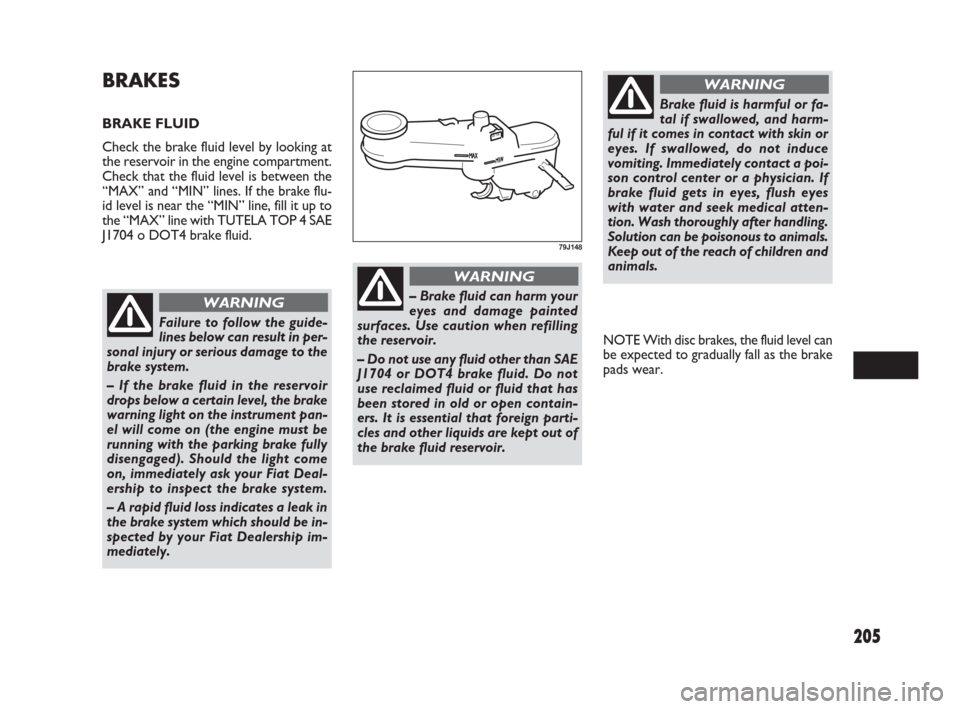
Check the brake fluid level by looking at
the reservoir in the engine compartment.
Check that the fluid level is between the
“MAX” and “MIN” lines. If the brake flu-
id level is near the “MIN” line, fill it up to
the “MAX” line with TUTELA TOP 4 SAE
J1704 o DOT4 brake fluid.
79J148
Failure to follow the guide-
lines below can result in per-
sonal injury or serious damage to the
brake system.
– If the brake fluid in the reservoir
drops below a certain level, the brake
warning light on the instrument pan-
el will come on (the engine must be
running with the parking brake fully
disengaged). Should the light come
on, immediately ask your Fiat Deal-
ership to inspect the brake system.
– A rapid fluid loss indicates a leak in
the brake system which should be in-
spected by your Fiat Dealership im-
mediately.
WARNING– Brake fluid can harm your
eyes and damage painted
surfaces. Use caution when refilling
the reservoir.
– Do not use any fluid other than SAE
J1704 or DOT4 brake fluid. Do not
use reclaimed fluid or fluid that has
been stored in old or open contain-
ers. It is essential that foreign parti-
cles and other liquids are kept out of
the brake fluid reservoir.
WARNING
Brake fluid is harmful or fa-
tal if swallowed, and harm-
ful if it comes in contact with skin or
eyes. If swallowed, do not induce
vomiting. Immediately contact a poi-
son control center or a physician. If
brake fluid gets in eyes, flush eyes
with water and seek medical atten-
tion. Wash thoroughly after handling.
Solution can be poisonous to animals.
Keep out of the reach of children and
animals.
WARNING
183-230 SEDICI LUM FL GB 1E 19-06-2009 11:00 Pagina 205
Page 207 of 270
206
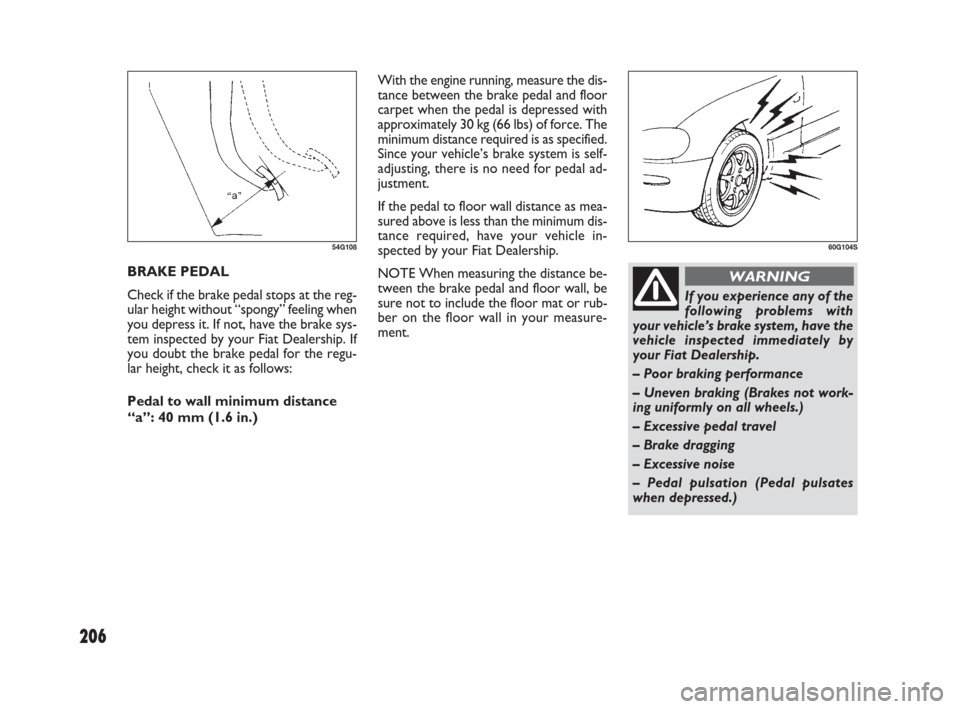
With the engine running, measure the dis-
tance between the brake pedal and floor
carpet when the pedal is depressed with
approximately 30 kg (66 lbs) of force. The
minimum distance required is as specified.
Since your vehicle’s brake system is self-
adjusting, there is no need for pedal ad-
justment.
If the pedal to floor wall distance as mea-
sured above is less than the minimum dis-
tance required, have your vehicle in-
spected by your Fiat Dealership.
NOTE When measuring the distance be-
tween the brake pedal and floor wall, be
sure not to include the floor mat or rub-
ber on the floor wall in your measure-
ment. BRAKE PEDAL
Check if the brake pedal stops at the reg-
ular height without “spongy” feeling when
you depress it. If not, have the brake sys-
tem inspected by your Fiat Dealership. If
you doubt the brake pedal for the regu-
lar height, check it as follows:
Pedal to wall minimum distance
“a”: 40 mm (1.6 in.)
54G10860G104S
If you experience any of the
following problems with
your vehicle’s brake system, have the
vehicle inspected immediately by
your Fiat Dealership.
– Poor braking performance
– Uneven braking (Brakes not work-
ing uniformly on all wheels.)
– Excessive pedal travel
– Brake dragging
– Excessive noise
– Pedal pulsation (Pedal pulsates
when depressed.)
WARNING
183-230 SEDICI LUM FL GB 1E 19-06-2009 11:00 Pagina 206
Page 208 of 270
207
STEERING
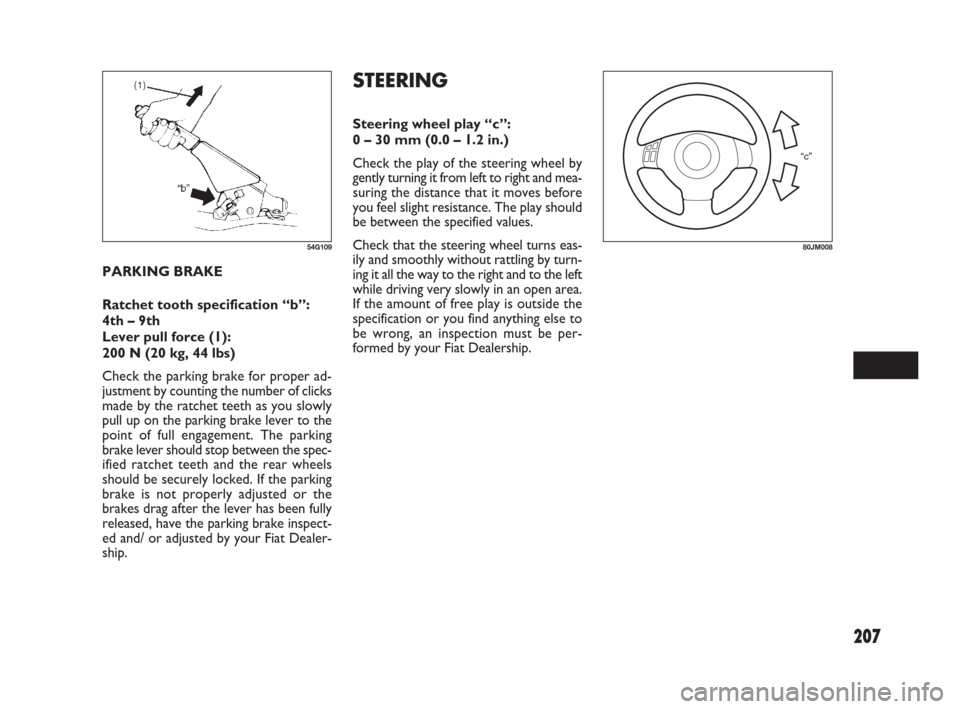
Steering wheel play “c”:
0 – 30 mm (0.0 – 1.2 in.)
Check the play of the steering wheel by
gently turning it from left to right and mea-
suring the distance that it moves before
you feel slight resistance. The play should
be between the specified values.
Check that the steering wheel turns eas-
ily and smoothly without rattling by turn-
ing it all the way to the right and to the left
while driving very slowly in an open area.
If the amount of free play is outside the
specification or you find anything else to
be wrong, an inspection must be per-
formed by your Fiat Dealership. PARKING BRAKE
Ratchet tooth specification “b”:
4th – 9th
Lever pull force (1):
200 N (20 kg, 44 lbs)
Check the parking brake for proper ad-
justment by counting the number of clicks
made by the ratchet teeth as you slowly
pull up on the parking brake lever to the
point of full engagement. The parking
brake lever should stop between the spec-
ified ratchet teeth and the rear wheels
should be securely locked. If the parking
brake is not properly adjusted or the
brakes drag after the lever has been fully
released, have the parking brake inspect-
ed and/ or adjusted by your Fiat Dealer-
ship.
54G109
“c”
80JM008
183-230 SEDICI LUM FL GB 1E 19-06-2009 11:00 Pagina 207
Page 209 of 270
208
TIRES
The front and rear tire pressure specifi-
cations for your vehicle are listed on the
Tire Information Label. Both the front and
rear tires should have the specified tire
pressure.
Note that the value does not apply to the
compact spare tire (for versions/markets,
where provided).
TIRE INSPECTION
Inspect your vehicle’s tires at least once
a month by performing the following
checks:
❒Measure the air pressure with a tire
gauge. Adjust the pressure if necessary.
Remember to check the spare tire, too.
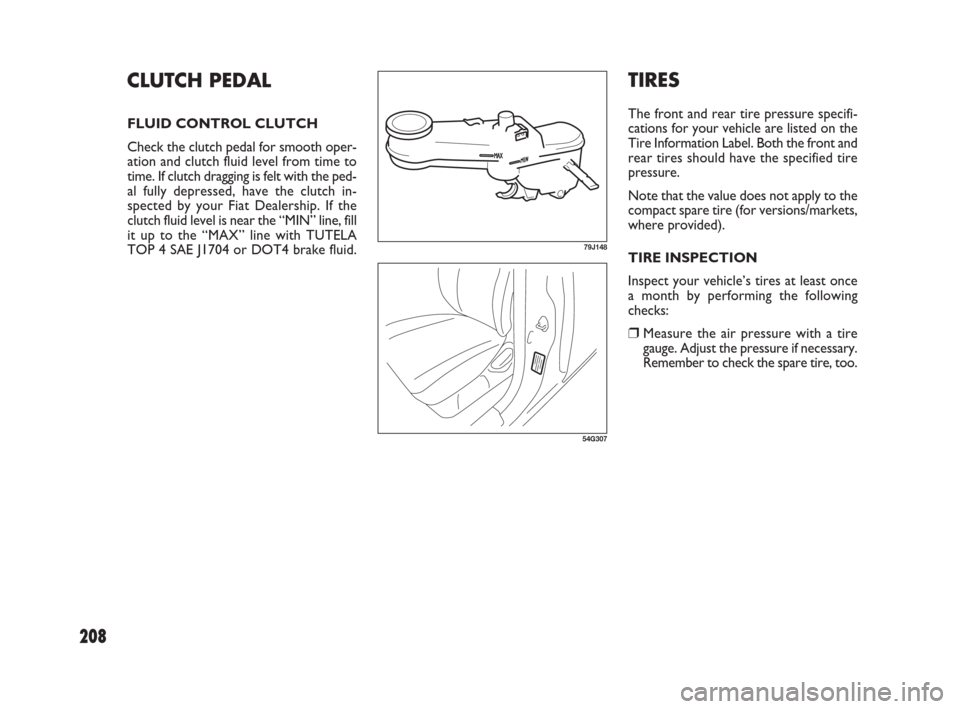
CLUTCH PEDAL
FLUID CONTROL CLUTCH
Check the clutch pedal for smooth oper-
ation and clutch fluid level from time to
time. If clutch dragging is felt with the ped-
al fully depressed, have the clutch in-
spected by your Fiat Dealership. If the
clutch fluid level is near the “MIN” line, fill
it up to the “MAX” line with TUTELA
TOP 4 SAE J1704 or DOT4 brake fluid.
79J148
54G307
183-230 SEDICI LUM FL GB 1E 19-06-2009 11:00 Pagina 208
Page 210 of 270
209
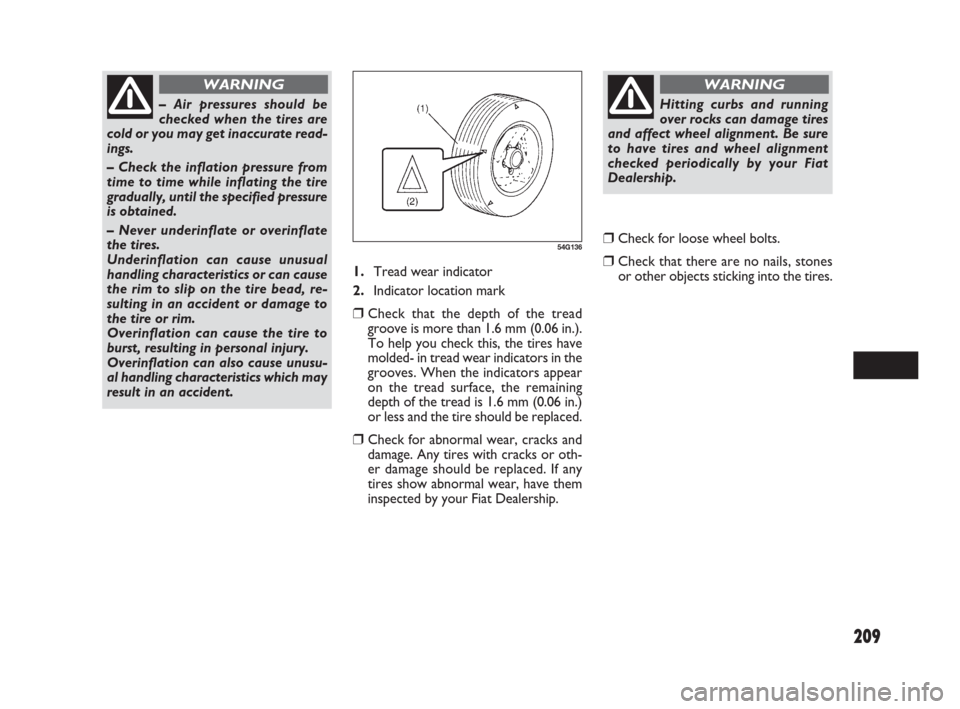
1.Tread wear indicator
2.Indicator location mark
❒Check that the depth of the tread
groove is more than 1.6 mm (0.06 in.).
To help you check this, the tires have
molded- in tread wear indicators in the
grooves. When the indicators appear
on the tread surface, the remaining
depth of the tread is 1.6 mm (0.06 in.)
or less and the tire should be replaced.
❒Check for abnormal wear, cracks and
damage. Any tires with cracks or oth-
er damage should be replaced. If any
tires show abnormal wear, have them
inspected by your Fiat Dealership.
❒Check for loose wheel bolts.
❒Check that there are no nails, stones
or other objects sticking into the tires.
54G136
– Air pressures should be
checked when the tires are
cold or you may get inaccurate read-
ings.
– Check the inflation pressure from
time to time while inflating the tire
gradually, until the specified pressure
is obtained.
– Never underinflate or overinflate
the tires.
Underinflation can cause unusual
handling characteristics or can cause
the rim to slip on the tire bead, re-
sulting in an accident or damage to
the tire or rim.
Overinflation can cause the tire to
burst, resulting in personal injury.
Overinflation can also cause unusu-
al handling characteristics which may
result in an accident.
WARNING
Hitting curbs and running
over rocks can damage tires
and affect wheel alignment. Be sure
to have tires and wheel alignment
checked periodically by your Fiat
Dealership.
WARNING
183-230 SEDICI LUM FL GB 1E 19-06-2009 11:00 Pagina 209