FORD FIESTA 2007 Workshop Manual
FIESTA 2007
FORD
FORD
https://www.carmanualsonline.info/img/11/56936/w960_56936-0.png
FORD FIESTA 2007 Workshop Manual
Trending: 204-02, brake sensor, wiring, air condition, door open, door trim panel, towing
Page 951 of 1226
303-1 4-27 Electronic Engine Controls 303-1 4-27
REMOVAL AND INSTALLATION
Powertrain Control Module (PCM) - 2.OL Duratec-HE (M14),
Vehicles Without: PCM Security Shield
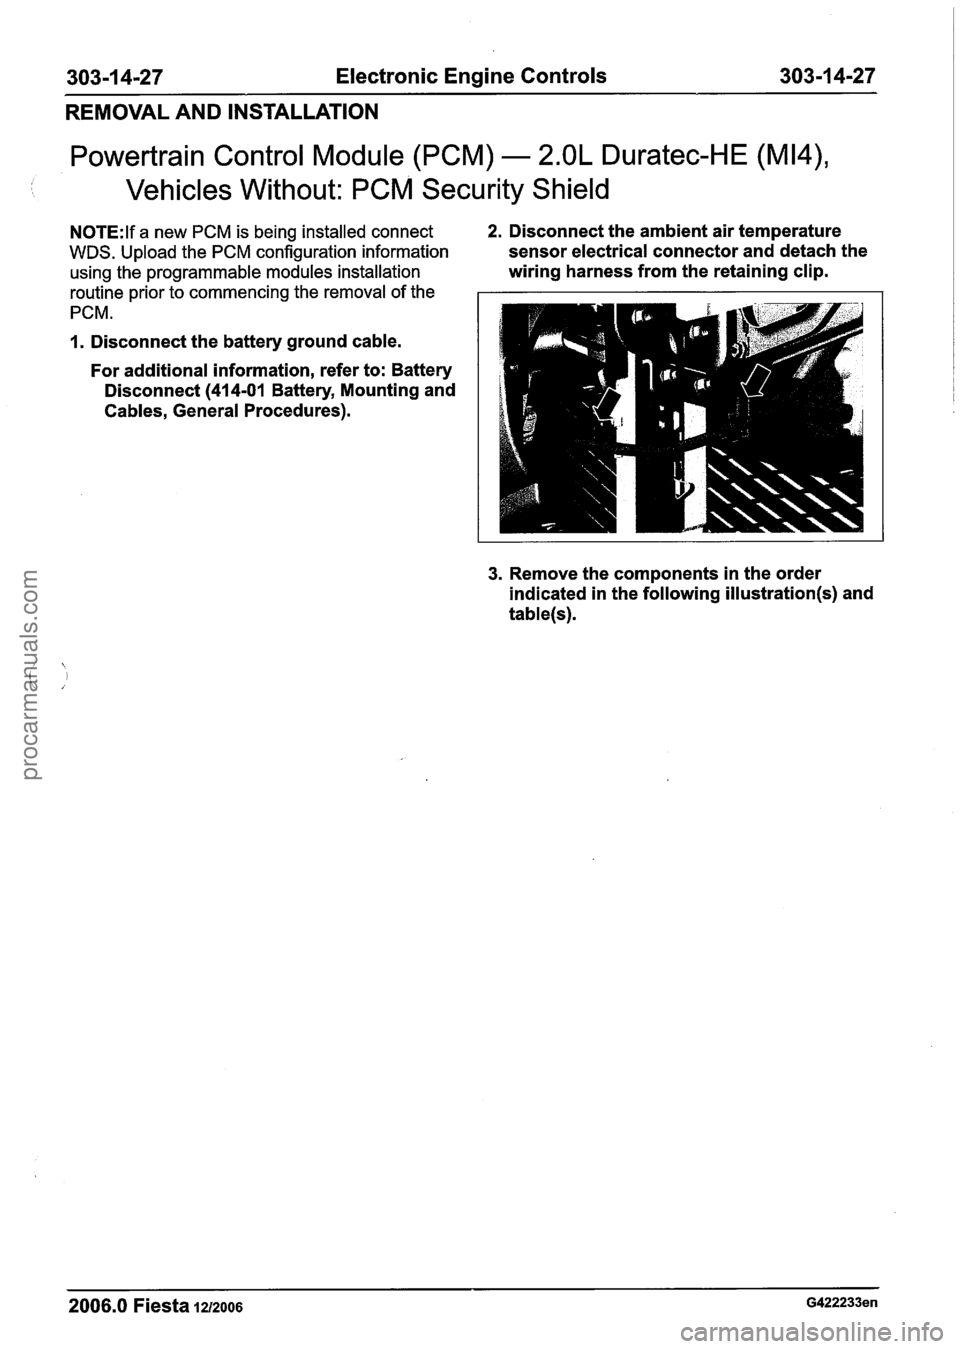
N0TE:lf a new PCM is being installed connect 2. Disconnect the ambient air temperature
WDS. Upload the PCM configuration information sensor electrical connector and detach the
using the programmable modules installation wiring harness from the retaining clip.
routine prior to commencing the removal of the
PCM.
1. Disconnect the battery ground cable.
For additional information, refer to: Battery
Disconnect
(414-01 Battery, Mounting and
Cables, General Procedures).
3. Remove the components in the order
indicated in the following
illustration(s) and
table(s).
2006.0 Fiesta 1212006 G422233en
procarmanuals.com
Page 952 of 1226
303-1 4-28 Electronic Engine Controls 303-1 4-28
REMOVAL AND INSTALLATION
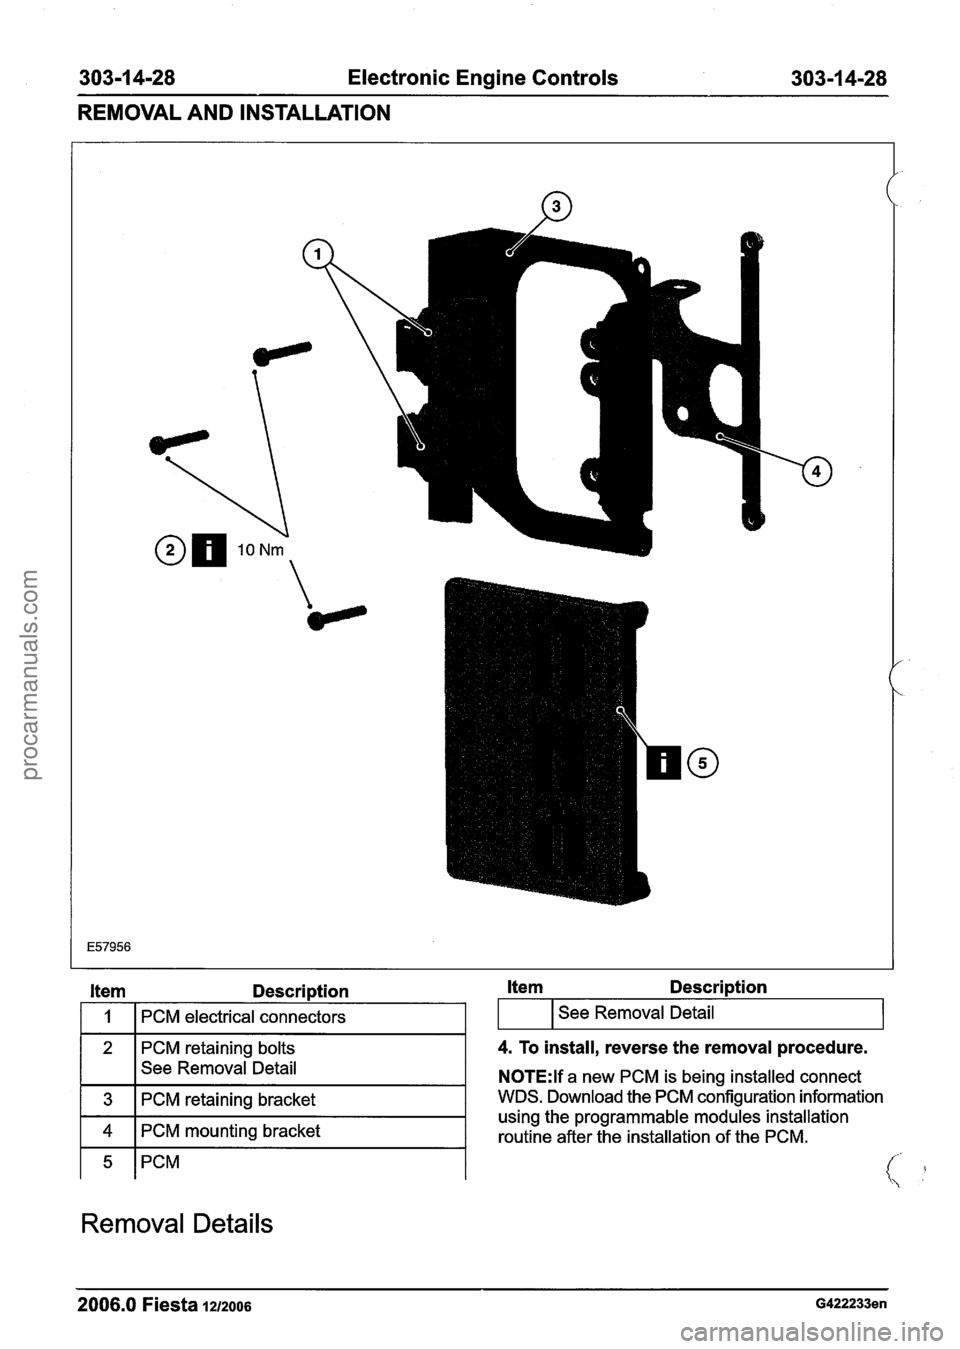
Item Description
I 1 I PCM electrical connectors I
121
PCM retaining bolts
See Removal Detail
1 3 1 PCM retaining bracket I
1 4 1 PCM mounting bracket I
Removal Details
Item Description - - -
I I See Removal Detail I
4. To install, reverse the removal procedure.
N0TE:lf a new PCM is being installed connect
WDS. Download the PCM configuration information
using the programmable modules installation
routine after the installation of the PCM.
2006.0 Fiesta 1212006 G422233en
procarmanuals.com
Page 953 of 1226
303-1 4-29 Electronic Engine Controls 303-1 4-29
REMOVAL AND INSTALLATION
Item 2 PCM retaining bolts
I. Support the PCM and PCM retaining bracket
, while removing the PCM retaining bolts.
1. Remove the PCM from the PCM retaining
bracket.
2006.0 Fiesta 1212006 G422233en
procarmanuals.com
Page 954 of 1226
303-1 4-30 Electronic Engine Controls 303-1 4-30
REMOVAL AND INSTALLATION
Heated Oxygen Sensor (H02S)(29 220 0) /
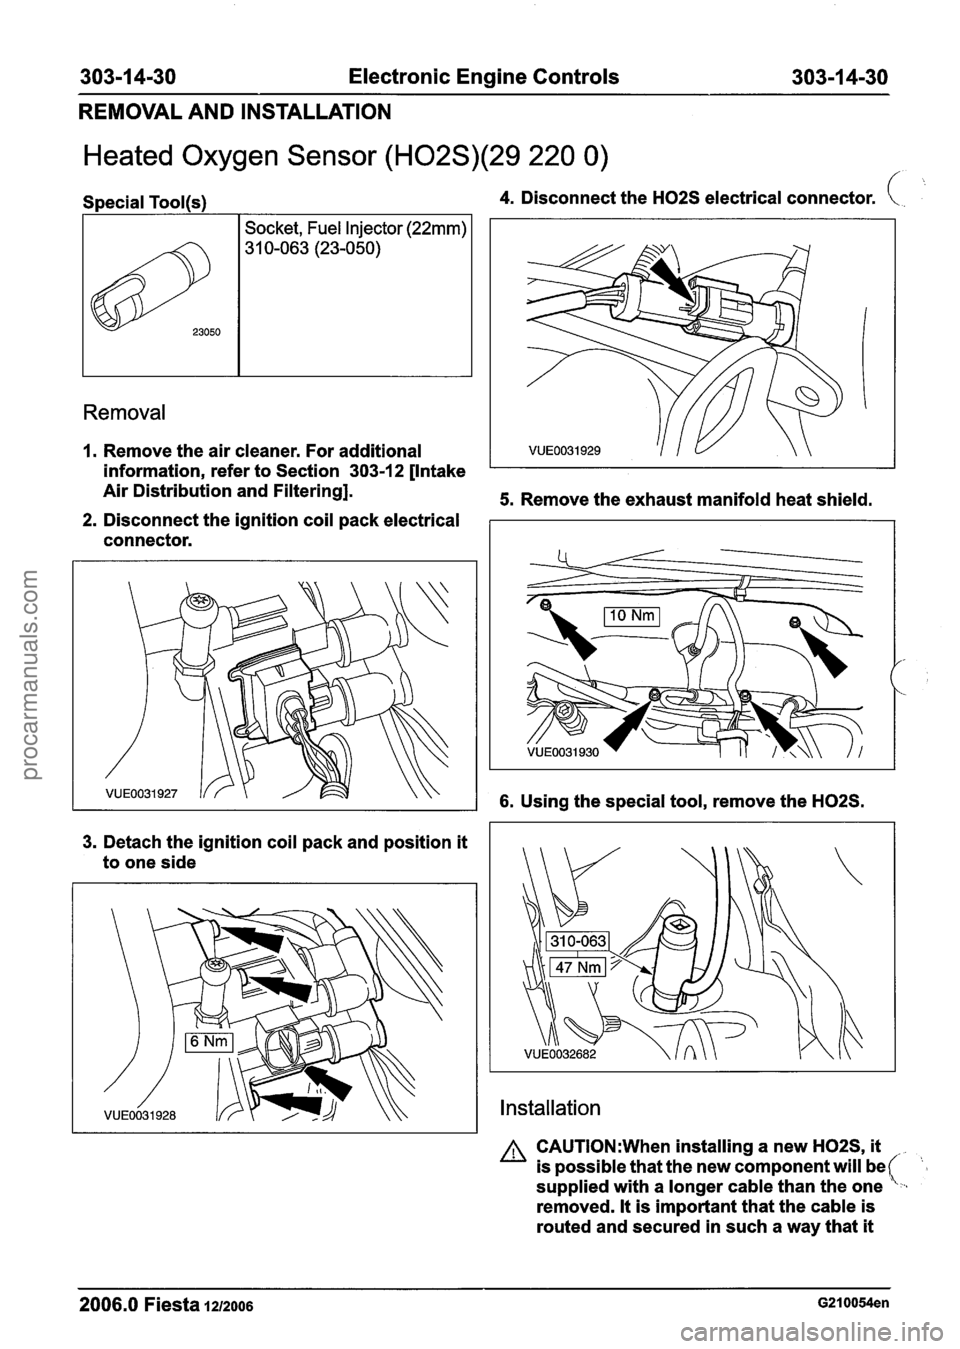
Removal
Special Tool(s) 4. Disconnect the H02S electrical connector. (. .. >k,
1. Remove the air cleaner. For additional
information, refer to Section 303-1 2 [Intake
Air Distribution and Filtering].
5. Remove the exhaust manifold heat shield.
2. Disconnect the ignition coil pack electrical
connector.
23050
3. Detach the ignition coil pack and position it
to one side
Socket, Fuel Injector (22mm)
31 0-063 (23-050)
6. Using the special tool, remove the H02S.
Installation
A CAUTI0N:When installing a new H02S, it
is possible that the new component will be (- supplied with a longer cable than the one ,
removed. It is important that the cable is
routed and secured in such a way that
it
2006.0 Fiesta 1212006 G210054en
procarmanuals.com
Page 955 of 1226
303-1 4-31 Electronic Engine Controls 303-1 4-31
REMOVAL AND INSTALLATION
cannot be damaged by heat or moving
components and will not cause a noise,
vibration or harshness
(NVH) issue.
1. To install, reverse the removal procedure.
2006.0 Fiesta 1212006 G210054en
procarmanuals.com
Page 956 of 1226
303-1 4-32 Electronic Engine Controls 303-1 4-32
REMOVAL AND INSTALLATION
Crankshaft Position (CKP) Sensor
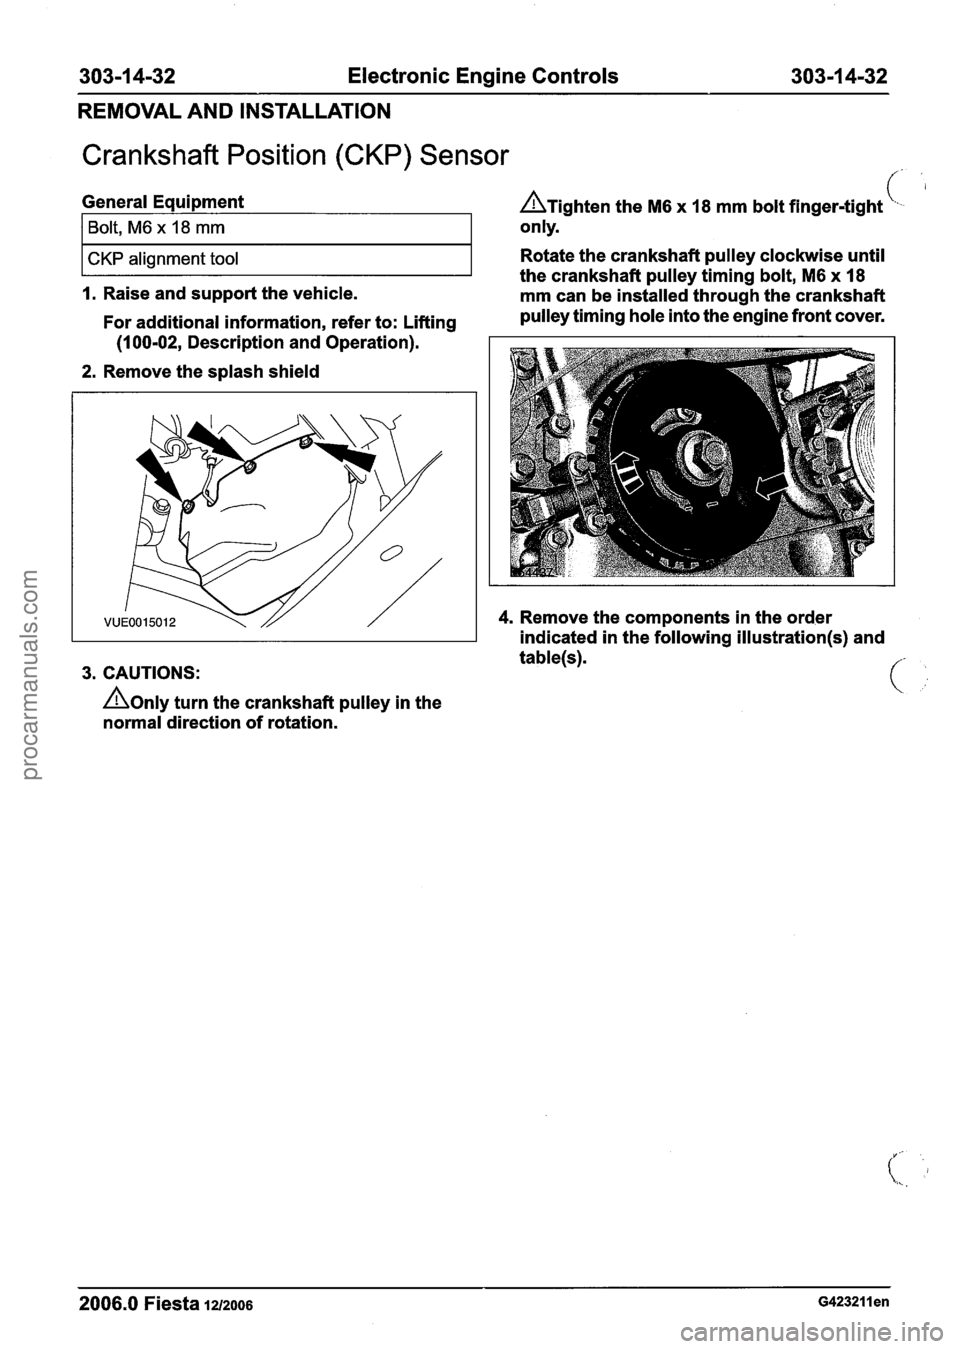
General Equipment A~i~hten the M6 x 18 mm bolt finger-tight L,. '
2. Remove the splash shield
I ~olt, ~6 x 18 mm
CKP alignment tool
3. CAUTIONS: only.
Rotate the crankshaft pulley clockwise until
A0nly turn the crankshaft pulley in the
normal direction of rotation. the
crankshaft pulley timing bolt,
M6 x 18
I. Raise and support the vehicle.
mm can be installed through the crankshaft
For additional information, refer to: Lifting pulley
timing hole into the engine front cover.
(1 00-02, Description and Operation).
4. Remove the components in the order
indicated in the following
illustration(s) and
2006.0 Fiesta 1212006 ~423211 en
procarmanuals.com
Page 957 of 1226
303-1 4-33 Electronic Engine Controls 303-1 4-33
REMOVAL AND INSTALLATION
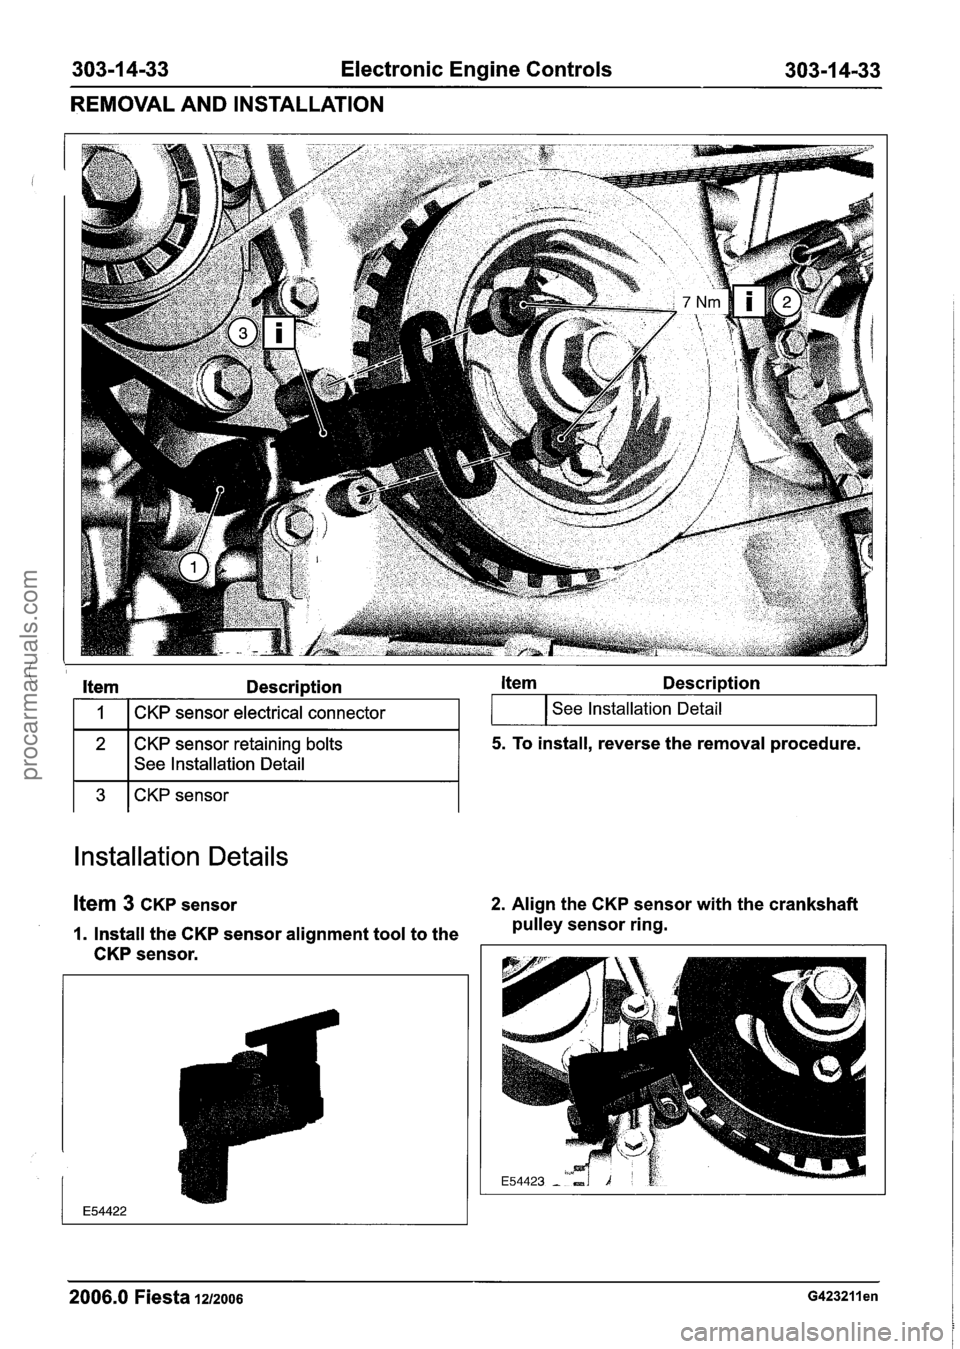
Item Description Item Description
1 3 1 CKP sensor
I 1 I CKP sensor electrical connector
2
Installation Details
I See Installation Detail
Item 3 CKP sensor 2. Align the CKP sensor with the crankshaft
1. Install the CKP sensor alignment tool to the pulley
sensor ring.
CKP sensor.
CKP sensor retaining bolts
See Installation Detail
2006.0 Fiesta 1212006 ~423211 en
I I J
5. To install, reverse the removal procedure.
procarmanuals.com
Page 958 of 1226
303-1 4-34 Electronic Engine Controls 303-1 4-34
REMOVAL AND INSTALLATION
Item 2 CKP sensor retaining bolts
I. Install the CKP sensor retaining bolts.
2. Remove the CKP sensor alignment tool.
2006.0 Fiesta iz1~006 ~423211 en
procarmanuals.com
Page 959 of 1226
303-1 4-35 Electronic Engine Controls 303-1 4-35
REMOVAL AND INSTALLATION
Knock Sensor (KS)
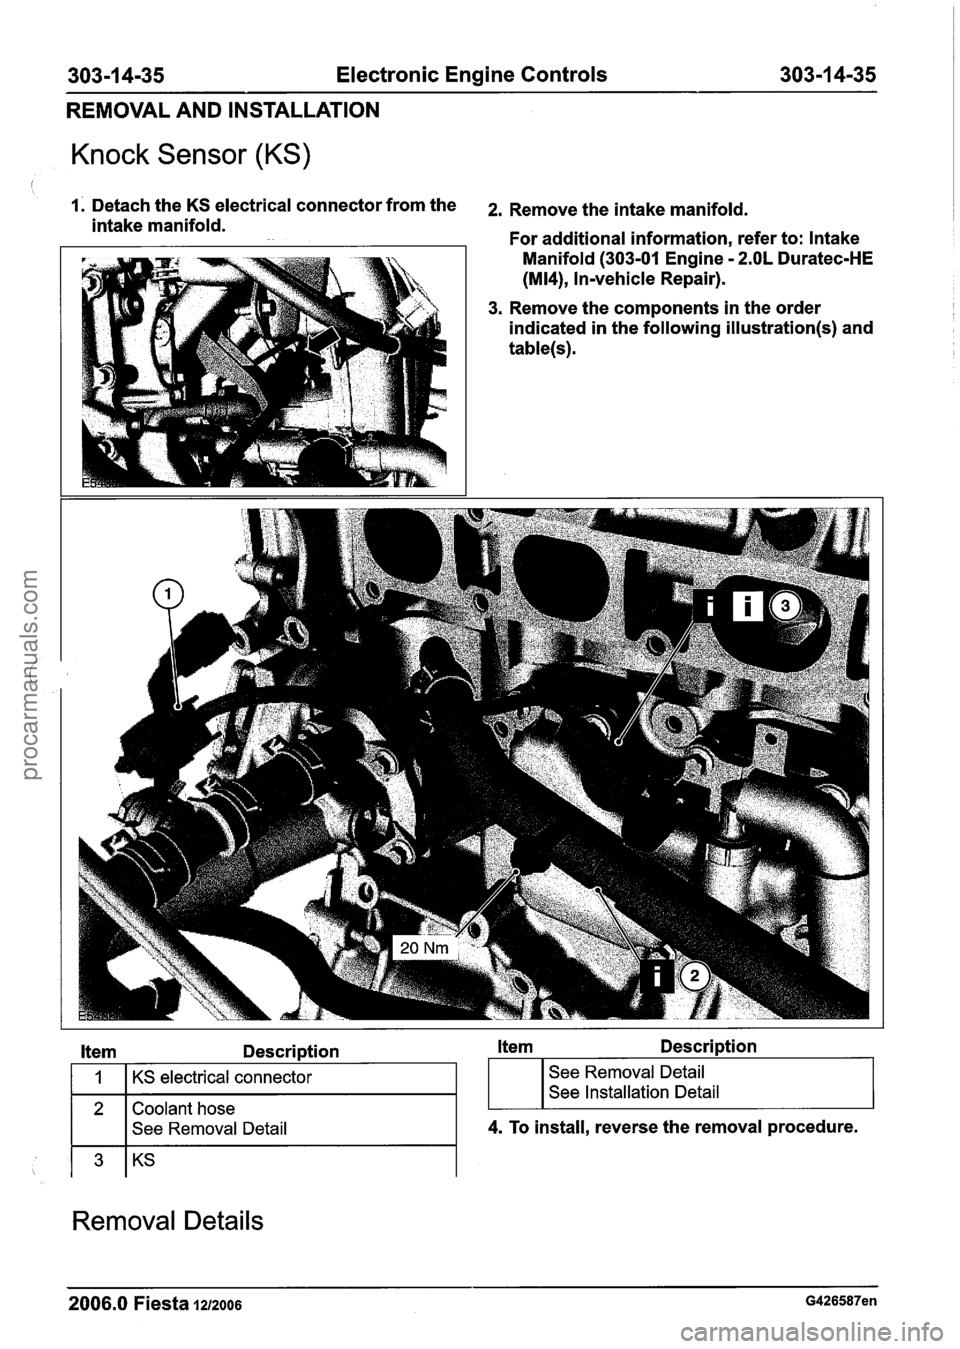
1. Detach the KS electrical connector from the 2, Remove the intake manifold. intake manifold.
For additional information, refer to: Intake
1 Manifold (303-01 Engine - 2.OL Duratec-HE
(M14), Invehicle Repair).
3. Remove the components in the order
indicated in the following
illustration(s) and
table(s).
Item Description Item Description
2 Coolant hose
I I See Removal Detail
1
I I
4. To install, reverse the removal procedure.
KS electrical connector
Removal Details
; I I
See Removal Detail
See Installation Detail
2006.0 Fiesta 1212006 G426587en
procarmanuals.com
Page 960 of 1226
303-1 4-36 Electronic Engine Controls 303-1 4-36
REMOVAL AND INSTALLATION
Ifem 2 Coolant hose kern 3 KS
I. Detach the coolant hose from the coolant N0TE:Make a note of the position of the KS and
hose retaining clip and position it to one
when installed.
make sure
it is positioned in the same position
.
side.
Installation Details
ltem 3 KS
NOTE: Prior to installing the KS, clean the engine
block and KS mating surfaces.
N0TE:Make sure the KS is installed in the same
position as removed.
(I.
2006.0 Fiesta 1212006 G426587en
procarmanuals.com
Trending: jump start terminals, warning lights, run flat, central locking, coolant, OBD port, oil
