FORD KUGA 2010 1.G User Guide
Manufacturer: FORD, Model Year: 2010, Model line: KUGA, Model: FORD KUGA 2010 1.GPages: 226, PDF Size: 8.07 MB
Page 11 of 226
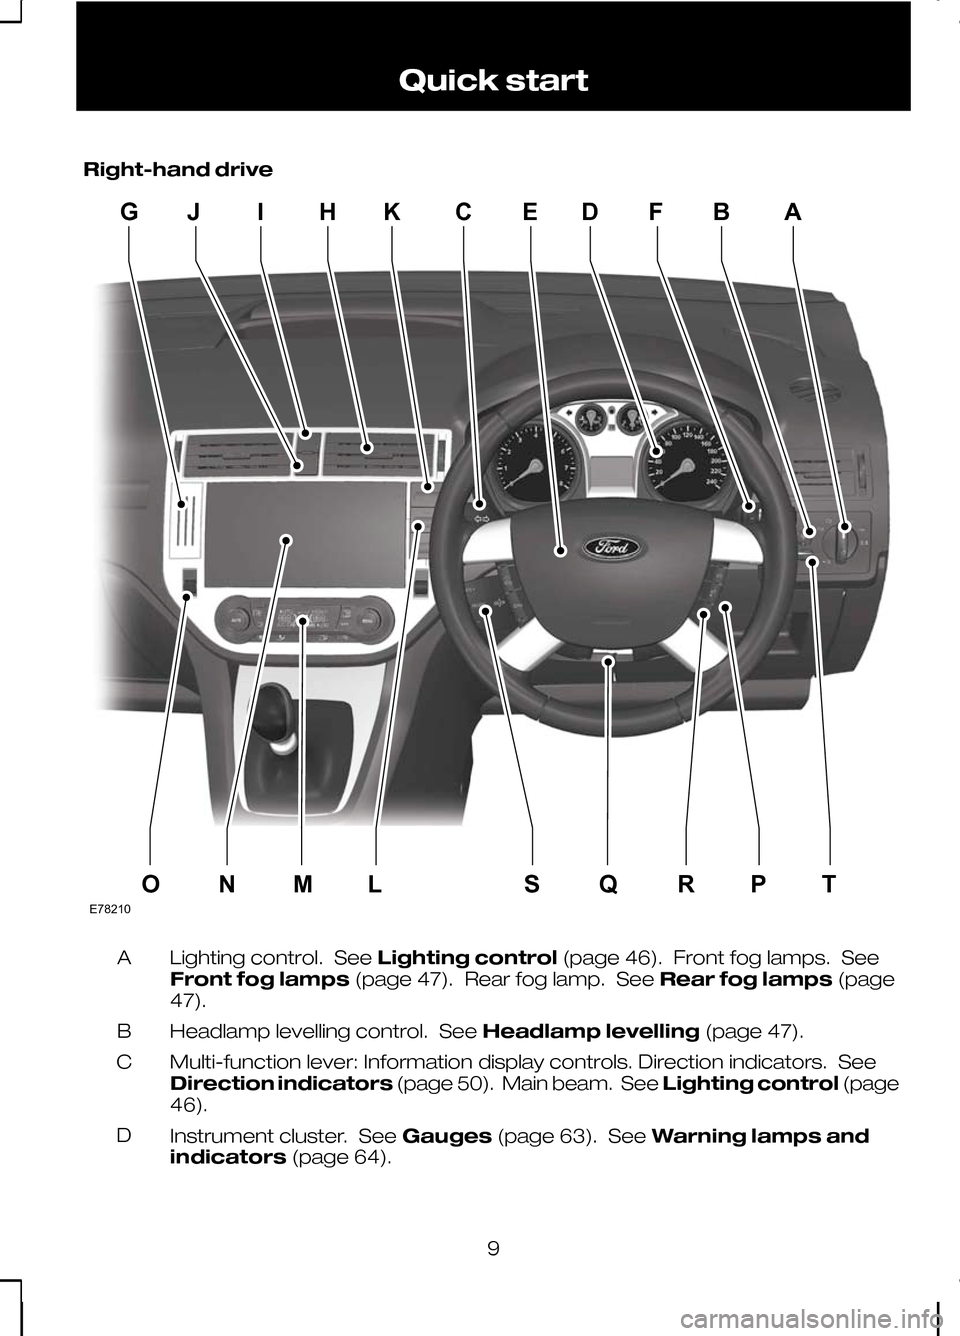
Right-hand drive
Lighting control. See
Lighting control(page 46). Front fog lamps. See
Front fog lamps (page 47). Rear fog lamp. See Rear fog lamps(page
47).
A
Headlamp levelling control. See Headlamp levelling(page 47).
B
Multi-function lever: Information display controls. Direction indicators. See
Direction indicators (page 50). Main beam. See Lighting control(page
46).
C
Instrument cluster. See Gauges(page 63). See Warning lamps and
indicators (page 64).
D
9 Quick startE78210IHGJKCEDFBAONMLSQRPT
Page 12 of 226
Horn.
E
Wiper lever. See Wipers and washers (page 41).
F
Card holder.
G
Air vents. See Air vents(page 80).
H
Hazard warning flasher switch. See Hazard warning flashers(page 48).
I
Airbag deactivation indicator. See Disabling the passenger airbag (page
25). Parking aid switch. See Using the parking aid(page 115).
J
Start button. See Keyless starting (page 101).
J
Heated windscreen switch. See Heated windows and mirrors (page
86).
K
Heated rear window switch. See Heated windows and mirrors (page
86).
L
Climate controls. See Climate control(page 80).
M
Audio or navigation unit. See separate handbook.
N
Heated front seat switch. See Heated seats(page 94).
O
Ignition switch.
P
Steering wheel adjustment. See Adjusting the steering wheel (page 39).
Q
Cruise control switches. See Using cruise control(page 120).
R
Audio controls. See Audio control(page 39).
S
Instrument lighting dimmer. See Instrument lighting dimmer(page 96).
T
10Quick start
Page 13 of 226
Locking and unlocking
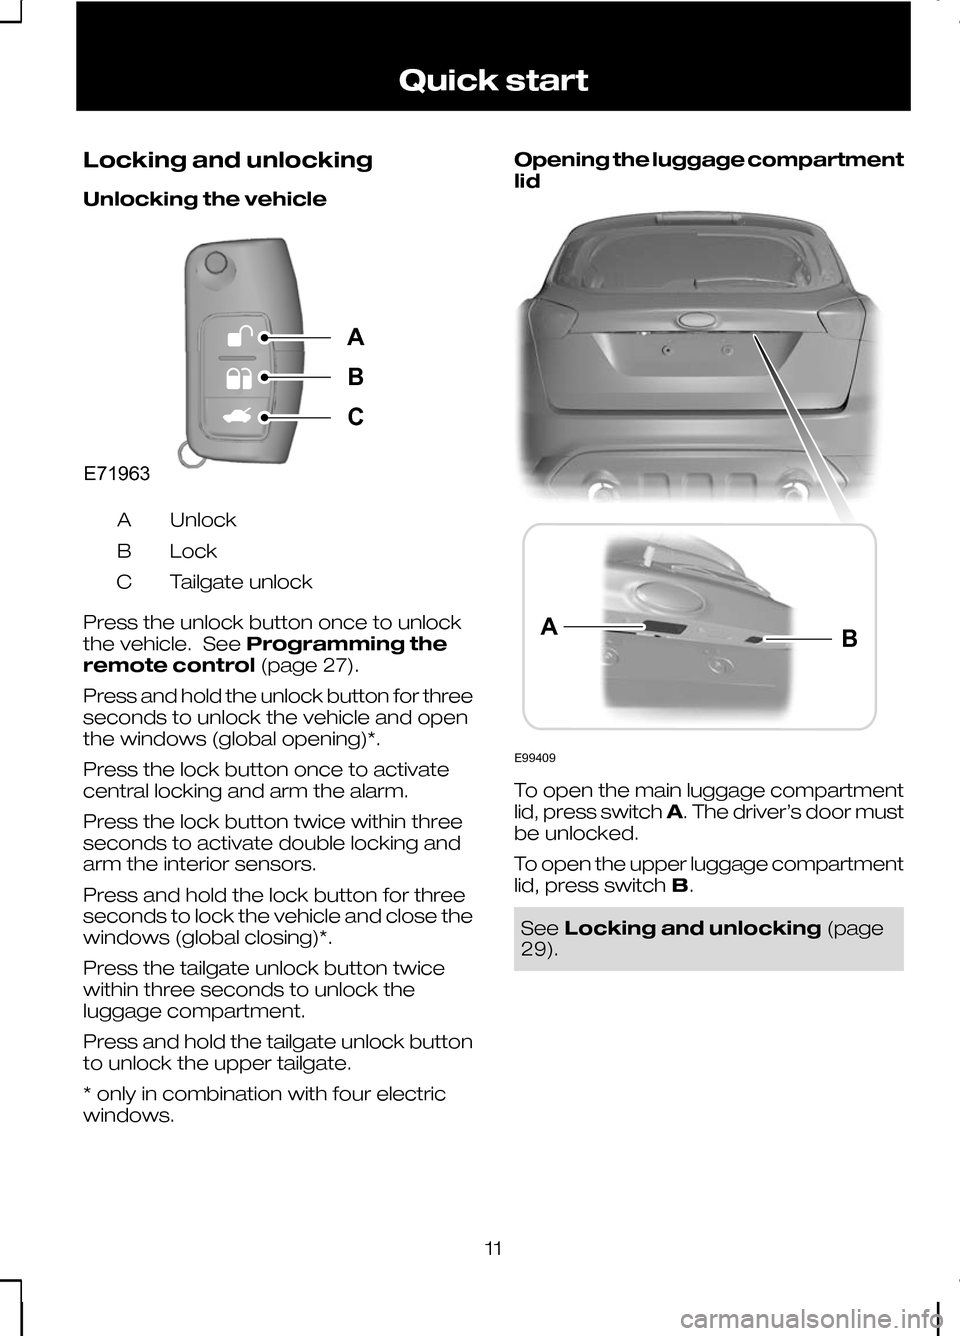
Unlocking the vehicle
Unlock
A
Lock
B
Tailgate unlock
C
Press the unlock button once to unlock
the vehicle. See Programming the
remote control (page 27).
Press and hold the unlock button for three
seconds to unlock the vehicle and open
the windows (global opening)*.
Press the lock button once to activate
central locking and arm the alarm.
Press the lock button twice within three
seconds to activate double locking and
arm the interior sensors.
Press and hold the lock button for three
seconds to lock the vehicle and close the
windows (global closing)*.
Press the tailgate unlock button twice
within three seconds to unlock the
luggage compartment.
Press and hold the tailgate unlock button
to unlock the upper tailgate.
* only in combination with four electric
windows. Opening the luggage compartment
lid
To open the main luggage compartment
lid, press switch
A. The driver’s door must
be unlocked.
To open the upper luggage compartment
lid, press switch B. See
Locking and unlocking (page
29).
11 Quick startE71963ABC E99409BA
Page 14 of 226
Keyless entry
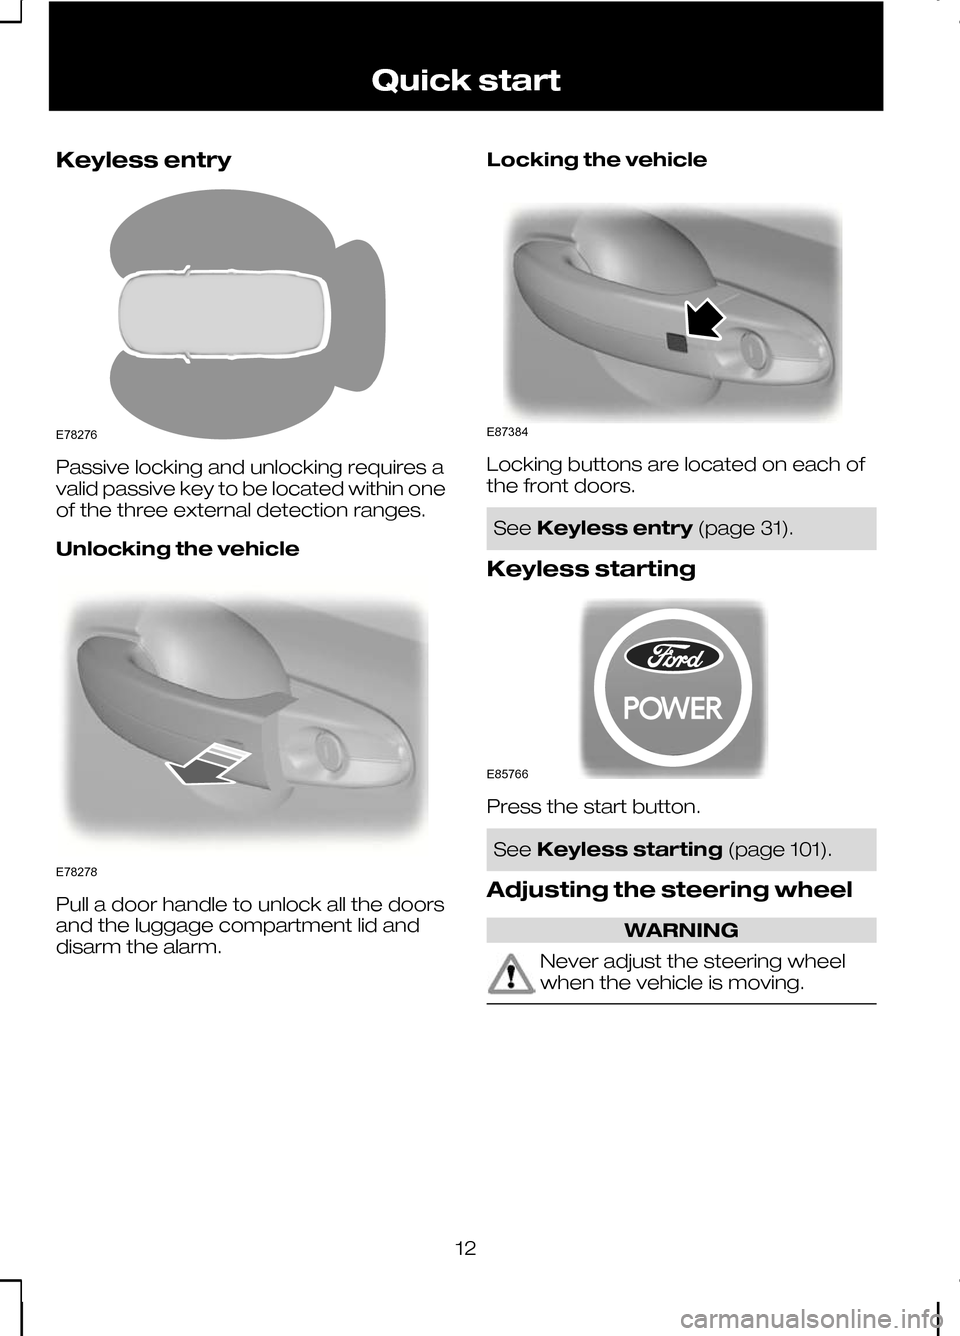
Passive locking and unlocking requires a
valid passive key to be located within one
of the three external detection ranges.
Unlocking the vehicle
Pull a door handle to unlock all the doors
and the luggage compartment lid and
disarm the alarm. Locking the vehicle Locking buttons are located on each of
the front doors.
See
Keyless entry (page 31).
Keyless starting Press the start button.
See
Keyless starting (page 101).
Adjusting the steering wheel WARNING
Never adjust the steering wheel
when the vehicle is moving.
12Quick startE78276 E78278 E87384 E85766
Page 15 of 226
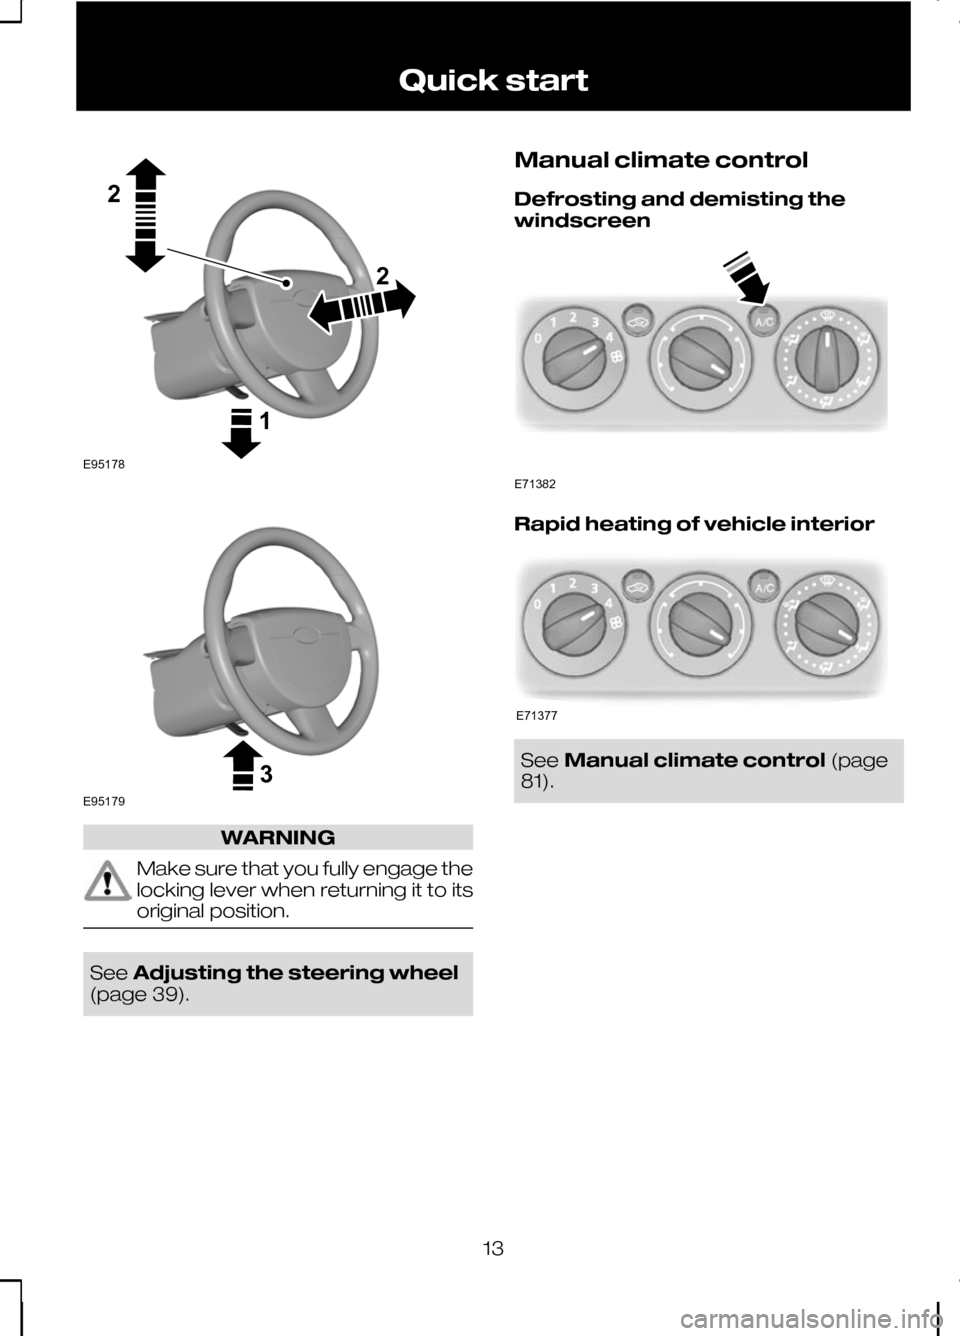
WARNING
Make sure that you fully engage the
locking lever when returning it to its
original position.
See
Adjusting the steering wheel
(page 39). Manual climate control
Defrosting and demisting the
windscreen
Rapid heating of vehicle interior
See
Manual climate control (page
81).
13 Quick start122E95178 3E95179 E71382 E71377
Page 16 of 226
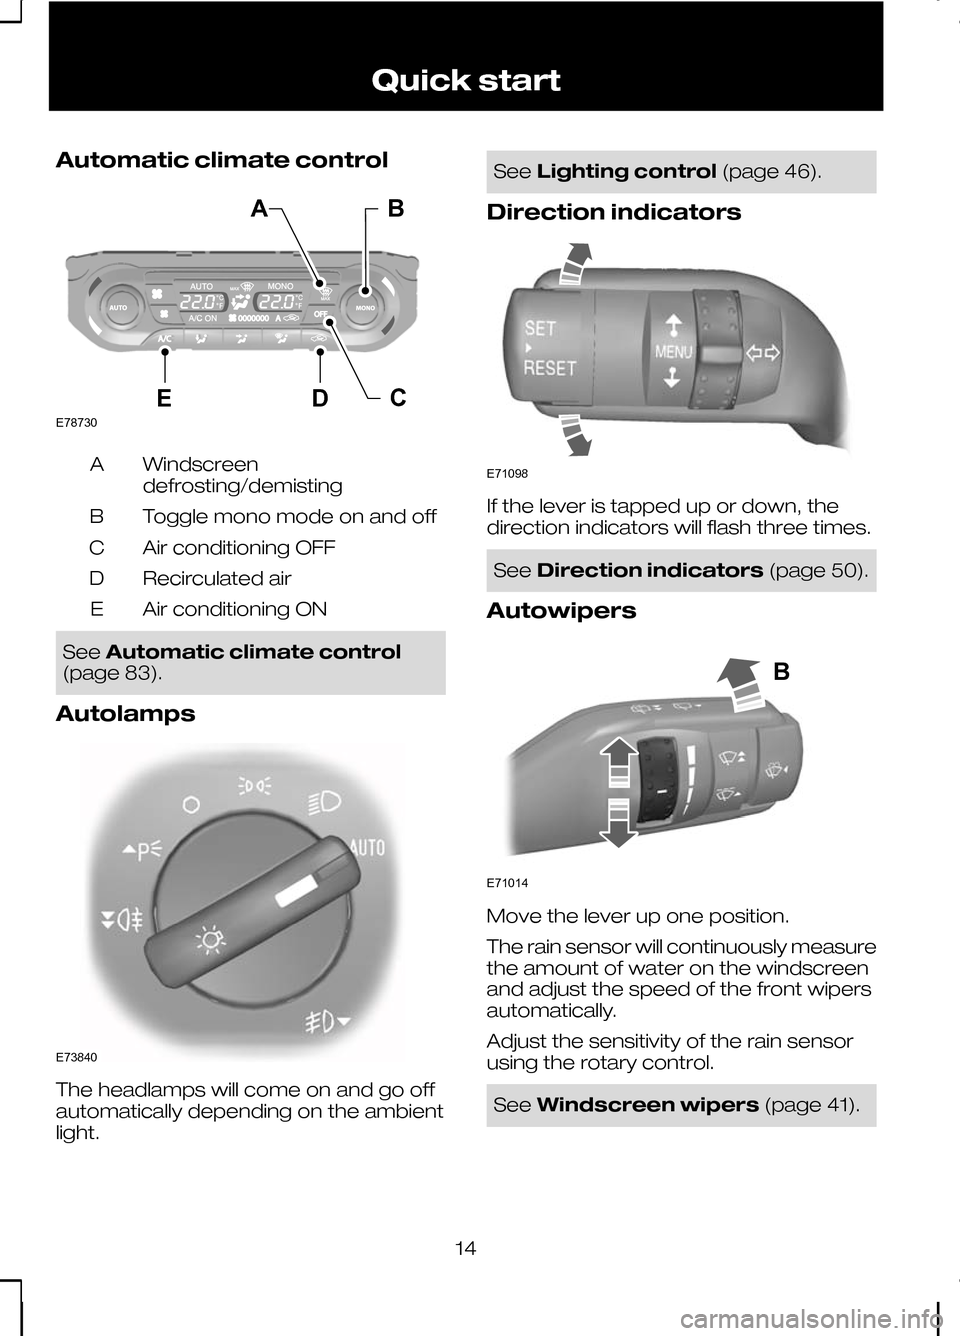
Automatic climate control
Windscreen
defrosting/demisting
A
Toggle mono mode on and off
B
Air conditioning OFF
C
Recirculated air
D
Air conditioning ON
E See
Automatic climate control
(page 83).
Autolamps The headlamps will come on and go off
automatically depending on the ambient
light. See
Lighting control (page 46).
Direction indicators If the lever is tapped up or down, the
direction indicators will flash three times.
See
Direction indicators (page 50).
Autowipers Move the lever up one position.
The rain sensor will continuously measure
the amount of water on the windscreen
and adjust the speed of the front wipers
automatically.
Adjust the sensitivity of the rain sensor
using the rotary control.
See
Windscreen wipers (page 41).
14 Quick startE78730EDCBA E73840 E71098 E71014B
Page 17 of 226
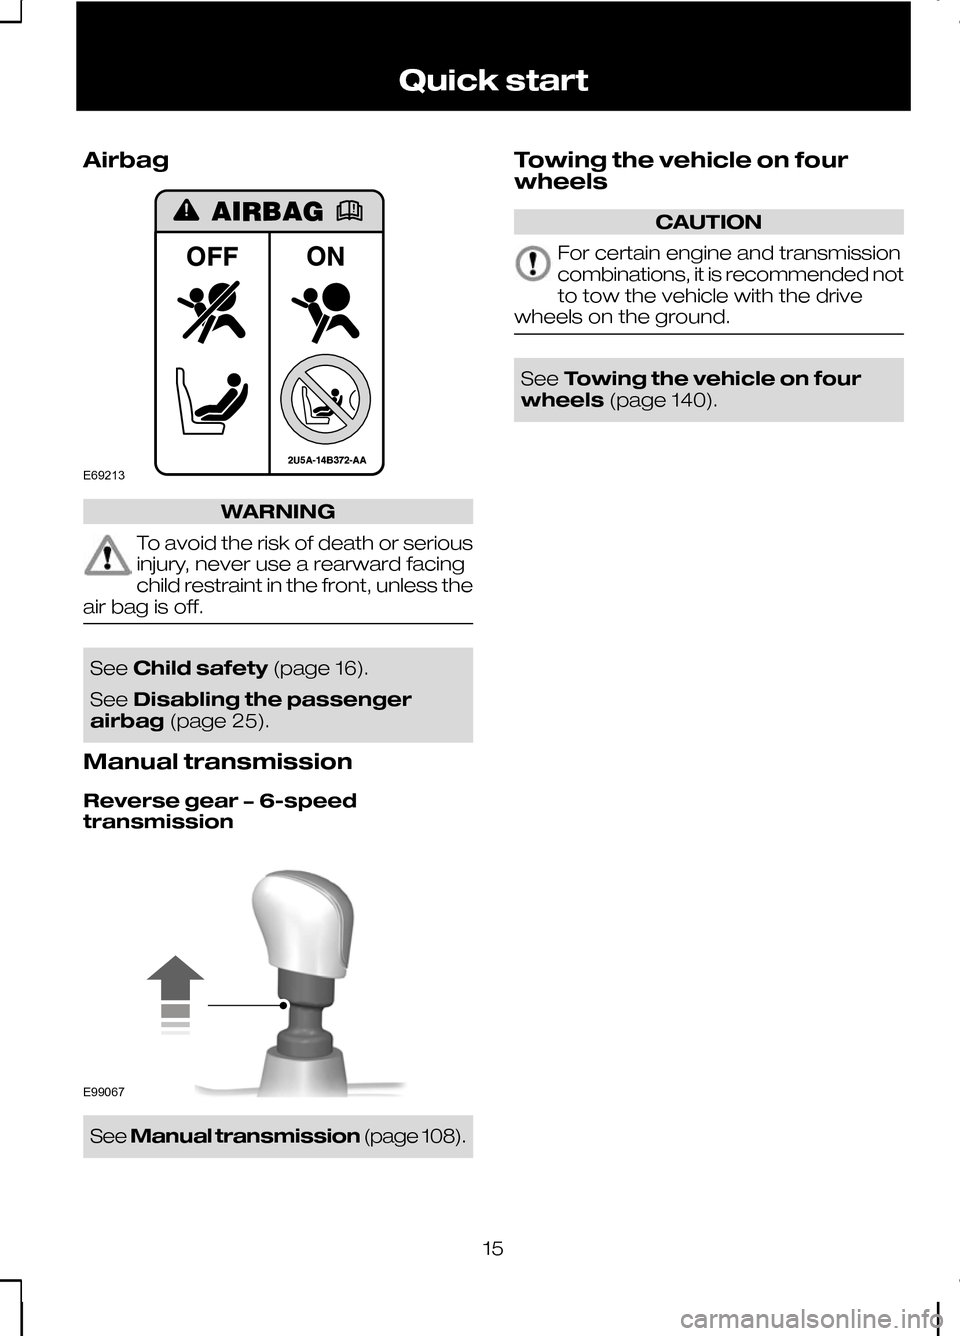
Airbag
WARNING
To avoid the risk of death or serious
injury, never use a rearward facing
child restraint in the front, unless the
air bag is off. See
Child safety (page 16).
See Disabling the passenger
airbag (page 25).
Manual transmission
Reverse gear − 6-speed
transmission See
Manual transmission (page 108).Towing the vehicle on four
wheels CAUTION
For certain engine and transmission
combinations, it is recommended not
to tow the vehicle with the drive
wheels on the ground. See
Towing the vehicle on four
wheels (page 140).
15 Quick startE69213 E99067
Page 18 of 226
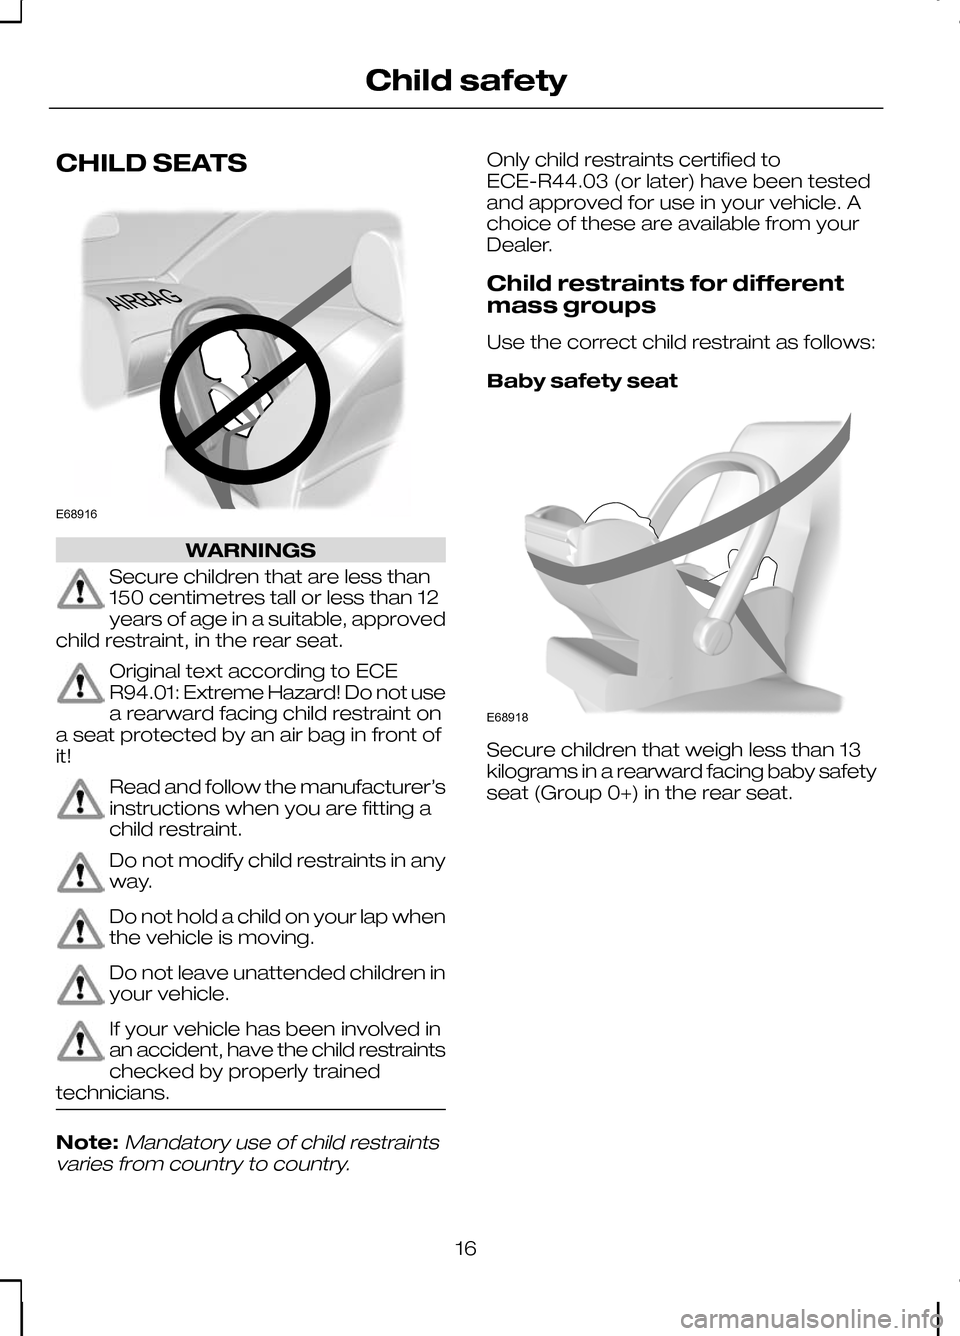
CHILD SEATS
WARNINGS
Secure children that are less than
150 centimetres tall or less than 12
years of age in a suitable, approved
child restraint, in the rear seat. Original text according to ECE
R94.01: Extreme Hazard! Do not use
a rearward facing child restraint on
a seat protected by an air bag in front of
it! Read and follow the manufacturer’s
instructions when you are fitting a
child restraint.
Do not modify child restraints in any
way.
Do not hold a child on your lap when
the vehicle is moving.
Do not leave unattended children in
your vehicle.
If your vehicle has been involved in
an accident, have the child restraints
checked by properly trained
technicians. Note:Mandatory use of child restraints
varies from country to country.
Only child restraints certified to
ECE-R44.03 (or later) have been tested
and approved for use in your vehicle. A
choice of these are available from your
Dealer.
Child restraints for different
mass groups
Use the correct child restraint as follows:
Baby safety seat Secure children that weigh less than 13
kilograms in a rearward facing baby safety
seat (Group 0+) in the rear seat.
16
Child safetyE68916 E68918
Page 19 of 226
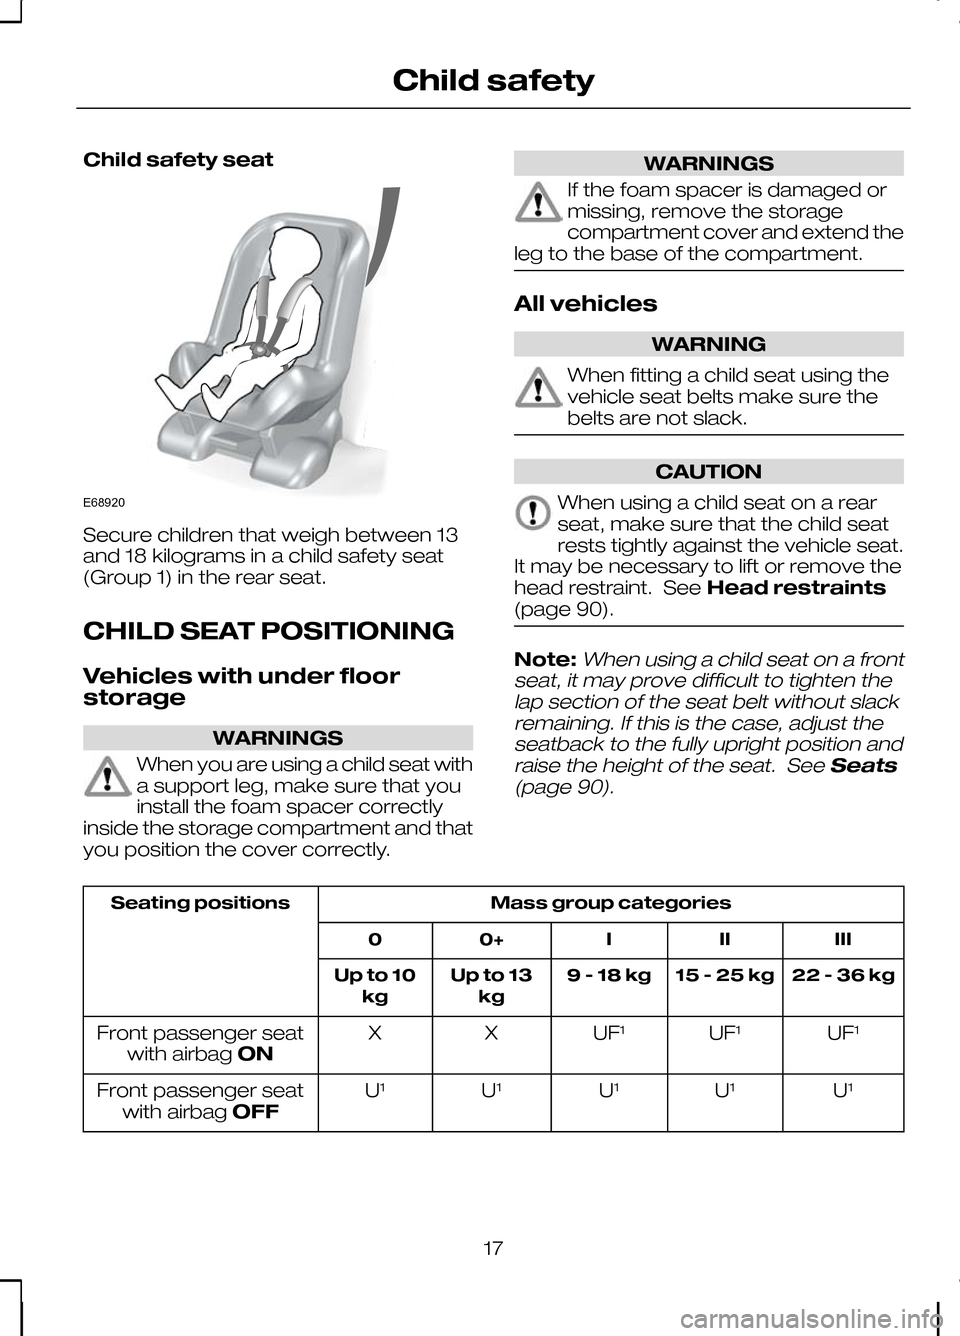
Child safety seat
Secure children that weigh between 13
and 18 kilograms in a child safety seat
(Group 1) in the rear seat.
CHILD SEAT POSITIONING
Vehicles with under floor
storage
WARNINGS
When you are using a child seat with
a support leg, make sure that you
install the foam spacer correctly
inside the storage compartment and that
you position the cover correctly. WARNINGS
If the foam spacer is damaged or
missing, remove the storage
compartment cover and extend the
leg to the base of the compartment. All vehicles
WARNING
When fitting a child seat using the
vehicle seat belts make sure the
belts are not slack.
CAUTION
When using a child seat on a rear
seat, make sure that the child seat
rests tightly against the vehicle seat.
It may be necessary to lift or remove the
head restraint. See Head restraints
(page 90). Note:When using a child seat on a front
seat, it may prove difficult to tighten the lap section of the seat belt without slackremaining. If this is the case, adjust theseatback to the fully upright position and
raise the height of the seat. See Seats
(page 90). Mass group categories
Seating positions
III
II
I
0+
0
22 - 36 kg
15 - 25 kg
9 - 18 kg
Up to 13
kg
Up to 10
kg
UF¹
UF¹
UF¹
X
X
Front passenger seat
with airbag ON
U¹
U¹
U¹
U¹
U¹
Front passenger seat
with airbag OFF
17
Child safetyE68920
Page 20 of 226
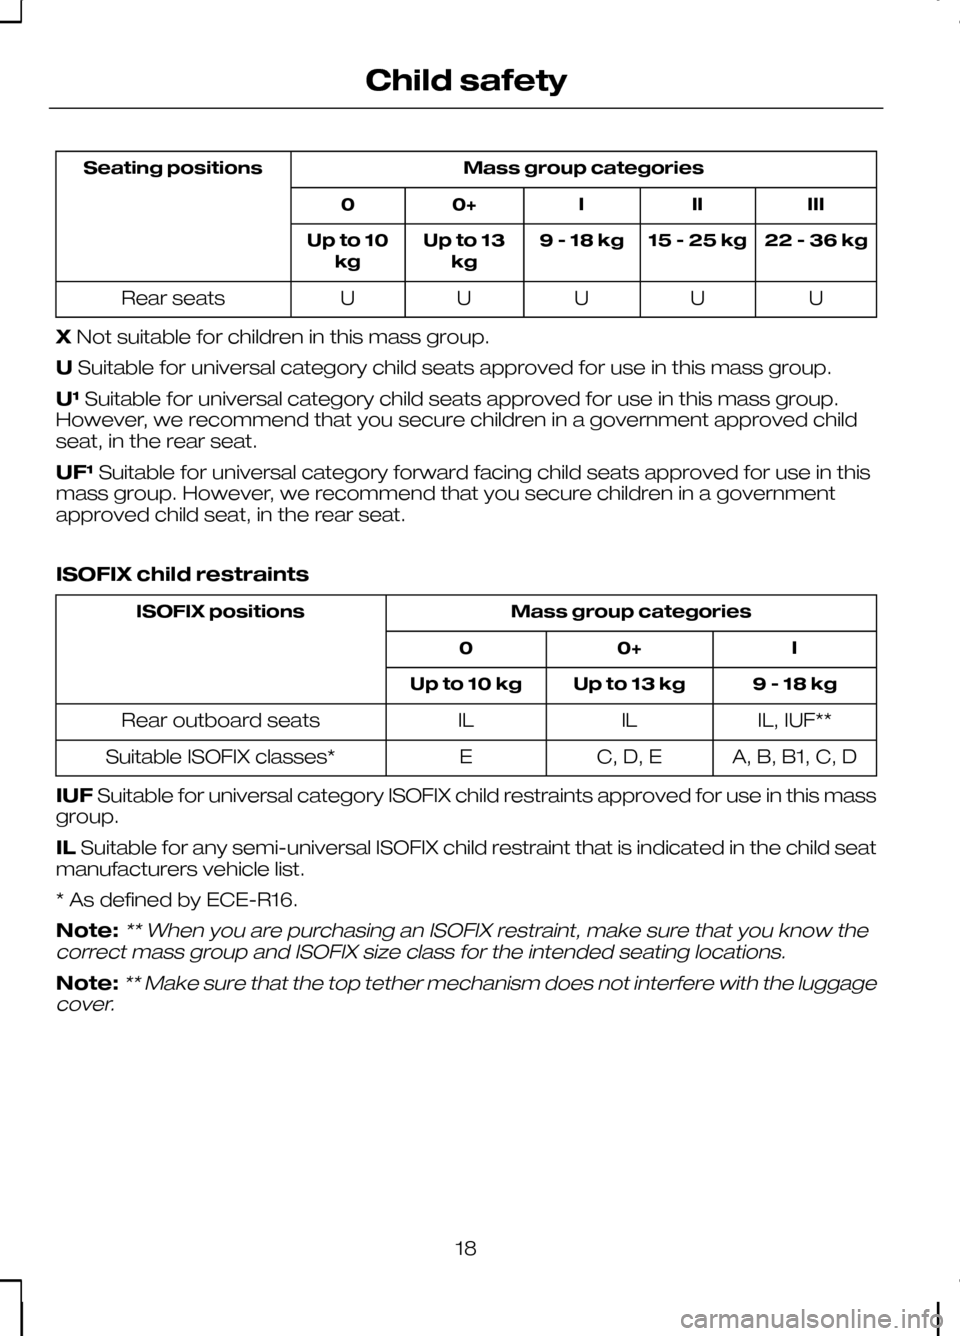
Mass group categories
Seating positions
III
II
I
0+
0
22 - 36 kg
15 - 25 kg
9 - 18 kg
Up to 13
kg
Up to 10
kg
U
U
U
U
U
Rear seats
X Not suitable for children in this mass group.
U Suitable for universal category child seats approved for use in this mass group.
U¹ Suitable for universal category child seats approved for use in this mass group.
However, we recommend that you secure children in a government approved child
seat, in the rear seat.
UF¹ Suitable for universal category forward facing child seats approved for use in this
mass group. However, we recommend that you secure children in a government
approved child seat, in the rear seat.
ISOFIX child restraints Mass group categories
ISOFIX positions
I
0+
0
9 - 18 kg
Up to 13 kg
Up to 10 kg
IL, IUF**
IL
IL
Rear outboard seats
A, B, B1, C, D
C, D, E
E
Suitable ISOFIX classes*
IUF Suitable for universal category ISOFIX child restraints approved for use in this mass
group.
IL Suitable for any semi-universal ISOFIX child restraint that is indicated in the child seat
manufacturers vehicle list.
* As defined by ECE-R16.
Note:** When you are purchasing an ISOFIX restraint, make sure that you know the
correct mass group and ISOFIX size class for the intended seating locations.
Note:** Make sure that the top tether mechanism does not interfere with the luggage
cover.
18
Child safety