VIN HONDA ACCORD 2015 9.G Manual Online
[x] Cancel search | Manufacturer: HONDA, Model Year: 2015, Model line: ACCORD, Model: HONDA ACCORD 2015 9.GPages: 593
Page 152 of 593
Continued
151
uuAdjusting the Seats uAdjusting the Seat Positions
Controls
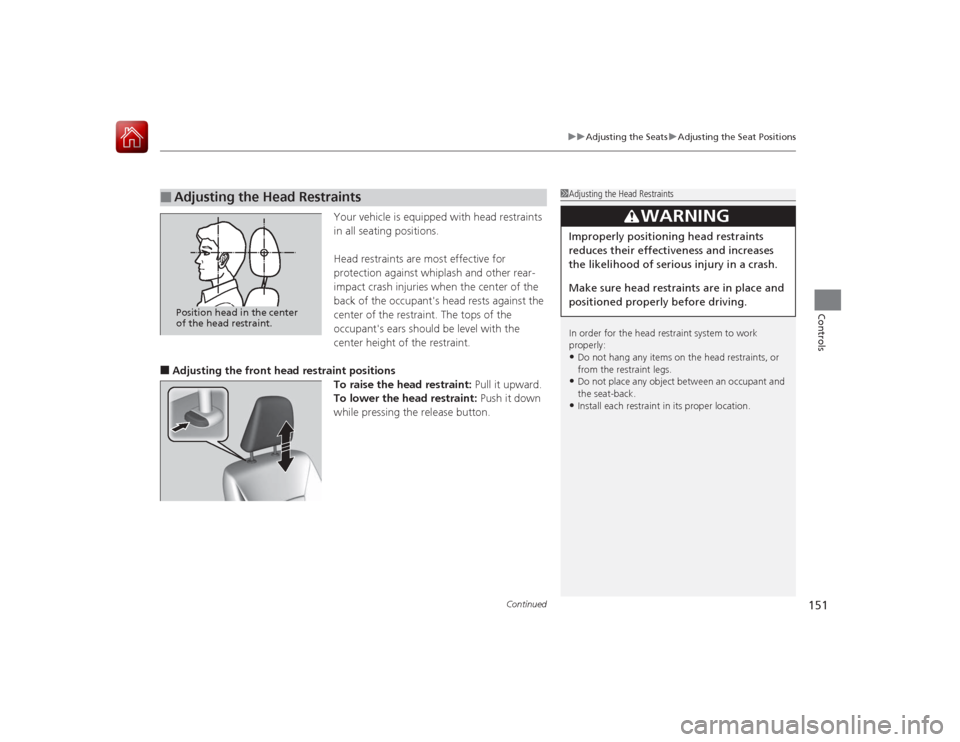
Your vehicle is equipped with head restraints
in all seating positions.
Head restraints are most effective for
protection against whiplash and other rear-
impact crash injuries when the center of the
back of the occupant's head rests against the
center of the restraint. The tops of the
occupant's ears should be level with the
center height of the restraint.
■Adjusting the front head restraint positions To raise the head restraint: Pull it upward.
To lower the head restraint: Push it down
while pressing the release button.■
Adjusting the Head Restraints
1 Adjusting the Head Restraints
In order for the head restraint system to work
properly:•Do not hang any items on the head restraints, or
from the restraint legs.•Do not place any object between an occupant and
the seat-back.•Install each restraint in its proper location.
3
WARNING
Improperly posi tioning head restraints
reduces their effectiveness and increases
the likelihood of seriou s injury in a crash.
Make sure head restraints are in place and
positioned properly before driving.
Position head in the center
of the head restraint.
Page 153 of 593
uuAdjusting the Seats uAdjusting the Seat Positions
152Controls
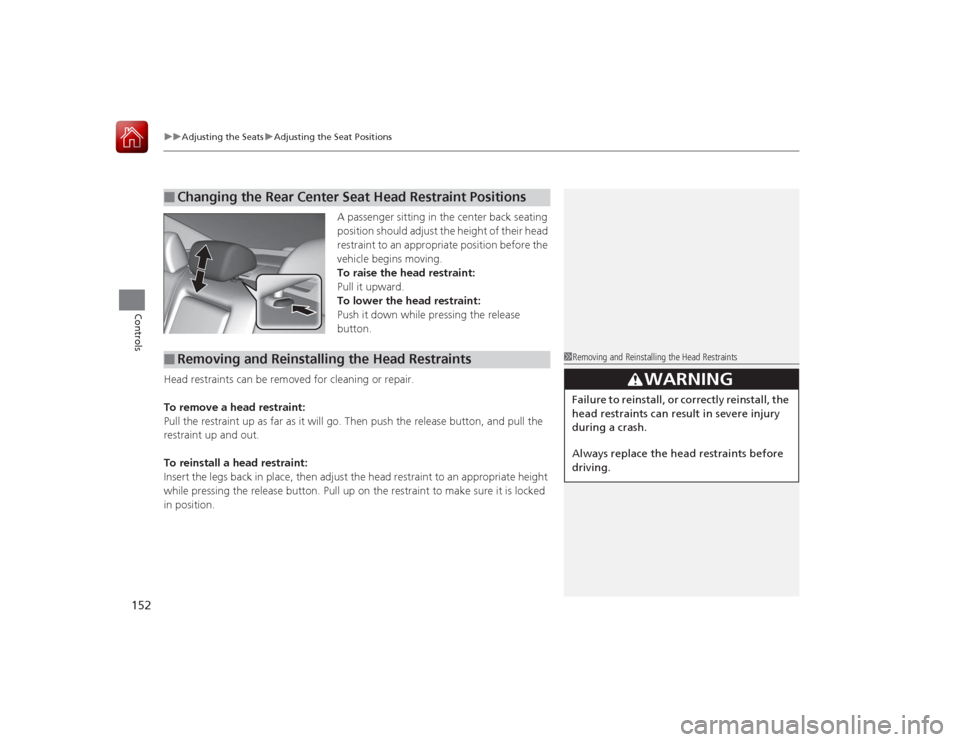
A passenger sitting in the center back seating
position should adjust the height of their head
restraint to an appropriate position before the
vehicle begins moving.
To raise the head restraint:
Pull it upward.
To lower the head restraint:
Push it down while pressing the release
button.
Head restraints can be removed for cleaning or repair.
To remove a head restraint:
Pull the restraint up as far as it will go. Then push the release button, and pull the
restraint up and out.
To reinstall a head restraint:
Insert the legs back in place, then adjust the head restraint to an appropriate height
while pressing the release button. Pull up on the restraint to make sure it is locked
in position.
■
Changing the Rear Center Seat Head Restraint Positions
■
Removing and Reinstalling the Head Restraints
1 Removing and Reinstalling the Head Restraints
3
WARNING
Failure to reinstall, or correctly reinstall, the
head restraints can result in severe injury
during a crash.
Always replace the head restraints before
driving.
Page 155 of 593
154
uuAdjusting the Seats uRear Seats
Controls
Rear Seats
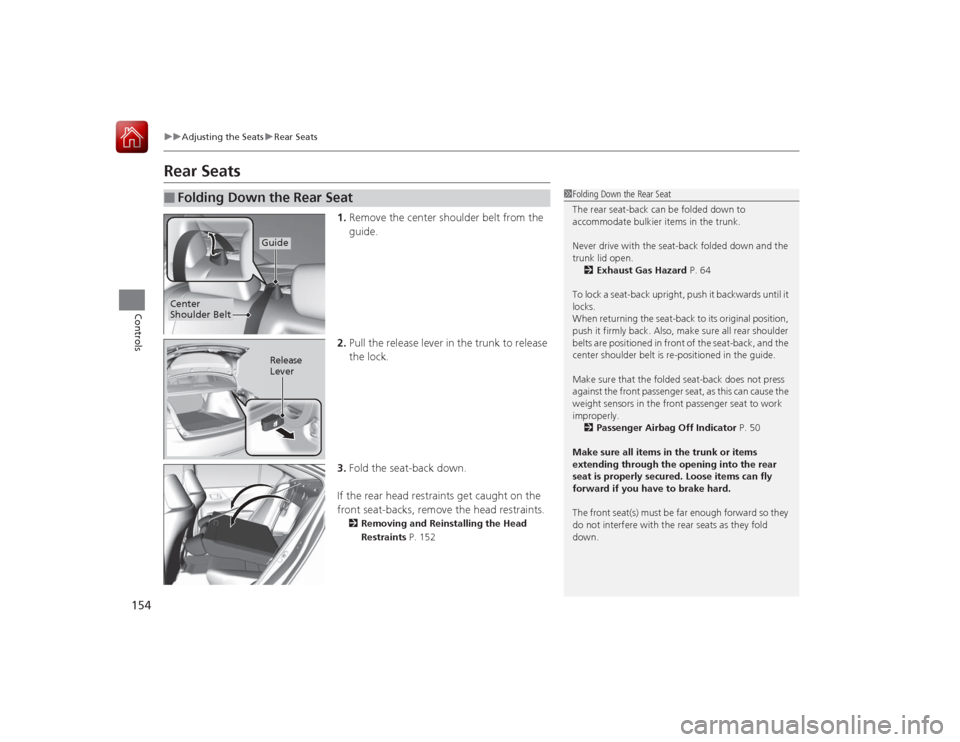
1. Remove the center shoulder belt from the
guide.
2. Pull the release lever in the trunk to release
the lock.
3. Fold the seat-back down.
If the rear head restraints get caught on the
front seat-backs, remove the head restraints.2 Removing and Reinstalling the Head
Restraints P. 152
■
Folding Down the Rear Seat
1Folding Down the Rear Seat
The rear seat-back can be folded down to
accommodate bulkier items in the trunk.
Never drive with the seat-back folded down and the
trunk lid open. 2 Exhaust Gas Hazard P. 64
To lock a seat-back upright, push it backwards until it
locks.
When returning the seat-back to its original position,
push it firmly back. Also, make sure all rear shoulder
belts are positioned in front of the seat-back, and the
center shoulder belt is re-positioned in the guide.
Make sure that the folded seat-back does not press
against the front passenger seat, as this can cause the
weight sensors in the front passenger seat to work
improperly. 2 Passenger Airbag Off Indicator P. 50
Make sure all items in the trunk or items
extending through the opening into the rear
seat is properly secured. Loose items can fly
forward if you have to brake hard.
The front seat(s) must be far enough forward so they
do not interfere with the rear seats as they fold
down.
Guide
Center
Shoulder Belt
Release
Lever
Page 159 of 593
158
uuInterior Lights/Interior Convenience Items uInterior Convenience Items
Controls
Interior Convenience Items
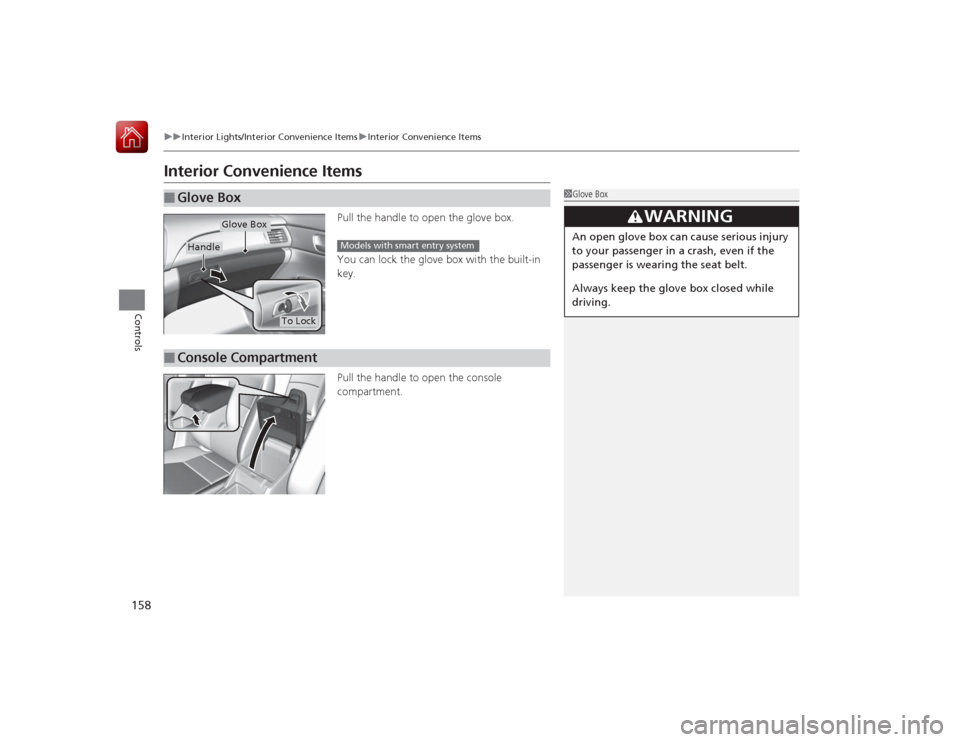
Pull the handle to open the glove box.
You can lock the glove box with the built-in
key.
Pull the handle to open the console
compartment.
■
Glove Box
1Glove Box
3
WARNING
An open glove box can cause serious injury
to your passenger in a crash, even if the
passenger is wearing the seat belt.
Always keep the glove box closed while
driving.
Glove Box
Handle
To Lock
Models with smart entry system
■
Console Compartment
Page 164 of 593
Continued
163
uuInterior Lights/Interior Convenience Items uInterior Convenience Items
Controls
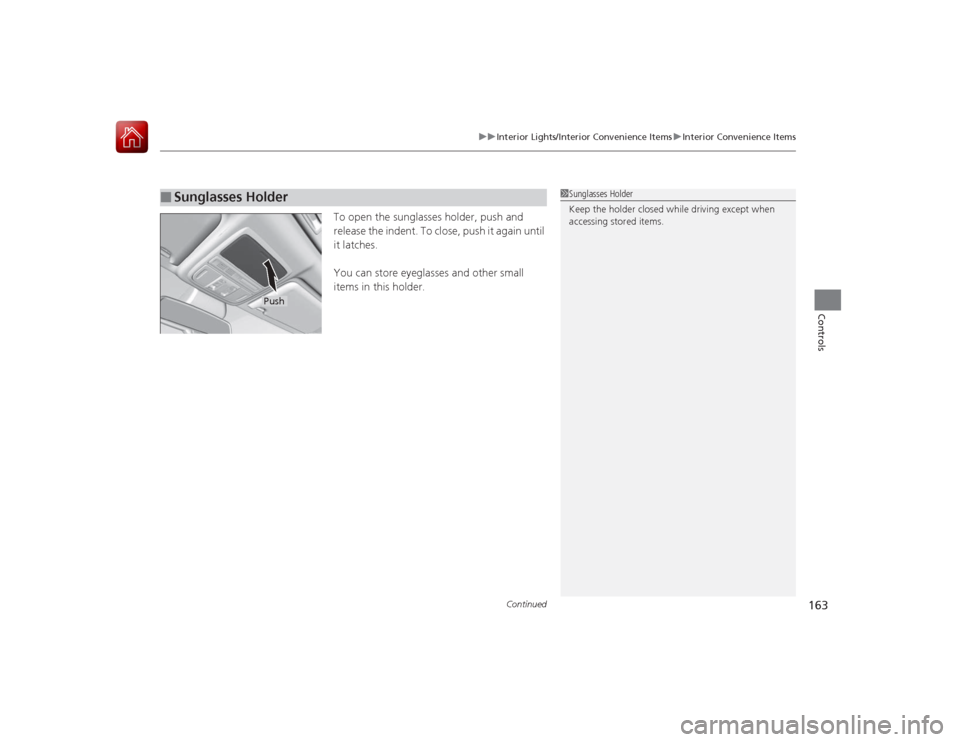
To open the sunglasses holder, push and
release the indent. To close, push it again until
it latches.
You can store eyeglasses and other small
items in this holder.
■
Sunglasses Holder
1Sunglasses Holder
Keep the holder closed while driving except when
accessing stored items.
Push
Page 169 of 593
uuHeating and Cooling
*uUsing Vents, Heating and A/C
168Controls
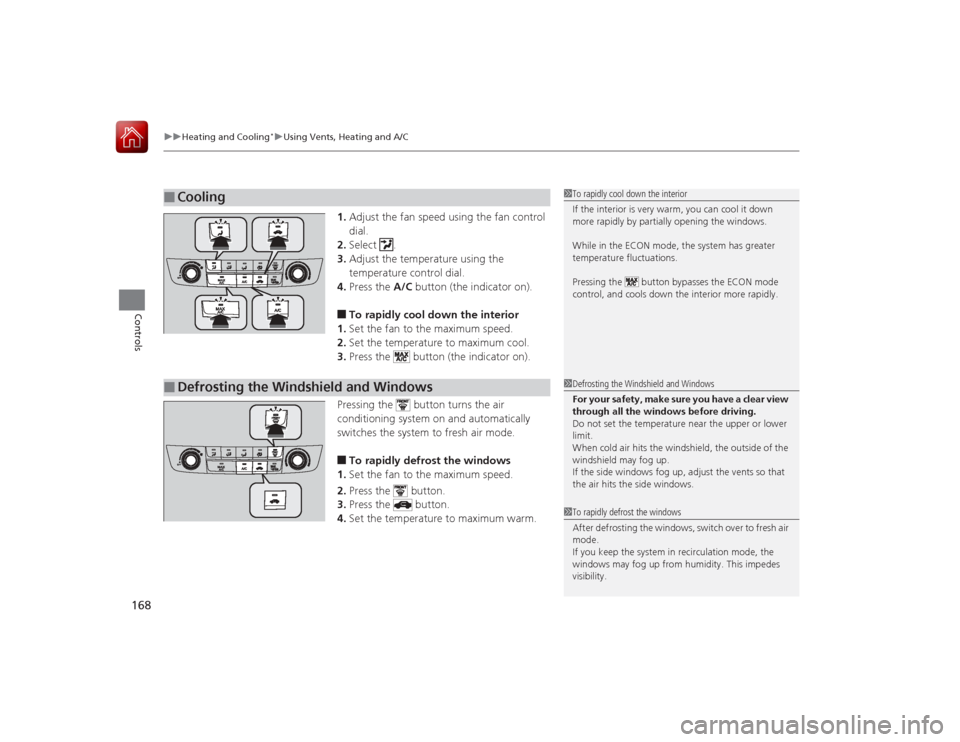
1. Adjust the fan speed using the fan control
dial.
2. Select .
3. Adjust the temperature using the
temperature control dial.
4. Press the A/C button (the indicator on).■To rapidly cool down the interior
1. Set the fan to the maximum speed.
2. Set the temperature to maximum cool.
3. Press the button (the indicator on).
Pressing the button turns the air
conditioning system on and automatically
switches the system to fresh air mode.■To rapidly defrost the windows
1. Set the fan to the maximum speed.
2. Press the button.
3. Press the button.
4. Set the temperature to maximum warm.
■
Cooling
1To rapidly cool down the interior
If the interior is very warm, you can cool it down
more rapidly by partially opening the windows.
While in the ECON mode, the system has greater
temperature fluctuations.
Pressing the button bypasses the ECON mode
control, and cools down the interior more rapidly.
■
Defrosting the Windshield and Windows
1Defrosting the Windshield and Windows
For your safety, make sure you have a clear view
through all the windows before driving.
Do not set the temperature near the upper or lower
limit.
When cold air hits the windshield, the outside of the
windshield may fog up.
If the side windows fog up, adjust the vents so that
the air hits the side windows.1To rapidly defrost the windows
After defrosting the windows, switch over to fresh air
mode.
If you keep the system in recirculation mode, the
windows may fog up from humidity. This impedes
visibility.
Page 171 of 593
uuClimate Control System
*uUsing Automatic Climate Control
170Controls
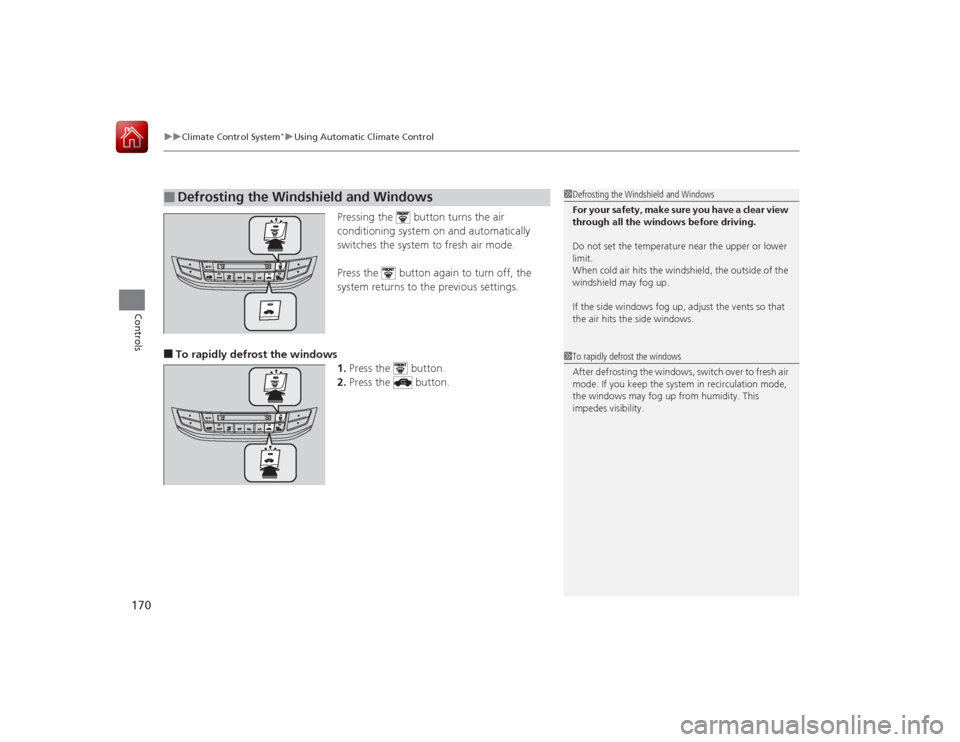
Pressing the button turns the air
conditioning system on and automatically
switches the system to fresh air mode.
Press the button again to turn off, the
system returns to the previous settings.
■To rapidly defrost the windows
1.Press the button.
2. Press the button.■
Defrosting the Windshield and Windows
1Defrosting the Windshield and Windows
For your safety, make sure you have a clear view
through all the windows before driving.
Do not set the temperature near the upper or lower
limit.
When cold air hits the windshield, the outside of the
windshield may fog up.
If the side windows fog up, adjust the vents so that
the air hits the side windows.1To rapidly defrost the windows
After defrosting the windows, switch over to fresh air
mode. If you keep the system in recirculation mode,
the windows may fog up from humidity. This
impedes visibility.
Page 180 of 593
179
uuAudio System uAudio Remote Controls
Features
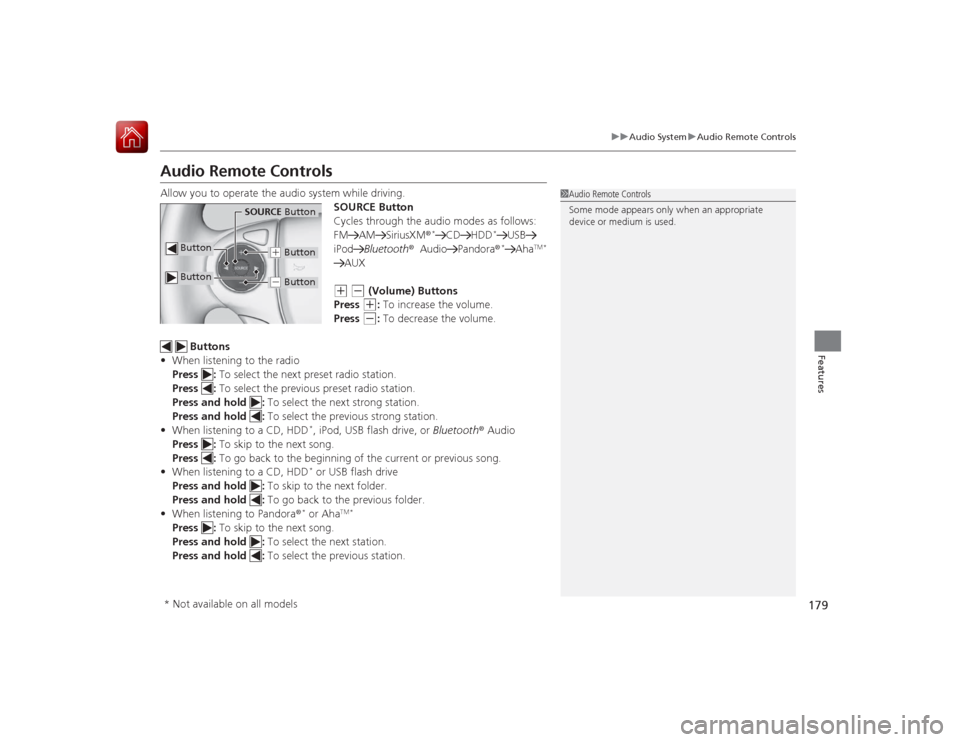
Audio Remote ControlsAllow you to operate the audio system while driving.
SOURCE Button
Cycles through the audio modes as follows:
FM AM SiriusXM ®
*
CD HDD
*
USB
iPod Bluetooth® Audio Pandora ®*
Aha
TM *
AUX(+
(-
(Volume) Buttons
Press (+
: To increase the volume.
Press
(-
: To decrease the volume.
Buttons
• When listening to the radio
Press : To select the next preset radio station.
Press : To select the previous preset radio station.
Press and hold : To select the next strong station.
Press and hold : To select the previous strong station.
• When listening to a CD, HDD
*, iPod, USB flash drive, or Bluetooth ® Audio
Press : To skip to the next song.
Press : To go back to the beginning of the current or previous song.
• When listening to a CD, HDD* or USB flash drive
Press and hold : To skip to the next folder.
Press and hold : To go back to the previous folder.
• When listening to Pandora®* or Aha
TM *
Press : To skip to the next song.
Press and hold : To select the next station.
Press and hold : To select the previous station.
1Audio Remote Controls
Some mode appears only when an appropriate
device or medium is used.
Button
SOURCE Button
Button
(+ Button(- Button
* Not available on all models
Page 183 of 593
182
uuAudio System Basic Operation uAudio/Information Screen
Features
■Audio
Shows the current audio information.■Trip computer (Current Drive)
Shows the range, and instant and average fuel economy of the current trip, as well
as the average fuel economy from your last trip.■Trip computer (History of Trip A)
Shows the range, average fuel economy and distance traveled for the current trip,
as well as the average fuel economy and distances traveled during the last three
driving cycles.
Each time you reset the trip meter A, the information on the display updates. The
history of the previous three driving cycles is kept.■Clock/Wallpaper
Shows a clock screen or an image you import.
Page 201 of 593
200
uuAudio System Basic Operation uPlaying Bluetooth ® Audio
Features
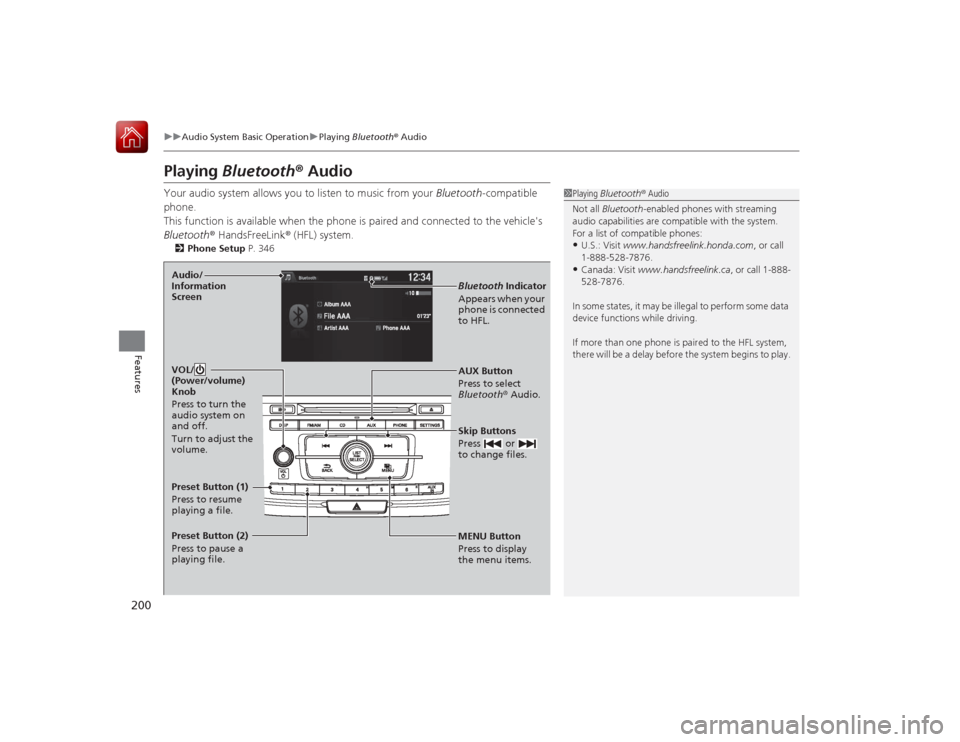
Playing Bluetooth® AudioYour audio system allows you to listen to music from your Bluetooth-compatible
phone.
This function is available when the phone is paired and connected to the vehicle's
Bluetooth ® HandsFreeLink ® (HFL) system.2 Phone Setup P. 346
1Playing Bluetooth ® Audio
Not all Bluetooth-enabled phones with streaming
audio capabilities are compatible with the system.
For a list of compatible phones:•U.S.: Visit www.handsfreelink.honda.com , or call
1-888-528-7876.•Canada: Visit www.handsfreelink.ca , or call 1-888-
528-7876.
In some states, it may be illegal to perform some data
device functions while driving.
If more than one phone is paired to the HFL system,
there will be a delay before the system begins to play.
MENU Button
Press to display
the menu items. AUX Button
Press to select
Bluetooth ® Audio.
Skip Buttons
Press or
to change files.Bluetooth Indicator
Appears when your
phone is connected
to HFL.
VOL/
(Power/volume)
Knob
Press to turn the
audio system on
and off.
Turn to adjust the
volume.
Audio/
Information
ScreenPreset Button (1)
Press to resume
playing a file.
Preset Button (2)
Press to pause a
playing file.