HONDA CIVIC 1991 Owners Manual
Manufacturer: HONDA, Model Year: 1991, Model line: CIVIC, Model: HONDA CIVIC 1991Pages: 136, PDF Size: 1.33 MB
Page 91 of 136
Checking the fuses:
1 .Turn off the ignition and all other switches.
2. If you find a blown or possibly faulty fuse, use the fuse remover, stored beside the spare fuse to pull the blown fuse out of its clips.
3. Check all other fuses as well as the one you suspect.
4. Push in a new fuse of the same rating, and make sure it fits tightly in the clips. If it fits loosely, have your dealer fix it.If you don't have a spare, take a fuse of the same rating (or lower)
out of a circuit you may not need, like the radio or cigarette lighter.
Remember to replace the borrowed fuse and the missing spares.
CAUTION:
A blown fuse may be just a symptom of some other problem. If a new fuse blows right away, the cause should be diagnosed and
corrected by a qualified Honda technician. Never replace a fuse with anything but another fuse of the same or lower rating. A
higher capacity fuse could cause damage and even start a fire.
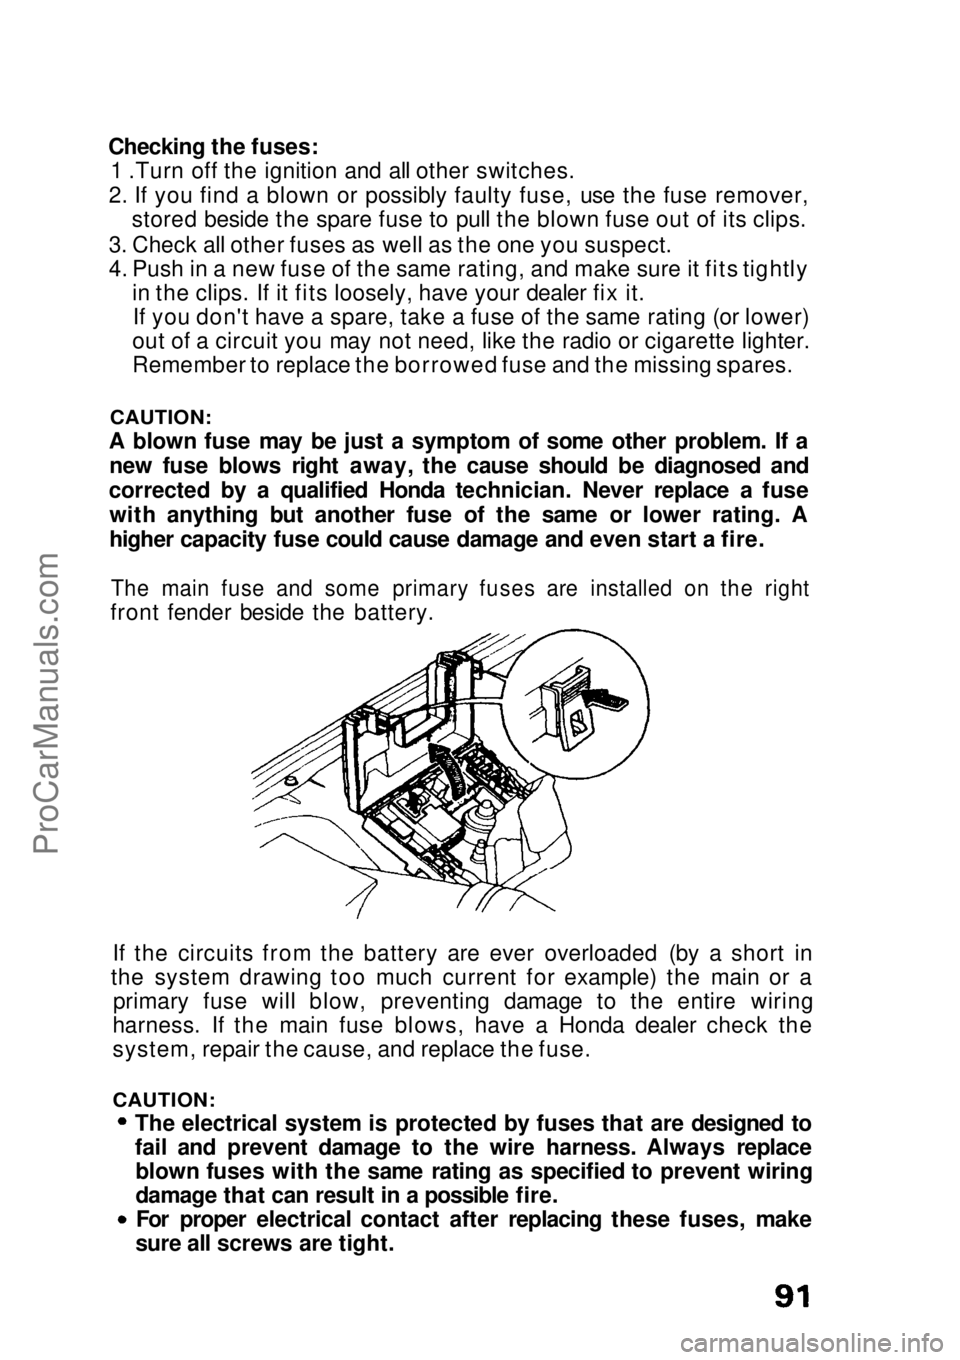
The main fuse and some primary fuses are installed on the right
front fender beside the battery.
If the circuits from the battery are ever overloaded (by a short in
the system drawing too much current for example) the main or a primary fuse will blow, preventing damage to the entire wiring
harness. If the main fuse blows, have a Honda dealer check the
system, repair the cause, and replace the fuse.
CAUTION:
The electrical system is protected by fuses that are designed to
fail and prevent damage to the wire harness. Always replaceblown fuses with the same rating as specified to prevent wiring
damage that can result in a possible fire.For proper electrical contact after replacing these fuses, make
sure all screws are tight.ProCarManuals.comMain Menu s t
Page 92 of 136
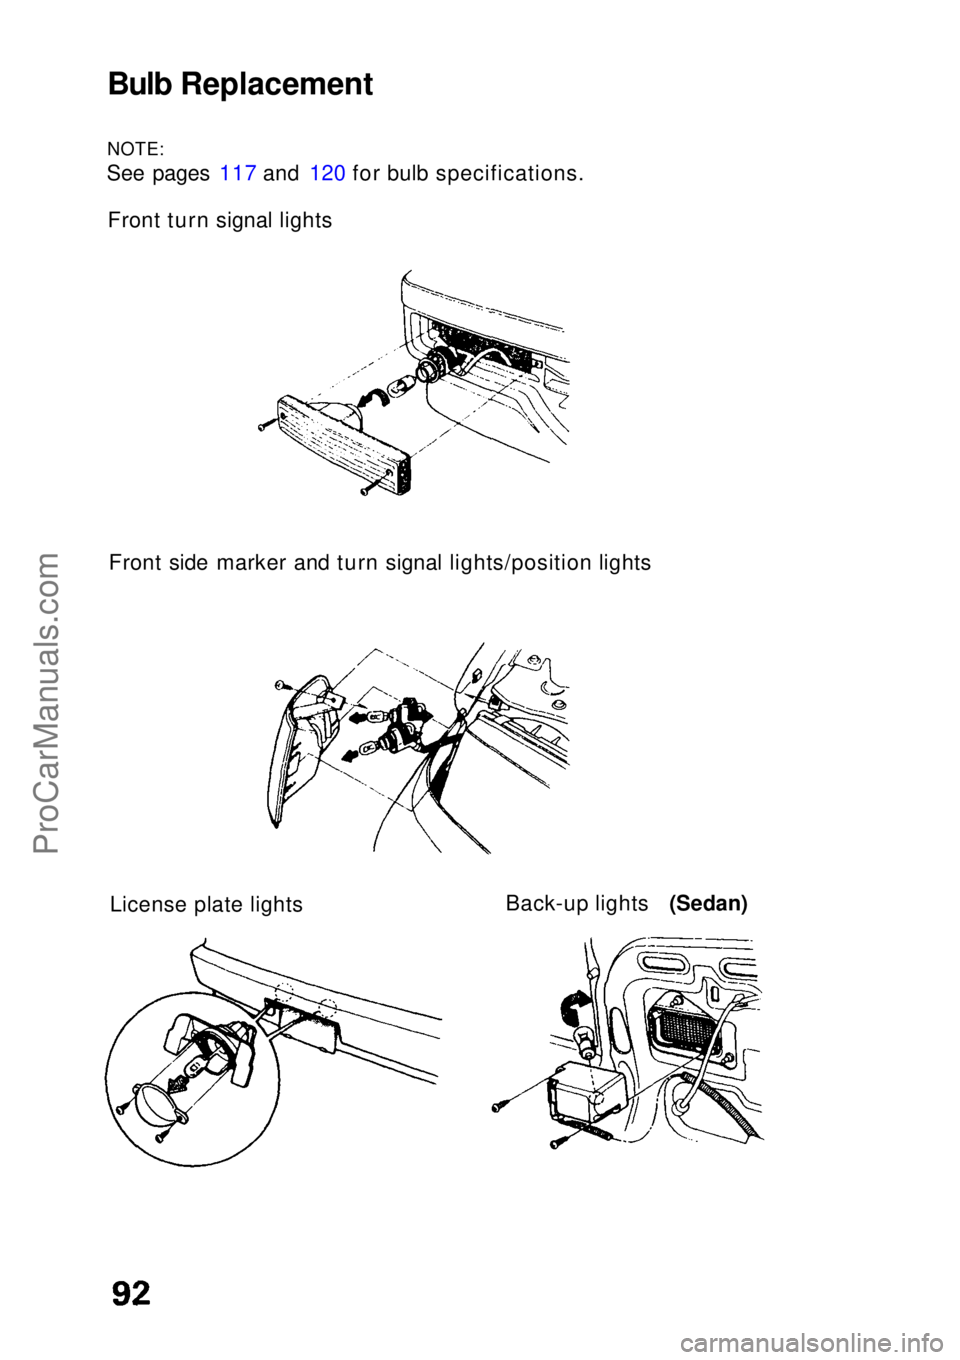
Bulb Replacement
NOTE:
See pages 117 and 120 for bulb specifications.
Front turn signal lights
Front side marker and turn signal lights/position lightsLicense plate lights Back-up lights (Sedan)ProCarManuals.comMain Menu s t
Page 93 of 136
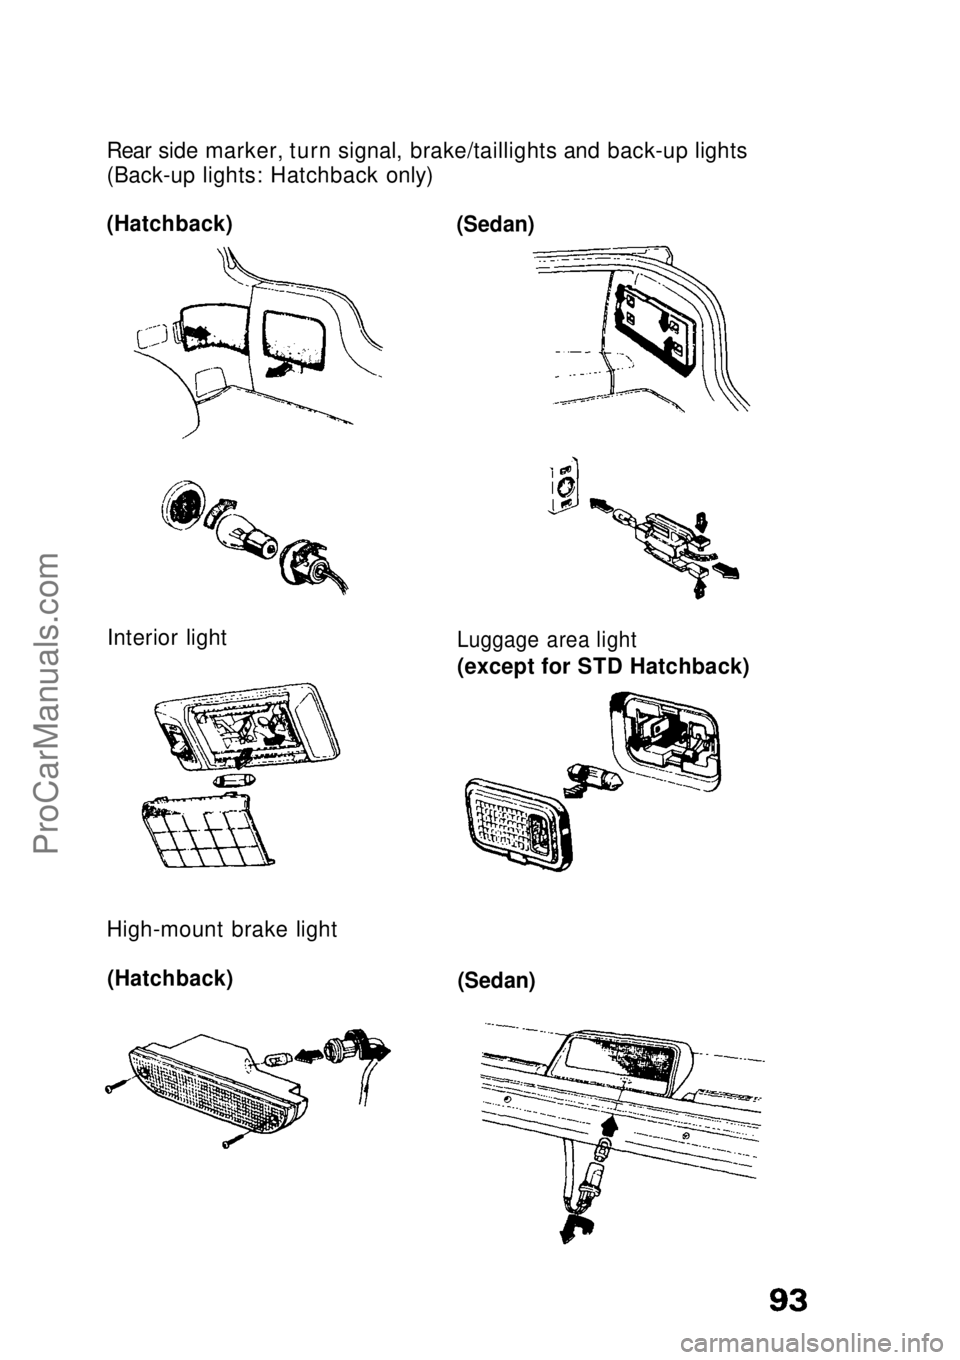
Rear side marker, turn signal, brake/taillights and back-up lights
(Back-up lights: Hatchback only)
(Hatchback)
(Sedan)
Interior light
Luggage area light
(except for STD Hatchback)
(Hatchback)
(Sedan)
High-mount brake lightProCarManuals.comMain Menu s t
Page 94 of 136
The factory installed tires on your car were selected to match the
car's performance capabilities and to provide the best combination
of handling, ride comfort and tread wear.
We recommend that you get the same size, type, and grade of tires when replacement is necessary. If your tires have an all-season
tread design, the model name will be followed by the marking: "M + S" (mud and snow) or "all-season".
If you decide not to get the same brand of tires as those originally
installed, you should make sure that the replacements are the radial
type, of the same size, load range and speed rating as the original
tires.
If you have any questions about your car's tires, please contact
your Honda dealer.
Inflation Pressures
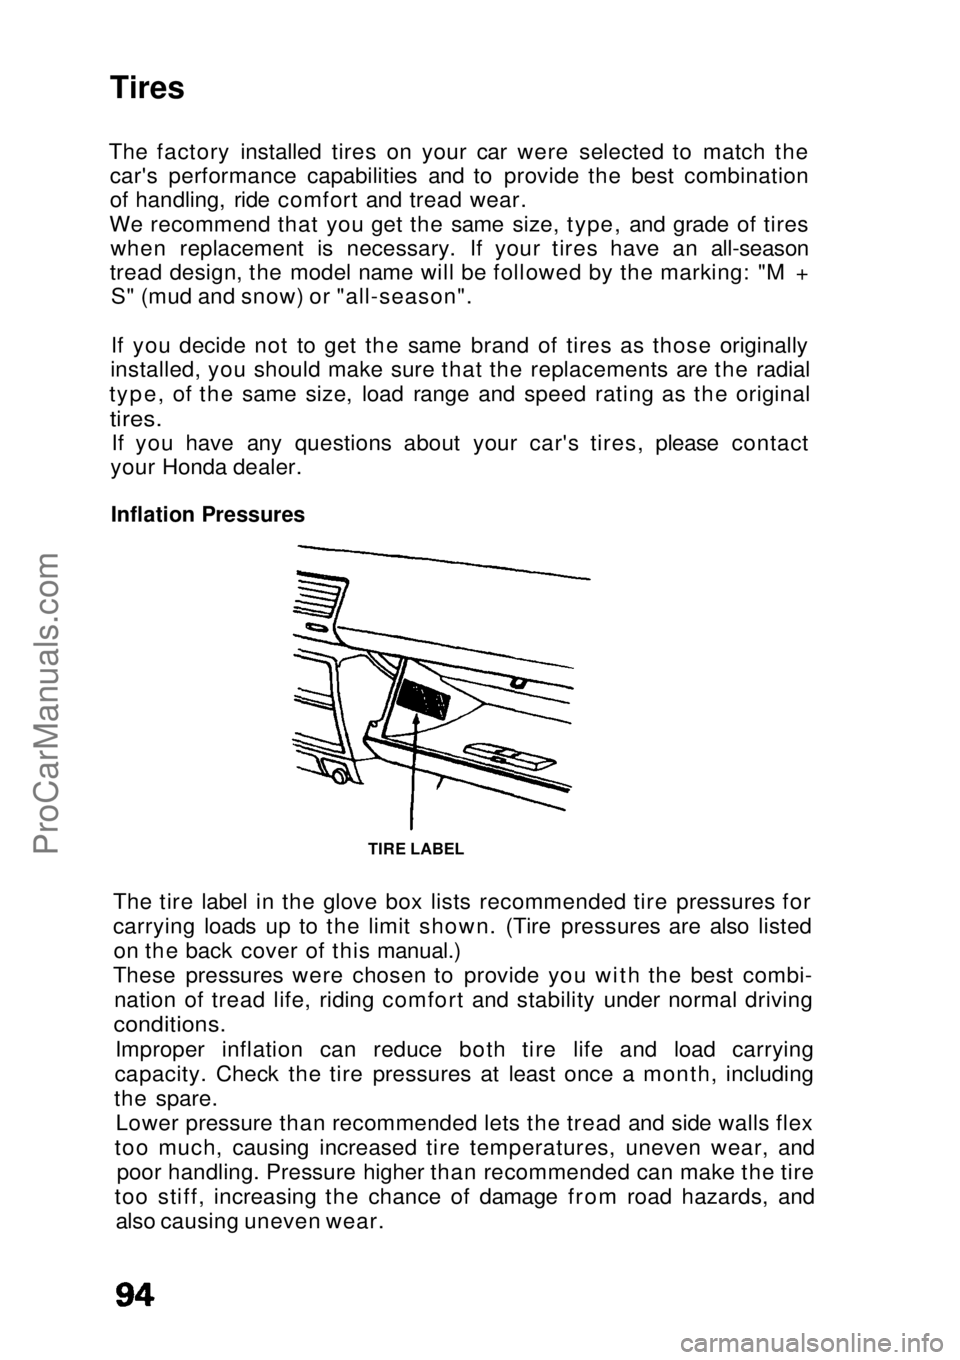
The tire label in the glove box lists recommended tire pressures for
carrying loads up to the limit shown. (Tire pressures are also listedon the back cover of this manual.)
These pressures were chosen to provide you with the best combi- nation of tread life, riding comfort and stability under normal driving
conditions.
Improper inflation can reduce both tire life and load carrying
capacity. Check the tire pressures at least once a month, including
the spare. Lower pressure than recommended lets the tread and side walls flex
too much, causing increased tire temperatures, uneven wear, and poor handling. Pressure higher than recommended can make the tire
too stiff, increasing the chance of damage from road hazards, and also causing uneven wear.
Tires
TIRE LABELProCarManuals.comMain Menu s t
Page 95 of 136

CAUTION:
Check tire pressure when the tires are cold.(After the car has been parked for more than 3 hours or driven
less than 1 mile/1.6 km.)
Tire pressure may increase as much as 41 kPa (6 psi) when the
tire is hot, so NEVER ADJUST tire pressure when the tires are hot.
Never inflate load range B tires to more than 220 kPa (32 psi)
cold.
Cars with luggage racks or cartop carriers DO NOT have greater
load limits than those on the label.
Winter Driving Tires marked "M + S" or "all season" have an all-weather treaddesign and should be suitable for most driving conditions. However,
snow tires and tire chains may be required under some conditions. Ifyour tires do not have these markings, they may not be suitable forwinter driving conditions. We recommend snow tires or tire chainsfor snow and icy conditions.
Snow TiresIf you use snow tires, they should be of the same size, construction
and load capacity as the original tires on your car. Snow tires must
be installed in sets of four, or they may cause poor handling. Driving
with snow tires on dry roads can reduce your car's performance
during acceleration, turning and stopping.
If you need further information on snow tires, please contact your
Honda dealer.
Tire Chains
Use chains only when you have to. Check with local authorities or
Provinces for requirements prior to installing tire chains. Make sure
the chains are the right size for your tires. Install them only on the
drive wheels of your car, and do so as tightly as possible, following
the manufacturer's instructions. If metal chains are used, they must
be SAE Class "S." Cable type traction devices can also be used.
Drive slowly with chains installed. If you hear the chains contacting
your car's body or chassis, stop and tighten them.
(cont'd)ProCarManuals.comMain Menu s t
Page 96 of 136
Tires (cont'd)
CAUTION:
If the contact continues, slow down until it stops or your car can
be damaged. Chains that are the wrong size or improperly installed can
damage your car's brake lines, suspension, body, and wheels.
If you need further information on tire chains, please see your
Honda dealer.
Remove the chains as soon as the road is clear of ice and snow.
Tire Replacement Honda recommends that you replace tires in sets of four, or in pairs,
front or rear. If you need to replace only one tire, mount the new
tire opposite the tire showing the least amount of wear. For instance, if the left front tire shows the least amount of wear,
mount the new tire on the front right side.
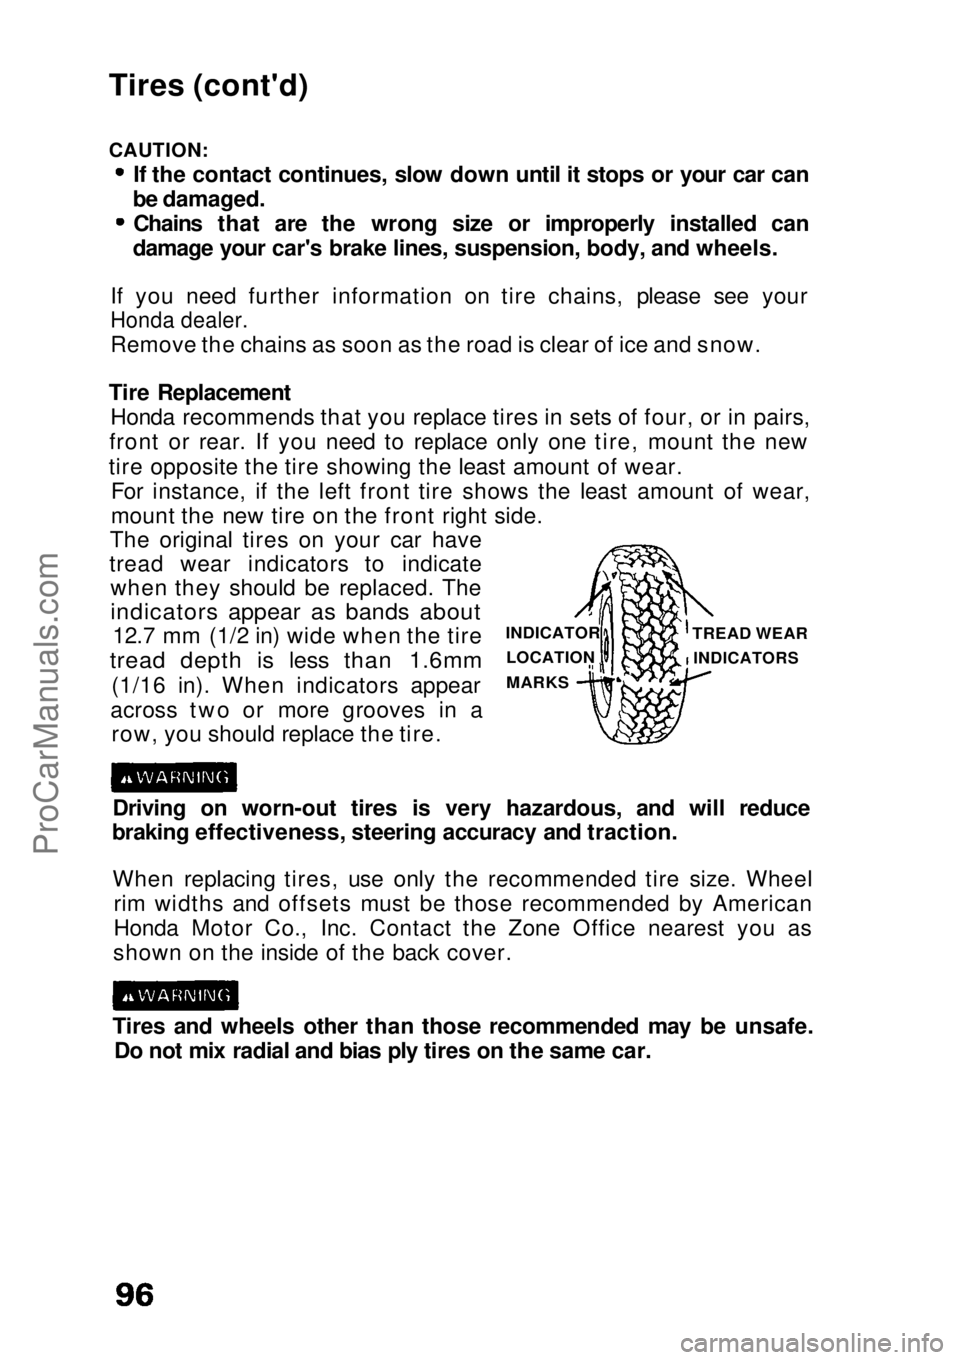
The original tires on your car have
tread wear indicators to indicate when they should be replaced. The
indicators appear as bands about
12.7 mm (1/2 in) wide when the tire
tread depth is less than 1.6mm
(1/16 in). When indicators appear
across two or more grooves in a row, you should replace the tire.
Driving on worn-out tires is very hazardous, and will reduce
braking effectiveness, steering accuracy and traction.
When replacing tires, use only the recommended tire size. Wheel rim widths and offsets must be those recommended by American
Honda Motor Co., Inc. Contact the Zone Office nearest you as
shown on the inside of the back cover.
Tires and wheels other than those recommended may be unsafe. Do not mix radial and bias ply tires on the same car. INDICATOR
LOCATION
MARKS TREAD WEAR
INDICATORSProCarManuals.comMain Menu s t
Page 97 of 136
Tire Balancing
Unbalanced tires may affect handling and tire wear. A tire should
always be rebalanced after it has been dismounted from the wheel.
Your original tires were properly balanced before the car left the
factory, but may need rebalancing at some time during the life of the
tire. Tire balancing for the COMPACT spare is not necessary.
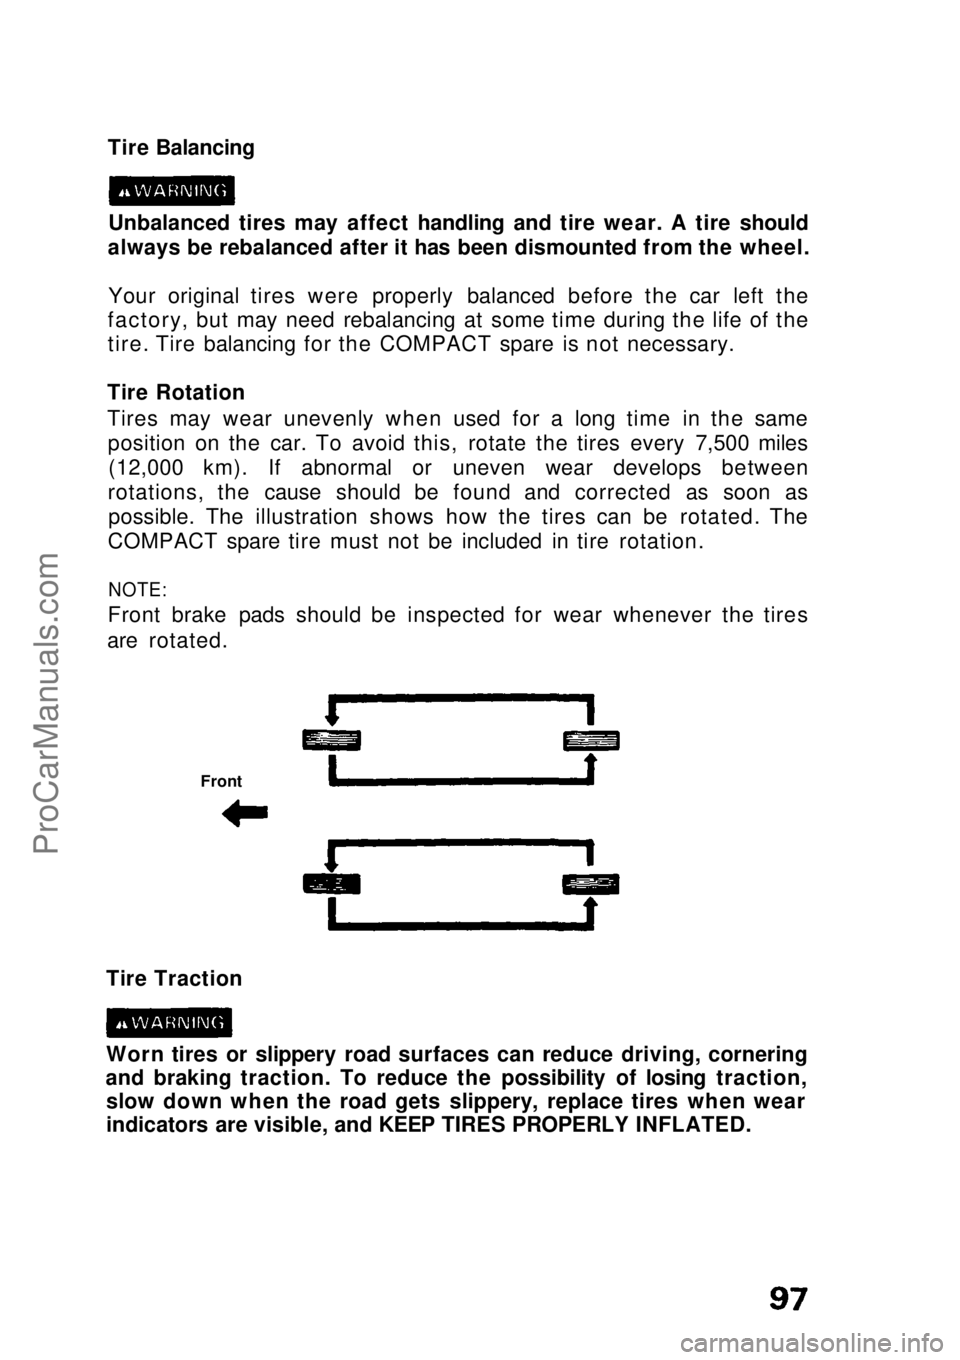
Tire Rotation
Tires may wear unevenly when used for a long time in the same position on the car. To avoid this, rotate the tires every 7,500 miles(12,000 km). If abnormal or uneven wear develops between
rotations, the cause should be found and corrected as soon as possible. The illustration shows how the tires can be rotated. The
COMPACT spare tire must not be included in tire rotation.
NOTE:
Front brake pads should be inspected for wear whenever the tires
are rotated.
Tire Traction
Worn tires or slippery road surfaces can reduce driving, cornering
and braking traction. To reduce the possibility of losing traction, slow down when the road gets slippery, replace tires when wear
indicators are visible, and KEEP TIRES PROPERLY INFLATED. FrontProCarManuals.comMain Menu s t
Page 98 of 136
Air Conditioner Care
Condenser and Radiator
Check the engine radiator and the air conditioner condenser (in front
of the radiator) for accumulated dirt, insects or leaves. Carefully brush or hose them off to assure maximum cooling performance.
CAUTION:
Radiator and condenser fins are very thin and easily damaged; do
not bend them with the high water pressure or brush.
Compressor Drive Belt
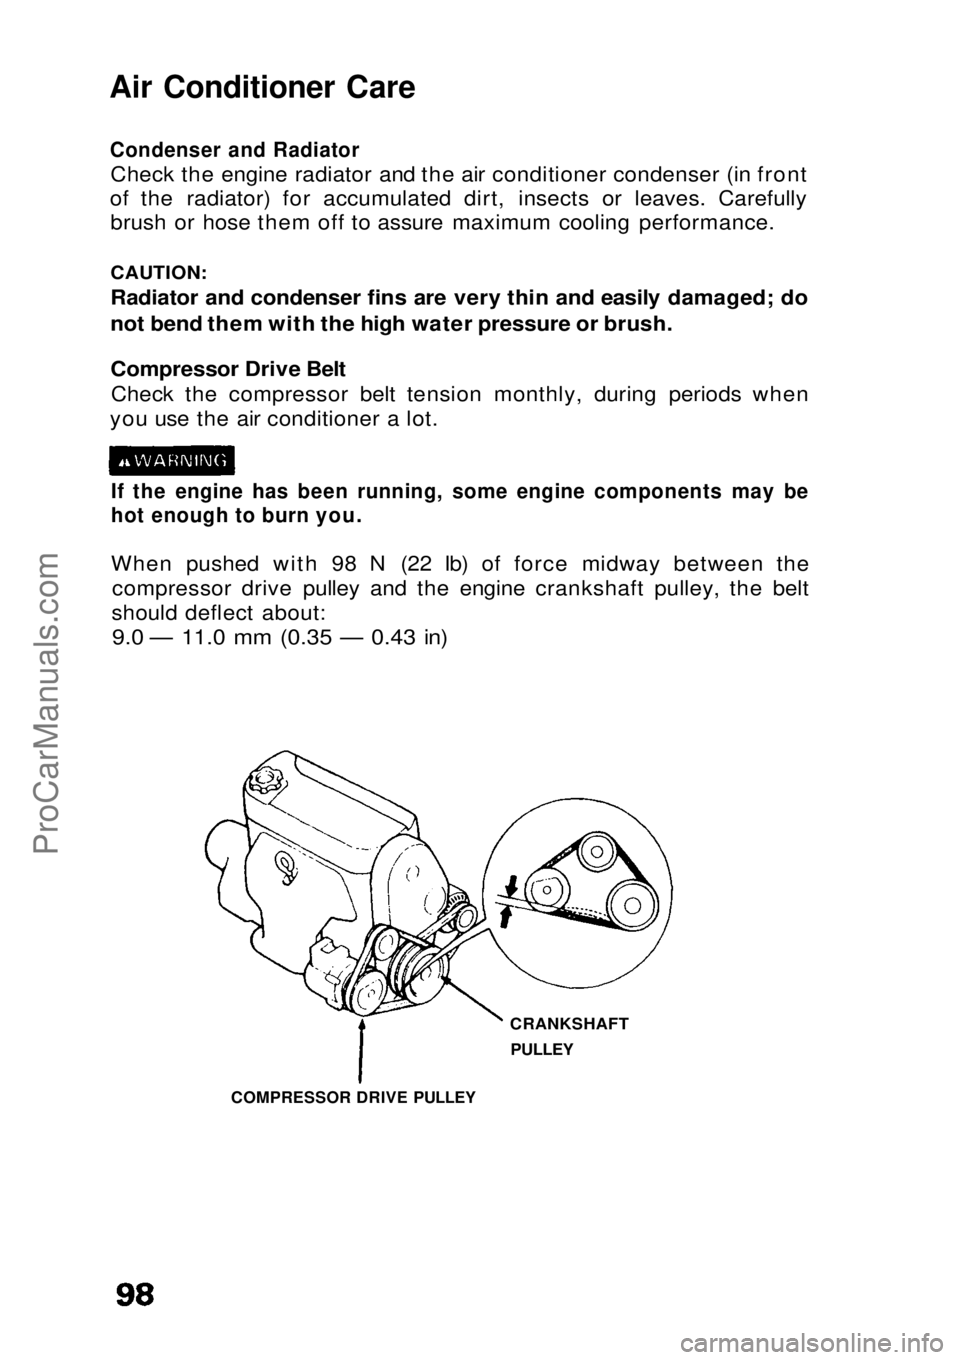
Check the compressor belt tension monthly, during periods when
you use the air conditioner a lot.
If the engine has been running, some engine components may be
hot enough to burn you.
When pushed with 98 N (22 Ib) of force midway between thecompressor drive pulley and the engine crankshaft pulley, the belt
should deflect about:
9.0 — 11.0 mm (0.35 — 0.43 in)
CRANKSHAFTPULLEY
COMPRESSOR DRIVE PULLEYProCarManuals.comMain Menu s t
Page 99 of 136

System Maintenance
Run your air conditioner at least once a week for about ten minutes,
even during the off season, to lubricate the seals and the inside of
the compressor and, to verify that the system is functional.
If the air conditioner is not cooling properly, it may indicate an
undercharged system. Have your dealer check the system for leaks,
then evacuate and charge the system with refrigerant 12. Charging quantity:
850 — 950 g (30.1 — 33.6 oz)
CAUTION:
Prolonged use of an undercharged system may damage the
compressor.ProCarManuals.comMain Menu s t
Page 100 of 136

Appearance Care
Interior Trim
Remove dust and loose dirt with a vacuum cleaner.
Wipe the vinyl with a clean, damp cloth or sponge. Stains can be removed with a commercially available vinyl cleaner.
CAUTION:
Do not use thinner, gasoline, kerosene, naphtha or other solvents
on the interior. They are toxic, flammable and hazardous and could
damage the material you're cleaning.
Windows
A 10 to 1 mix of water and white vinegar, or a commercially
available glass cleaner may be used to clean windows and to remove
the dust film sometimes caused by the ingredients used in interior vinyls and plastics.
NOTE:
Do not put this solution in the windshield washer reservoir, it will
damage the windshield washer pump.
Be careful not to scratch or damage the defogger wires when clean-
ing the inside of the rear window; wipe the window horizontally
along the wires, not up and down.
Dry the windows with a lint-free cloth or paper towel. Keep all the
windows clean for maximum visibility.
Exterior Care
Washing
Rinse all loose dirt off the car by spraying it with lukewarm or cold
water. Do not use hot water.
Wash using a soft-bristle brush, sponge or cloth with water containing a mild detergent such as a liquid dishwashing detergent. Remove oil, tar, tree sap, etc., with tar remover or turpentine.
Remove road salt, insects, etc., with mild detergent and lukewarm
water. Any of these substances may damage the finish if left on
painted surfaces.
Rinse the car well. Promptly wipe with a chamois or soft towel toprevent water-spotting. Do not let water or soap air-dry on painted
surfaces. During wiping, inspect the surface for stone chips and scratches;
paint them with touch-up paint so they won't rust (touch-up paint
is available through your Honda dealer).
For further instructions on corrosion protection, refer to the Rust
Prevention section on following page.ProCarManuals.comMain Menu s t