HONDA CIVIC COUPE 1999 Manual Online
Manufacturer: HONDA, Model Year: 1999, Model line: CIVIC COUPE, Model: HONDA CIVIC COUPE 1999Pages: 269, PDF Size: 2.42 MB
Page 81 of 269
Power Windows
On HX, EX and Si models in the U.S., Si
and SiR models in Canada
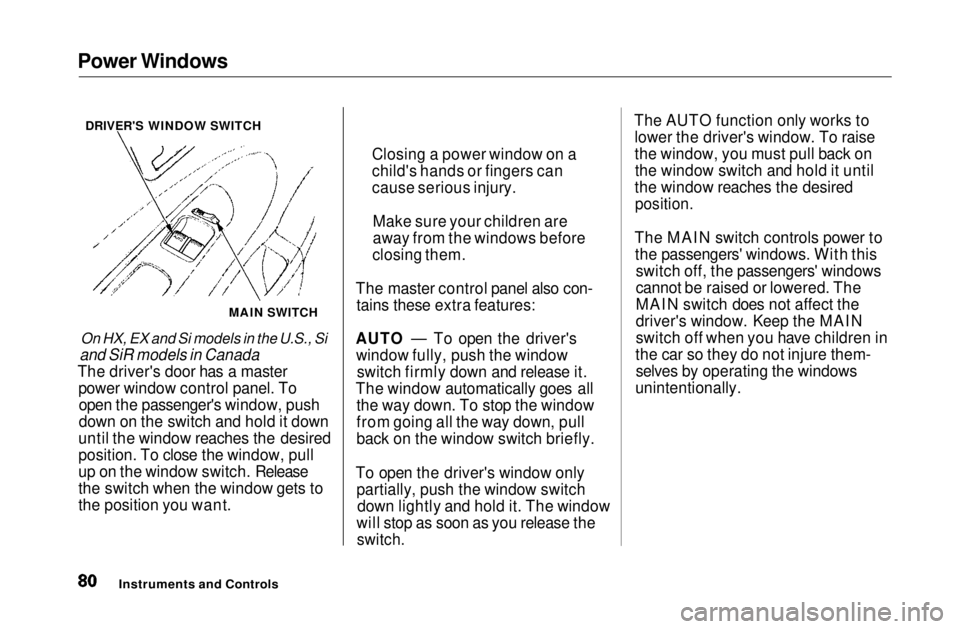
The driver's door has a master power window control panel. Toopen the passenger's window, push
down on the switch and hold it down
until the window reaches the desired
position. To close the window, pull
up on the window switch. Release
the switch when the window gets to
the position you want. The master control panel also con-
tains these extra features:
AUTO — To open the driver's window fully, push the window switch firmly down and release it.
The window automatically goes all the way down. To stop the window
from going all the way down, pull
back on the window switch briefly.
To open the driver's window only partially, push the window switchdown lightly and hold it. The window
will stop as soon as you release the
switch.
The AUTO function only works to
lower the driver's window. To raise
the window, you must pull back onthe window switch and hold it until
the window reaches the desired
position.
The MAIN switch controls power to the passengers' windows. With this switch off, the passengers' windows
cannot be raised or lowered. The
MAIN switch does not affect the
driver's window. Keep the MAIN
switch off when you have children in
the car so they do not injure them- selves by operating the windows
unintentionally.
Instruments and Controls
MAIN SWITCH
DRIVER'S WINDOW SWITCH
Closing a power window on a
child's hands or fingers can
cause serious injury.
Make sure your children are
away from the windows before
closing them.Main Menu Table of Contents s t
Page 82 of 269
Moonroof, Mirrors
On EX and Si models in the U.S., and Si
and SiR models in Canada
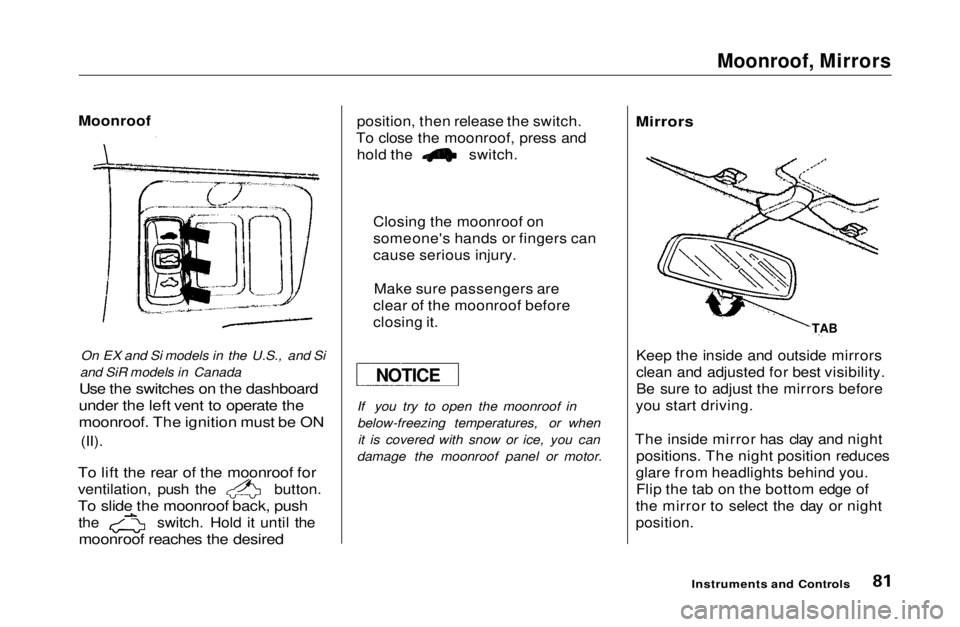
Use the switches on the dashboard
under the left vent to operate the
moonroof. The ignition must be ON
(II).
To lift the rear of the moonroof for
ventilation, push the button.
To slide the moonroof back, push
the switch. Hold it until the
moonroof reaches the desired
position, then release the switch.
To close the moonroof, press and hold the switch.
If you try to open the moonroof in
below-freezing temperatures, or whenit is covered with snow or ice, you can
damage the moonroof panel or motor.
Mirrors
Keep the inside and outside mirrors
clean and adjusted for best visibility.
Be sure to adjust the mirrors before
you start driving.
The inside mirror has clay and night positions. The night position reduces
glare from headlights behind you. Flip the tab on the bottom edge of
the mirror to select the day or night
position.
Instruments and Controls
Moonroof
Closing the moonroof on
someone's hands or fingers can
cause serious injury.Make sure passengers are
clear of the moonroof before
closing it.
NOTICE TABMain Menu Table of Contents s t
Page 83 of 269
Mirrors
On HX. KX and Si models in the U.S.. Si
and SiR models in Canada
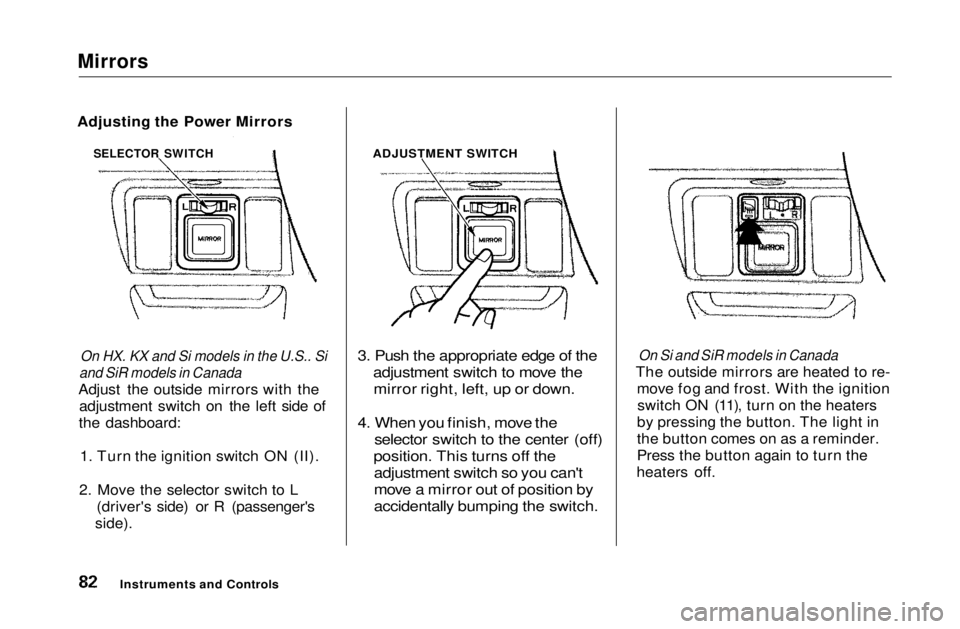
Adjust the outside mirrors with the adjustment switch on the left side of
the dashboard:
1. Turn the ignition switch ON (II).
2. Move the selector switch to L (driver's side) or R (passenger's
side).
3. Push the appropriate edge of the
adjustment switch to move the
mirror right, left, up or down.
4. When you finish, move the
selector switch to the center (off)
position. This turns off the
adjustment switch so you can't
move a mirror out of position by
accidentally bumping the switch.
On Si and SiR models in Canada
The outside mirrors are heated to re- move fog and frost. With the ignitionswitch ON (11), turn on the heaters
by pressing the button. The light in
the button comes on as a reminder.
Press the button again to turn the
heaters off.
Instruments and Controls ADJUSTMENT SWITCH
Adjusting the Power Mirrors
SELECTOR SWITCHMain Menu Table of Contents s t
Page 84 of 269
Parking Brake, Glove Box
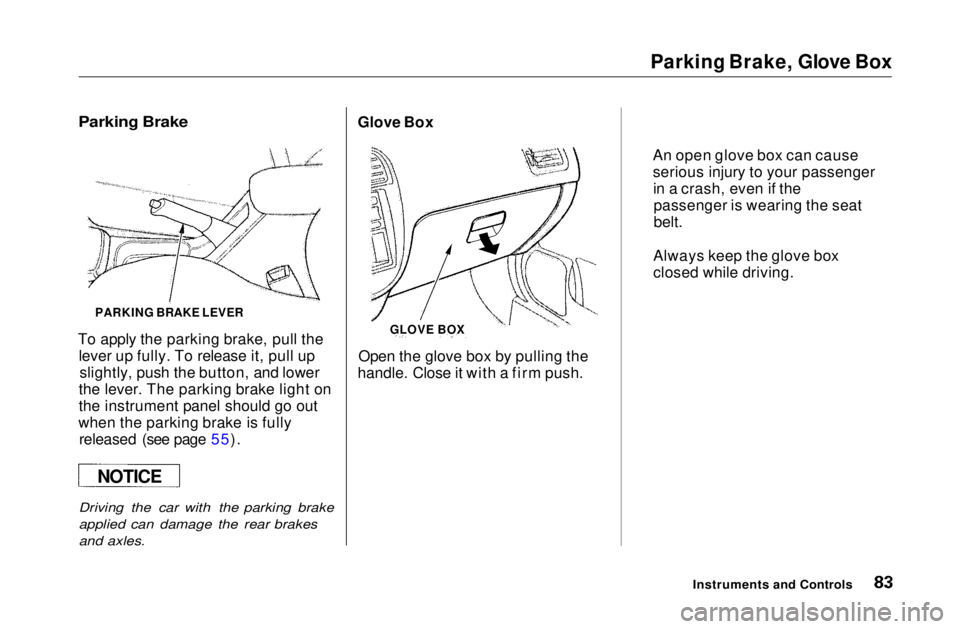
PARKING BRAKE LEVER
To apply the parking brake, pull the lever up fully. To release it, pull upslightly, push the button, and lower
the lever. The parking brake light on
the instrument panel should go out
when the parking brake is fully released (see page 55).
Driving the car with the parking brake
applied can damage the rear brakes
and axles.
Open the glove box by pulling the
handle. Close it with a firm push.
Instruments and Controls
GLOVE BOX
Glove Box
An open glove box can cause
serious injury to your passengerin a crash, even if thepassenger is wearing the seat
belt.
Always keep the glove box
closed while driving.
NOTICE
Parking BrakeMain Menu Table of Contents s t
Page 85 of 269
Beverage Holder
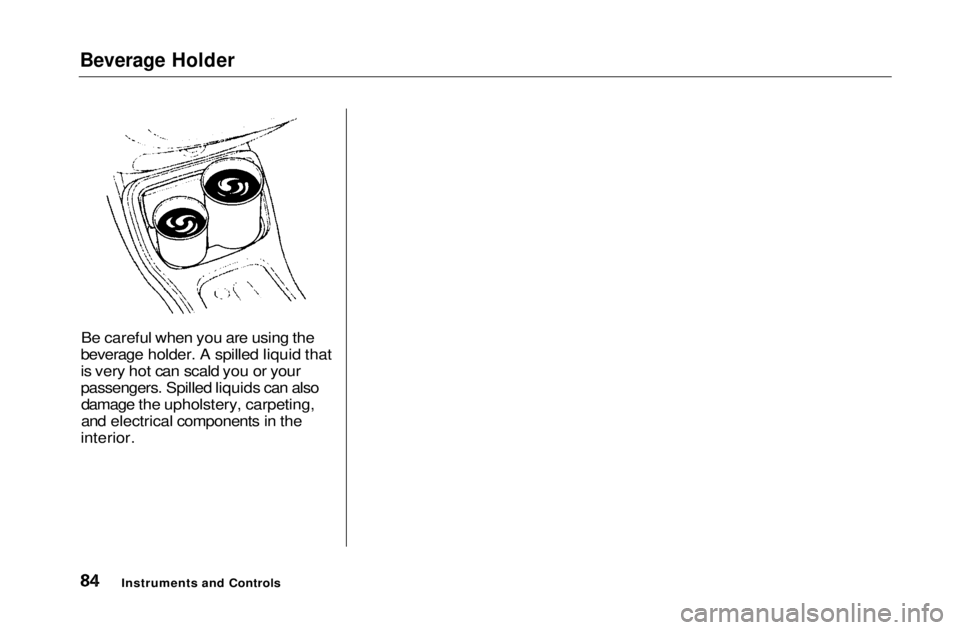
Be careful when you are using the
beverage holder. A spilled liquid that
is very hot can scald you or your
passengers. Spilled liquids can also damage the upholstery, carpeting,
and electrical components in the
interior.
Instruments and ControlsMain Menu Table of Contents s t
Page 86 of 269
Accessory Power Socket, Ashtrays
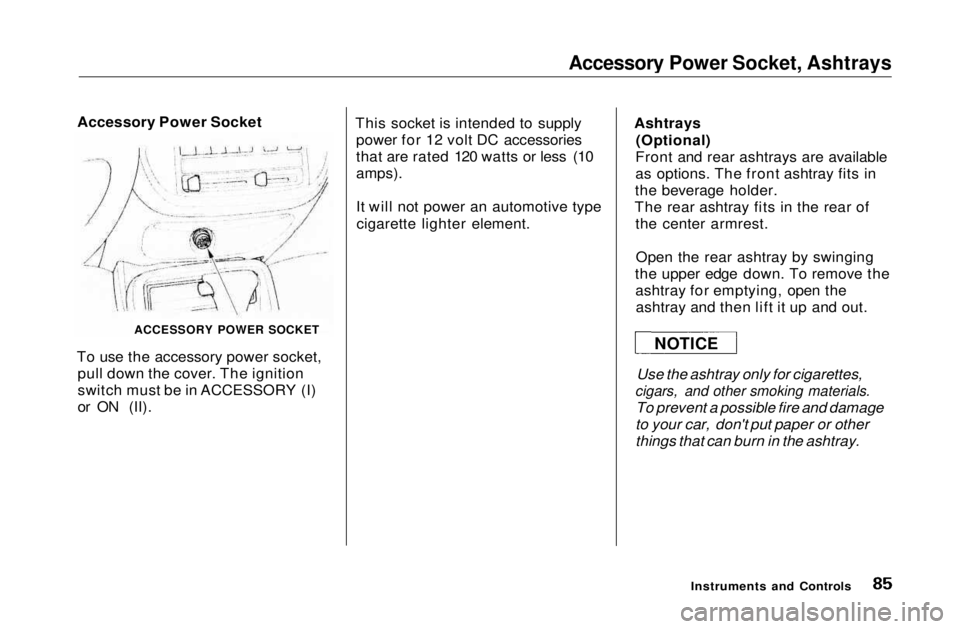
Accessory Power Socket
ACCESSORY POWER SOCKET
To use the accessory power socket, pull down the cover. The ignition
switch must be in ACCESSORY (I)
or ON (II). This socket is intended to supply
power for 12 volt DC accessories
that are rated 120 watts or less (10
amps).
It will not power an automotive type
cigarette lighter element. Ashtrays
(Optional)
Front and rear ashtrays are available
as options. The front ashtray fits in
the beverage holder.
The rear ashtray fits in the rear of the center armrest.
Open the rear ashtray by swinging
the upper edge down. To remove the ashtray for emptying, open theashtray and then lift it up and out.
Use the ashtray only for cigarettes,
cigars, and other smoking materials.
To prevent a possible fire and damage
to your car, don't put paper or other
things that can burn in the ashtray.
Instruments and Controls
NOTICEMain Menu Table of Contents s t
Page 87 of 269
Interior Light
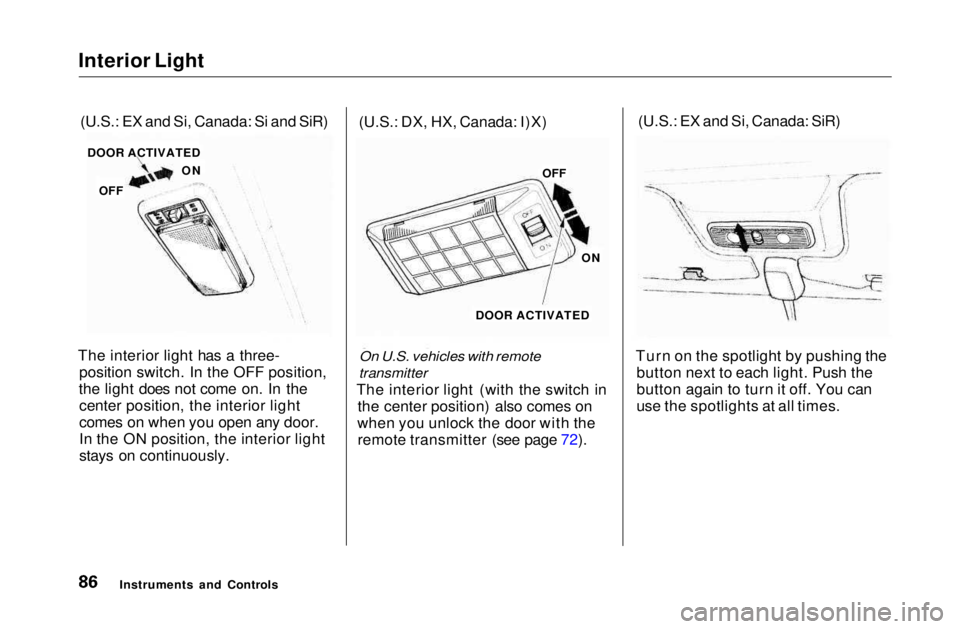
The interior light has a three- position switch. In the OFF position,
the light does not come on. In the center position, the interior light
comes on when you open any door.
In the ON position, the interior light
stays on continuously. (U.S.: DX, HX, Canada: I)X)
On U.S. vehicles with remote
transmitter
The interior light (with the switch in the center position) also comes on
when you unlock the door with the remote transmitter (see page 72). (U.S.: EX and Si, Canada: SiR)
Turn on the spotlight by pushing the button next to each light. Push the
button again to turn it off. You can
use the spotlights at all times.
Instruments and Controls
(U.S.: EX and Si, Canada: Si and SiR)
DOOR ACTIVATED
ON
OFF OFF
ON
DOOR ACTIVATEDMain Menu Table of Contents s t
Page 88 of 269

Comfort and Convenience Features
The heating and air conditioning*
systems in your Honda provide a
comfortable driving environment in
all weather conditions.
The standard audio system has
many features. This section de-
scribes those features and how to
use them. (If you selected an optional audio system, refer to the
operating instructions that came
with it.)
* Air conditioning is standard on the
EX and Si models in the U.S. and on
SiR model in Canada. It is optional on
other models.
Heating and Cooling........................ 88
What Each Control Does............ 88How to Use the System............... 90
To Turn Everything Off ............. 95
Audio System................................... 96 Operating the Radio.................... 96
Adjusting the Sound.................... 98 Digital Clock................................. 99Operating the Optional CD Player/Changer.............. 100
CD Changer Error Indications.............................. 102
AM/FM/CD Audio System..... 103 Operating the Radio.................. 104
Adjusting the Sound.................. 107 Digital Clock............................... 108
Operating the CD Player.......... 109
Protecting Compact Discs........ 112 CD Changer Error Indications.............................. 114
Operating the Cassette Player...................................... 115
Theft Protection........................ 119 Radio Frequencies..................... 120
Radio Reception......................... 120
Comfort and Convenience FeaturesMain Menu s t
Page 89 of 269
Heating and Cooling
Proper use of the Heating and
Cooling system can make the
interior dry and comfortable, and
keep the windows clear for best
visibility.
If your car does not have air
conditioning, it can be installed at
any time. Your dealer will install aGenuine Honda air conditioning
system that meets Honda's high
quality standards and is designed to
exactly fit your car. Please contact
your dealer for more information.
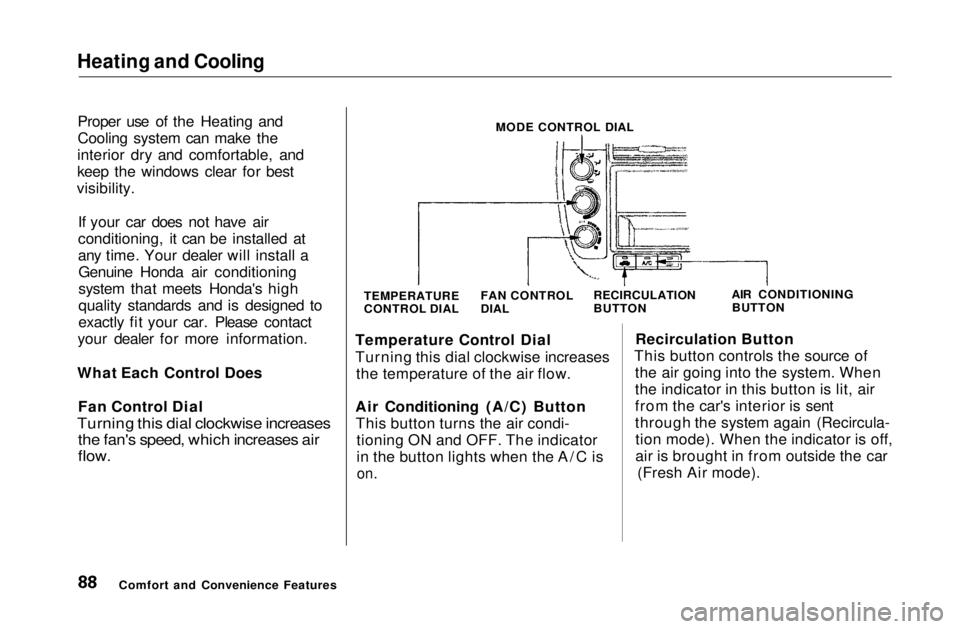
What Each Control Does Fan Control Dial
Turning this dial clockwise increases
the fan's speed, which increases air
flow.
MODE CONTROL DIAL
TEMPERATURE
CONTROL DIAL AIR CONDITIONING
BUTTON
Temperature Control Dial
Turning this dial clockwise increases the temperature of the air flow.
Air Conditioning (A/C) Button This button turns the air condi- tioning ON and OFF. The indicator
in the button lights when the A/C is
on.
Recirculation Button
This button controls the source of the air going into the system. When
the indicator in this button is lit, air
from the car's interior is sent
through the system again (Recircula-tion mode). When the indicator is off,
air is brought in from outside the car (Fresh Air mode).
Comfort and Convenience Features FAN CONTROL
DIAL
RECIRCULATION
BUTTONMain Menu Table of Contents s t
Page 90 of 269
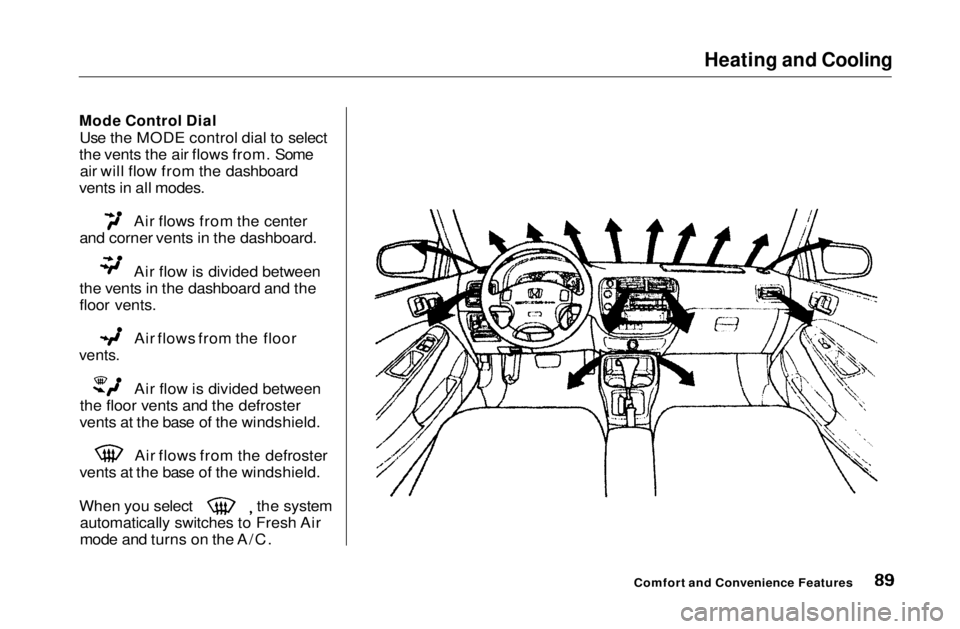
Heating and Cooling
Mode Control Dial
Use the MODE control dial to select
the vents the air flows from. Some air will flow from the dashboard
vents in all modes. Air flows from the center
and corner vents in the dashboard. Air flow is divided between
the vents in the dashboard and the
floor vents. Air flows from the floor
vents.
Air flow is divided between
the floor vents and the defroster
vents at the base of the windshield. Air flows from the defroster
vents at the base of the windshield. When you select the system
automatically switches to Fresh Air
mode and turns on the A/C.
Comfort and Convenience FeaturesMain Menu Table of Contents s t