HONDA ELEMENT 2011 1.G Owners Manual
Manufacturer: HONDA, Model Year: 2011, Model line: ELEMENT, Model: HONDA ELEMENT 2011 1.GPages: 286, PDF Size: 14.07 MB
Page 141 of 286
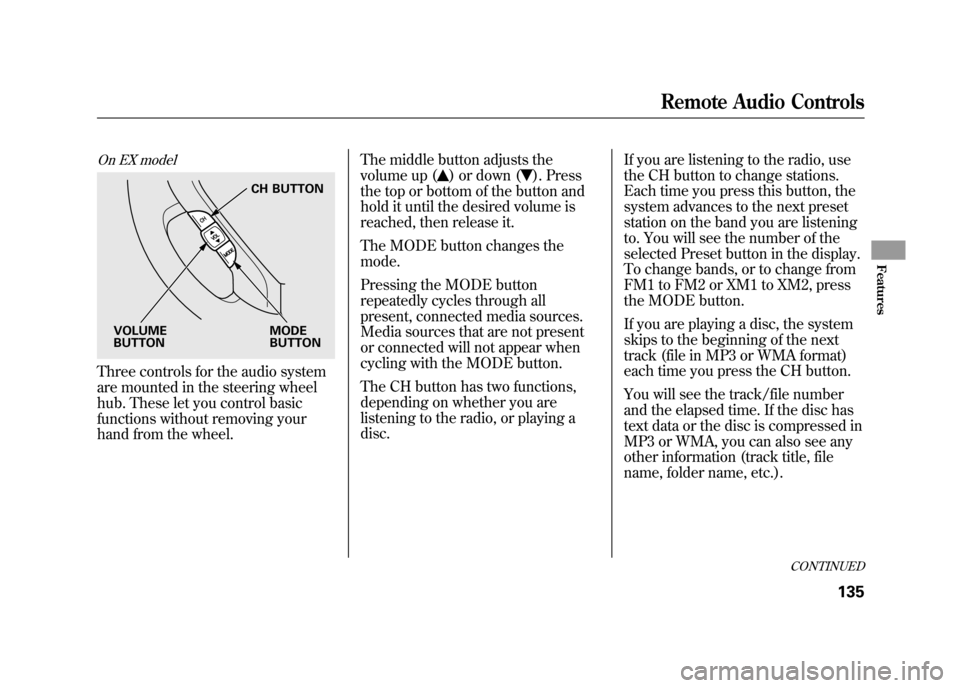
On EX modelThree controls for the audio system
are mounted in the steering wheel
hub. These let you control basic
functions without removing your
hand from the wheel.The middle button adjusts the
volume up (
) or down (
). Press
the top or bottom of the button and
hold it until the desired volume is
reached, then release it.
The MODE button changes the
mode.
Pressing the MODE button
repeatedly cycles through all
present, connected media sources.
Media sources that are not present
or connected will not appear when
cycling with the MODE button.
The CH button has two functions,
depending on whether you are
listening to the radio, or playing a
disc. If you are listening to the radio, use
the CH button to change stations.
Each time you press this button, the
system advances to the next preset
station on the band you are listening
to. You will see the number of the
selected Preset button in the display.
To change bands, or to change from
FM1 to FM2 or XM1 to XM2, press
the MODE button.
If you are playing a disc, the system
skips to the beginning of the next
track (file in MP3 or WMA format)
each time you press the CH button.
You will see the track/file number
and the elapsed time. If the disc has
text data or the disc is compressed in
MP3 or WMA, you can also see any
other information (track title, file
name, folder name, etc.).
CH BUTTON
MODE
BUTTON
VOLUME
BUTTON
CONTINUED
Remote Audio Controls
135
Features
10/08/06 08:34:41 11 ELEMENT MMC North America Owner's Man 50 31SCV680 enu
Page 142 of 286
In MP3 or WMA mode, you can use
the seek function to select folders.
Press and hold the CH button until
you hear a beep, to skip forward to
the first file of the next folder.Auxiliary Input Jack
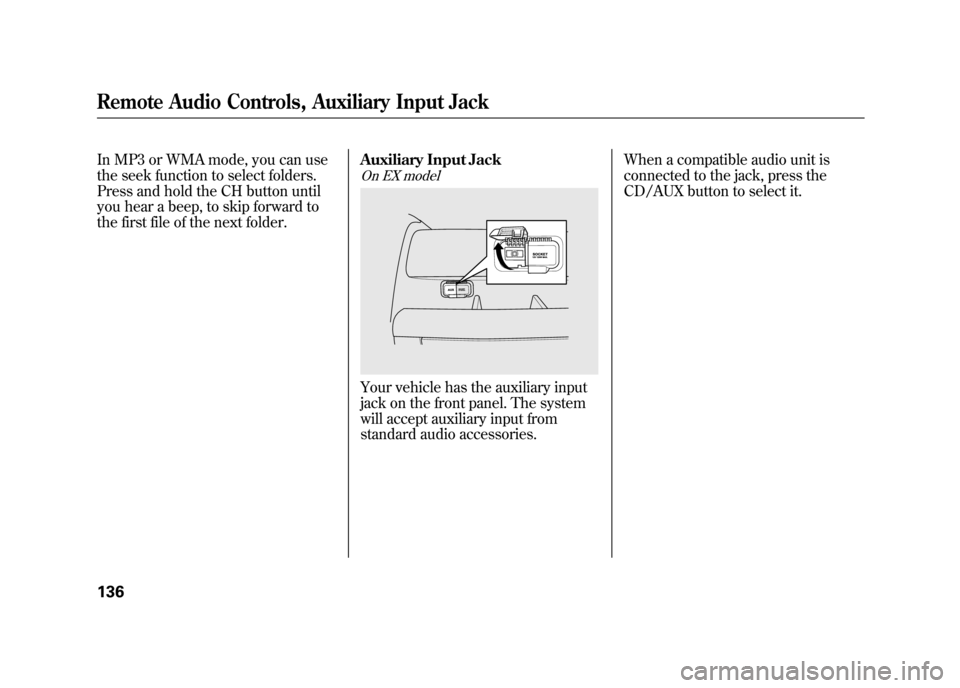
On EX modelYour vehicle has the auxiliary input
jack on the front panel. The system
will accept auxiliary input from
standard audio accessories.When a compatible audio unit is
connected to the jack, press the
CD/AUX button to select it.
Remote Audio Controls, Auxiliary Input Jack13610/08/06 08:34:41 11 ELEMENT MMC North America Owner's Man 50 31SCV680 enu
Page 143 of 286
Cruise control allows you to maintain
a set speed above 25 mph (40 km/h)
without keeping your foot on the
accelerator pedal. It should be used
for cruising on straight, open
highways. It is not recommended for
city driving, winding roads, slippery
roads, heavy rain, or bad weather.
Improper use of the cruise
control can lead to a crash.
Use the cruise control only
when traveling on open
highways in good weather.Using Cruise Control
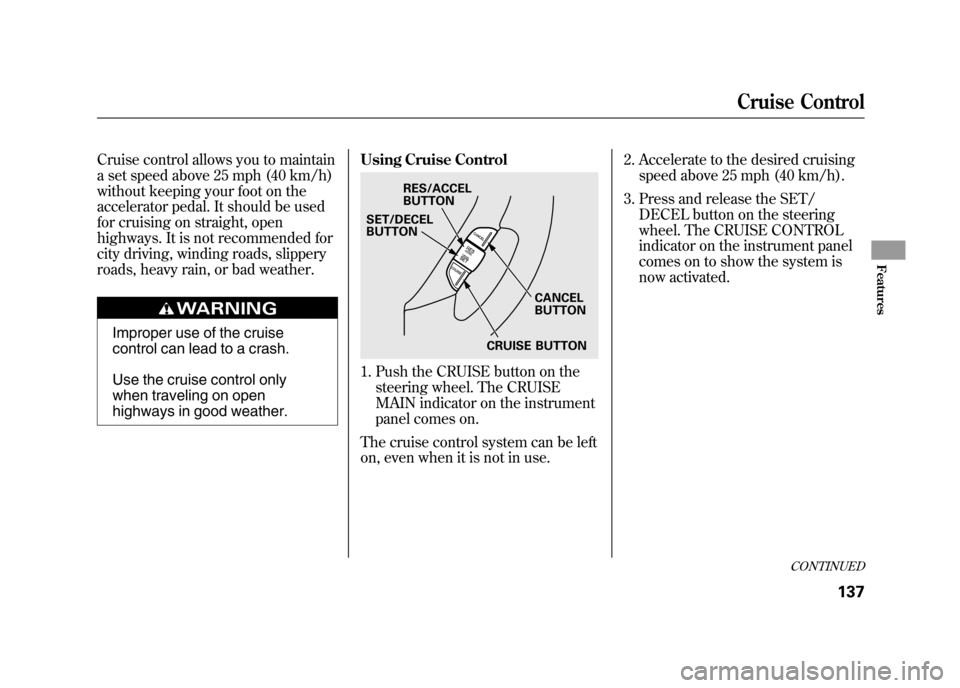
1. Push the CRUISE button on the
steering wheel. The CRUISE
MAIN indicator on the instrument
panel comes on.
The cruise control system can be left
on, even when it is not in use. 2. Accelerate to the desired cruising
speed above 25 mph (40 km/h).
3. Press and release the SET/ DECEL button on the steering
wheel. The CRUISE CONTROL
indicator on the instrument panel
comes on to show the system is
now activated.
RES/ACCEL
BUTTON
CANCEL
BUTTON
SET/DECEL
BUTTON
CRUISE BUTTON
CONTINUED
Cruise Control
137
Features
10/08/06 08:34:41 11 ELEMENT MMC North America Owner's Man 50 31SCV680 enu
Page 144 of 286
Cruise control may not hold the set
speed when you are going up and
down hills. If your speed increases
going down a hill, use the brakes to
slow down. This will cancel cruise
control. To resume the set speed,
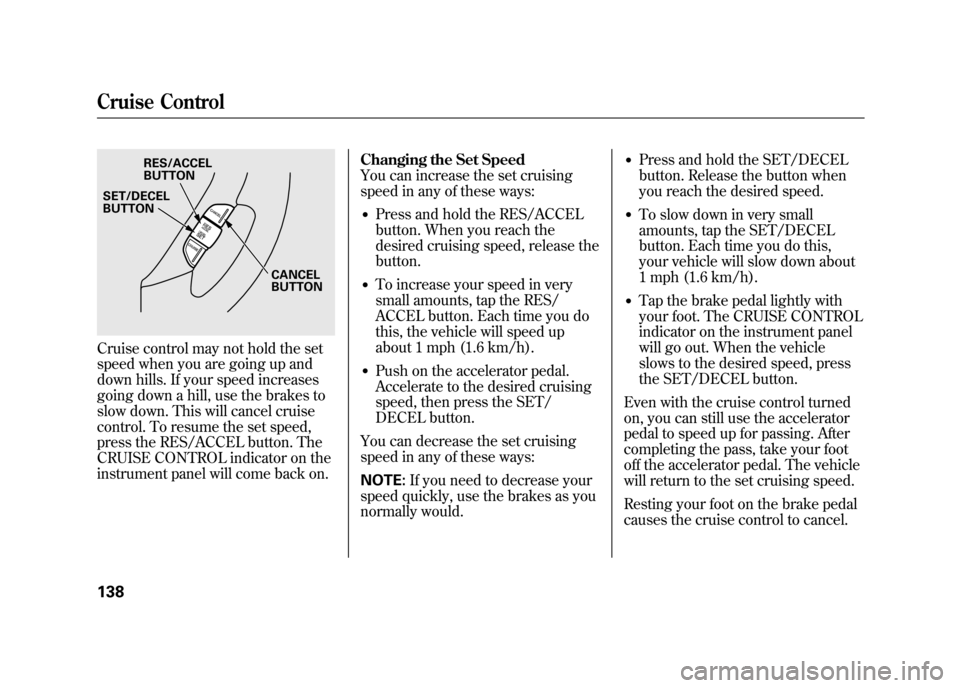
press the RES/ACCEL button. The
CRUISE CONTROL indicator on the
instrument panel will come back on.Changing the Set Speed
You can increase the set cruising
speed in any of these ways:
●Press and hold the RES/ACCEL
button. When you reach the
desired cruising speed, release the
button.●To increase your speed in very
small amounts, tap the RES/
ACCEL button. Each time you do
this, the vehicle will speed up
about 1 mph (1.6 km/h).●Push on the accelerator pedal.
Accelerate to the desired cruising
speed, then press the SET/
DECEL button.
You can decrease the set cruising
speed in any of these ways:
NOTE: If you need to decrease your
speed quickly, use the brakes as you
normally would.
●Press and hold the SET/DECEL
button. Release the button when
you reach the desired speed.●To slow down in very small
amounts, tap the SET/DECEL
button. Each time you do this,
your vehicle will slow down about
1 mph (1.6 km/h).●Tap the brake pedal lightly with
your foot. The CRUISE CONTROL
indicator on the instrument panel
will go out. When the vehicle
slows to the desired speed, press
the SET/DECEL button.
Even with the cruise control turned
on, you can still use the accelerator
pedal to speed up for passing. After
completing the pass, take your foot
off the accelerator pedal. The vehicle
will return to the set cruising speed.
Resting your foot on the brake pedal
causes the cruise control to cancel.
RES/ACCEL
BUTTON
CANCEL
BUTTON
SET/DECEL
BUTTON
Cruise Control13810/08/06 08:34:41 11 ELEMENT MMC North America Owner's Man 50 31SCV680 enu
Page 145 of 286
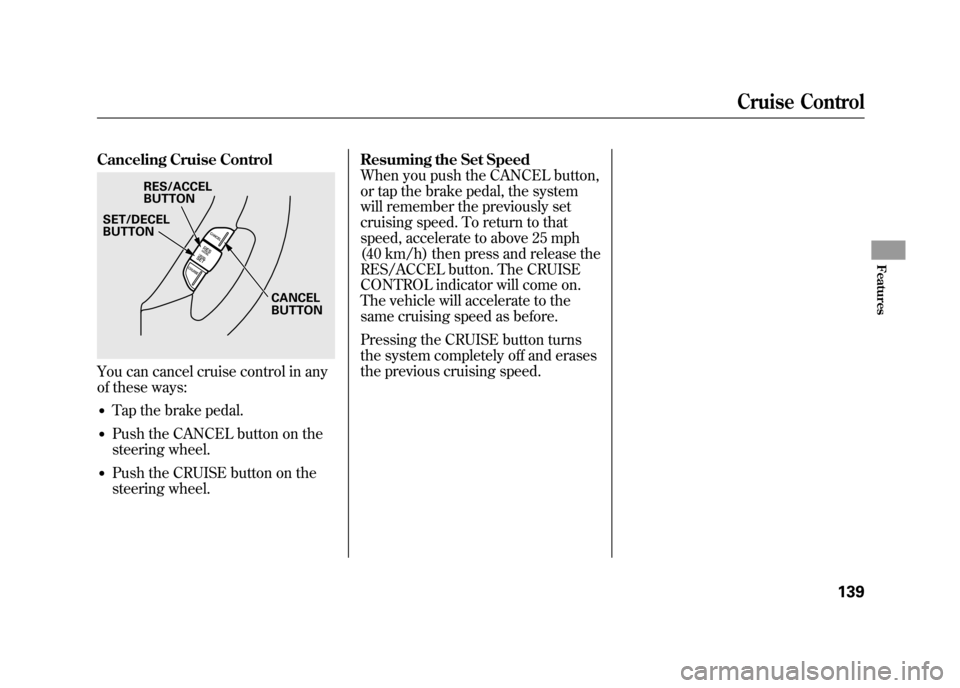
Canceling Cruise ControlYou can cancel cruise control in any
of these ways:●Tap the brake pedal.●Push the CANCEL button on the
steering wheel.●Push the CRUISE button on the
steering wheel.Resuming the Set Speed
When you push the CANCEL button,
or tap the brake pedal, the system
will remember the previously set
cruising speed. To return to that
speed, accelerate to above 25 mph
(40 km/h) then press and release the
RES/ACCEL button. The CRUISE
CONTROL indicator will come on.
The vehicle will accelerate to the
same cruising speed as before.
Pressing the CRUISE button turns
the system completely off and erases
the previous cruising speed.
RES/ACCEL
BUTTON
CANCEL
BUTTON
SET/DECEL
BUTTON
Cruise Control
139
Features
10/08/06 08:34:41 11 ELEMENT MMC North America Owner's Man 50 31SCV680 enu
Page 146 of 286

14010/08/06 08:34:41 11 ELEMENT MMC North America Owner's Man 50 31SCV680 enu
Page 147 of 286

Before you begin driving your
vehicle, you should know what
gasoline to use and how to check the
levels of important fluids. You also
need to know how to properly store
cargo or packages. The information
in this section will help you. If you
plan to add any accessories to your
vehicle, please read the information
in this section first.Break-in Period
...........................
142
Fuel Recommendation
................
142
Service Station Procedures
.........
143
Refueling
.................................
143
Opening and Closing the Hood
...................................
144
Oil Check
................................
145
Engine Coolant Check
............
145
Fuel Economy
.............................
146
Accessories and Modifications
..........................
149
Carrying Cargo
...........................
151
Before Driving
141
Before Driving
10/08/06 08:34:41 11 ELEMENT MMC North America Owner's Man 50 31SCV680 enu
Page 148 of 286

Break-in Period
Help assure your vehicle's future
reliability and performance by paying
extra attention to how you drive
during the first 600 miles (1,000 km).
During this period:●Avoid full-throttle starts and rapid
acceleration.●Do not change the oil until the
scheduled maintenance time.●Avoid hard braking for the first 200
miles (300 km).●Do not tow a trailer.
You should also follow these
recommendations with an
overhauled or exchanged engine, or
when the brakes are replaced. Fuel Recommendation
Your vehicle is designed to operate
on unleaded gasoline with a pump
octane number of 87 or higher. Use
of a lower octane gasoline can cause
a persistent, heavy metallic rapping
noise that can lead to engine
damage.
We recommend using quality
gasoline containing detergent
additives that help prevent fuel
system and engine deposits.
In addition, in order to maintain good
performance, fuel economy, and
emissions control, we strongly
recommend, in areas where it is
available, the use of gasoline that
does NOT contain manganese-based
fuel additives such as MMT.
Use of gasoline with these additives
may adversely affect performance,
and cause the malfunction indicator
lamp on your instrument panel to
come on. If this happens, contact
your authorized dealer for service.
Some gasoline today is blended with
oxygenates such as ethanol or
MTBE. Your vehicle is designed to
operate on oxygenated gasoline
containing up to 10% ethanol by
volume and up to 15% MTBE by
volume. Do not use gasoline
containing methanol.Break-in Period, Fuel Recommendation14210/08/06 08:34:41 11 ELEMENT MMC North America Owner's Man 50 31SCV680 enu
Page 149 of 286

If you notice any undesirable
operating symptoms, try another
service station or switch to another
brand of gasoline.
For further important fuel-related
information for your vehicle, or
information on gasoline that does not
contain MMT, visit Owner Link atowners.honda.com
.Refueling
1. Park with the driver's side closest to
the service station pump.
2. Outside of the vehicle, open the fuel fill door by pulling its notched edge.
Gasoline is highly flammable and
explosive. You can be burned or
seriously injured when handling
fuel.●Stop the engine and keep heat,
sparks, and flame away.●Handle fuel only outdoors.●Wipe up spills immediately.
3. Remove the fuel fill cap slowly. You may hear a hissing sound as
pressure inside the tank escapes.
Place the cap in the holder on the
fuel fill door. 4. Stop filling the tank after the fuel
nozzle automatically clicks off. Do
not try to ‘‘top off ’’the tank. This
leaves some room in the fuel tank for
the fuel to expand with temperature
changes.
If the fuel nozzle keeps clicking off
even though the tank is not full,
there may be a problem with your
vehicle's fuel vapor recovery system.
The system helps keep fuel vapor
from going into the atmosphere. Try
filling at another pump. If this does
not fix the problem, consult your
dealer.
5. Screw the fuel fill cap back on until it clicks at least once. If you do not
properly tighten the cap, the
malfunction indicator lamp may
come on (see page 236). You will
also see a ‘‘CHECK FUEL CAP’’
message on the information display.
6. Close the fuel fill door.
Fuel Recommendation, Service Station Procedures
143
Before Driving
10/08/06 08:34:41 11 ELEMENT MMC North America Owner's Man 50 31SCV680 enu
Page 150 of 286
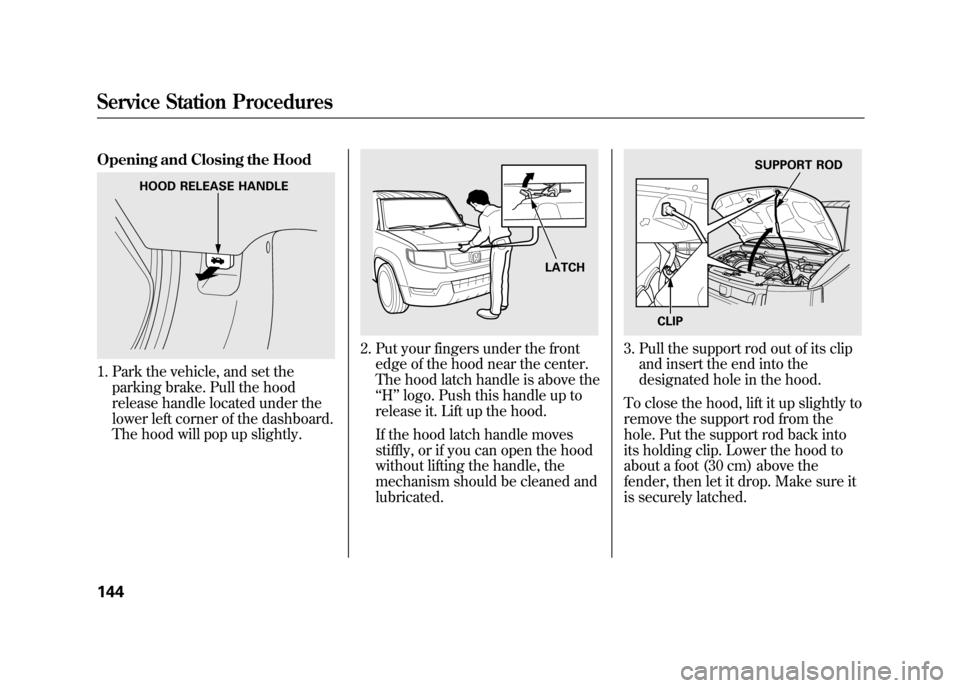
Opening and Closing the Hood1. Park the vehicle, and set theparking brake. Pull the hood
release handle located under the
lower left corner of the dashboard.
The hood will pop up slightly.
2. Put your fingers under the frontedge of the hood near the center.
The hood latch handle is above the
‘‘H ’’logo. Push this handle up to
release it. Lift up the hood.
If the hood latch handle moves
stiffly, or if you can open the hood
without lifting the handle, the
mechanism should be cleaned and
lubricated.
3. Pull the support rod out of its clip and insert the end into the
designated hole in the hood.
To close the hood, lift it up slightly to
remove the support rod from the
hole. Put the support rod back into
its holding clip. Lower the hood to
about a foot (30 cm) above the
fender, then let it drop. Make sure it
is securely latched.
HOOD RELEASE HANDLE
LATCH
SUPPORT ROD
CLIP
Service Station Procedures14410/08/06 08:34:41 11 ELEMENT MMC North America Owner's Man 50 31SCV680 enu