HONDA ODYSSEY 1996 Service Manual
Manufacturer: HONDA, Model Year: 1996, Model line: ODYSSEY, Model: HONDA ODYSSEY 1996Pages: 240, PDF Size: 2.64 MB
Page 41 of 240

Controls Near the Steering Wheel
Headlights
The rotating switch on the left lever controls the lights. Turning this switch to the first position
turns on the parking lights, taillights, instrument panel lights, side-marker
lights, and rear license plate lights.
Turning the switch to the second position turns on the
headlights. If you leave the lights on with the
ignition switch in ACCESSORY (I)
or LOCK (0), you will hear a
reminder chime when you open the
driver's door.
To change between low beams and high beams, pull back on the turnsignal lever until you hear a click,
then let go. The blue high beam indicator will light (see page 36). To flash the high beams, pull back
and hold the turn signal lever.
Release the lever and the high
beams will go off.
The high beams will stay on for as long as you hold the lever, no matter
what position the headlight switch is
in.
Daytime Running Lights (Canadian Models)
With the headlight switch off, the high beam headlights come on with
reduced brightness when you turn
the ignition switch to ON (II) and release the parking brake. They
remain on until you turn the ignition
off, even if you set the parking brake
The headlights revert to normal operation when you turn them on
with the switch.
Instruments and ControlsProCarManuals.comMain Menu s t Table of Contents
Page 42 of 240

Controls Near the Steering Wheel
Instrument Panel Brightness
The knob on the dashboard to the left of the steering column controlsthe brightness of the instrument panel lights. Push the knob to get it
to pop out. Turn the knob to adjust the brightness. Turn Signals
Signal a turn or lane change with this
lever. Push down on the lever tosignal a left turn, and up to signal aright turn. If you push it up or down
all the way, the turn signal continues
to blink even when you release the
lever. It shuts off automatically as
you complete the turn. To signal a lane change, push lightly
on the turn signal lever in the proper
direction and hold it. The lever will
return to the center position as soon as you release it.
Instruments and Controls
TURN SIGNAL LEVERProCarManuals.comMain Menu s t Table of Contents
Page 43 of 240

Controls Near the Steering Wheel
Windshield Wipers
The right lever controls the wind-
shield wipers and washers. The
rotary switch at the end of the lever
has three positions:
INT: intermittent
: low speed
: high speed
In intermittent, the wipers operate
every few seconds. In low speed and
high speed, the wipers run continu- ously. To operate the wipers in mist mode,
push the control lever down. The
wipers run at high speed until yourelease the lever. This gives you a quick way to clear the windshield. Windshield Washers
To clean the windshield, pull back ofthe wiper control lever. The washersspray until you release the lever. The
wipers run at low speed while you're pulling the lever, then complete onemore sweep of the windshield after
you release it.
Instruments and ControlsProCarManuals.comMain Menu s t Table of Contents
Page 44 of 240
Controls Near the Steering Wheel
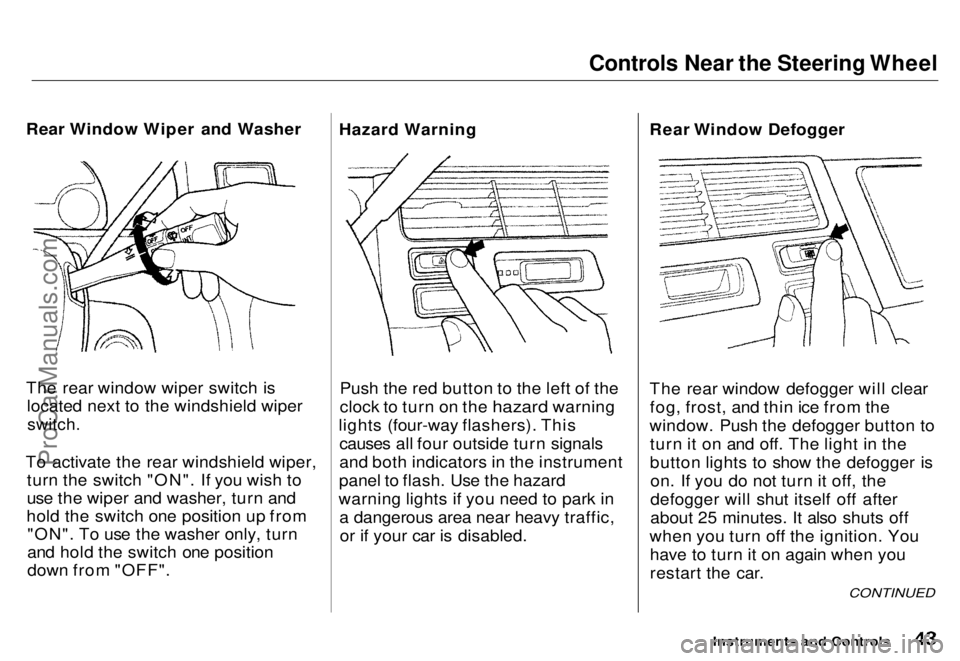
Rear Window Wiper and Washer
The rear window wiper switch is located next to the windshield wiper
switch.
To activate the rear windshield wiper, turn the switch "ON". If you wish to
use the wiper and washer, turn and
hold the switch one position up from "ON". To use the washer only, turn
and hold the switch one position
down from "OFF". Hazard Warning
Push the red button to the left of the
clock to turn on the hazard warning
lights (four-way flashers). This causes all four outside turn signals
and both indicators in the instrument
panel to flash. Use the hazard
warning lights if you need to park in a dangerous area near heavy traffic,or if your car is disabled. Rear Window Defogger
The rear window defogger will clear
fog, frost, and thin ice from the
window. Push the defogger button to turn it on and off. The light in the
button lights to show the defogger ison. If you do not turn it off, the
defogger will shut itself off after
about 25 minutes. It also shuts off
when you turn off the ignition. You have to turn it on again when you
restart the car.
Instruments and Controls
CONTINUED
ProCarManuals.comMain Menu s t Table of Contents
Page 45 of 240

Controls Near the Steering Wheel
Make sure the rear window is clear
and you have good visibility before
starting to drive.
The defogger wires on the inside of the rear window can be accidentally damaged. When cleaning the glass,
always wipe side to side. Steering Wheel Adjustment
You can adjust the steering wheel height to suit your preference. Do
this before you begin driving.
1. Adjust the seat so you are acomfortable distance from the
pedals.
2. The lever to tilt the steering wheel is under the steering column to
the left. Push this lever all the was
down.
Instruments and Controls
Adjusting the steering wheel
position while driving may
cause you to lose control of the
car and be seriously injured in a
crash.
Adjust the steering wheel only
when the car is stopped.ProCarManuals.coms t Table of Contents Main Menu
Page 46 of 240

Controls Near the Steering Wheel
Instruments and Controls
3. Move the steering wheel up or
down to the desired position.
Position the wheel so you can see
all the instrument panel gauges
and warning lights. Push the lever
up to lock the steering wheel in
that position.
4. Make sure you have securely locked the steering wheel in place
by trying to move it up and down.ProCarManuals.comMain Menu s t Table of Contents
Page 47 of 240

without keeping your foot on the accelerator pedal. It is for cruising onstraight, open")
Steering Wheel Controls
Cruise ControlCruise control allows you to maintain
a set speed above 25 mph (40 km/h)
without keeping your foot on the accelerator pedal. It is for cruising onstraight, open highways. It is not
recommended for conditions such as city driving, winding roads, slippery
roads, heavy rain, or bad weather.
You should have full control of the car under those conditions.
Using the Cruise Control
1. Push in the Cruise Control Master Switch to the left of the steering
column. The indicator in the
switch will light.
2. Accelerate to the desired cruising speed above 25 mph (40 km/h).
Instruments and Controls
Improper use of the cruise
control can lead to a crash.
Use the cruise control only
when traveling on open highways in good weather.
CRUISE CONTROL MASTER SWITCHProCarManuals.comMain Menu s t Table of Contents
Page 48 of 240

Steering Wheel Controls
3. Press and hold the SET/decel button on the steering wheel until
the CRUISE CONTROL light on
the instrument panel comes on.
This shows the system is now
activated.
The set speed may vary slightly,particularly on hills.
Changing the Set Speed
You can increase the set cruising speed in either of two ways:
Press and hold the RESUME/accel button. The car will acceler-
ate slowly. When you reach the
desired cruising speed, release the
button. Push on the accelerator pedal. Ac-
celerate to the desired cruising
speed and press the SET/decel
button. You can decrease the set cruising
speed in either of two ways:
Press and hold the SET/decel
button. The car will decelerate.
Release the button when you
reach the desired speed. Tap the brake pedal lightly with
your foot. The CRUISE CONTROL light on the instru-
ment panel will go out. When the
car slows to the desired speed, press the SET/decel button. The
car will then maintain the desired
speed.
CONTINUED
Instruments and Controls
RESUME/
accel
SET/decelProCarManuals.comMain Menu s t Table of Contents
Page 49 of 240

Steering Wheel Controls
Even with the cruise control turnedon, you can still use the accelerator
pedal to speed up for passing. After
completing the pass, take your foot
off the accelerator pedal. The car
will return to the set cruising speed.
Resting your foot on the brake or clutch pedal will cause the cruise
control to cancel.
Cancelling the Cruise Control
Any of these actions cause the cruise
control to cancel.
Tap the brake pedal.
Press the SET/decel and RE-
SUME/accel buttons at the same
time.
Press the Cruise Control Master
Switch.
When you tap the brake pedal, or press the SET and RESUME buttonsat the same time, the CRUISECONTROL light on the instrument
panel will go out and the car will
begin to slow down. You can use the accelerator pedal in the normal way. If you use the brake pedal to cancel
cruise control, the system retains the
previously-set cruising speed. To
return to that speed, accelerate to
above 25 mph (40 km/h) and press
the RESUME/accel button until theCRUISE CONTROL light comes on.
The car will accelerate to the same cruising speed as before.
If you cancel cruise control by
pressing the SET and RESUME
buttons at the same time, the
previously-set cruising speed is erased. To use the cruise control,
accelerate to the desired cruisingspeed and press the SET/decel
button.
Pressing the Cruise Control Master
Switch turns the system completely off and erases the previous cruisingspeed from memory. To use the
system again, refer to Using the
Cruise Control.
Instruments and ControlsProCarManuals.comMain Menu s t Table of Contents
Page 50 of 240

Keys and Locks
Keys
Your car comes with two kinds ofkeys: a master key and a valet key.
The master key fits all locks on your
car:
Ignition
Doors
Glove box
Tailgate
The valet key only works the ignition
and the door locks. You can keep theglove box locked when you leave
your car and valet key at a parking
facility.
You should have received a key number plate with your set of keys.
You will need this key number if you ever have to replace a lost key. Store
this plate in a safe place.
When replacing keys, use only Honda-approved key blanks.
Ignition Switch
The ignition switch is on the right
side of the steering column. It has
four positions: LOCK (0), ACCES- SORY (I), ON (II), and START (III).
Instruments and Controls
KEY
NUMBER
PLATE
VALET
KEY
MASTER
KEYProCarManuals.comMain Menu s t Table of Contents