HONDA PRELUDE 2000 (in English) Owners Manual
Manufacturer: HONDA, Model Year: 2000, Model line: PRELUDE, Model: HONDA PRELUDE 2000Pages: 293, PDF Size: 3.43 MB
Page 91 of 293
Mirror
s
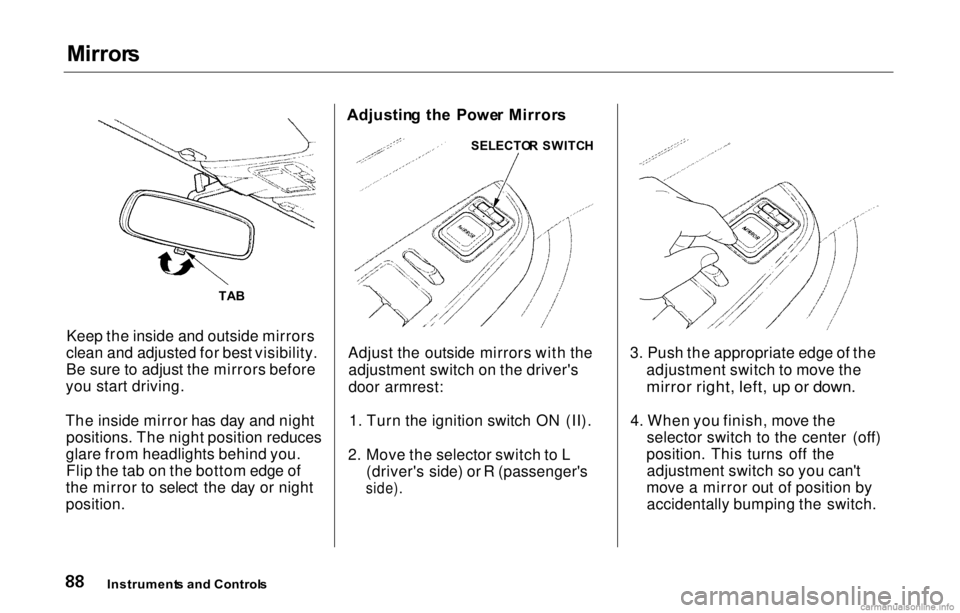
Keep the inside and outside mirrors
clean and adjusted for best visibility.
Be sure to adjust the mirrors before
you start driving.
The inside mirror has day and night positions. The night position reduces
glare from headlights behind you. Flip the tab on the bottom edge of
the mirror to select the day or night
position. Adjustin
g th e Powe r Mirror s
Adjust the outside mirrors with the adjustment switch on the driver's
door armrest:
1. Turn the ignition switch ON (II).
2. Move the selector switch to L (driver's side) or R (passenger's
side).
3. Push the appropriate edge of the
adjustment switch to move the
mirror right, left, up or down.
4.
When you finish, mov
e the
selector switch to the center (off)
position. This turns off the adjustment switch so you can't
move a mirror out of position by accidentally bumping the switch.
Instrument s an d Control s
TA
B SELECTO
R SWITC H
Page 92 of 293
Mirrors
, Parkin g Brake
Available on all Canadian models
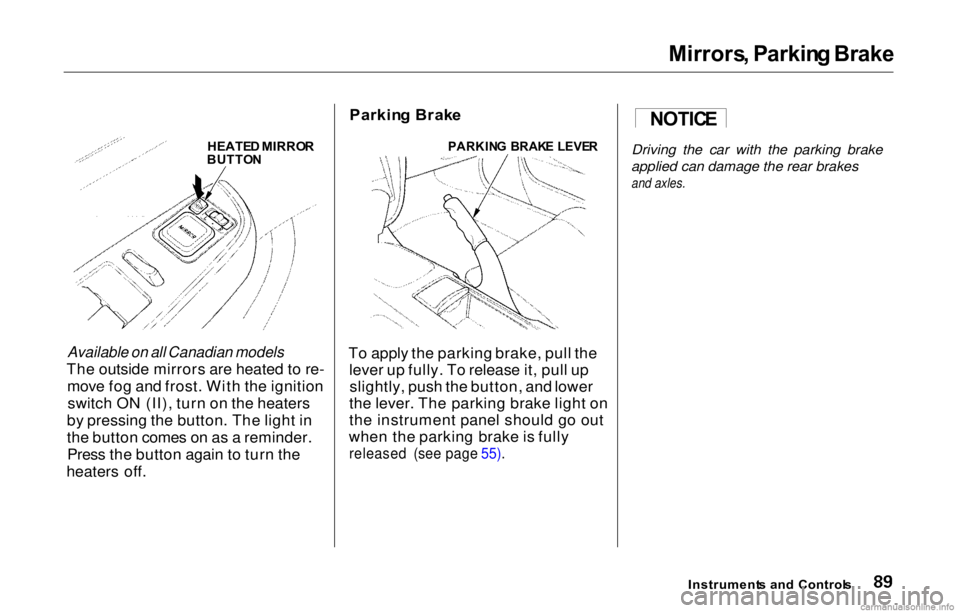
The outside mirrors are heated to re- move fog and frost. With the ignitionswitch ON (II), turn on the heaters
by pressing the button. The light in
the button comes on as a reminder. Press the button again to turn the
heaters off. Parkin
g Brak e
To apply the parking brake, pull the lever up fully. To release it, pull upslightly, push the button, and lower
the lever. The parking brake light on
the instrument panel should go out
when the parking brake is fully
released (see page 55).
Instruments an d Control s
Driving the car with the parking brake
applied can damage the rear brakes
and axles.
HEATE
D MIRRO R
BUTTO N
PARKIN
G BRAK E LEVE R NOTIC
E
Page 93 of 293
Digita
l Cloc k
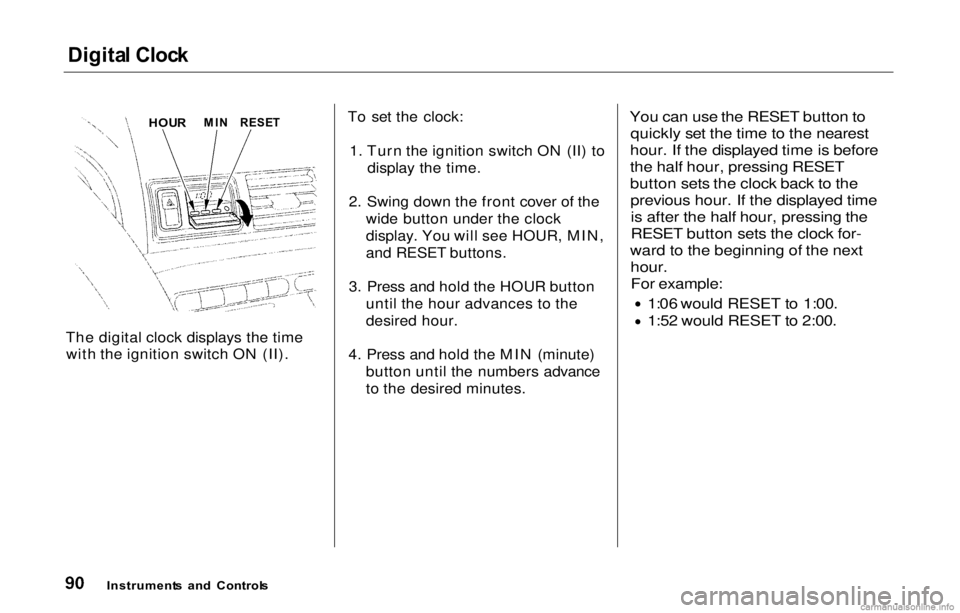
The digital clock displays the time with the ignition switch ON (II). To set the clock:
1. Turn the ignition switch ON (II) to display the time.
2. Swing down the front cover of the wide button under the clock
display. You will see HOUR, MIN,
and RESET buttons.
3. Press and hold the HOUR button until the hour advances to the
desired hour.
4. Press and hold the MIN (minute) button until the numbers advance
to the desired minutes.
You can use the RESET button to
quickly set the time to the nearest
hour. If the displayed time is before
the half hour, pressing RESET
button sets the clock back to the previous hour. If the displayed timeis after the half hour, pressing the
RESET button sets the clock for-
ward to the beginning of the next
hour.
For example:
1:06 would RESET to 1:00. 1:52 would RESET to 2:00.
Instrument s
an d Control s
HOU
R
MI
N RESE T
Page 94 of 293
Beverag
e Holde r
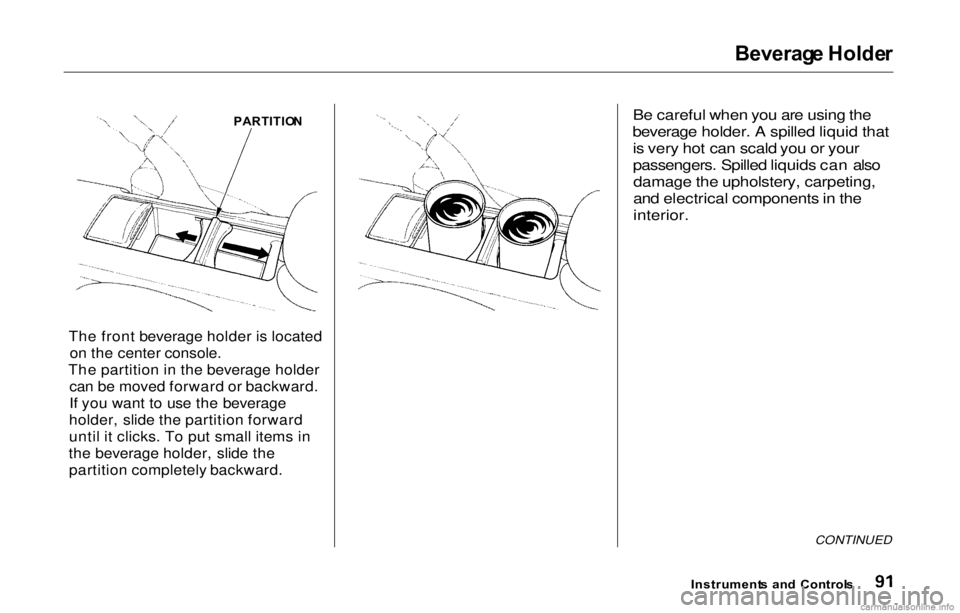
The front beverage holder is located on the center console.
The partition in the beverage holder can be moved forward or backward.
If you want to use the beverage
holder, slide the partition forward
until it clicks. To put small items in
the beverage holder, slide the partition completely backward.
Be careful when you are using the
beverage holder. A spilled liquid that is very hot can scald you or your
passengers. Spilled liquids can alsodamage the upholstery, carpeting,
and electrical components in the
interior.
CONTINUED
Instrument s an d Control s
PARTITIO
N
Page 95 of 293
Beverag
e Holder , Consol e Compartment
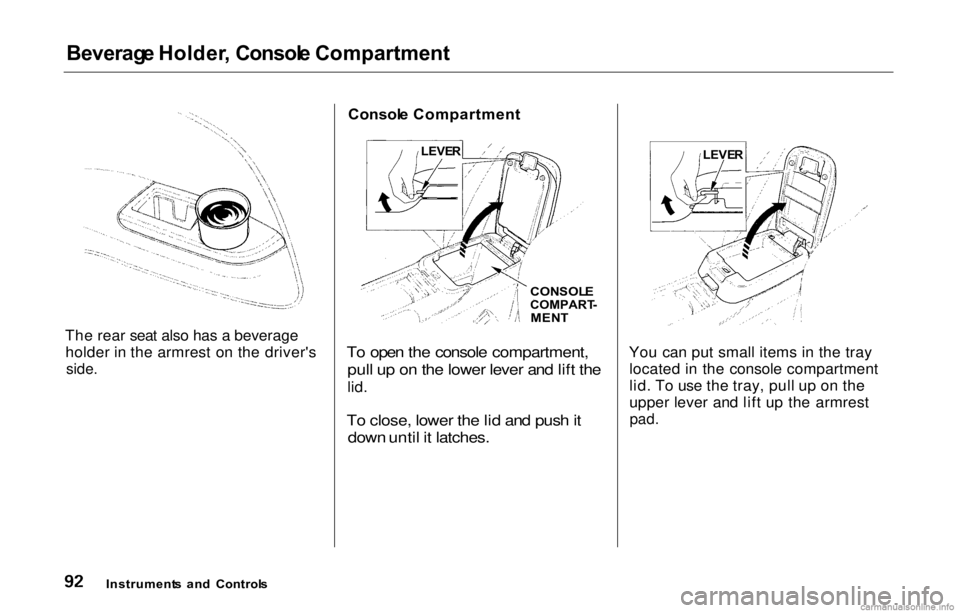
The rear seat also has a beverage holder in the armrest on the driver's
side.
Consol
e Compartment
To open the console compartment, pull up on the lower lever and lift the
lid.
To close, lower the lid and push it down until it latches.
You can put small items in the tray
located in the console compartment
lid. To use the tray, pull up on the
upper lever and lift up the armrest
pad.
Instrument s an d Control s
LEVE
R
CONSOLE
COMPART -
MEN T
LEVE
R
Page 96 of 293
Coi
n Box , Accessor y Powe r Socke t
Coi n Bo x
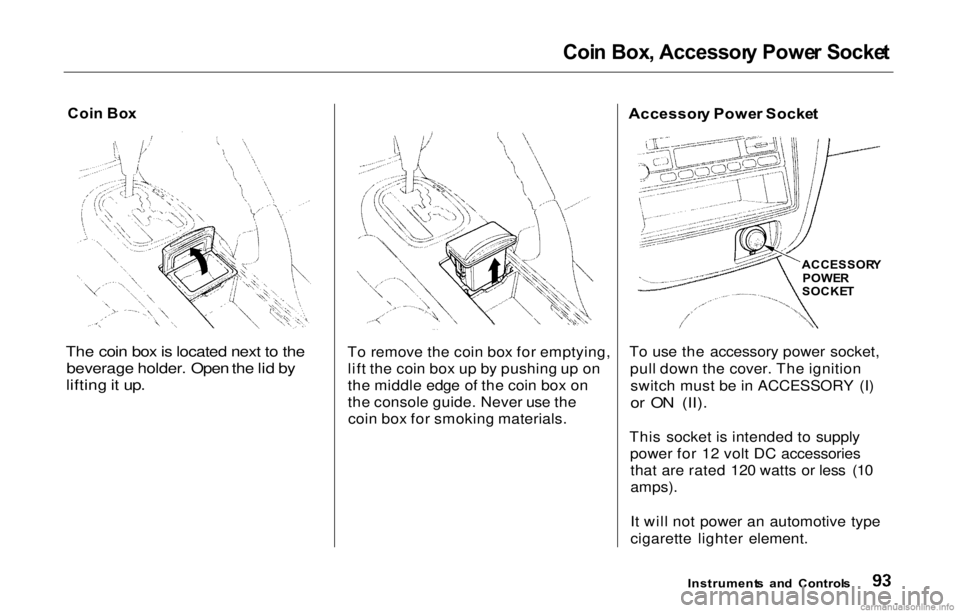
The coin box is located next to the beverage holder. Open the lid by
lifting it up.
To remove the coin box for emptying,
lift the coin box up by pushing up on
the middle edge of the coin box on
the console guide. Never use thecoin box for smoking materials. Accessor
y Powe r Socke t
To use the accessory power socket, pull down the cover. The ignitionswitch must be in ACCESSORY (I)
or ON (II).
This socket is intended to supply power for 12 volt DC accessoriesthat are rated 120 watts or less (10
amps).
It will not power an automotive type
cigarette lighter element.
Instrument s an d Control s
ACCESSOR
Y
POWE R
SOCKE T
Page 97 of 293
Ashtrays
, Interio r Light s
Ashtray s
(Optional )
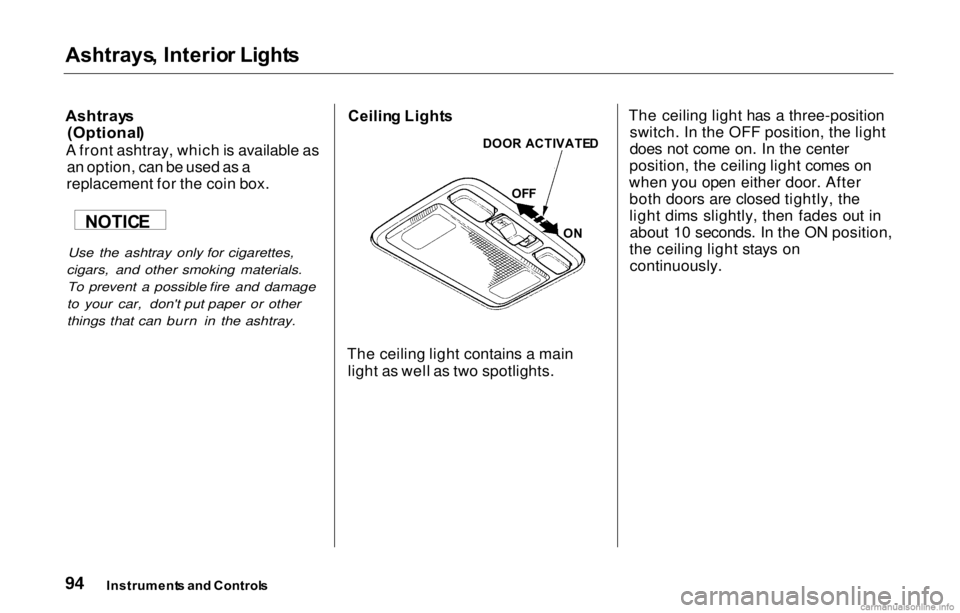
A front ashtray, which is available as an option, can be used as a
replacement for the coin box.
Use the ashtray only for cigarettes,
cigars, and other smoking materials. To prevent a possible fire and damage
to your car, don't put paper or other
things that can burn in the ashtray.
Ceilin
g Light s
The ceiling light contains a main light as well as two spotlights. The ceiling light has a three-position
switch. In the OFF position, the light
does not come on. In the center
position, the ceiling light comes on
when you open either door. After both doors are closed tightly, the
light dims slightly, then fades out inabout 10 seconds. In the ON position,
the ceiling light stays on continuously.
Instrument s an d Control s
NOTIC
E
DOOR
ACTIVATE D
OF F
ON
Page 98 of 293
Interior
Lights
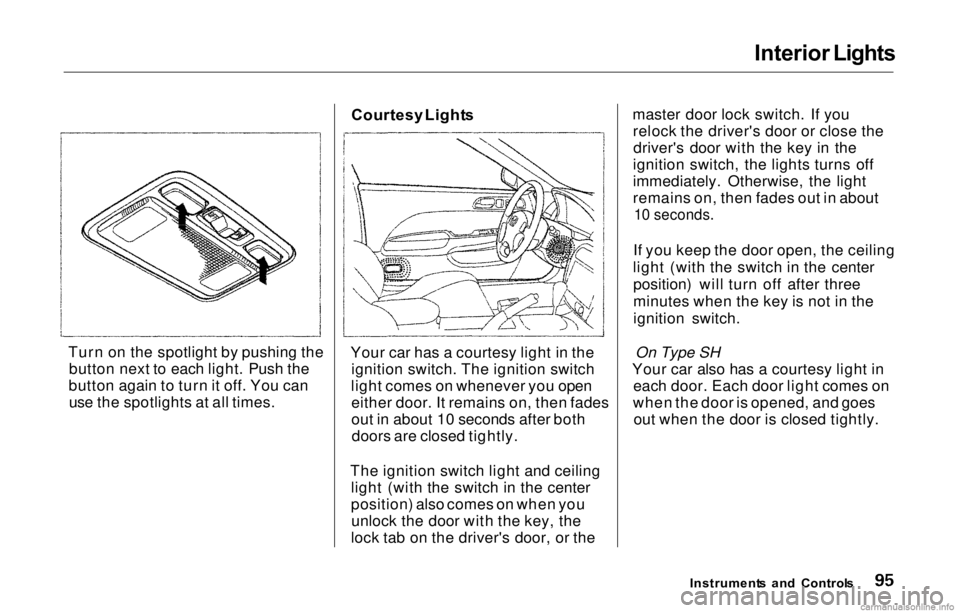
Turn on the spotlight by pushing the button next to each light. Push the
button again to turn it off. You can use the spotlights at all times. Courtesy
Light s
Your car has a courtesy light in the ignition switch. The ignition switch
light comes on whenever you open either door. It remains on, then fades
out in about 10 seconds after bothdoors are closed tightly.
The ignition switch light and ceiling light (with the switch in the center
position) also comes on when youunlock the door with the key, the
lock tab on the driver's door, or the master door lock switch. If you
relock the driver's door or close thedriver's door with the key in the
ignition switch, the lights turns off
immediately. Otherwise, the light
remains on, then fades out in about
10 seconds.
If you keep the door open, the ceiling
light (with the switch in the center position) will turn off after three
minutes when the key is not in the
ignition switch.
On Type SH
Your car also has a courtesy light in each door. Each door light comes on
when the door is opened, and goes out when the door is closed tightly.
Instrument s an d Control s
Page 99 of 293

96
Page 100 of 293
Comfor
t an d Convenienc e Feature s
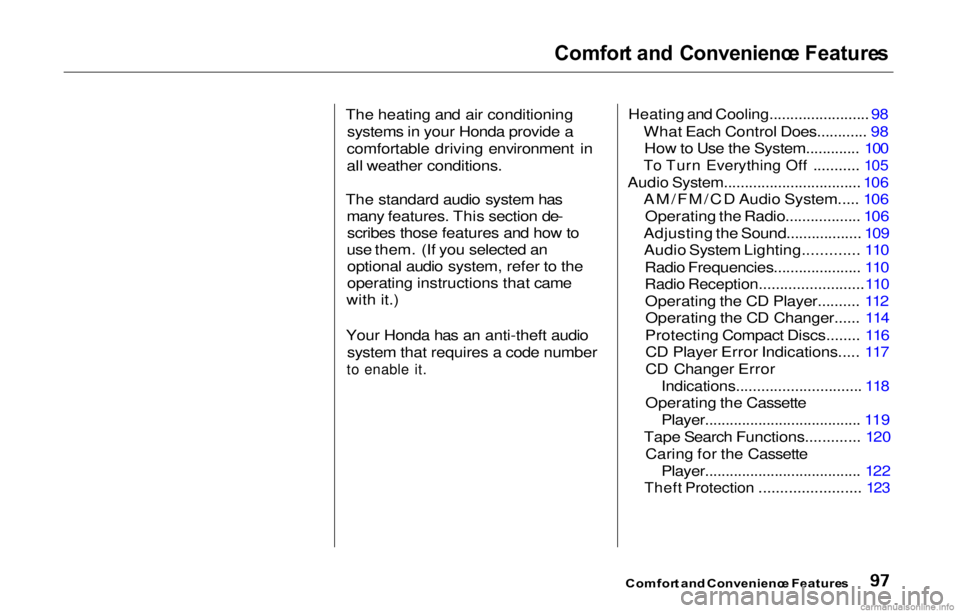
The heating and air conditioning systems in your Honda provide a
comfortable driving environment in
all weather conditions.
The standard audio system has many features. This section de-scribes those features and how to
use them. (If you selected an optional audio system, refer to the
operating instructions that came
with it.)
Your Honda has an anti-theft audio system that requires a code number
to enable it.
Heating and Cooling........................
98
What Each Control Does............ 9
8
How to Use the System............. 100
To Turn Everything Off ...........
10 5
Audio System.................................
106
AM/FM/CD Audio System.....
10 6
Operating the Radio..................
106
Adjusting the Sound.................. 10
9
Audio System Lighting............. 110
Radio
Frequencies..................... 110
Radio Reception.........................
110
Operating the CD Player.......... 11
2
Operating the CD Changer...... 114
Protecting Compact Discs........ 116 CD Player Error Indications..... 117
CD Changer Error
Indications.............................. 118
Operating the Cassette
Player......................................
119
Tape Search Functions............. 12
0
Caring for the Cassette
Player......................................
12
2
Theft Protection ........................ 12
3
Comfor
t an d Convenienc e Feature s