HONDA S2000 2000 1.G Service Manual
Manufacturer: HONDA, Model Year: 2000, Model line: S2000, Model: HONDA S2000 2000 1.GPages: 273, PDF Size: 21.58 MB
Page 41 of 273
Additional Information About Your SRS
SRSService
Your Supplemental Restraint System
is virtually maintenance-free, and
there are no parts you can safely
service. However, you must have
your car serviced
if:
• Your airbags ever inflate. The
airbags, seat belt tensioners, and
control unit must be replaced.
Do
not try to remove or replace the
airbags yourself.
This must be done by a Honda
dealer or a knowledgeable body
shop.
• The SRS indicator light alerts you
to a problem. Take your car to an
authorized Honda dealer as soon
as possible.
If you ignore this
indication, the airbags might not
inflate when you need
them (see
page
45 ).
38 Driver and Passenger Safety
Additional Safety Precautions
• Do not attempt to deactivate your
airbags. Together, airbags and
seat belts provide the best
protection
in a moderate to severe
frontal collision.
• Do not tamper with SRS
components or wiring for any
reason. Tampering could cause
the airbags to deploy, possibly
causing very serious injury.
See page 123 for further information
and precautions relating to your
SRS.
Page 42 of 273
Your car's exhaust contains carbon
monoxide gas.
You should have no
problem with carbon monoxide
entering the car in normal driving
if
you maintain your car properly.
Have the exhaust system inspected
for leaks whenever:
• The car is raised for an oil change.
• You notice a change in the sound
of
the exhaust.
• The car was in an accident that
may have damaged the underside.
Carbon monoxide gas is toxic.
Breathing it can cause
unconsciousness and even
kill
you.
Avoid any
enclosed areas or
activities that expose you to
carbon monoxide.
High levels of carbon monoxide can
collect rapidly in enclosed areas,
such as a garage. Do not run the
engine with the garage door closed.
Even with the door open, run the
engine only long enough to move the
car out of the garage.
Carbon Monoxide Hazard
With the trunk lid open, air flow can
pull exhaust gas into your vehicle's
interior and create a hazardous
condition.
If you must drive with the
trunk lid open, open
all the windows
and set the heating and cooling
system as shown below.
If you must sit in your parked car,
even
in an unconfined area, with the
engine running, adjust the heating
and cooling system as follows:
1. Push the ~ button.
2. Select the w mode.
3. Turn the fan on high speed.
4. Set the temperature control to a
comfortable setting.
Driver and Passenger Safety 39
Page 43 of 273

Safety Labels
These labels are in the locations
shown.
They warn you of potential
hazards that could cause serious
injury. Read these labels carefully.
If a label comes off or becomes hard
to read, contact your Honda dealer
for a replacement.
DASHBOARD U.S. models only
A WARNING
Children Can Be KILLED or INJURED by Passenger Air Bag Male sure all ctilcran use aeatbalts or~ild seata
40 Driver and Passenger Safety
SUN VISOR
U.S. models
Canadian models
SEAT BELT TENSIONER
I ... "·'·"''""" I ... ~iEUl1>11 I UrLOIIH "'•[OIH '""'"' ~"'"'""'lOS I' o l'oN""""" ..... , ..... , ... , ......... , .. _ , .... , ............. , ........... . •Do ,., "~'" " ""'"~'" ""' "" .,.,,. •• ''"""" '"" '" ··-...... ~ .. """ •h••'"-"' "~"'" ~;··;;;;;;;;:·:7 .. ·.:~··· :~;::;~::;;;;;::;:::::·;:::~:~::~:~~···
BATTERY
SUPPLEMENTAL RESTRAINT SYSTEM (SRS)@ ~~~'-------=::_'7=~i-Y~~----I This vehlclf Is equipped with driver and front seal passenger airbags All S RS electrical wir1ng and con 1ecto rs ore co I or ed ~ell ow. Tamoering wit~, disconnecting or using e I ec ~~ i ca I test equIpment on the S R S wl rln g can maXe the syslem inoperatiH or cause Hcidentat firing of th inflator A WARNING The alrbag Inflator Is uplosive and, II a c c ide r.t a II y de p I o ~ e d, can serious I y h urI 'IOU Fc',lcw Service Manual instructions caretulll'·
Page 44 of 273
This section gives information about
the controls and displays
that
contribute to the daily operation of
your Honda.
All the essential
controls are within easy reach.
Control Locations ............................ 42
Indicator Lights ................................ 43
Gauges .............................................. 47
Speedometer ................................ 4 7
Select Button ................................ 4 7
Tachometer .................................. 4 7
Temperature Gauge ....................
47
Fuel Gauge ................................... 48
Odometer ...................................... 48
Trip Meter .................................... 48
Maintenance Required
Indicator ....................................
49
Controls Near the Steering
Wheel ........................................
50
Headlights .................................... 51
Daytime Running Lights ............. 52
Instrument Panel Brightness ..... 52
Turn Signals ................................. 53
Windshield Wipers ...................... 53
Windshield Washers ................... 54
Steering Wheel Controls ................ 55
Cruise Control .............................. 55
Keys and Locks ................................ 58
Keys ............................................... 58
Immobilizer System ..................... 59
Ignition Switch ............................. 60
Instruments and Controls
Power Door Locks ....................... 62
Remote Transmitter .................... 63
Trunk ............................................ 66
Console Compartments .............. 67
Seat Adjustments ............................. 68
Power Windows ............................... 69
Convertible Top ............................... 71
Opening the Convertible Top ..... 71
Closing the Convertible Top ...... 7 4
Convertible Top
Cover.. .............. 76
Maintenance ................................. 77
Hazard Warning ............................... 79
Mirrors .............................................. 79
Adjusting the Power Mirrors ..... 79
Parking Brake .................................. 80
Beverage Holder .............................. 81
Accessory Power Socket ................ 81
Audio Panel. ...................................... 82
Interior Lights .................................. 83
Instruments and Controls 41
Page 45 of 273
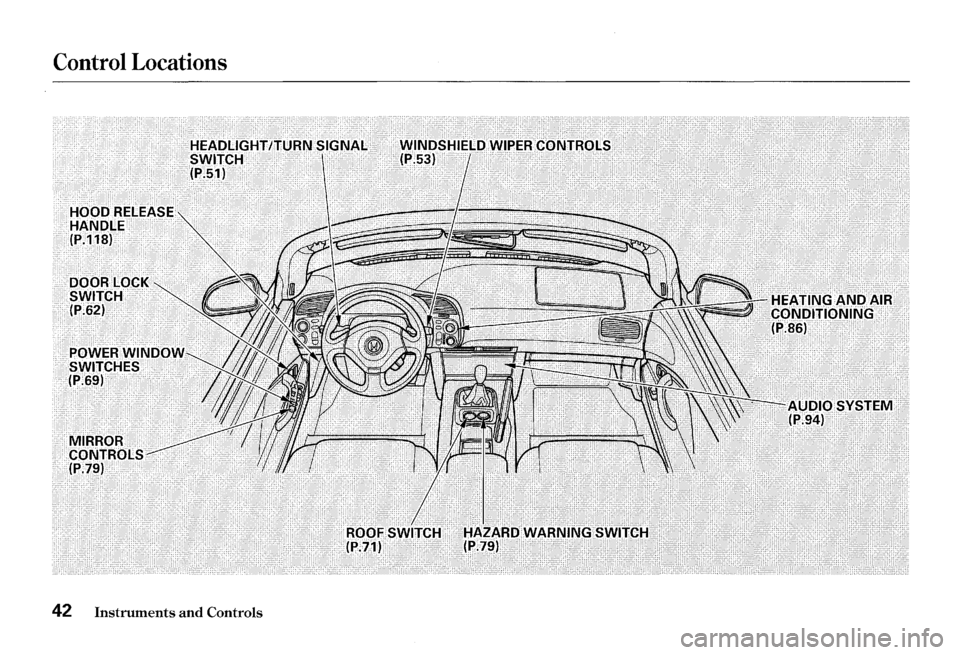
Control Locations
42 Instruments and Controls
Page 46 of 273
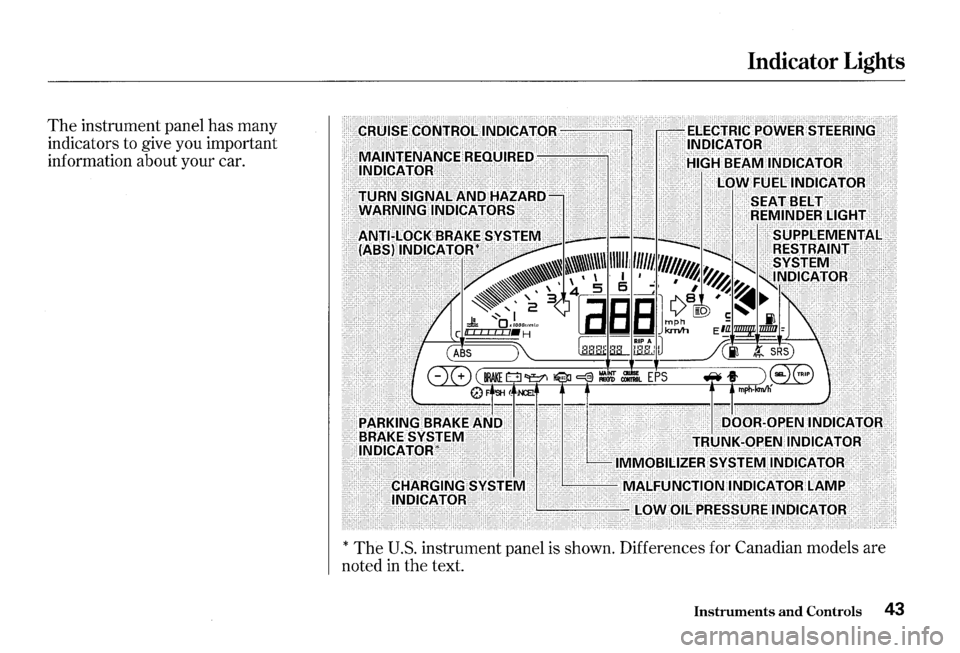
The instrument panel has many
indicators to give you important
information about your car.
Indicator Lights
EliA~~~I\Id~vs"l'~:l\ll IVIALFoi\Jt"fld~INDic.4.tdRtAMP: .·· ·
> · ll\lbicA'fOR: . . .. .... ·"--"-~~~'--'--:l.()WHII_lPR~ssDREIN[)ICAT0R: .
*The U.S. instrument panel is shown. Differences for Canadian models are
noted in the text.
Instruments and Controls 43
Page 47 of 273
Indicator Lights
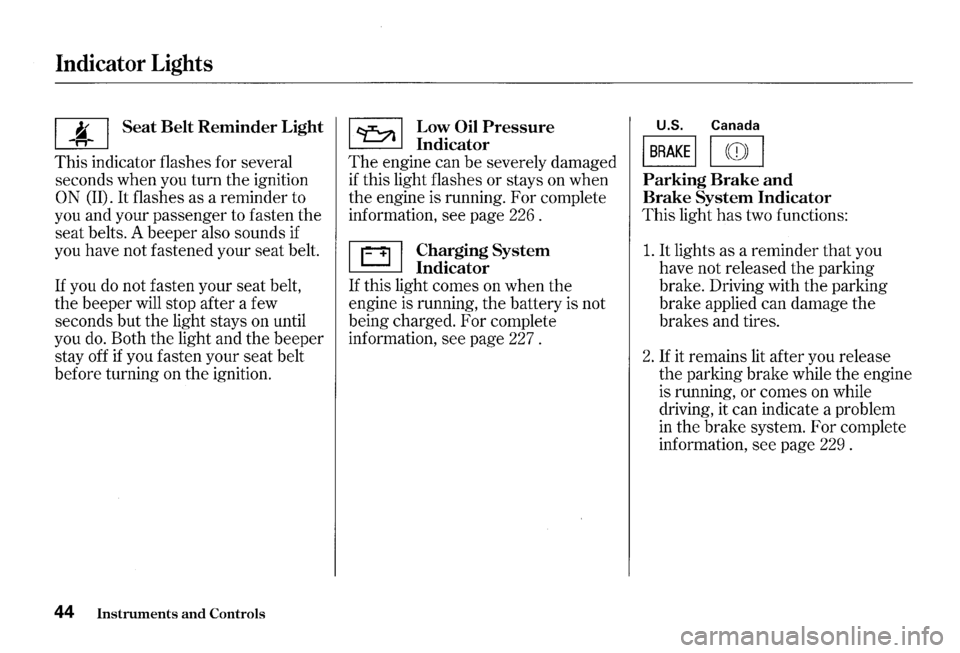
I ~ I Seat Belt Reminder Light
This indicator flashes for several
seconds when you turn
the ignition
0 N (II). It flashes as a reminder to
you and your passenger to fasten
the
seat belts. A beeper also sounds if
you have not fastened your
seat belt.
If you do not fasten your seat belt,
the beeper will stop after a few
seconds
but the light stays on until
you do. Both
the light and the beeper
stay off if you fasten your seat belt
before turning on
the ignition.
44 Instruments and Controls
~ Low Oil Pressure
~ Indicator
The engine can be severely damaged
if this light flashes or stays on when
the engine is running. For complete
information, see page 226 .
~ Charging System
~ Indicator
If this light comes on when the
engine is running, the battery is not
being charged. For complete
information, see page 227 .
U.S. Canada
I BRAKE I I ((D) I
Parking Brake and
Brake System Indicator
This light has two functions:
1. It lights as a reminder that you
have not released
the parking
brake. Driving with
the parking
brake applied can damage
the
brakes and tires.
2. If it remains lit after you release
the parking brake while the engine
is running,
or comes on while
driving, it can indicate a problem
in
the brake system. For complete
information,
see page 229 .
Page 48 of 273
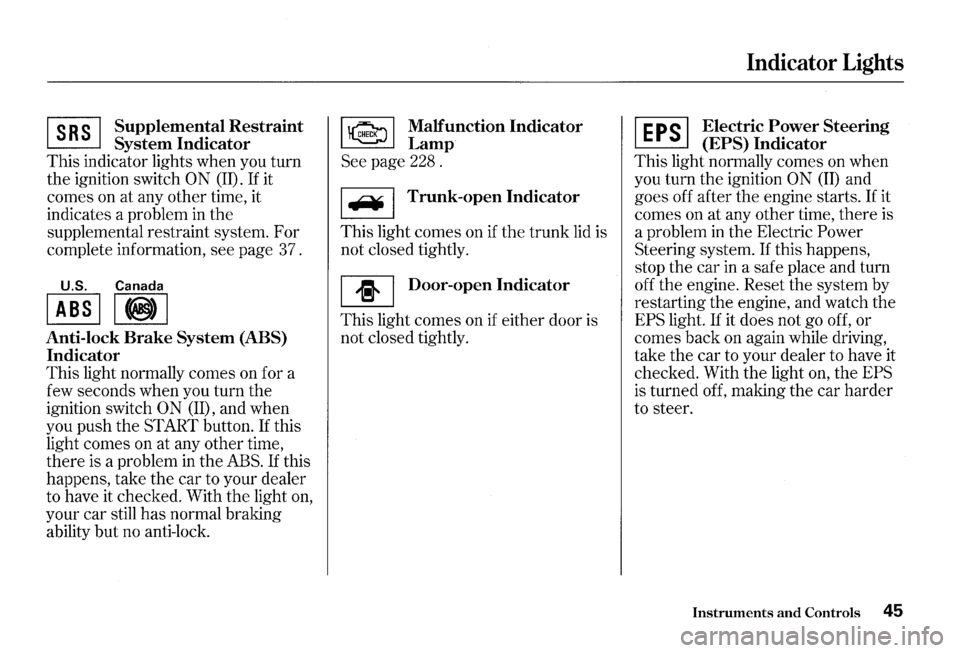
~ Supplemen~al Restraint
~ System Indicator
This indicator lights when you turn
the ignition switch
0 N (II). If it
comes on at any other time, it
indicates a problem in
the
supplemental restraint system. For
complete information, see page 37.
U.S. Canada
I ABS II@) I
Anti-lock Brake System (ABS)
Indicator
This light normally comes on for a
few seconds when you turn the
ignition switch
ON (II), and when
you push the START button.
If this
light comes on at any other time,
there
is a problem in the ABS. If this
happens, take the car to your dealer
to have it checked. With
the light on,
your car still
has normal braking
ability but no anti-lock.
~ Malfunction Indicator
~Lamp
See page 228 .
I F¥ I Trunk-open Indicator
This light comes on if the trunk lid is
not closed tightly.
[I] Door-open Indicator
This light comes on if either door is
not closed tightly.
Indicator Lights
~ Electric Power Steering
~ (EPS) Indicator
This light normally comes on when
you turn the ignition
ON (II) and
goes off after the engine starts.
If it
comes on at any other time, there is
a problem
in the Electric Power
Steering system. If this happens,
stop the car
in a safe place and turn
off the engine. Reset the system by
restarting the engine, and watch the
EPS light. If it does not go off, or
comes back on again while driving,
take the car to your dealer to have it
checked. With the light
on, the EPS
is turned off, making the car harder
to steer.
Instruments and Controls 45
Page 49 of 273
Indicator Lights
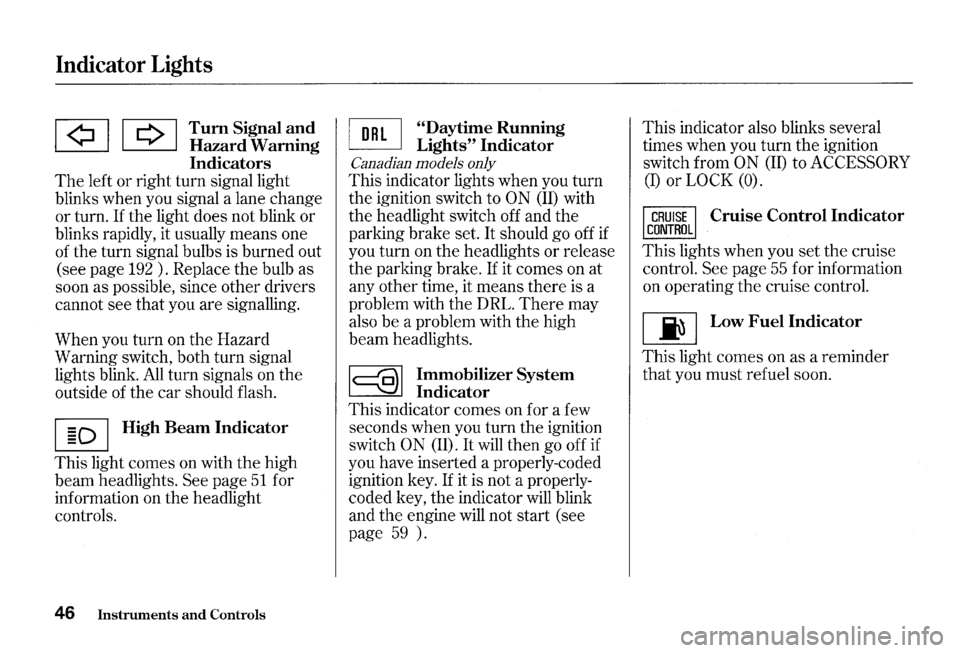
lA! I Q I Tum Signal a!ld ~ Hazard Wammg
Indicators
The left or right turn signal light
blinks when you signal a lane change
or turn. If the light does not blink or
blinks rapidly, it usually means one
of the turn signal bulbs is burned out
(see page
192 ) . Replace the bulb as
soon as possible, since other drivers
cannot see that you are signalling.
When you turn on the Hazard
Warning switch, both turn signal
lights blink.
All turn signals on the
outside of the car should flash.
I § D I High Beam Indicator
This light comes on with the high
beam headlights.
See page 51 for
information on the headlight
controls.
46 Instruments and Controls
~ "Daytime Running
~ Lights" Indicator
Canadian models only
This indicator lights when you turn
the ignition switch to
ON (ID with
the headlight switch off and the
parking brake set.
It should go off if
you turn on the headlights or release
the parking brake.
If it comes on at
any other time, it means there is a
problem with the DRL.
There may
also be a problem with the high
beam headlights.
~ Immobilizer System
~ Indicator
This indicator comes on for a few
seconds when you turn the ignition
switch
0 N (ID. It will then go off if
you have inserted a properly-coded
ignition key.
If it is not a properly
coded key, the indicator will blink
and
the engine will not start (see
page
59 ). This
indicator also blinks several
times when you turn the ignition
switch from
ON (II) to ACCESSORY
(I) or LOCK (0).
Cruise Control Indicator
This lights when you set the cruise
control.
See page 55 for information
on operating the cruise control.
[ji] Low Fuel Indicator
This light comes on as a reminder
that you must refuel soon.
Page 50 of 273
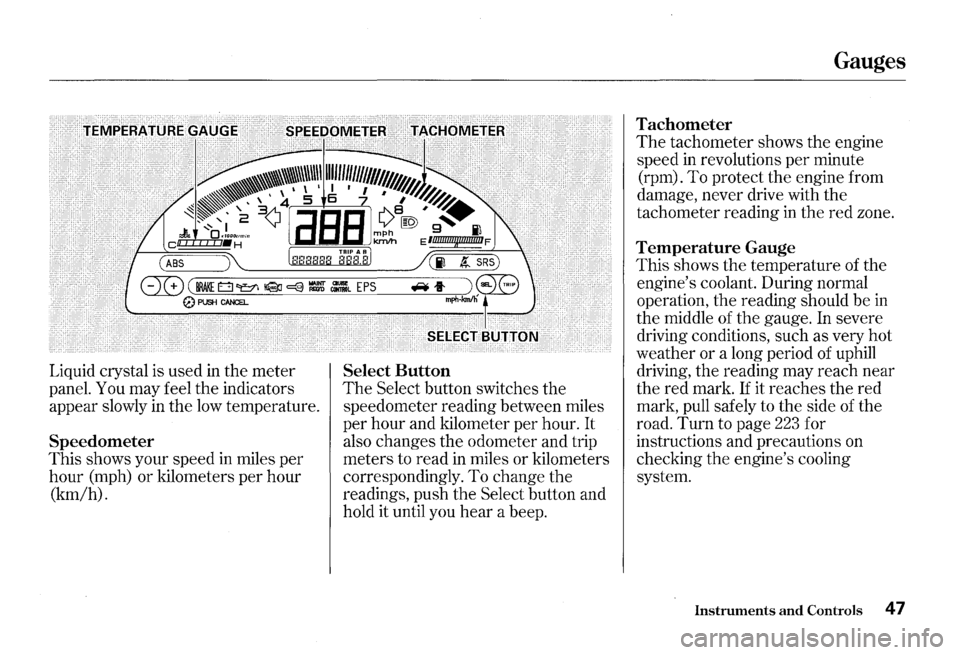
Liquid crystal is used in the meter
panel. You may feel the indicators
appear slowly
in the low temperature.
Speedometer
This shows your speed in miles per
hour (mph) or kilometers per hour
(km/h). Select
Button
The Select button switches the
speedometer reading between miles
per hour and kilometer per hour.
It
also changes the odometer and trip
meters to read in miles or kilometers
correspondingly. To change the
readings, push the Select button and
hold it until you
hear a beep.
Gauges
Tachometer
The tachometer shows the engine
speed
in revolutions per minute
(rpm). To protect the engine from
damage, never drive with the
tachometer reading in the red zone.
Temperature Gauge
This shows the temperature of the
engine's coolant. During normal
operation, the reading should be
in
the middle of the gauge. In severe
driving conditions, such as very hot
weather or a long period of uphill
driving, the reading may reach near
the red mark.
If it reaches the red
mark, pull safely to the side of the
road.
Turn to page 223 for
instructions and precautions on
checking
the engine's cooling
system.
Instruments and Controls 4 7