HONDA S2000 2000 1.G Workshop Manual
Manufacturer: HONDA, Model Year: 2000, Model line: S2000, Model: HONDA S2000 2000 1.GPages: 273, PDF Size: 21.58 MB
Page 51 of 273
Gauges
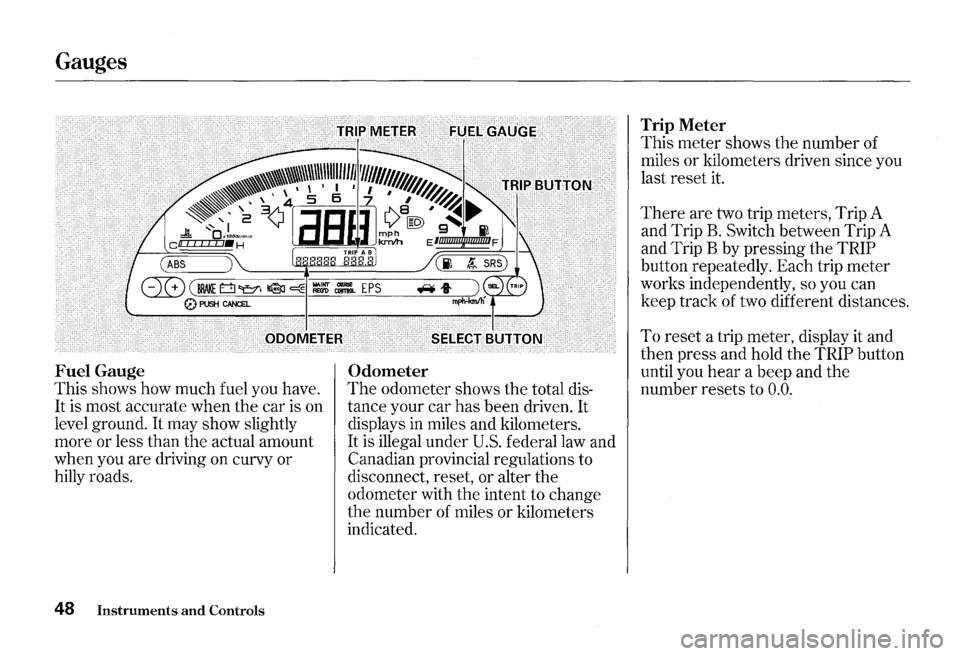
Fuel Gauge
This shows how much fuel you have.
It is most accurate when the car is on
level ground.
It may show slightly
more or less than the actual amount
when you are driving on curvy or
hilly roads.
48 Instruments and Controls
Odometer
The odometer shows the total dis
tance your car has been driven.
It
displays in miles and kilometers.
It is illegal under U.S. federal law and
Canadian provincial regulations to
disconnect, reset,
or alter the
odometer with the intent to change
the number of miles
or kilometers
indicated.
Trip Meter
This meter shows the number of
miles or kilometers driven since you
last reset it.
There are two trip meters, Trip A
and Trip
B. Switch between Trip A
and Trip B by pressing the
TRIP
button repeatedly. Each trip meter
works independently, so you can
keep track of two different distances.
To reset a trip meter, display it and
then press and hold
the TRIP button
until you
hear a beep and the
number resets to
0.0.
Page 52 of 273
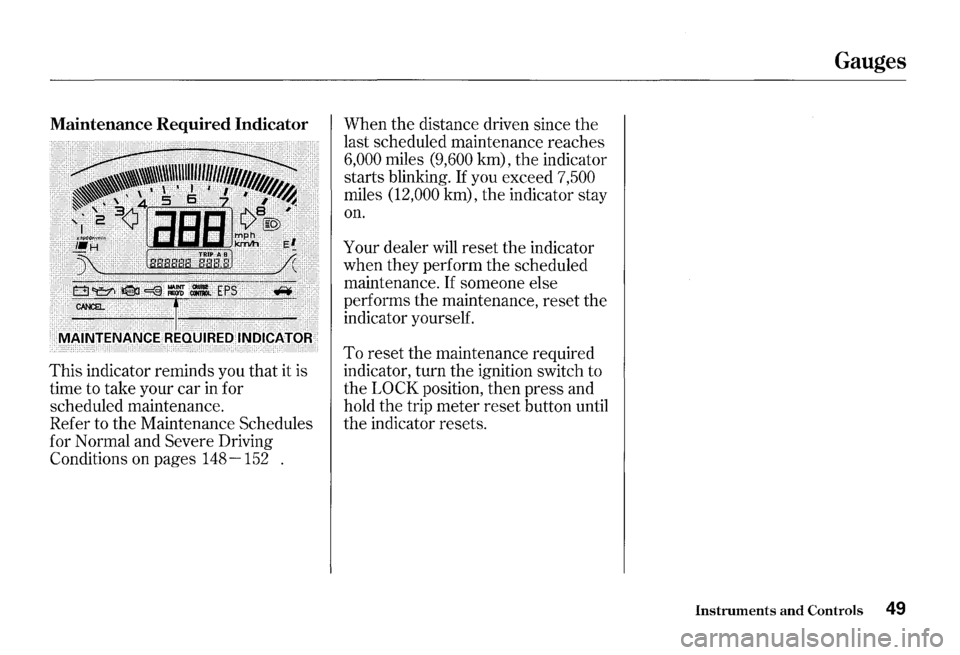
Maintenance Required Indicator
This indicator reminds you that it is
time to take your car in for
scheduled maintenance.
Refer to the Maintenance Schedules
for Normal and
Severe Driving
Conditions on pages
148-152 . When
the distance driven since
the
last scheduled maintenance reaches
6,000 miles (9,600 km), the indicator
starts blinking.
If you exceed 7,500
miles (12,000 km), the indicator stay
on.
Your dealer will reset the indicator
when they perform the scheduled
maintenance.
If someone else
performs the maintenance, reset the
indicator yourself.
To reset the maintenance required
indicator, turn the ignition switch to
the
LOCK position, then press and
hold the trip meter reset button until
the indicator resets.
Gauges
Instruments and Controls 49
Page 53 of 273
Controls Near the Steering Wheel I
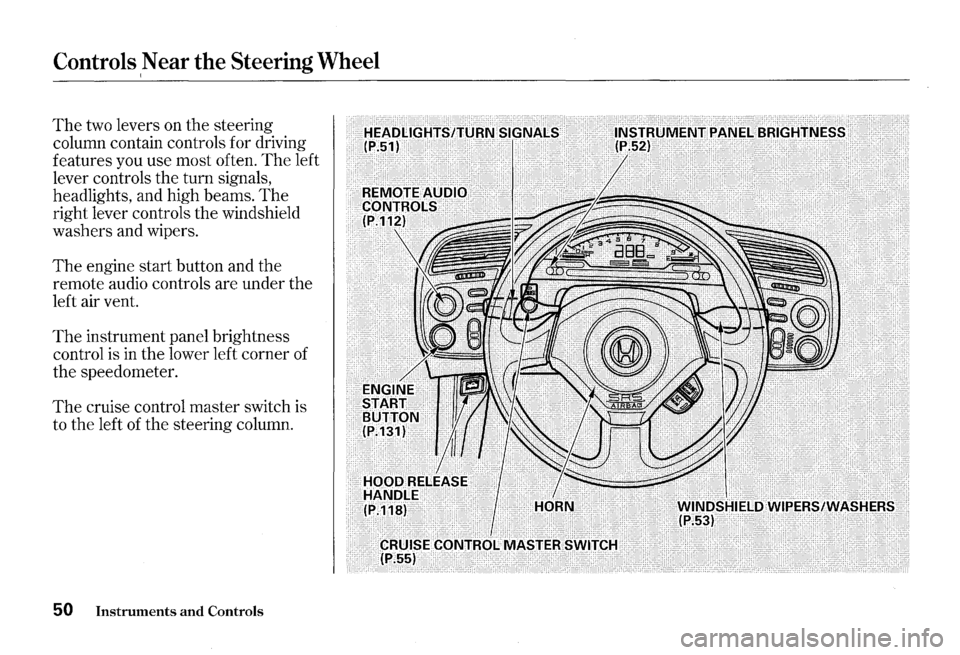
The two levers on the steering
column contain controls for driving
features you use most often.
The left
lever controls the turn signals,
headlights, and high beams.
The
right lever controls the windshield
washers and wipers.
The engine start button and the
remote audio controls are under the
left air vent.
The instrument panel brightness
control is
in the lower left corner of
the speedometer.
The cruise control master switch is
to the left
of the steering column.
50 Instruments and Controls
Page 54 of 273
Headlights
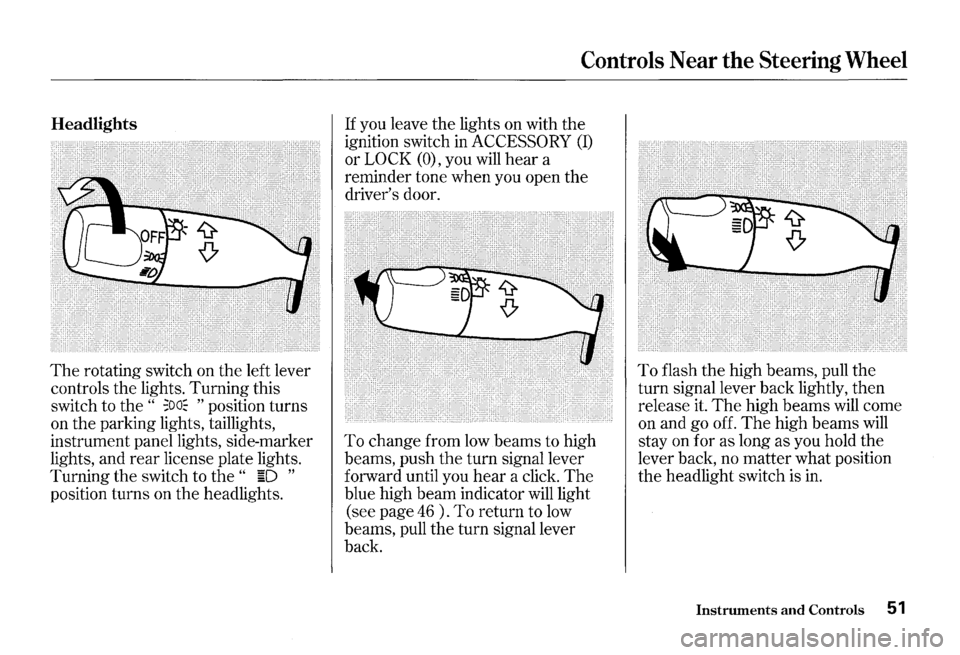
The rotating switch on the left lever
controls the lights. Turning this
switch to the
" ;oa~ " position turns
on the parking lights, taillights,
instrument panel lights, side-marker
lights, and
rear license plate lights.
Turning the switch to
the " ~D "
position turns on the headlights.
Controls Near the Steering Wheel
If you leave the lights on with the
ignition switch in
ACCESSORY (I)
or LOCK (O), you will hear a
reminder tone when you open the
driver's door.
To change from low beams to high
beams, push
the turn signal lever
forward until you
hear a click. The
blue high beam indicator will light
(see page
46 ) . To return to low
beams, pull the turn signal lever
back.
To flash the high beams, pull the
turn signal lever back lightly, then
release it.
The high beams will come
on and go off.
The high beams will
stay on for as long as you hold the
lever back, no matter what position
the headlight switch is in.
Instruments and Controls 51
Page 55 of 273
Controls Near the Steering Wheel
Daytime Running Lights
Canadian models only
With the headlight switch off, the
high beam headlights come on with
reduced brightness when you turn
the ignition switch to
0 N (II) and
release
the parking brake. They
remain on until you turn the ignition
off, even
if you set the parking brake.
The headlights revert to normal
operation when you turn
them on
with the switch.
52 Instruments and Controls
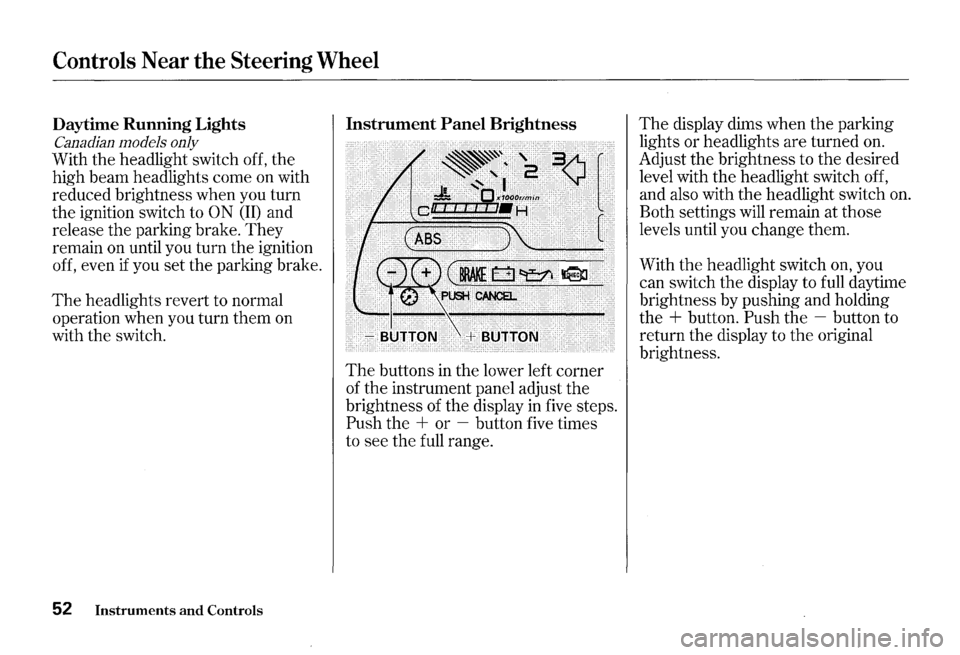
Instrument Panel Brightness
·.···.·.~.·.~.·~.· •. ~ ... · .. ~ ... · .. ~~.·~ .. ·.·.~.~.' .•.•.••.•. '. ). 3)1, .. ~·. ~~ .... 2;~··•············
• ~ •• < ; .~C~L!io'""'"i .... · •• :•. • .• •·•··.·····•·• cat'J +'f•H
} c .... ~ .... ,.., ... .;,., .... ,.., .. ..,..,..,.~~ ........ .
!0•~~/Tri
The buttons in the lower left corner
of the instrument panel adjust
the
brightness of the display in five steps.
Push the + or -button five times
to see the full range.
The display dims when the parking
lights or headlights are turned
on.
Adjust the brightness to the desired
level with the headlight switch off,
and also with the headlight switch
on.
Both settings will remain at those
levels until you change them.
With
the headlight switch on, you
can switch the display to full daytime
brightness by pushing and holding
the
+ button. Push the -button to
return the display to
the original
brightness.
Page 56 of 273
Turn Signals
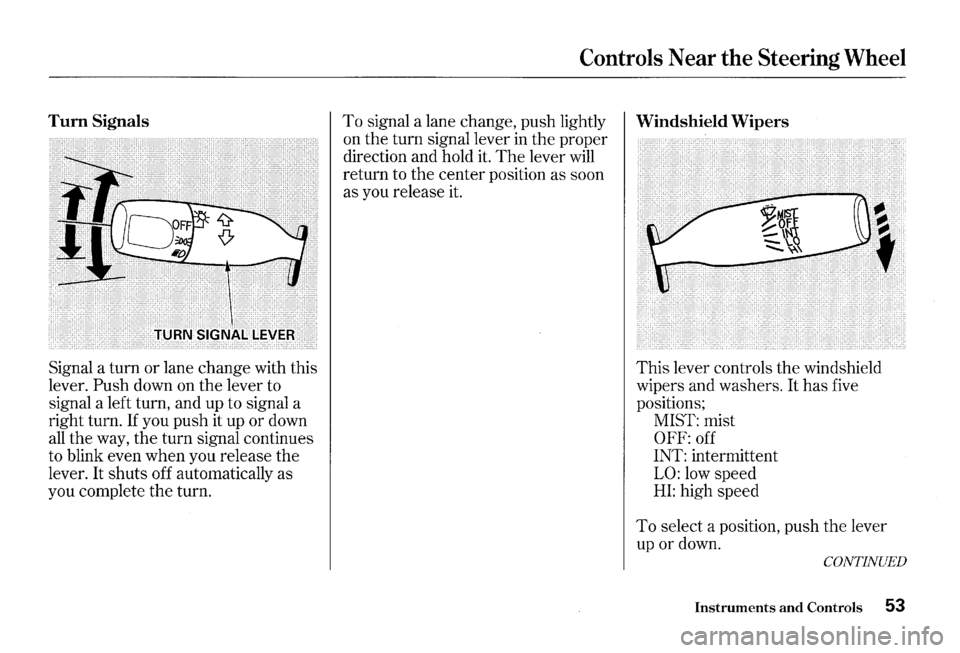
Signal a turn or lane change with this
lever.
Push down on the lever to
signal a left turn, and up to signal a
right turn.
If you push it up or down
all the way, the turn signal continues
to blink even when you release the
lever.
It shuts off automatically as
you complete the turn.
Controls Near the Steering Wheel
To signal a lane change, push lightly Windshield Wipers
on the turn signal lever in the proper
direction and hold
it. The lever will
return to the center position as soon
as you release it.
This lever controls the windshield
wipers and washers.
It has five
positions;
MIST: mist
OFF: off
INT: intermittent
LO: low speed
HI: high speed
To select a position, push the lever
up or down.
CONTINUED
Instruments and Controls 53
Page 57 of 273
Controls Near the Steering Wheel
In intermittent, the wipers operate
every few seconds. In low speed and
high speed, the wipers run continu
ously.
54
Instruments and Controls
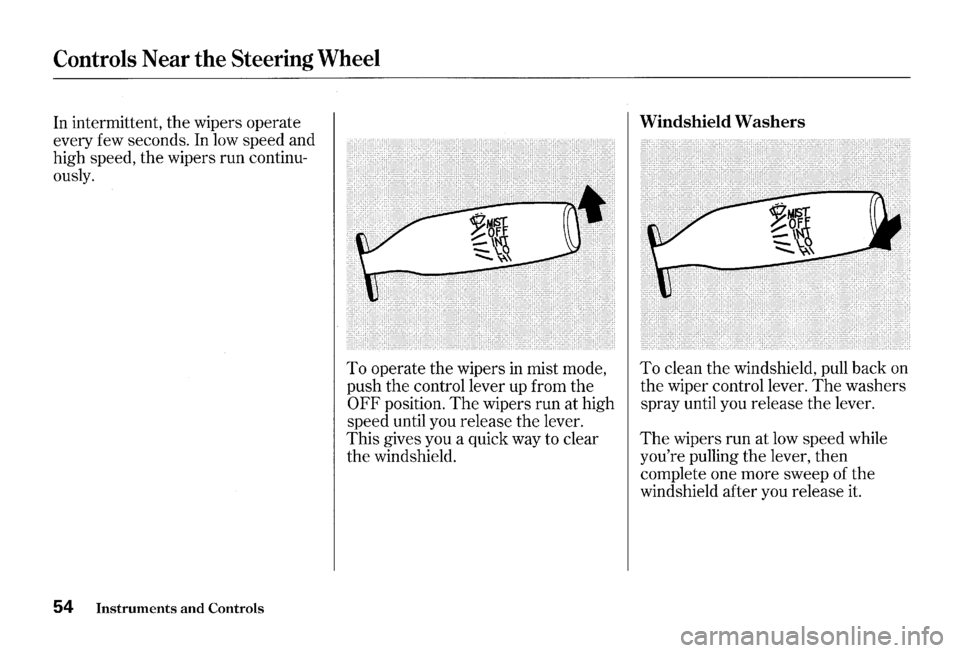
To operate the wipers in mist mode,
push
the control lever up from the
OFF position. The wipers run at high
speed until you release the lever.
This gives you a quick way to clear
the windshield.
Windshield Washers
To clean the windshield, pull back on
the wiper control lever.
The washers
spray until you release the lever.
The wipers run at low speed while
you're pulling the lever, then
complete one more sweep of the
windshield after you release it.
Page 58 of 273
Cruise Control
Cruise control allows you to maintain
a
set speed above 25 mph ( 40 km/h)
without keeping your foot on the
accelerator pedal. It should be used
for cruising on straight, open
highways.
It is not recommended for
conditions such as city driving,
winding roads, slippery roads, heavy
rain, or bad weather. You should
have full control of
the car under
those conditions.
Improper use of the cruise
control can lead to a crash.
Use the cruise
control only
when traveling on open
highways
in good weather.
NOTICE
The cruise control, as it operates,
moves the accelerator pedal. You can
damage your vehicle's accelerator
mechanism by resting your
foot under
the pedal and blocking the movement.
Steering Wheel Controls
Using the Cruise Control
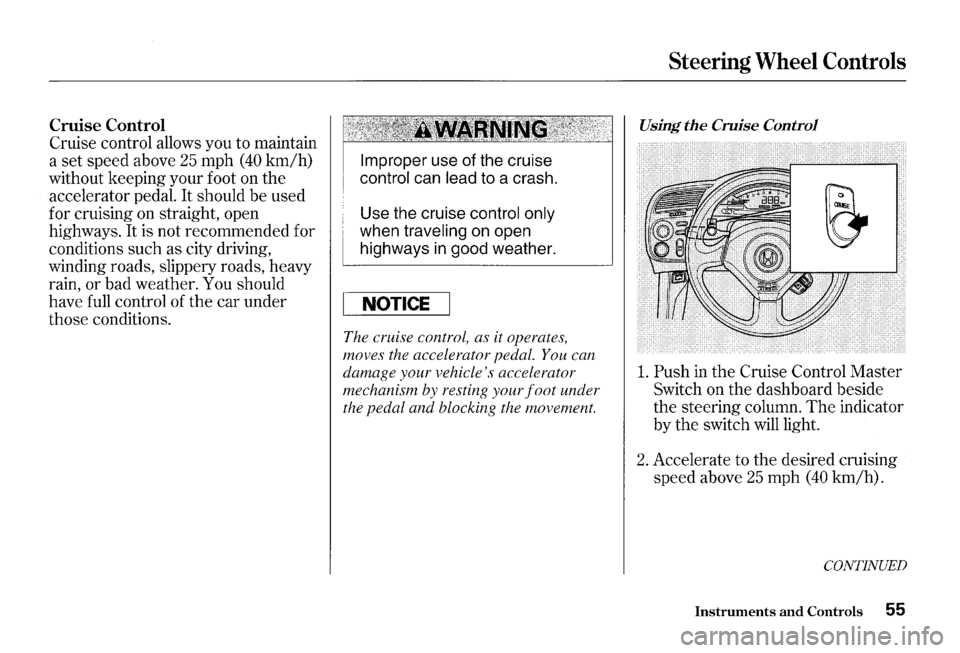
1. Push in the Cruise Control Master
Switch on the dashboard beside
the steering column. The indicator
by
the switch will light.
2. Accelerate to the desired cruising
speed above
25 mph (40 km/h).
CONTINUED
Instruments and Controls 55
Page 59 of 273
Steering Wheel Controls
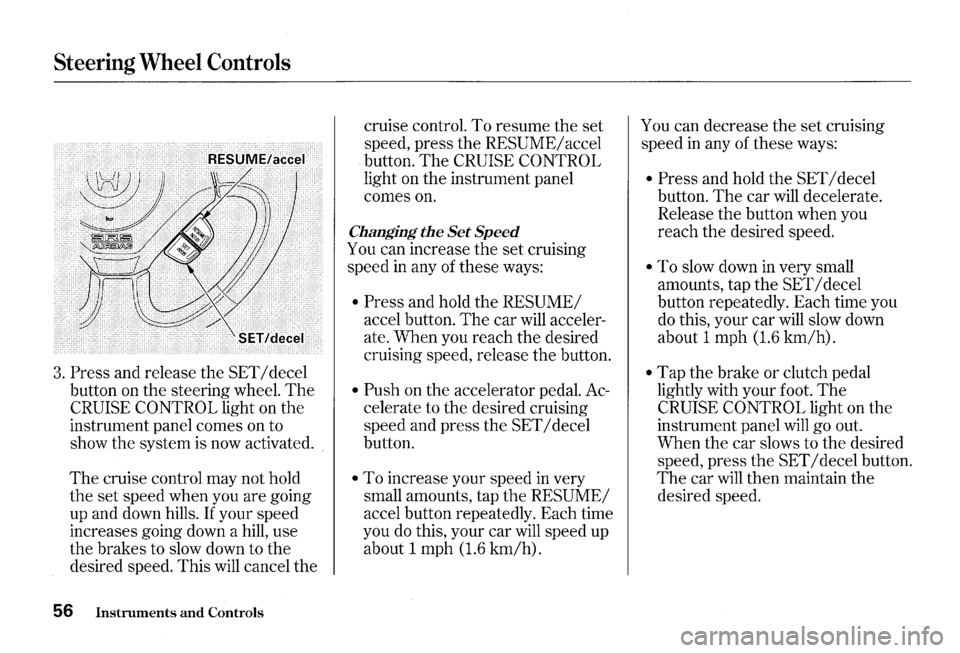
3. Press and release the SET I decel
button on the steering wheel.
The
CRUISE CONTROL light on the
instrument panel comes on to
show the system is now activated.
The cruise control may not hold
the set speed when you are going
up and down hills.
If your speed
increases going down a hill, use
the brakes to slow down to the
desired speed. This
will cancel the
56 Instruments and Controls
cruise control. To resume the set
speed, press the
RESUME/ accel
button.
The CRUISE CONTROL
light on the instrument panel
comes
on.
Changing the Set Speed
You can increase the set cruising
speed
in any of these ways:
• Press and hold the RESUME/
accel button. The car will acceler
ate. When you reach the desired
cruising speed, release the button.
• Push on the accelerator pedal. Ac
celerate to the desired cruising
speed and press the
SET I decel
button.
• To increase your speed in very
small amounts, tap the
RESUME/
accel button repeatedly. Each time
you
do this, your car will speed up
about 1 mph
(1.6 km/h).
You can decrease the set cruising
speed
in any of these ways:
• Press and hold the SET I decel
button.
The car will decelerate.
Release the button when you
reach the desired speed.
• To slow down in very small
amounts, tap the
SET I decel
button repeatedly. Each time you
do this, your car will slow down
about 1 mph
(1.6 km/h).
• Tap the brake or clutch pedal
lightly with your foot.
The
CRUISE CONTROL light on the
instrument panel
will go out.
When the car slows to the desired
speed, press
the SET I decel button.
The car will then maintain the
desired speed.
Page 60 of 273
Even with the cruise control turned
on, you can still use the accelerator
pedal to speed up for passing. After
completing the pass, take your foot
off the accelerator pedal.
The car
will return to the set cruising speed.
Resting your foot on the brake or
clutch pedal
will cause the cruise
control to cancel.
Cancelling the Cruise Control
You can cancel the cruise control in
any
of these ways:
• Tap the brake or clutch pedal.
• Press the SET I decel and RE
SUME/ accel buttons at the same
time.
• Press the Cruise Control Master
Switch.
When you tap the brake or clutch
pedal, or press the SET and
RE
SUME buttons at the same time, the
CRUISE CONTROL light on the
instrument panel will
go out and the
car
will begin to slow down. You can
use the accelerator pedal in the
normal way.
The system remembers the
previously-set cruising speed. To
return to that speed, accelerate to
above
25 mph (40 km/h) and press
the
RESUME/ accel button until the
Steering Wheel Controls
CRUISE CONTROL light comes on.
The car will accelerate to the same
cruising speed as before.
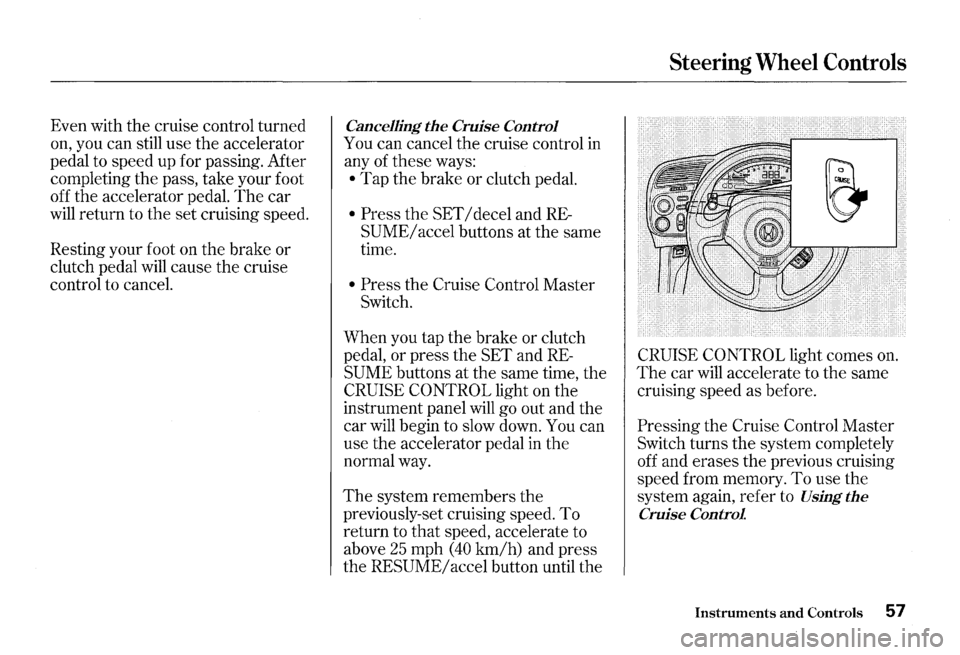
Pressing the Cruise Control Master
Switch turns the system completely
off and erases the previous cruising
speed from memory.
To use the
system again, refer to
Using the
Cruise Control
Instruments and Controls 57