HONDA S2000 2000 1.G Manual Online
Manufacturer: HONDA, Model Year: 2000, Model line: S2000, Model: HONDA S2000 2000 1.GPages: 273, PDF Size: 21.58 MB
Page 81 of 273
Convertible Top
To reduce the possibility of leaks:
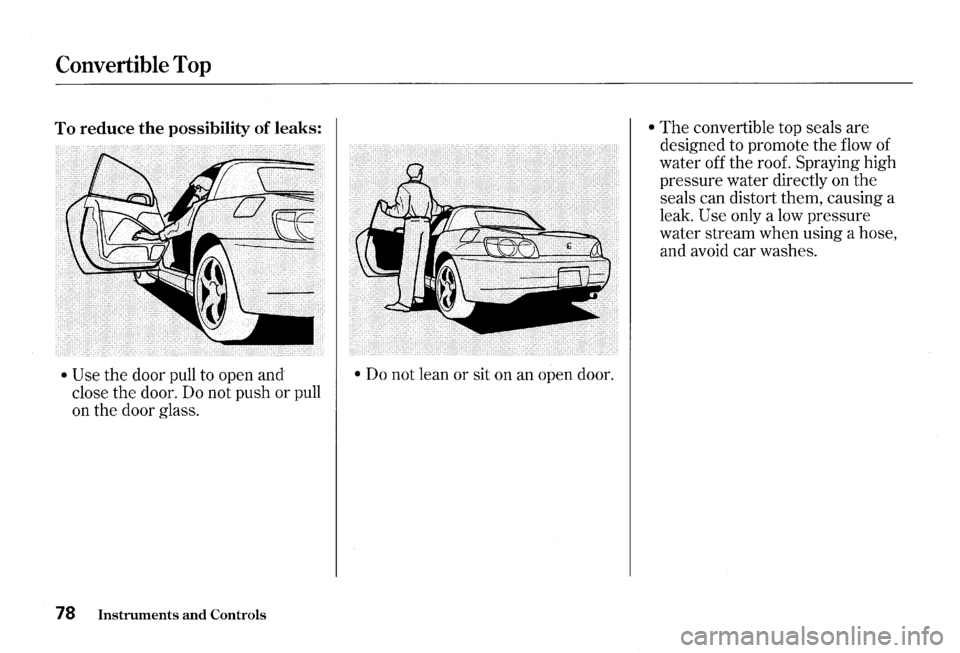
• Use the door pull to open and
close the door. Do not push or pull
on the door glass.
78 Instruments and Controls
• Do not lean or sit on an open door.
• The convertible top seals are
designed to promote the flow of
water off the roof. Spraying high
pressure water directly on the
seals can distort them, causing a
leak.
Use only a low pressure
water stream when using a hose,
and avoid car washes.
Page 82 of 273
Hazard Warning
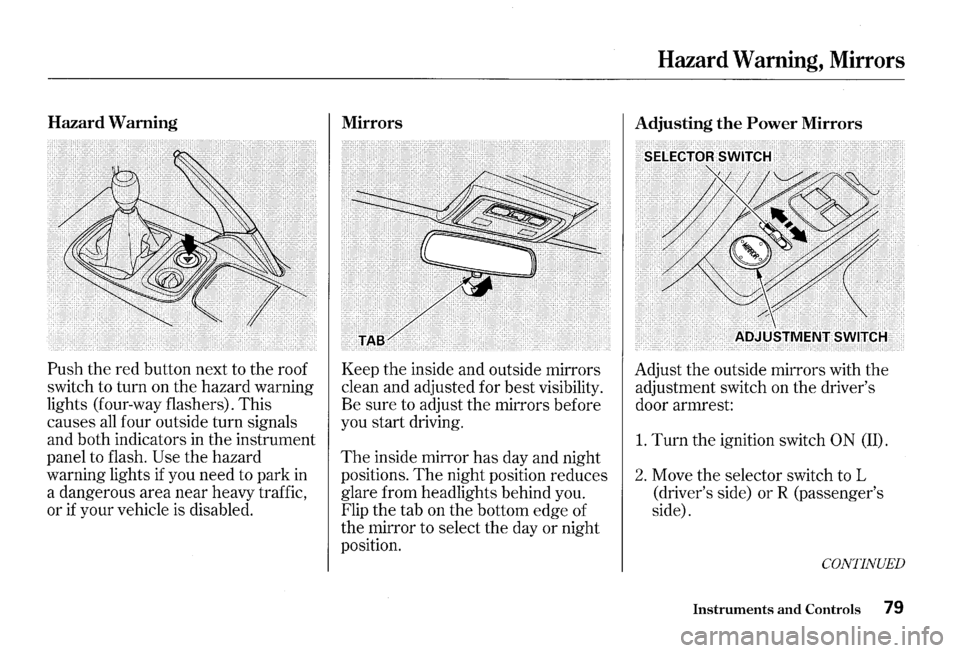
Push the red button next to the roof
switch to turn on the hazard warning
lights (four-way flashers). This
causes
all four outside turn signals
and both indicators in the instrument
panel to flash.
Use the hazard
warning lights
if you need to park in
a dangerous area near heavy traffic,
or
if your vehicle is disabled.
Mirrors
Keep the inside and outside mirrors
clean and adjusted for best visibility.
Be sure to adjust the mirrors before
you start driving.
The inside mirror has day and night
positions.
The night position reduces
glare from headlights behind you.
Flip the tab on the bottom edge of
the mirror to select the day or night
position.
Hazard Warning, Mirrors
Adjusting the Power Mirrors
Adjust the outside mirrors with the
adjustment switch on the driver's
door armrest:
1. Turn the ignition switch 0 N (II).
2. Move the selector switch to L
(driver's side)
orR (passenger's
side).
CONTINUED
Instruments and Controls 79
Page 83 of 273
Mirrors, Parking Brake
3. Push the appropriate edge of the
adjustment switch to move the
mirror right, left, up or down.
4. When you finish, move the
selector switch to the center (off)
position. This turns off the
adjustment switch
so you can't
move a mirror out of position by
accidentally bumping the switch.
80 Instruments and Controls
Parking Brake
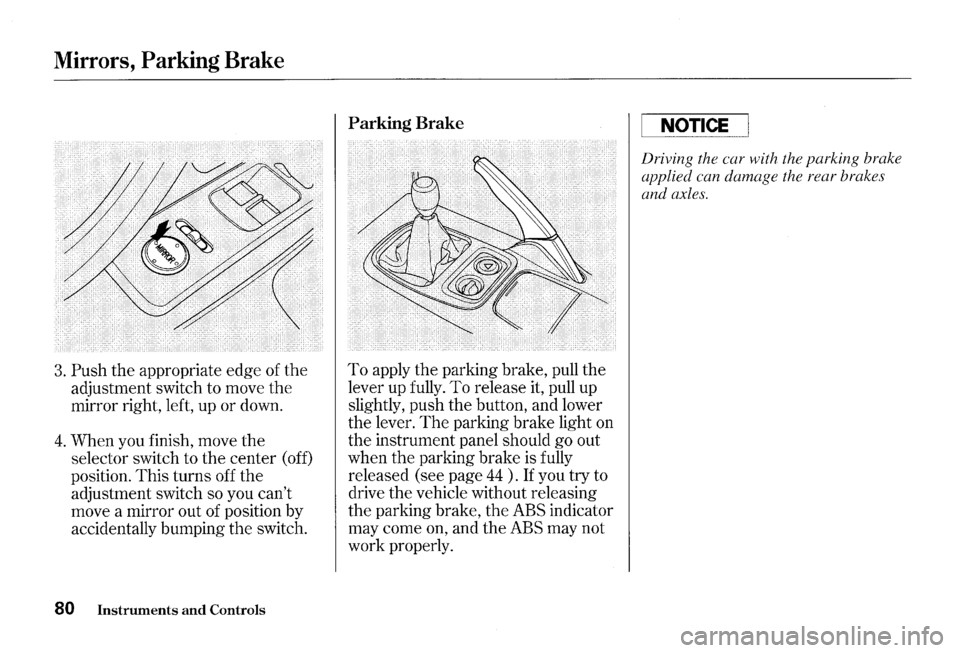
To apply the parking brake, pull the
lever up fully.
To release it, pull up
slightly, push the button, and lower
the lever.
The parking brake light on
the instrument panel should go out
when the parking brake is fully
released (see page
44 ) . If you try to
drive the vehicle without releasing
the parking brake, the ABS indicator
may come on, and the ABS may not
work properly.
I NOTICE
Driving the car with the parking brake
applied can damage the rear brakes
and axles.
Page 84 of 273
Beverage Holder
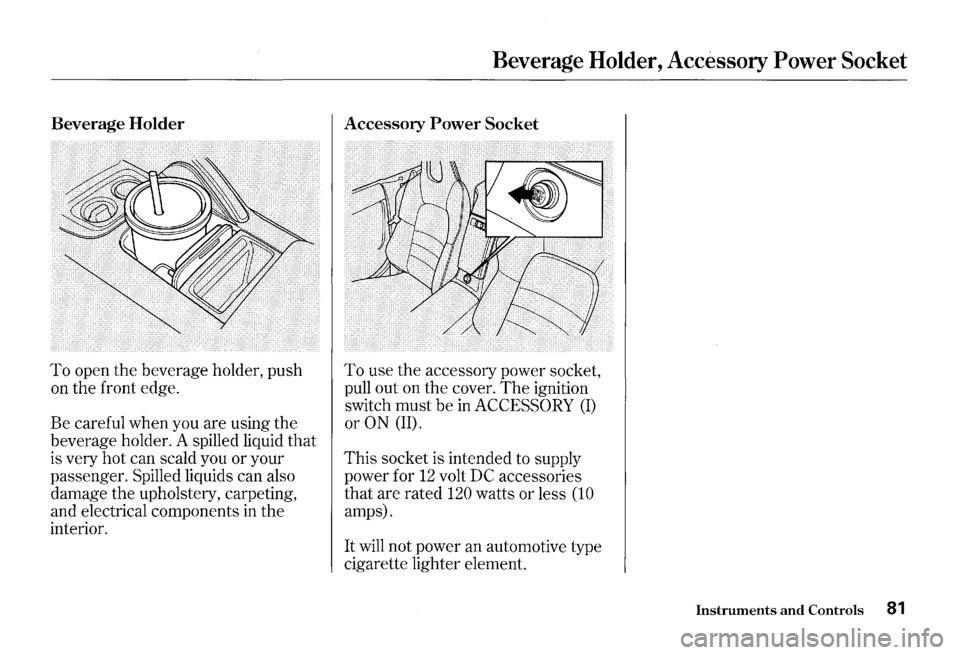
To open the beverage holder, push
on the front edge.
Be careful when you are using the
beverage holder. A spilled liquid
that
is very hot can scald you or your
passenger. Spilled liquids can also
damage the upholstery, carpeting,
and electrical components
in the
interior.
Beverage Holder, Accessory Power Socket
Accessory Power Socket
To use the accessory power socket,
pull out on the cover.
The ignition
switch must be
in ACCESSORY (I)
or ON (II).
This socket is intended to supply
power for
12 volt DC accessories
that are rated
120 watts or less (10
amps).
It will not power an automotive type
cigarette lighter element.
Instruments and Controls 81
Page 85 of 273
Audio Panel
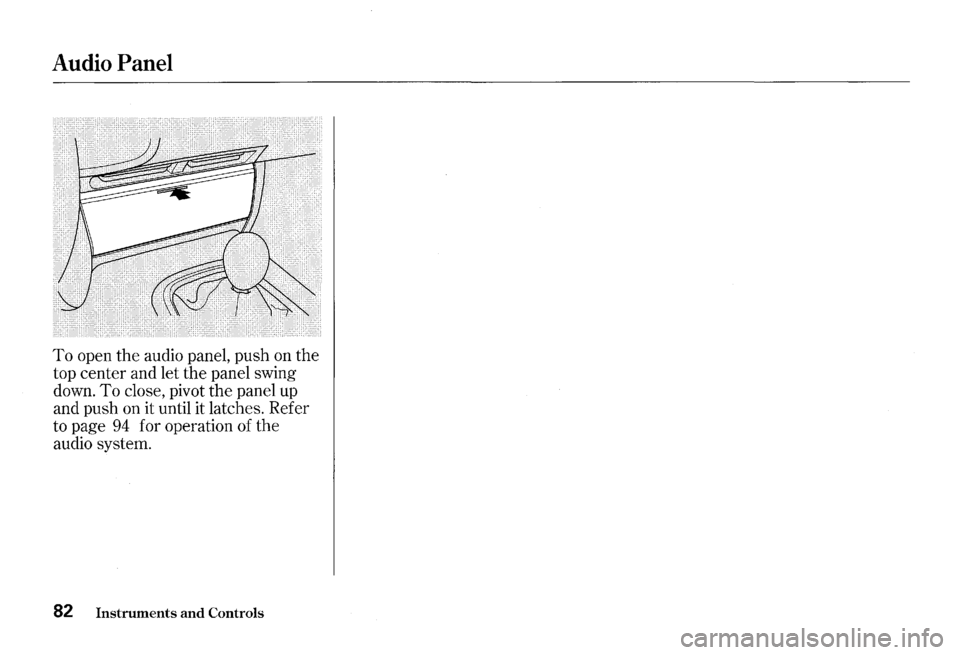
To open the audio panel, push on the
top center and let the panel swing
down.
To close, pivot the panel up
and push on it until it latches. Refer
to page
94 for operation of the
audio system.
82 Instruments and Controls
Page 86 of 273
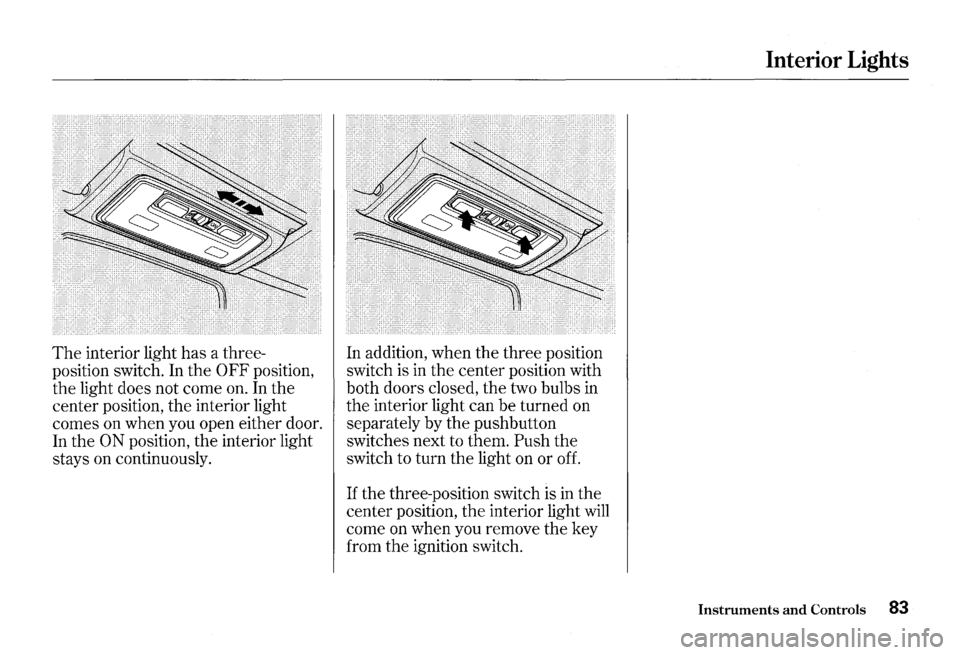
The interior light has a three
position switch. In the
0 FF position,
the light does not come on. In the
center position, the interior light
comes on when you open either door.
In the
ON position, the interior light
stays on continuously. In
addition, when the three position
switch is in the center position with
both doors closed, the two bulbs
in
the interior light can be turned on
separately by the pushbutton
switches next to them.
Push the
switch to turn the light on or off.
If the three-position switch is in the
center position,
the interior light will
come on when you remove the key
from the ignition switch.
Interior Lights
Instruments and Controls 83
Page 87 of 273

84
Page 88 of 273
Comfort and Convenience Features
The heating and air conditioning
systems
in your Honda provide a
comfortable driving environment
in
all weather conditions.
The standard audio system has
many features. This section de
scribes those features and how to
use them.
(If you selected an
optional audio system, refer to the
operating instructions that came
with it.) Heating
and Cooling ........................ 86
What Each Control Does ............
86
How to Use the System ............... 88
To Turn Everything Off ............. 93
Audio System
AM/FM/CD Audio System ....... 94
Operating the Radio .................... 95
Adjusting the Sound .................... 99
Audio System Lighting ............. 100
Radio Frequencies ..................... 100
Radio Reception ......................... 101
Operating the CD Player .......... 102
Operating the CD Changer ...... 107
Protecting Compact Discs ........ 108
CD Player Error Indications ..... 110
CD Changer Error
Indications ..............................
111
Remote Audio Controls ............ 112
Theft Protection ........................ 113
Comfort and Convenience Features 85
Page 89 of 273
Heating and Cooling
Proper use of the Heating and
Cooling system can make the
interior dry and comfortable, and
keep the windows clear for best
visibility.
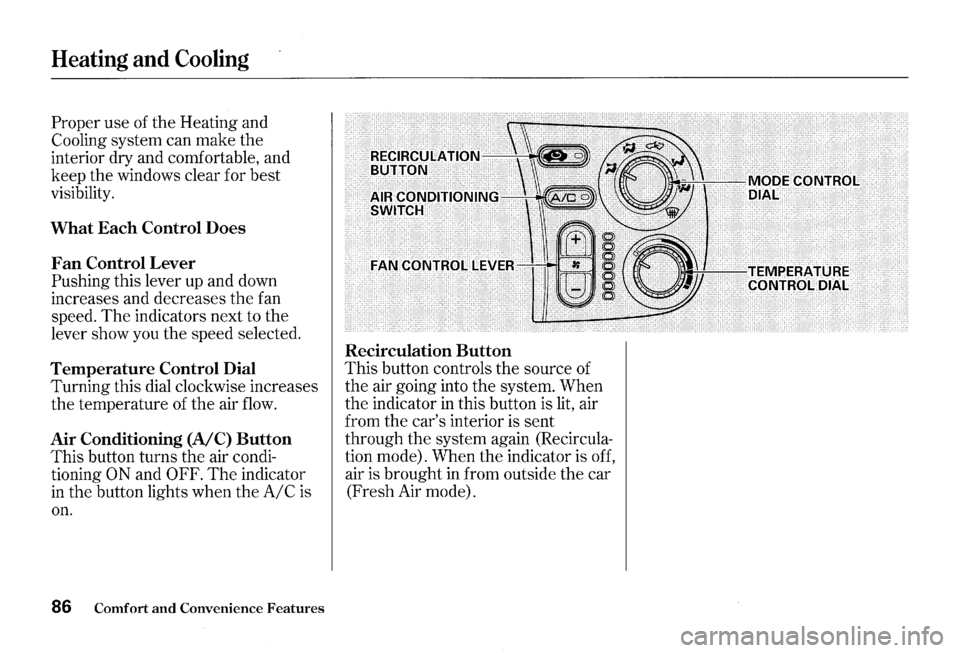
What Each Control Does
Fan Control Lever
Pushing this lever up and down
increases and decreases
the fan
speed.
The indicators next to the
lever show you the speed selected.
Temperature Control Dial
Turning this dial clockwise increases
the temperature of the air
flow.
Air Conditioning (A/C) Button
This button turns the air condi
tioning
ON and OFF. The indicator
in the button lights when theA/Cis
on.
86 Comfort and Convenience Features
Recirculation Button
This button controls the source of
the air going into the system. When
the indicator
in this button is lit, air
from the car's interior is sent
through the system again (Recircula
tion mode). When the indicator is off,
air
is brought in from outside the car
(Fresh Air mode).
Page 90 of 273
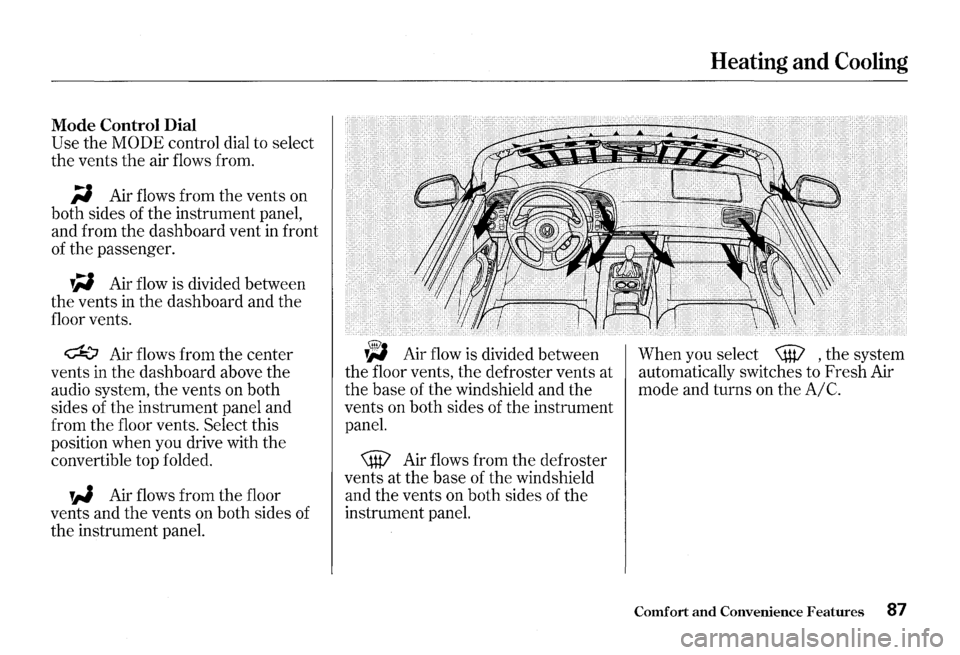
Mode Control Dial
Use the MODE control dial to select
the vents
the air flows from.
;i Air flows from the vents on
both sides of the instrument panel,
and from the dashboard vent
in front
of the passenger.
W Air flow is divided between
the vents
in the dashboard and the
floor vents.
~ Air flows from the center
vents in the dashboard above the
audio system, the vents on both
sides of the instrument panel and
from the floor vents.
Select this
position when you drive with the
convertible top folded.
W Air flows from the floor
vents and
the vents on both sides of
the instrument panel.
~ Air flow is divided between
the floor vents, the defroster vents at
the base of the windshield and the
vents on both sides of the instrument
panel.
\W Air flows from the defroster
vents at the base of the windshield
and the vents on both sides of the
instrument panel.
Heating and Cooling
When you select \W , the system
automatically switches to Fresh Air
mode and turns on the
A/C.
Comfort and Convenience Features 87