lock Hyundai Atos 2002 Owner's Guide
[x] Cancel search | Manufacturer: HYUNDAI, Model Year: 2002, Model line: Atos, Model: Hyundai Atos 2002Pages: 249, PDF Size: 3.11 MB
Page 54 of 249
FEATURES OF YOUR HYUNDAI
FEATURES OF YOUR HYUNDAI FEATURES OF YOUR HYUNDAI
FEATURES OF YOUR HYUNDAI
FEATURES OF YOUR HYUNDAI
1- 45
B900B02X-GAT
1. POWER ON-OFF/VOLUME CON-
TROL KNOB
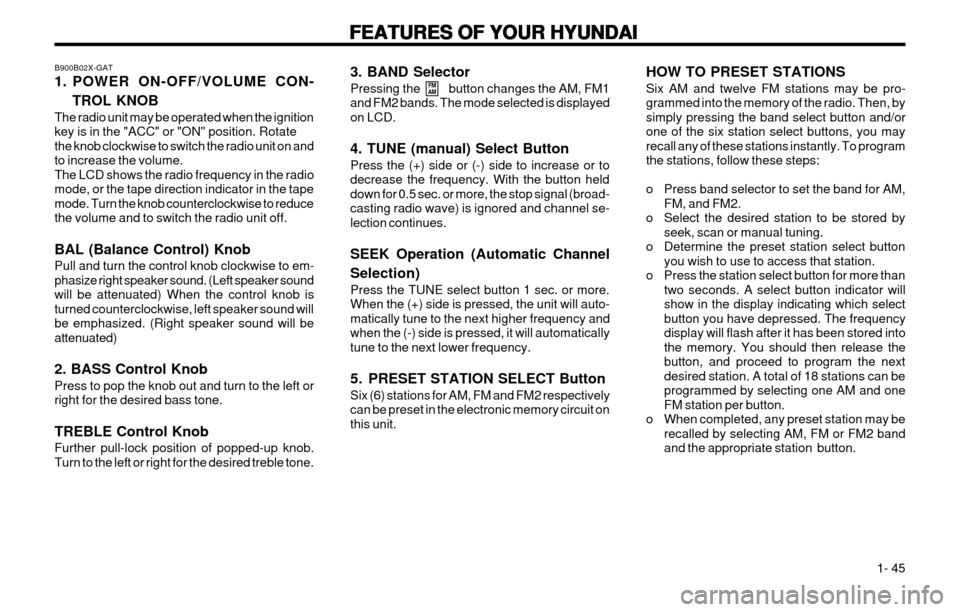
The radio unit may be operated when the ignition key is in the "ACC" or "ON" position. Rotatethe knob clockwise to switch the radio unit on andto increase the volume.The LCD shows the radio frequency in the radiomode, or the tape direction indicator in the tapemode. Turn the knob counterclockwise to reducethe volume and to switch the radio unit off. BAL (Balance Control) Knob Pull and turn the control knob clockwise to em- phasize right speaker sound. (Left speaker soundwill be attenuated) When the control knob isturned counterclockwise, left speaker sound willbe emphasized. (Right speaker sound will beattenuated) 2. BASS Control Knob Press to pop the knob out and turn to the left or right for the desired bass tone. TREBLE Control Knob Further pull-lock position of popped-up knob. Turn to the left or right for the desired treble tone. 3. BAND Selector Pressing the button changes the AM, FM1 and FM2 bands. The mode selected is displayedon LCD. 4. TUNE (manual) Select Button Press the (+) side or (-) side to increase or to decrease the frequency. With the button helddown for 0.5 sec. or more, the stop signal (broad-casting radio wave) is ignored and channel se-lection continues. SEEK Operation (Automatic Channel Selection) Press the TUNE select button 1 sec. or more. When the (+) side is pressed, the unit will auto-matically tune to the next higher frequency andwhen the (-) side is pressed, it will automaticallytune to the next lower frequency.
5. PRESET STATION SELECT Button Six (6) stations for AM, FM and FM2 respectively can be preset in the electronic memory circuit onthis unit.
FM
AMHOW TO PRESET STATIONS Six AM and twelve FM stations may be pro- grammed into the memory of the radio. Then, bysimply pressing the band select button and/orone of the six station select buttons, you mayrecall any of these stations instantly. To programthe stations, follow these steps:
o Press band selector to set the band for AM,
FM, and FM2.
o Select the desired station to be stored by seek, scan or manual tuning.
o Determine the preset station select button you wish to use to access that station.
o Press the station select button for more than two seconds. A select button indicator will show in the display indicating which selectbutton you have depressed. The frequencydisplay will flash after it has been stored intothe memory. You should then release thebutton, and proceed to program the nextdesired station. A total of 18 stations can beprogrammed by selecting one AM and oneFM station per button.
o When completed, any preset station may be recalled by selecting AM, FM or FM2 bandand the appropriate station button.
Page 55 of 249
FEATURES OF YOUR HYUNDAI
FEATURES OF YOUR HYUNDAI FEATURES OF YOUR HYUNDAI
FEATURES OF YOUR HYUNDAI
FEATURES OF YOUR HYUNDAI
1- 46
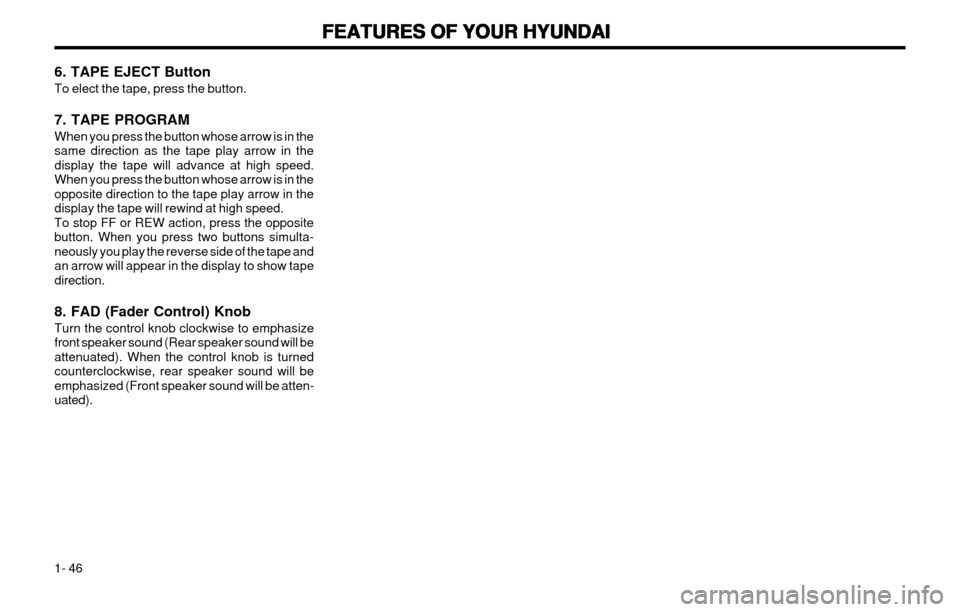
6. TAPE EJECT Button To elect the tape, press the button. 7. TAPE PROGRAM When you press the button whose arrow is in the same direction as the tape play arrow in thedisplay the tape will advance at high speed.When you press the button whose arrow is in theopposite direction to the tape play arrow in thedisplay the tape will rewind at high speed.To stop FF or REW action, press the oppositebutton. When you press two buttons simulta-neously you play the reverse side of the tape andan arrow will appear in the display to show tapedirection. 8. FAD (Fader Control) Knob Turn the control knob clockwise to emphasize front speaker sound (Rear speaker sound will beattenuated). When the control knob is turnedcounterclockwise, rear speaker sound will beemphasized (Front speaker sound will be atten-uated).
Page 57 of 249
FEATURES OF YOUR HYUNDAI
FEATURES OF YOUR HYUNDAI FEATURES OF YOUR HYUNDAI
FEATURES OF YOUR HYUNDAI
FEATURES OF YOUR HYUNDAI
1- 48
B922B03X-GAT
1. POWER ON-OFF/VOLUME
CONTROL KNOB
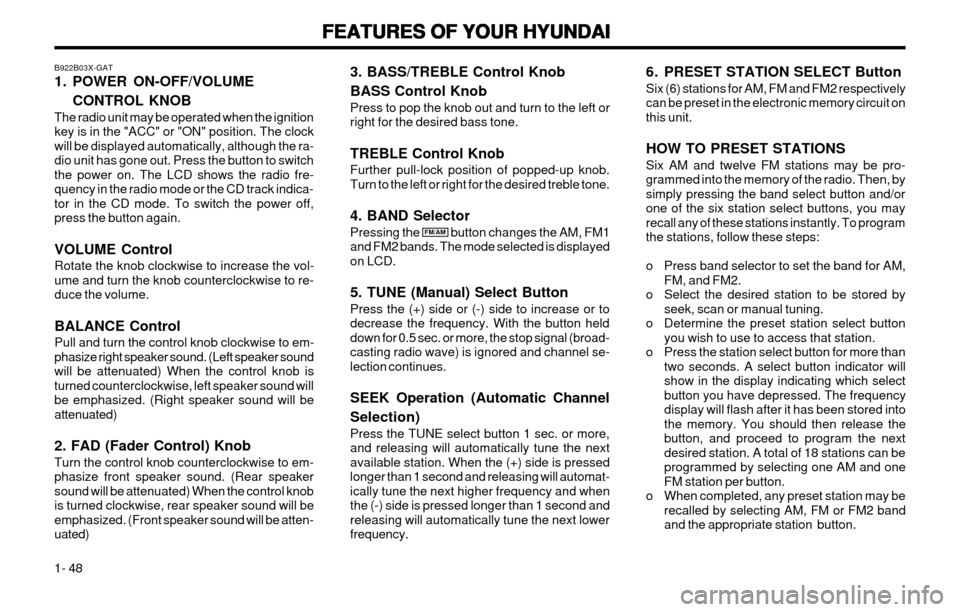
The radio unit may be operated when the ignition key is in the "ACC" or "ON" position. The clockwill be displayed automatically, although the ra-dio unit has gone out. Press the button to switchthe power on. The LCD shows the radio fre-quency in the radio mode or the CD track indica-tor in the CD mode. To switch the power off,press the button again. VOLUME Control Rotate the knob clockwise to increase the vol- ume and turn the knob counterclockwise to re-duce the volume. BALANCE Control Pull and turn the control knob clockwise to em- phasize right speaker sound. (Left speaker soundwill be attenuated) When the control knob isturned counterclockwise, left speaker sound willbe emphasized. (Right speaker sound will beattenuated) 2. FAD (Fader Control) Knob Turn the control knob counterclockwise to em- phasize front speaker sound. (Rear speakersound will be attenuated) When the control knobis turned clockwise, rear speaker sound will beemphasized. (Front speaker sound will be atten-uated)
FM/AM 6. PRESET STATION SELECT Button Six (6) stations for AM, FM and FM2 respectively can be preset in the electronic memory circuit onthis unit. HOW TO PRESET STATIONS Six AM and twelve FM stations may be pro- grammed into the memory of the radio. Then, bysimply pressing the band select button and/orone of the six station select buttons, you mayrecall any of these stations instantly. To programthe stations, follow these steps:
o Press band selector to set the band for AM,
FM, and FM2.
o Select the desired station to be stored by seek, scan or manual tuning.
o Determine the preset station select button you wish to use to access that station.
o Press the station select button for more than two seconds. A select button indicator will show in the display indicating which selectbutton you have depressed. The frequencydisplay will flash after it has been stored intothe memory. You should then release thebutton, and proceed to program the nextdesired station. A total of 18 stations can beprogrammed by selecting one AM and oneFM station per button.
o When completed, any preset station may be recalled by selecting AM, FM or FM2 bandand the appropriate station button.
3. BASS/TREBLE Control Knob BASS Control Knob Press to pop the knob out and turn to the left or right for the desired bass tone. TREBLE Control Knob Further pull-lock position of popped-up knob. Turn to the left or right for the desired treble tone. 4. BAND Selector Pressing the button changes the AM, FM1 and FM2 bands. The mode selected is displayedon LCD. 5. TUNE (Manual) Select Button Press the (+) side or (-) side to increase or to decrease the frequency. With the button helddown for 0.5 sec. or more, the stop signal (broad-casting radio wave) is ignored and channel se-lection continues. SEEK Operation (Automatic Channel Selection) Press the TUNE select button 1 sec. or more, and releasing will automatically tune the nextavailable station. When the (+) side is pressedlonger than 1 second and releasing will automat-ically tune the next higher frequency and whenthe (-) side is pressed longer than 1 second andreleasing will automatically tune the next lowerfrequency.
Page 65 of 249
DRIVING YOUR HYUNDAI
DRIVING YOUR HYUNDAI DRIVING YOUR HYUNDAI
DRIVING YOUR HYUNDAI
DRIVING YOUR HYUNDAI
2- 2 C020A01A-AAT
BEFORE STARTING THE ENGINE
BEFORE STARTING THE ENGINE BEFORE STARTING THE ENGINE
BEFORE STARTING THE ENGINE
BEFORE STARTING THE ENGINE
Before you start the engine, you should always:
1. Look around the vehicle to be sure there are no flat tires, puddles of oil, water or other indications of possible trouble.
2. After entering the car, check to be sure the parking brake is engaged.
3. Check that all windows, and lights are clean.
4. Check that the interior and exterior mirrors are clean and in position.
5. Check your seat, seatback and headrest to be sure they are in their proper positions.
6. Lock all the doors.
7. Fasten your seat belt and be sure that all other occupants have fastened theirs.
8. Turn off all lights and accessories that are not needed.
9. When you turn the ignition switch to "ON", check that all appropriate warning lights are operating and that you have sufficient fuel.
10. Check the operation of warning lights and all bulbs when key is in the "ON" position. o To start the engine, insert the ignition key
and turn it to the "START" position. Releaseit as soon as the engine starts. Do not hold
the key in the "START" position for morethan 15 seconds.
NOTE:
NOTE: NOTE:
NOTE:
NOTE:
For safety, the engine will not start if the
For safety, the engine will not start if the For safety, the engine will not start if the
For safety, the engine will not start if the
For safety, the engine will not start if the
shift lever is not
shift lever is not shift lever is not
shift lever is not
shift lever is not in "P" or "N" Position
in "P" or "N" Position in "P" or "N" Position
in "P" or "N" Position
in "P" or "N" Position
(Automatic Transaxle).
(Automatic Transaxle). (Automatic Transaxle).
(Automatic Transaxle).
(Automatic Transaxle). C040A01A-AAT
KEY POSITIONS
KEY POSITIONS KEY POSITIONS
KEY POSITIONS
KEY POSITIONS
WARNING:
WARNING: WARNING:
WARNING:
WARNING:
The engine should not be turned off or the
The engine should not be turned off or the The engine should not be turned off or the
The engine should not be turned off or the
The engine should not be turned off or the
key removed from
key removed from key removed from
key removed from
key removed from the ignition key cylinder
the ignition key cylinder the ignition key cylinder
the ignition key cylinder
the ignition key cylinder
while the vehicle is in motion. The steering
while the vehicle is in motion. The steering while the vehicle is in motion. The steering
while the vehicle is in motion. The steering
while the vehicle is in motion. The steering
wheel
wheel wheel
wheel
wheel is locked by removing the key.
is locked by removing the key. is locked by removing the key.
is locked by removing the key.
is locked by removing the key. oo
oo
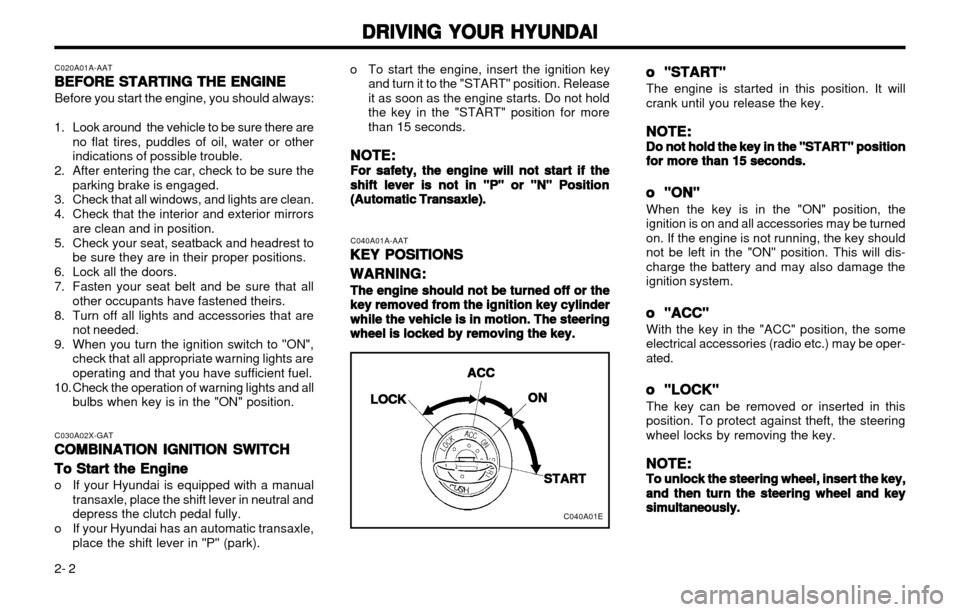
o "START"
"START" "START"
"START"
"START"
The engine is started in this position. It will crank until you release the key.
NOTE:
NOTE: NOTE:
NOTE:
NOTE:
Do not hold the key in the "START" position
Do not hold the key in the "START" position Do not hold the key in the "START" position
Do not hold the key in the "START" position
Do not hold the key in the "START" position
for more than 15 seconds.
for more than 15 seconds. for more than 15 seconds.
for more than 15 seconds.
for more than 15 seconds.
oo
oo
o
"ON"
"ON" "ON"
"ON"
"ON"
When the key is in the "ON" position, the
ignition is on and all accessories may be turnedon. If the engine is not running, the key shouldnot be left in the "ON" position. This will dis-
charge the battery and may also damage theignition system.
oo
oo
o "ACC"
"ACC" "ACC"
"ACC"
"ACC"
With the key in the "ACC" position, the some
electrical accessories (radio etc.) may be oper-ated.
oo
oo
o "LOCK"
"LOCK" "LOCK"
"LOCK"
"LOCK"
The key can be removed or inserted in thisposition. To protect against theft, the steeringwheel locks by removing the key.
NOTE:
NOTE: NOTE:
NOTE:
NOTE:
To unlock the steering wheel, insert the key,
To unlock the steering wheel, insert the key, To unlock the steering wheel, insert the key,
To unlock the steering wheel, insert the key,
To unlock the steering wheel, insert the key,
and then turn the
and then turn the and then turn the
and then turn the
and then turn the
steering wheel and key
steering wheel and key steering wheel and key
steering wheel and key
steering wheel and key
simultaneously.
simultaneously. simultaneously.
simultaneously.
simultaneously.
C030A02X-GAT
COMBINATION IGNITION SWITCH
COMBINATION IGNITION SWITCH COMBINATION IGNITION SWITCH
COMBINATION IGNITION SWITCH
COMBINATION IGNITION SWITCH
To Start the Engine
To Start the Engine To Start the Engine
To Start the Engine
To Start the Engine
o If your Hyundai is equipped with a manual
transaxle, place the shift lever in neutral and depress the clutch pedal fully.
o If your Hyundai has an automatic transaxle, place the shift lever in "P" (park).
C040A01E
LOCK
LOCK LOCK
LOCK
LOCK ACC
ACC ACC
ACC
ACC
ONON
ONON
ON
START
START START
START
START
Page 68 of 249

DRIVING YOUR HYUNDAI
DRIVING YOUR HYUNDAI DRIVING YOUR HYUNDAI
DRIVING YOUR HYUNDAI
DRIVING YOUR HYUNDAI
2- 5
Shift
from-toRecommended
1-2 2-3 3-4 4-5 20 km/h (15 mph)40 km/h (25 mph) 55 km/h (35 mph) 75 km/h (45 mph)
NOTE:
NOTE: NOTE:
NOTE:
NOTE:
Depress the brake pedal and push the
Depress the brake pedal and push the Depress the brake pedal and push the
Depress the brake pedal and push the
Depress the brake pedal and push the
button when shifting.
button when shifting. button when shifting.
button when shifting.
button when shifting.
Push the button when shifting.
Push the button when shifting. Push the button when shifting.
Push the button when shifting.
Push the button when shifting.
The selector lever can be shifted free-
The selector lever can be shifted free- The selector lever can be shifted free-
The selector lever can be shifted free-
The selector lever can be shifted free-
ly.ly.
ly.ly.
ly.
For optimum fuel economy, accelerate gradual- ly. The transaxle will automatically shift to thesecond, third and overdrive gears. C090B01A-AAT The function of each position is as
The function of each position is as The function of each position is as
The function of each position is as
The function of each position is as
follows:
follows: follows:
follows:
follows:
o P (Park):
o P (Park): o P (Park):
o P (Park):
o P (Park): Use to hold the vehicle in place when parking or
while starting the engine; shift the selector lever to the "P" (Park) position. Whenever parkingthe car, apply the parking brake and shift theselector lever to the "P" (Park) position.
CAUTION:
CAUTION: CAUTION:
CAUTION:
CAUTION:
Never place the selector lever in the "P"
Never place the selector lever in the "P" Never place the selector lever in the "P"
Never place the selector lever in the "P"
Never place the selector lever in the "P" (Park) position unless the vehicle is fully
(Park) position unless the vehicle is fully (Park) position unless the vehicle is fully
(Park) position unless the vehicle is fully
(Park) position unless the vehicle is fully
stopped. Failure to observe this caution will
stopped. Failure to observe this caution will stopped. Failure to observe this caution will
stopped. Failure to observe this caution will
stopped. Failure to observe this caution will
cause severe damage to the transaxle.
cause severe damage to the transaxle. cause severe damage to the transaxle.
cause severe damage to the transaxle.
cause severe damage to the transaxle.
C090A01A-GAT
AUTOMATIC TRANSAXLE
AUTOMATIC TRANSAXLE AUTOMATIC TRANSAXLE
AUTOMATIC TRANSAXLE
AUTOMATIC TRANSAXLE
The highly efficient Hyundai automatic transaxle
has four forward speeds and one reverse speed. It has a conventional shift pattern as shown inthe illustration. At night, with the first position ofthe multi-function switch, the appropriate sym-bol on the shift pattern indicator will be illuminat-ed according to the range selected.
CAUTION:
CAUTION: CAUTION:
CAUTION:
CAUTION:
Never shift into "R" or "P" position while
Never shift into "R" or "P" position while Never shift into "R" or "P" position while
Never shift into "R" or "P" position while
Never shift into "R" or "P" position while the vehicle is moving.
the vehicle is moving. the vehicle is moving.
the vehicle is moving.
the vehicle is moving.
C090B01X
C070C01A-AAT
To Remove the Ignition Key
To Remove the Ignition Key To Remove the Ignition Key
To Remove the Ignition Key
To Remove the Ignition Key
1. Turn the ignition key to the "ACC" position.
2. Simultaneously push and turn the ignition
key counterclockwise from the "ACC" posi- tion to the "LOCK" position.
3. The key can be removed in the "LOCK" position.
C070E02A-GAT Recommended Shift Points
Recommended Shift Points Recommended Shift Points
Recommended Shift Points
Recommended Shift Points
C070C01E
LOCK
LOCK LOCK
LOCK
LOCK ACC
ACC ACC
ACC
ACC
ONON
ONON
ON
START
START START
START
START
The shift points as shown are recommended for
optimum fuel economy and performance.
Page 71 of 249
DRIVING YOUR HYUNDAI
DRIVING YOUR HYUNDAI DRIVING YOUR HYUNDAI
DRIVING YOUR HYUNDAI
DRIVING YOUR HYUNDAI
2- 8 WARNING:
WARNING: WARNING:
WARNING:
WARNING:
Your ABS will not prevent accidents due to
Your ABS will not prevent accidents due to Your ABS will not prevent accidents due to
Your ABS will not prevent accidents due to
Your ABS will not prevent accidents due to improper or dangerous
improper or dangerous improper or dangerous
improper or dangerous
improper or dangerous
driving maneuvers.
driving maneuvers. driving maneuvers.
driving maneuvers.
driving maneuvers.
Even though vehicle control is improved
Even though vehicle control is improved Even though vehicle control is improved
Even though vehicle control is improved
Even though vehicle control is improved
during emergency
during emergency during emergency
during emergency
during emergency
braking, always maintain
braking, always maintain braking, always maintain
braking, always maintain
braking, always maintain
a safe distance between you and objects
a safe distance between you and objects a safe distance between you and objects
a safe distance between you and objects
a safe distance between you and objects
ahead. Vehicle
ahead. Vehicle ahead. Vehicle
ahead. Vehicle
ahead. Vehicle
speeds should always be
speeds should always be speeds should always be
speeds should always be
speeds should always be
reduced during extreme road conditions.
reduced during extreme road conditions. reduced during extreme road conditions.
reduced during extreme road conditions.
reduced during extreme road conditions.
The braking distance for cars equipped with
The braking distance for cars equipped with The braking distance for cars equipped with
The braking distance for cars equipped with
The braking distance for cars equipped withan anti-lock braking system
an anti-lock braking system an anti-lock braking system
an anti-lock braking system
an anti-lock braking system may be longer
may be longer may be longer
may be longer
may be longer
than for those without it in the following
than for those without it in the following than for those without it in the following
than for those without it in the following
than for those without it in the following
road conditions.
road conditions. road conditions.
road conditions.
road conditions.
oo
oo
o Driving on rough, gravel or snow-cov-
Driving on rough, gravel or snow-cov- Driving on rough, gravel or snow-cov-
Driving on rough, gravel or snow-cov-
Driving on rough, gravel or snow-cov-
ered roads.
ered roads. ered roads.
ered roads.
ered roads.
oo
oo
o Driving with tire chains installed.
Driving with tire chains installed. Driving with tire chains installed.
Driving with tire chains installed.
Driving with tire chains installed.
oo
oo
o Driving on roads where the road surface
Driving on roads where the road surface Driving on roads where the road surface
Driving on roads where the road surface
Driving on roads where the road surface
is pitted or has different
is pitted or has different is pitted or has different
is pitted or has different
is pitted or has different surface height.
surface height. surface height.
surface height.
surface height.
During these conditions the vehicle
During these conditions the vehicle During these conditions the vehicle
During these conditions the vehicle
During these conditions the vehicle should
should should
should
should
be driven at reduced speeds. The safety
be driven at reduced speeds. The safety be driven at reduced speeds. The safety
be driven at reduced speeds. The safety
be driven at reduced speeds. The safety
features
features features
features
features of an ABS equipped vehicle should
of an ABS equipped vehicle should of an ABS equipped vehicle should
of an ABS equipped vehicle should
of an ABS equipped vehicle should
not be tested by high speed driving or cor-
not be tested by high speed driving or cor- not be tested by high speed driving or cor-
not be tested by high speed driving or cor-
not be tested by high speed driving or cor-
nering.
nering. nering.
nering.
nering. This could endanger the safety of
This could endanger the safety of This could endanger the safety of
This could endanger the safety of
This could endanger the safety of
yourself or others.
yourself or others. yourself or others.
yourself or others.
yourself or others.
C120A02A-AAT
ANTI-LOCK BRAKE SYSTEM
ANTI-LOCK BRAKE SYSTEM ANTI-LOCK BRAKE SYSTEM
ANTI-LOCK BRAKE SYSTEM
ANTI-LOCK BRAKE SYSTEM
(If installed)
(If installed) (If installed)
(If installed)
(If installed)
The Anti-Lock Brake System (ABS) is designed
to prevent wheel lock-up during sudden braking or on hazardous road surfaces. The ABS con-
trol module monitors the wheel speed and con-trols the pressure applied to each brake. Thus,in emergency situations or on slick roads, ABSwill increase vehicle control during braking.
NOTE:
NOTE: NOTE:
NOTE:
NOTE:
During ABS operation, a slight pulsation
During ABS operation, a slight pulsation During ABS operation, a slight pulsation
During ABS operation, a slight pulsation
During ABS operation, a slight pulsation may be felt in the brake
may be felt in the brake may be felt in the brake
may be felt in the brake
may be felt in the brake
pedal when the
pedal when the pedal when the
pedal when the
pedal when the
brakes are applied. Also, a noise may be
brakes are applied. Also, a noise may be brakes are applied. Also, a noise may be
brakes are applied. Also, a noise may be
brakes are applied. Also, a noise may be
heard in the engine
heard in the engine heard in the engine
heard in the engine
heard in the engine
compartment while brak-
compartment while brak- compartment while brak-
compartment while brak-
compartment while brak-
ing. These conditions are normal and indi-
ing. These conditions are normal and indi- ing. These conditions are normal and indi-
ing. These conditions are normal and indi-
ing. These conditions are normal and indi-
cate that the
cate that the cate that the
cate that the
cate that the
anti-lock brake system is func-
anti-lock brake system is func- anti-lock brake system is func-
anti-lock brake system is func-
anti-lock brake system is func-
tioning properly.
tioning properly. tioning properly.
tioning properly.
tioning properly. put the gear selector lever in "P" (automatic) or in first or reverse gear (manual transaxle)and block the rear wheels so the car cannotroll. Then release the parking brake.
o Do not hold the vehicle on the upgrade with the accelerator pedal. This can cause thetransaxle to overheat. Always use the brake
pedal or parking brake.
o Don't "ride" the brake pedal. Resting your
foot on the brake pedal while driving can bedangerous because it can result in the brakesoverheating and losing their effectiveness. Italso increases the wear of the brake compo-nents.
o If a tire goes flat while you are driving, apply the brakes gently and keep the car pointedstraight ahead while you slow down. Whenyou are moving slowly enough for it to be
safe to do so, pull off the road and stop in asafe place.
o If your car is equipped with an automatic transaxle, don't let your car creep forward.To avoid creeping forward, keep your foot
on the brake pedal when the car is stopped.
o Use caution when parking on a hill. Engage the parking brake and place the gear selec-tor lever in "P" (automatic transaxle) or in
first or reverse gear (manual transaxle). Ifyour car is facing downhill, turn the frontwheels into the curb to help keep the carfrom rolling. If your car is facing uphill, turnthe front wheels away from the curb to helpkeep the car from rolling. If there is no curb
or if it is required by other conditions to keepthe car from rolling, block the wheels.
o Under some conditions your parking brake can freeze in the engaged position. This ismost likely to happen when there is an
accumulation of snow or ice around or nearthe rear brakes or if the brakes are wet. If
there is a risk that the parking brake may
freeze, apply it only temporarily while you
Page 73 of 249
DRIVING YOUR HYUNDAI
DRIVING YOUR HYUNDAI DRIVING YOUR HYUNDAI
DRIVING YOUR HYUNDAI
DRIVING YOUR HYUNDAI
2- 10 ice. If the lock is frozen internally, you may be able to thaw it out by using a heated key.Handle the heated key with care to avoid burn-ing your fingers.
NOTE:
NOTE: NOTE:
NOTE:
NOTE:
The proper temperature for using the immo-
The proper temperature for using the immo- The proper temperature for using the immo-
The proper temperature for using the immo-
The proper temperature for using the immo-
bilizer key is from -40°C to 80°C. If you heat
bilizer key is from -40°C to 80°C. If you heat bilizer key is from -40°C to 80°C. If you heat
bilizer key is from -40°C to 80°C. If you heat
bilizer key is from -40°C to 80°C. If you heat
the immobilizer key over 80°C to open the
the immobilizer key over 80°C to open the the immobilizer key over 80°C to open the
the immobilizer key over 80°C to open the
the immobilizer key over 80°C to open the
frozen lock,
frozen lock, frozen lock,
frozen lock,
frozen lock, it may cause damage to the
it may cause damage to the it may cause damage to the
it may cause damage to the
it may cause damage to the
transponder in its head.
transponder in its head. transponder in its head.
transponder in its head.
transponder in its head. C160H01A-AAT
Use Approved Anti-Freeze in Window
Use Approved Anti-Freeze in Window Use Approved Anti-Freeze in Window
Use Approved Anti-Freeze in Window
Use Approved Anti-Freeze in Window
Washer System
Washer System Washer System
Washer System
Washer System
To keep the water in the window washer sys- tem from freezing, add an approved anti-freezesolution in accordance with instructions on thecontainer. Window washer anti-freeze is avail-able from Hyundai dealers and most auto partsoutlets. Do not use engine coolant or othertypes of anti-freeze as these may damage thefinish. C160I01X-GAT
Don't Let Your Parking Brake Freeze
Don't Let Your Parking Brake Freeze Don't Let Your Parking Brake Freeze
Don't Let Your Parking Brake Freeze
Don't Let Your Parking Brake Freeze
Under some conditions your parking brake can freeze in the engaged position. This is mostlikely to happen when there is an accumulationof snow or ice around or near the rear brakes orif the brakes are wet. If there is a risk theparking brake may freeze, apply it only tempo-
C160F01A-AAT
Check Spark Plugs and Ignition
Check Spark Plugs and Ignition Check Spark Plugs and Ignition
Check Spark Plugs and Ignition
Check Spark Plugs and Ignition
System
System System
System
System
Inspect your spark plugs as described in Sec-tion 6 and replace them if necessary. Alsocheck all ignition wiring and components to besure they are not cracked, worn or damaged inany way.
C160D01A-AAT
Check Battery and Cables
Check Battery and Cables Check Battery and Cables
Check Battery and Cables
Check Battery and Cables
Winter puts additional burdens on the batterysystem. Visually inspect the battery and cablesas described in Section 6. The level of chargein your battery can be checked by your Hyundaidealer or a service station. C160E01A-AATChange to "Winter Weight" Oil if
Change to "Winter Weight" Oil if Change to "Winter Weight" Oil if
Change to "Winter Weight" Oil if
Change to "Winter Weight" Oil if
Necessary
Necessary Necessary
Necessary
Necessary
In some climates it is recommended that a lower viscosity "winter weight" oil be used dur-ing cold weather. See Section 9 for recommen-dations. If you aren't sure what weight oil youshould use, consult your Hyundai dealer. C160G01A-GAT
To Keep Locks from Freezing
To Keep Locks from Freezing To Keep Locks from Freezing
To Keep Locks from Freezing
To Keep Locks from Freezing
To keep the locks from freezing, squirt an approved de-icer fluid or glycerine into the keyopening. If a lock is covered with ice, squirt itwith an approved de-icing fluid to remove the
Failure to do so may adversely affect the safety
and handling of your car. Speeding, rapid accel-eration, sudden brake applications, and sharpturns are potentially very hazardous practices.During deceleration, use engine braking to thefullest extent. Sudden brake applications onsnowy or icy roads may cause skids to occur.
You need to keep sufficient distance betweenthe vehicle in front and your vehicle. Also, applythe brake gently.
It should be noted that installing tire chains on
the tire will provide a greater driving force, butwill not prevent side skids.
NOTE:
NOTE: NOTE:
NOTE:
NOTE:
Tire chains are not legal in all provinces.
Tire chains are not legal in all provinces. Tire chains are not legal in all provinces.
Tire chains are not legal in all provinces.
Tire chains are not legal in all provinces. Check
Check Check
Check
Check province laws before fitting tire
province laws before fitting tire province laws before fitting tire
province laws before fitting tire
province laws before fitting tire
chains.
chains. chains.
chains.
chains.
C160C01A-AATUse High Quality Ethylene Glycol
Use High Quality Ethylene Glycol Use High Quality Ethylene Glycol
Use High Quality Ethylene Glycol
Use High Quality Ethylene Glycol
Coolant
Coolant Coolant
Coolant
Coolant
Your Hyundai is delivered with high quality
ethylene glycol coolant in the cooling system. It is the only type of coolant that should be usedbecause it helps prevent corrosion in the cool-ing system, lubricates the water pump andprevents freezing. Be sure to replace or replen-ish your coolant in accordance with the main-tenance schedule in Section 5. Before winter,have your coolant tested to assure that itsfreezing point is sufficient for the temperaturesanticipated during the winter.
Page 74 of 249
DRIVING YOUR HYUNDAI
DRIVING YOUR HYUNDAI DRIVING YOUR HYUNDAI
DRIVING YOUR HYUNDAI
DRIVING YOUR HYUNDAI
2- 11
C190A01A-GAT
TRAILER OR VEHICLE TOWING
TRAILER OR VEHICLE TOWING TRAILER OR VEHICLE TOWING
TRAILER OR VEHICLE TOWING
TRAILER OR VEHICLE TOWING
If you are considering towing with your car, you
should first check with your Province Depart- ment of Motor Vehicles to determine their legal
requirements. Since laws vary from province to province the
requirements for towing trailers, cars, or other types of vehicles or apparatus may differ. Askyour Hyundai dealer for further details beforetowing.
CAUTION:
CAUTION: CAUTION:
CAUTION:
CAUTION:
Do not do any towing with your car during
Do not do any towing with your car during Do not do any towing with your car during
Do not do any towing with your car during
Do not do any towing with your car during its first 2,000 km (1,200 miles) in order to
its first 2,000 km (1,200 miles) in order to its first 2,000 km (1,200 miles) in order to
its first 2,000 km (1,200 miles) in order to
its first 2,000 km (1,200 miles) in order to
allow the engine to properly break in. Fail-
allow the engine to properly break in. Fail- allow the engine to properly break in. Fail-
allow the engine to properly break in. Fail-
allow the engine to properly break in. Fail-
ure to heed this caution may result in seri-
ure to heed this caution may result in seri- ure to heed this caution may result in seri-
ure to heed this caution may result in seri-
ure to heed this caution may result in seri-
ous engine or transaxle damage.
ous engine or transaxle damage. ous engine or transaxle damage.
ous engine or transaxle damage.
ous engine or transaxle damage.
C190B01S-AATTrailer Hitches
Trailer Hitches Trailer Hitches
Trailer Hitches
Trailer Hitches
Select the proper hitch and ball combination,
making sure that it's location is compatible with that of the trailer or vehicle being towed.
Use a quality non-equalizing hitch which distrib-
utes the tongue load uniformly throughout thechassis.
The hitch should be bolted securely to the car
and installed by a qualified technician. DO NOTUSE A HITCH DESIGNED FOR TEMPORARYINSTALLATION AND NEVER USE ONE THATATTACHES ONLY TO THE BUMPER.
C170A01A-AAT
HIGHER SPEED MOTORING
HIGHER SPEED MOTORING HIGHER SPEED MOTORING
HIGHER SPEED MOTORING
HIGHER SPEED MOTORING
Pre-Trip Inspections
Pre-Trip Inspections Pre-Trip Inspections
Pre-Trip Inspections
Pre-Trip Inspections 1. Tires:
Adjust the tire inflation pressures to specifica-
tion driving. Low tire inflation pressures will result in overheating and possible failure of thetires.
Avoid using worn or damaged tires which may
result in reduced traction or tire failure.
NOTE:
NOTE: NOTE:
NOTE:
NOTE:
Never exceed the maximum tire inflation
Never exceed the maximum tire inflation Never exceed the maximum tire inflation
Never exceed the maximum tire inflation
Never exceed the maximum tire inflation pressure shown on the tires.
pressure shown on the tires. pressure shown on the tires.
pressure shown on the tires.
pressure shown on the tires.
2. Fuel, engine coolant and engine oil:High speed travel consumes 1.5 times more
fuel than urban motoring. Do not forget to check both engine coolant and engine oil. 3. Drive belt:
A loose or damaged drive belt may result in
overheating of the engine.
C180A01A-AATUSE OF LIGHTS
USE OF LIGHTS USE OF LIGHTS
USE OF LIGHTS
USE OF LIGHTS
Check your lights regularly for correct operation
and always keep them clean. When driving during the day in conditions of poor visibility, itis helpful to drive with headlights on low beam.This enables you to be seen as well as to see.
rarily while you put the gear selector lever in"P" (automatic transaxle) or in first or reversegear (manual transaxle) and block the rearwheels so the car cannot roll. Then release theparking brake.
C160J01A-AATDon't Let Ice and Snow Accumulate
Don't Let Ice and Snow Accumulate Don't Let Ice and Snow Accumulate
Don't Let Ice and Snow Accumulate
Don't Let Ice and Snow Accumulate
Underneath
Underneath Underneath
Underneath
Underneath
Under some conditions, snow and ice can build
up under the fenders and interfere with thesteering. When driving in severe winter condi-tions where this may happen, you should peri-odically check underneath the car to be surethe movement of the front wheels and thesteering components are not obstructed.
C160K01A-AATCarry Emergency Equipment
Carry Emergency Equipment Carry Emergency Equipment
Carry Emergency Equipment
Carry Emergency Equipment
Depending on the severity of the weather where
you drive your car, you should carry appropri-ate emergency equipment. Some of the itemsyou may want to carry include tire chains, towstraps or chains, flashlight, emergency flares,sand, a shovel, jumper cables, a windowscraper, gloves, ground cloth, coveralls, a blan-ket, etc.
Page 81 of 249
WHAT TO DO IN AN EMERGENCY
WHAT TO DO IN AN EMERGENCY WHAT TO DO IN AN EMERGENCY
WHAT TO DO IN AN EMERGENCY
WHAT TO DO IN AN EMERGENCY
3-4 D060A01A-AAT
CHANGING A FLAT TIRE
CHANGING A FLAT TIRE CHANGING A FLAT TIRE
CHANGING A FLAT TIRE
CHANGING A FLAT TIRE
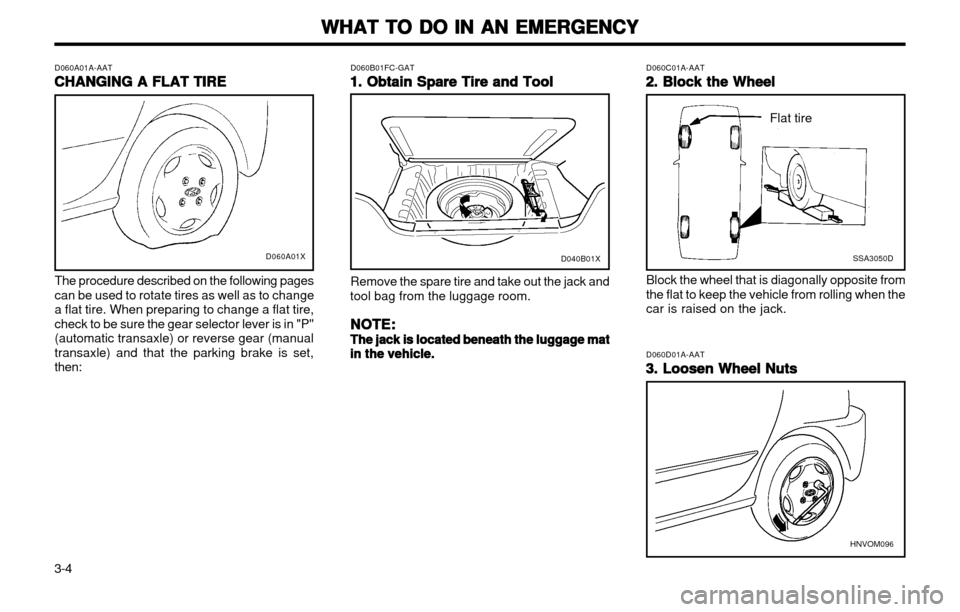
The procedure described on the following pages can be used to rotate tires as well as to change
a flat tire. When preparing to change a flat tire,check to be sure the gear selector lever is in "P"(automatic transaxle) or reverse gear (manualtransaxle) and that the parking brake is set,then: D060B01FC-GAT
1. Obtain Spare Tire and Tool
1. Obtain Spare Tire and Tool 1. Obtain Spare Tire and Tool
1. Obtain Spare Tire and Tool
1. Obtain Spare Tire and Tool
Remove the spare tire and take out the jack and
tool bag from the luggage room.
NOTE:
NOTE: NOTE:
NOTE:
NOTE:
The jack is located beneath the luggage mat
The jack is located beneath the luggage mat The jack is located beneath the luggage mat
The jack is located beneath the luggage mat
The jack is located beneath the luggage mat in the vehicle.
in the vehicle. in the vehicle.
in the vehicle.
in the vehicle. Block the wheel that is diagonally opposite from the flat to keep the vehicle from rolling when thecar is raised on the jack.
D060C01A-AAT
2. Block the Wheel
2. Block the Wheel 2. Block the Wheel
2. Block the Wheel
2. Block the Wheel
SSA3050D
Flat tire
D060D01A-AAT 3. Loosen Wheel Nuts
3. Loosen Wheel Nuts 3. Loosen Wheel Nuts
3. Loosen Wheel Nuts
3. Loosen Wheel Nuts
D060A01X
HNVOM096
D040B01X
Page 82 of 249
WHAT TO DO IN AN EMERGENCY
WHAT TO DO IN AN EMERGENCY WHAT TO DO IN AN EMERGENCY
WHAT TO DO IN AN EMERGENCY
WHAT TO DO IN AN EMERGENCY
3-5
Wheel nut Wrench
The wheel nuts should be loosened slightly
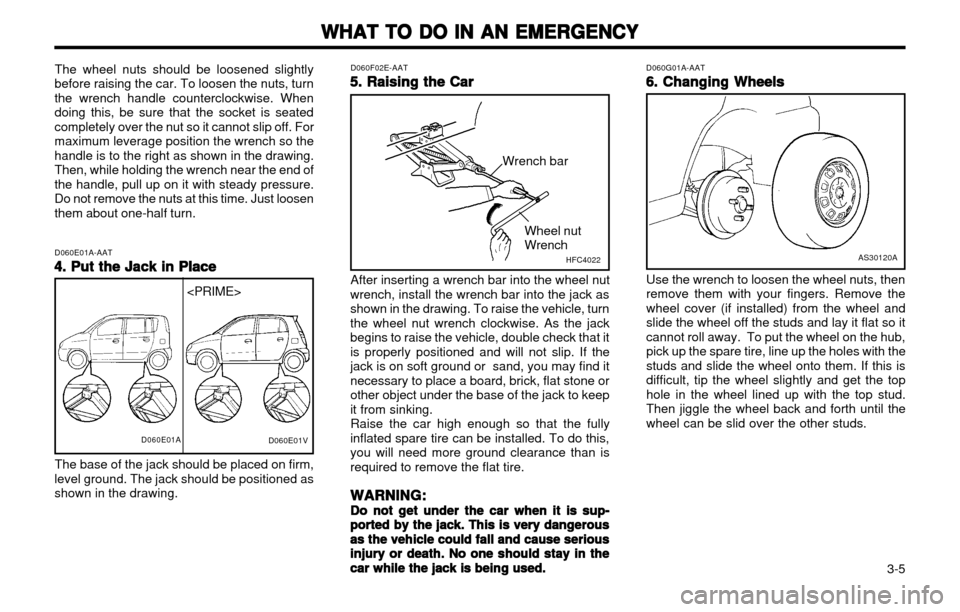
before raising the car. To loosen the nuts, turnthe wrench handle counterclockwise. Whendoing this, be sure that the socket is seatedcompletely over the nut so it cannot slip off. Formaximum leverage position the wrench so thehandle is to the right as shown in the drawing.Then, while holding the wrench near the end ofthe handle, pull up on it with steady pressure.Do not remove the nuts at this time. Just loosenthem about one-half turn.
D060E01A-AAT4. Put the Jack in Place
4. Put the Jack in Place 4. Put the Jack in Place
4. Put the Jack in Place
4. Put the Jack in Place
The base of the jack should be placed on firm,
level ground. The jack should be positioned asshown in the drawing. D060F02E-AAT
5. Raising the Car
5. Raising the Car 5. Raising the Car
5. Raising the Car
5. Raising the Car D060G01A-AAT
6. Changing Wheels
6. Changing Wheels 6. Changing Wheels
6. Changing Wheels
6. Changing Wheels
AS30120A
After inserting a wrench bar into the wheel nut
wrench, install the wrench bar into the jack as shown in the drawing. To raise the vehicle, turnthe wheel nut wrench clockwise. As the jackbegins to raise the vehicle, double check that itis properly positioned and will not slip. If thejack is on soft ground or sand, you may find itnecessary to place a board, brick, flat stone orother object under the base of the jack to keepit from sinking. Raise the car high enough so that the fully
inflated spare tire can be installed. To do this,you will need more ground clearance than isrequired to remove the flat tire.
WARNING:
WARNING: WARNING:
WARNING:
WARNING:
Do not get under the car when it is sup-
Do not get under the car when it is sup- Do not get under the car when it is sup-
Do not get under the car when it is sup-
Do not get under the car when it is sup- ported by the jack. This is very dangerous
ported by the jack. This is very dangerous ported by the jack. This is very dangerous
ported by the jack. This is very dangerous
ported by the jack. This is very dangerous
as the vehicle could fall and cause serious
as the vehicle could fall and cause serious as the vehicle could fall and cause serious
as the vehicle could fall and cause serious
as the vehicle could fall and cause serious
injury or death. No one should stay in the
injury or death. No one should stay in the injury or death. No one should stay in the
injury or death. No one should stay in the
injury or death. No one should stay in the
car while the jack is being used.
car while the jack is being used. car while the jack is being used.
car while the jack is being used.
car while the jack is being used. Use the wrench to loosen the wheel nuts, then remove them with your fingers. Remove thewheel cover (if installed) from the wheel andslide the wheel off the studs and lay it flat so itcannot roll away. To put the wheel on the hub,pick up the spare tire, line up the holes with thestuds and slide the wheel onto them. If this isdifficult, tip the wheel slightly and get the tophole in the wheel lined up with the top stud.Then jiggle the wheel back and forth until thewheel can be slid over the other studs.
D060E01A
D060E01V
HFC4022
Wrench bar