lock Hyundai Atos 2002 Service Manual
[x] Cancel search | Manufacturer: HYUNDAI, Model Year: 2002, Model line: Atos, Model: Hyundai Atos 2002Pages: 249, PDF Size: 3.11 MB
Page 125 of 249
INDEX
INDEX INDEX
INDEX
INDEX
10-1
Catalytic Converter .................................................................... 7-1 ~ 7-2
Child-Protector Rear Door Lock ......................................................... 1-5
Cigarette Lighter ................................................................................
1-26
Clock ................................................................................................ 1-26
Clutch Pedal freeplay ........................................................................ 6-13
Combination Light Daytime running lights ................................................................. 1-23
Headlight flasher .......................................................................... 1-24
Headlight switch ........................................................................... 1-23
High-beam switch ........................................................................ 1-24
Lane change signal ...................................................................... 1-23
Turn signal operation ................................................................... 1-23
Compact Disk Player Operation (H922M) ........................................ 1-49
Cooling Fans ..................................................................................... 6-16
Corrosion Protection Cleaning the interior ....................................................................... 4-3
Protecting your Hyundai from corrosion ........................................ 4-1
Washing and waxing ...................................................................... 4-2
DD
DD
D
Defroster ........................................................................................... 1-38
Door Central door locking system .......................................................... 1-7
Door locks ...................................................................................... 1-4
Locking, unlocking front doors with a key ..................................... 1-4
Drive Belts ............................................................................... 6-12, 6-14 Driving Economical driving ......................................................................... 2-9
Smooth cornering ........................................................................... 2-9
Winter driving ................................................................................. 2-9
ZK000A1-G
10. INDEX
10. INDEX 10. INDEX
10. INDEX
10. INDEX
AA
AA
A
Air bag .................................................................................... 1-13 ~ 1-17
Air Cleaner Filter ................................................................................. 6-9Air Conditioning
Care ............................................................................................. 6-12
Operation ..................................................................................... 1-38
Antenna ............................................................................................. 1-54
Ashtray .............................................................................................. 1-27
Audio Fault Code .............................................................................. 1-51
BB
BB
B
Battery ...................................................................................... 2-10, 6-16
Bi-Level Heating ................................................................................ 1-36
Brake Anti-lock system ............................................................................ 2-8
Checking the brakes .................................................................... 6-11
Fluid .................................................................................. 6-11 ~ 6-12
Pedal clearance ........................................................................... 6-14
Pedal freeplay .............................................................................. 6-13
Practices ............................................................................... 2-7 ~ 2-8
Breaking-In your New Hyundai ........................................................... 1-1
CC
CC
C
Care of Cassette Tapes ................................................................... 1-52
Cassette Tape Player Operation (H900A) ............................. 1-44 ~ 1-46
1010
1010
10
Page 139 of 249
FEATURES OF YOUR HYUNDAI
1-2
B010E01A-AAT GASOLINES FOR CLEANER AIRTo help contribute to cleaner air, Hyundai rec-
ommends that you use gasolines treated with detergent additives, which help to prevent de-posit formation in the engine. These gasolineswill help the engines run cleaner and the Emis-sion Control System performance.
B880A01A-EAT IMMOBILIZER SYSTEMThe immobilizer system is an anti-theft device,
designed to prevent and deter automobile theft.
B880B03A-GATKeys
B880B01O
All of the locks fitted to the vehicle are operated
by the same key. However, since it is possible to lock the doors without the use of the key,care should be exercised to ensure that the keydoes not become locked inside the vehicle bymistake. B880C02A-GAT Key Numbers
AX10030A-1
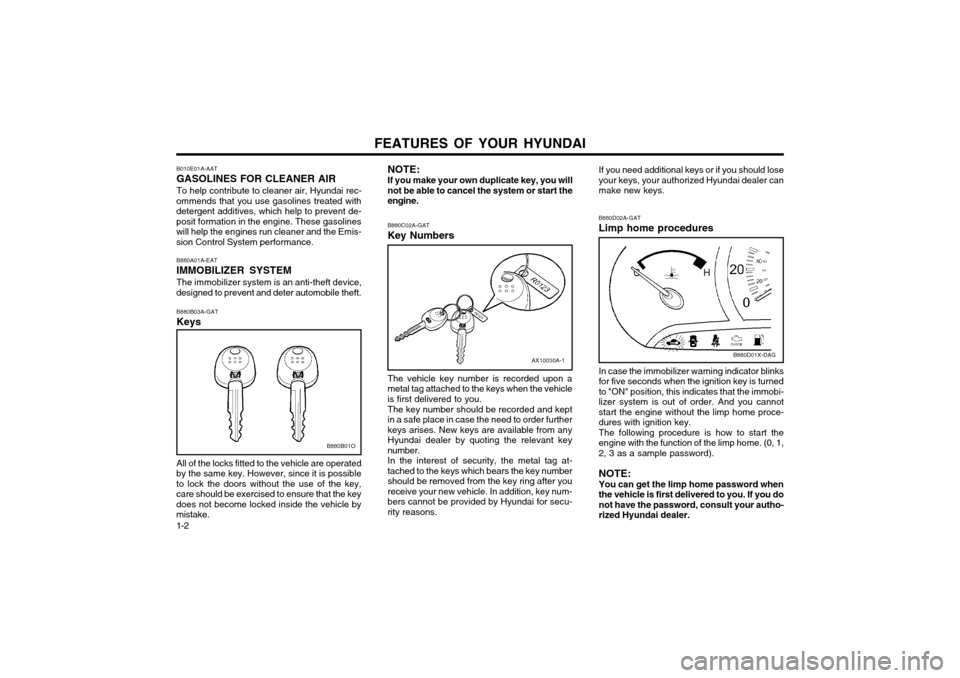
The vehicle key number is recorded upon a metal tag attached to the keys when the vehicleis first delivered to you. The key number should be recorded and kept in a safe place in case the need to order furtherkeys arises. New keys are available from anyHyundai dealer by quoting the relevant keynumber.In the interest of security, the metal tag at-tached to the keys which bears the key numbershould be removed from the key ring after youreceive your new vehicle. In addition, key num-bers cannot be provided by Hyundai for secu-rity reasons.
NOTE: If you make your own duplicate key, you will not be able to cancel the system or start theengine. If you need additional keys or if you should loseyour keys, your authorized Hyundai dealer canmake new keys. B880D02A-GAT Limp home procedures
B880D01X-DAG
In case the immobilizer warning indicator blinks for five seconds when the ignition key is turnedto "ON" position, this indicates that the immobi-lizer system is out of order. And you cannotstart the engine without the limp home proce-dures with ignition key.The following procedure is how to start theengine with the function of the limp home. (0, 1,2, 3 as a sample password). NOTE: You can get the limp home password when the vehicle is first delivered to you. If you donot have the password, consult your autho-rized Hyundai dealer.
Page 140 of 249
FEATURES OF YOUR HYUNDAI 1-3
CAUTION:
o If you fail to try the limp home procedure with the sequence of three times, you have to wait for about one hour to do thelimp home procedure again.
o If you cannot start your engine in spite of limp home procedure, have your vehicletowed by an authorized Hyundai dealer.
1. To set the password you may turn the igni-
tion key "ON" and then turn it "OFF" accord-ing to the digit numbers, then the immobi-lizer indicator will blink along with the opera-tion of the ignition key. For example, turn theignition key once for digit number "1", andtwice for "2", and so on. However, for thedigit number "0", you must turn the ignitionkey for 10 times.
2. Wait for 3~10 seconds.
3. You may set the remaining number of digits by following the same procedures 1 and 2.
4. If all of four digits have been tried success- fully, turn the ignition key "ON" and check that the immobilizer indicator illuminates.From this time, you have to start your enginewithin 30 seconds. If you start your engineafter 30 seconds, your engine will not start.
NOTE: If the engine dies while driving after limp
home procedure, you can start your engine within 8 seconds without limp home proce-dure again.
5. If the immobilizer indicator blinks for five seconds, you have to try the limp home procedure again from the beginning.
After doing the limp home procedure, you have
to consult with your authorized Hyundai dealeras soon as possible. SB040A1-F DOOR LOCKS WARNING:
o Unlocked doors can be dangerous. Before you drive away-especially if there are children in the car-be sure that all thedoors are securely closed and locked, the doors cannot be opened from inside. This helps assure that doors will not beopened accidentally. Also, when com-bined with the proper use of seat belts,locking the doors helps keep occupantsfrom being ejected from the car in caseof an accident.
o Before opening the door, always look for and avoid oncoming traffic.
XV10050E
Unlock Lock
SB040B1-F Locking, unlocking front doors with key
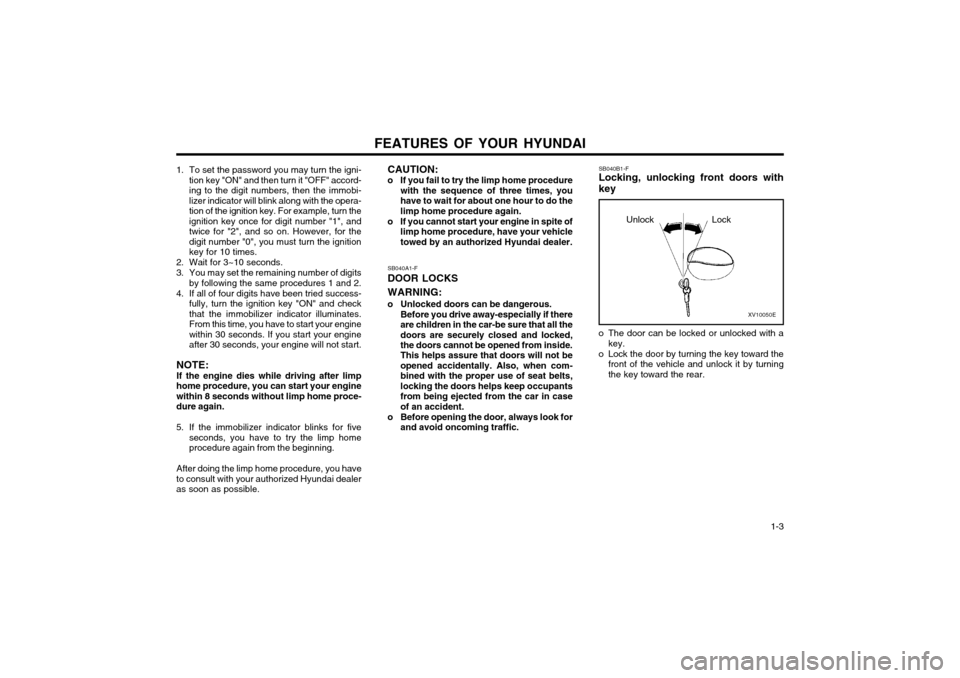
o The door can be locked or unlocked with a key.
o Lock the door by turning the key toward the front of the vehicle and unlock it by turning the key toward the rear.
Page 141 of 249
FEATURES OF YOUR HYUNDAI
1-4 B040E02A-AAT Child-Protector Rear Door Lock Your Hyundai is equipped with a "child-protec-
tor" rear door lock assembly. When the lockmechanism is engaged, the rear door cannot be
opened from the inside. Its use is recommend-ed whenever there are small childrenin the rear seat. To engage the child-protector feature so that
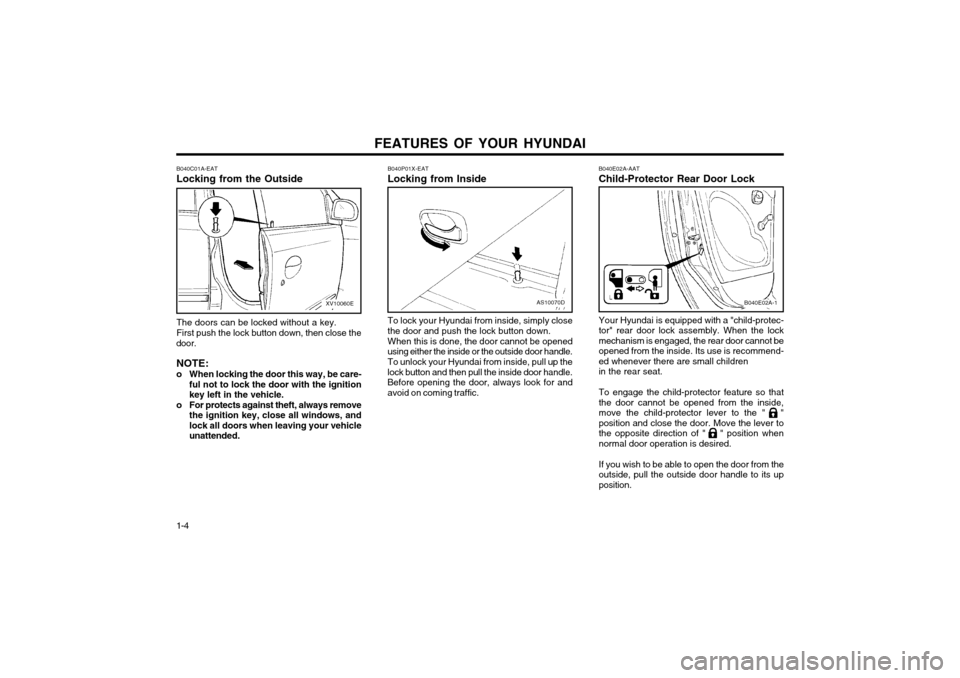
the door cannot be opened from the inside,move the child-protector lever to the " "
position and close the door. Move the lever to
the opposite direction of " " position whennormal door operation is desired. If you wish to be able to open the door from the outside, pull the outside door handle to its upposition.
B040E02A-1
To lock your Hyundai from inside, simply close the door and push the lock button down. When this is done, the door cannot be opened using either the inside or the outside door handle. To unlock your Hyundai from inside, pull up the lock button and then pull the inside door handle.
Before opening the door, always look for andavoid on coming traffic. B040P01X-EAT Locking from Inside
AS10070D
B040C01A-EAT Locking from the OutsideXV10060E
The doors can be locked without a key. First push the lock button down, then close the
door.
NOTE:
o When locking the door this way, be care- ful not to lock the door with the ignition key left in the vehicle.
o For protects against theft, always remove the ignition key, close all windows, andlock all doors when leaving your vehicleunattended.
Page 142 of 249
FEATURES OF YOUR HYUNDAI 1-5
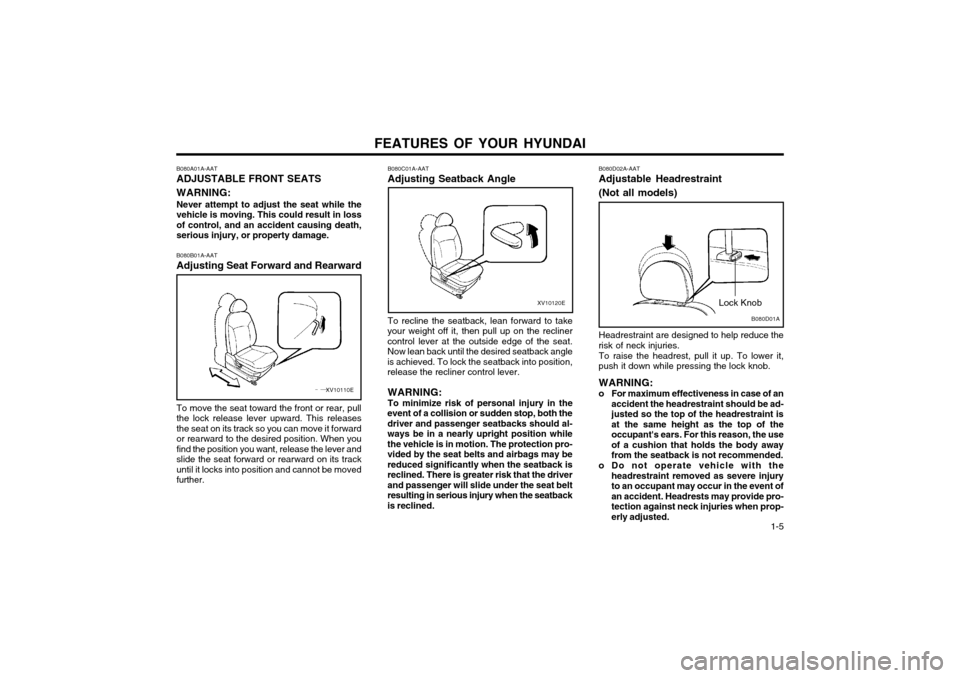
B080A01A-AAT ADJUSTABLE FRONT SEATS WARNING: Never attempt to adjust the seat while the vehicle is moving. This could result in lossof control, and an accident causing death,serious injury, or property damage. B080B01A-AAT Adjusting Seat Forward and Rearward
B080C01A-AATAdjusting Seatback Angle
XV10110E
To move the seat toward the front or rear, pull the lock release lever upward. This releasesthe seat on its track so you can move it forwardor rearward to the desired position. When youfind the position you want, release the lever andslide the seat forward or rearward on its trackuntil it locks into position and cannot be movedfurther.
XV10120E
To recline the seatback, lean forward to take
your weight off it, then pull up on the recliner control lever at the outside edge of the seat.Now lean back until the desired seatback angleis achieved. To lock the seatback into position,release the recliner control lever.
WARNING: To minimize risk of personal injury in the
event of a collision or sudden stop, both the driver and passenger seatbacks should al-ways be in a nearly upright position whilethe vehicle is in motion. The protection pro-vided by the seat belts and airbags may bereduced significantly when the seatback isreclined. There is greater risk that the driverand passenger will slide under the seat beltresulting in serious injury when the seatbackis reclined.B080D01A
Lock Knob
B080D02A-AAT Adjustable Headrestraint (Not all models) Headrestraint are designed to help reduce the
risk of neck injuries.
To raise the headrest, pull it up. To lower it,
push it down while pressing the lock knob.
WARNING:
o For maximum effectiveness in case of an accident the headrestraint should be ad- justed so the top of the headrestraint isat the same height as the top of theoccupant's ears. For this reason, the useof a cushion that holds the body awayfrom the seatback is not recommended.
o Do not operate vehicle with the headrestraint removed as severe injuryto an occupant may occur in the event ofan accident. Headrests may provide pro-tection against neck injuries when prop-erly adjusted.
Page 143 of 249
FEATURES OF YOUR HYUNDAI
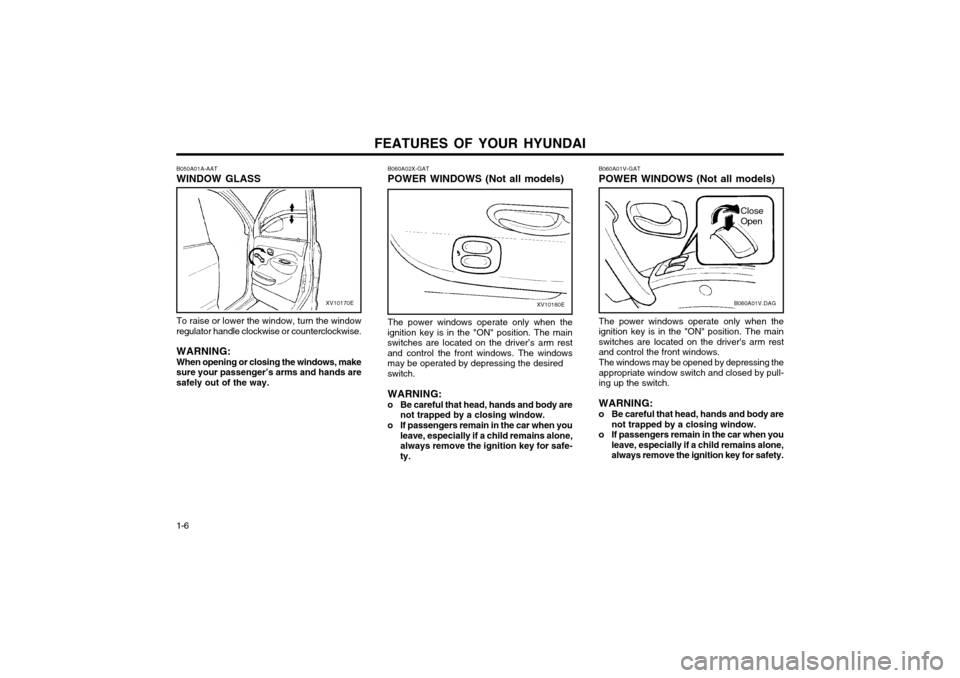
1-6 B060A01V-GAT POWER WINDOWS (Not all models)
B060A01V.DAG
The power windows operate only when the
ignition key is in the "ON" position. The mainswitches are located on the driver's arm restand control the front windows. The windows may be opened by depressing the appropriate window switch and closed by pull-ing up the switch. WARNING:
o Be careful that head, hands and body are not trapped by a closing window.
o If passengers remain in the car when you leave, especially if a child remains alone, always remove the ignition key for safety.
Close Open
The power windows operate only when the
ignition key is in the "ON" position. The main switches are located on the driver’s arm restand control the front windows. The windowsmay be operated by depressing the desired switch. WARNING:
o Be careful that head, hands and body are not trapped by a closing window.
o If passengers remain in the car when you leave, especially if a child remains alone, always remove the ignition key for safe-ty.
B060A02X-GAT POWER WINDOWS (Not all models)
XV10180E
B050A01A-AAT WINDOW GLASS
XV10170E
To raise or lower the window, turn the window
regulator handle clockwise or counterclockwise.
WARNING: When opening or closing the windows, make
sure your passenger’s arms and hands are safely out of the way.
Page 144 of 249
FEATURES OF YOUR HYUNDAI 1-7
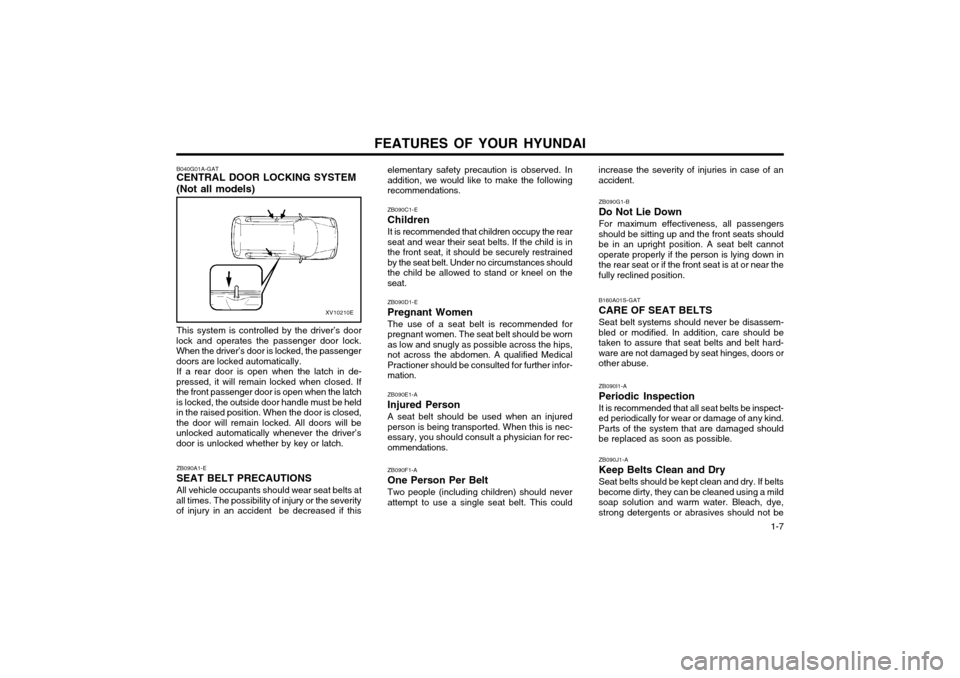
B040G01A-GAT CENTRAL DOOR LOCKING SYSTEM (Not all models)
XV10210E
This system is controlled by the driver’s door
lock and operates the passenger door lock. When the driver’s door is locked, the passengerdoors are locked automatically. If a rear door is open when the latch in de-
pressed, it will remain locked when closed. Ifthe front passenger door is open when the latchis locked, the outside door handle must be heldin the raised position. When the door is closed,the door will remain locked. All doors will beunlocked automatically whenever the driver’sdoor is unlocked whether by key or latch.
ZB090A1-E SEAT BELT PRECAUTIONSAll vehicle occupants should wear seat belts at
all times. The possibility of injury or the severity of injury in an accident be decreased if this elementary safety precaution is observed. Inaddition, we would like to make the followingrecommendations. ZB090C1-E ChildrenIt is recommended that children occupy the rear seat and wear their seat belts. If the child is inthe front seat, it should be securely restrainedby the seat belt. Under no circumstances shouldthe child be allowed to stand or kneel on theseat. ZB090D1-E Pregnant WomenThe use of a seat belt is recommended for pregnant women. The seat belt should be wornas low and snugly as possible across the hips,not across the abdomen. A qualified MedicalPractioner should be consulted for further infor-mation. ZB090E1-A Injured PersonA seat belt should be used when an injured person is being transported. When this is nec-essary, you should consult a physician for rec-ommendations. ZB090F1-A One Person Per BeltTwo people (including children) should never attempt to use a single seat belt. This could
increase the severity of injuries in case of anaccident.
ZB090G1-B Do Not Lie DownFor maximum effectiveness, all passengers
should be sitting up and the front seats should be in an upright position. A seat belt cannotoperate properly if the person is lying down inthe rear seat or if the front seat is at or near thefully reclined position.
B160A01S-GAT CARE OF SEAT BELTSSeat belt systems should never be disassem-
bled or modified. In addition, care should be taken to assure that seat belts and belt hard-
ware are not damaged by seat hinges, doors orother abuse.
ZB090I1-A Periodic InspectionIt is recommended that all seat belts be inspect-
ed periodically for wear or damage of any kind. Parts of the system that are damaged shouldbe replaced as soon as possible.
ZB090J1-A Keep Belts Clean and Dry Seat belts should be kept clean and dry. If belts
become dirty, they can be cleaned using a mild soap solution and warm water. Bleach, dye,strong detergents or abrasives should not be
Page 145 of 249
FEATURES OF YOUR HYUNDAI
1-8
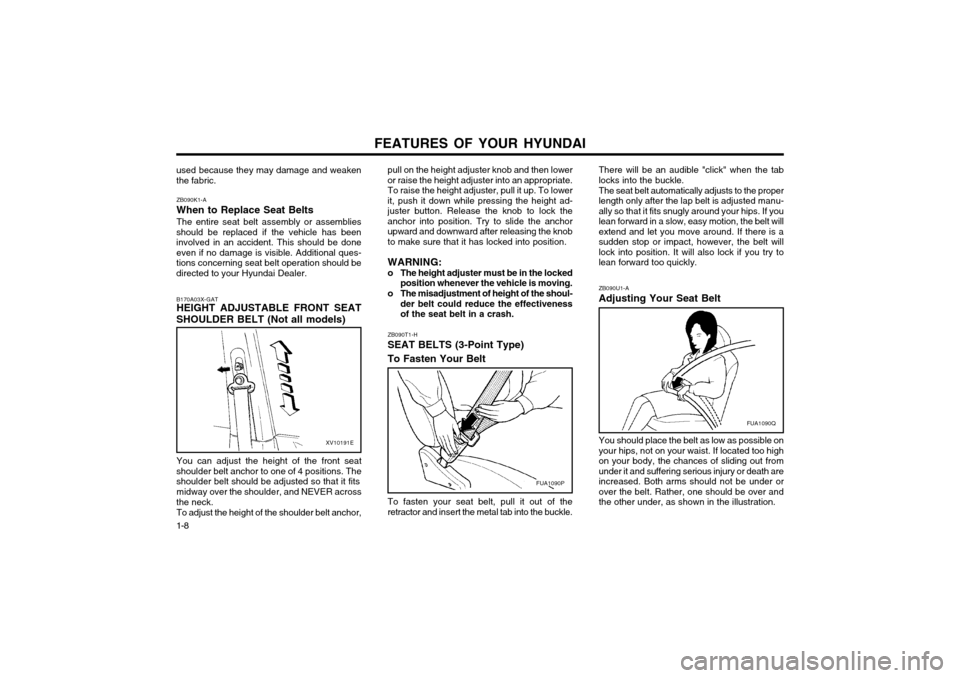
ZB090U1-A Adjusting Your Seat Belt You should place the belt as low as possible on your hips, not on your waist. If located too highon your body, the chances of sliding out fromunder it and suffering serious injury or death areincreased. Both arms should not be under orover the belt. Rather, one should be over andthe other under, as shown in the illustration.
There will be an audible "click" when the tablocks into the buckle. The seat belt automatically adjusts to the proper length only after the lap belt is adjusted manu-ally so that it fits snugly around your hips. If youlean forward in a slow, easy motion, the belt willextend and let you move around. If there is asudden stop or impact, however, the belt willlock into position. It will also lock if you try tolean forward too quickly.
To fasten your seat belt, pull it out of theretractor and insert the metal tab into the buckle.
pull on the height adjuster knob and then loweror raise the height adjuster into an appropriate.To raise the height adjuster, pull it up. To lowerit, push it down while pressing the height ad-
juster button. Release the knob to lock theanchor into position. Try to slide the anchorupward and downward after releasing the knobto make sure that it has locked into position. WARNING:
o The height adjuster must be in the locked
position whenever the vehicle is moving.
o The misadjustment of height of the shoul- der belt could reduce the effectiveness of the seat belt in a crash.
ZB090T1-H SEAT BELTS (3-Point Type) To Fasten Your Belt
used because they may damage and weaken the fabric.
B170A03X-GAT HEIGHT ADJUSTABLE FRONT SEAT
SHOULDER BELT (Not all models)
XV10191E
You can adjust the height of the front seat
shoulder belt anchor to one of 4 positions. The shoulder belt should be adjusted so that it fits
midway over the shoulder, and NEVER across
the neck.
To adjust the height of the shoulder belt anchor,
ZB090K1-A When to Replace Seat BeltsThe entire seat belt assembly or assemblies
should be replaced if the vehicle has been involved in an accident. This should be doneeven if no damage is visible. Additional ques-tions concerning seat belt operation should bedirected to your Hyundai Dealer.
FUA1090P
FUA1090Q
Page 146 of 249
FEATURES OF YOUR HYUNDAI 1-9
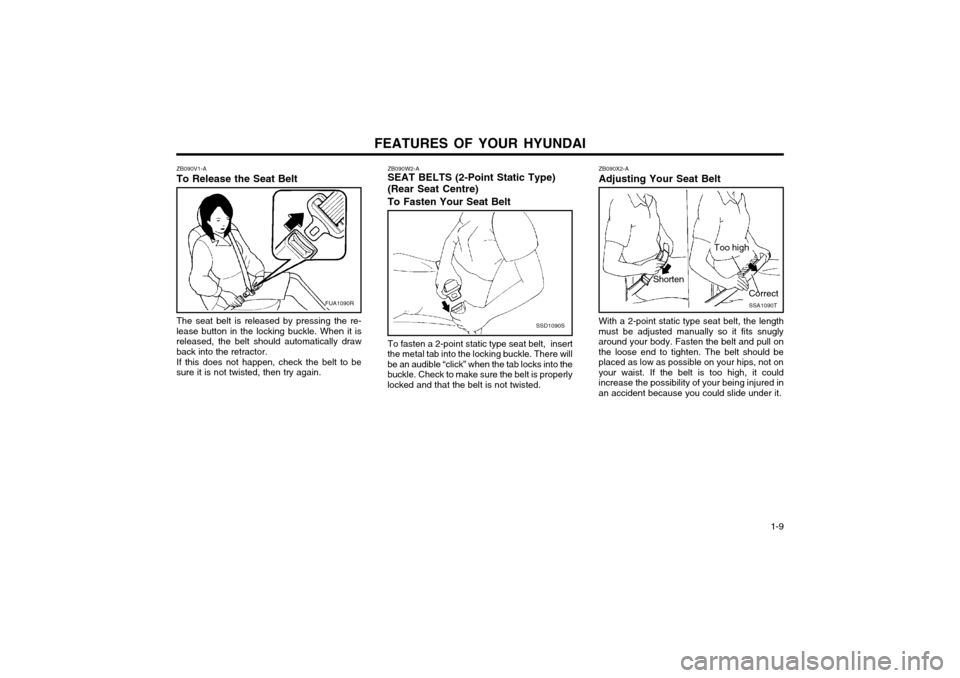
ZB090W2-A SEAT BELTS (2-Point Static Type) (Rear Seat Centre) To Fasten Your Seat Belt
ZB090V1-A To Release the Seat Belt The seat belt is released by pressing the re- lease button in the locking buckle. When it isreleased, the belt should automatically drawback into the retractor. If this does not happen, check the belt to be sure it is not twisted, then try again.
SSD1090S
To fasten a 2-point static type seat belt, insert
the metal tab into the locking buckle. There will be an audible “click” when the tab locks into thebuckle. Check to make sure the belt is properlylocked and that the belt is not twisted.
FUA1090R ZB090X2-A Adjusting Your Seat BeltSSA1090T
Shorten
Correct
Too high
With a 2-point static type seat belt, the length
must be adjusted manually so it fits snugly around your body. Fasten the belt and pull onthe loose end to tighten. The belt should beplaced as low as possible on your hips, not onyour waist. If the belt is too high, it couldincrease the possibility of your being injured inan accident because you could slide under it.
Page 147 of 249
FEATURES OF YOUR HYUNDAI
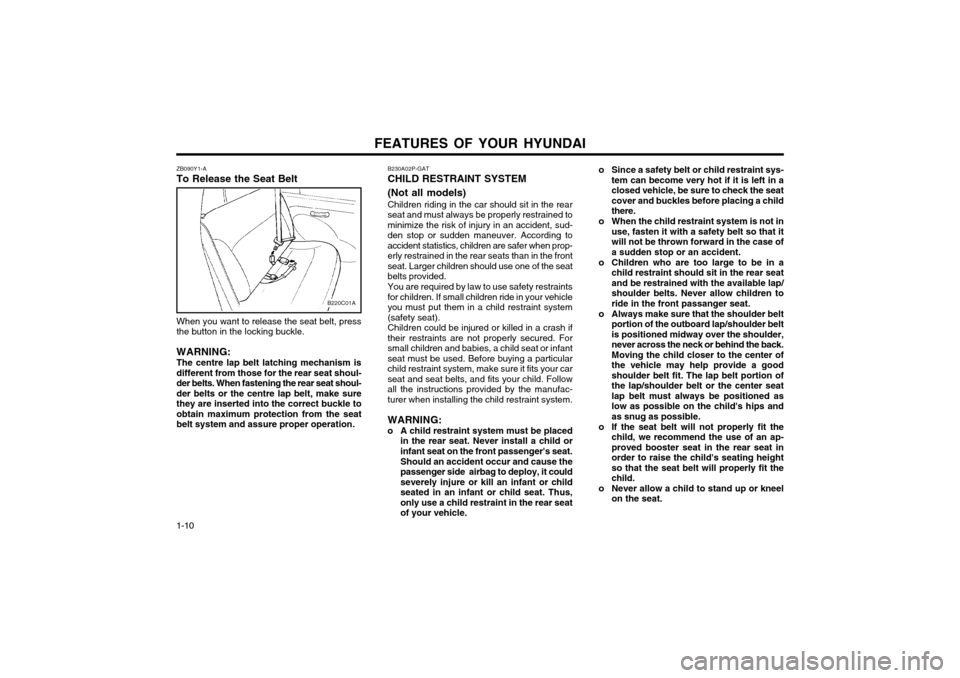
1-10 ZB090Y1-A To Release the Seat Belt
B220C01A
When you want to release the seat belt, press the button in the locking buckle. WARNING: The centre lap belt latching mechanism is different from those for the rear seat shoul-der belts. When fastening the rear seat shoul-der belts or the centre lap belt, make surethey are inserted into the correct buckle toobtain maximum protection from the seatbelt system and assure proper operation. B230A02P-GAT CHILD RESTRAINT SYSTEM (Not all models) Children riding in the car should sit in the rear seat and must always be properly restrained tominimize the risk of injury in an accident, sud-den stop or sudden maneuver. According toaccident statistics, children are safer when prop-erly restrained in the rear seats than in the frontseat. Larger children should use one of the seatbelts provided. You are required by law to use safety restraints for children. If small children ride in your vehicleyou must put them in a child restraint system(safety seat).Children could be injured or killed in a crash iftheir restraints are not properly secured. Forsmall children and babies, a child seat or infantseat must be used. Before buying a particularchild restraint system, make sure it fits your carseat and seat belts, and fits your child. Followall the instructions provided by the manufac-turer when installing the child restraint system. WARNING:
o A child restraint system must be placed in the rear seat. Never install a child or infant seat on the front passenger's seat. Should an accident occur and cause the passenger side airbag to deploy, it couldseverely injure or kill an infant or childseated in an infant or child seat. Thus,only use a child restraint in the rear seatof your vehicle. o Since a safety belt or child restraint sys-
tem can become very hot if it is left in aclosed vehicle, be sure to check the seatcover and buckles before placing a childthere.
o When the child restraint system is not in use, fasten it with a safety belt so that itwill not be thrown forward in the case ofa sudden stop or an accident.
o Children who are too large to be in a child restraint should sit in the rear seatand be restrained with the available lap/shoulder belts. Never allow children toride in the front passanger seat.
o Always make sure that the shoulder belt portion of the outboard lap/shoulder beltis positioned midway over the shoulder,never across the neck or behind the back.Moving the child closer to the center ofthe vehicle may help provide a goodshoulder belt fit. The lap belt portion ofthe lap/shoulder belt or the center seatlap belt must always be positioned aslow as possible on the child's hips andas snug as possible.
o If the seat belt will not properly fit the child, we recommend the use of an ap-proved booster seat in the rear seat inorder to raise the child's seating heightso that the seat belt will properly fit thechild.
o Never allow a child to stand up or kneel on the seat.