door lock Hyundai Getz 2007 User Guide
[x] Cancel search | Manufacturer: HYUNDAI, Model Year: 2007, Model line: Getz, Model: Hyundai Getz 2007Pages: 463, PDF Size: 11.14 MB
Page 29 of 463

FEATURES OF YOUR HYUNDAI 1- 17
B130A01A-AAT REAR SEAT ENTRY (For 3-door model) The front passenger seatback should be tilted to enter the rear seat. By pulling up on the recliner controllever (1) at the outside of the front passenger seat, the seatback will tilt forward and the seat will automaticallyslide forward. Rear seat occupants can tilt the front passenger seatback by depressing thefoot lever (2) as shown in the illustra- tion. HTB258
(1)
(2)
To recline the seatback, push the seatback folding lever toward the head- rest, and release it after the desired seatback angle is achieved.When you recline the seatback to de- sired position, always be sure it has locked into position.
CAUTION:
When reclining the seatback youshould adjust the seatback folding lever while standing.
!
WARNING:
Passengers sitting in the rear seat should be careful not to acciden- tally press the foot lever (2) whilethe vehicle is moving, as this may cause the seatback to move for- ward and injure a front seat occu-pant.!
B080I01TB
Seatback folding lever
B080I01FC-GAT REAR SEAT Adjusting Seatback Angle
Page 35 of 463

FEATURES OF YOUR HYUNDAI 1- 23
B170A04A-AAT HEIGHT ADJUSTABLE FRONT SEAT SHOULDER BELT(If Installed)
B170A01L
You can adjust the height of the shoul- der belt anchor to one of the 4 posi- tions.If the height of the adjusting seat belt is too near your neck, you will not be getting the most effective protection.The shoulder portion should be ad- justed so that it lies across your chest and midway over your shoulder nearestthe door and not your neck. To adjust the height of the seat belt anchor, lower or raise the height ad-juster into an appropriate position. To raise the height adjuster, pull it up. To lower it, push it down while pressing theheight adjuster button. Release the button to lock the anchorinto position. Try sliding the release button to make sure that it has locked into the position.
WARNING:
o The height adjuster must be in the locked position when thevehicle is moving.
o The misadjustment of height of
the shoulder belt could reduce the effectiveness of the seat belt in a crash.
!
B160B01A-AAT Periodic Inspection It is recommended that all seat belts be inspected periodically for wear ordamage of any kind. Parts of the sys- tem that are damaged should be re- placed as soon as possible. B160C01A-AAT Keep Belts Clean and Dry Seat belts should be kept clean and dry. If belts become dirty, they can be cleaned by using a mild soap solutionand warm water. Bleach, dye, strong detergents or abrasives should not be used because they may damage andweaken the fabric. B160D01A-AAT When to Replace Seat Belts Entire in-use seat belt assembly or assemblies should be replaced if the vehicle has been involved in an acci-dent. This should be done even if no damage is visible. Additional ques- tions concerning seat belt operationshould be directed to your Hyundai Dealer.
Page 37 of 463

FEATURES OF YOUR HYUNDAI 1- 25
B210A01A-AAT To Release the Seat Belt
The seat belt is released by pressing the release button in the locking buckle.When it is released, the belt should automatically draw back into the re- tractor.
You should place the belt as low as possible on your hips, not on your waist. If the belt is located too high onyour body, you could slide under it in case of accident or a sudden stop. This could result of death, seriousinjury or property damage. Both arms should not be under or over the belt. Rather, one should be over and theother under, as shown in the illustration. Never wear the seat belt under the arm nearest the door.
B210A01NF
B220A01A-AAT SEAT BELTS (2-Point Static Type) (Rear Seat Center)(If Installed)To Fasten Your Seat Belt
To fasten a 2-point static type belt, insert the metal tab into the lockingbuckle. There will be an audible "click" when the tab locks into the buckle. Check to make sure the belt is properlylocked and that the belt is not twisted. B220A04NF
If this does not happen, check the belt to be sure it is not twisted, then try again.
B220B01NF
Correct Too high
B220B01A-AAT Adjusting Your Seat Belt With a 2-point static type seat belt, the length must be adjusted manually so it fits snugly around your body. Fastenthe belt and pull on the loose end to tighten. The belt should be placed as low as possible on your hips, not onyour waist. If the belt is too high, it could increase the possibility of your being injured in an accident.
Page 54 of 463

1- 42 FEATURES OF YOUR HYUNDAI
B240C01Y-GAT SRS Care The SRS is virtually maintenance-free and there are no parts you can safely service by yourself. The entire SRSsystem must be inspected by an au- thorized Hyundai dealer in 10 years after the date that the vehicle wasmanufactured. Any work on the SRS system, such as removing, installing, repairing, or any work on the steering wheel must be performed by a qualified Hyundai tech-nician. Improper handling of the SRS system may result in serious personal injury.
The airbags deploy only in certain side impact conditions severe enough to cause significant injury to the vehicle occupants.
o For best protection from the side impact airbag system and to avoidbeing injured by the deployingside impact airbag, both front seat occupants should sit in an up- right position with the seat beltproperly fastened. The driver's hands should be placed on the steering wheel at the 9:00 and 3:00o'clock positions. The passenger's arms and hands should be placed in their laps.
o Do not use any accessory seat covers.
o Use of seat covers could reduce or
prevent the effectiveness of the system.
o Do not install any accessories on
the side or near the side impactairbag.
o Do not use excessive force on
the side of the seat.
o Do not place any objects over the
airbag or between the airbag and yourself. o Do not place any objects (an um-
brella, bag, etc.) between the frontdoor and the front seat. Such ob- jects may become dangerous pro- jectiles and cause injury if thesupplemental side impact air bag inflates.
o To prevent unexpected deploy- ment of the side impact air bagthat may result in personal injury, avoid impact to the side airbagsensor when the ignition key is on.
HTB072
Side airbag sensor
!WARNING:
o The side impact airbag is supple- mental to the driver's and the passenger's seat belt systems andis not a substitute for them. There- fore your seat belts must be worn at all times while the vehicle is inmotion.
Important Safety Notes on the Side Impact Airbag system Following is a number of safety points concerning this system which should always be observed to ensure risk ofinjury is reduced in an accident.
Page 143 of 463
DRIVING YOUR HYUNDAI 2- 3
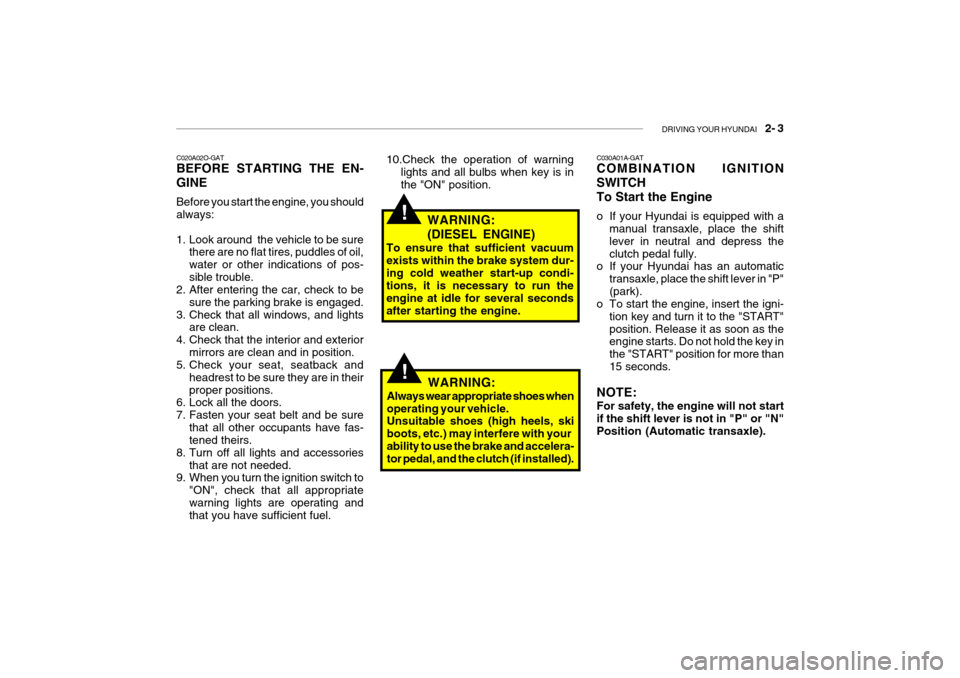
C020A02O-GAT BEFORE STARTING THE EN- GINE Before you start the engine, you should always:
1. Look around the vehicle to be sure
there are no flat tires, puddles of oil, water or other indications of pos-sible trouble.
2. After entering the car, check to be
sure the parking brake is engaged.
3. Check that all windows, and lights are clean.
4. Check that the interior and exterior mirrors are clean and in position.
5. Check your seat, seatback and
headrest to be sure they are in theirproper positions.
6. Lock all the doors.
7. Fasten your seat belt and be sure
that all other occupants have fas- tened theirs.
8. Turn off all lights and accessories that are not needed.
9. When you turn the ignition switch to
"ON", check that all appropriate warning lights are operating and that you have sufficient fuel. 10.Check the operation of warning
lights and all bulbs when key is in the "ON" position.
!WARNING: (DIESEL ENGINE)
To ensure that sufficient vacuum exists within the brake system dur-ing cold weather start-up condi- tions, it is necessary to run the engine at idle for several secondsafter starting the engine. C030A01A-GAT COMBINATION IGNITION SWITCHTo Start the Engine
o If your Hyundai is equipped with a
manual transaxle, place the shift lever in neutral and depress theclutch pedal fully.
o If your Hyundai has an automatic
transaxle, place the shift lever in "P"(park).
o To start the engine, insert the igni-
tion key and turn it to the "START"position. Release it as soon as the engine starts. Do not hold the key in the "START" position for more than15 seconds.
NOTE: For safety, the engine will not start if the shift lever is not in "P" or "N"Position (Automatic transaxle).
!WARNING:
Always wear appropriate shoes when operating your vehicle. Unsuitable shoes (high heels, ski boots, etc.) may interfere with yourability to use the brake and accelera- tor pedal, and the clutch (if installed).
Page 177 of 463

3- 14 WHAT TO DO IN AN EMERGENCY
D120A01A-GAT IF YOU LOSE YOUR KEYS If you lose your keys, many Hyundai dealers can make you a new key if youhave your key number. If you lock the keys inside your car and you cannot obtain a new key, manyHyundai dealers can use special tools to open the door for you. Information about the key of immobi- lizer system (if installed) will be found on page 1-5.
Page 200 of 463
DO-IT-YOURSELF MAINTENANCE 6- 5
G020A02A-AAT GENERAL CHECKS Engine Compartment The following should be checked regu-larly:
o Engine oil level and condition
o Transaxle fluid level and condition
o Brake fluid level
o Clutch fluid level
o Engine coolant level
o Windshield washer fluid level
o Accessory drive belt condition
o Engine coolant hose condition
o Fluid leaks (on or below compo-
nents)
o Power steering fluid level
o Battery condition
o Air filter condition G020C01A-AAT Vehicle Interior The following should be checked each time when the vehicle is driven:
o Lights operation
o Windshield wiper operation
o Horn operation
o Defroster, heater system operation
(and air conditioning, if installed)
o Steering operation and condition
o Mirror condition and operation
o Turn signal operation
o Accelerator pedal operation
o Brake operation, including parking brake
o Manual transaxle operation, includ- ing clutch operation
o Automatic transaxle operation, in- cluding "Park" mechanism opera-tion
o Seat control condition and opera- tion
o Seat belt condition and operation
o Sunvisor operation If you notice anything that does not operate correctly or appears to befunctioning incorrectly, inspect it care- fully and seek assistance from your Hyundai dealer if service is needed.
G020B01A-AAT Vehicle Exterior The following should be checked monthly:
o Overall appearance and condition
o Wheel condition and wheel nut
torgue
o Exhaust system condition
o Light condition and operation
o Windshield glass condition
o Wiper blade condition
o Paint condition and body corrosion
o Fluid leaks
o Door and hood lock condition
o Tire pressure and condition
(including spare tire)
Page 233 of 463
6- 38 DO-IT-YOURSELF MAINTENANCE
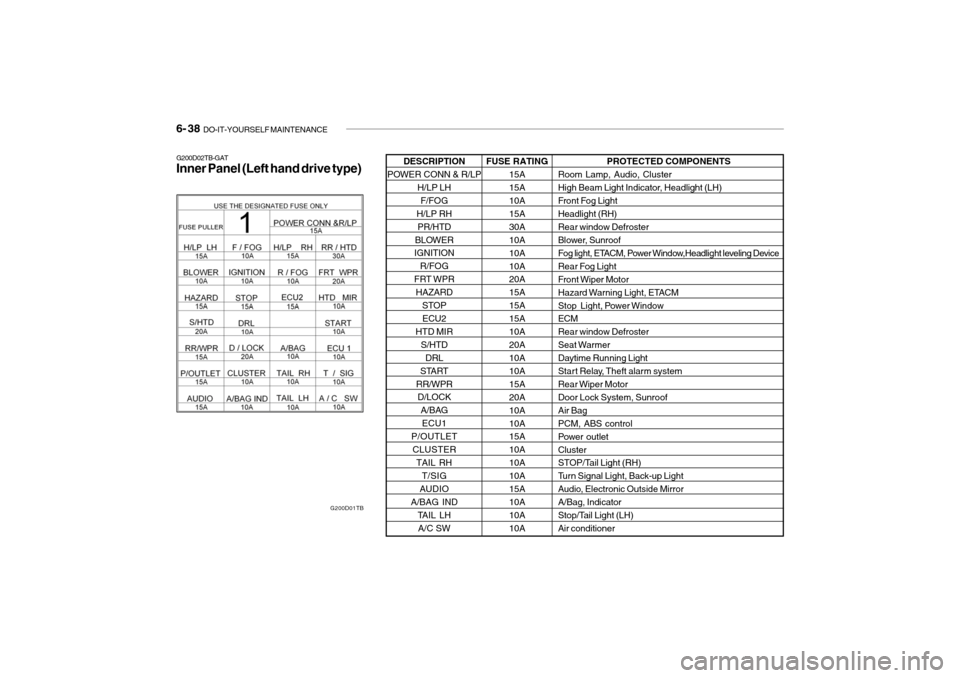
PROTECTED COMPONENTS
Room Lamp, Audio, Cluster
High Beam Light Indicator, Headlight (LH)
Front Fog LightHeadlight (RH)
Rear window Defroster
Blower, Sunroof
Fog light, ETACM, Power Window,Headlight leveling Device
Rear Fog Light
Front Wiper Motor
Hazard Warning Light, ETACM
Stop Light, Power Window ECM
Rear window Defroster
Seat Warmer
Daytime Running Light
Start Relay, Theft alarm system
Rear Wiper Motor
Door Lock System, SunroofAir BagPCM, ABS control
Power outletCluster
STOP/Tail Light (RH)
Turn Signal Light, Back-up Light
Audio, Electronic Outside MirrorA/Bag, Indicator
Stop/Tail Light (LH)Air conditioner
G200D02TB-GAT Inner Panel (Left hand drive type)
G200D01TBFUSE RATING15A 15A 10A 15A30A10A10A10A 20A 15A15A15A10A20A 10A 10A15A20A10A10A 15A 10A10A10A15A10A 10A 10A
DESCRIPTION
POWER CONN & R/LP
H/LP LH
F/FOG
H/LP RH PR/HTD
BLOWER
IGNITION
R/FOG
FRT WPR
HAZARD STOPECU2
HTD MIR
S/HTDDRL
START
RR/WPR D/LOCK
A/BAGECU1
P/OUTLET
CLUSTER TAIL RH T/SIG
AUDIO
A/BAG IND TAIL LH
A/C SW
Page 234 of 463
DO-IT-YOURSELF MAINTENANCE 6- 39
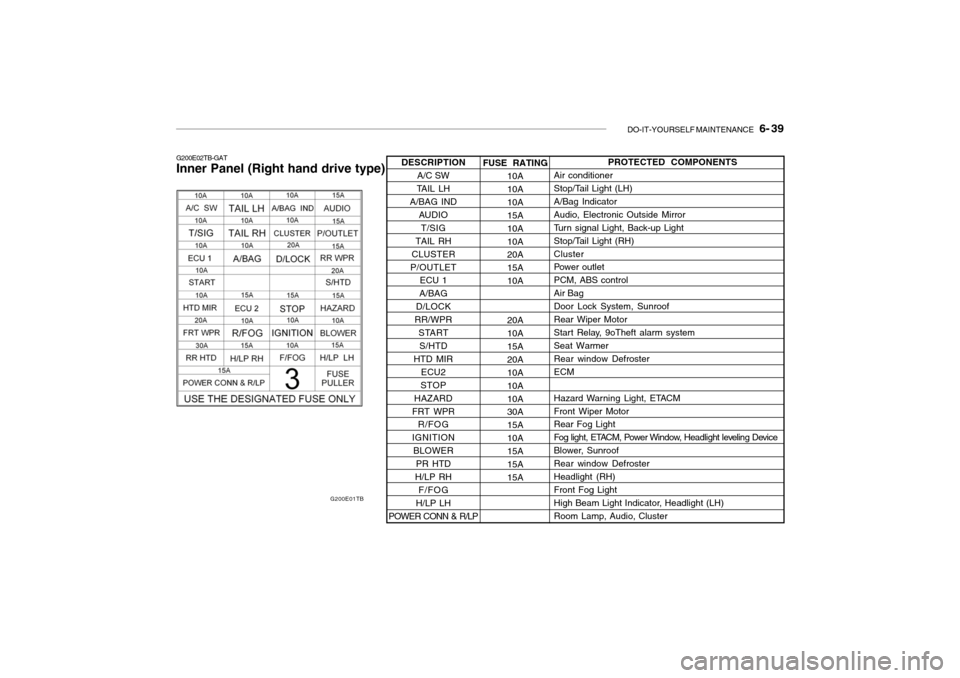
G200E02TB-GAT Inner Panel (Right hand drive type)
G200E01TBFUSE RATING10A 10A10A15A10A10A 20A 15A10A 20A 10A 15A20A10A10A10A 30A 15A10A15A15A15APROTECTED COMPONENTS
Air conditioner
Stop/Tail Light (LH) A/Bag IndicatorAudio, Electronic Outside Mirror
Turn signal Light, Back-up Light
Stop/Tail Light (RH)Cluster
Power outlet PCM, ABS controlAir BagDoor Lock System, SunroofRear Wiper Motor
Start Relay, 9oTheft alarm system Seat Warmer Rear window DefrosterECM
Hazard Warning Light, ETACM Front Wiper Motor Rear Fog Light
Fog light, ETACM, Power Window, Headlight leveling Device
Blower, SunroofRear window DefrosterHeadlight (RH)Front Fog Light
High Beam Light Indicator, Headlight (LH) Room Lamp, Audio, Cluster
DESCRIPTION
A/C SW
TAIL LH
A/BAG IND
AUDIO
T/SIG
TAIL RH
CLUSTER
P/OUTLET ECU 1
A/BAG
D/LOCK
RR/WPR STARTS/HTD
HTD MIR ECU2
STOP
HAZARD
FRT WPR R/FOG
IGNITION BLOWER PR HTD
H/LP RH F/FOG
H/LP LH
POWER CONN & R/LP
Page 250 of 463
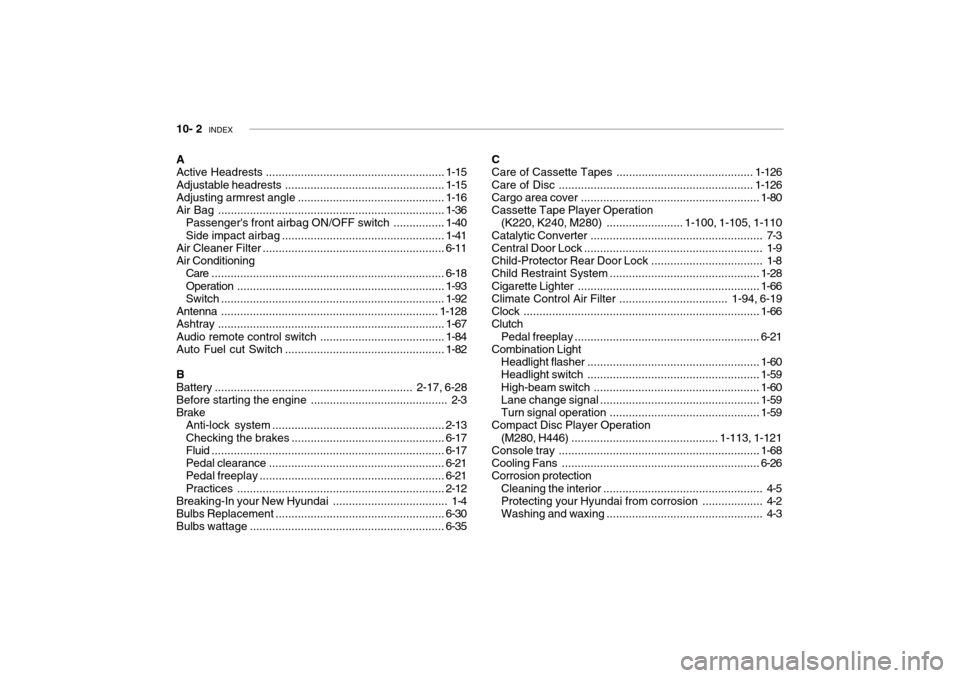
10- 2 INDEX
A Active Headrests ........................................................ 1-15
Adjustable headrests .................................................. 1-15
Adjusting arm rest angle .............................................. 1-16
Air Bag ....................................................................... 1-36
Passenger's front airbag O N/OFF switch ................1-40
Side impact airbag ................................................... 1-41
Air Cleaner Filter ......................................................... 6-11
Air Conditioning Care ......................................................................... 6-18
Operation ................................................................. 1-93
Switch ...................................................................... 1-92
Antenna .................................................................... 1-128
Ashtray ....................................................................... 1-67
Audio remote control switch .......................................1-84
Auto Fuel cut Switch .................................................. 1-82
B Battery .............................................................. 2-17, 6-28
Before starting the engine ........................................... 2-3Brake Anti-lock system ...................................................... 2-13
Checking the brakes ................................................ 6-17
Fluid ......................................................................... 6-17
Pedal clearance ....................................................... 6-21
Pedal free play .......................................................... 6-21
Practices ................................................................. 2-12
Breaking-In your New Hyundai .................................... 1-4
Bulbs Replacem ent ..................................................... 6-30
Bulbs wa ttage ............................................................. 6-35C
Care of Cassette Tapes ...........................................
1-126
Care of Disc ............................................................. 1-126
Cargo area cover ........................................................ 1-80
Cassette Tape Player Operation (K220, K240, M280) ........................1-100, 1-105, 1-110
Catalytic Converter ...................................................... 7-3
Central Door Lock ........................................................ 1-9
Child-Protector Rear Door Lock ................................... 1-8
Child Restraint System ............................................... 1-28
Cigarette Lighter ......................................................... 1-66
Climate Control Air Filter .................................. 1-94, 6-19
Clock .......................................................................... 1-66
Clutch
Pedal freep lay .......................................................... 6-21
Combination Light
Headlight flasher ...................................................... 1-60
Headlight swi tch ...................................................... 1-59
High-beam switch .................................................... 1-60
Lane change si gnal .................................................. 1-59
Turn signal operation ............................................... 1-59
Compact Disc Player Operation
(M280, H446) .............................................. 1-113, 1-121
Console tray ............................................................... 1-68
Cooling Fans .............................................................. 6-26
Corrosion protection
Cleaning the interior .................................................. 4-5
Protecting your Hyundai from corrosion ................... 4-2
Washing and waxing ................................................. 4-3