replace Hyundai Kona EV 2019 Workshop Manual
[x] Cancel search | Manufacturer: HYUNDAI, Model Year: 2019, Model line: Kona EV, Model: Hyundai Kona EV 2019Pages: 540, PDF Size: 21.84 MB
Page 417 of 540
7-37
7
Maintenance
Maximum Inflation Pressure
The maximum air pressure to which
a cold tire may be inflated. The max-
imum air pressure is molded onto the
sidewall.
Maximum Load Rating
The load rating for a tire at the maxi-
mum permissible inflation pressure
for that tire.
Maximum Loaded VehicleWeight
The sum of curb weight; accessory
weight; vehicle capacity weight; and
production options weight.
Normal Occupant Weight
The number of occupants a vehicle
is designed to seat multiplied by 150
pounds (68 kg).
Occupant Distribution
Designated seating positions.
Outward Facing Sidewall
An asymmetrical tire has a particular
side that faces outward when mount-
ed on a vehicle. The outward facing
sidewall bears white lettering or
bears manufacturer, brand, and/or
model name molding that is higher or
deeper than the same moldings on
the inner facing sidewall.
Passenger (P-Metric) tire
A tire used on passenger cars and
some light duty trucks and multipur-
pose vehicles.
Ply
A layer of rubber-coated parallel
cords.
Pneumatic tire
A mechanical device made of rubber,
chemicals, fabric and steel or other
materials, that, when mounted on an
automotive wheel provides the trac-
tion and contains the gas or fluid that
sustains the load.
Pneumatic options weight
The combined weight of installed
regular production options weighing
over 5 lb. (2.3 kg) in excess of the
standard items which they replace,
not previously considered in curb
weight or accessory weight, includ-
ing heavy duty breaks, ride levelers,
roof rack, heavy duty battery, and
special trim.
Recommended InflationPressure
Vehicle manufacturer's recommend-
ed tire inflation pressure as shown
on the tire placard.
Page 421 of 540
7-41
7
Maintenance
F
FU
U S
SE
E S
S
A vehicle's electrical system is pro-
tected from electrical overload dam-
age by fuses.
This vehicle has 2 (or 3) fuse panels,
one located in the driver's side panel
bolster, the other in the motor com-
partment near the battery.
If any of your vehicle’s lights, acces-
sories, or controls do not work, check
the appropriate circuit fuse. If a fuse
has blown, the element inside the
fuse will be melted or broken.
If the electrical system does not
work, first check the driver's side
fuse panel. Before replacing a blown
fuse, turn the vehicle and all switch-
es off, and then disconnect the neg-
ative battery cable. Always replace a
blown fuse with one of the same rat-
ing.
If the replacement fuse blows, this
indicates an electrical problem. Avoid
using the system involved and imme-
diately consult an authorized
HYUNDAI dealer.Information
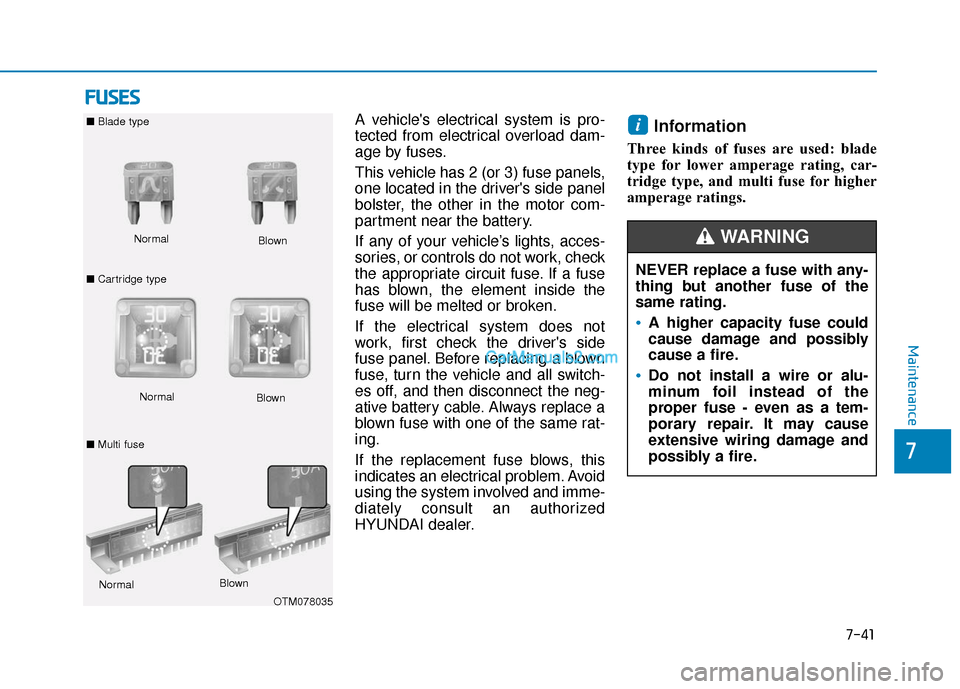
Three kinds of fuses are used: blade
type for lower amperage rating, car-
tridge type, and multi fuse for higher
amperage ratings.
i
NEVER replace a fuse with any-
thing but another fuse of the
same rating.
A higher capacity fuse could
cause damage and possibly
cause a fire.
Do not install a wire or alu-
minum foil instead of the
proper fuse - even as a tem-
porary repair. It may cause
extensive wiring damage and
possibly a fire.
WARNING Normal
■
Blade type
■ Cartridge type Blown
Normal Blown
OTM078035
Normal
Blown
■ Multi fuse
Page 422 of 540
7-42
Maintenance
Do not use a screwdriver or any
other metal object to remove
fuses because it may cause a
short circuit and damage the sys-
tem.
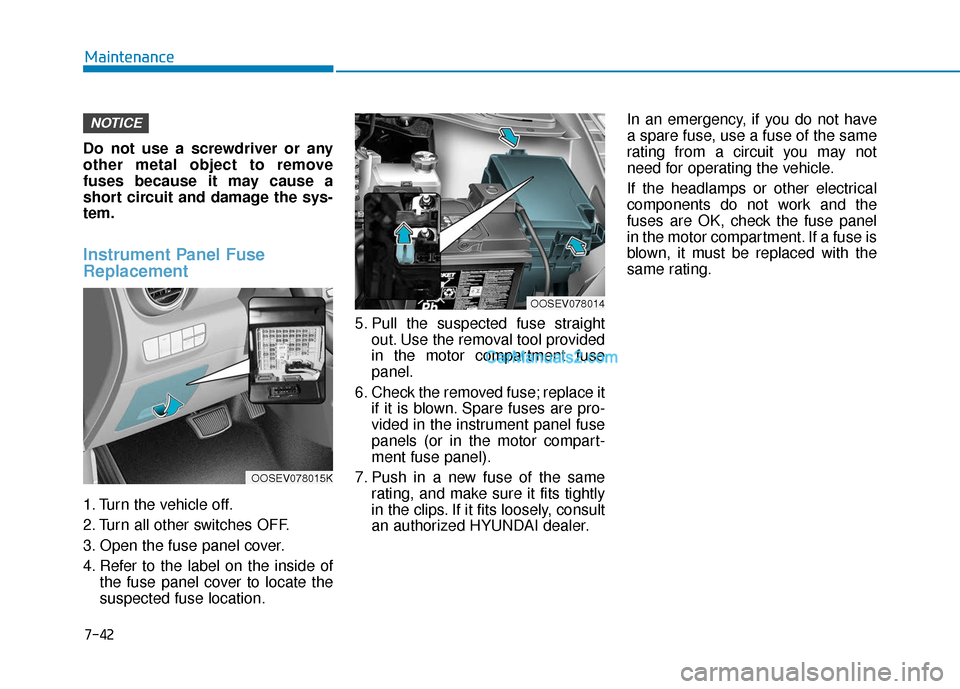
Instrument Panel Fuse
Replacement
1. Turn the vehicle off.
2. Turn all other switches OFF.
3. Open the fuse panel cover.
4. Refer to the label on the inside of the fuse panel cover to locate the
suspected fuse location. 5. Pull the suspected fuse straight
out. Use the removal tool provided
in the motor compartment fuse
panel.
6. Check the removed fuse; replace it if it is blown. Spare fuses are pro-
vided in the instrument panel fuse
panels (or in the motor compart-
ment fuse panel).
7. Push in a new fuse of the same rating, and make sure it fits tightly
in the clips. If it fits loosely, consult
an authorized HYUNDAI dealer. In an emergency, if you do not have
a spare fuse, use a fuse of the same
rating from a circuit you may not
need for operating the vehicle.
If the headlamps or other electrical
components do not work and the
fuses are OK, check the fuse panel
in the motor compartment. If a fuse is
blown, it must be replaced with the
same rating.
NOTICE
OOSEV078014
OOSEV078015K
Page 423 of 540
7-43
7
Maintenance
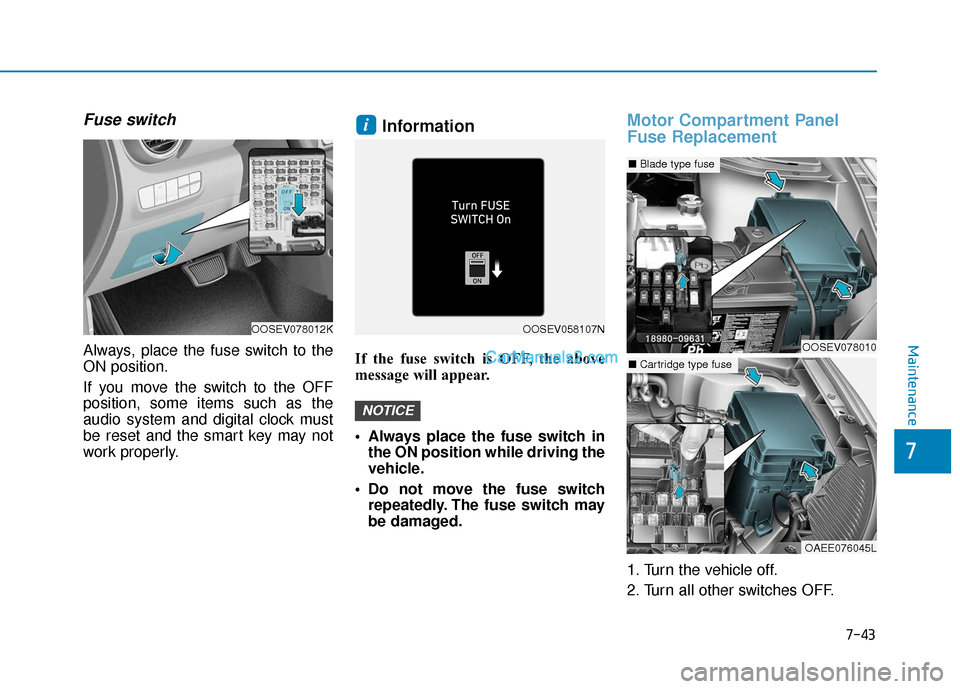
Fuse switch
Always, place the fuse switch to the
ON position.
If you move the switch to the OFF
position, some items such as the
audio system and digital clock must
be reset and the smart key may not
work properly.
Information
If the fuse switch is OFF, the above
message will appear.
Always place the fuse switch inthe ON position while driving the
vehicle.
Do not move the fuse switch repeatedly. The fuse switch may
be damaged.
Motor Compartment Panel
Fuse Replacement
1. Turn the vehicle off.
2. Turn all other switches OFF.
NOTICE
i
OOSEV078012KOOSEV058107N
OOSEV078010
■ Blade type fuse
OAEE076045L
■Cartridge type fuse
Page 424 of 540
7-44
Maintenance
3. Remove the fuse panel cover by pressing the tap and pulling up.
4. Check the removed fuse; replace it if it is blown. To remove or insert
the fuse, use the fuse puller in the
motor compartment fuse panel.
5. Push in a new fuse of the same rating, and make sure it fits tightly
in the clips. If it fits loosely, consult
an authorized HYUNDAI dealer.
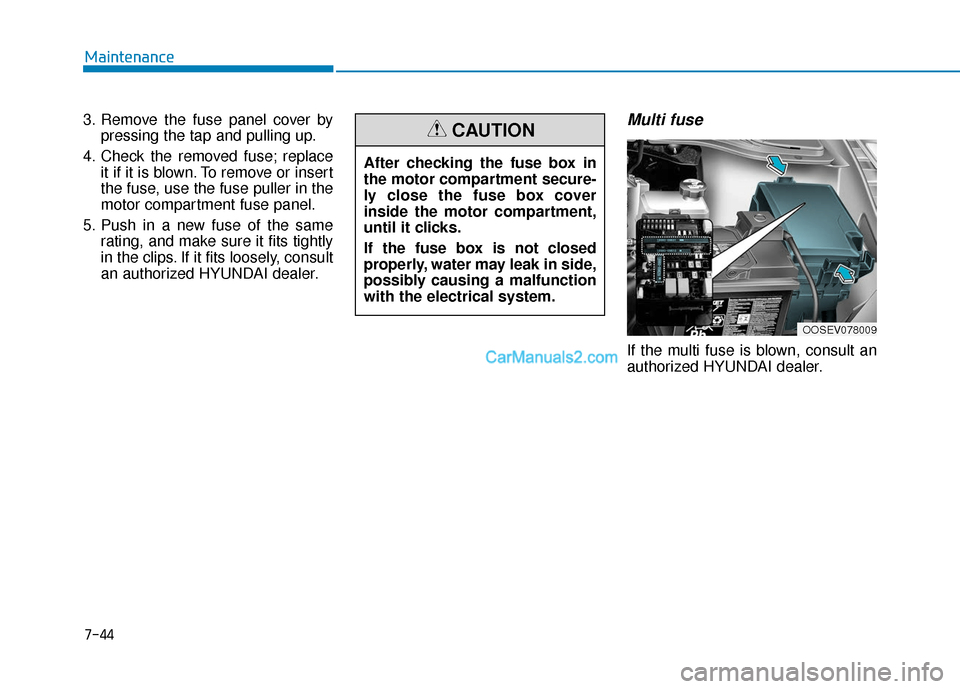
Multi fuse
If the multi fuse is blown, consult an
authorized HYUNDAI dealer.
After checking the fuse box in
the motor compartment secure-
ly close the fuse box cover
inside the motor compartment,
until it clicks.
If the fuse box is not closed
properly, water may leak in side,
possibly causing a malfunction
with the electrical system.
CAUTION
OOSEV078009
Page 435 of 540
7-55
7
Maintenance
L
LI
IG
G H
H T
T
B
B U
U L
LB
B S
S
Consult an authorized HYUNDAI
dealer to replace most vehicle light
bulbs. It is difficult to replace vehicle
light bulbs because other parts of the
vehicle must be removed before you
can get to the bulb. This is especially
true for removing the headlamp
assembly to get to the bulb(s).
Removing/installing the headlamp
assembly can result in damage to
the vehicle. Light replacement
Be sure to replace the burned out
bulb with one of the same wattage
rating. Otherwise, it may cause
damage to the fuse or electric
wiring system.
Headlamp lens
To prevent damage, do not clean
the headlamp lens with chemical
solvents or strong detergents.
Information
After heavy rain or washing, head-
lamp and trunk lenses could appear
frosty. This condition is caused by the
temperature difference between the
lamp inside and the outside tempera-
ture. This is similar to the condensa-
tion on your windows inside your
vehicle during the rain and doesn’t
indicate a problem with your vehicle.
If the water leaks into the lamp bulb
circuitry, have your vehicle checked
by an authorized retailer of Genesis
Branded products.
Information
• A normally functioning lamp may flicker momentarily to stabilize the
vehicle’s electrical control system.
However, if the lamp goes out after
flickering momentarily, or contin-
ues to flicker, we recommend the
system be checked by an authorized
HYUNDAI dealer.
• The position lamp may not turn on when the position lamp switch is
turned on, but the position lamp and
headlamp switch may turn on when
the headlamp switch is turned on.
This may be caused by network fail-
ure or vehicle electrical control sys-
tem malfunction. If this occurs, we
recommend the system be checked
by an authorized HYUNDAI dealer.
i
i
NOTICE
NOTICE
Prior to replacing a lamp,
depress the foot brake, shift
to P (Park), apply the parking
brake, place the POWER but-
ton in the OFF position and
take the key with you when
leaving the vehicle to avoid
sudden movement of the vehi-
cle and to prevent possible
electric shock.
Be aware the bulbs may be
hot and may burn your fin-
gers.
WARNING
Page 437 of 540
7-57
7
Maintenance
Always handle them carefully, andavoid scratches and abrasions. If
the bulbs are lit, avoid contact with
liquids.
Never touch the glass with bare hands. Residual oil may cause the
bulb to overheat and burst when lit.
A bulb should be operated only when installed in a headlamp.
If a bulb becomes damaged or cracked, replace it immediately
and carefully dispose of it.
Daytime running light(DRL)/Position lamp
If the lamp (LED) does not operate,
have the system checked by an
authorized HYUNDAI dealer.
The LED lamps cannot be replaced
as a single unit because it is an inte-
grated unit. The LED lamps has to be
replaced with the unit.
A skilled technician should check or
repair the LED lamp, for it may dam-
age related parts of the vehicle.
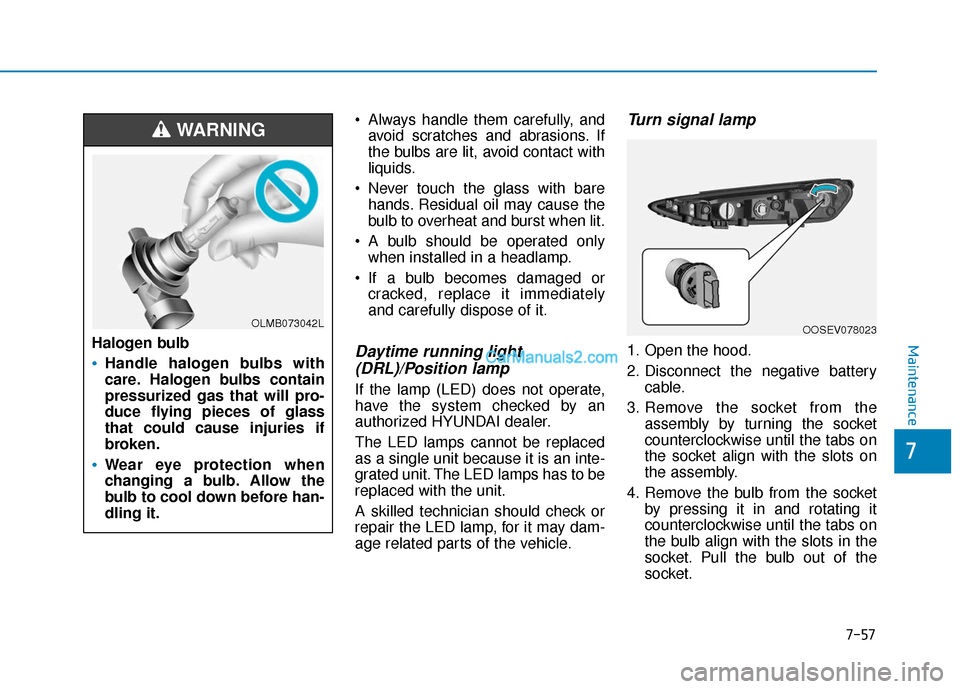
Turn signal lamp
1. Open the hood.
2. Disconnect the negative battery
cable.
3. Remove the socket from the assembly by turning the socket
counterclockwise until the tabs on
the socket align with the slots on
the assembly.
4. Remove the bulb from the socket by pressing it in and rotating it
counterclockwise until the tabs on
the bulb align with the slots in the
socket. Pull the bulb out of the
socket.
OOSEV078023Halogen bulb
Handle halogen bulbs with
care. Halogen bulbs contain
pressurized gas that will pro-
duce flying pieces of glass
that could cause injuries if
broken.
Wear eye protection when
changing a bulb. Allow the
bulb to cool down before han-
dling it.
WARNING
OLMB073042L
Page 440 of 540
7-60
Maintenance
Always handle them carefully, and avoid scratches and abrasions. If
the bulbs are lit, avoid contact with
liquids.
Never touch the glass with bare hands. Residual oil may cause the
bulb to overheat and burst when lit.
A bulb should be operated only when installed in a headlamp.
If a bulb becomes damaged or cracked, replace it immediately
and carefully dispose of it.
Headlamp (Low/High) andDaytime Running Light(DRL)/Position lamp
If the lamp (LED) does not operate,
have the system checked by an
authorized HYUNDAI dealer.
The LED lamps cannot be replaced
as a single unit because it is an inte-
grated unit. The LED lamps has to be
replaced with the unit.
A skilled technician should check or
repair the LED lamp, for it may dam-
age related parts of the vehicle.
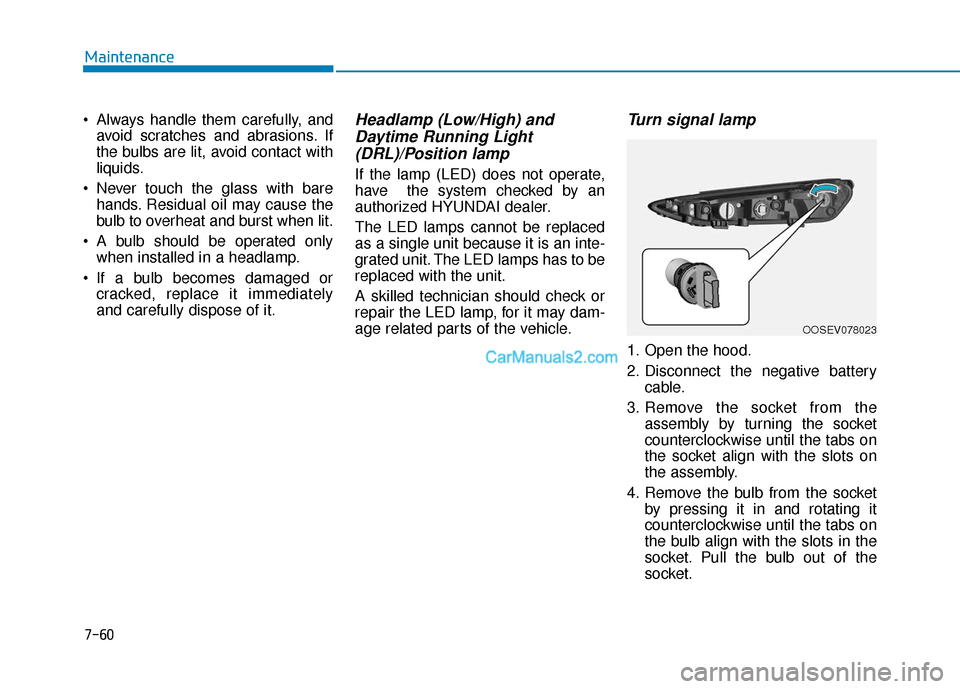
Turn signal lamp
1. Open the hood.
2. Disconnect the negative battery
cable.
3. Remove the socket from the assembly by turning the socket
counterclockwise until the tabs on
the socket align with the slots on
the assembly.
4. Remove the bulb from the socket by pressing it in and rotating it
counterclockwise until the tabs on
the bulb align with the slots in the
socket. Pull the bulb out of the
socket.
OOSEV078023
Page 441 of 540
7-61
7
Maintenance
5. Install a new bulb by inserting itinto the socket and rotating it until
it locks into place.
6. Install the socket in the assembly by aligning the tabs on the socket
with the slots in the assembly.
7. Push the socket into the assembly and turn the socket clockwise.Side Repeater Lamp
Replacement
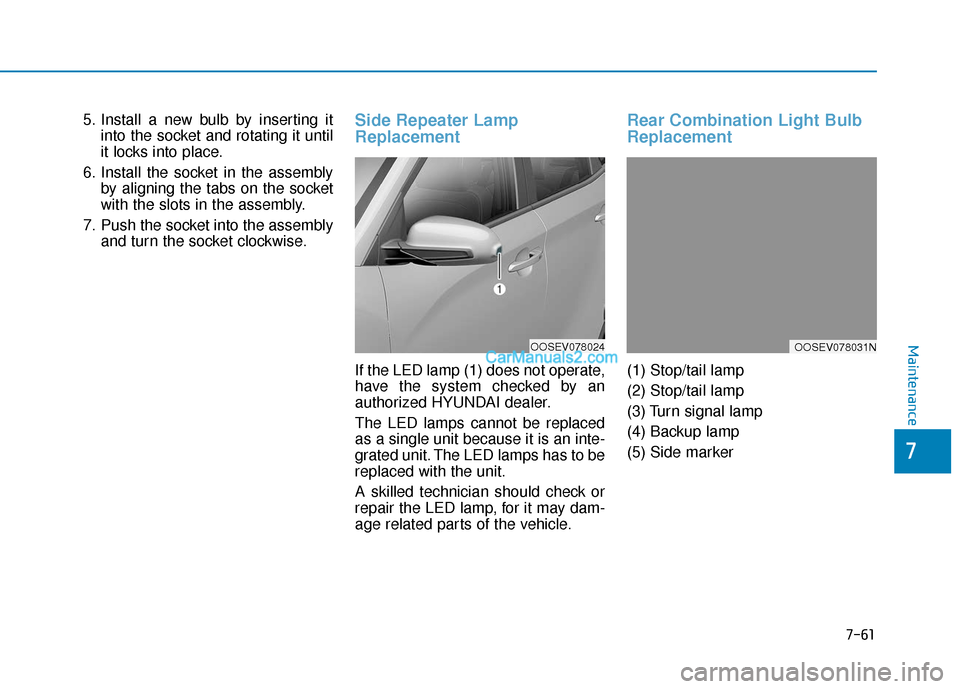
If the LED lamp (1) does not operate,
have the system checked by an
authorized HYUNDAI dealer.
The LED lamps cannot be replaced
as a single unit because it is an inte-
grated unit. The LED lamps has to be
replaced with the unit.
A skilled technician should check or
repair the LED lamp, for it may dam-
age related parts of the vehicle.
Rear Combination Light Bulb
Replacement
(1) Stop/tail lamp
(2) Stop/tail lamp
(3) Turn signal lamp
(4) Backup lamp
(5) Side marker
OOSEV078024OOSEV078031N
Page 442 of 540
7-62
Maintenance
Stop/tail lamp and side marker
If the lamp (LED) does not operate,
have the system checked by an
authorized HYUNDAI dealer.
The LED lamps cannot be replaced
as a single unit because it is an inte-
grated unit. The LED lamps has to be
replaced with the unit.
A skilled technician should check or
repair the LED lamp, for it may dam-
age related parts of the vehicle.
Turn signal lamp and backuplamp
If the lamp does not operate, have
the vehicle checked by an author-
ized HYUNDAI dealer.
High Mounted Stop Lamp Bulb
Replacement
If the LED lamp (1) does not operate,
have the system checked by an
authorized HYUNDAI dealer.
The LED lamps cannot be replaced
as a single unit because it is an inte-
grated unit. The LED lamps has to be
replaced with the unit.
A skilled technician should check or
repair the LED lamp, for it may dam-
age related parts of the vehicle.
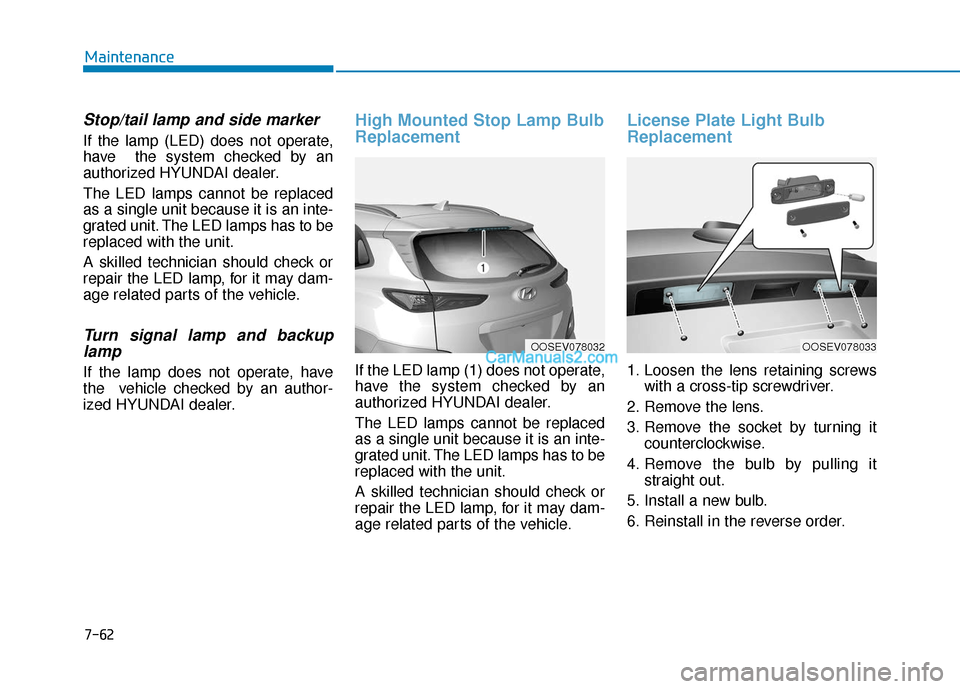
License Plate Light Bulb
Replacement
1. Loosen the lens retaining screws
with a cross-tip screwdriver.
2. Remove the lens.
3. Remove the socket by turning it counterclockwise.
4. Remove the bulb by pulling it straight out.
5. Install a new bulb.
6. Reinstall in the reverse order.
OOSEV078032OOSEV078033