AUX Hyundai Kona EV 2019 Owner's Manual
[x] Cancel search | Manufacturer: HYUNDAI, Model Year: 2019, Model line: Kona EV, Model: Hyundai Kona EV 2019Pages: 540, PDF Size: 21.84 MB
Page 14 of 540
I
IN
N S
ST
T R
R U
U M
M E
EN
N T
T
P
P A
A N
N E
EL
L
O
O V
VE
ER
R V
V I
IE
E W
W
The actual shape may differ from the illustration.
1-5
Your vehicle at a glance
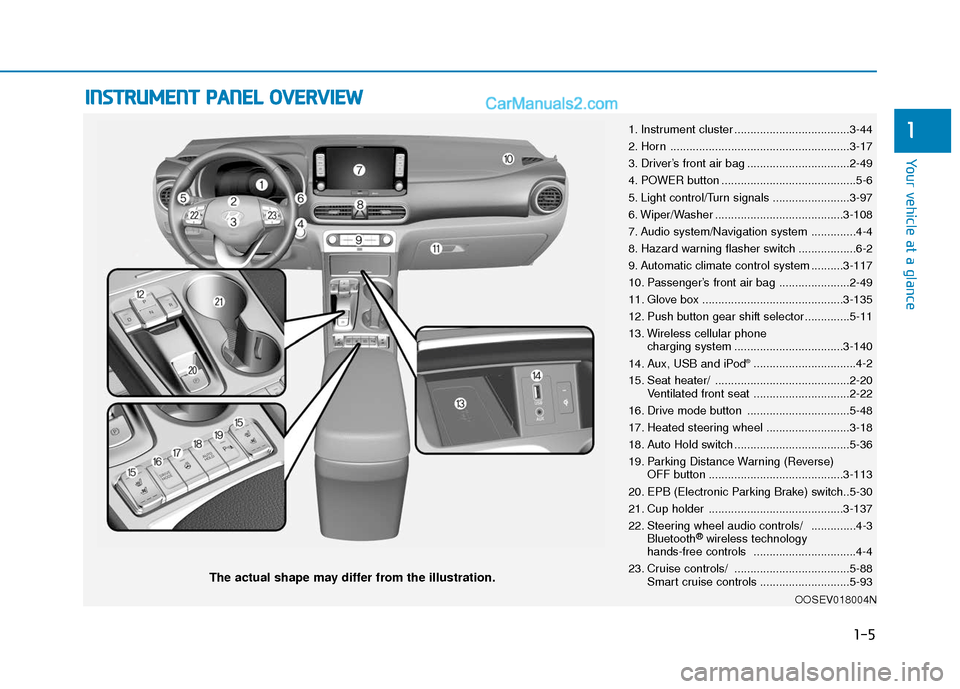
11. Instrument cluster ....................................3-44
2. Horn ........................................................3-17
3. Driver’s front air bag ................................2-49
4. POWER button ..........................................5-6
5. Light control/Turn signals ........................3-97
6. Wiper/Washer ........................................3-108
7. Audio system/Navigation system ..............4-4
8. Hazard warning flasher switch ..................6-2
9. Automatic climate control system ..........3-117
10. Passenger’s front air bag ......................2-49
11. Glove box ............................................3-135
12. Push button gear shift selector..............5-11
13. Wireless cellular phone
charging system ..................................3-140
14. Aux, USB and iPod
®................................4-2
15. Seat heater/ ..........................................2-20 Ventilated front seat ..............................2-22
16. Drive mode button ................................5-48
17. Heated steering wheel ..........................3-18
18. Auto Hold switch ....................................5-36
19. Parking Distance Warning (Reverse) OFF button ..........................................3-113
20. EPB (Electronic Parking Brake) switch..5-30
21. Cup holder ..........................................3-137
22. Steering wheel audio controls/ ..............4-3 Bluetooth
®wireless technology
hands-free controls ................................4-4
23. Cruise controls/ ....................................5-88 Smart cruise controls ............................5-93
OOSEV018004N
Page 15 of 540
1-6
Your vehicle at a glance
E
EV
V
D
D R
RI
IV
V E
E
M
M O
OT
TO
O R
R
C
C O
O M
M P
PA
A R
RT
TM
M E
EN
N T
T
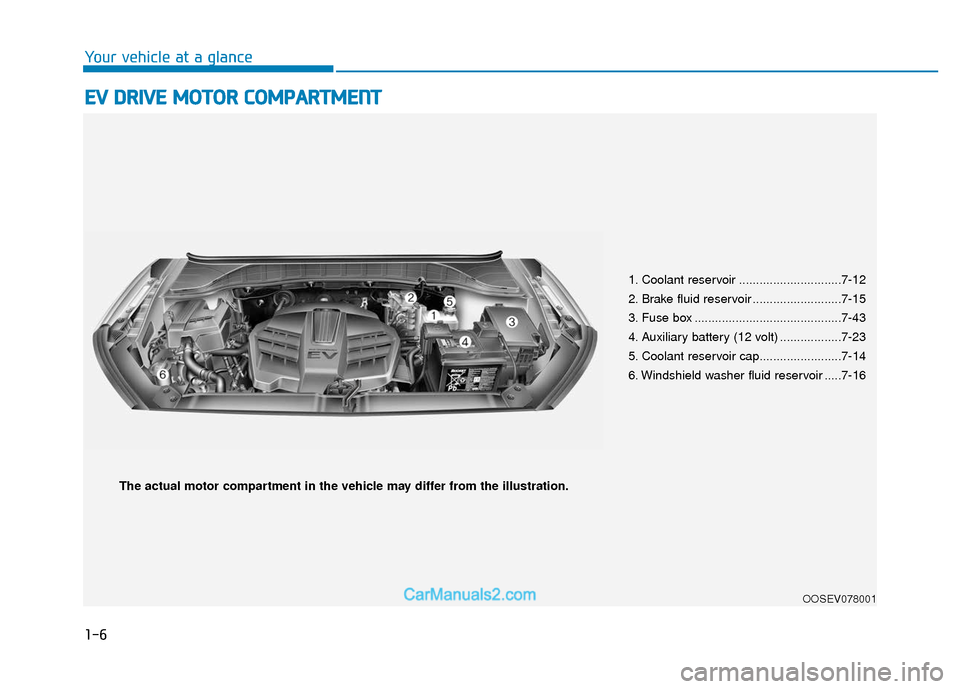
1. Coolant reservoir ..............................7-12
2. Brake fluid reservoir ..........................7-15
3. Fuse box ...........................................7-43
4. Auxiliary battery (12 volt) ..................7-23
5. Coolant reservoir cap........................7-14
6. Windshield washer fluid reservoir .....7-16
OOSEV078001
The actual motor compartment in the vehicle may differ from the illustration.
Page 95 of 540
3-11
Convenient features of your vehicle
3
Operating Door Locks from
Inside the Vehicle
With the door lock button
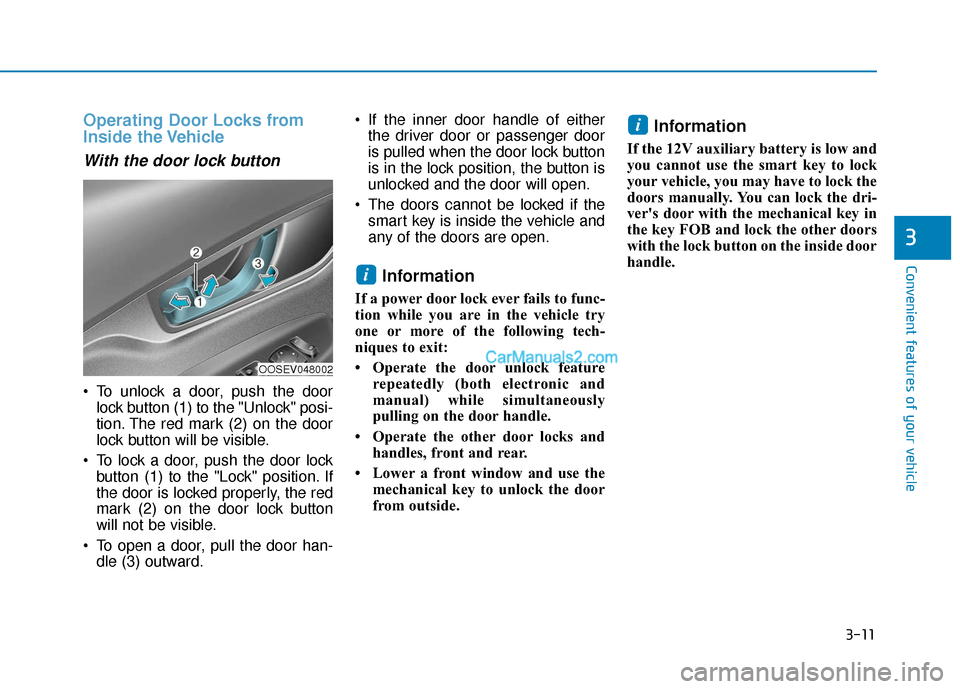
To unlock a door, push the doorlock button (1) to the "Unlock" posi-
tion. The red mark (2) on the door
lock button will be visible.
To lock a door, push the door lock button (1) to the "Lock" position. If
the door is locked properly, the red
mark (2) on the door lock button
will not be visible.
To open a door, pull the door han- dle (3) outward. If the inner door handle of either
the driver door or passenger door
is pulled when the door lock button
is in the lock position, the button is
unlocked and the door will open.
The doors cannot be locked if the smart key is inside the vehicle and
any of the doors are open.
Information
If a power door lock ever fails to func-
tion while you are in the vehicle try
one or more of the following tech-
niques to exit:
• Operate the door unlock feature repeatedly (both electronic and
manual) while simultaneously
pulling on the door handle.
• Operate the other door locks and handles, front and rear.
• Lower a front window and use the mechanical key to unlock the door
from outside.
Information
If the 12V auxiliary battery is low and
you cannot use the smart key to lock
your vehicle, you may have to lock the
doors manually. You can lock the dri-
ver's door with the mechanical key in
the key FOB and lock the other doors
with the lock button on the inside door
handle.
i
i
OOSEV048002
Page 140 of 540
3-56
Convenient features of your vehicle
Electric PowerSteering (EPS)Warning Light
This warning light illuminates:
When the POWER button is in the
ON position.
- It illuminates for approximately 3seconds and then goes off.
When there is a malfunction with the EPS.
If this occurs, have your vehicle
inspected by an authorized
HYUNDAI dealer.
Charging SystemWarning Light(for 12-volt battery)
This warning light illuminates:
If the 12V auxiliary battery voltage
is low, or if a system malfunction
related to the low voltage DC
charging system (LDC) occurs.
If this warning light comes on while driving, or if this warning light
comes on and off intermittently
with ignition cycle, have the vehicle
inspected by an authorized
HYUNDAI dealer.
If the vehicle is driven continuously
with the Charging System Warning
Light on, the 12V auxiliary battery
may discharge. If this occurs, vehi-
cle operation may be limited.
Low Tire PressureWarning Light
This warning light illuminates:
When the POWER button is in the
ON position.
- It illuminates for approximately 3seconds and then goes off.
When one or more of your tires are significantly underinflated (The
location of each underinflated tire
is displayed on the LCD display).
For more details, refer to "Tire
Pressure Monitoring System
(TPMS)" in chapter 6.
Page 155 of 540
3-71
Convenient features of your vehicle
Aux. Battery Saver+ used whileparked
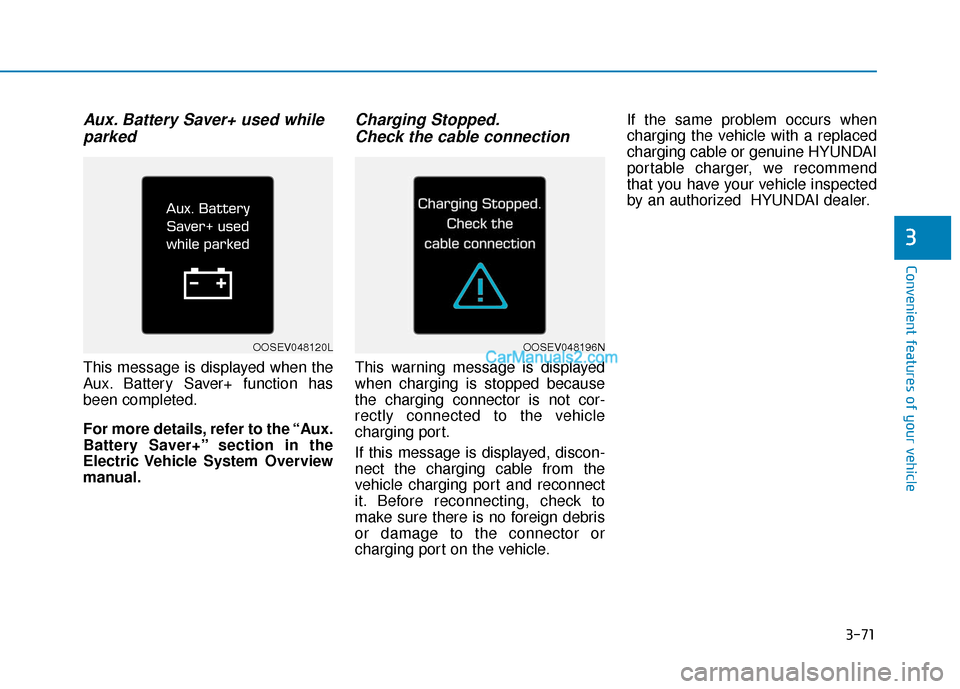
This message is displayed when the
Aux. Battery Saver+ function has
been completed.
For more details, refer to the “Aux.
Battery Saver+” section in the
Electric Vehicle System Overview
manual.
Charging Stopped.Check the cable connection
This warning message is displayed
when charging is stopped because
the charging connector is not cor-
rectly connected to the vehicle
charging port.
If this message is displayed, discon-
nect the charging cable from the
vehicle charging port and reconnect
it. Before reconnecting, check to
make sure there is no foreign debris
or damage to the connector or
charging port on the vehicle. If the same problem occurs when
charging the vehicle with a replaced
charging cable or genuine HYUNDAI
portable charger, we recommend
that you have your vehicle inspected
by an authorized HYUNDAI dealer.
3
OOSEV048120LOOSEV048196N
Page 172 of 540
3-88
Convenient features of your vehicle
ItemsExplanation
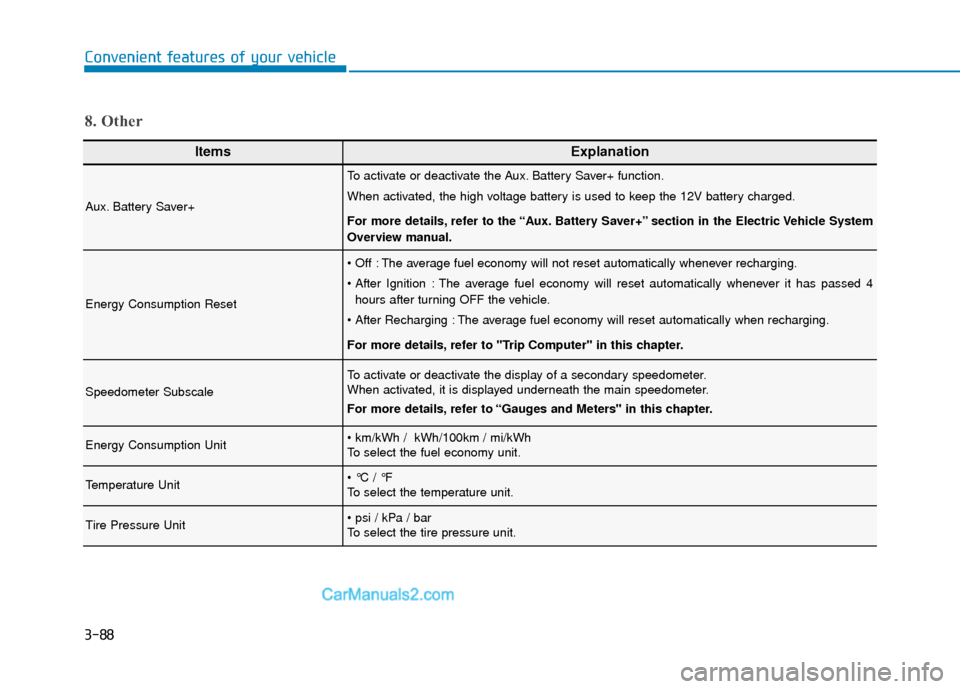
Aux. Battery Saver+
To activate or deactivate the Aux. Battery Saver+ function.
When activated, the high voltage battery is used to keep the 12V battery charged.
For more details, refer to the “Aux. Battery Saver+” section in the Electric Vehicle System
Overview manual.
Energy Consumption Reset
The average fuel economy will not reset automatically whenever recharging.
The average fuel economy will reset automatically whenever it has passed 4hours after turning OFF the vehicle.
The average fuel economy will reset automatically when recharging.
For more details, refer to "Trip Computer" in this chapter.
Speedometer Subscale
To activate or deactivate the display of a secondary speedometer.
When activated, it is displayed underneath the main speedometer.
For more details, refer to “Gauges and Meters" in this chapter.
Energy Consumption Unit
To select the fuel economy unit.
Temperature Unit
To select the temperature unit.
Tire Pressure Unit
To select the tire pressure unit.
8. Other
Page 230 of 540
Multimedia System
Multimedia System.................................................4-2
AUX, USB and iPod®Port ...............................................4-2
Antenna ........................................................................\
.......4-3
Steering Wheel Audio Controls ......................................4-3
Bluetooth®Wireless Technology ..................................4-4
Audio (Display Audio) / Video /
Navigation System (AVN).................................................4-4
4
Page 231 of 540
4-2
Multimedia System
• If you install an aftermarket HID head lamp, your vehicle's audio
and electronic devices may not
function properly.
Prevent chemicals such as per- fume, cosmetic oil, sun cream,
hand cleaner, and air freshener
from contacting the interior
parts because they may cause
damage or discoloration.
AUX, USB and iPod®Por t
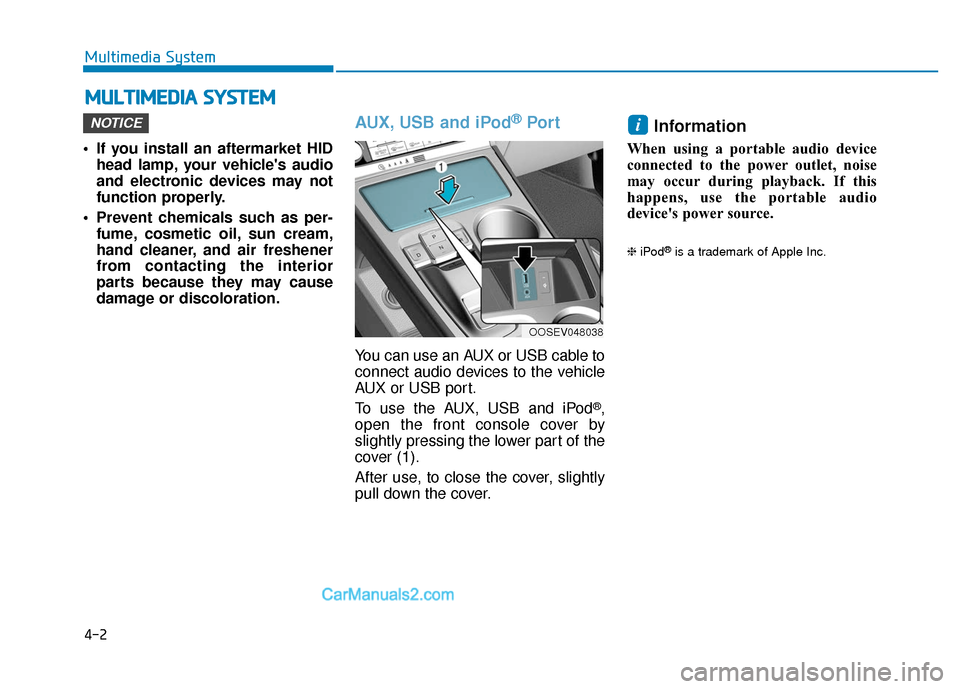
You can use an AUX or USB cable to
connect audio devices to the vehicle
AUX or USB port.
To use the AUX, USB and iPod
®,
open the front console cover by
slightly pressing the lower part of the
cover (1).
After use, to close the cover, slightly
pull down the cover.
Information
When using a portable audio device
connected to the power outlet, noise
may occur during playback. If this
happens, use the portable audio
device's power source.
❈ iPod®is a trademark of Apple Inc.
iNOTICE
M MU
UL
LT
T I
IM
M E
ED
D I
IA
A
S
S Y
Y S
ST
T E
EM
M
OOSEV048038
Page 232 of 540
Antenna
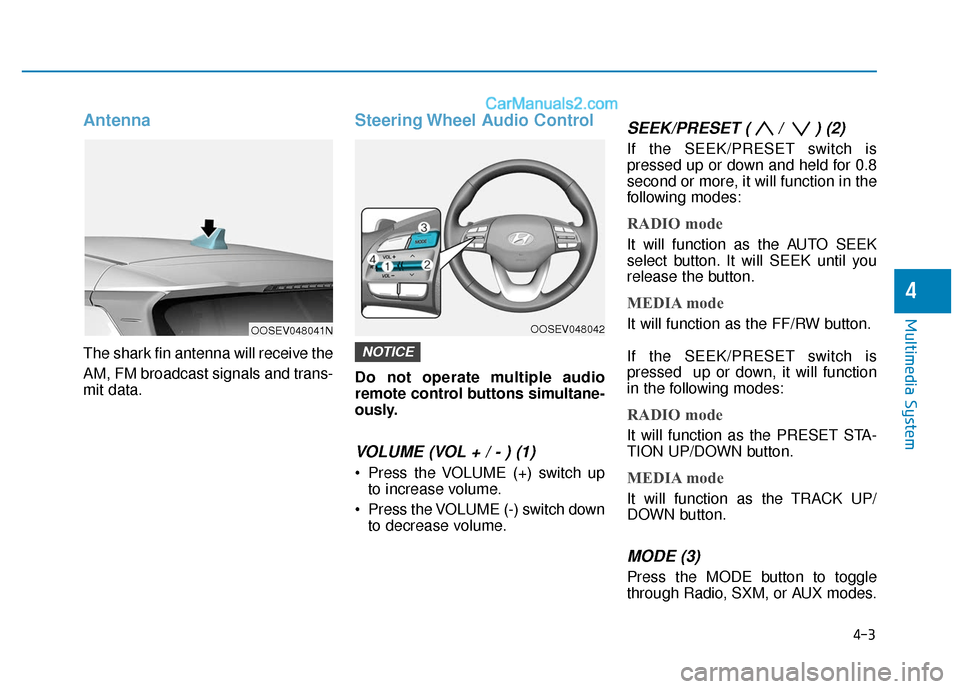
The shark fin antenna will receive the
AM, FM broadcast signals and trans-
mit data.
Steering Wheel Audio Control
Do not operate multiple audio
remote control buttons simultane-
ously.
VOLUME (VOL + / - ) (1)
Press the VOLUME (+) switch upto increase volume.
Press the VOLUME (-) switch down to decrease volume.
SEEK/PRESET ( / ) (2)
If the SEEK/PRESET switch is
pressed up or down and held for 0.8
second or more, it will function in the
following modes:
RADIO mode
It will function as the AUTO SEEK
select button. It will SEEK until you
release the button.
MEDIA mode
It will function as the FF/RW button.
If the SEEK/PRESET switch is
pressed up or down, it will function
in the following modes:
RADIO mode
It will function as the PRESET STA-
TION UP/DOWN button.
MEDIA mode
It will function as the TRACK UP/
DOWN button.
MODE (3)
Press the MODE button to toggle
through Radio, SXM, or AUX modes.
NOTICE
4-3
Multimedia System
4
OOSEV048041NOOSEV048042
Page 357 of 540
What to do in an emergency
6
Hazard Warning Flasher .......................................6-2
In Case of an Emergency While Driving.............6-2
If the Vehicle Stalls While Driving .................................6-2
If the Vehicle Stalls at a Crossroad or Crossing .......6-2
If you Have a Flat Tire While Driving ..........................6-3
If the Vehicle Will Not Start .................................6-3
Confirm the EV Battery SOC Level ...............................6-3
Jump Starting (12V Auxiliary Battery) ...............6-4
If the Vehicle Overheats .......................................6-6
Tire Pressure Monitoring System (TPMS).........6-8
Check Tire Pressure .........................................................6-8
Tire Pressure Monitoring System .................................6-9
Low Tire Pressure Telltale ............................................6-10
Low Tire Pressure LCD Display with
Position Indicator ............................................................6-10
TPMS Malfunction Indicator ........................................6-11
Changing a Tire with TPMS..........................................6-12
If you Have a Flat Tire
(With Tire Mobility Kit) .......................................6-14
Introduction ......................................................................6-\
14
Components of the Tire Mobility Kit .........................6-16
Using the Tire Mobility Kit............................................6-17
Checking the Tire Inflation Pressure .........................6-19
Towing ...................................................................6-21
Towing Service .................................................................6-21
Flat Towing is Not Recommended ..............................6-22
Removable Towing Hook ...............................................6-22
Emergency Towing..........................................................6-23