check engine INFINITI FX35 2008 Owner's Manual
[x] Cancel search | Manufacturer: INFINITI, Model Year: 2008, Model line: FX35, Model: INFINITI FX35 2008Pages: 3924, PDF Size: 81.37 MB
Page 127 of 3924

AT-54
< SERVICE INFORMATION >
TROUBLE DIAGNOSIS
2.CHECK STARTING THE ENGINE
1. Turn ignition switch ON. (Do not start engine.)
2. Move selector lever to “D”, “M” or “R” position.
3. Start engine.
Does the engine start in either position?
YES >> Stop the road test and go to AT-170, "Engine Cannot Be Started in "P" or "N" Position".
NO >> GO TO 3.
3.CHECK “P” POSITION FUNCTIONS
1. Move selector lever to “P” position.
2. Turn ignition switch OFF.
3. Disengage the parking brake.
4. Push the vehicle forward or backward.
5. Engage the parking brake.
When you push the vehicle with disengaging the parking brake, does it move?
YES >> Enter a check mark at AT-171, "In "P" Position, Vehicle Moves When Pushed" on the “Diagnostic
Worksheet Chart”, then continue the road test.
NO >> GO TO 4.
4.CHECK “N” POSITION FUNCTIONS
1. Start engine.
2. Move selector lever to “N” position.
3. Disengage the parking brake.
Does vehicle move forward or backward?
YES >> Enter a check mark at AT-172, "In "N" Position, Vehicle Moves" on the “Diagnostic Worksheet
Chart”, then continue the road test.
NO >> GO TO 5.
5.CHECK SHIFT SHOCK
1. Engage the brake.
2. Move selector lever to “D” position.
When the transmission is shifted from
“N” to “D”, is there an excessive shock?
YES >> Enter a check mark at AT-173, "Large Shock ("N" to "D" Position)"on the “Diagnostic Worksheet
Chart”, then continue the road test.
NO >> GO TO 6.
6.CHECK “R” POSITION FUNCTIONS
1. Engage the brake.
2. Move selector lever to “R” position.
3. Disengage the brake for 4 to 5 seconds.
Does the vehicle creep backward?
YES >> GO TO 7.
NO >> Enter a check mark at AT-175, "
Vehicle Does Not Creep Backward in "R" Position" on the “Diag-
nostic Worksheet Chart”, then continue the road test.
7.CHECK “D” POSITION FUNCTIONS
Inspect whether the vehicle creep forward when the A/T is put into the “D” position.
Does the vehicle creep forward in the
“D” position?
YES >> Go to AT-53, "Road Test".
NO >> Enter a check mark at AT-178, "
Vehicle Does Not Creep Forward in "D" Position"on the “Diagnos-
tic Worksheet Chart”, then continue the road test.
CRUISE TEST - PART 1
1.CHECK STARTING OUT FROM D1
1. Drive the vehicle for about 10 minutes to warm up the engine oil and ATF. Appropriate temperature for the ATF: 50 to 80 °C (122 to 176 °F)
3AA93ABC3ACD3AC03ACA3AC03AC63AC53A913A773A893A873A873A8E3A773A983AC73AC93AC03AC3
3A893A873A873A8F3A773A9D3AAF3A8A3A8C3A863A9D3AAF3A8B3A8C
Page 128 of 3924

TROUBLE DIAGNOSISAT-55
< SERVICE INFORMATION >
DE
F
G H
I
J
K L
M A
B
AT
N
O P
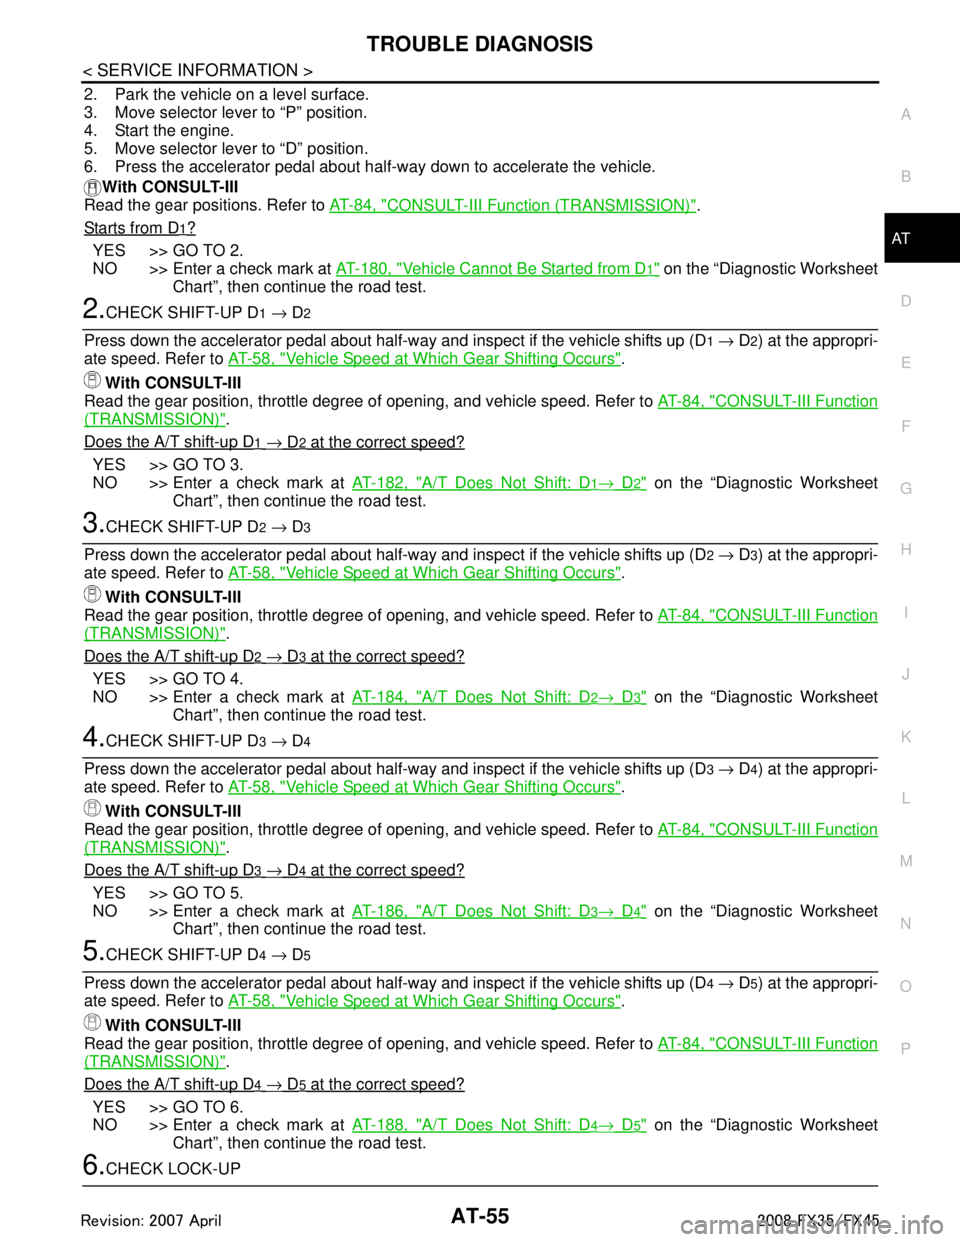
2. Park the vehicle on a level surface.
3. Move selector lever to “P” position.
4. Start the engine.
5. Move selector lever to “D” position.
6. Press the accelerator pedal about half-way down to accelerate the vehicle. With CONSULT-III
Read the gear positions. Refer to AT-84, "
CONSULT-III Function (TRANSMISSION)".
Starts from D
1?
YES >> GO TO 2.
NO >> Enter a check mark at AT-180, "
Vehicle Cannot Be Started from D1" on the “Diagnostic Worksheet
Chart”, then continue the road test.
2.CHECK SHIFT-UP D1 → D2
Press down the accelerator pedal about half-way and inspect if the vehicle shifts up (D1 → D2) at the appropri-
ate speed. Refer to AT-58, "
Vehicle Speed at Which Gear Shifting Occurs".
With CONSULT-III
Read the gear position, throttle degree of opening, and vehicle speed. Refer to AT-84, "
CONSULT-III Function
(TRANSMISSION)".
Does the A/T shift-up D
1 → D2 at the correct speed?
YES >> GO TO 3.
NO >> Enter a check mark at AT-182, "
A/T Does Not Shift: D1→ D2" on the “Diagnostic Worksheet
Chart”, then continue the road test.
3.CHECK SHIFT-UP D2 → D3
Press down the accelerator pedal about half-way and inspect if the vehicle shifts up (D2 → D3) at the appropri-
ate speed. Refer to AT-58, "
Vehicle Speed at Which Gear Shifting Occurs".
With CONSULT-III
Read the gear position, throttle degree of opening, and vehicle speed. Refer to AT-84, "
CONSULT-III Function
(TRANSMISSION)".
Does the A/T shift-up D
2 → D3 at the correct speed?
YES >> GO TO 4.
NO >> Enter a check mark at AT-184, "
A/T Does Not Shift: D2→ D3" on the “Diagnostic Worksheet
Chart”, then continue the road test.
4.CHECK SHIFT-UP D3 → D4
Press down the accelerator pedal about half-way and inspect if the vehicle shifts up (D3 → D4) at the appropri-
ate speed. Refer to AT-58, "
Vehicle Speed at Which Gear Shifting Occurs".
With CONSULT-III
Read the gear position, throttle degree of opening, and vehicle speed. Refer to AT-84, "
CONSULT-III Function
(TRANSMISSION)".
Does the A/T shift-up D
3 → D4 at the correct speed?
YES >> GO TO 5.
NO >> Enter a check mark at AT-186, "
A/T Does Not Shift: D3→ D4" on the “Diagnostic Worksheet
Chart”, then continue the road test.
5.CHECK SHIFT-UP D4 → D5
Press down the accelerator pedal about half-way and inspect if the vehicle shifts up (D4 → D5) at the appropri-
ate speed. Refer to AT-58, "
Vehicle Speed at Which Gear Shifting Occurs".
With CONSULT-III
Read the gear position, throttle degree of opening, and vehicle speed. Refer to AT-84, "
CONSULT-III Function
(TRANSMISSION)".
Does the A/T shift-up D
4 → D5 at the correct speed?
YES >> GO TO 6.
NO >> Enter a check mark at AT-188, "
A/T Does Not Shift: D4→ D5" on the “Diagnostic Worksheet
Chart”, then continue the road test.
6.CHECK LOCK-UP
3AA93ABC3ACD3AC03ACA3AC03AC63AC53A913A773A893A873A873A8E3A773A983AC73AC93AC03AC3
3A893A873A873A8F3A773A9D3AAF3A8A3A8C3A863A9D3AAF3A8B3A8C
Page 129 of 3924

AT-56
< SERVICE INFORMATION >
TROUBLE DIAGNOSIS
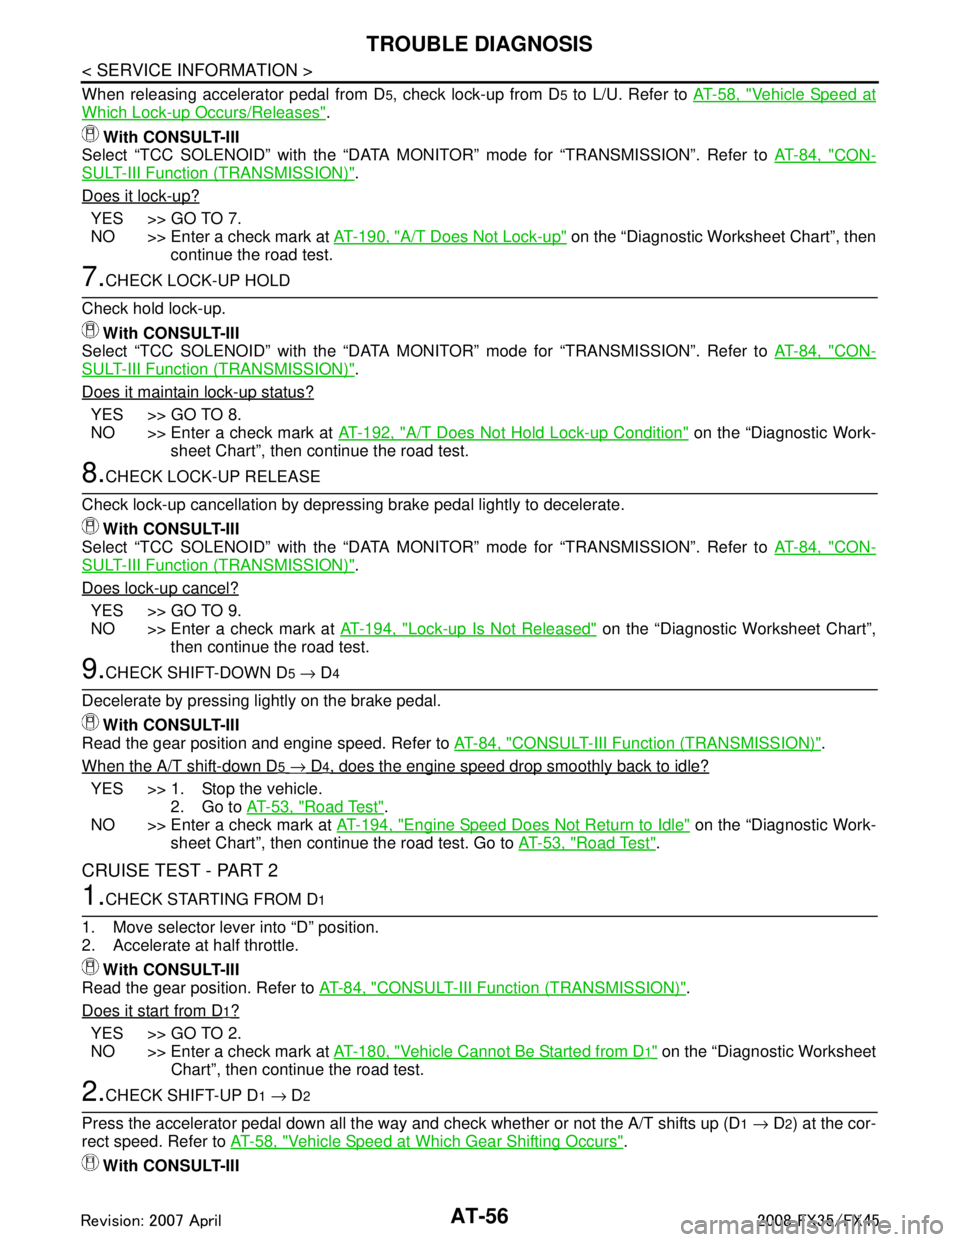
When releasing accelerator pedal from D5, check lock-up from D5 to L/U. Refer to AT-58, "Vehicle Speed at
Which Lock-up Occurs/Releases".
With CONSULT-III
Select “TCC SOLENOID” with the “DATA MONI TOR” mode for “TRANSMISSION”. Refer to AT-84, "
CON-
SULT-III Function (TRANSMISSION)".
Does it lock-up?
YES >> GO TO 7.
NO >> Enter a check mark at AT-190, "
A/T Does Not Lock-up" on the “Diagnostic Worksheet Chart”, then
continue the road test.
7.CHECK LOCK-UP HOLD
Check hold lock-up. With CONSULT-III
Select “TCC SOLENOID” with the “DATA MONI TOR” mode for “TRANSMISSION”. Refer to AT-84, "
CON-
SULT-III Function (TRANSMISSION)".
Does it maintain lock-up status?
YES >> GO TO 8.
NO >> Enter a check mark at AT-192, "
A/T Does Not Hold Lock-up Condition" on the “Diagnostic Work-
sheet Chart”, then continue the road test.
8.CHECK LOCK-UP RELEASE
Check lock-up cancellation by depressing brake pedal lightly to decelerate. With CONSULT-III
Select “TCC SOLENOID” with the “DATA MONI TOR” mode for “TRANSMISSION”. Refer to AT-84, "
CON-
SULT-III Function (TRANSMISSION)".
Does lock-up cancel?
YES >> GO TO 9.
NO >> Enter a check mark at AT-194, "
Lock-up Is Not Released" on the “Diagnostic Worksheet Chart”,
then continue the road test.
9.CHECK SHIFT-DOWN D5 → D4
Decelerate by pressing lightly on the brake pedal.
With CONSULT-III
Read the gear position and engine speed. Refer to AT-84, "
CONSULT-III Function (TRANSMISSION)".
When the A/T shift-down D
5 → D4, does the engine speed drop smoothly back to idle?
YES >> 1. Stop the vehicle. 2. Go to AT-53, "
Road Test".
NO >> Enter a check mark at AT-194, "
Engine Speed Does Not Return to Idle" on the “Diagnostic Work-
sheet Chart”, then continue the road test. Go to AT-53, "
Road Test".
CRUISE TEST - PART 2
1.CHECK STARTING FROM D1
1. Move selector lever into “D” position.
2. Accelerate at half throttle.
With CONSULT-III
Read the gear position. Refer to AT-84, "
CONSULT-III Function (TRANSMISSION)".
Does it start from D
1?
YES >> GO TO 2.
NO >> Enter a check mark at AT-180, "
Vehicle Cannot Be Started from D1" on the “Diagnostic Worksheet
Chart”, then continue the road test.
2.CHECK SHIFT-UP D1 → D2
Press the accelerator pedal down all the way and check whether or not the A/T shifts up (D1 → D2) at the cor-
rect speed. Refer to AT-58, "
Vehicle Speed at Which Gear Shifting Occurs".
With CONSULT-III
3AA93ABC3ACD3AC03ACA3AC03AC63AC53A913A773A893A873A873A8E3A773A983AC73AC93AC03AC3
3A893A873A873A8F3A773A9D3AAF3A8A3A8C3A863A9D3AAF3A8B3A8C
Page 130 of 3924

TROUBLE DIAGNOSISAT-57
< SERVICE INFORMATION >
DE
F
G H
I
J
K L
M A
B
AT
N
O P
Read the gear position, throttle pos ition and vehicle speed. Refer to AT-84, "CONSULT-III Function (TRANS-
MISSION)".
Does the A/T shift-up D
1 → D2 at the correct speed?
YES >> GO TO 3.
NO >> Enter a check mark at AT-182, "
A/T Does Not Shift: D1→ D2" on the “Diagnostic Worksheet
Chart”, then continue the road test.
3.CHECK SHIFT-UP D2 → D3
Press the accelerator pedal down all the way and check whether or not the A/T shifts up (D2 → D3) at the cor-
rect speed. Refer to AT-58, "
Vehicle Speed at Which Gear Shifting Occurs".
With CONSULT-III
Read the gear position, throttle pos ition and vehicle speed. Refer to AT-84, "
CONSULT-III Function (TRANS-
MISSION)".
Does the A/T shift-up D
2 → D3 at the correct speed?
YES >> GO TO 4.
NO >> Enter a check mark at AT-184, "
A/T Does Not Shift: D2→ D3" on the “Diagnostic Worksheet
Chart”, then continue the road test.
4.CHECK SHIFT-UP D3 → D4 AND ENGINE BRAKE
When the A/T changes speed D
3 → D4, return the accelerator pedal.
With CONSULT-III
Read the gear position. Refer to AT-84, "
CONSULT-III Function (TRANSMISSION)".
Does the A/T shift-up D
3 → D4 and apply the engine brake?
YES >> 1. Stop the vehicle. 2. Go to AT-53, "
Road Test".
NO >> Enter a check mark at AT-186, "
A/T Does Not Shift: D3→ D4" on the “Diagnostic Worksheet
Chart”, then continue the road test. Go to AT-53, "
Road Test".
CRUISE TEST - PART 3
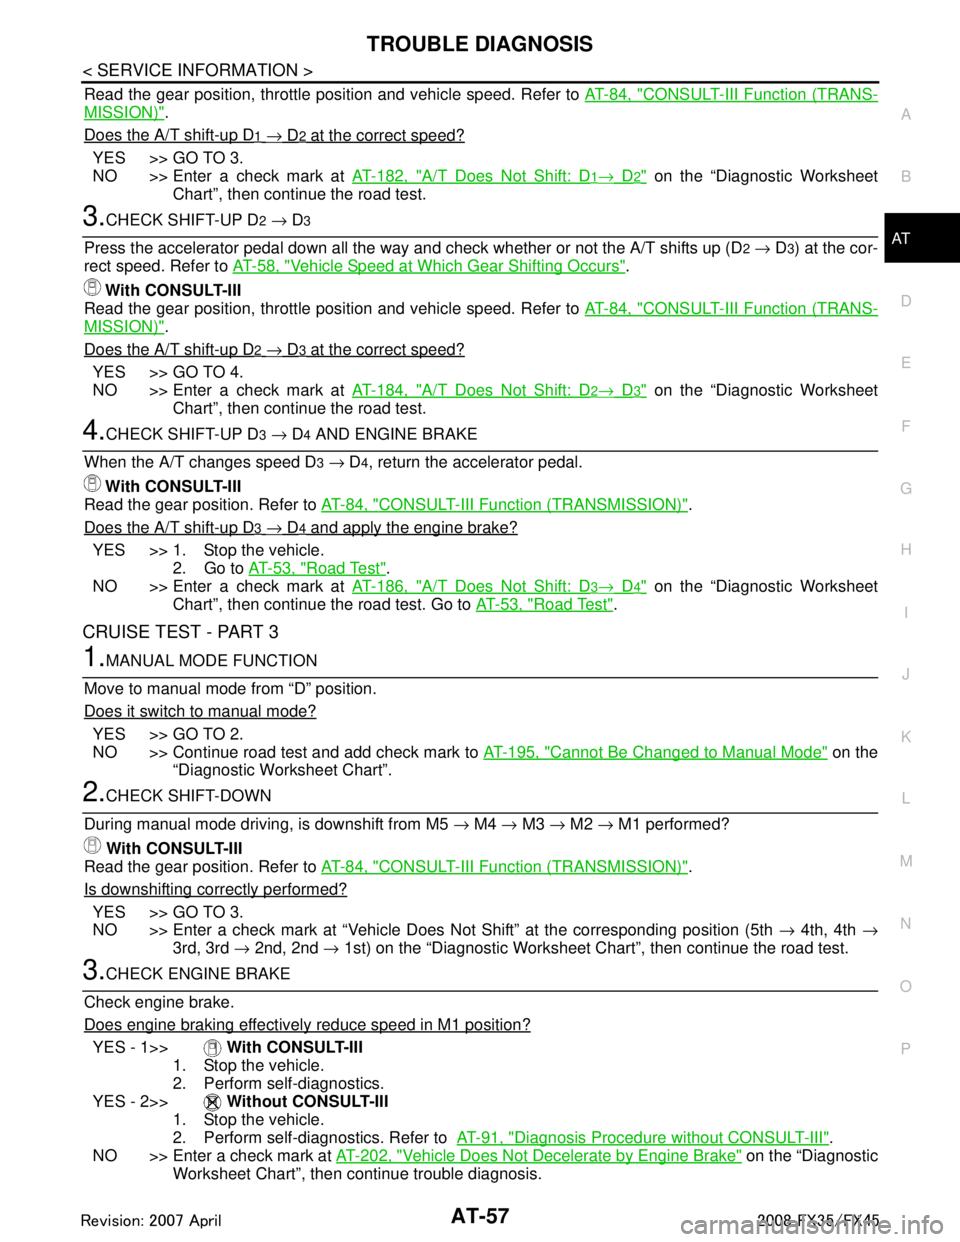
1.MANUAL MODE FUNCTION
Move to manual mode from “D” position.
Does it switch to manual mode?
YES >> GO TO 2.
NO >> Continue road test and add check mark to AT-195, "
Cannot Be Changed to Manual Mode" on the
“Diagnostic Worksheet Chart”.
2.CHECK SHIFT-DOWN
During manual mode driving, is downshift from M5 → M4 → M3 → M2 → M1 performed?
With CONSULT-III
Read the gear position. Refer to AT-84, "
CONSULT-III Function (TRANSMISSION)".
Is downshifting correctly performed?
YES >> GO TO 3.
NO >> Enter a check mark at “Vehicle Does No t Shift” at the corresponding position (5th → 4th, 4th →
3rd, 3rd → 2nd, 2nd → 1st) on the “Diagnostic Worksheet Chart”, then continue the road test.
3.CHECK ENGINE BRAKE
Check engine brake.
Does engine braking effectively reduce speed in M1 position?
YES - 1>> With CONSULT-III
1. Stop the vehicle.
2. Perform self-diagnostics.
YES - 2>> Without CONSULT-III
1. Stop the vehicle.
2. Perform self-diagnostics. Refer to AT-91, "
Diagnosis Procedure without CONSULT-III".
NO >> Enter a check mark at AT-202, "
Vehicle Does Not Decelerate by Engine Brake" on the “Diagnostic
Worksheet Chart”, then continue trouble diagnosis.
3AA93ABC3ACD3AC03ACA3AC03AC63AC53A913A773A893A873A873A8E3A773A983AC73AC93AC03AC3
3A893A873A873A8F3A773A9D3AAF3A8A3A8C3A863A9D3AAF3A8B3A8C
Page 132 of 3924

TROUBLE DIAGNOSISAT-59
< SERVICE INFORMATION >
DE
F
G H
I
J
K L
M A
B
AT
N
O P
At closed throttle, the accelerator opening is less than 1/8 condition. (Closed throttle position signal: OFF)
At half throttle, the accelerator opening is 4/8 of the full opening.
At closed throttle, the accelerator opening is less than 1/8 condition. (Closed throttle position signal: OFF)
At half throttle, the accelerator opening is 4/8 of the full opening.
Symptom ChartINFOID:0000000001327161
The diagnostics item numbers show the sequence for inspection. Check in order from item 1.
Overhaul and check inside the A/T only if A/T fluid condition is NG. Refer to AT-49, "
Inspections Before Trou-
ble Diagnosis".
Engine model VK45DE
Throttle positionVehicle speed km/h (MPH)
Lock-up ON Lock-up OFF
Closed throttle 66 - 74 (41 - 46) 53 - 61 (33 - 38)
Half throttle 191 - 199 (119 - 124) 145 - 153 (90 - 95)
No. Items Symptom Condition Diagnostic Item Reference
page
1 Shift
Shock Large shock. (“N”
→
“D” position)
Refer to AT- 1 7 3 ,
"Large Shock ("N" to
"D" Position)". ON vehicle 1. Engine idle speed
EC-84
(for
VQ35DE)
or EC-661
(for
VK45DE)
2. Engine speed signal AT- 11 2
3. Accelerator pedal position sensorAT- 1 3 0
4. A/T positionAT- 2 0 7
5. A/T fluid temperature sensorAT- 1 3 2
6. Front brake solenoid valveAT- 1 4 5
7. CAN communication line AT- 9 4
8. A/T fluid level and stateAT- 4 9
9. Line pressure testAT- 4 9
10. Control valve with TCMAT- 2 1 5
OFF vehicle11. Forward brake (Parts behind drum support is impossible
to perform inspection by disassembly. Refer to
AT- 1 6 , "
Cross-
Sectional View (2WD Models)", AT- 1 7 , "Cross-Sectional View
(VQ35DE Models for AWD)" or AT- 1 8 , "Cross-Sectional View
(VK45DE Models for AWD)") AT- 2 6 7
2
Shock is too large
when changing D1
→
D
2 or M1 → M2. ON vehicle 1. Accelerator pedal position sensor
AT- 1 3 0
2. A/T positionAT- 2 0 7
3. Direct clutch solenoid valveAT- 1 4 7
4. CAN communication line AT- 9 4
5. Engine speed signalAT- 11 2
6. Turbine revolution sensorAT- 1 0 6
7. Vehicle speed sensor A/T and vehicle speed sensor MTRAT- 1 0 8,
AT- 1 3 7
8. A/T fluid level and state AT- 4 9
9. Control valve with TCMAT- 2 1 5
OFF vehicle 10. Direct clutch AT- 3 0 3
3AA93ABC3ACD3AC03ACA3AC03AC63AC53A913A773A893A873A873A8E3A773A983AC73AC93AC03AC3
3A893A873A873A8F3A773A9D3AAF3A8A3A8C3A863A9D3AAF3A8B3A8C
Page 159 of 3924

AT-86
< SERVICE INFORMATION >
TROUBLE DIAGNOSIS
SELF-DIAGNOSTIC RESULT MODE
After performing “SELF-DIAGNOSTIC RESULT MODE”, place check marks for results on the AT-42, "How to
Perform Trouble Diagnosis for Quick and Accurate Repair". Reference pages are provided following the items.
Display Items List
X: Applicable, —: Not applicable
CLSD THL POSReleased accelerator pedal. ON
Fully depressed accelerator pedal. OFF
W/O THL POS Fully depressed accelerator pedal. ON
Released accelerator pedal. OFF
BRAKE SW Depressed brake pedal. ON.
Released brake pedal. OFF
GEAR During driving. 1,2,3,4,5, Item name Condition Display value (Approx.)
Items (CONSULT-
III screen terms) Malfunction is detected when... TCM self-di-
agnosis OBD-II
(DTC)
Reference page
“TRANS-
MISSION”
with CON- SULT-III MIL indica-
tor lamp(*1),
“ENGINE”
with CON-
SULT-III or GST
CAN COMM CIR-
CUIT When TCM is not transmitting or receiving CAN communication sig-
nal for 2 seconds or more.
U1000 U1000
AT- 9 4
STARTER RELAY/
CIRCIf this signal is ON other than in “P” or “N” position, this is judged to
be a malfunction.
(And if it is OFF in “P” or “N” position, this too is judged to be a mal-
function.)
P0615 —
AT- 9 7
TCM TCM is malfunctioning. P0700 P0700 AT- 1 0 1
PNP SW/CIRC PNP switch 1-4 signals input with impossible pattern.
“P” position is detected from “N” position without any other posi-
tion being detected in between. P0705 P0705
AT- 1 0 2
TURBINE REV S/
CIRC TCM does not receive the proper voltage signal from the sensor.
TCM detects an irregularity only at position of 4th gear for turbine
revolution sensor 2. P0717 P0717
AT- 1 0 6
VEH SPD SEN/CIR
AT Signal from vehicle speed sensor A/T (Revolution sensor) not in-
put due to cut line or the like.
Unexpected signal input during running.
After ignition switch is turned ON, unexpected signal input from vehicle speed sensor MTR before the vehicle starts moving. P0720 P0720
AT- 1 0 8
ENGINE SPEED
SIGTCM does not receive the CAN communication signal from the
ECM.
P0725 P0725
AT- 11 2
A/T 1ST GR
FNCTNA/T cannot shift to 1st gear. P0731 P0731
AT- 11 4
A/T 2ND GR
FNCTNA/T cannot shift to 2nd gear. P0732 P0732
AT- 11 6
A/T 3RD GR
FNCTNA/T cannot shift to 3rd gear. P0733 P0733
AT- 11 8
A/T 4TH GR
FNCTNA/T cannot shift to 4th gear. P0734 P0734
AT- 1 2 0
A/T 5TH GR
FNCTNA/T cannot shift to 5th gear. P0735 P0735
AT- 1 2 2
TCC SOLENOID/
CIRCNormal voltage not applied to solenoid due to cut line, short, or the
like.
P0740 P0740
AT- 1 2 4
3AA93ABC3ACD3AC03ACA3AC03AC63AC53A913A773A893A873A873A8E3A773A983AC73AC93AC03AC3
3A893A873A873A8F3A773A9D3AAF3A8A3A8C3A863A9D3AAF3A8B3A8C
Page 165 of 3924

AT-92
< SERVICE INFORMATION >
TROUBLE DIAGNOSIS
1.CHECK A/T CHECK INDICATOR LAMP
1. Start the engine with selector lever in “P” pos ition. Warm engine to normal operating temperature.
2. Turn ignition switch ON and OFF at least twice, then leave it in the OFF position.
3. Wait 10 seconds.
4. Turn ignition switch ON. (Do not start engine.)
Does A/T CHECK indicator lamp come on for about 2 seconds?
YES >> GO TO 2.
NO >> Go to AT-170, "
A/T Check Indicator Lamp Does Not Come On".
2.JUDGEMENT PROCEDURE
1. Turn ignition switch OFF.
2. Keep pressing shift lock release button.
3. Move selector lever from “P” to “D” position.
4. Release accelerator pedal. (Set the closed throttle position signal ON.)
5. Depress brake pedal. (Stop lamp switch signal ON.)
6. Turn ignition switch ON. (Do not start engine.)
7. Wait 3 seconds.
8. Move the selector lever to the manual shift gate side. (Manual mode signal ON.)
9. Release brake pedal. (Stop lamp switch signal OFF.)
10. Move the selector lever to “D” position. (Manual mode signal OFF.)
11. Depress brake pedal. (Stop lamp switch signal ON.)
12. Release brake pedal. (Stop lamp switch signal OFF.)
13. Depress accelerator pedal fully and release it.
>> GO TO 3.
3.CHECK SELF-DIAGNOSIS CODE
Check A/T CHECK indicator lamp. Refer to "Judgement Self-diagnosis Code".
If the system does not go into self-diagnostics. Refer to AT-102
, AT-155, AT-164, AT-165.
>> DIAGNOSIS END
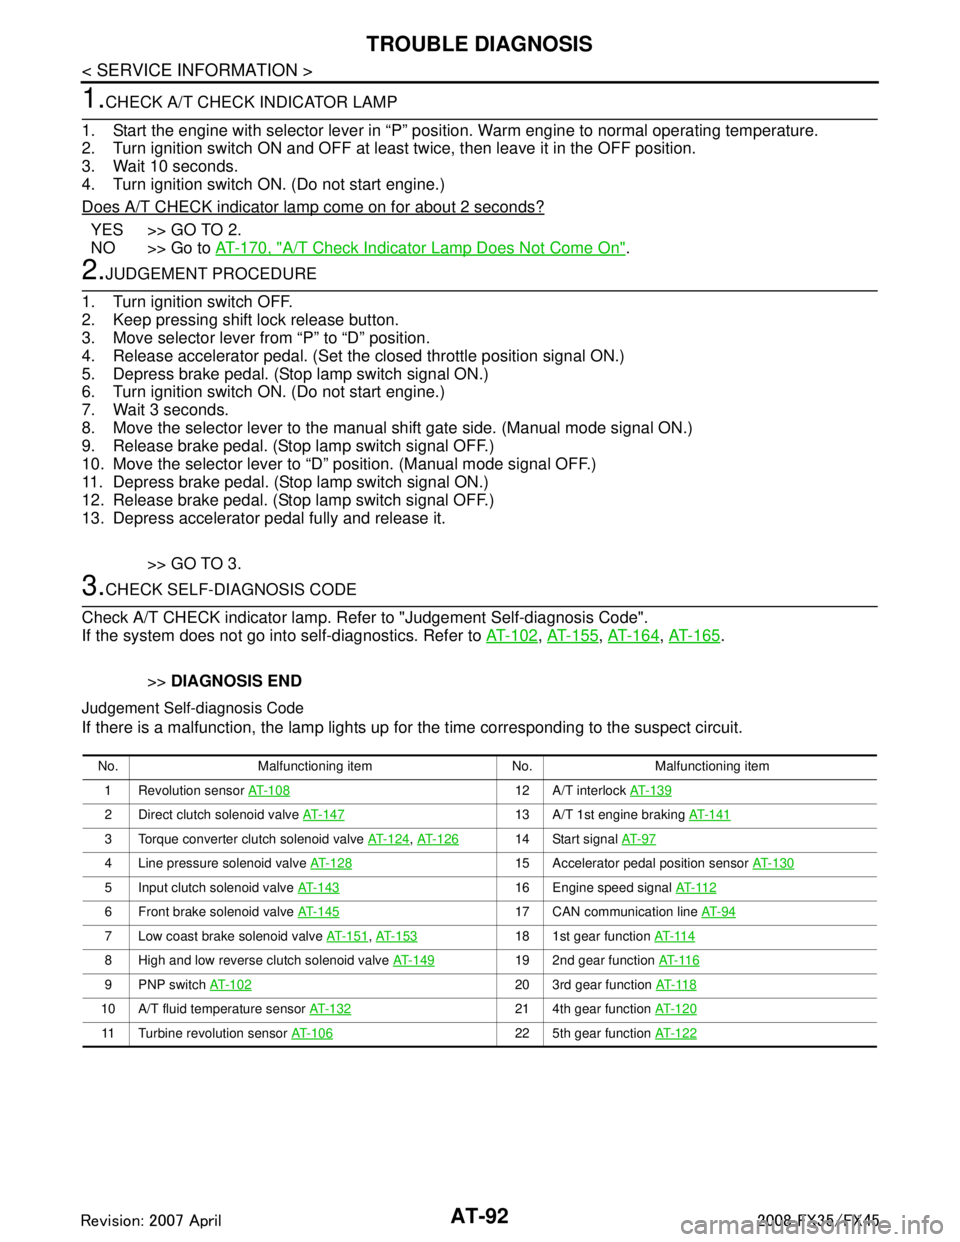
Judgement Self-diagnosis Code
If there is a malfunction, the lamp lights up fo r the time corresponding to the suspect circuit.
No. Malfunctioning item No. Malfunctioning item
1 Revolution sensor AT- 1 0 8
12 A/T interlock AT- 1 3 9
2 Direct clutch solenoid valve AT- 1 4 713 A/T 1st engine braking AT-141
3 Torque converter clutch solenoid valve AT- 1 2 4, AT- 1 2 614 Start signal AT- 9 7
4 Line pressure solenoid valve AT- 1 2 815 Accelerator pedal position sensor AT- 1 3 0
5 Input clutch solenoid valve AT- 1 4 316 Engine speed signal AT- 11 2
6 Front brake solenoid valve AT- 1 4 517 CAN communication line AT- 9 4
7 Low coast brake solenoid valve AT- 1 5 1, AT- 1 5 318 1st gear function AT- 11 4
8 High and low reverse clutch solenoid valve AT- 1 4 919 2nd gear function AT- 11 6
9 PNP switch AT- 1 0 220 3rd gear function AT- 11 8
10 A/T fluid temperature sensor AT-13221 4th gear function AT- 1 2 0
11 Turbine revolution sensor AT- 1 0 622 5th gear function AT- 1 2 2
3AA93ABC3ACD3AC03ACA3AC03AC63AC53A913A773A893A873A873A8E3A773A983AC73AC93AC03AC3
3A893A873A873A8F3A773A9D3AAF3A8A3A8C3A863A9D3AAF3A8B3A8C
Page 169 of 3924

AT-96
< SERVICE INFORMATION >
DTC U1000 CAN COMMUNICATION LINE
TCM terminals and data are reference value. Measured betwe en each terminal and ground.
Diagnosis ProcedureINFOID:0000000001327170
1.CHECK CAN COMMUNICATION CIRCUIT
With CONSULT-III1. Turn ignition switch ON and start engine.
2. Select “SELF-DIAG RESULTS” mode fo r “TRANSMISSION” with CONSULT-III.
Is the
“U1000 CAN COMM CIRCUIT” indicated?
YES >> Go to LAN section. Refer to LAN-43, "CAN System Specification Chart".
NO >> INSPECTION END
Te r m i n a l Wire
color Item Condition Data (Approx.)
3 L CAN-H – –
8 P CAN-L – –
3AA93ABC3ACD3AC03ACA3AC03AC63AC53A913A773A893A873A873A8E3A773A983AC73AC93AC03AC3
3A893A873A873A8F3A773A9D3AAF3A8A3A8C3A863A9D3AAF3A8B3A8C
Page 170 of 3924

DTC P0615 START SIGNAL CIRCUITAT-97
< SERVICE INFORMATION >
DE
F
G H
I
J
K L
M A
B
AT
N
O P
DTC P0615 START SIGNAL CIRCUIT
DescriptionINFOID:0000000001327171
TCM prohibits cranking other than at “P” or “N” position.
CONSULT-III Reference Value in Data Monitor ModeINFOID:0000000001327172
On Board Diagnosis LogicINFOID:0000000001327173
Diagnostic trouble code “P0615 STARTER RELAY/CIRC” wit h CONSULT-III or 14th judgement flicker without
CONSULT-III is detected when starter relay is switc hed ON other than at “P” or “N” position. (Or when
switched OFF at “P” or “N” position).
Possible CauseINFOID:0000000001327174
Harness or connectors (Starter relay and TCM circuit is open or shorted.)
Starter relay circuit
DTC Confirmation ProcedureINFOID:0000000001327175
CAUTION:
Always drive vehicle at a safe speed.
NOTE:
If “DTC Confirmation Procedure” has been previously performed, alw ays turn ignition switch OFF and
wait at least 10 seconds before performing the next test.
After the repair, perform the following procedure to confirm the malfunction is eliminated.
WITH CONSULT-III
1. Turn ignition switch ON.
2. Select “SELECTION FROM MENU” in “DATA MONI TOR” mode for “TRANSMISSION” with CONSULT-III
and check monitor “STARTER RELAY” ON/OFF.
3. Start engine.
4. Drive vehicle for at least 2 consecutive seconds.
5. If DTC is detected, go to AT-99, "
Diagnosis Procedure".
Item name Condition Display value
STARTER RELAY Selector lever in “N
” and “P” positions. ON
Selector lever in other positions. OFF
3AA93ABC3ACD3AC03ACA3AC03AC63AC53A913A773A893A873A873A8E3A773A983AC73AC93AC03AC3
3A893A873A873A8F3A773A9D3AAF3A8A3A8C3A863A9D3AAF3A8B3A8C
Page 174 of 3924

DTC P0700 TCMAT-101
< SERVICE INFORMATION >
DE
F
G H
I
J
K L
M A
B
AT
N
O P
DTC P0700 TCM
DescriptionINFOID:0000000001327178
The TCM consists of a microcomputer and connectors for signal input and output and for power supply. The
TCM controls the A/T.
On Board Diagnosis LogicINFOID:0000000001327179
Diagnostic trouble code “P0700 TCM” with CONSULT-II I is detected when TCM is malfunctioning.
Possible CauseINFOID:0000000001327180
TCM.
DTC Confirmation ProcedureINFOID:0000000001327181
NOTE:
If “DTC Confirmation Procedure” has been previously performed, alw ays turn ignition switch OFF and
wait at least 10 seconds before performing the next test.
After the repair, perform the following procedure to confirm the malfunction is eliminated.
WITH CONSULT-III
1. Turn ignition switch ON.
2. Select “ECU INPUT SIGNALS” or “MAIN SIGNAL S” in “DATA MONITOR” mode for “TRANSMISSION”
with CONSULT-III.
3. Touch “START”.
4. Start engine.
5. Run engine for at least 2 cons ecutive seconds at idle speed.
6. If DTC is detected, go to AT-101, "
Diagnosis Procedure".
WITH GST
Follow the procedure “WITH CONSULT-III”.
Diagnosis ProcedureINFOID:0000000001327182
1.CHECK DTC
With CONSULT-III
1. Turn ignition switch ON.
2. Select “SELF DIAG RESULTS” mode fo r “TRANSMISSION” with CONSULT-III.
3. Touch “ERASE”.
4. Turn ignition switch OFF and wait at least 10 seconds.
5. Perform AT-101, "
DTC Confirmation Procedure".
Is the
“P0700 TCM” displayed again?
YES >> Replace the control valve with TCM. Refer to AT-215, "Control Valve with TCM and A/T Fluid Tem-
perature Sensor 2".
NO >> INSPECTION END
3AA93ABC3ACD3AC03ACA3AC03AC63AC53A913A773A893A873A873A8E3A773A983AC73AC93AC03AC3
3A893A873A873A8F3A773A9D3AAF3A8A3A8C3A863A9D3AAF3A8B3A8C