INFINITI QX4 2001 Factory Workshop Manual
QX4 2001
INFINITI
INFINITI
https://www.carmanualsonline.info/img/42/57027/w960_57027-0.png
INFINITI QX4 2001 Factory Workshop Manual
Page 488 of 2395

Removal and InstallationNBBT0005IBumper fascia is made of plastic. Do not use excessive force and be sure to keep oil away from it.
IBack door lock system adjustment: Adjust lock & striker so that they are in the center.
After adjustment, check back door lock operation.
IBack door hatch lock system adjustment: Adjust lock & striker so that they are in the center.
After adjustment, check back door hatch lock operation.
WARNING:
IBe careful not to scratch back door stay and/or back door hatch stay when installing back door
and/or back door hatch. A scratched stay may cause gas leakage.
IThe contents of the back door stay and back door hatch stay are under pressure. Do not take apart,
puncture, apply heat or allow fire near them.
REAR BUMPER ASSEMBLYNBBT0005S011. Remove bolts and screws securing left and right mudguards and remove the mudguards.
2. Remove clips and screws securing left and right sides of wheel protector.
3. Remove clips and bolts securing left and right rear fenders to bumper fascia.
4. Remove bolts securing bumper reinforcement to bumper fascia.
5. Remove clips securing bumper fascia.
6. Extract bumper fascia assembly.
7. Remove bolts and nuts securing bumper reinforcement.
8. Extract bumper reinforcement.
SBT715
GI
MA
EM
LC
EC
FE
AT
TF
PD
AX
SU
BR
ST
RS
HA
SC
EL
IDX
BODY REAR END AND OPENER
Removal and Installation
BT-15
Page 489 of 2395
SBT716
BODY REAR END AND OPENER
Removal and Installation (Cont'd)
BT-16
Page 490 of 2395
SBT717
GI
MA
EM
LC
EC
FE
AT
TF
PD
AX
SU
BR
ST
RS
HA
SC
EL
IDX
BODY REAR END AND OPENER
Removal and Installation (Cont'd)
BT-17
Page 492 of 2395
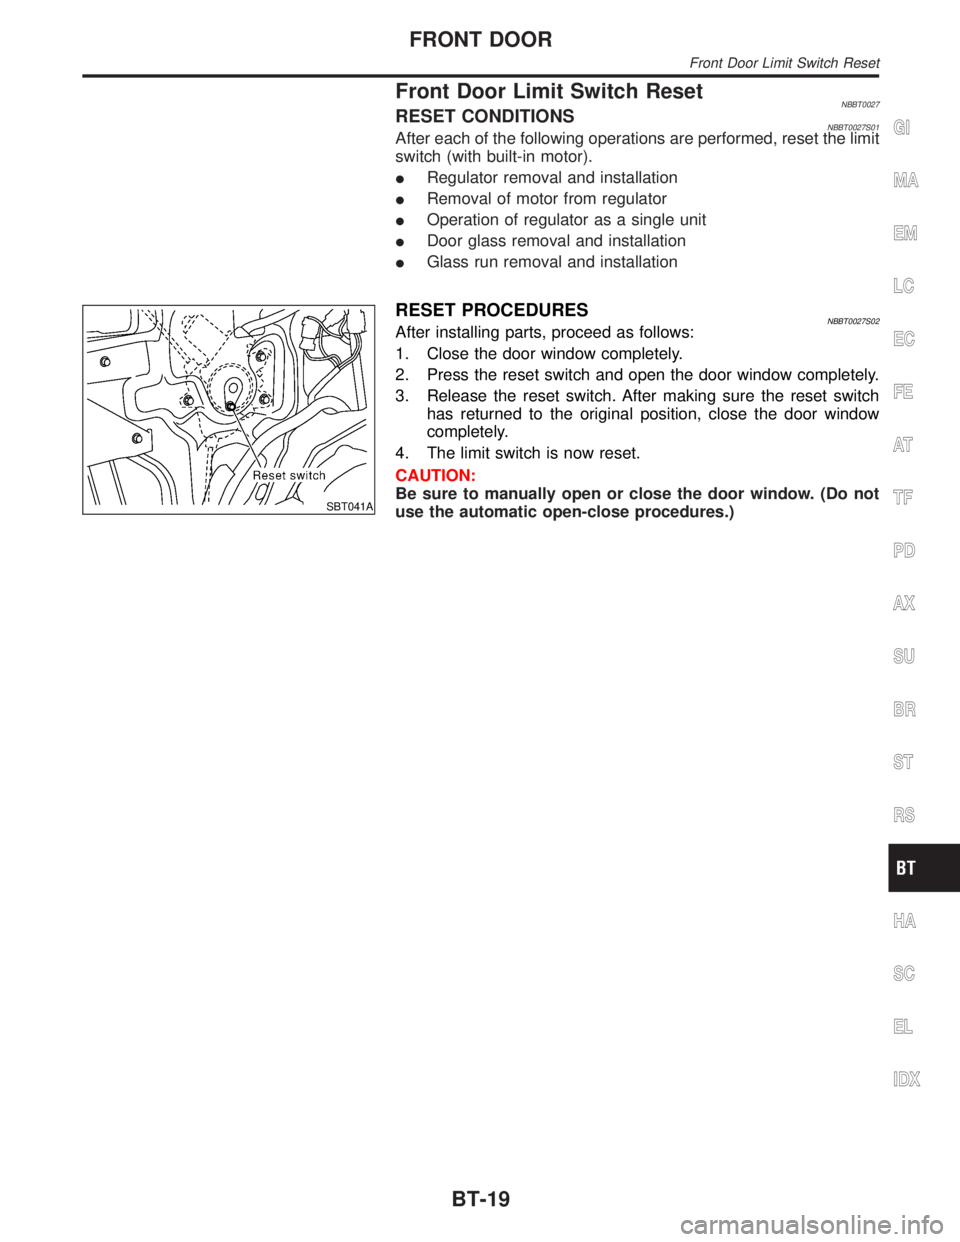
Front Door Limit Switch ResetNBBT0027RESET CONDITIONSNBBT0027S01After each of the following operations are performed, reset the limit
switch (with built-in motor).
IRegulator removal and installation
IRemoval of motor from regulator
IOperation of regulator as a single unit
IDoor glass removal and installation
IGlass run removal and installation
SBT041A
RESET PROCEDURESNBBT0027S02After installing parts, proceed as follows:
1. Close the door window completely.
2. Press the reset switch and open the door window completely.
3. Release the reset switch. After making sure the reset switch
has returned to the original position, close the door window
completely.
4. The limit switch is now reset.
CAUTION:
Be sure to manually open or close the door window. (Do not
use the automatic open-close procedures.)
GI
MA
EM
LC
EC
FE
AT
TF
PD
AX
SU
BR
ST
RS
HA
SC
EL
IDX
FRONT DOOR
Front Door Limit Switch Reset
BT-19
Page 494 of 2395
Removal and InstallationNBBT0008CAUTION:
IDisconnect both battery cables in advance.
IDisconnect air bag system line in advance.
INever tamper with or force air bag lid open, as this may
adversely affect air bag performance.
IBe careful not to scratch pad and other parts.
SBT042A
*1 RS-17 *2 BT-28
GI
MA
EM
LC
EC
FE
AT
TF
PD
AX
SU
BR
ST
RS
HA
SC
EL
IDX
INSTRUMENT PANEL ASSEMBLY
Removal and Installation
BT-21
Page 495 of 2395
SBT043A
*2 BT-28 *3 RS-19
INSTRUMENT PANEL ASSEMBLY
Removal and Installation (Cont'd)
BT-22
Page 496 of 2395
SBT038A
GI
MA
EM
LC
EC
FE
AT
TF
PD
AX
SU
BR
ST
RS
HA
SC
EL
IDX
INSTRUMENT PANEL ASSEMBLY
Removal and Installation (Cont'd)
BT-23
Page 497 of 2395
SBT039A
INSTRUMENT PANEL ASSEMBLY
Removal and Installation (Cont'd)
BT-24
Page 498 of 2395
SBT029A
Steering column cover
After removing the screws, release the pawls by pressing on the
upper cover where it meets (the bottom cover) from both sides.
SBT030A
Instrument lower panel on the driver side
Open the pocket after removing the screws. Hold the opening and
the bottom and pull out horizontally.
SBT044A
Cluster lid A
After removing the screws, hold the bottom and pull out.
CAUTION:
Cover the surroundings with a cloth to prevent damage.
SBT031A
Center ventilator
Hook a cloth-covered flat-bladed screwdriver into the right-side
groove section, and pull out.
CAUTION:
To prevent the screwdriver from slipping and causing damage
to the surface, pull out while applying pressure on the screw-
driver towards the right.
SBT045A
Cluster lid C
After removing the screws, place hands on the metal clip section,
and pull forward to remove the metal clips.
GI
MA
EM
LC
EC
FE
AT
TF
PD
AX
SU
BR
ST
RS
HA
SC
EL
IDX
INSTRUMENT PANEL ASSEMBLY
Removal and Installation (Cont'd)
BT-25
Page 499 of 2395
SBT040A
Console finisher
1) Open the lid of the cup holders, insert a cloth-covered flat-
bladed screwdriver into the gap between the console and the
finisher, and remove the clip at the back.
2) Lift up the metal clip section, and pull forward to remove.
SBT033A
Console box
1) Pull up the parking brake lever.
2) Remove the screws, pull the console towards the back of the
car until it is free of the instrument panel, lift up the front and
remove.
IIt will be easier to remove if the parking brake lever is pulled
up for more than 10 notches.
SBT034A
Instrument finisher
Remove the screws and pull up.
SBT046A
Instrument lower panel on the passenger side
After removing the screws, hold both sides and pull out horizontally.
SBT047A
Instrument mask
Insert a cloth-covered flat-bladed screwdriver, and remove by lift-
ing up.
INSTRUMENT PANEL ASSEMBLY
Removal and Installation (Cont'd)
BT-26


