stop start INFINITI QX4 2001 Factory Workshop Manual
[x] Cancel search | Manufacturer: INFINITI, Model Year: 2001, Model line: QX4, Model: INFINITI QX4 2001Pages: 2395, PDF Size: 43.2 MB
Page 819 of 2395

5 CHECK HEATED OXYGEN SENSOR 2 (REAR)
With CONSULT-II
1. Start engine and drive vehicle at a speed of more than 70 km/h (43 MPH) for 2 consecutive minutes.
2. Stop vehicle with engine running.
3. Select ªFUEL INJECTIONº in ªACTIVE TESTº mode, and select ªHO2S2 (B1)/(B2)º as the monitor item with CONSULT-
II.
4. Check ªHO2S2 (B1)/(B2)º at idle speed when adjusting ªFUEL INJECTIONº to±25%.
SEF972Y
ªHO2S2 (B1)/(B2)º should be above 0.62V at least once when the ªFUEL INJECTIONº is +25%.
ªHO2S2 (B1)/(B2)º should be below 0.57V at least once when the ªFUEL INJECTIONº is þ25%.
CAUTION:
Discard any heated oxygen sensor which has been dropped from a height of more than 0.5 m (19.7 in) onto a
hard surface such as a concrete floor; use a new one.
OK or NG
OK©GO TO 9.
NG©GO TO 8.
6 CHECK HEATED OXYGEN SENSOR 2 (REAR)-I
Without CONSULT-II
1. Start engine and drive vehicle at a speed of more than 70 km/h (43 MPH) for 2 consecutive minutes.
2. Stop vehicle with engine running.
3. Set voltmeter probes between ECM terminal 72 (HO2S2 bank 1 right signal) or 71 (HO2S2 bank 2 left signal) and
engine ground.
4. Check the voltage when revving up to 4,000 rpm under no load at least 10 times.
(Depress and release accelerator pedal as soon as possible.)
SEF313XA
OK or NG
OK©GO TO 9.
NG©GO TO 7.
DTC P0140, P0160 HEATED OXYGEN SENSOR 2 (REAR) (BANK 1)/(BANK 2)
(HIGH VOLTAGE)
Diagnostic Procedure (Cont'd)
EC-284
Page 822 of 2395

On Board Diagnosis LogicNBEC0165Malfunction is detected when the current amperage in the heated
oxygen sensor 2 heater (rear) circuit is out of the normal range.
[An improper voltage drop signal is sent to ECM through the heated
oxygen sensor 2 heater (rear).]
Possible CauseNBEC0442IHarness or connectors
[The heated oxygen sensor 2 heater (rear) circuit is open or
shorted.]
IHeated oxygen sensor 2 heater (rear)
SEF058Y
DTC Confirmation ProcedureNBEC0166NOTE:
If ªDTC Confirmation Procedureº has been previously conducted,
always turn ignition switch ªOFFº and wait at least 10 seconds
before conducting the next test.
TESTING CONDITION:
Before performing the following procedure, confirm that bat-
tery voltage is between 10.5V and 16V at idle.
WITH CONSULT-IINBEC0166S011) Turn ignition switch ªONº and select ªDATA MONITORº mode
with CONSULT-II.
2) Start engine.
3) Drive vehicle at a speed of more than 70 km/h (43 MPH) for 2
consecutive minutes.
4) Stop vehicle and let engine idle for at least 6 seconds.
5) If 1st trip DTC is detected, go to ªDiagnostic Procedureº,
EC-291.
WITH GSTNBEC0166S021) Start engine.
2) Drive vehicle at a speed of more than 70 km/h (43 MPH) for 2
consecutive minutes.
3) Stop vehicle and let engine idle for at least 6 seconds.
4) Turn ignition switch ªOFFº and wait at least 10 seconds.
5) Start engine.
6) Drive vehicle at a speed of more than 70 km/h (43 MPH) for 2
consecutive minutes.
7) Stop vehicle and let engine idle for at least 6 seconds.
8) Select ªMODE 3º with GST.
9) If DTC is detected, go to ªDiagnostic Procedureº, EC-291.
IWhen using GST, ªDTC Confirmation Procedureº should
be performed twice as much as when using CONSULT-II
GI
MA
EM
LC
FE
AT
TF
PD
AX
SU
BR
ST
RS
BT
HA
SC
EL
IDX
DTC P0141, P0161 HEATED OXYGEN SENSOR 2 HEATER (REAR) (BANK 1)/
(BANK 2)
On Board Diagnosis Logic
EC-287
Page 830 of 2395

SEF960Y
WITH GSTNBEC0170S021) Start engine and warm it up to normal operating temperature.
2) Turn ignition switch ªOFFº and wait at least 10 seconds.
3) Disconnect mass air flow sensor harness connector. Then
restart and run engine for at least 5 seconds at idle speed.
4) Stop engine and reconnect mass air flow sensor harness con-
nector.
5) Select ªMODE 7º with GST. Make sure 1st trip DTC P0100 is
detected.
6) Select ªMODE 4º with GST and erase the 1st trip DTC P0100.
7) Start engine again and let it idle for at least 10 minutes.
8) Select ªMODE 7º with GST. The 1st trip DTC P0171 or P0174
should be detected at this stage, if a malfunction exists. If so,
go to ªDiagnostic Procedureº, EC-298.
9) If it is difficult to start engine at step 7, the fuel injection sys-
tem has a malfunction.
10) Crank engine while depressing accelerator pedal. If engine
starts, go to ªDiagnostic Procedureº, EC-298. If engine does
not start, check exhaust and intake air leak visually.
GI
MA
EM
LC
FE
AT
TF
PD
AX
SU
BR
ST
RS
BT
HA
SC
EL
IDX
DTC P0171 (RIGHT, -B1), P0174 (LEFT, -B2) FUEL INJECTION SYSTEM
FUNCTION (LEAN)
DTC Confirmation Procedure (Cont'd)
EC-295
Page 838 of 2395

SEF960Y
WITH GSTNBEC0174S021) Start engine and warm it up to normal operating temperature.
2) Turn ignition switch ªOFFº and wait at least 10 seconds.
3) Disconnect mass air flow sensor harness connector. Then
restart and run engine for at least 5 seconds at idle speed.
4) Stop engine and reconnect mass air flow sensor harness con-
nector.
5) Select ªMODE 7º with GST. Make sure 1st trip DTC P0100 is
detected.
6) Select ªMODE 4º with GST and erase the 1st trip DTC P0100.
7) Start engine again and let it idle for at least 10 minutes.
8) Select ªMODE 7º with GST. The 1st trip DTC P0172 or P0175
should be detected at this stage, if a malfunction exists. If so,
go to ªDiagnostic Procedureº, EC-306.
9) If it is difficult to start engine at step 7, the fuel injection sys-
tem has a malfunction.
10) Crank engine while depressing accelerator pedal.
If engine starts, go to ªDiagnostic Procedureº, EC-306. If
engine does not start, check exhaust and intake air leak visu-
ally.
GI
MA
EM
LC
FE
AT
TF
PD
AX
SU
BR
ST
RS
BT
HA
SC
EL
IDX
DTC P0172 (RIGHT, -B1), P0175 (LEFT, -B2) FUEL INJECTION SYSTEM
FUNCTION (RICH)
DTC Confirmation Procedure (Cont'd)
EC-303
Page 856 of 2395

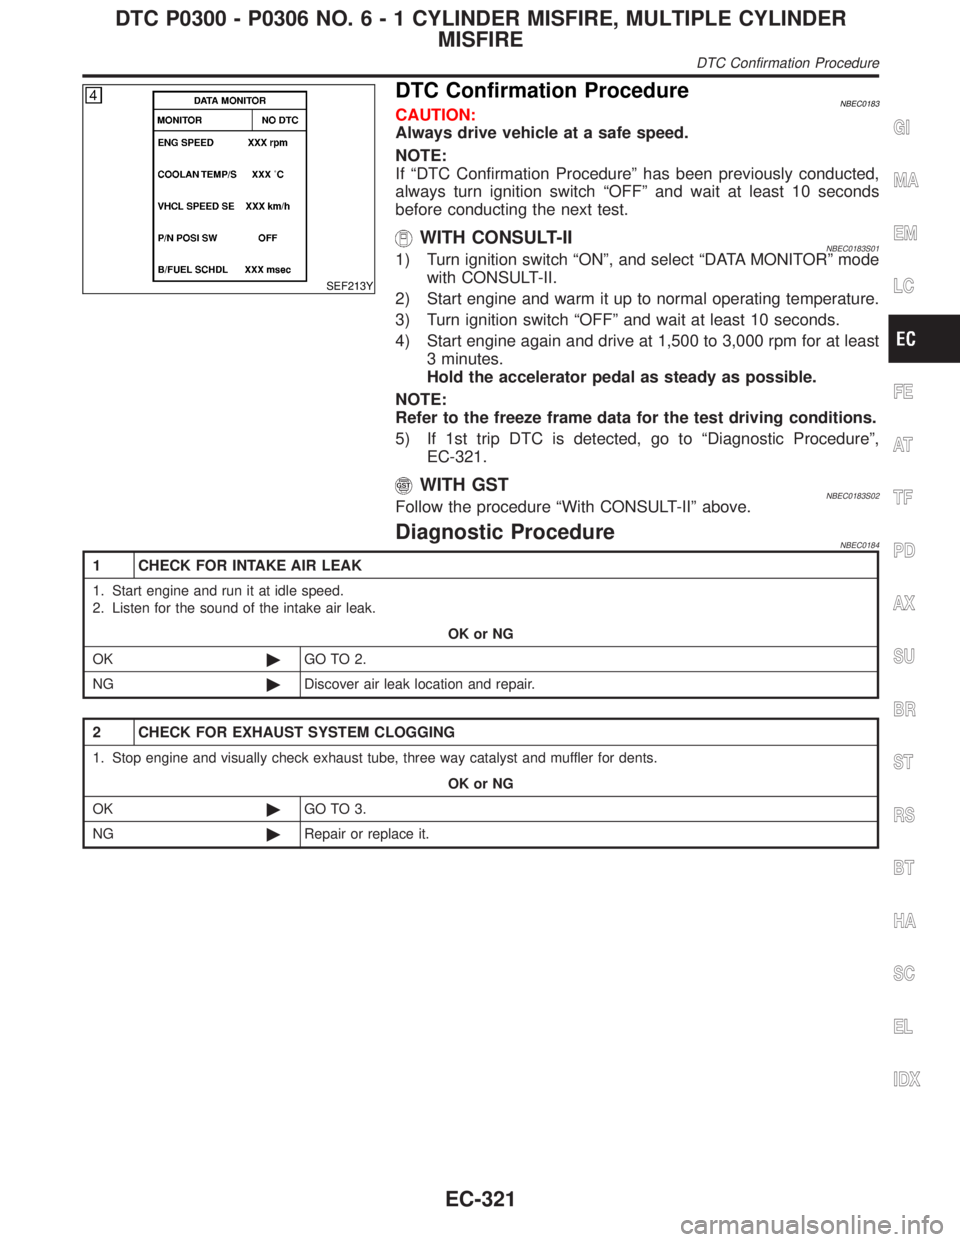
SEF213Y
DTC Confirmation ProcedureNBEC0183CAUTION:
Always drive vehicle at a safe speed.
NOTE:
If ªDTC Confirmation Procedureº has been previously conducted,
always turn ignition switch ªOFFº and wait at least 10 seconds
before conducting the next test.
WITH CONSULT-IINBEC0183S011) Turn ignition switch ªONº, and select ªDATA MONITORº mode
with CONSULT-II.
2) Start engine and warm it up to normal operating temperature.
3) Turn ignition switch ªOFFº and wait at least 10 seconds.
4) Start engine again and drive at 1,500 to 3,000 rpm for at least
3 minutes.
Hold the accelerator pedal as steady as possible.
NOTE:
Refer to the freeze frame data for the test driving conditions.
5) If 1st trip DTC is detected, go to ªDiagnostic Procedureº,
EC-321.
WITH GSTNBEC0183S02Follow the procedure ªWith CONSULT-IIº above.
Diagnostic ProcedureNBEC0184
1 CHECK FOR INTAKE AIR LEAK
1. Start engine and run it at idle speed.
2. Listen for the sound of the intake air leak.
OK or NG
OK©GO TO 2.
NG©Discover air leak location and repair.
2 CHECK FOR EXHAUST SYSTEM CLOGGING
1. Stop engine and visually check exhaust tube, three way catalyst and muffler for dents.
OK or NG
OK©GO TO 3.
NG©Repair or replace it.
GI
MA
EM
LC
FE
AT
TF
PD
AX
SU
BR
ST
RS
BT
HA
SC
EL
IDX
DTC P0300 - P0306 NO.6-1CYLINDER MISFIRE, MULTIPLE CYLINDER
MISFIRE
DTC Confirmation Procedure
EC-321
Page 883 of 2395

SEF344Z
DTC Confirmation ProcedureNBEC0215
SEF345Z
SEF560X
NOTE:
If ªDTC Confirmation Procedureº has been previously conducted,
always turn ignition switch ªOFFº and wait at least 10 seconds
before conducting the next test.
WITH CONSULT-IINBEC0215S01TESTING CONDITION:
IOpen engine hood before conducting the following proce-
dure.
IDo not hold engine speed for more than the specified
minutes below.
1) Turn ignition switch ªONº.
2) Select ªDTC & SRT CONFIRMATIONº then ªSRT WORK SUP-
PORTº mode with CONSULT-II.
3) Start engine.
4) Rev engine up to 3,000±500 rpm and hold it for 3 consecutive
minutes then release the accelerator pedal completely.
5) Wait 5 seconds at idle.
6) Rev engine up to 2,500±500 rpm and maintain it until ªINCMPº
of CATALYST changes to ªCMPLTº (It will take approximately
5 minutes).
If not ªCMPLTº, stop engine and cool it down to less than 70ÉC
(158ÉF) and then retest from step 1.
7) Select ªSELF-DIAG RESULTSº mode with CONSULT-II.
8) Confirm that the 1st trip DTC is not detected.
If the 1st trip DTC is detected, go to ªDiagnostic Procedureº,
EC-349.
SEF329X
SEF330X
Overall Function CheckNBEC0216Use this procedure to check the overall function of the warm-up
three way catalyst. During this check, a 1st trip DTC might not be
confirmed.
CAUTION:
Always drive vehicle at a safe speed.
WITH GSTNBEC0216S011) Start engine and drive vehicle at a speed of more than 70 km/h
(43 MPH) for 2 consecutive minutes.
2) Stop vehicle with engine running.
3) Set voltmeters probes between ECM terminals 63 [heated oxy-
gen sensor 1 (front) right bank signal], 62 [heated oxygen
sensor 1 (front) left bank signal] and engine ground, and ECM
terminals 72 [heated oxygen sensor 2 (rear) right bank signal],
71 [heated oxygen sensor 2 (rear) left bank signal] and engine
ground.
4) Keep engine speed at 2,000 rpm constant under no load.
5) Make sure that the voltage switching frequency (high & low)
between ECM terminals 72 and engine ground, or 71 and
engine ground is very less than that of ECM terminals 63 and
engine ground, or 62 and engine ground.
Switching frequency ratio = A/B
DTC P0420 (RIGHT BANK, -B1), P0430 (LEFT BANK, -B2) THREE WAY
CATALYST FUNCTION
DTC Confirmation Procedure
EC-348
Page 889 of 2395

SEF565X
DTC Confirmation ProcedureNBEC0219
SEF566X
SEF874X
SEF567X
NOTE:
IIf DTC P0440 or P1440 is displayed with P1448, perform
trouble diagnosis for DTC P1448 first. (See EC-573.)
IIf ªDTC Confirmation Procedureº has been previously
conducted, always turn ignition switch ªOFFº and wait at least
10 seconds before conducting the next test.
TESTING CONDITION:
IPerform ªDTC WORK SUPPORTº when the fuel level is
between 1/4 to 3/4 full and vehicle is placed on flat level
surface.
IOpen engine hood before conducting the following proce-
dure.
WITH CONSULT-IINBEC0219S011) Turn ignition switch ªONº.
2) Turn ignition switch ªOFFº and wait at least 10 seconds.
3) Turn ignition switch ªONº and select ªDATA MONITORº mode
with CONSULT-II.
4) Make sure that the following conditions are met.
COOLAN TEMP/S: 0 - 70ÉC (32 - 158ÉF)
INT/A TEMP SE: 0 - 30ÉC (32 - 86ÉF)
5) Select ªEVAP SML LEAK P0440/P1440º of ªEVAPORATIVE
SYSTEMº in ªDTC WORK SUPPORTº mode with CONSULT-
II.
Follow the instruction displayed.
NOTE:
If the engine speed cannot be maintained within the range dis-
played on the CONSULT-II screen, go to ªBasic Inspectionº,
EC-101.
6) Make sure that ªOKº is displayed.
If ªNGº is displayed, refer to ªDiagnostic Procedureº, EC-355.
NOTE:
Make sure that EVAP hoses are connected to EVAP canister
purge volume control solenoid valve properly.
WITH GSTNBEC0219S02NOTE:
Be sure to read the explanation of ªDriving Patternº on EC-66
before driving vehicle.
1) Start engine.
2) Drive vehicle according to ªDriving Patternº, EC-66.
3) Stop vehicle.
4) Select ªMODE 1º with GST.
IIf SRT of EVAP system is not set yet, go to the following step.
IIf SRT of EVAP system is set, the result will be OK.
5) Turn ignition switch ªOFFº and wait at least 10 seconds.
6) Start engine.
It is not necessary to cool engine down before driving.
7) Drive vehicle again according to the ªDriving Patternº, EC-66.
8) Stop vehicle.
9) Select ªMODE 3º with GST.
IIf P0440 or P1440 is displayed on the screen, go to ªDiagnos-
tic Procedureº, EC-355.
IIf P1447 is displayed on the screen, go to ªDiagnostic Proce-
dureº for DTC P1447, EC-564.
DTC P0440 EVAP CONTROL SYSTEM (SMALL LEAK) (NEGATIVE PRESSURE)
DTC Confirmation Procedure
EC-354
Page 896 of 2395

11 CHECK EVAP CANISTER
Weigh the EVAP canister with the EVAP canister vent control valve attached.
The weight should be less than 1.8 kg (4.0 lb).
OK or NG
OK (With CONSULT-II)©GO TO 13.
OK (Without CONSULT-
II)©GO TO 14.
NG©GO TO 12.
12 DETECT MALFUNCTIONING PART
Check the following.
IEVAP canister for damage
IEVAP hose between EVAP canister and water separator for clogging or poor connection
©Repair hose or replace EVAP canister.
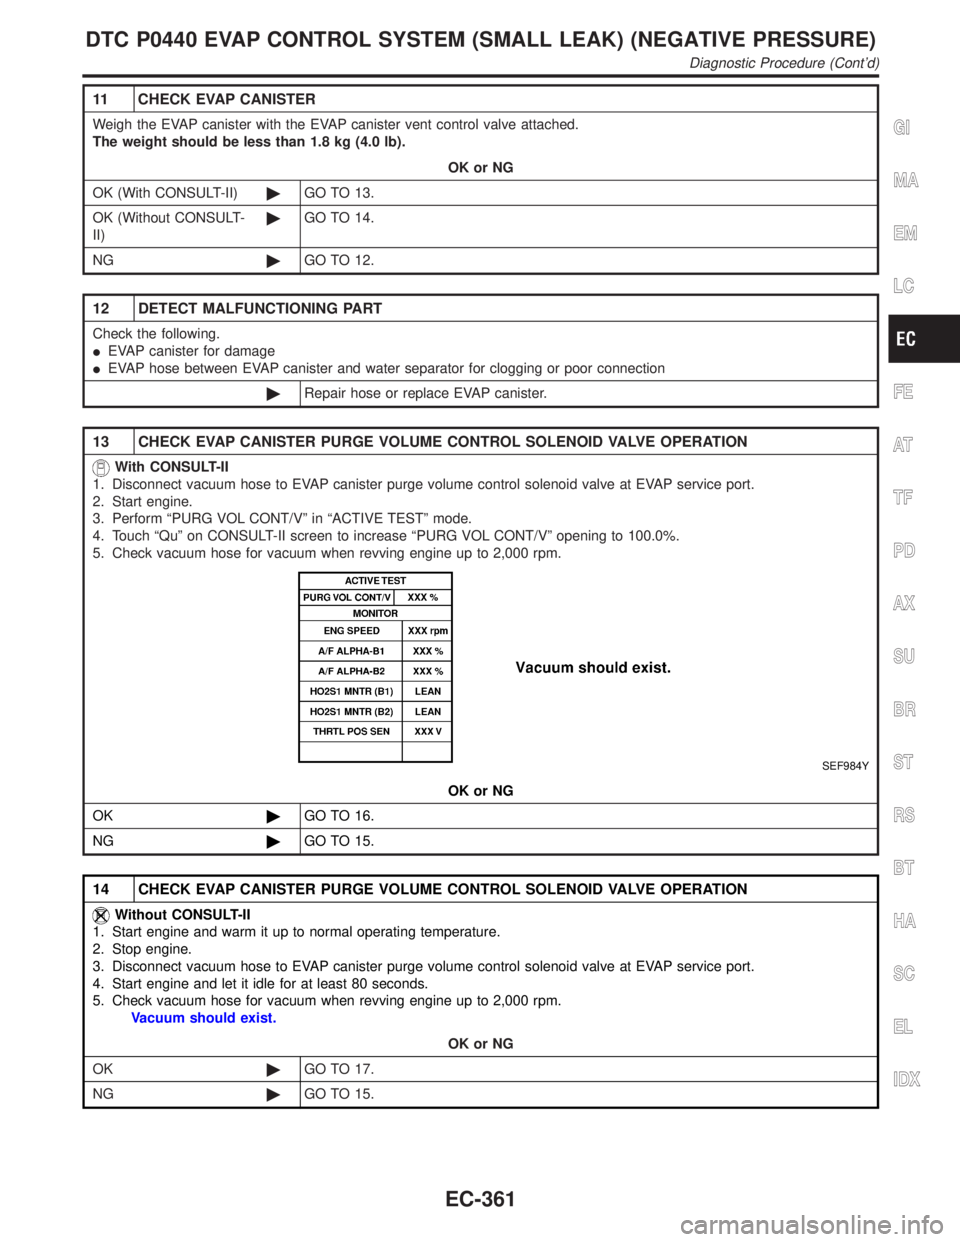
13 CHECK EVAP CANISTER PURGE VOLUME CONTROL SOLENOID VALVE OPERATION
With CONSULT-II
1. Disconnect vacuum hose to EVAP canister purge volume control solenoid valve at EVAP service port.
2. Start engine.
3. Perform ªPURG VOL CONT/Vº in ªACTIVE TESTº mode.
4. Touch ªQuº on CONSULT-II screen to increase ªPURG VOL CONT/Vº opening to 100.0%.
5. Check vacuum hose for vacuum when revving engine up to 2,000 rpm.
SEF984Y
OK or NG
OK©GO TO 16.
NG©GO TO 15.
14 CHECK EVAP CANISTER PURGE VOLUME CONTROL SOLENOID VALVE OPERATION
Without CONSULT-II
1. Start engine and warm it up to normal operating temperature.
2. Stop engine.
3. Disconnect vacuum hose to EVAP canister purge volume control solenoid valve at EVAP service port.
4. Start engine and let it idle for at least 80 seconds.
5. Check vacuum hose for vacuum when revving engine up to 2,000 rpm.
Vacuum should exist.
OK or NG
OK©GO TO 17.
NG©GO TO 15.
GI
MA
EM
LC
FE
AT
TF
PD
AX
SU
BR
ST
RS
BT
HA
SC
EL
IDX
DTC P0440 EVAP CONTROL SYSTEM (SMALL LEAK) (NEGATIVE PRESSURE)
Diagnostic Procedure (Cont'd)
EC-361
Page 902 of 2395

DescriptionNBEC0221SYSTEM DESCRIPTIONNBEC0221S01
Sensor Input Signal to ECMECM
functionActuator
Crankshaft position sensor (POS) Engine speed (POS signal)
EVAP can-
ister purge
flow controlEVAP canister purge volume
control solenoid valve Crankshaft position sensor (REF) Engine speed (REF signal)
Mass air flow sensor Amount of intake air
Engine coolant temperature sensor Engine coolant temperature
Ignition switch Start signal
Throttle position sensor Throttle position
Throttle position switch Closed throttle position
Heated oxygen sensor 1 (front)Density of oxygen in exhaust gas
(Mixture ratio feedback signal)
Fuel tank temperature sensor Fuel temperature in fuel tank
Vehicle speed sensor Vehicle speed
This system controls flow rate of fuel vapor from the EVAP canis-
ter. The opening of the vapor by-pass passage in the EVAP canis-
ter purge volume control solenoid valve changes to control the flow
rate. The EVAP canister purge volume control solenoid valve
repeats ON/OFF operation according to the signal sent from the
ECM. The opening of the valve varies for optimum engine control.
The optimum value stored in the ECM is determined by consider-
ing various engine conditions. When the engine is operating, the
flow rate of fuel vapor from the EVAP canister is regulated as the
air flow changes.
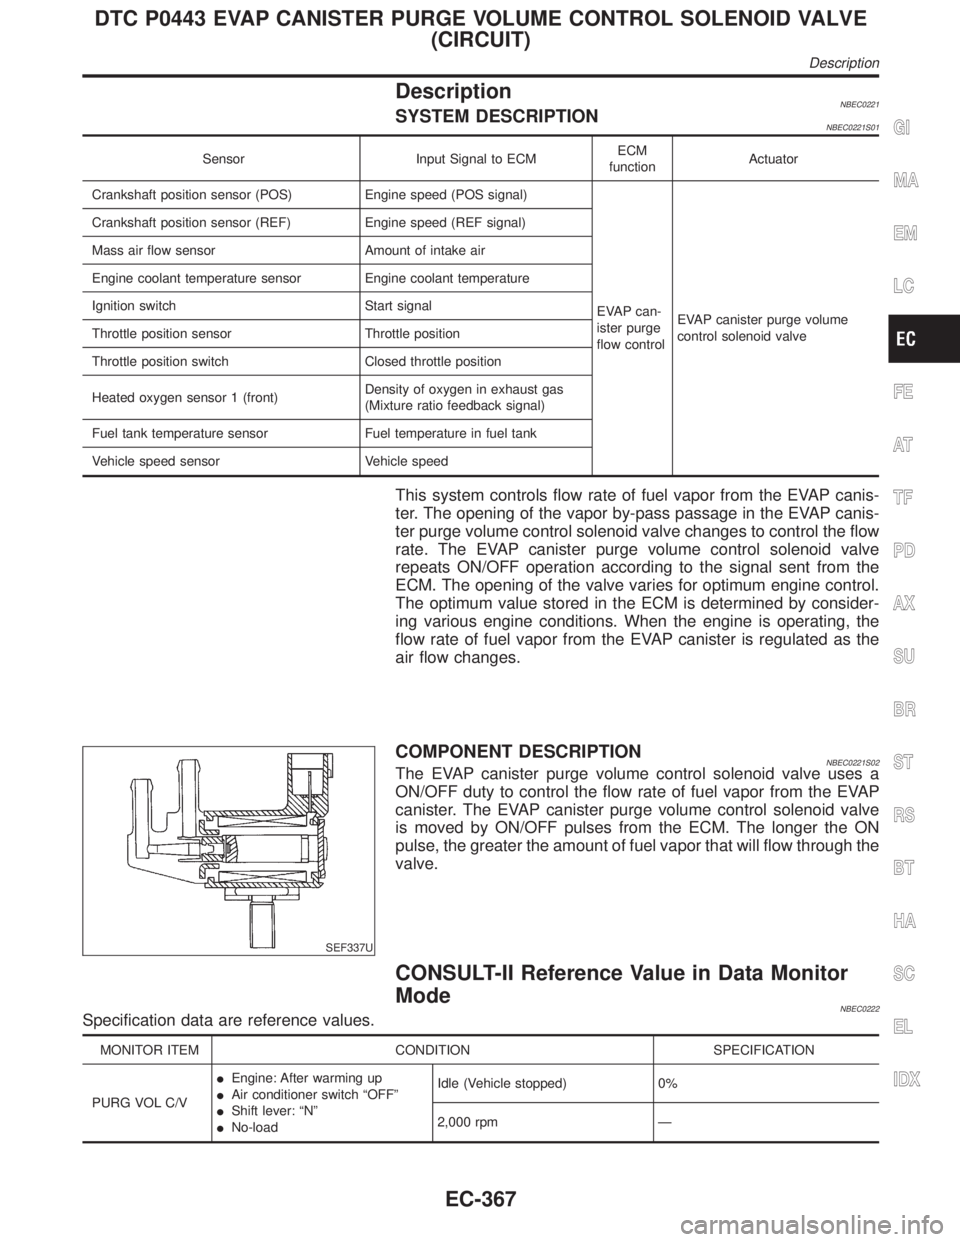
SEF337U
COMPONENT DESCRIPTIONNBEC0221S02The EVAP canister purge volume control solenoid valve uses a
ON/OFF duty to control the flow rate of fuel vapor from the EVAP
canister. The EVAP canister purge volume control solenoid valve
is moved by ON/OFF pulses from the ECM. The longer the ON
pulse, the greater the amount of fuel vapor that will flow through the
valve.
CONSULT-II Reference Value in Data Monitor
Mode
NBEC0222Specification data are reference values.
MONITOR ITEM CONDITION SPECIFICATION
PURG VOL C/VIEngine: After warming up
IAir conditioner switch ªOFFº
IShift lever: ªNº
INo-loadIdle (Vehicle stopped) 0%
2,000 rpm Ð
GI
MA
EM
LC
FE
AT
TF
PD
AX
SU
BR
ST
RS
BT
HA
SC
EL
IDX
DTC P0443 EVAP CANISTER PURGE VOLUME CONTROL SOLENOID VALVE
(CIRCUIT)
Description
EC-367
Page 931 of 2395

SEF565X
DTC Confirmation ProcedureNBEC0646
SEF566X
SEF874X
SEF567X
CAUTION:
Never remove fuel filler cap during the DTC Confirmation Pro-
cedure.
NOTE:
IIf DTC P0455 is displayed with P1448, perform trouble
diagnosis for DTC P1448 first. (See EC-573.)
IMake sure that EVAP hoses are connected to EVAP canis-
ter purge volume control solenoid valve properly.
IIf ªDTC Confirmation Procedureº has been previously
conducted, always turn ignition switch ªOFFº and wait at least
10 seconds before conducting the next test.
TESTING CONDITION:
IPerform ªDTC WORK SUPPORTº when the fuel level is
between 1/4 to 3/4 full and vehicle is placed on flat level
surface.
IOpen engine hood before conducting the following proce-
dures.
WITH CONSULT-IINBEC0646S011) Tighten fuel filler cap securely until ratcheting sound is heard.
2) Turn ignition switch ªONº.
3) Turn ignition switch ªOFFº and wait at least 10 seconds.
4) Turn ignition switch ªONº and select ªDATA MONITORº mode
with CONSULT-II.
5) Make sure that the following conditions are met.
COOLAN TEMP/S: 0 - 70ÉC (32 - 158ÉF)
INT/A TEMP SE: 0 - 60ÉC (32 - 140ÉF)
6) Select ªEVAP SML LEAK P0440/P1440º of ªEVAPORATIVE
SYSTEMº in ªDTC WORK SUPPORTº mode with CONSULT-
II.
Follow the instruction displayed.
NOTE:
If the engine speed cannot be maintained within the range dis-
played on the CONSULT-II screen, go to ªBasic Inspectionº,
EC-101.
7) Make sure that ªOKº is displayed.
If ªNGº is displayed, select ªSELF-DIAG RESULTSº mode and
make sure that ªEVAP GROSS LEAK [P0455]º is displayed. If
it is displayed, refer to ªDiagnostic Procedureº, EC-397.
If P0440 is displayed, perform ªDiagnostic Procedureº for DTC
P0440.
WITH GSTNBEC0646S02NOTE:
Be sure to read the explanation of ªDriving Patternº on EC-66
before driving vehicle.
1) Start engine.
2) Drive vehicle according to ªDriving Patternº, EC-66.
3) Stop vehicle.
4) Select ªMODE 1º with GST.
IIf SRT of EVAP system is not set yet, go to the following step.
IIf SRT of EVAP system is set, the result will be OK.
5) Turn ignition switch ªOFFº and wait at least 10 seconds.
6) Start engine.
It is not necessary to cool engine down before driving.
7) Drive vehicle again according to the ªDriving Patternº, EC-66.
DTC P0455 EVAP CONTROL SYSTEM (GROSS LEAK)
DTC Confirmation Procedure
EC-396