display INFINITI QX56 2007 Factory Service Manual
[x] Cancel search | Manufacturer: INFINITI, Model Year: 2007, Model line: QX56, Model: INFINITI QX56 2007Pages: 3061, PDF Size: 64.56 MB
Page 419 of 3061

TROUBLE DIAGNOSISATC-49
< SERVICE INFORMATION >
C
DE
F
G H
I
K L
M A
B
AT C
N
O P
The self-diagnostic system diagnoses sensors, door motors, blower motor, etc. Refer to applicable sections
(items) for details. Fault codes (if any are present) wil l be displayed in the ambient temperature display area.
Refer to "SELF-DIAGNOSIS CODE CHART" .
SELF-DIAGNOSIS CODE CHART
WJIA1913E
Code No. Reference page
02 EE changed by calibration ATC-123, "
Removal and Installation"
03 Battery voltage out of rangeSC-4
12 Air mix door motor (Passenger) circuit failureAT C - 5 9 , "Air Mix Door Motor Circuit"
20 BCM not responding to A/C requestAT C - 9 6 , "Magnet Clutch Circuit"
21 BCM not responding to rear defroster requestGW-68
22 Air mix door motor (Driver) circuit failure AT C - 5 9 , "Air Mix Door Motor Circuit"
30 In-vehicle sensor circuit out of range (low)
AT C - 11 6 , "In-vehicle Sensor Circuit"31 In-vehicle sensor circuit out of range (high)
38 Air mix door motor (rear) circuit failure AT C - 5 9 , "
Air Mix Door Motor Circuit"
40 Ambient sensor circuit short
AT C - 11 4 , "Ambient Sensor Circuit"41 Ambient sensor circuit open
44 In-vehicle sensor motor circuit openATC-120, "
Intake Sensor Circuit"46 In-vehicle sensor motor circuit short
50 Optical sensor (Driver) circuit open or shortAT C - 11 9 , "
Optical Sensor Circuit"52 Optical sensor (Passenger) circuit open or short
56 Intake sensor circuit shortATC-120, "
Intake Sensor Circuit"57 Intake sensor circuit open
62 Defroster door motor circuit failureAT C - 7 4 , "
Defroster Door Motor Circuit"
80 CAN bus faultLAN-4, "CAN Communication System"
82 Intake door motor (d river) circuit malfunction AT C - 7 0 , "Intake Door Motor Circuit"
Page 420 of 3061

ATC-50
< SERVICE INFORMATION >
TROUBLE DIAGNOSIS
Operational Check (Front)
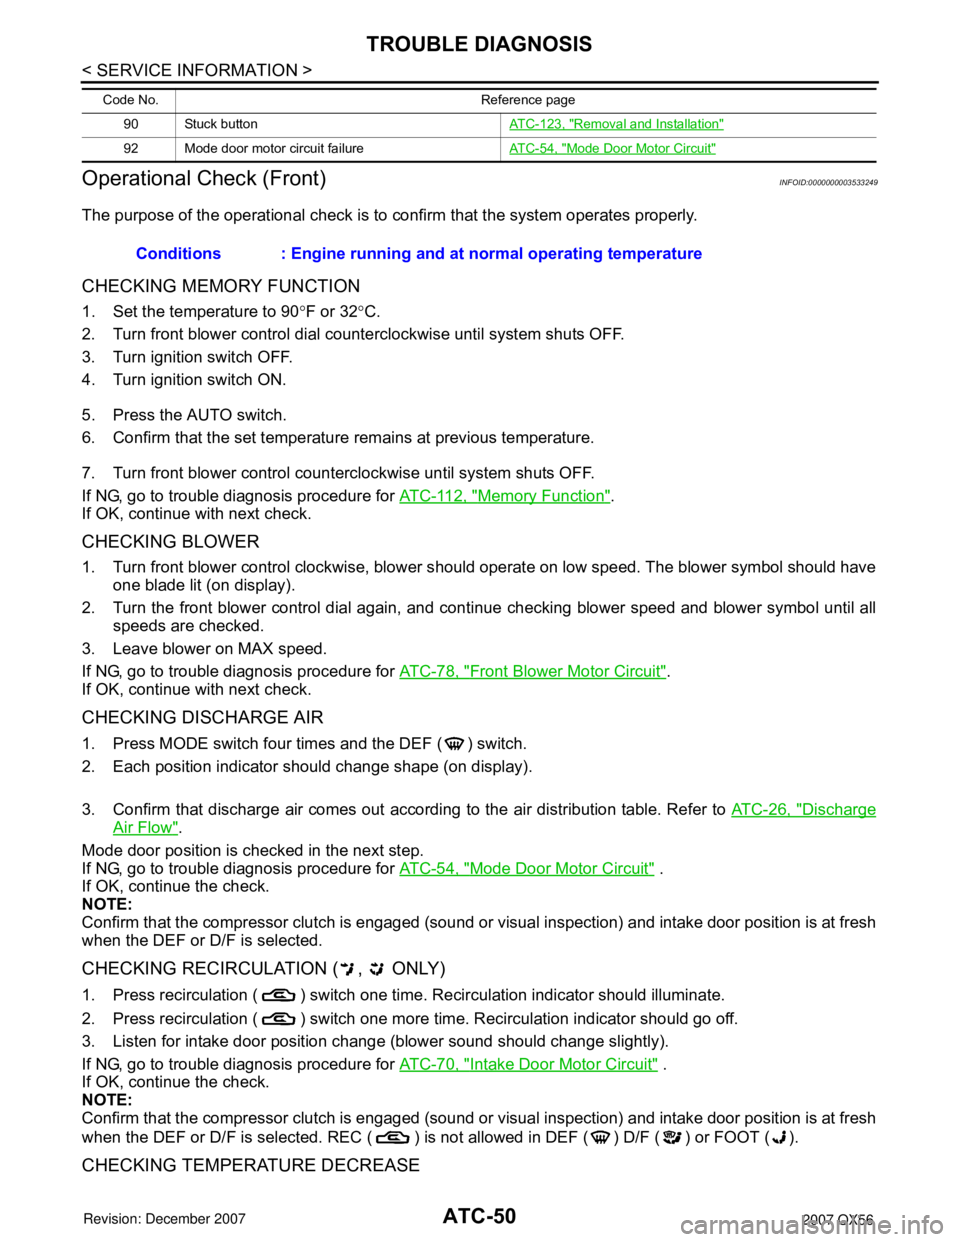
INFOID:0000000003533249
The purpose of the operational check is to confirm that the system operates properly.
CHECKING MEMORY FUNCTION
1. Set the temperature to 90 °F or 32 °C.
2. Turn front blower control dial counterclockwise until system shuts OFF.
3. Turn ignition switch OFF.
4. Turn ignition switch ON.
5. Press the AUTO switch.
6. Confirm that the set temperature remains at previous temperature.
7. Turn front blower control counterclockwise until system shuts OFF.
If NG, go to trouble diagnosis procedure for ATC-112, "
Memory Function".
If OK, continue with next check.
CHECKING BLOWER
1. Turn front blower control clockwise, blower s hould operate on low speed. The blower symbol should have
one blade lit (on display).
2. Turn the front blower control dial again, and c ontinue checking blower speed and blower symbol until all
speeds are checked.
3. Leave blower on MAX speed.
If NG, go to trouble diagnosis procedure for ATC-78, "
Front Blower Motor Circuit".
If OK, continue with next check.
CHECKING DISCHARGE AIR
1. Press MODE switch four times and the DEF ( ) switch.
2. Each position indicator should change shape (on display).
3. Confirm that discharge air comes out according to the air distribution table. Refer to ATC-26, "
Discharge
Air Flow".
Mode door position is checked in the next step.
If NG, go to trouble diagnosis procedure for ATC-54, "
Mode Door Motor Circuit" .
If OK, continue the check.
NOTE:
Confirm that the compressor clutch is engaged (sound or vis ual inspection) and intake door position is at fresh
when the DEF or D/F is selected.
CHECKING RECIRCULATION ( , ONLY)
1. Press recirculation ( ) switch one time. Recirculation indicator should illuminate.
2. Press recirculation ( ) switch one more time. Recirculation indicator should go off.
3. Listen for intake door position change (blower sound should change slightly).
If NG, go to trouble diagnosis procedure for ATC-70, "
Intake Door Motor Circuit" .
If OK, continue the check.
NOTE:
Confirm that the compressor clutch is engaged (sound or vis ual inspection) and intake door position is at fresh
when the DEF or D/F is selected. REC ( ) is not allowed in DEF ( ) D/F ( ) or FOOT ( ).
CHECKING TEMPERATURE DECREASE
90 Stuck button ATC-123, "Removal and Installation"
92 Mode door motor circuit failureAT C - 5 4 , "Mode Door Motor Circuit"
Code No. Reference page
Conditions : Engine running and at normal operating temperature
Page 421 of 3061

TROUBLE DIAGNOSISATC-51
< SERVICE INFORMATION >
C
DE
F
G H
I
K L
M A
B
AT C
N
O P
1. Rotate temperature control dial (driver si de or passenger side) counterclockwise until 16 °C (60 °F) is dis-
played.
2. Check for cold air at appropriate discharge air outlets.
If NG, listen for sound of air mix door motor operat ion. If OK, go to trouble diagnosis procedure for ATC-100,
"Insufficient Cooling" . If air mix door motor appears to be malfunctioning, go to ATC-59, "Air Mix Door Motor
Circuit" or ATC-59, "Air Mix Door Motor Circuit".
If OK, continue the check.
CHECKING TEMPERATURE INCREASE
1. Rotate temperature control dial clockw ise (driver side or passenger side) until 32°C (90 °F) is displayed.
2. Check for hot air at appropriate discharge air outlets.
If NG, listen for sound of air mix door motor operat ion. If OK, go to trouble diagnosis procedure for ATC-108,
"Insufficient Heating" . If air mix door motor appears to be malfunctioning, go to ATC-59, "Air Mix Door Motor
Circuit" or ATC-59, "Air Mix Door Motor Circuit".
If OK, continue with next check.
CHECK A/C SWITCH
1. Press A/C switch when AUTO switch is ON, or in manual mode.
2. A/C switch indicator will turn ON.
• Confirm that the compressor clutch engages (sound or visual inspection).
NOTE:
If current mode setting is DEF or D/F, compressor clutch may already be engaged.
If NG, go to trouble diagnosis procedure for ATC-96, "
Magnet Clutch Circuit" .
If OK, continue with next check.
CHECKING AUTO MODE
1. Press AUTO switch.
2. Display should indicate AUTO.
• If ambient temperature is warm, and selected temperat ure is cool, confirm that the compressor clutch
engages (sound or visual inspection). (Discharge air and blower speed will depend on ambient, in-vehi-
cle, and set temperatures.)
If NG, go to trouble diagnosis procedure for ATC-52, "
Power Supply and Ground Circuit for Front Air Control" ,
then if necessary, trouble diagnosis procedure for ATC-96, "
Magnet Clutch Circuit" .
If all operational checks are OK (symptom cannot be duplicated), go to malfunction Simulation Tests in AT C -
32, "How to Perform Trouble Diagnosis for Quick and Accurate Repair" and perform tests as outlined to simu-
late driving conditions environment . If symptom appears. Refer to ATC-32, "
How to Perform Trouble Diagnosis
for Quick and Accurate Repair", ATC-32, "How to Perform Trouble Diagnosis for Quick and Accurate Repair"
and perform applicable trouble diagnosis procedures.
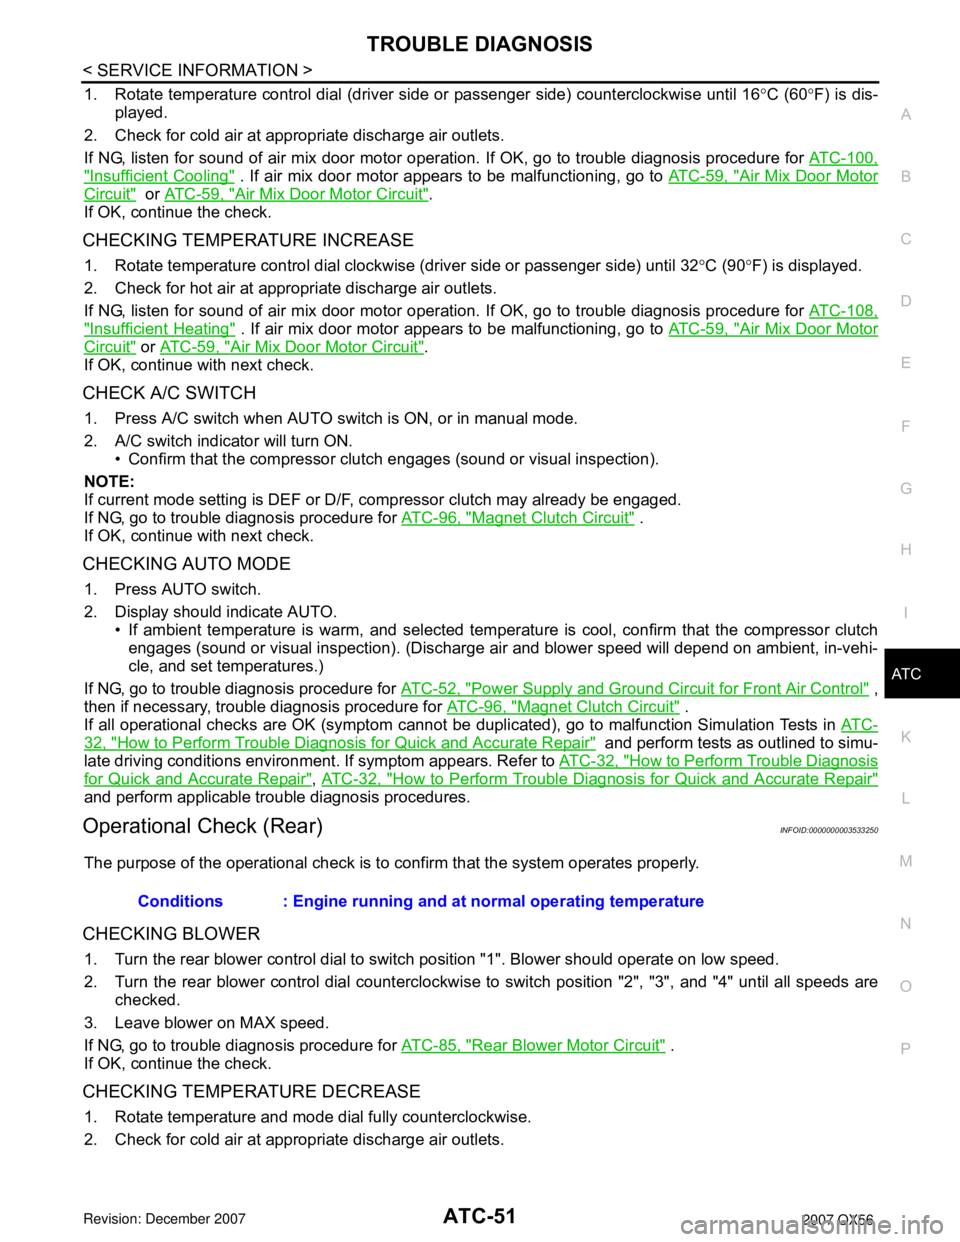
Operational Check (Rear)INFOID:0000000003533250
The purpose of the operational check is to confirm that the system operates properly.
CHECKING BLOWER
1. Turn the rear blower control dial to swit ch position "1". Blower should operate on low speed.
2. Turn the rear blower control dial counterclockwis e to switch position "2", "3", and "4" until all speeds are
checked.
3. Leave blower on MAX speed.
If NG, go to trouble diagnosis procedure for ATC-85, "
Rear Blower Motor Circuit" .
If OK, continue the check.
CHECKING TEMPERATURE DECREASE
1. Rotate temperature and mode dial fully counterclockwise.
2. Check for cold air at appropriate discharge air outlets. Conditions : Engine running and at normal operating temperature
Page 422 of 3061

ATC-52
< SERVICE INFORMATION >
TROUBLE DIAGNOSIS
If NG, listen for sound of air mix door motor operation if OK, go to trouble diagnosis procedure for ATC-100,
"Insufficient Cooling" . If air mix door motor appears to be malfunctioning, go to ATC-59, "Air Mix Door Motor
Circuit".
If OK, continue the check.
CHECKING TEMPERATURE INCREASE
1. Rotate temperature and mode dial clockwise.
2. Check for hot air at appropriate discharge air outlets.
If NG, listen for sound of air mix door motor operat ion. If OK, go to trouble diagnosis procedure for ATC-108,
"Insufficient Heating". If air mix door motor appears to be malfunctioning, go to ATC-59, "Air Mix Door Motor
Circuit" .
If OK, continue the check.
Power Supply and Ground Circu it for Front Air ControlINFOID:0000000003533251
SYMPTOM: A/C system does not come on.
INSPECTION FLOW
1.CONFIRM SYMPTOM BY PERFORMING OPERATIONAL CHECK - AUTO MODE
1. Press AUTO switch.
2. Display should indicate AUTO. Confirm that the compressor clutch engages (sound or visual inspection).
(Discharge air and blower speed will depend on am bient, in-vehicle and set temperatures.)
Can a symptom be duplicated?
YES >> GO TO 3.
NO >> GO TO 2.
2.PERFORM COMPLETE OPERATIONAL CHECK
Perform a complete operational check and check for any symptoms. Refer to ATC-50, "
Operational Check
(Front)".
Can a symptom be duplicated
YES >> Refer to ATC-32, "How to Perform Trouble Diagnosis for Quick and Accurate Repair".
NO >> System OK.
3.CHECK FOR SERVICE BULLETINS
Check for any service bulletins.
>> GO TO 4.
4.CHECK POWER AND GROUND CIRCUIT
Check main power supply and ground circuit. Refe r to "DIAGNOSTIC PROCEDURE FOR A/C SYSTEM".
OK or NG
OK >> System OK.
NO >> Replace front air control. Refer to ATC-123, "
Removal and Installation".
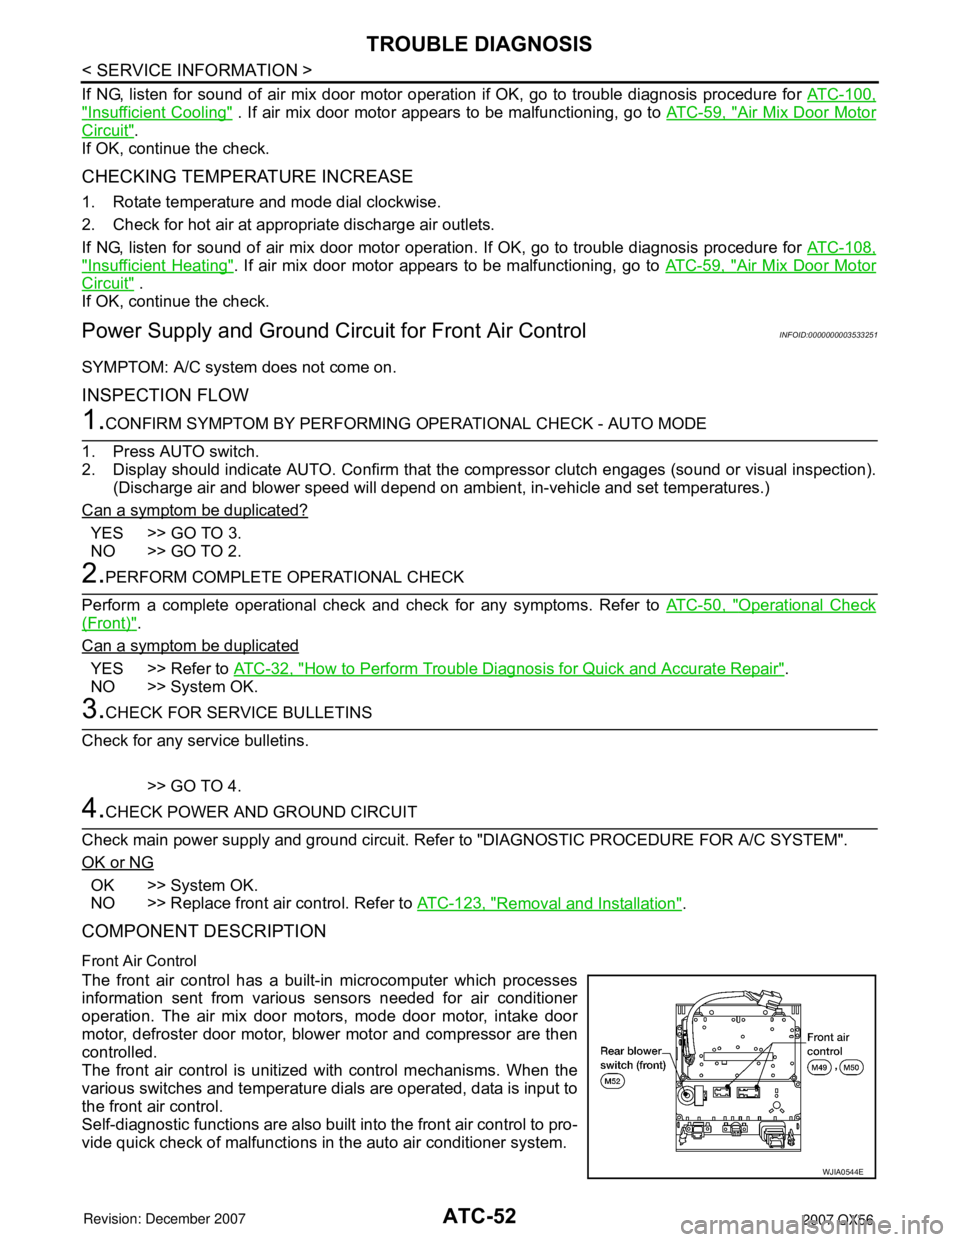
COMPONENT DESCRIPTION
Front Air Control
The front air control has a built-in microcomputer which processes
information sent from various sensors needed for air conditioner
operation. The air mix door motors, mode door motor, intake door
motor, defroster door motor, blower motor and compressor are then
controlled.
The front air control is unitized with control mechanisms. When the
various switches and temperature dials are operated, data is input to
the front air control.
Self-diagnostic functions are also built into the front air control to pro-
vide quick check of malfunctions in the auto air conditioner system.
WJIA0544E
Page 423 of 3061

TROUBLE DIAGNOSISATC-53
< SERVICE INFORMATION >
C
DE
F
G H
I
K L
M A
B
AT C
N
O P
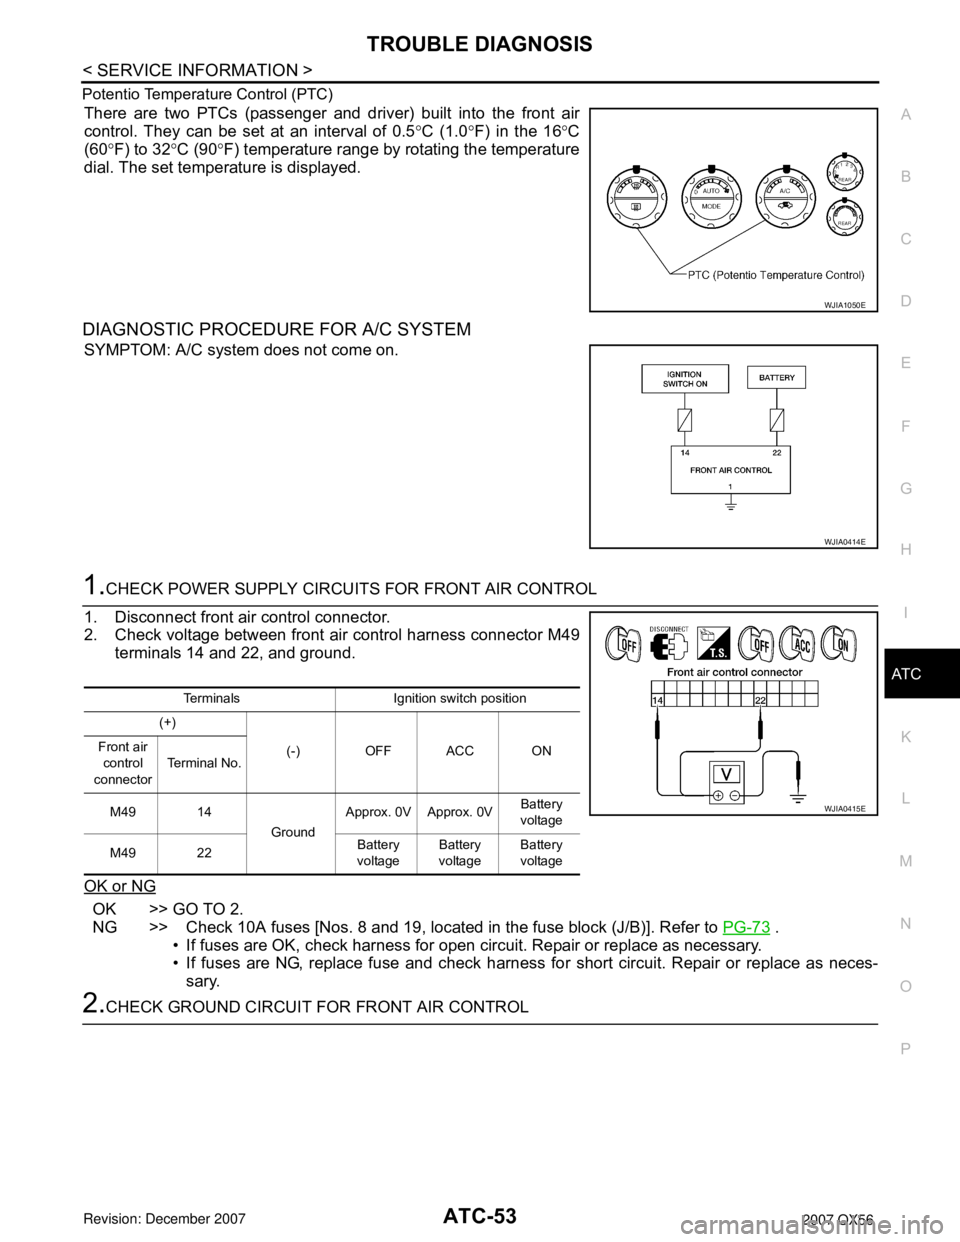
Potentio Temperature Control (PTC)
There are two PTCs (passenger and driver) built into the front air
control. They can be set at an interval of 0.5
°C (1.0 °F) in the 16 °C
(60 °F) to 32 °C (90 °F) temperature range by rotating the temperature
dial. The set temperature is displayed.
DIAGNOSTIC PROCEDURE FOR A/C SYSTEM
SYMPTOM: A/C system does not come on.
1.CHECK POWER SUPPLY CIRCUITS FOR FRONT AIR CONTROL
1. Disconnect front air control connector.
2. Check voltage between front air control harness connector M49 terminals 14 and 22, and ground.
OK or NG
OK >> GO TO 2.
NG >> Check 10A fuses [Nos. 8 and 19, located in the fuse block (J/B)]. Refer to PG-73
.
• If fuses are OK, check harness for open circuit. Repair or replace as necessary.
• If fuses are NG, replace fuse and check harness fo r short circuit. Repair or replace as neces-
sary.
2.CHECK GROUND CIRCUIT FOR FRONT AIR CONTROL
WJIA1050E
WJIA0414E
Terminals Ignition switch position
(+)
(-) OFF ACC ON
Front air
control
connector Te r m i n a l N o .
M49 14 GroundApprox. 0V Approx. 0V
Battery
voltage
M49 22 Battery
voltage Battery
voltage Battery
voltage
WJIA0415E
Page 424 of 3061

ATC-54
< SERVICE INFORMATION >
TROUBLE DIAGNOSIS
1. Turn ignition switch OFF.
2. Check continuity between front air control harness connectorM49 terminal 1 and ground.
OK or NG
OK >> Replace front air control. Refer to ATC-123, "Removal
and Installation" .
NG >> Repair harness or connector.
Mode Door Motor CircuitINFOID:0000000003533252
SYMPTOM:
• Air outlet does not change.
• Mode door motor does not operate normally.
INSPECTION FLOW
1.CONFIRM SYMPTOM BY PERFORMING OP ERATIONAL CHECK - DISCHARGE AIR
1. Press mode switch four times and then press the (DEF) switch. Each position indicator should change shape (on display).
2. Confirm that discharge air comes out according to the air distribution table. Refer to ATC-26, "
Discharge
Air Flow".
NOTE:
Confirm that the compressor clutch is engaged (visual inspection) and intake door position is at FRESH
when DEF ( ) or D/F ( ) is selected.
Can a symptom be duplicated?
YES >> GO TO 3.
NO >> GO TO 2.
2.PERFORM COMPLETE OPERATIONAL CHECK
Perform a complete operational check and check for any symptoms. Refer to ATC-50, "
Operational Check
(Front)".
Can a symptom be duplicated?
YES >> Refer to ATC-32, "How to Perform Trouble Diagnosis for Quick and Accurate Repair".
NO >> System OK.
3.CHECK FOR SERVICE BULLETINS
Check for any service bulletins.
>> GO TO 4.
4.CHECK MODE DOOR OPERATION
Check and verify mode door mechanism for smooth operation in each mode.
OK or NG
OK >> GO TO 5.
NG >> Repair as necessary.
5.PERFORM SELF-DIAGNOSIS
Perform self-diagnosis to check for any codes. Refer to ATC-48, "
A/C System Self-Diagnosis Function".
Are any self-diagnosis codes present?
YES >> Refer to ATC-48, "A/C System Self-Diagnosis Function".
NO >> GO TO 6.
6.CHECK THE MODE DOOR MOTOR PBR CIRCUIT 1 - Ground : Continuity should exist.
WJIA1351E
Page 429 of 3061

TROUBLE DIAGNOSISATC-59
< SERVICE INFORMATION >
C
DE
F
G H
I
K L
M A
B
AT C
N
O P
1. Turn ignition switch OFF.
2. Disconnect front air control harness connector.
3. Check continuity between front air control harness connector
M49 terminal 16 and ground.
OK or NG
OK >> Replace front air control. Refer to ATC-123, "Removal
and Installation" .
NG >> Repair or replace harness as necessary.
12.CHECK PBR FEEDBACK CIRCUIT FOR OPEN
1. Turn ignition switch OFF.
2. Disconnect the mode door motor harness connector and front air control harness connector.
3. Check continuity between mode door motor harness connector M142 terminal 2 and front air control harness connector M49 ter-
minal 16.
OK or NG
OK >> Replace mode door motor. Refer to ATC-140, "Removal
and Installation".
NG >> Repair or replace harness as necessary.
Air Mix Door Motor CircuitINFOID:0000000003533253
SYMPTOM:• Discharge air temperature does not change.
• Air mix door motor does not operate.
INSPECTION FLOW
1.CONFIRM SYMPTOM BY PERFORMING OPERAT IONAL CHECK - TEMPERATURE INCREASE
1. Turn the temperature control dial (driver) clockwise until 32 °C (90 °F) is displayed.
2. Check for hot air at discharge air outlets.
>> GO TO 2.
2.CONFIRM SYMPTOM BY PERFORMING OPERAT IONAL CHECK - TEMPERATURE DECREASE
1. Turn the temperature control dial (driver) counterclockwise until 16 °C (60 °F) is displayed.
2. Check for cold air at discharge air outlets.
Can a symptom be duplicated?
YES >> GO TO 4.
NO >> GO TO 3.
3.PERFORM COMPLETE OPERATIONAL CHECK
Perform a complete operational check and check for any symptoms. Refer to ATC-50, "
Operational Check
(Front)" .
Can a symptom be duplicated?
YES >> Refer to ATC-32, "How to Perform Trouble Diagnosis for Quick and Accurate Repair" .
NO >> System OK.
4.CHECK FOR SERVICE BULLETINS
Check for any service bulletins.
>> GO TO 5.
Continuity should not exist.
WJIA1733E
Continuity should exist.
LJIA0034E
Page 441 of 3061

TROUBLE DIAGNOSISATC-71
< SERVICE INFORMATION >
C
DE
F
G H
I
K L
M A
B
AT C
N
O P
INSPECTION FLOW
1.CONFIRM SYMPTOM BY PERFORMING OPERATIONAL CHECK - REC ( )
1. Press the mode switch to vent mode( ).
2. Press REC ( ) switch. The REC ( ) icon should illuminate on display.
3. Press REC ( ) switch again. The REC ( ) icon should go out on the display.
4. Listen for intake door position change (you should hear blower sound changes slightly).
Can a symptom be duplicated?
YES >> GO TO 3.
NO >> GO TO 2.
2.PERFORM COMPLETE OPERATIONAL CHECK
Perform a complete operational check and check for any symptoms. Refer to ATC-50, "
Operational Check
(Front)" .
Can a symptom be duplicated?
YES >> Refer to ATC-32, "How to Perform Trouble Diagnosis for Quick and Accurate Repair".
NO >> System OK.
3.CHECK FOR SERVICE BULLETINS
Check for any service bulletins.
>> GO TO 4.
4.CHECK INTAKE DOOR OPERATION
Check and verify intake door me chanism for smooth operation.
OK or NG
OK >> GO TO 5.
NG >> Repair intake door mechanism.
5.PERFORM SELF-DIAGNOSIS
Perform self-diagnosis to check for any codes. Refer to ATC-48, "
A/C System Self-Diagnosis Function" .
Are any self-diagnosis codes present?
YES >> Refer to ATC-48, "A/C System Self-Diagnosis Function" .
NO >> GO TO 6.
6.RECHECK FOR ANY SYMPTOMS
Perform a complete operational check for any symptoms. Refer to ATC-50, "
Operational Check (Front)" .
Does another symptom exist?
YES >> Refer to ATC-32, "How to Perform Trouble Diagnosis for Quick and Accurate Repair" .
NO >> Replace front air control. Refer to ATC-123, "
Removal and Installation".
SYSTEM DESCRIPTION
Component Parts
Intake door control system components are:• Front air control
• Intake door motor
• In-vehicle sensor
• Ambient sensor
• Optical sensor
• Intake sensor
System Operation
The intake door control determines the intake door posit ion based on the position of the recirculation switch.
When the recirculation switch is depressed the intake door motor rotates closing off the fresh air inlet and
recirculating the cabin air. If the recirculation switch is depressed again, the intake door motor rotates in the
opposite direction, again allowing fresh air into the cabin.
Page 444 of 3061

ATC-74
< SERVICE INFORMATION >
TROUBLE DIAGNOSIS
1. Disconnect the intake door motor harness connector.
2. Check continuity between front air control harness connectorM49 terminal 7, 8 and the intake door motor harness connector
M58 terminal 1, 6.
OK or NG
OK >> Replace intake door motor. Refer to ATC-139, "Removal
and Installation".
NG >> Repair or replace harness as necessary.
Defroster Door Motor CircuitINFOID:0000000003533255
SYMPTOM:
• Defroster door does not change.
• Defroster door motor does not operate normally.
INSPECTION FLOW
1.CONFIRM SYMPTOM BY PERFORMING OP ERATIONAL CHECK - DEFROSTER DOOR
1. Press the mode switch and select vent ( ).
2. Press the defrost switch ( ). Defroster indicator should illuminate (on display).
3. Listen for defroster door position c hange (blower sound should change slightly).
Can the symptom be duplicated?
YES >> GO TO 3.
NO >> GO TO 2.
2.CHECK FOR ANY SYMPTOMS
Perform a complete operational check for any symptoms. Refer to ATC-50, "
Operational Check (Front)".
Does another symptom exist?
YES >> Refer to ATC-32, "How to Perform Trouble Diagnosis for Quick and Accurate Repair".
NO >> System OK.
3.CHECK FOR SERVICE BULLETINS
Check for any service bulletins.
>> GO TO 4.
4.CHECK DEFROSTER DOOR MOTOR
Perform diagnostic procedure for defroster door mo tor. Refer to "DIAGNOSTIC PROCEDURE FOR
DEFROSTER DOOR MOTOR".
OK or NG
OK >> GO TO 5.
NG >> Repair PBR circuit or replace defroster door motor. Refer to ATC-138
.
5.CHECK DEFROSTER DOOR OPERATION
Check and verify defroster door mechanism for smooth operation.
OK or NG
OK >> Replace defroster door motor. Refer to ATC-138.
NG >> Repair defroster door mechanism.
SYSTEM DESCRIPTION
Component Parts
Defroster door control system components are:
• Front air control
• Defroster door motor 1 - 7 : Continuity should exist.
6 - 8 : Continuity should exist.
WJIA0591E
Page 466 of 3061

ATC-96
< SERVICE INFORMATION >
TROUBLE DIAGNOSIS
1. Disconnect air mix door motor (rear) connector.
2. Check continuity between rear air control harness connector
R209 terminal 2 and 4 and air mix door motor (rear) harness
connector B155 terminal 2 and 3.
3. Check continuity between rear air control harness connector
R209 terminals 2 and 4 and ground.
OK or NG
OK >> Replace rear air control. Refer to ATC-123, "Removal and Installation"
NG >> Repair harness or connector.
Magnet Clutch CircuitINFOID:0000000003533259
SYMPTOM: Magnet clutch does not engage.
INSPECTION FLOW
1.CONFIRM SYMPTOM BY PERFORMING OP ERATIONAL CHECK - MAGNET CLUTCH
1. Turn ignition switch ON.
2. Press the A/C switch.
3. Press mode switch to select vent ( ) mode.
4. Display shows , A/C. Confirm that the compress or clutch engages (sound or visual inspection). (Dis-
charge air and blower speed will depend on ambi ent, in-vehicle and set temperatures.)
Can the symptom be duplicated?
YES >> GO TO 3.
NO >> GO TO 2.
2.CHECK FOR ANY SYMPTOMS
Perform a complete operational check for any symptoms. Refer to ATC-50, "
Operational Check (Front)" .
Does another symptom exist?
YES >> Refer to ATC-32, "How to Perform Trouble Diagnosis for Quick and Accurate Repair" .
NO >> System OK.
3.CHECK FOR SERVICE BULLETINS
Check for any service bulletins.
>> GO TO 4.
4.PERFORM SELF-DIAGNOSIS
Perform self-diagnosis to check for any codes. Refer to ATC-48, "
A/C System Self-Diagnosis Function" .
Are any self-diagnosis codes present?
YES >> Refer to ATC-48, "A/C System Self-Diagnosis Function" .
NO >> GO TO 5.
5.CHECK AMBIENT SENSOR
Check and verify ambient sensor circuit. Refer to ATC-114, "
Ambient Sensor Circuit" .
>> GO TO 6.
6.CHECK INTAKE SENSOR
Check and verify intake sensor circuit. Refer to ATC-120, "
Intake Sensor Circuit" .
>> GO TO 7.
2 - 2 Continuity
should exist.
4 - 3 Continuity should exist.
2, 4 - Ground Continuity should not exist.
WJIA1442E