ABS INFINITI QX56 2007 Factory User Guide
[x] Cancel search | Manufacturer: INFINITI, Model Year: 2007, Model line: QX56, Model: INFINITI QX56 2007Pages: 3061, PDF Size: 64.56 MB
Page 373 of 3061

PRECAUTIONSATC-3
< SERVICE INFORMATION >
C
DE
F
G H
I
K L
M A
B
AT C
N
O P
SERVICE INFORMATION
PRECAUTIONS
Precaution for Supplemental Restraint System (SRS) "AIR BAG" and "SEAT BELT
PRE-TENSIONER"
INFOID:0000000003533217
The Supplemental Restraint System such as “A IR BAG” and “SEAT BELT PRE-TENSIONER”, used along
with a front seat belt, helps to reduce the risk or severi ty of injury to the driver and front passenger for certain
types of collision. This system includes seat belt switch inputs and dual stage front air bag modules. The SRS
system uses the seat belt switches to determine the front air bag deployment, and may only deploy one front
air bag, depending on the severity of a collision and w hether the front occupants are belted or unbelted.
Information necessary to service the system safely is included in the SRS and SB section of this Service Man-
ual.
WARNING:
• To avoid rendering the SRS inoper ative, which could increase the risk of personal injury or death in
the event of a collision which would result in air bag inflation, all maintenance must be performed by
an authorized NISSAN/INFINITI dealer.
• Improper maintenance, including in correct removal and installation of the SRS, can lead to personal
injury caused by unintentional act ivation of the system. For removal of Spiral Cable and Air Bag
Module, see the SRS section.
• Do not use electrical test equipm ent on any circuit related to the SRS unless instructed to in this
Service Manual. SRS wiring harnesses can be identi fied by yellow and/or orange harnesses or har-
ness connectors.
Precaution for Workin g with HFC-134a (R-134a)INFOID:0000000003533218
WARNING:
• CFC-12 (R-12) refrigerant and HFC-134a (R-134a) refr igerant are not compatible. If the refrigerants
are mixed compressor failure is likely to occur. Refer to AT C - 3 , "
Contaminated Refrigerant". To
determine the purity of HFC-134a (R-134a) in the vehicle and recovery tank, use recovery/recycling
equipment and refrigerant identifier.
• Use only specified oil for the HFC-134a (R-134a) A/C system and HFC-134a (R-134a) components. If
oil other than that specifi ed is used, compressor fa ilure is likely to occur.
• The specified HFC-134a (R-134a) oil rapidly absorb s moisture from the atmosphere. The following
handling precautions must be observed:
- When removing refrigerant components from a vehicle, immediately cap (seal) the component to
minimize the entry of mois ture from the atmosphere.
- When installing refrigerant components to a vehicle, do not remove the caps (unseal) until just
before connecting the co mponents. Connect all refrigerant lo op components as quickly as possible
to minimize the entry of moisture into system.
- Only use the specified oil from a sealed container. Immediately reseal containers of oil. Without
proper sealing, oil will become moisture saturat ed and should not be used.
- Avoid breathing A/C refrigerant and oil vapor or mist. Exposure may irritate eyes, nose and throat.
Remove HFC-134a (R-134a) from the A/C system usi ng certified service equipment meeting require-
ments of SAE J2210 [HFC-134a (R-134a) recycling eq uipment], or J2209 [HFC-134a (R-134a) recovery
equipment]. If accidental system discharge occurs , ventilate work area before resuming service.
Additional health and safety information may be ob tained from refrigerant and oil manufacturers.
- Do not allow A/C oil to come in contact with styrofoam parts. Damage may result.
Contaminated RefrigerantINFOID:0000000003533219
If a refrigerant other than pure HFC-134a (R-134a) is identified in a vehicle, your options are:
• Explain to the customer that environmental regulations prohibit the release of contaminated refrigerant into
the atmosphere.
• Explain that recovery of the contaminated refri gerant could damage your service equipment and refrigerant
supply.
• Suggest the customer return the vehicle to the locati on of previous service where the contamination may
have occurred.
• If you choose to perform the repair, recover the refrigerant using only dedicated equipment and contain-
ers. Do not recover contaminated refriger ant into your existing service equipment. If your facility does
Page 603 of 3061

TELEPHONE
AV-63
< SERVICE INFORMATION >
C
D
E
F
G
H
I
J
L
MA
B
AV
N
O
P
CAUTION:
To avoid damage use care when removing console finisher.
• Sunroof switch (2).
• Microphone (3).
• Front personal/map lamp LH (4).
• Interior lamp switch (5).
• Front personal/map lamp RH (6).
1. Remove console assembly, roof finisher.
2. Release Bluetooth ON indicator tabs.
3. Disconnect Bluetooth ON indicator connector.
4. Remove Bluetooth ON indicator (1).
Installation
Installation is in the reverse order of removal.
MICROPHONE
Removal
CAUTION:
To avoid damage use care when removing console finisher.
• Bluetooth on indicator (1).
• Sunroof switch (2).
• Front personal/map lamp LH (4).
• Interior lamp switch (5).
• Front personal/map lamp RH (6).
1. Remove console assembly, roof finisher.
2. Release microphone tabs.
3. Disconnect microphone connector.
4. Remove microphone (3).
Installation
Installation is in the reverse order of removal.
LKIA0667E
LKIA0667E
Page 852 of 3061

BODY REPAIR
BL-141
< SERVICE INFORMATION >
C
D
E
F
G
H
J
K
L
MA
B
BL
N
O
P
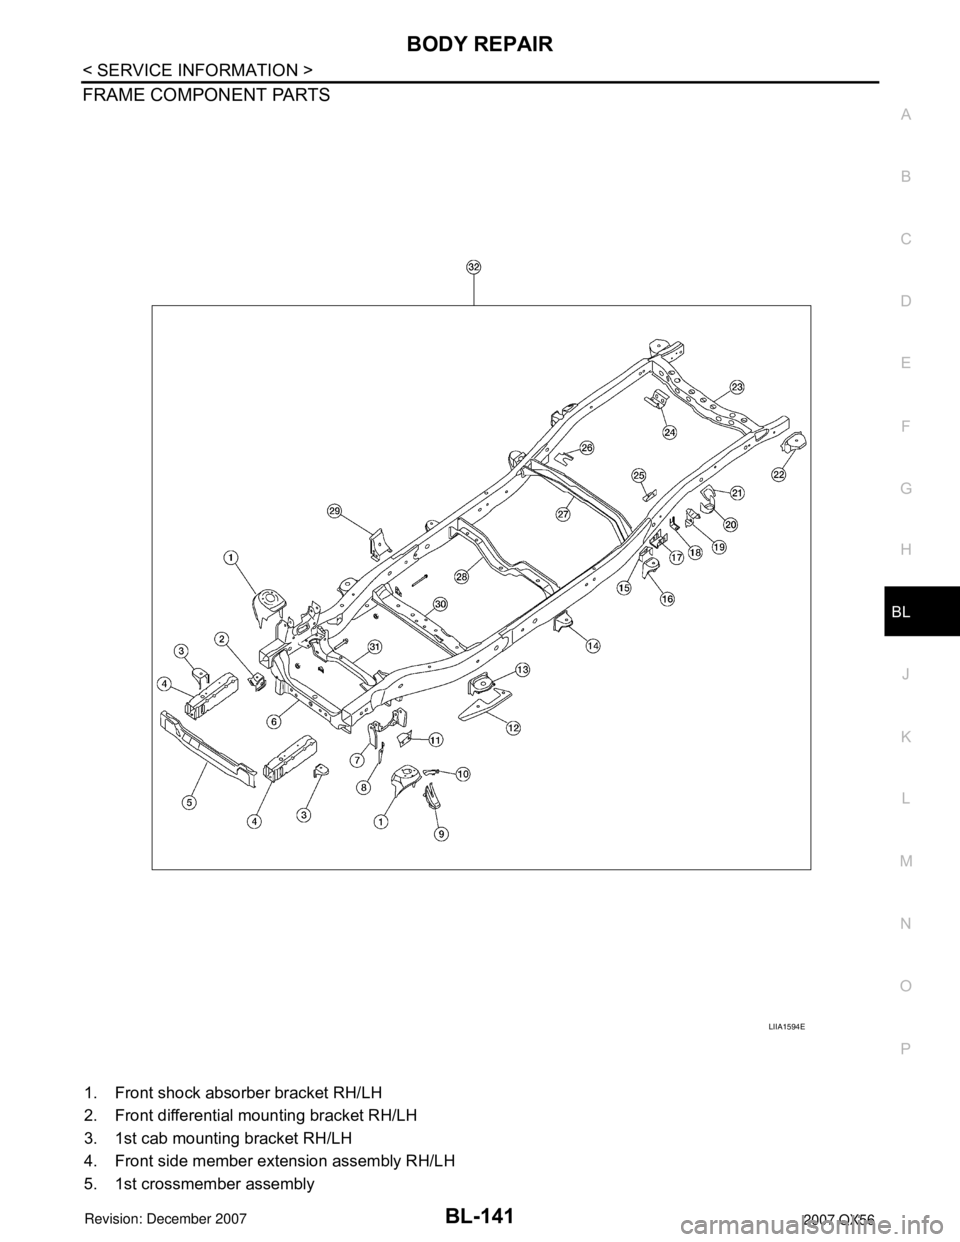
FRAME COMPONENT PARTS
1. Front shock absorber bracket RH/LH
2. Front differential mounting bracket RH/LH
3. 1st cab mounting bracket RH/LH
4. Front side member extension assembly RH/LH
5. 1st crossmember assembly
LIIA1594E
Page 853 of 3061

BL-142
< SERVICE INFORMATION >
BODY REPAIR
6. 2nd crossmember assembly
7. Front upper link mounting bracket RH/LH
8. Panhard rod bracket reinforcement
9. Bound bumper bracket RH/LH
10. Front brake hose bracket RH/LH
11. Panhard rod reinforcement
12. 4th crossmember gusset RH/LH
13. 2nd cab mounting bracket RH/LH
14. 3rd cab mounting bracket RH/LH
15. 4th cab mounting reinforcement RH/LH
16. 4th cab mounting bracket RH/LH
17. Rear suspension mounting bracket RH/LH
18. Rear brake hose bracket
19. Rear shock absorber bracket assembly RH/LH
20. Rear bound bumper bracket RH/LH
21. Rear bracket bumper reinforcement RH/LH
22. Cab mounting bracket assembly RH/LH
23. 9th crossmember assembly
24. Exhaust bracket assembly
25. Canister bracket, LH
26. 7th crossmember reinforcement
27. 7th crossmember assembly
28. 6th crossmember assembly
29. 4th crossmember gusset RH/LH
30. 4th crossmember assembly
31. 3rd crossmember assembly
32. Frame assembly
Corrosion ProtectionINFOID:0000000003533007
DESCRIPTION
To provide improved corrosion prevention, the following anti-corrosive measures have been implemented in
NISSAN production plants. When repairing or replacing body panels, it is necessary to use the same anti-cor-
rosive measures.
ANTI-CORROSIVE PRECOATED STEEL (GALVANNEALED STEEL)
To improve repairability and corrosion resistance, a new type of anti-
corrosive precoated steel sheet has been adopted replacing conven-
tional zinc-coated steel sheet.
Galvannealed steel is electroplated and heated to form Zinc-iron
alloy, which provides excellent and long term corrosion resistance
with cationic electrode position primer.
Nissan Genuine Service Parts are fabricated from galvannealed steel. Therefore, it is recommended that
GENUINE NISSAN PARTS or equivalent be used for panel replacement to maintain the anti-corrosive perfor-
mance built into the vehicle at the factory.
PHOSPHATE COATING TREATMENT AND CATIONIC ELECTRODEPOSITION PRIMER
PIIA0093E
Page 854 of 3061

BODY REPAIR
BL-143
< SERVICE INFORMATION >
C
D
E
F
G
H
J
K
L
MA
B
BL
N
O
P
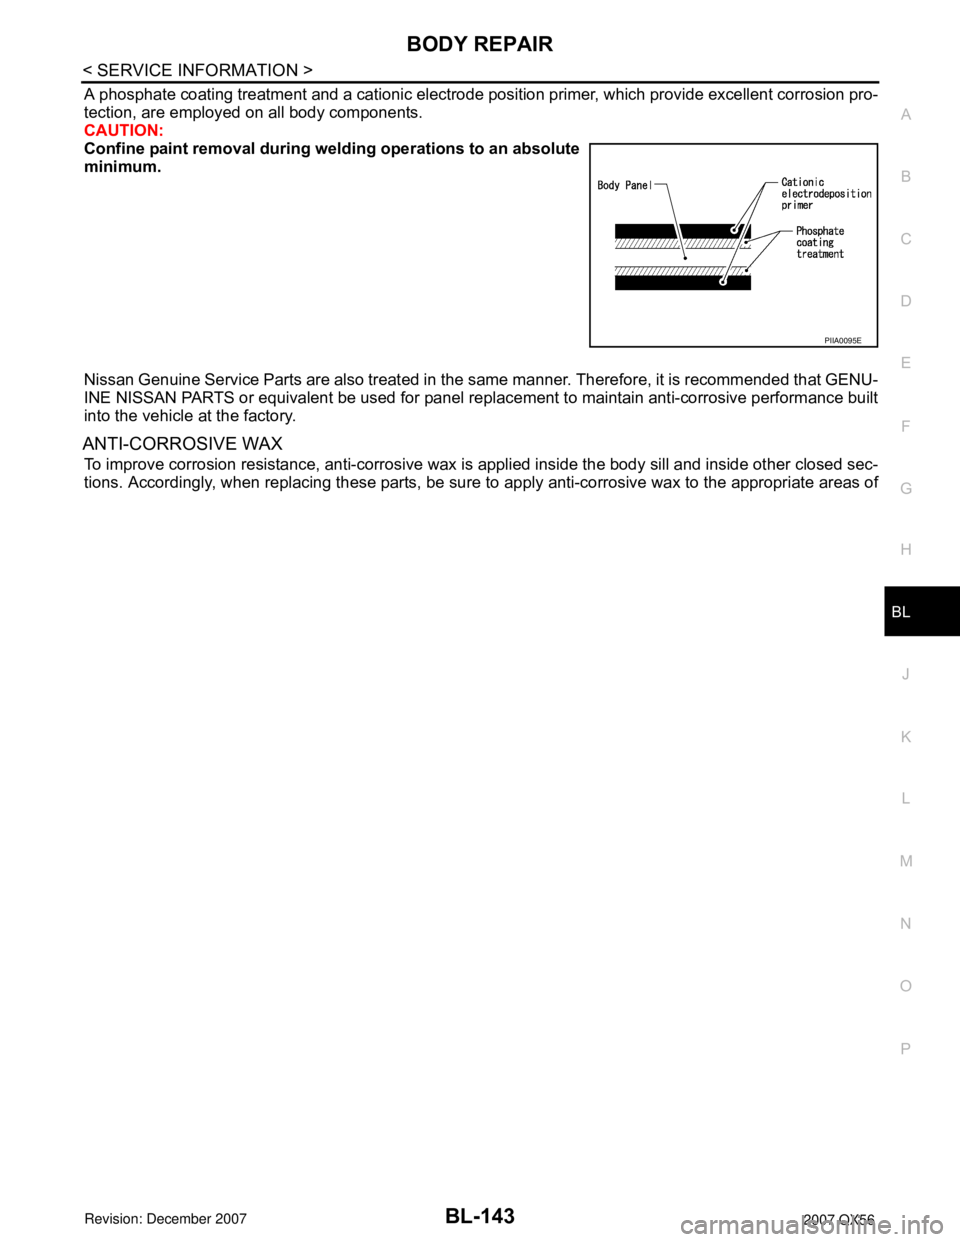
A phosphate coating treatment and a cationic electrode position primer, which provide excellent corrosion pro-
tection, are employed on all body components.
CAUTION:
Confine paint removal during welding operations to an absolute
minimum.
Nissan Genuine Service Parts are also treated in the same manner. Therefore, it is recommended that GENU-
INE NISSAN PARTS or equivalent be used for panel replacement to maintain anti-corrosive performance built
into the vehicle at the factory.
ANTI-CORROSIVE WAX
To improve corrosion resistance, anti-corrosive wax is applied inside the body sill and inside other closed sec-
tions. Accordingly, when replacing these parts, be sure to apply anti-corrosive wax to the appropriate areas of
PIIA0095E
Page 876 of 3061

BODY REPAIR
BL-165
< SERVICE INFORMATION >
C
D
E
F
G
H
J
K
L
MA
B
BL
N
O
P
1. When repairing and painting a portion of the body adjacent to plastic parts, consider their characteristics
(influence of heat and solvent) and remove them if necessary or take suitable measures to protect them.
2. Plastic parts should be repaired and painted using methods suiting the materials
, characteristics.
Abbre-
viationMaterial nameHeat resisting
temperature
°C (°F)Resistance to gasoline and
solventsOther cautions
PE Polyethylene 60 (140)Gasoline and most solvents are
harmless if applied for a very
short time (wipe up quickly).Flammable
PVC Polyvinyl Chloride 80 (176) Same as above.Poison gas is emitted
when burned.
EPM/
EPDMEthylene Propylene (Diene) rub-
ber80 (176) Same as above. Flammable
TPO/
TPRThermoplastic Olefine/
Thermoplastic Rubber80 (176) Same as above. Flammable
PP Polypropylene 90 (194) Same as above.Flammable, avoid bat-
tery acid.
UP Polyester thermoset 90 (194) Same as above. Flammable
PS Polystyrene 80 (176) Avoid solvents. Flammable
ABSAcrylonitrile Butadiene Styrene
resin80 (176) Avoid gasoline and solvents.
AES Acrylonitrile Ethylene Styrene 80 (176) Same as above.
PMMA Polymethyl Methacrylate 85 (185) Same as above.
AAS Acrylonitrile Acrylic Styrene 85 (185) Same as above.
AS Acrylonitrile Styrene 85 (185) Same as above.
EVA Polyvinyl Ethyl Acetate 90 (194) Same as above.
ASA Acrylonitrile Styrene Acrylate 100 (222) Same as above. Flammable
PPO/
PPEPolyphenylene Oxide/
Polyphenylene Ether110 (230) Same as above.
PC Polycarbonate 120 (248) Same as above.
PAR Polyacrylate 180 (356) Same as above.
L-
LDPELenear Low Density PE 45 (100)Gasoline and most solvents are
harmless.Flammable
PUR Polyurethane 90 (194) Same as above.
TPU Thermoplastic Urethane 110 (230) Same as above.
PPC Polypropylene Composite 115 (239) Same as above. Flammable
POM Polyacetal 120 (248) Same as above. Avoid battery acid.
PBT+P
CPolybutylene Terephtha-
late+Polycarbonate120 (248) Same as above. Flammable
PA Polyamide (Nylon) 140 (284) Same as above.Avoid immersing in wa-
ter.
PBT Polybutylene Terephthalate 140 (284) Same as above.
FRP Fiber Reinforced Plastics 170 (338) Same as above. Avoid battery acid.
PET Polyethylene Terephthalate 180 (356) Same as above.
PEI Polyetherimide 200 (392) Same as above.
Page 900 of 3061

BR-2
< SERVICE INFORMATION >
PRECAUTIONS
SERVICE INFORMATION
PRECAUTIONS
Precaution for Supplemental Restraint System (SRS) "AIR BAG" and "SEAT BELT
PRE-TENSIONER"
INFOID:0000000003532717
The Supplemental Restraint System such as “AIR BAG” and “SEAT BELT PRE-TENSIONER”, used along
with a front seat belt, helps to reduce the risk or severity of injury to the driver and front passenger for certain
types of collision. This system includes seat belt switch inputs and dual stage front air bag modules. The SRS
system uses the seat belt switches to determine the front air bag deployment, and may only deploy one front
air bag, depending on the severity of a collision and whether the front occupants are belted or unbelted.
Information necessary to service the system safely is included in the SRS and SB section of this Service Man-
ual.
WARNING:
• To avoid rendering the SRS inoperative, which could increase the risk of personal injury or death in
the event of a collision which would result in air bag inflation, all maintenance must be performed by
an authorized NISSAN/INFINITI dealer.
• Improper maintenance, including incorrect removal and installation of the SRS, can lead to personal
injury caused by unintentional activation of the system. For removal of Spiral Cable and Air Bag
Module, see the SRS section.
• Do not use electrical test equipment on any circuit related to the SRS unless instructed to in this
Service Manual. SRS wiring harnesses can be identified by yellow and/or orange harnesses or har-
ness connectors.
Precaution for Brake SystemINFOID:0000000003532718
• Always use recommended brake fluid. Refer to MA-10 .
• Do not reuse drained brake fluid.
• Be careful not to splash brake fluid on painted areas.
• To clean or wash all parts of master cylinder, disc brake caliper and wheel cylinder, use clean brake fluid.
• Do not use mineral oils such as gasoline or kerosene. They will ruin rubber parts of the hydraulic system.
• Use flare nut wrench when removing and installing brake tube.
• Always check tightening torque when installing brake lines.
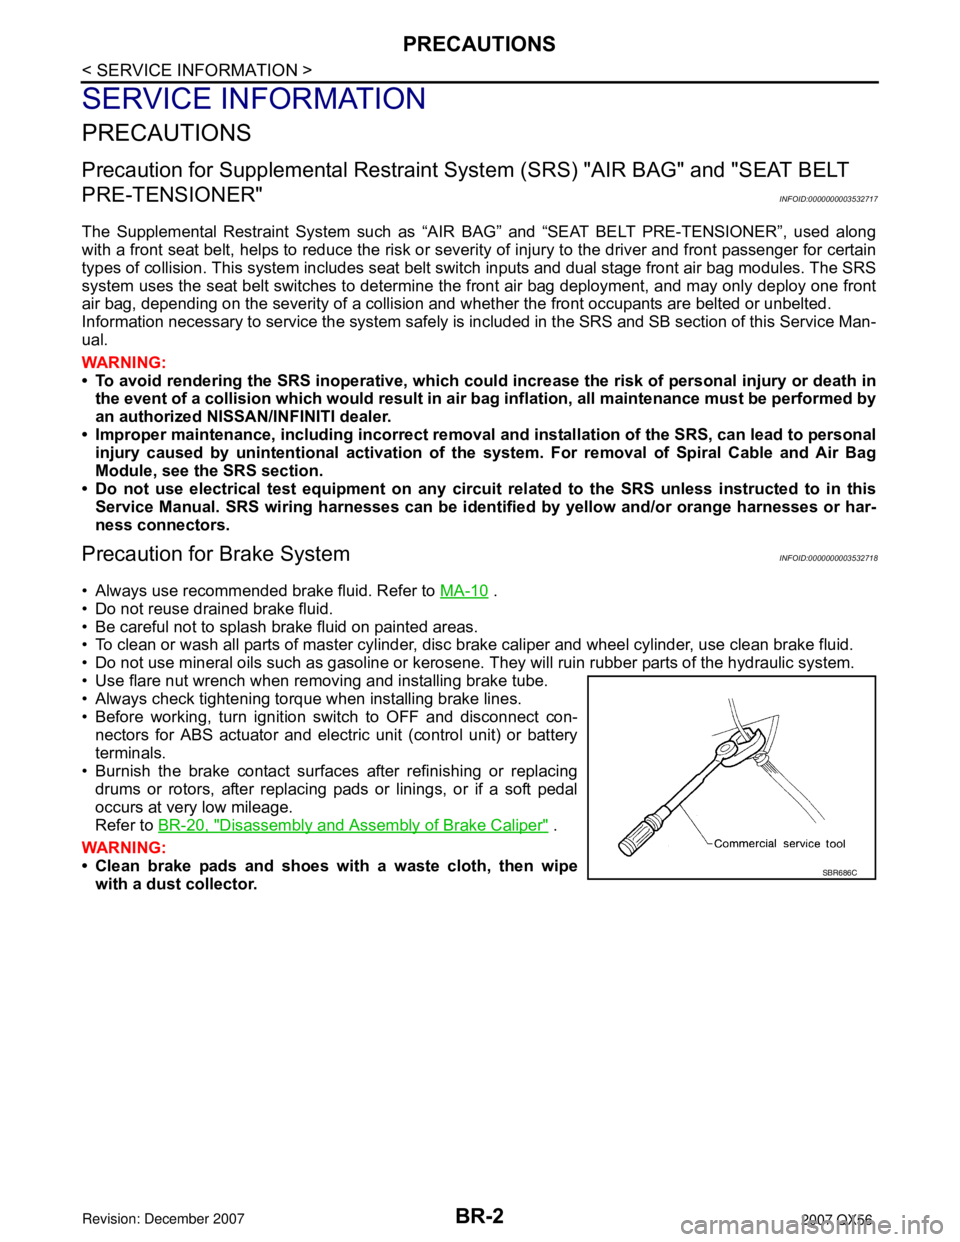
• Before working, turn ignition switch to OFF and disconnect con-
nectors for ABS actuator and electric unit (control unit) or battery
terminals.
• Burnish the brake contact surfaces after refinishing or replacing
drums or rotors, after replacing pads or linings, or if a soft pedal
occurs at very low mileage.
Refer to BR-20, "
Disassembly and Assembly of Brake Caliper" .
WARNING:
• Clean brake pads and shoes with a waste cloth, then wipe
with a dust collector.
SBR686C
Page 906 of 3061

BR-8
< SERVICE INFORMATION >
BRAKE FLUID
BRAKE FLUID
On Board InspectionINFOID:0000000003532724
LEVEL CHECK
• Make sure the fluid level in reservoir tank is within the standard
(between MAX and MIN lines).
• Visually check around reservoir tank for fluid leaks.
• If fluid level is excessively low, check brake system for leaks.
• If brake warning lamp remains illuminated after parking lever is
released, check brake system for fluid leakage.
Drain and RefillINFOID:0000000003532725
CAUTION:
• Refill with new brake fluid. Refer to MA-10
.
• Do not reuse drained brake fluid.
• Do not let brake fluid splash on the painted surfaces of the body. This might damage the paint, so
when splashing it, immediately wipe off the area and wash away with water.
• Before servicing, disconnect actuator connector or battery negative cable.
1. Connect a vinyl tube to each bleed valve.
2. Depress brake pedal, loosen each bleed valve, and gradually
remove brake fluid.
3. Make sure there is no foreign material in reservoir tank, and refill
with new brake fluid.
4. Rest foot on brake pedal. Loosen bleed valve. Slowly depress
pedal until it stops. Tighten bleed valve. Release brake pedal.
Repeat this process a few times, then pause to add new brake
fluid to master cylinder. Continue until new brake fluid flows out.
Bleed air from brake system. Refer to BR-8, "
Bleeding Brake
System" .
Bleeding Brake SystemINFOID:0000000003532726
CAUTION:
While bleeding, pay attention to master cylinder fluid level.
1. Turn ignition switch OFF and disconnect ABS actuator and electric unit (control unit) connector or battery
negative cable.
2. Connect a vinyl tube to the rear right bleed valve.
3. Fully depress brake pedal 4 to 5 times.
LFIA0225E
SBR419C
SBR995
Page 912 of 3061

BR-14
< SERVICE INFORMATION >
BRAKE MASTER CYLINDER
• Refill brake fluid and bleed air. Refer to BR-8, "Bleeding Brake System".
CAUTION:
• Refill with new brake fluid. Refer to MA-10
.
• Do not reuse drained brake fluid.
• Adjust brake pedal. Refer to BR-5, "
Inspection and Adjustment" .
Disassembly and AssemblyINFOID:0000000003532733
DISASSEMBLY
CAUTION:
• Master cylinder cannot be disassembled.
• Remove reservoir tank only when absolutely necessary.
Pull reservoir tank off master cylinder sub-assembly, then remove grommets from master cylinder sub-assem-
bly body.
ASSEMBLY
CAUTION:
• Never use mineral oil such as kerosene, gasoline during the cleaning and assembly process.
• Do not drop parts. If a part is dropped, do not use it.
1. Apply brake fluid or rubber grease to new grommets, then insert into master cylinder sub-assembly. Refer
to GI-45
.
CAUTION:
Do not reuse grommet.
2. Install reservoir tank onto master cylinder sub-assembly.
Page 914 of 3061

BR-16
< SERVICE INFORMATION >
BRAKE BOOSTER
• Be careful not to damage brake booster stud bolt threads. If brake booster is tilted or inclined during
installation, dash panel may damage the threads.
• Attach the check valve in the correct direction.
1. Remove engine room cover with power tool. Refer to EM-12, "
Removal and Installation" .
2. Remove engine air duct assembly. Refer to EM-15, "
Removal and Installation" .
3. Remove brake piping from brake master cylinder.
4. Remove brake master cylinder. Refer to BR-13, "
Removal and Installation" .
5. Remove vacuum hose from brake booster. Refer to BR-17
.
6. Disconnect active boost and delta stroke sensor harness connectors from brake booster assembly.
7. Remove brake pedal attachment snap pin and clevis pin from inside the vehicle.
8. Remove nuts on brake booster and brake pedal assembly.
9. Remove brake booster assembly from dash panel.
INSPECTION AFTER REMOVAL
Output Rod Length Inspection
1. Using a handy vacuum pump, apply a vacuum of – 66.7 kPa (–
500 mmHg, –19.69 inHg) to brake booster.
2. Check output rod length.
INSTALLATION
1. Loosen lock nut to adjust input rod length so that the length B (in
the figure) satisfies the specified value.
2. After adjusting “B”, temporarily tighten lock nut and install
booster assembly to the vehicle.
• Install a gaskets and spacer block between booster assembly
and the dash panel.
3. Connect brake pedal with clevis of input rod.
4. Install pedal bracket mounting nuts and tighten them to the
specified torque.
5. Install brake piping from brake master cylinder to ABS actuator. Refer to BR-10, "
Hydraulic Circuit".
6. Connect active boost and delta stroke sensor harness connectors to brake booster assembly.
7. Connect vacuum hose to brake booster.
8. Install master cylinder to booster assembly. Refer to BR-13, "
Removal and Installation" .
9. Adjust the height and play of brake pedal.
10. Tighten lock nut of input rod to specification.
11. Install engine air duct assembly. Refer to EM-15, "
Removal and Installation" .
12. Install engine room cover with power tool. Refer to EM-12, "
Removal and Installation" .
13. Refill with new brake fluid and bleed air. Refer to BR-8, "
Bleeding Brake System" .
SBR208E
Standard dimension : 15.6 − 15.9 mm (0.614 − 0.626 in)
[when vacuum is – 66.7 kPa (– 500 mmHg, – 19.69 inHg)]
Length “B” : 151 mm (5.94 in)
WFIA0382E