ECU JAGUAR X308 1998 2.G Workshop Manual
[x] Cancel search | Manufacturer: JAGUAR, Model Year: 1998, Model line: X308, Model: JAGUAR X308 1998 2.GPages: 2490, PDF Size: 69.81 MB
Page 1118 of 2490
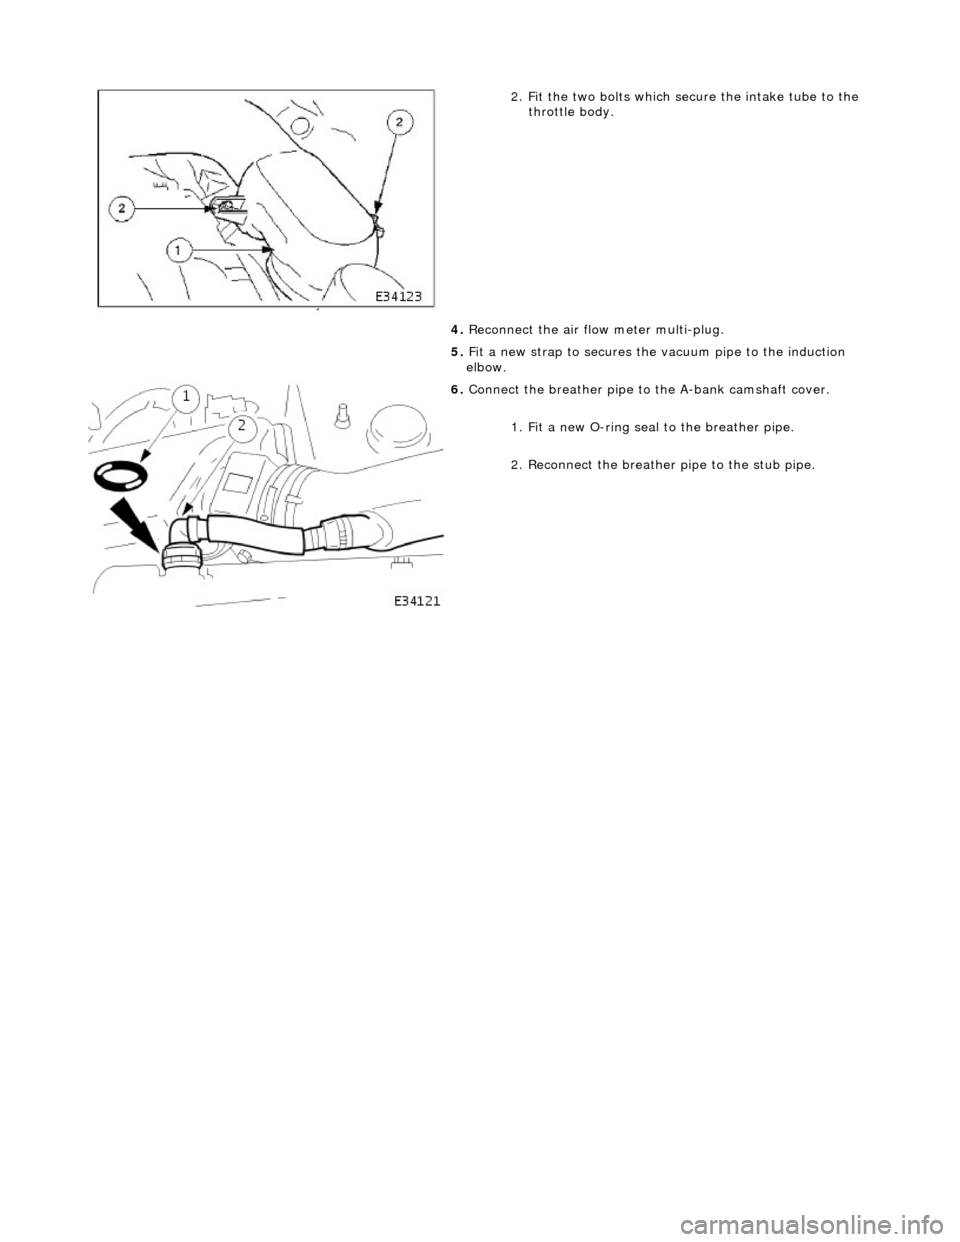
2. Fi
t the two bolts which secure the intake tube to the
throttle body.
4. Reconnect the air flow meter multi-plug.
5. Fit a new strap to secures the vacuum pipe to the induction
elbow.
6. Connect the breather pipe to
the A-bank camshaft cover.
1. Fit a new O-ring seal to the breather pipe.
2. Reconnect the breather pipe to the stub pipe.
Page 1119 of 2490
Intake Air Distribution and Filtering - Air Cleaner Element
Re
moval and Installation
Remov
al
Installation
1.
O
pen the engine compartment and fit paintwork protection
sheets.
2. Di
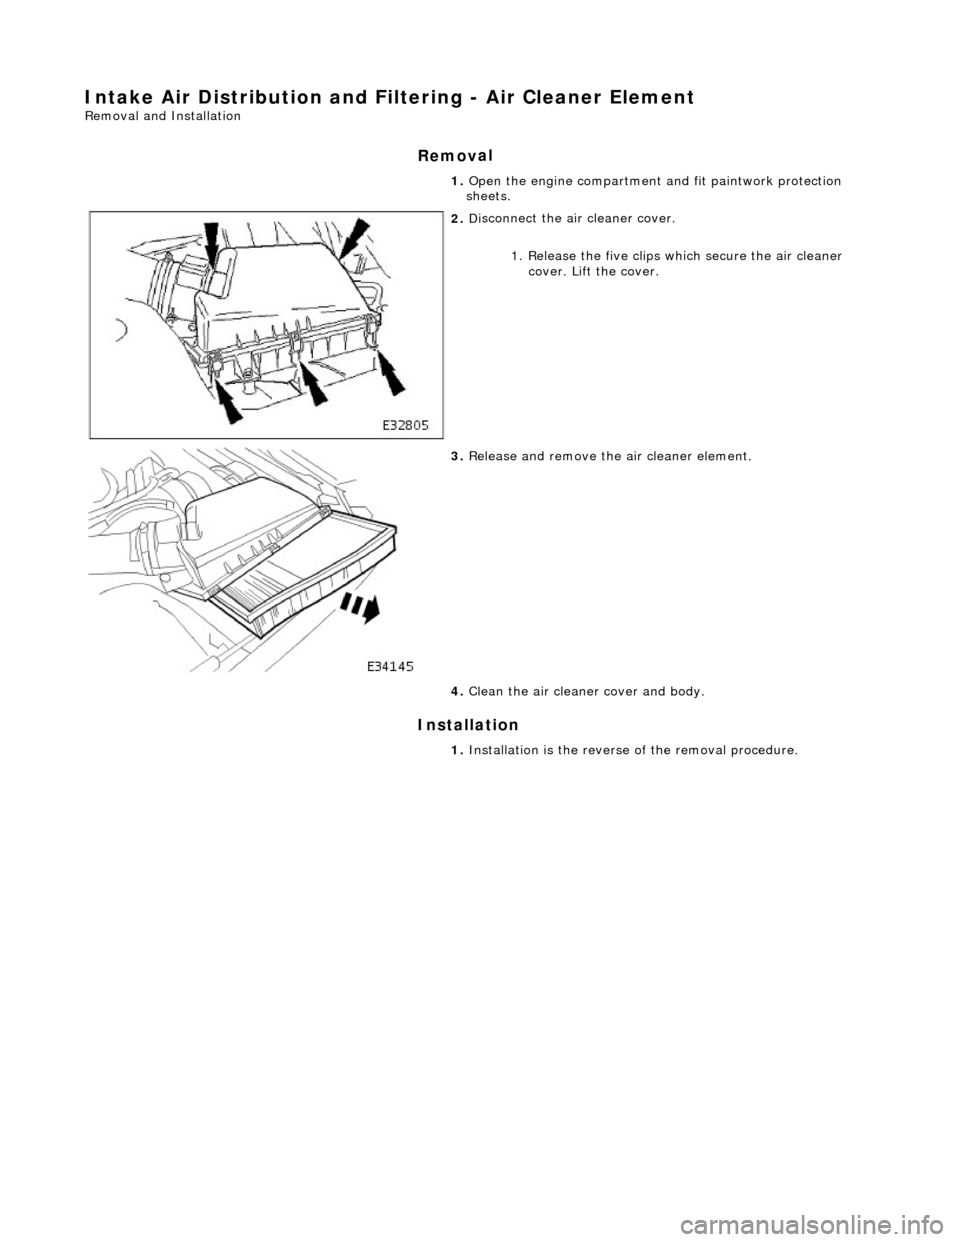
sconnect the air cleaner cover.
1. Release the five clips which secure the air cleaner cover. Lift the cover.
3. R
elease and remove the air cleaner element.
4. Clean the air cleaner cover and body.
1. Installation is th e reverse of the re moval procedure.
Page 1127 of 2490
I
nstallation
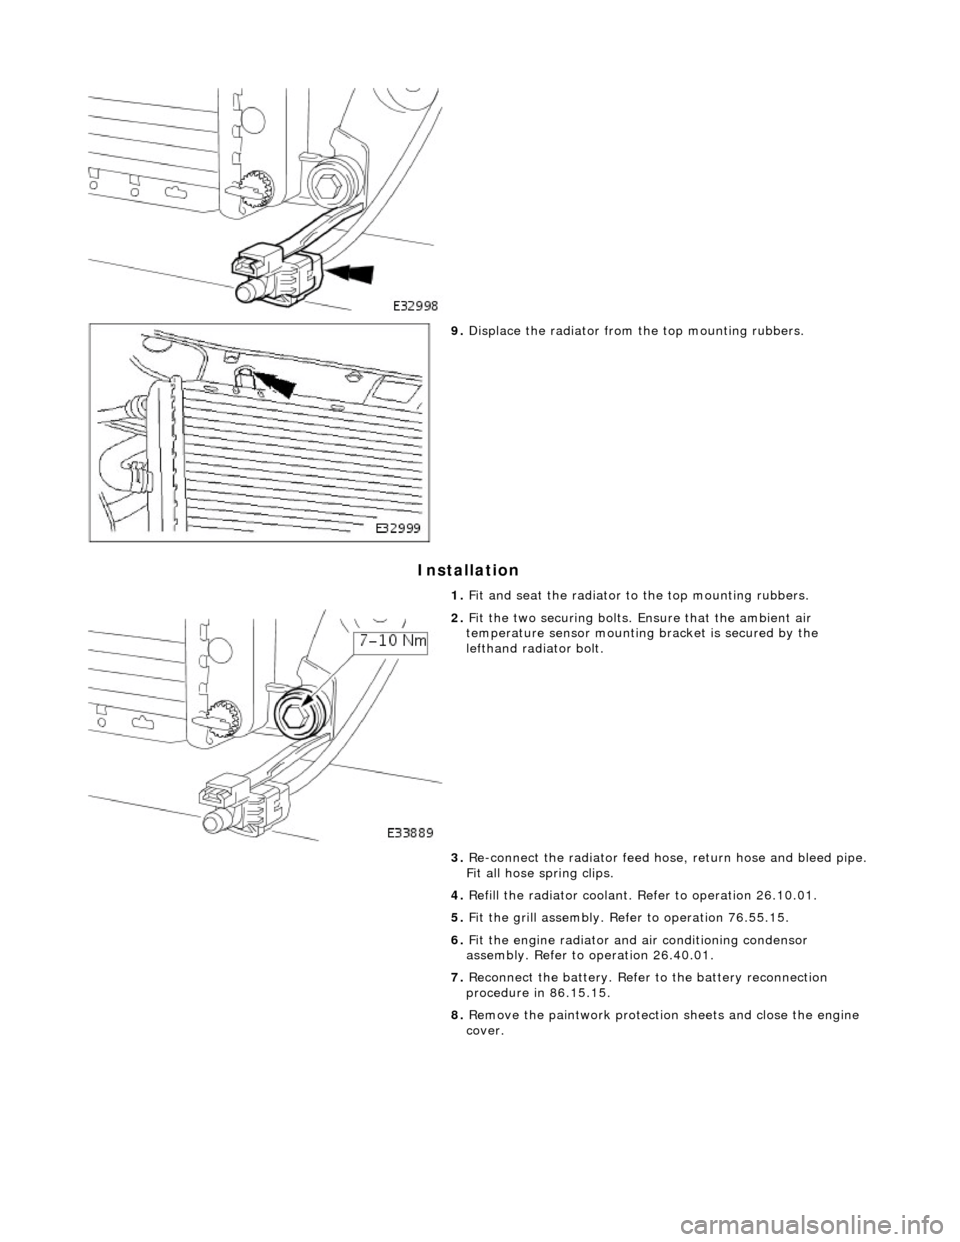
9.
Di
splace the radiator from
the top mounting rubbers.
1. Fit and seat the radiator to the top mounting rubbers.
2. F
it the two securing bolts.
Ensure that the ambient air
temperature sensor mounting bracket is secured by the
lefthand radiator bolt.
3. Re-connect the radiator feed ho se, return hose and bleed pipe.
Fit all hose spring clips.
4. Refill the radiator coolant. Refer to operation 26.10.01.
5. Fit the grill assembly. Refer to operation 76.55.15.
6. Fit the engine radiator and air conditioning condensor
assembly. Refer to operation 26.40.01.
7. Reconnect the battery. Refer to the battery reconnection
procedure in 86.15.15.
8. Remove the paintwork protection sheets and close the engine
cover.
Page 1132 of 2490

4. Secure charge air cool
er inlet as
sembly to supercharger outlet
duct.
1. Install bolts.
5. Inst al
l coolant hoses and vacuum pipe to outlet duct.
1. Install vacuum pipe.
2. Install coolant hoses.
6. Refill cooling system; refer to (SC) (26.10.01).
7. Install intake tube / air fl ow meter / air cleaner cover
assembly; refer to 19.10.30.
Page 1134 of 2490

Intake Air Distribution and Filtering - Thrott
le Body Elbow
Re
mo
val and Installation
Remov
a
l
1.
WARNING: B E
FORE PROCEEDING, IT IS ESSENTIAL THAT
WARNING NOTES GIVEN IN SECTION 100-00 (UNDER HEADING
'SAFETY PRECAUTIONS') AR E READ AND UNDERSTOOD.
Disconnect battery ground cable (IMPORTANT, see SRO
86.15.19 for further information).
2. Re
move air cleaner cover / inta
ke assembly; refer 19.10.30.
3. Remove throttle assemb ly; refer to 19.70.04.
4. Remove exhaust gas recirculation (EGR) valve where installed;
refer 17.45.01.
5. Re
lease intake elbow from right-hand support bracket.
Re
lea
se brake servo vacuum pi
pe and disconnect pipe.
1. Disconnect vacuum pipe.
2. Remove upper bolt.
6. Relea
se intake elbow from le
ft-hand support bracket.
1. Disconnect vacuum pipe.
2. Disconnect engine breather T-piece.
3. Remove upper bolt.
4. Loosen, but do not remove, lower two bolts.
7. Re
move intake elbow from supercharger.
1. Release and pull back cl ips securing bypass hoses
at charge air coolers.
2. Remove four bolts.
3. Remove hoses from charge air cooler stub pipes.
Re move as
sembly from vehicle.
4. Discard gasket.
Cle a
n all mating faces.
8. Remove by-pass valve assembly from intake elbow.
Page 1135 of 2490
I
nstallation
1.
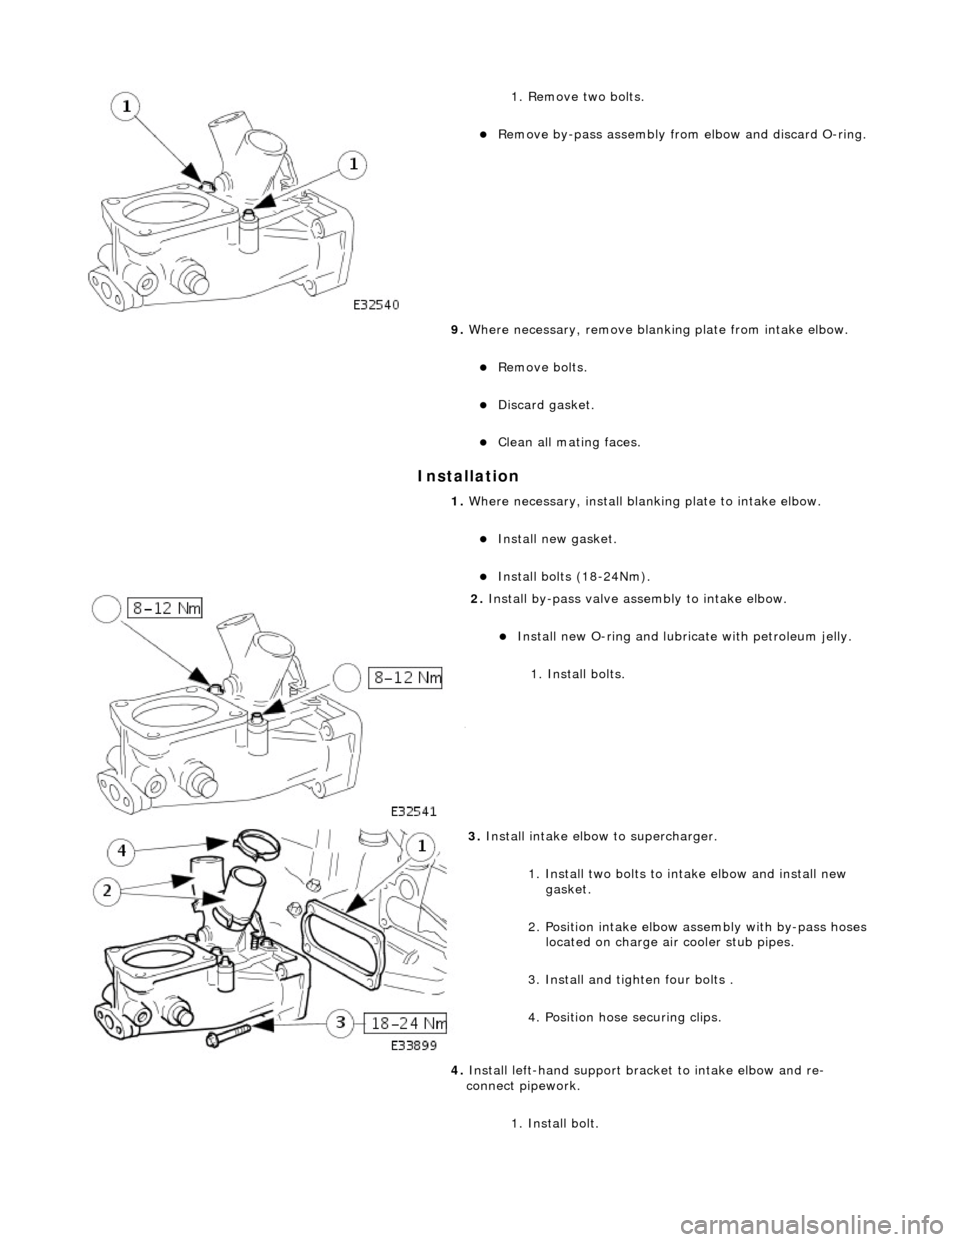
Remove two bolts.
Re
move by-pass assembly from
elbow and discard O-ring.
9. Where necessary, remove blanki ng plate from intake elbow.
Re
move bolts.
Di
scard gasket.
Cle
an all mating faces.
1. Where necessary, install blanking plate to intake elbow.
Inst
all new gasket.
Inst
all bolts (18-24Nm).
2. Inst
all by-pass valve assembly to intake elbow.
Inst
all new O-ring and lubricate with petroleum jelly.
1. Install bolts.
3. Install
intake elbow to supercharger.
1. Install two bolts to intake elbow and install new gasket.
2. Position intake elbow assembly with by-pass hoses located on charge air cooler stub pipes.
3. Install and tighten four bolts .
4. Position hose securing clips.
4. Install left-hand support brac ket to intake elbow and re-
connect pipework.
1. Install bolt.
Page 1142 of 2490
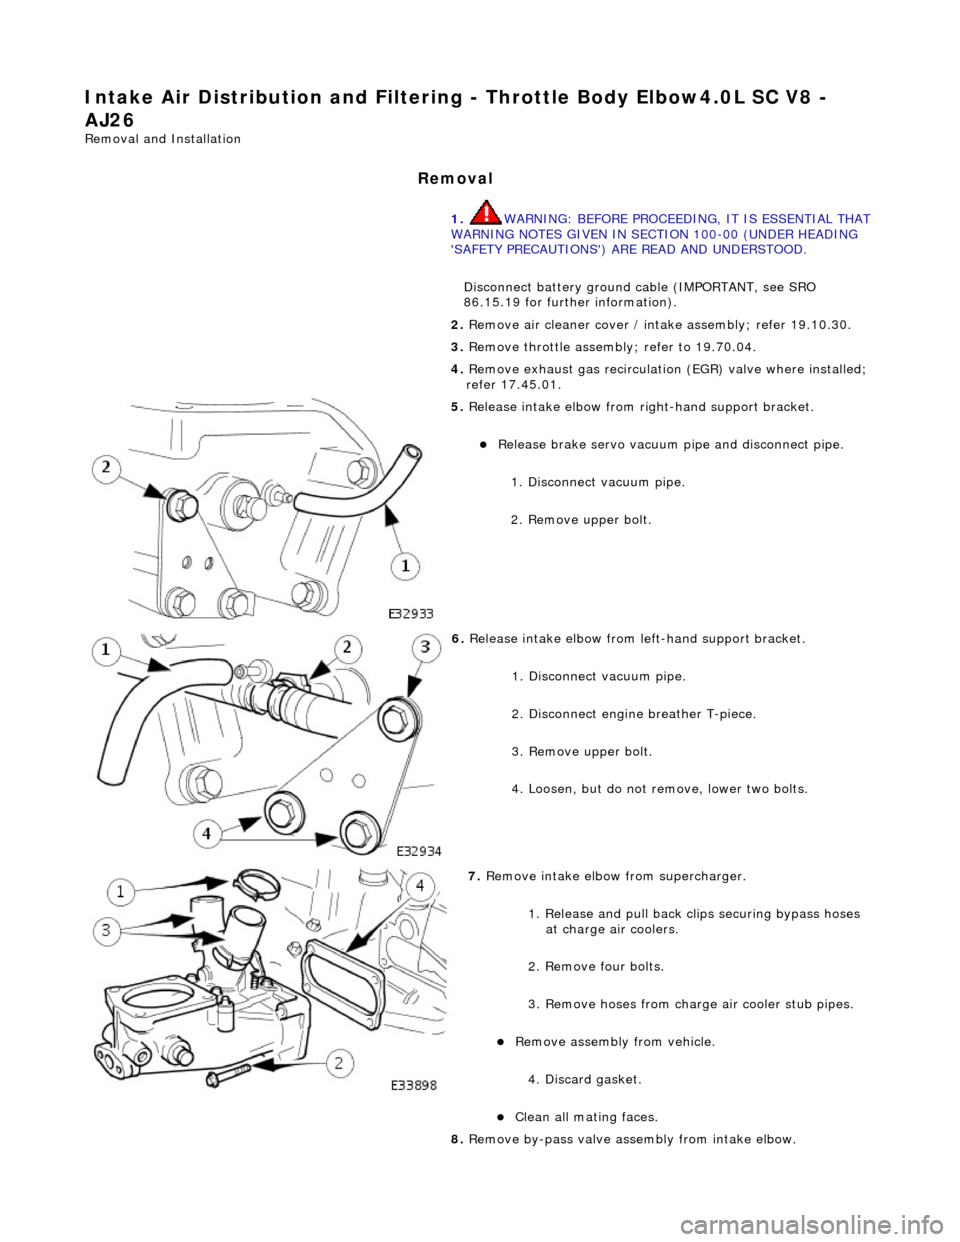
Intake Air Distribution and Filtering - Throttle B
ody Elbow4.0L SC V8 -
AJ26
Re mo
val and Installation
Remova
l
1.
WARNING: BE
FORE PROCEEDING, IT IS ESSENTIAL THAT
WARNING NOTES GIVEN IN SECTION 100-00 (UNDER HEADING
'SAFETY PRECAUTIONS') AR E READ AND UNDERSTOOD.
Disconnect battery ground cable (IMPORTANT, see SRO
86.15.19 for further information).
2. Re
move air cleaner cover / inta
ke assembly; refer 19.10.30.
3. Remove throttle assemb ly; refer to 19.70.04.
4. Remove exhaust gas recirculation (EGR) valve where installed;
refer 17.45.01.
5. Re
lease intake elbow from right-hand support bracket.
Re
lea
se brake servo vacuum pi
pe and disconnect pipe.
1. Disconnect vacuum pipe.
2. Remove upper bolt.
6. Relea
se intake elbow from le
ft-hand support bracket.
1. Disconnect vacuum pipe.
2. Disconnect engine breather T-piece.
3. Remove upper bolt.
4. Loosen, but do not remove, lower two bolts.
7. Re
move intake elbow from supercharger.
1. Release and pull back cl ips securing bypass hoses
at charge air coolers.
2. Remove four bolts.
3. Remove hoses from charge air cooler stub pipes.
Re move as
sembly from vehicle.
4. Discard gasket.
Cle a
n all mating faces.
8. Remove by-pass valve assembly from intake elbow.
Page 1143 of 2490
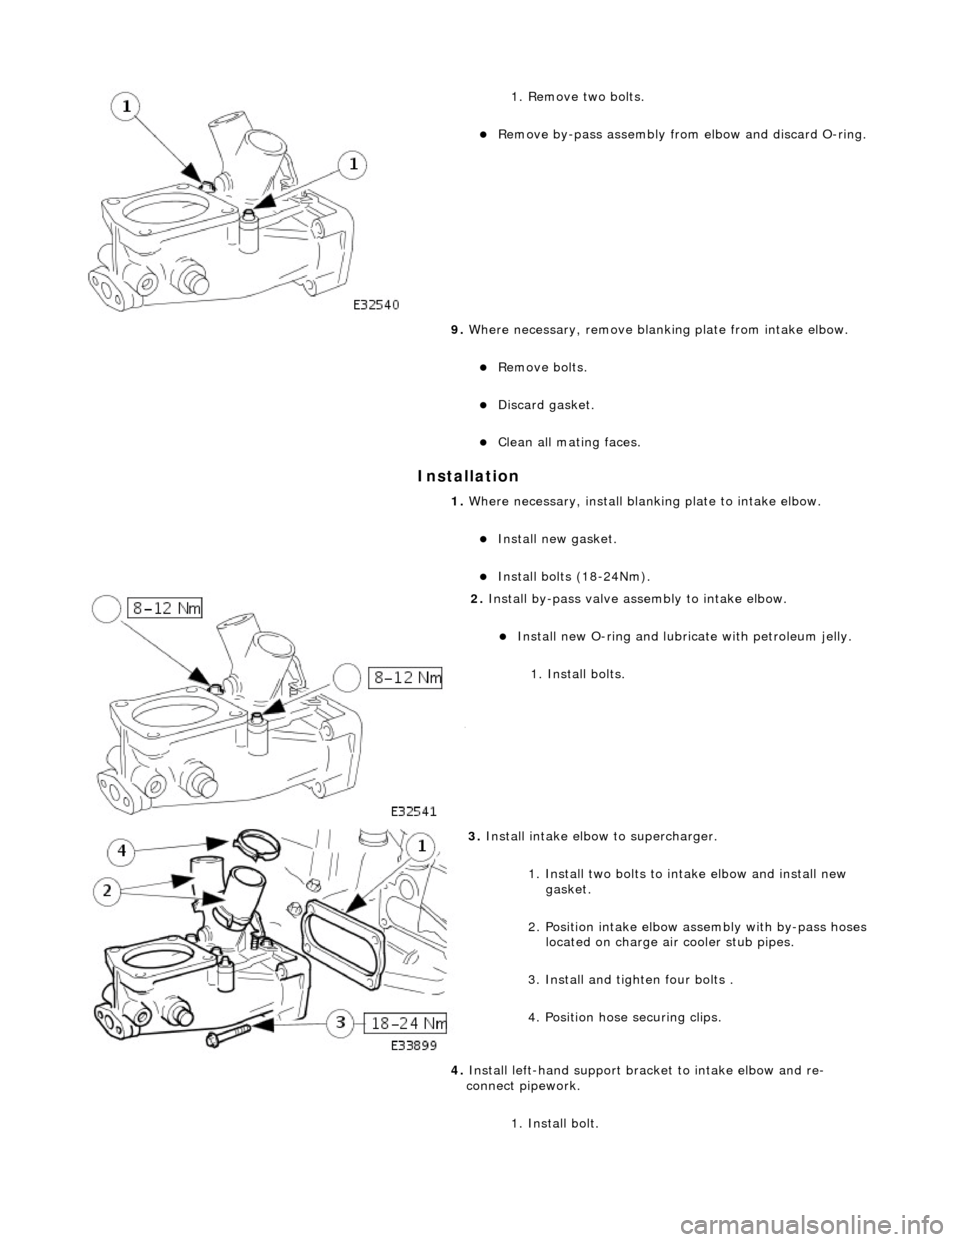
I
nstallation
1.
Remove two bolts.
Re
move by-pass assembly from
elbow and discard O-ring.
9. Where necessary, remove blanki ng plate from intake elbow.
Re
move bolts.
Di
scard gasket.
Cle
an all mating faces.
1. Where necessary, install blanking plate to intake elbow.
Inst
all new gasket.
Inst
all bolts (18-24Nm).
2. Inst
all by-pass valve assembly to intake elbow.
Inst
all new O-ring and lubricate with petroleum jelly.
1. Install bolts.
3. Install
intake elbow to supercharger.
1. Install two bolts to intake elbow and install new gasket.
2. Position intake elbow assembly with by-pass hoses located on charge air cooler stub pipes.
3. Install and tighten four bolts .
4. Position hose securing clips.
4. Install left-hand support brac ket to intake elbow and re-
connect pipework.
1. Install bolt.
Page 1155 of 2490
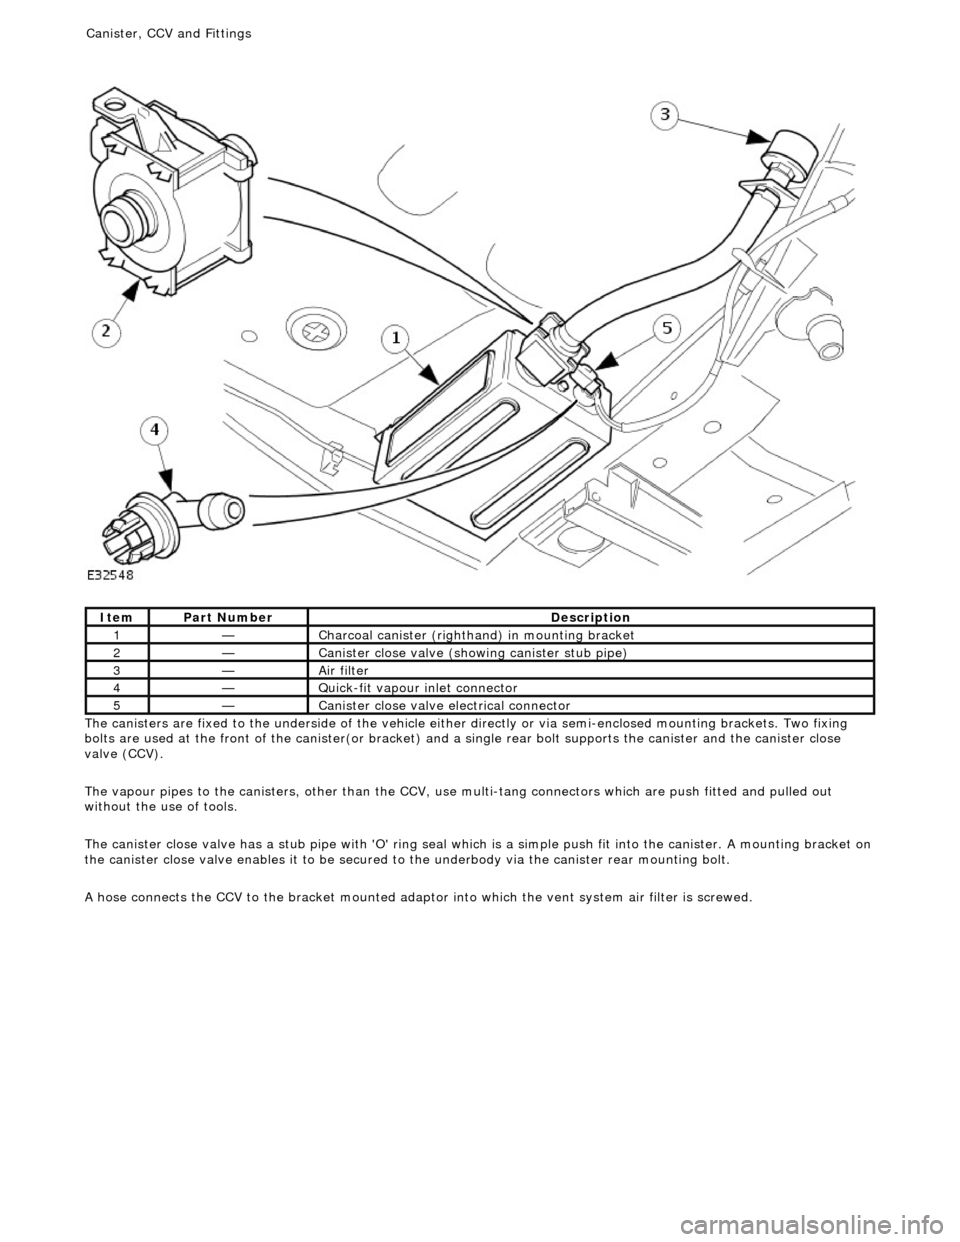
T
he canisters are fixed to the underside of the vehicle either
directly or via semi-enclosed mounting brackets. Two fixing
bolts are used at the front of the canister(or bracket) and a single rear bolt supports the canister and the canister close
valve (CCV).
The vapour pipes to the canisters, other than the CCV, use multi-tang connectors which are push fitted and pulled out
without the use of tools.
The canister close valve has a stub pipe with 'O' ring seal wh ich is a simple push fit into the canister. A mounting bracket on
the canister close valve enables it to be secured to the underbody via the canister rear mounting bolt.
A hose connects the CCV to the bracket mounted adaptor into which the vent system air filter is screwed.
It
em
Par
t Number
De
scription
1—C
harcoal canister (righthand) in mounting bracket
2—Cani
ster close valve (showi
ng canister stub pipe)
3—Ai
r filter
4—Q
uick-fit vapour inlet connector
5—Cani
ster close valve electrical connector
Canister, CCV an
d Fittings
Page 1159 of 2490
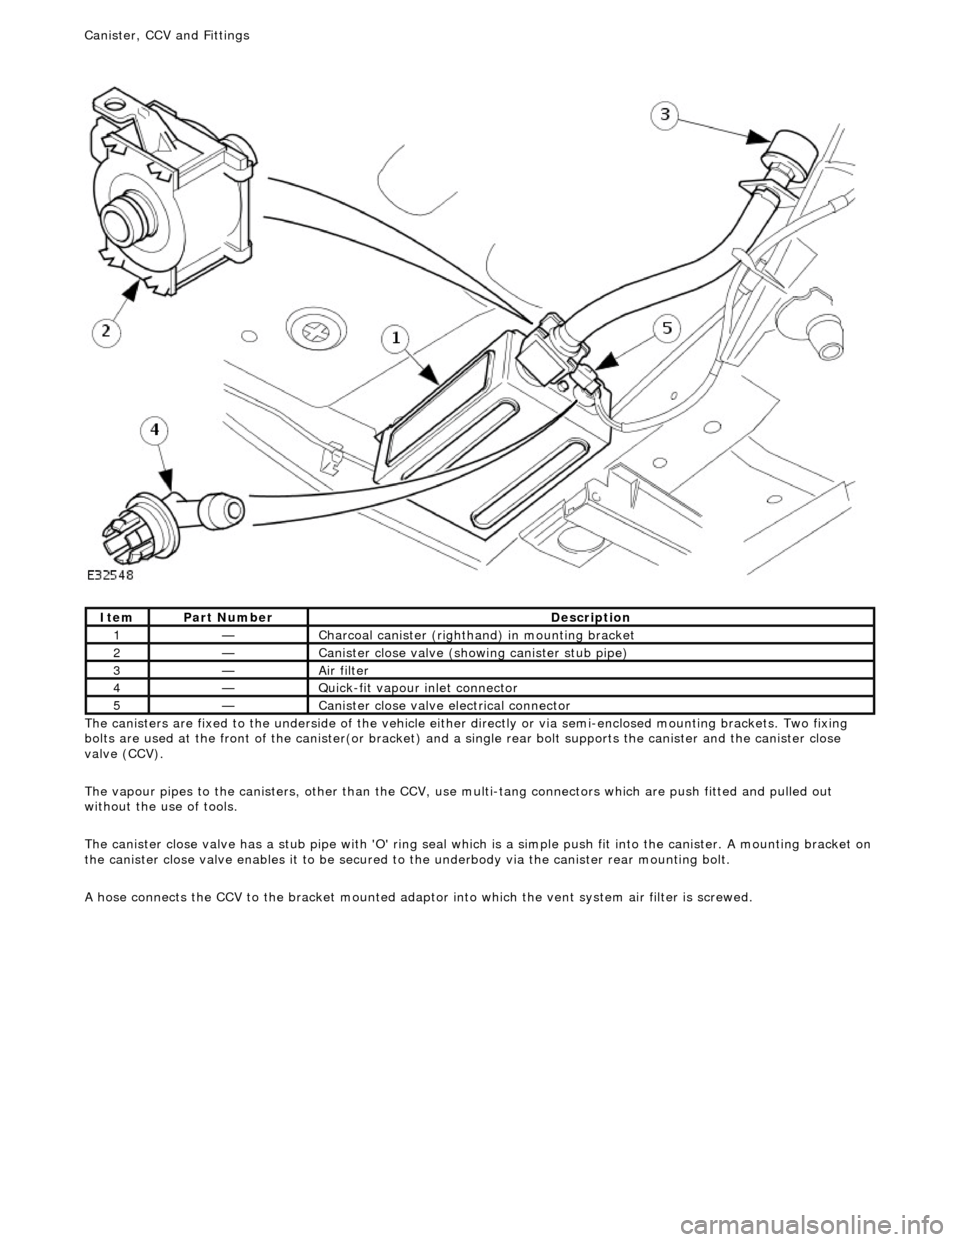
T
he canisters are fixed to the underside of the vehicle either
directly or via semi-enclosed mounting brackets. Two fixing
bolts are used at the front of the canister(or bracket) and a single rear bolt supports the canister and the canister close
valve (CCV).
The vapour pipes to the canisters, other than the CCV, use multi-tang connectors which are push fitted and pulled out
without the use of tools.
The canister close valve has a stub pipe with 'O' ring seal wh ich is a simple push fit into the canister. A mounting bracket on
the canister close valve enables it to be secured to the underbody via the canister rear mounting bolt.
A hose connects the CCV to the bracket mounted adaptor into which the vent system air filter is screwed.
It
em
Par
t Number
De
scription
1—C
harcoal canister (righthand) in mounting bracket
2—Cani
ster close valve (showi
ng canister stub pipe)
3—Ai
r filter
4—Q
uick-fit vapour inlet connector
5—Cani
ster close valve electrical connector
Canister, CCV an
d Fittings