length JAGUAR X308 1998 2.G Workshop Manual
[x] Cancel search | Manufacturer: JAGUAR, Model Year: 1998, Model line: X308, Model: JAGUAR X308 1998 2.GPages: 2490, PDF Size: 69.81 MB
Page 79 of 2490

1
11 and support on stands. Refer to Section 100-02.
5. Ins
tall Special Tool 204-111 in road spring.
Sl
acken tool adjuster to suit spring length.
Install adaptor
and thrust collar.
Posit
ion stem of tool in center of spring passing dowel
through slot in su spension turret.
6. R
otate stem of Special Tool to
position dowel across slot.
7. W
ARNING: WHEN TURNING TOOL ADJUSTER, ENSURE
THAT TOOL STEM DOES NOT ROTATE AND DISTURB POSITION
OF DOWEL IN SUSPENSION TURRET.
Rotate adjuster of Special Tool to tension spring.
8. R
emove spring pan to lower
wishbone securing bolts.
9. Rotate adjuster of Special Tool to release tension from spring.
Page 91 of 2490

1
11 and support on stands. Refer to Section 100-02.
5. Ins
tall Special Tool 204-111 in road spring.
Sl
acken tool adjuster to suit spring length.
Fit adaptor and th
rust collar.
Posit
ion stem of tool in center of spring passing dowel
through slot in su spension turret.
6. R
otate stem of Special Tool to
position dowel across slot.
7. W
ARNING: WHEN TURNING TOOL ADJUSTER, ENSURE
THAT TOOL STEM DOES NOT ROTATE AND DISTURB POSITION
OF DOWEL IN SUSPENSION TURRET.
Rotate adjuster of Special Tool to tension spring.
8. R
emove spring pan securing bolts.
9. Rotate adjuster of Special Tool to release tension from spring.
Page 97 of 2490

I
nstallation
CAUTI
ON: The wishbone front and rear arm bushes differ in length.
Ensure the correct bush is installed in each arm.
1.
Position arm on suitable supports on press bed.
2. Position Special Tool 204-214 on top of bush.
3. Operate press to remove bush from arm.
34. Remove wishbone front arm from press
35
.
NOTE: For assembly purposes, note orientation of bush.
• NOTE: Initial press action will cause tool to sh ear bush flange.
Using a hydraulic press, remove bush from rear wishbone arm.
1. Position arm on suitable supports on press bed.
2. Position special tool on top of bush.
3. Operate press to remove bush from arm.
1. Using a h
ydraulic press, install bu
sh in wishbone rear arm/ball
joint assembly.
1. Position arm on suitable supports on press bed.
2. Position bush on arm ensuring orientation is as noted during removal of old bush.
3. Position suitable flat steel plate on top of bush.
4. Operate press to install bush in arm.
2. Using a h
ydraulic press, install
bush in wishbone front arm.
1. Position arm on suitable supports on press bed.
2. Position bush on arm ensuring orientation is as noted during removal of old bush.
3. Position suitable flat steel plate on top of bush.
4. Operate press to install bush in arm.
3. Position wishbone rear arm on crossbeam and install but do
Page 109 of 2490
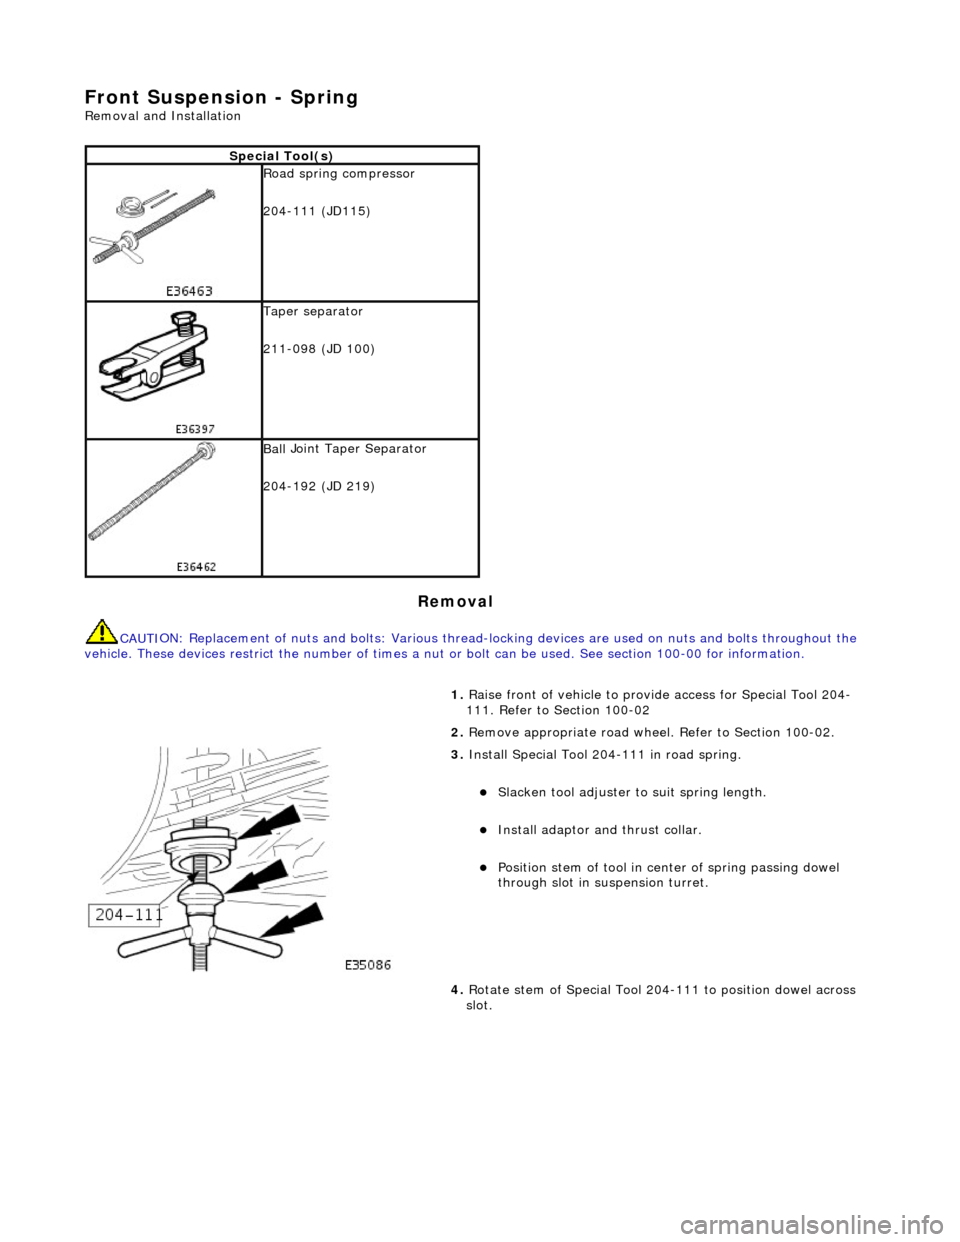
Front Suspension - Spring
Re
moval and Installation
Remov
al
CAUTI
ON: Replacement of
nuts and bolts: Various thread-locking devices are used on nuts and bolts throughout the
vehicle. These devices restrict the number of times a nut or bolt can be used. See section 100-00 for information.
S
pecial Tool(s)
R
oad spring compressor
204-111 (JD115)
Taper separator
211-098 (JD 100)
Ball
Joint Taper Separator
204-192 (JD 219)
1. R
aise front of vehicle to provid
e access for Special Tool 204-
111. Refer to Section 100-02
2. Remove appropriate road wheel. Refer to Section 100-02.
3. Ins
tall Special Tool 204-111 in road spring.
Sl
acken tool adjuster to suit spring length.
Install adaptor
and thrust collar.
Posit
ion stem of tool in center of spring passing dowel
through slot in su spension turret.
4. Rotate stem of Special Tool 204-111 to position dowel across
slot.
Page 113 of 2490
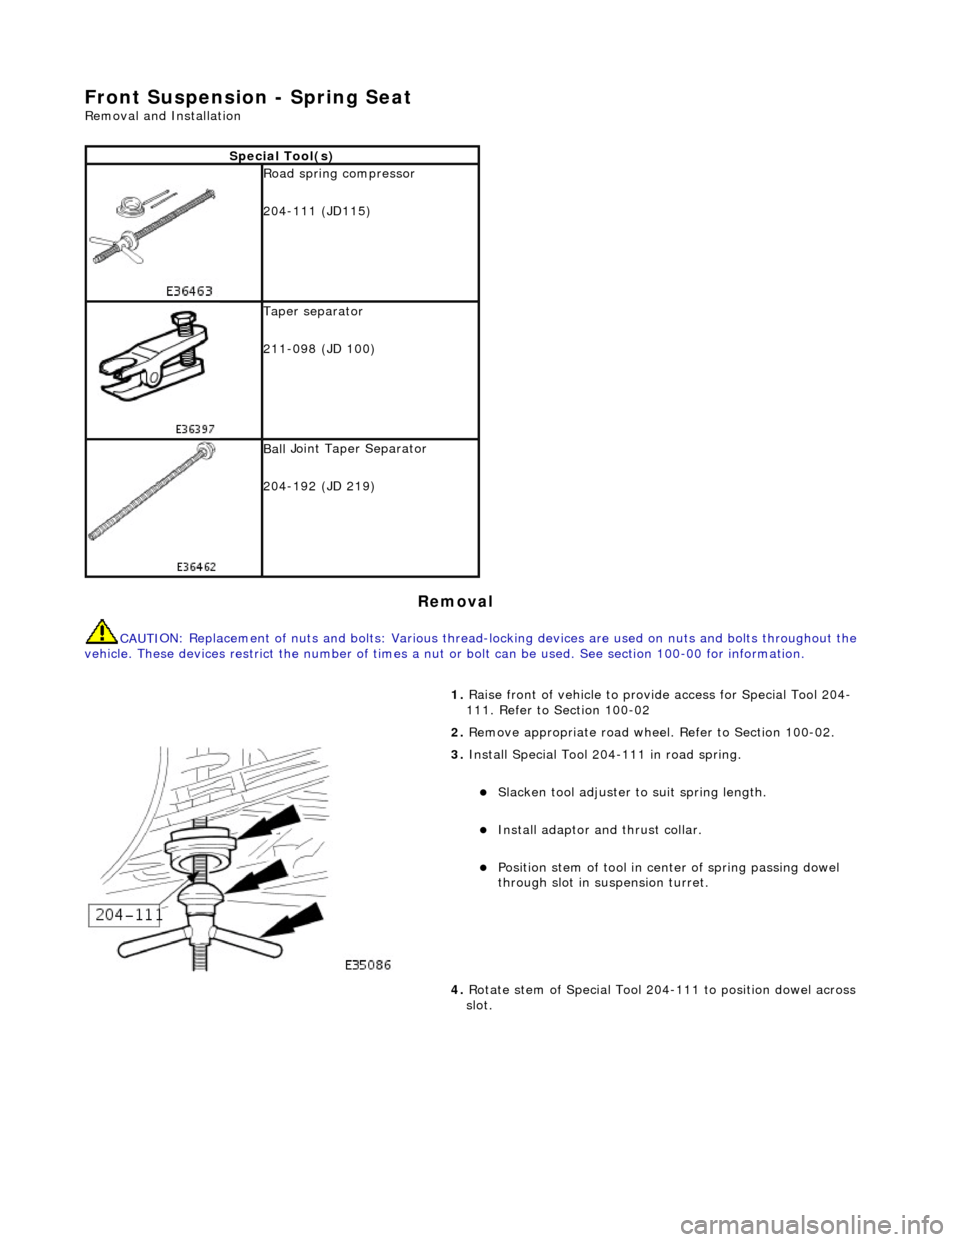
Front Suspension - Spring Seat
Re
moval and Installation
Remov
al
CAUTI
ON: Replacement of
nuts and bolts: Various thread-locking devices are used on nuts and bolts throughout the
vehicle. These devices restrict the number of times a nut or bolt can be used. See section 100-00 for information.
S
pecial Tool(s)
R
oad spring compressor
204-111 (JD115)
Taper separator
211-098 (JD 100)
Ball
Joint Taper Separator
204-192 (JD 219)
1. R
aise front of vehicle to provid
e access for Special Tool 204-
111. Refer to Section 100-02
2. Remove appropriate road wheel. Refer to Section 100-02.
3. Ins
tall Special Tool 204-111 in road spring.
Sl
acken tool adjuster to suit spring length.
Install adaptor
and thrust collar.
Posit
ion stem of tool in center of spring passing dowel
through slot in su spension turret.
4. Rotate stem of Special Tool 204-111 to position dowel across
slot.
Page 153 of 2490
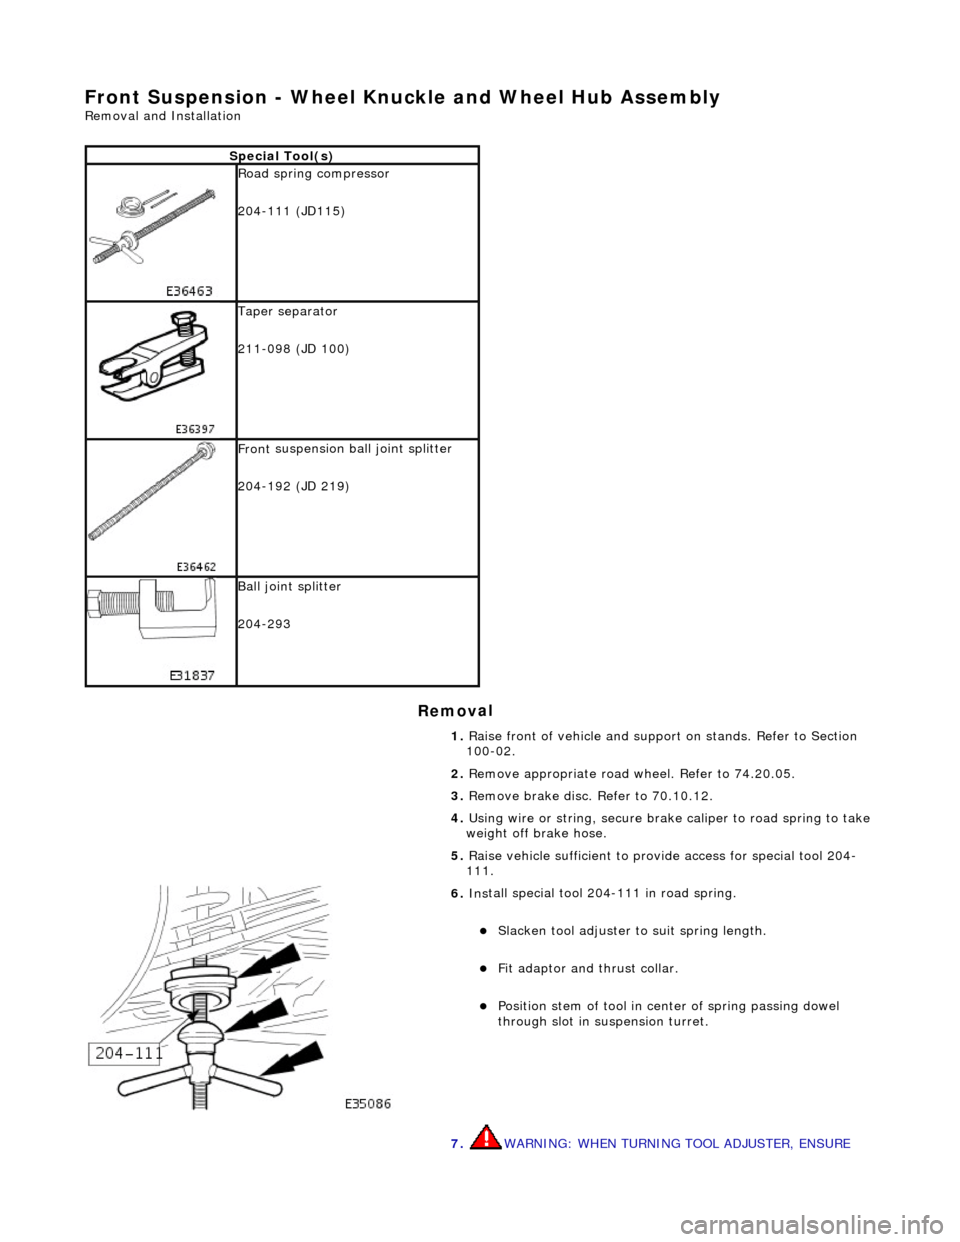
Front Susp
ension - Wheel Knuckle and Wheel Hub Assembly
Re
moval and Installation
Remov
al
S
pecial Tool(s)
R
oad spring compressor
204-111 (JD115)
Taper separator
211-098 (JD 100)
Front
suspension ball joint splitter
204-192 (JD 219)
Bal
l joint splitter
204-293
1. Raise front of vehicle and support on stands. Refer to Section
100-02.
2. Remove appropriate road wheel. Refer to 74.20.05.
3. Remove brake disc. Refer to 70.10.12.
4. Using wire or string, secure brak e caliper to road spring to take
weight off brake hose.
5. Raise vehicle sufficient to provide access for special tool 204-
111.
6. Ins
tall special tool 204-111 in road spring.
Sl
acken tool adjuster to suit spring length.
Fit adaptor and th
rust collar.
Posit
ion stem of tool in center of spring passing dowel
through slot in su spension turret.
7. WARNING: WHEN TURNING TOOL ADJUSTER, ENSURE
Page 160 of 2490

8. Inst
all special tool 204-111 in road spring.
Slacken tool
adjuster to suit spring length.
Fit adaptor and th
rust collar.
Positi
on stem of tool in center of spring passing dowel
through slot in su spension turret.
9. WA
RNING: WHEN TURNING TOOL ADJUSTER, ENSURE
THAT TOOL STEM DOES NOT ROTATE AND DISTURB POSITION
OF DOWEL IN SUSPENSION TURRET.
Engage dowel of special tool 204-111 in suspension turret and
rotate to position across slot.
10 . Lower veh
icle onto stands.
11 . R
otate tool adjuster to tension spring.
12. Remove wheel speed sensor se curing screw and withdraw
sensor from vertical link.
Page 616 of 2490
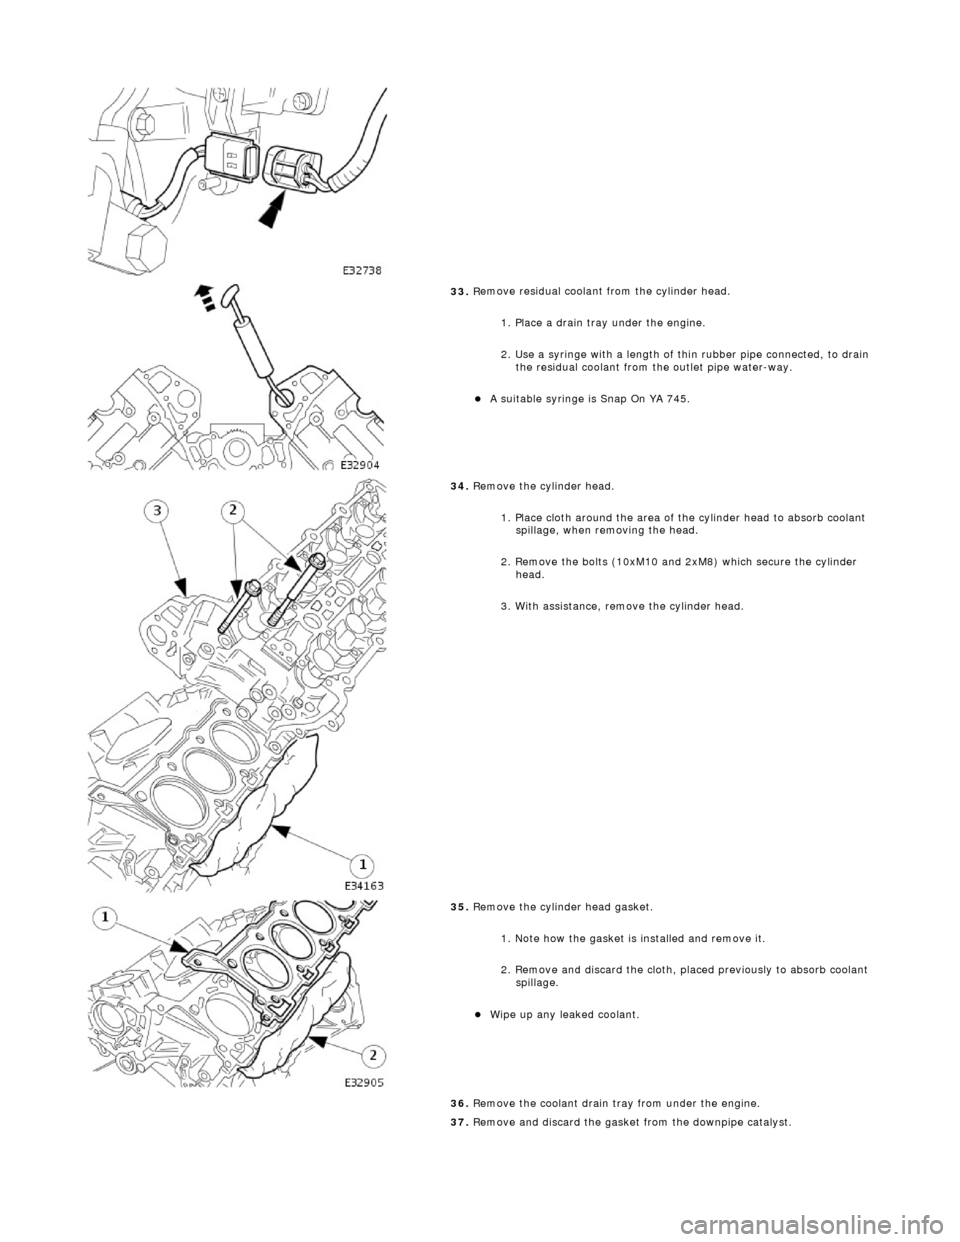
33. R
emove residual coolant from the cylinder head.
1. Place a drain tray under the engine.
2. Use a syringe with a length of thin rubber pipe connected, to drain the residual coolant from the outlet pipe water-way.
A s u
itable syringe is Snap On YA 745.
34 . R
emove the cylinder head.
1. Place cloth around the area of th e cylinder head to absorb coolant
spillage, when removing the head.
2. Remove the bolts (10xM10 and 2xM8) which secure the cylinder head.
3. With assistance, remove the cylinder head.
35 . R
emove the cylinder head gasket.
1. Note how the gasket is installed and remove it.
2. Remove and discard the cloth, placed previously to absorb coolant spillage.
Wipe up any l e
aked coolant.
36. Remove the coolant drain tray from under the engine.
37. Remove and discard the gasket from the downpipe catalyst.
Page 631 of 2490
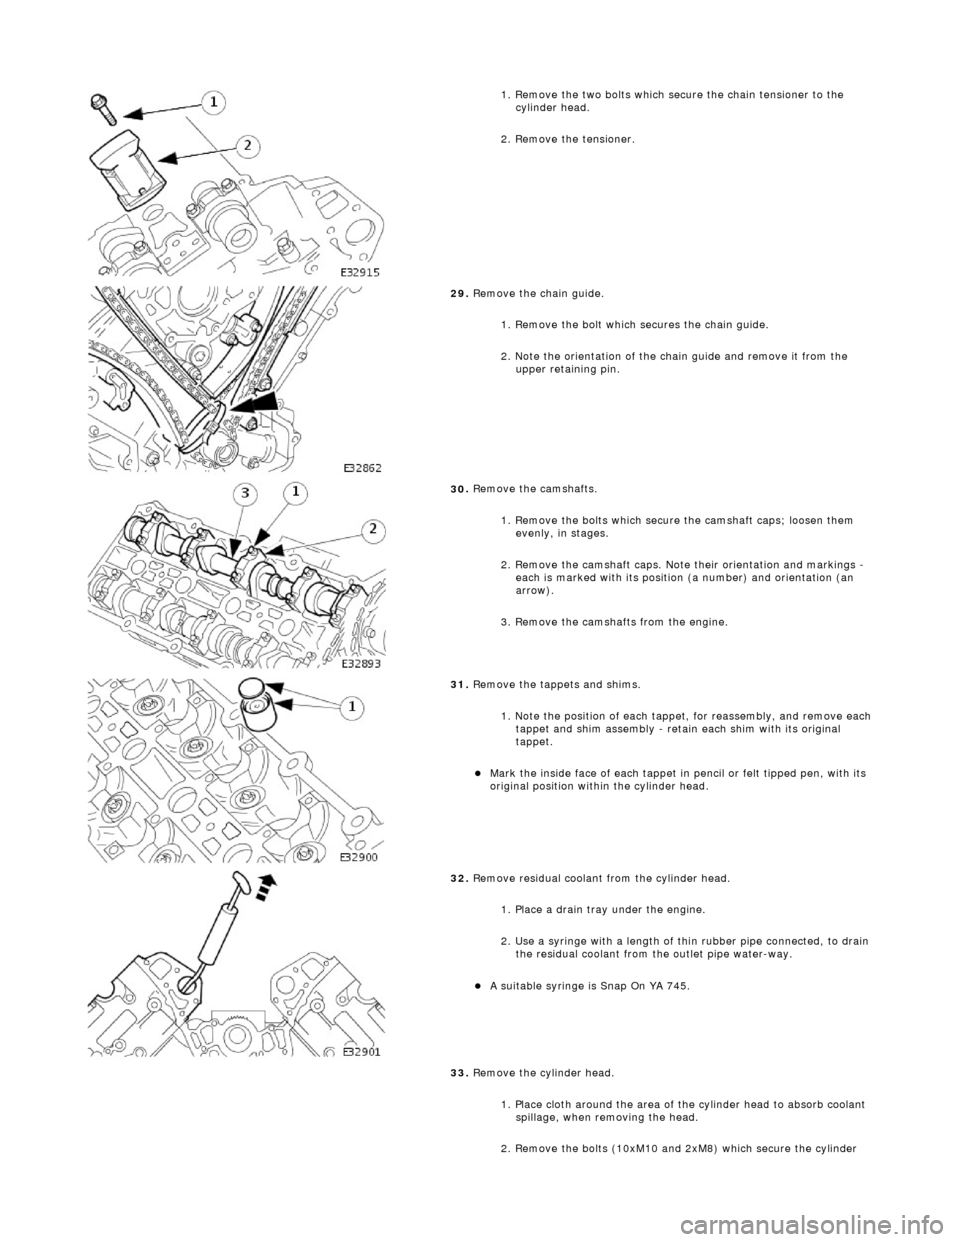
1.
Remove the two bolts which secure the chain tensioner to the
cylinder head.
2. Remove the tensioner.
29
.
Remove the chain guide.
1. Remove the bolt which secures the chain guide.
2. Note the orientation of the chain guide and remove it from the upper retaining pin.
30
.
Remove the camshafts.
1. Remove the bolts which secure the camshaft caps; loosen them evenly, in stages.
2. Remove the camshaft caps. Note their orientation and markings -
each is marked with its position (a number) and orientation (an
arrow).
3. Remove the camshafts from the engine.
31
.
Remove the tappets and shims.
1. Note the position of each tappet, for reassembly, and remove each
tappet and shim assembly - retain each shim with its original
tappet.
Mark
the inside face of each tappet in pencil or felt tipped pen, with its
original position within the cylinder head.
32
.
Remove residual coolant from the cylinder head.
1. Place a drain tray under the engine.
2. Use a syringe with a length of thin rubber pipe connected, to drain the residual coolant from the outlet pipe water-way.
A s
uitable syringe is Snap On YA 745.
33. Remove the cylinder head.
1. Place cloth around the area of th e cylinder head to absorb coolant
spillage, when removing the head.
2. Remove the bolts (10xM10 and 2xM8) which secure the cylinder
Page 665 of 2490

6. Rotate the crankshaft until the triangular arrow indent on
the drive plate is visible thro ugh the access hole; confirm
that the timing flat on ea ch camshaft is uppermost.
7. Install the crankshaft setting peg 303-531 to the crankshaft
position sensor location.
1. Install the crankshaft setting peg 303-531.
Position the crankshaft so that the setting peg engages
fully into the timing slot.
2. Install and tighten the bolt to secure the setting peg.
8. Lower the vehicle on the ramp.
9. Install the camshaft locking tool 303-530 to Bank 2 camshafts,
aligning the shafts sl ightly as necessary.
10. CAUTION: Use a length of steel strip that will not fall
into the timing cover.
Protect the upper face of the ti ming cover from scratches, when
removing the bolt which secures the sprocket.
1. Place a flat piece of stee l strip along the timing cover
horizontal jointing face, adjacent to the exhaust
camshaft sprocket.
2. Secure the steel strip in place with adhesive tape.
11. A ball-ended hexagon drive bit is required to remove the
sprocket securing bolt. A suitable tool is available from Snap On as (FABLM10E) Long Series 10mm AF.