bumper JEEP GRAND CHEROKEE 2013 Owner handbook (in English)
[x] Cancel search | Manufacturer: JEEP, Model Year: 2013, Model line: GRAND CHEROKEE, Model: JEEP GRAND CHEROKEE 2013Pages: 408, PDF Size: 3.21 MB
Page 52 of 408
•As the air bags deflate, you may see some
smoke-like particles. The particles are a nor-
mal by-product of the process that generates
the non-toxic gas used for air bag inflation.
These airborne particles may irritate the skin,
eyes, nose, or throat. If you have skin or eye
irritation, rinse the area with cool water. For
nose or throat irritation, move to fresh air. If
the irritation continues, see your doctor. If
these particles settle on your clothing, follow
the garment manufacturer’s instructions for
cleaning.
Do not drive your vehicle after the air bags have
deployed. If you are involved in another collision,
the air bags will not be in place to protect you.
WARNING!
Deployed air bags and seat belt pretension-
ers cannot protect you in another collision.
Have the air bags, seat belt pretensioners,
and the front seat belt retractor assemblies
replaced by an authorized dealer immedi-
ately. Also, have the Occupant Restraint
Controller (ORC) system serviced as well. Maintaining Your Air Bag System
WARNING!
•
Modifications to any part of the air bag
system could cause it to fail when you
need it. You could be injured if the air bag
system is not there to protect you. Do not
modify the components or wiring, including
adding any kind of badges or stickers to
the steering wheel hub trim cover or the
upper right side of the instrument panel.
Do not modify the front bumper, vehicle
body structure, or add aftermarket side
steps or running boards.
• It is dangerous to try to repair any part of
the air bag system yourself. Be sure to tell
anyone who works on your vehicle that it
has an air bag system.
(Continued)
WARNING!(Continued)
•Do not attempt to modify any part of your
air bag system. The air bag may inflate
accidentally or may not function properly if
modifications are made. Take your vehicle
to an authorized dealer for any air bag
system service. If your seat, including your
trim cover and cushion, needs to be ser-
viced in any way (including removal or
loosening/tightening of seat attachment
bolts), take the vehicle to your authorized
dealer. Only manufacturer approved seat
accessories may be used. If it is necessary
to modify the air bag system for persons
with disabilities, contact your authorized
dealer.
48
Page 131 of 408
•Do not attach or install any accessories near
the sensor, including transparent material or
aftermarket grilles. Doing so could cause an
ACC system failure or malfunction.
When the condition that deactivated the system
is no longer present, the system will return to
the “Adaptive Cruise Control Off” state and will
resume function by simply reactivating it.
NOTE:
• If the “Clean Radar Sensor In Front Of
Vehicle” message occurs frequently
(e.g. more than once on every trip) with-
out any snow, rain, mud, or other obstruc-
tion, have the radar sensor realigned at
your authorized dealer.
•
Installing a snow plow, front-end protector,
an aftermarket grille or modifying the grille
is not recommended. Doing so may block
the sensor and inhibit ACC operation.
Removing ACC Sensor For Off-Roading
NOTE:
When off-roading, it may be advisable to
remove the ACC sensor. The sensor is lo-
cated behind the front lower grille in the
center of the vehicle. After removing the
lower fascia, you may remove the lower
sensor and bracket assembly.
To remove the sensor follow these instructions:
1. Unplug the connector by depressing the two
tabs on the connector and pulling it out. Do not
pull by the wiring or use any tools to remove the
connector.
2. Remove the wiring christmas tree attach-
ment from the back of the bracket.
3. Remove the two M6 fasteners that connect
the bracket to the bumper.
NOTE:
Do not change the adjustment fasteners or
pull the sensor off of the bracket. Doing so
may misalign the sensor. Store the sensor and bracket assembly in a
safe location. The wiring and connector must be
stowed properly after the sensor and bracket
assembly is removed.
A connector plug is stowed on top of the bumper
beam. Insert the wiring connector into the con-
nector plug.
NOTE:
When the sensor is removed, Adaptive Cruise
Control, Normal Cruise Control, and Forward
Collision Warning will not be available. The
cluster will display the warning “ACC/FCW
Unavailable - Service Radar Sensor.”
To reinstall the sensor and bracket assembly
reverse the process above. The fastener torque
required to assembly the bracket back to the
beam is 6.6 ft lbs (9 N·m).
127
Page 138 of 408
PARKSENSE® FRONT AND
REAR PARK ASSIST — IF
EQUIPPED
The ParkSense® Park Assist system provides
visual and audible indications of the distance
between the rear and/or front fascia and a
detected obstacle when backing up or moving
forward, e.g. during a parking maneuver. Refer
to ParkSense® System Usage Precautions for
limitations of this system and recommenda-
tions.
ParkSense® will retain the last system state
(enabled or disabled) from the last ignition cycle
when the ignition is changed to the ON/RUN
position.
ParkSense® can be active only when the shift
lever is in REVERSE or DRIVE. If ParkSense®
is enabled at one of these shift lever positions,
the system will remain active until the vehicle
speed is increased to approximately 7 mph
(11 km/h) or above. The system will become
active again if the vehicle speed is decreased to
speeds less than approximately 6 mph (9 km/h).
ParkSense® SensorsThe four ParkSense® sensors, located in the
rear fascia/bumper, monitor the area behind the
vehicle that is within the sensors’ field of view.
The sensors can detect obstacles from approxi-
mately 12 in (30 cm) up to 59 in (150 cm) from
the rear fascia/bumper in the horizontal direc-
tion, depending on the location, type and orien-
tation of the obstacle.
The six ParkSense® sensors, located in the
front fascia/bumper, monitor the area in front of
the vehicle that is within the sensors’ field of
view. The sensors can detect obstacles from
approximately 12 in (30 cm) up to 47 in (120 cm)
from the front fascia/bumper in the horizontal
direction, depending on the location, type and
orientation of the obstacle.
ParkSense® Warning DisplayThe ParkSense® Warning screen will only be
displayed if Sound and Display is selected from
the Customer-Programmable Features section
of the Electronic Vehicle Information Center(EVIC). Refer to “Electronic Vehicle Information
Center (EVIC)/Personal Settings (Customer-
Programmable Features)” in “Understanding
Your Instrument Panel” for further information.
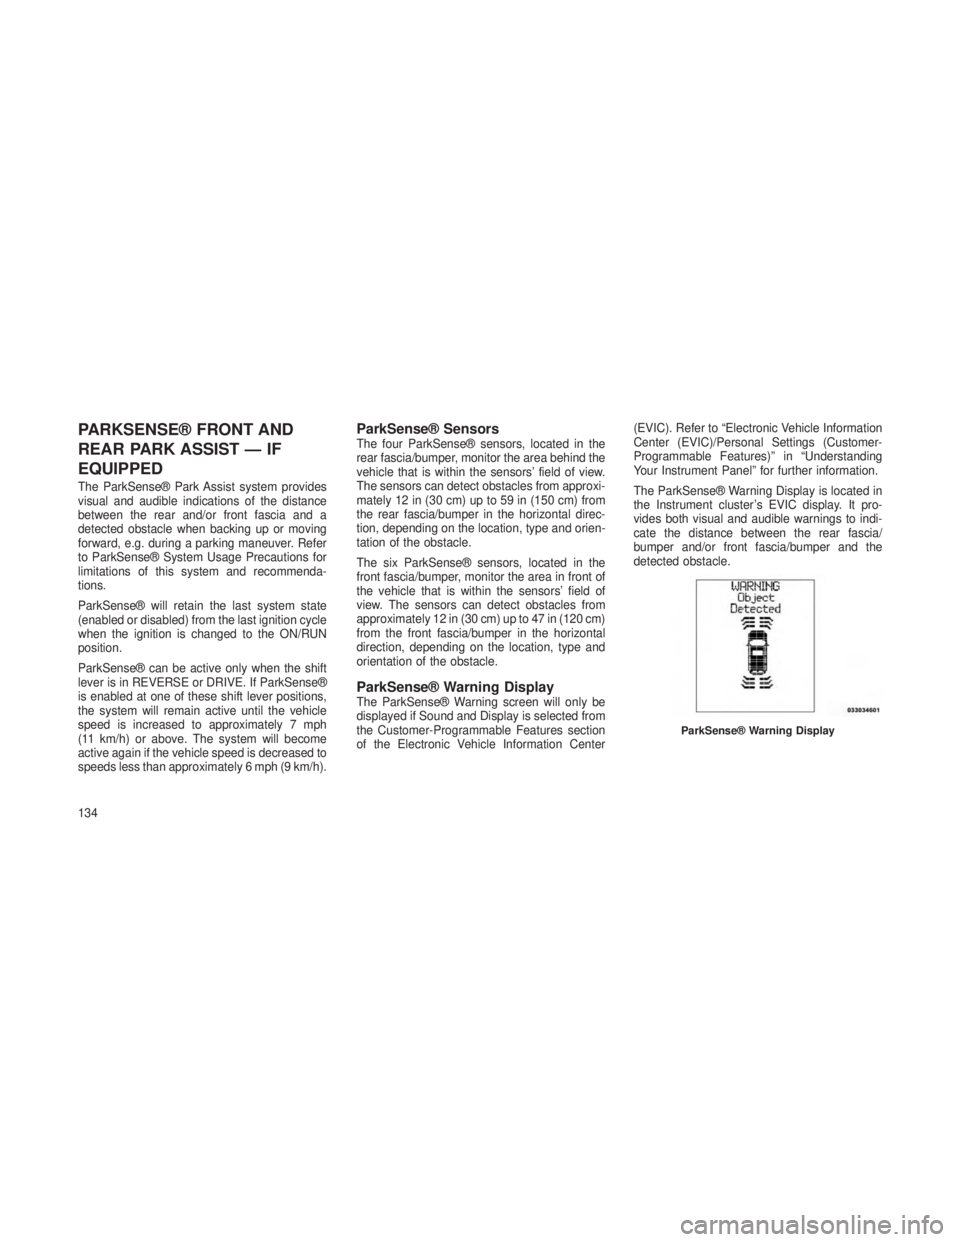
The ParkSense® Warning Display is located in
the Instrument cluster’s EVIC display. It pro-
vides both visual and audible warnings to indi-
cate the distance between the rear fascia/
bumper and/or front fascia/bumper and the
detected obstacle.
ParkSense® Warning Display
134
Page 141 of 408
Service The ParkSense® Park Assist
System
When the ParkSense Park Assist System is
malfunctioning, the instrument cluster will actu-
ate a single chime, once per ignition cycle, and
it will display the “CLEAN PARK ASSIST SEN-
SORS” or the “SERVICE PARK ASSIST SYS-
TEM” message. The instrument cluster will dis-
play the “CLEAN PARK ASSIST SENSORS”
message when any of the rear or front sensors
are blocked by snow, mud, or ice. The instru-
ment cluster will display the “SERVICE PARK
ASSIST SYSTEM” message when any of the
rear or front sensors are damaged and require
service.
When the shift lever is moved to REVERSE or
DRIVE and the system has detected a faulted
condition, the EVIC will display the “CLEAN
PARK ASSIST SENSORS” or the “SERVICE
PARK ASSIST SYSTEM” message for appro-
priately five seconds. Then, when the shift lever
is moved to REVERSE, the EVIC will display
the “PARK ASSIST SYSTEM OFF” message foras long as the vehicle is in REVERSE. Under
this condition ParkSense will not operate. Refer
to “Electronic Vehicle Information Center
(EVIC)” in “Understanding Your Instrument
Panel” for further information.
If the “CLEAN PARK ASSIST SENSORS” mes-
sage appears in the Electronic Vehicle Informa-
tion Center (EVIC) make sure the outer surface
and the underside of the rear fascia/bumper
and/or front fascia/bumper is clean and clear of
snow, ice, mud, dirt or other obstruction and
then cycle the ignition. If the message continues
to appear, see an authorized dealer.
If the “SERVICE PARK ASSIST SYSTEM” mes-
sage appears in the EVIC, see an authorized
dealer.
Cleaning The ParkSense® SystemClean the ParkSense® sensors with water, car
wash soap and a soft cloth. Do not use rough or
hard cloths. Do not scratch or poke the sensors.
Otherwise, you could damage the sensors.
ParkSense® System Usage
Precautions
NOTE:
•
Ensure that the front and rear bumper are
free of snow, ice, mud, dirt and debris to
keep the ParkSense® system operating
properly.
• Jackhammers, large trucks, and other vi-
brations could affect the performance of
ParkSense®.
• When you turn ParkSense® off, the in-
strument cluster will display “PARK AS-
SIST SYSTEM OFF.” Furthermore, once
you turn ParkSense® off, it remains off
until you turn it on again, even if you cycle
the ignition key.
• When you move the shift lever to the
REVERSE position and ParkSense is
turned off, the instrument cluster will dis-
play “PARK ASSIST SYSTEM OFF” mes-
sage for as long as the vehicle is in
REVERSE.
137
Page 142 of 408
•ParkSense®, when on, will MUTE the ra-
dio when it is sounding a tone.
• Clean the ParkSense® sensors regularly,
taking care not to scratch or damage
them. The sensors must not be covered
with ice, snow, slush, mud, dirt or debris.
Failure to do so can result in the system
not working properly. The ParkSense®
system might not detect an obstacle be-
hind or in front of the fascia/bumper, or it
could provide a false indication that an
obstacle is behind or in front of the
fascia/bumper.
•
Objects such as bicycle carriers, trailer
hitches, etc., must not be placed within
12 in (30 cm) from the rear fascia/bumper
while driving the vehicle. Failure to do so
can result in the system misinterpreting a
close object as a sensor problem, causing
the “SERVICE PARK ASSIST SYSTEM”
message to be displayed in the instrument
cluster.
• On vehicles equipped with a tailgate,
ParkSense® should be disabled when the
tailgate is in the lowered or open position.
A lowered tailgate could provide a false
indication that an obstacle is behind the
vehicle.
CAUTION!
•ParkSense® is only a parking aid and it is
unable to recognize every obstacle, includ-
ing small obstacles. Parking curbs might
be temporarily detected or not detected at
all. Obstacles located above or below the
sensors will not be detected when they are
in close proximity.
• The vehicle must be driven slowly when
using ParkSense® in order to be able to
stop in time when an obstacle is detected.
When backing up, it is recommended that
the driver looks over his/her shoulder
when using ParkSense®.
WARNING!
•Drivers must be careful when backing up
even when using the ParkSense® Park
Assist system. Always check carefully be-
hind your vehicle, look behind you, and be
sure to check for pedestrians, animals,
other vehicles, obstructions, and blind
spots before backing up. You are respon-
sible for safety and must continue to pay
attention to your surroundings. Failure to
do so can result in serious injury or death.
• Before using the ParkSense® Park Assist
system, it is strongly recommended that
the ball mount and hitch ball assembly is
disconnected from the vehicle when the
vehicle is not used for towing. Failure to do
so can result in injury or damage to ve-
hicles or obstacles because the hitch ball
will be much closer to the obstacle than the
rear fascia when the warning display turns
on the single flashing arc and sounds the
continuous tone. Also, the sensors could
(Continued)
138
Page 249 of 408
OFF-ROAD DRIVING TIPS
NOTE:
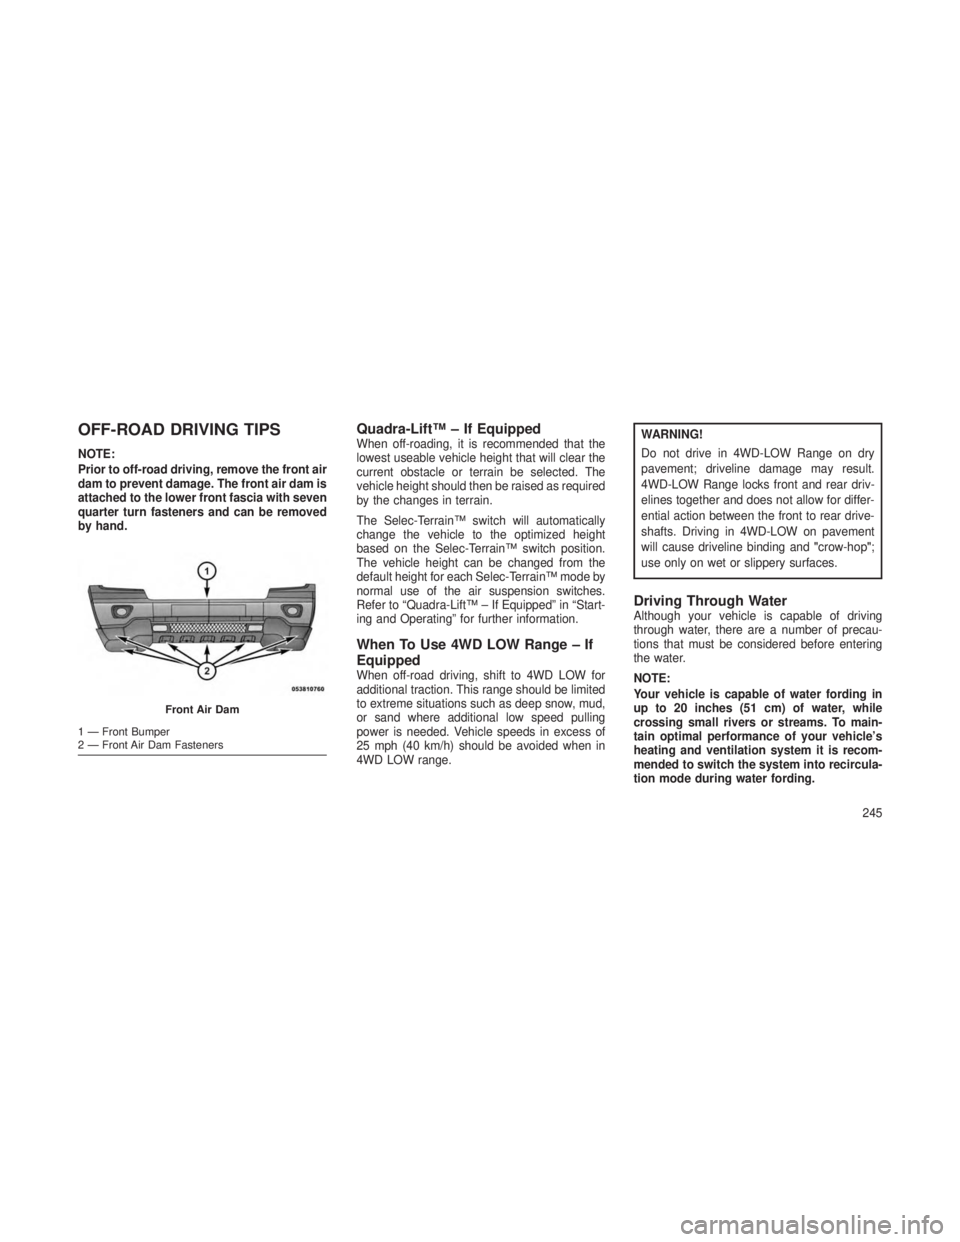
Prior to off-road driving, remove the front air
dam to prevent damage. The front air dam is
attached to the lower front fascia with seven
quarter turn fasteners and can be removed
by hand.
Quadra-Lift™ – If EquippedWhen off-roading, it is recommended that the
lowest useable vehicle height that will clear the
current obstacle or terrain be selected. The
vehicle height should then be raised as required
by the changes in terrain.
The Selec-Terrain™ switch will automatically
change the vehicle to the optimized height
based on the Selec-Terrain™ switch position.
The vehicle height can be changed from the
default height for each Selec-Terrain™ mode by
normal use of the air suspension switches.
Refer to “Quadra-Lift™ – If Equipped” in “Start-
ing and Operating” for further information.
When To Use 4WD LOW Range – If
Equipped
When off-road driving, shift to 4WD LOW for
additional traction. This range should be limited
to extreme situations such as deep snow, mud,
or sand where additional low speed pulling
power is needed. Vehicle speeds in excess of
25 mph (40 km/h) should be avoided when in
4WD LOW range.
WARNING!
Do not drive in 4WD-LOW Range on dry
pavement; driveline damage may result.
4WD-LOW Range locks front and rear driv-
elines together and does not allow for differ-
ential action between the front to rear drive-
shafts. Driving in 4WD-LOW on pavement
will cause driveline binding and"crow-hop";
use only on wet or slippery surfaces.
Driving Through WaterAlthough your vehicle is capable of driving
through water, there are a number of precau-
tions that must be considered before entering
the water.
NOTE:
Your vehicle is capable of water fording in
up to 20 inches (51 cm) of water, while
crossing small rivers or streams. To main-
tain optimal performance of your vehicle’s
heating and ventilation system it is recom-
mended to switch the system into recircula-
tion mode during water fording.
Front Air Dam
1 — Front Bumper
2 — Front Air Dam Fasteners
245
Page 292 of 408
CAUTION!
•DO NOT dolly tow any 4WD vehicle. Inter-
nal damage to the transmission or transfer
case will occur if a dolly is used when
recreational towing.
• Tow only in a forward direction. Towing this
vehicle backwards can cause severe dam-
age to the transfer case.
• The transmission must be in PARK for
recreational towing.
• Before recreational towing, perform the
procedure outlined under “Shifting into
NEUTRAL (N)” to be certain that the trans-
fer case is fully in NEUTRAL (N). Other-
wise, internal damage will result.
• Failure to follow these procedures can
cause severe transmission and/or transfer
case damage. Damage from improper
towing is not covered under the New Ve-
hicle Limited Warranty.
• Do not use a bumper-mounted clamp-on
tow bar on your vehicle. The bumper face
bar will be damaged. Shifting Into NEUTRAL (N)
WARNING!
You or others could be injured or killed if you
leave the vehicle unattended with the trans-
fer case in the NEUTRAL (N) position with-
out first fully engaging the parking brake. The
transfer case NEUTRAL (N) position disen-
gages both the front and rear driveshafts
from the powertrain and will allow the vehicle
to move, even if the transmission is in PARK.
The parking brake should always be applied
when the driver is not in the vehicle.
Use the following procedure to prepare your
vehicle for recreational towing.
CAUTION!
It is necessary to follow these steps to be
certain that the transfer case is fully in NEU-
TRAL (N) before recreational towing to pre-
vent damage to internal parts. 1. Bring the vehicle to a complete stop and shift
the transmission into PARK.
2. Turn the engine OFF.
3. For vehicles with Keyless Enter-N-Go™, re-
move the Keyless Enter-N-Go™ button and use
the key fob to complete this procedure. Refer to
“Installing and Removing the ENGINE START/
STOP Button/Keyless Enter-N-Go™” in “Start-
ing and Operating” how to remove the Keyless
Enter-N-Go™ button.
4. Turn the ignition switch to the ON/RUN po-
sition, but do not start the engine.
5. Press and hold the brake pedal.
6. Shift the transmission into NEUTRAL.
288